
Mountain Cop's 1986 4Runner Build-Up Thread - "FireRunner"


 Oct 23, 2013 | 06:48 PM
#422
Thread Starter
Registered User
Joined: Nov 2009
Posts: 504
Likes: 2
From: Central Sierra Nevadas (Oakhurst)
See what you can find. I have an '83 (or '82... the wrong one, but the right size) that I was just going to swap the stock guts into, but if there is a plug-n-play one available, that would be easier.
Oct 24, 2013 | 04:08 PM
#423
Registered User
Joined: Mar 2010
Posts: 594
Likes: 0
From: Fresno, California
congrats on your new daughter. good to see you back online. I havent done much to mine except new bumpers and body lift. I havent seen dbcfr in a while. he doesnt go to the 4wd club meetings anymore.
Oct 24, 2013 | 05:16 PM
#424
Thread Starter
Registered User
Joined: Nov 2009
Posts: 504
Likes: 2
From: Central Sierra Nevadas (Oakhurst)
I just came from his house. He is doing well. With both of our rigs getting revamped, we are going to need to go do another shakedown run... Maybe we should try to hit Bald again. I'm going to probably put my hardtop back on for winter.
Dec 5, 2013 | 06:57 PM
#426
Thread Starter
Registered User
Joined: Nov 2009
Posts: 504
Likes: 2
From: Central Sierra Nevadas (Oakhurst)
Like most projects that Dbcfr and I start on, this one is rapidly expanding. To complement the cam and oversize valves, I am buying Dbcfr's old Downey header. I'm also buying his Trail Gear GM alternator setup and Downey intake.
Today I pulled the old exhaust system out and the it the scrap pile. The header is at the machine shop getting resurfaced. I'll be running 2.25" throughout. I just got word that my fuel injectors are shipping from Witchhunter tomorrow.
By the way, I sent my spare set of injectors off to Witchhunter and didn't notice until I got them back that they won't work with my rig. I have the original 1986 efi setup, and those injectors are for an '89 to '95. If anyone needs a set, I'll send them with the flowchart for $100.00. Witchhunter gets $22 per injector for cleaning, balancing and rebuild. I'm just trying to recoup my cost without paying too much "stupid tax" for sending him the wrong ones.
I am swapping the upper plenum to the late style.
I got one other thing done today. I have never been happy with the way my OBA is set up with regard to the Jimmy-rigged adaptation from the stock intake and exhaust ports to the air hoses. So... I pulled the manifolds off and did it right.
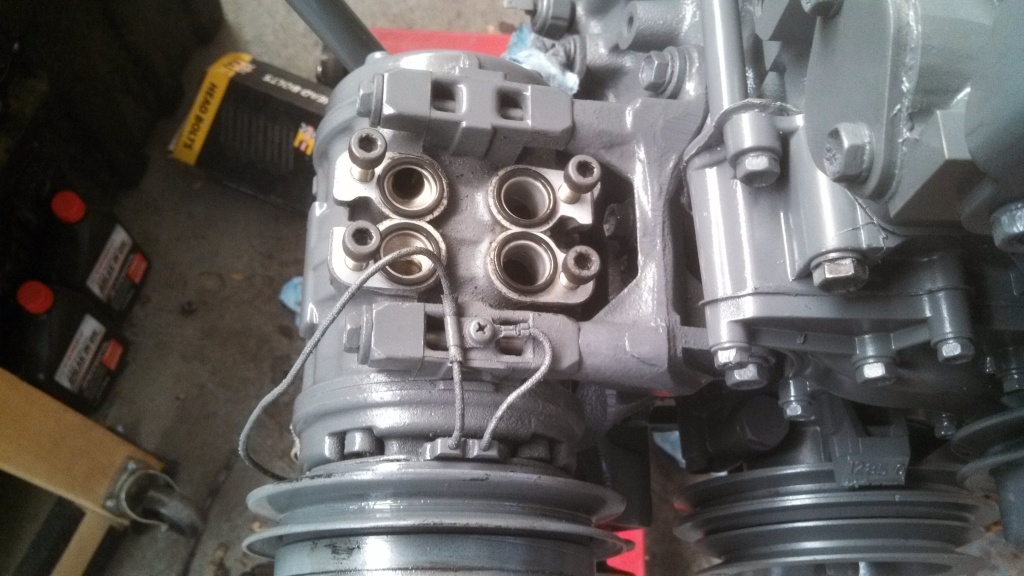
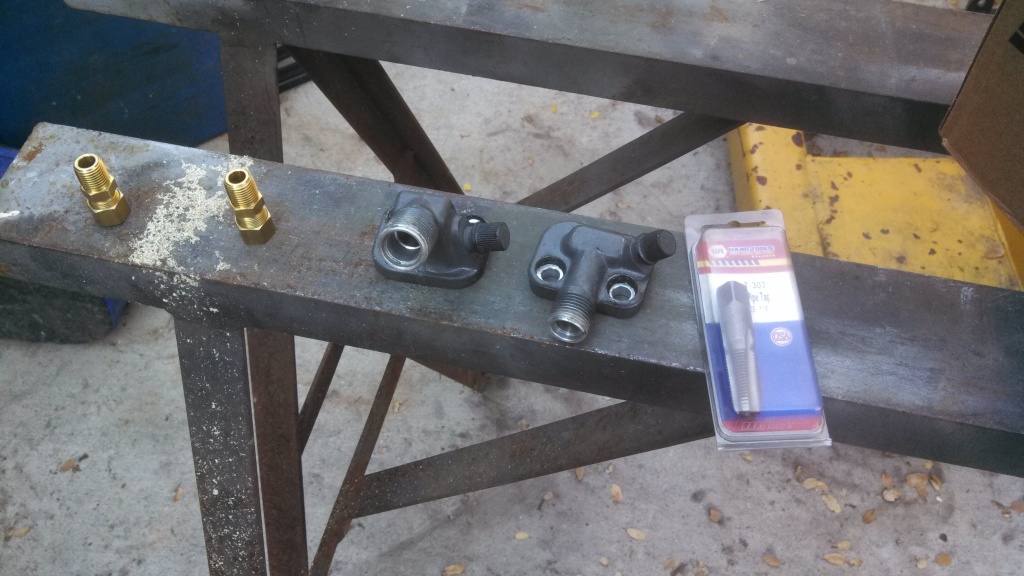
I had to trim the end of the intake manifold
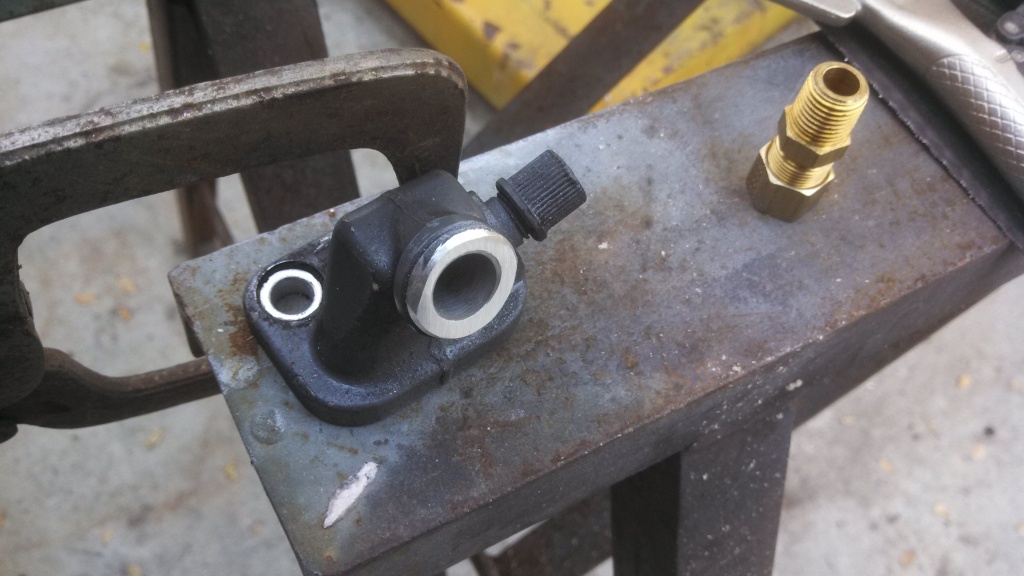
Tapped 1/4" npt. The exhaust manifold had to be drilled out slightly, as there is a shoulder about 1/2" inside that prevents the tap from running deep enough.
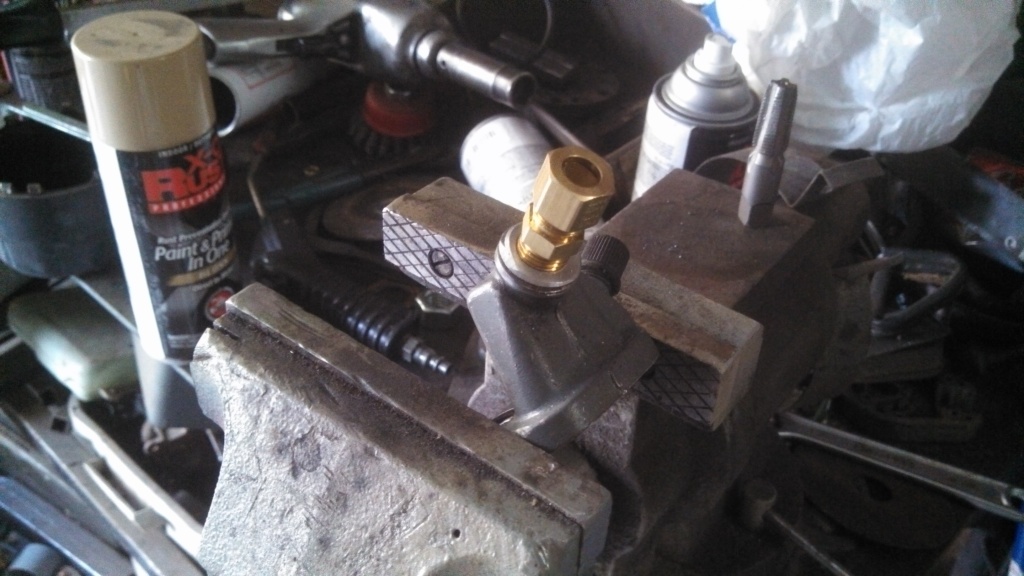
Installed
I think it looks better. Altogether, this project could be done in about 20 minutes. 1/4" npt is common enough that adapting to whatever format you want should be pretty painless.
Today I pulled the old exhaust system out and the it the scrap pile. The header is at the machine shop getting resurfaced. I'll be running 2.25" throughout. I just got word that my fuel injectors are shipping from Witchhunter tomorrow.
By the way, I sent my spare set of injectors off to Witchhunter and didn't notice until I got them back that they won't work with my rig. I have the original 1986 efi setup, and those injectors are for an '89 to '95. If anyone needs a set, I'll send them with the flowchart for $100.00. Witchhunter gets $22 per injector for cleaning, balancing and rebuild. I'm just trying to recoup my cost without paying too much "stupid tax" for sending him the wrong ones.
I am swapping the upper plenum to the late style.
I got one other thing done today. I have never been happy with the way my OBA is set up with regard to the Jimmy-rigged adaptation from the stock intake and exhaust ports to the air hoses. So... I pulled the manifolds off and did it right.
I had to trim the end of the intake manifold
Tapped 1/4" npt. The exhaust manifold had to be drilled out slightly, as there is a shoulder about 1/2" inside that prevents the tap from running deep enough.
Installed
I think it looks better. Altogether, this project could be done in about 20 minutes. 1/4" npt is common enough that adapting to whatever format you want should be pretty painless.
Last edited by Mountain Cop; Dec 5, 2013 at 07:09 PM.
Dec 21, 2013 | 08:28 PM
#428
Thread Starter
Registered User
Joined: Nov 2009
Posts: 504
Likes: 2
From: Central Sierra Nevadas (Oakhurst)
In the interest of doing things right and never doing them again, I am trying to accomplish anything that I would be likely to want to do with the engine out. To that end, I cut out the stock motor mount "towers" and plated the inside of my frame with 3/16. I cut two 2.5" lengths of 1.75 .120 wall HREW and stuffed energy suspension Chevy leaf spring bushings in them.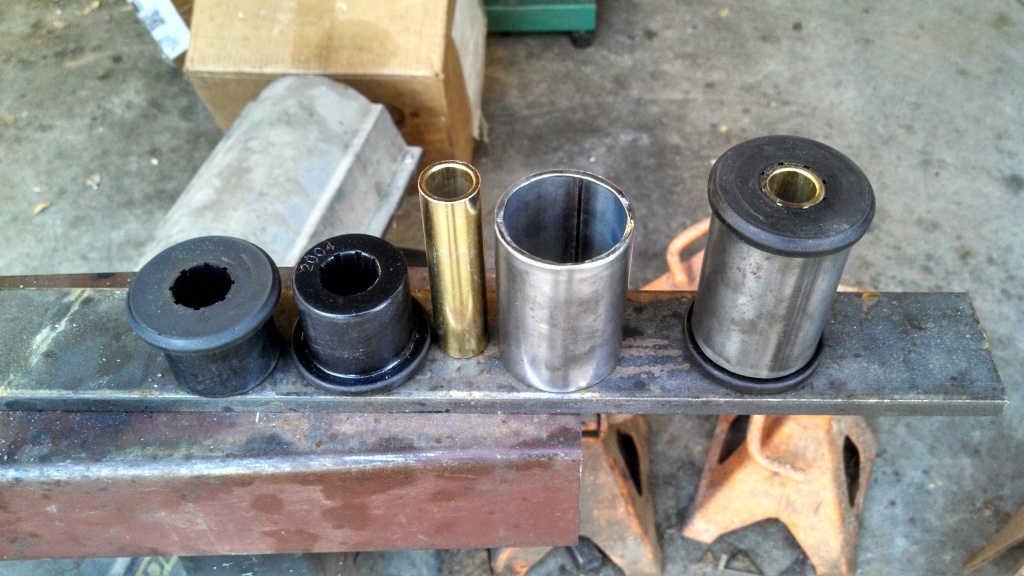
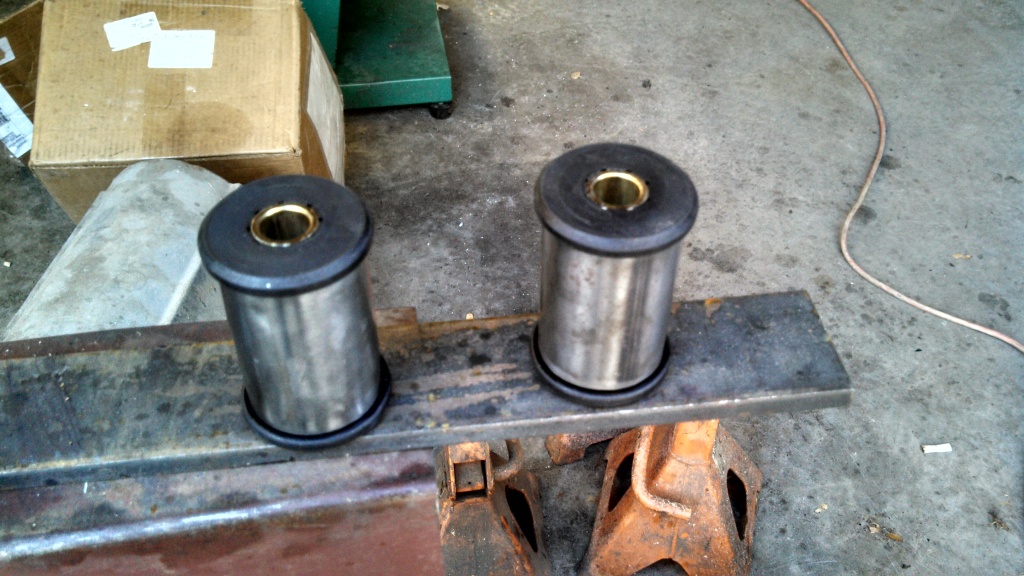
Then, I cut 2" square �" wall tube at 45 degree angle. I will drill a 9/16" hole in these to mount them as so:

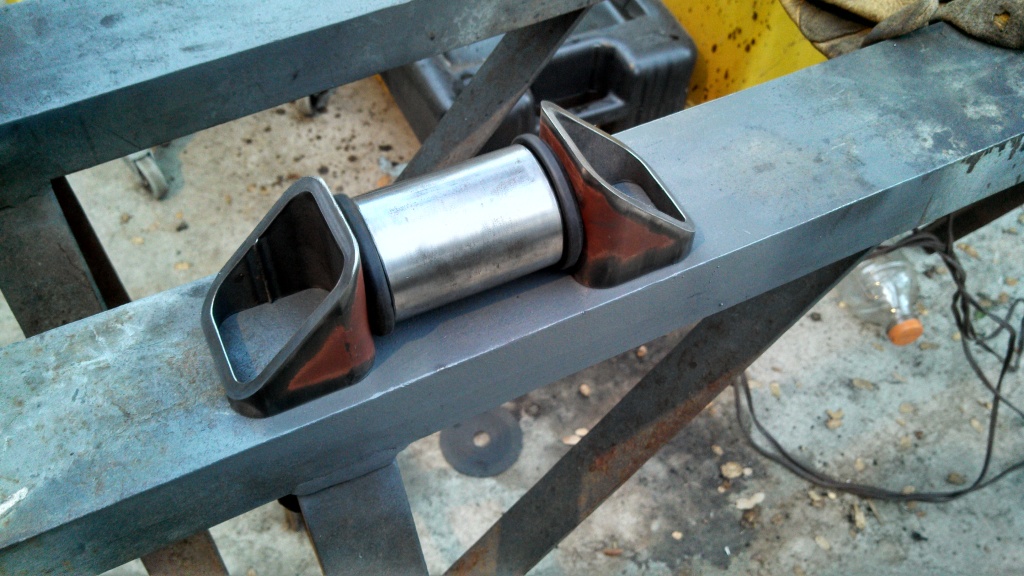
We will bend a piece of tubing to mount to the engine side motor mount brackets and "cradle" the motor, then extend out toward the frame where it will be welded to the bushing tube.
Maybe it will make sense when it is all done...
Then, I cut 2" square �" wall tube at 45 degree angle. I will drill a 9/16" hole in these to mount them as so:
We will bend a piece of tubing to mount to the engine side motor mount brackets and "cradle" the motor, then extend out toward the frame where it will be welded to the bushing tube.
Maybe it will make sense when it is all done...
Dec 22, 2013 | 12:37 PM
#429
Registered User
Joined: May 2011
Posts: 1,751
Likes: 0
From: pensacola FL
just read through all pages of this and I gotta say, come tax time I was wanting another first gen pickup but since ive never had a 4runner I think that's the route im gonna go! think looks great keep up the good work!
Feb 10, 2014 | 02:22 PM
#430
Registered User
Joined: Jun 2010
Posts: 57
Likes: 0
From: Coarsegold,Ca
I am happy to see it back on the road as with the 3 weeks of chasing down a bad (known good) Injector we have surely paid the Yota Gods with this one. All the rest of the problems are small ones and between problems it runs like glass great balance job by Redmans the motor is a great HP package you will be very happy with it after break in and small hickups.
Now I am on to my 4.3L/4L60E auto swap and a HP 22RE build for a performance shop in Fresno.
Motor#3 22RE I will not be a adviser on it will be done by me and I will be pulling out a few more build tricks
Jacob I am happy for you and your new motor
As you know I am here for you anytime you need help
DBCFR
Jun 13, 2014 | 10:01 PM
#431
Thread Starter
Registered User
Joined: Nov 2009
Posts: 504
Likes: 2
From: Central Sierra Nevadas (Oakhurst)
As much fun as it was to have made my own soft top, the design limited my ability to carry large items upright in back. I bit the bullet, and bought a Softopper. The cheapest price was directly from the company. I love it. Photos will follow.
The new engine is broken in. Balanced rotating assembly, oversized valves, 168 cam, late model throttle body, balanced injectors, Downy intake and header, new 2.25" exhaust with a magnaflow muffler... Even with very tight motor mounts, vibration is minimal. It sounds and responds great.
36x13.5 bias ply Iroks are mounted and bb balanced. I think, by the way, that bb balancing is probably the best bet for the bias ply tires. Early cold morning flat spots are barely discernable.
The new powerplant makes the 36s feel like my old bald 33s did with the original engine.
I installed a Smittybuilt XRC8 in front on a bare TG winch plate. Bumpers will happen eventually.
I still have some things to work out. For instance, my low beams stopped working. It is probably the switch, but I haven't spent much time tracing it down. The dash is ugly even when it is installed... And right now it isn't. I think I'll be doing a lot of sheet metal work in the future. A flat dash with round gauges, rocker switches and led indicator lights sounds appealing. Then, a simplified steering column would be needed, to clean things up. This could get complicated. I still don't have bedsides, correct rear seats, or any armor...
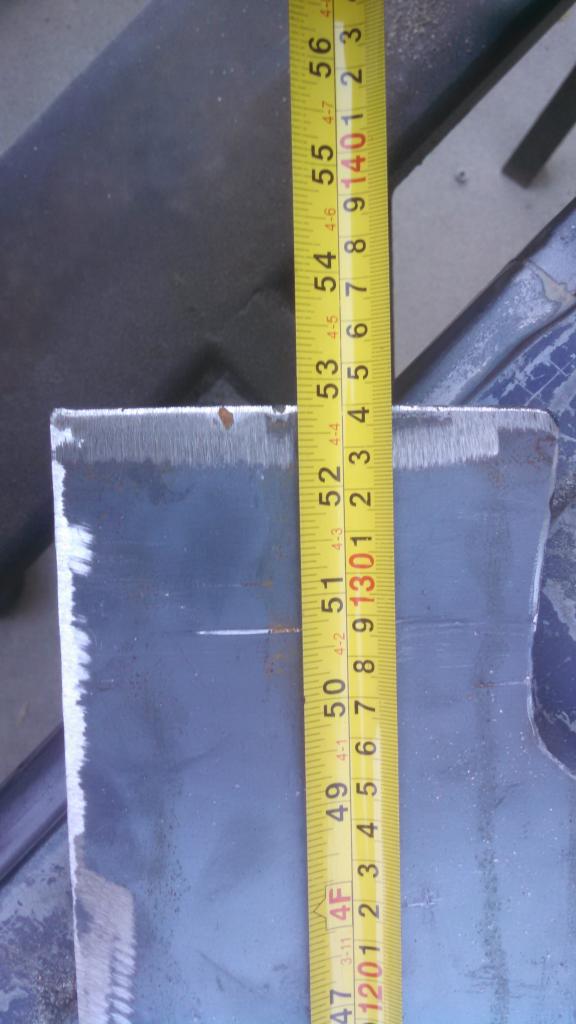
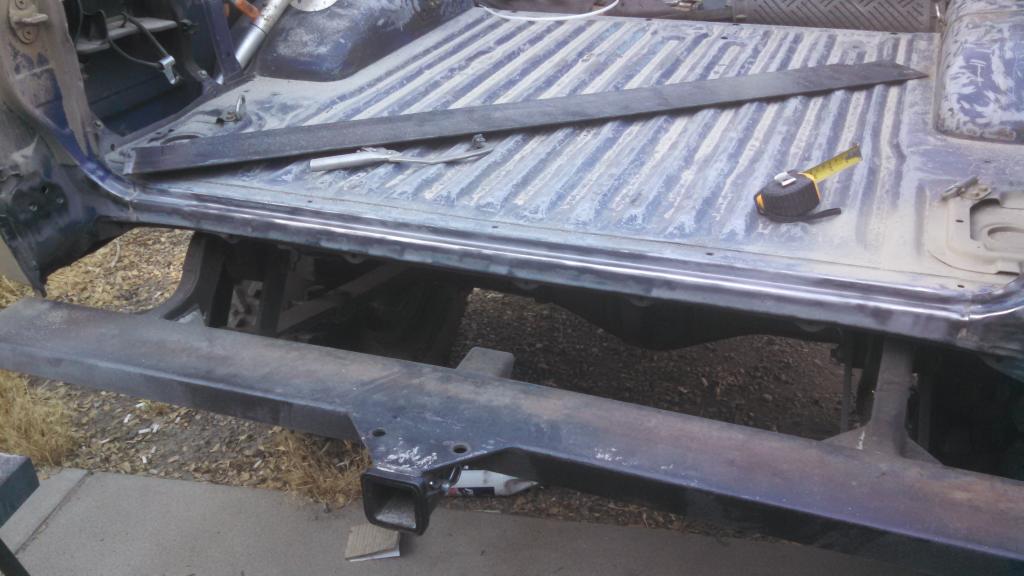
So today, instead of correcting any of that, I took my tailgate off and gave it to dbcfr. I have a pickup tailgate, and have been contemplating a swap similar to what Volcom did (https://www.yotatech.com/forums/f115...00/?styleid=41). I had acquired a 2'x4' piece of 3/16" steel, so today I cut out a 53" x ~5" piece and began work on the bed floor extension. Again, I'll add photos later.
The new engine is broken in. Balanced rotating assembly, oversized valves, 168 cam, late model throttle body, balanced injectors, Downy intake and header, new 2.25" exhaust with a magnaflow muffler... Even with very tight motor mounts, vibration is minimal. It sounds and responds great.
36x13.5 bias ply Iroks are mounted and bb balanced. I think, by the way, that bb balancing is probably the best bet for the bias ply tires. Early cold morning flat spots are barely discernable.
The new powerplant makes the 36s feel like my old bald 33s did with the original engine.
I installed a Smittybuilt XRC8 in front on a bare TG winch plate. Bumpers will happen eventually.
I still have some things to work out. For instance, my low beams stopped working. It is probably the switch, but I haven't spent much time tracing it down. The dash is ugly even when it is installed... And right now it isn't. I think I'll be doing a lot of sheet metal work in the future. A flat dash with round gauges, rocker switches and led indicator lights sounds appealing. Then, a simplified steering column would be needed, to clean things up. This could get complicated. I still don't have bedsides, correct rear seats, or any armor...
So today, instead of correcting any of that, I took my tailgate off and gave it to dbcfr. I have a pickup tailgate, and have been contemplating a swap similar to what Volcom did (https://www.yotatech.com/forums/f115...00/?styleid=41). I had acquired a 2'x4' piece of 3/16" steel, so today I cut out a 53" x ~5" piece and began work on the bed floor extension. Again, I'll add photos later.
Last edited by Mountain Cop; Jun 13, 2014 at 10:13 PM.
Jun 19, 2014 | 02:29 PM
#434
Thread Starter
Registered User
Joined: Nov 2009
Posts: 504
Likes: 2
From: Central Sierra Nevadas (Oakhurst)
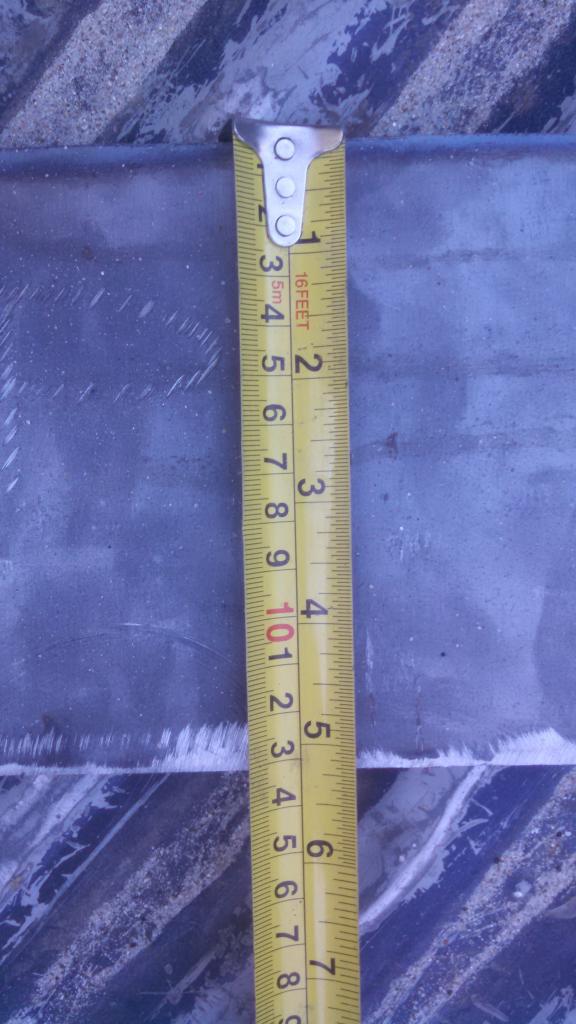
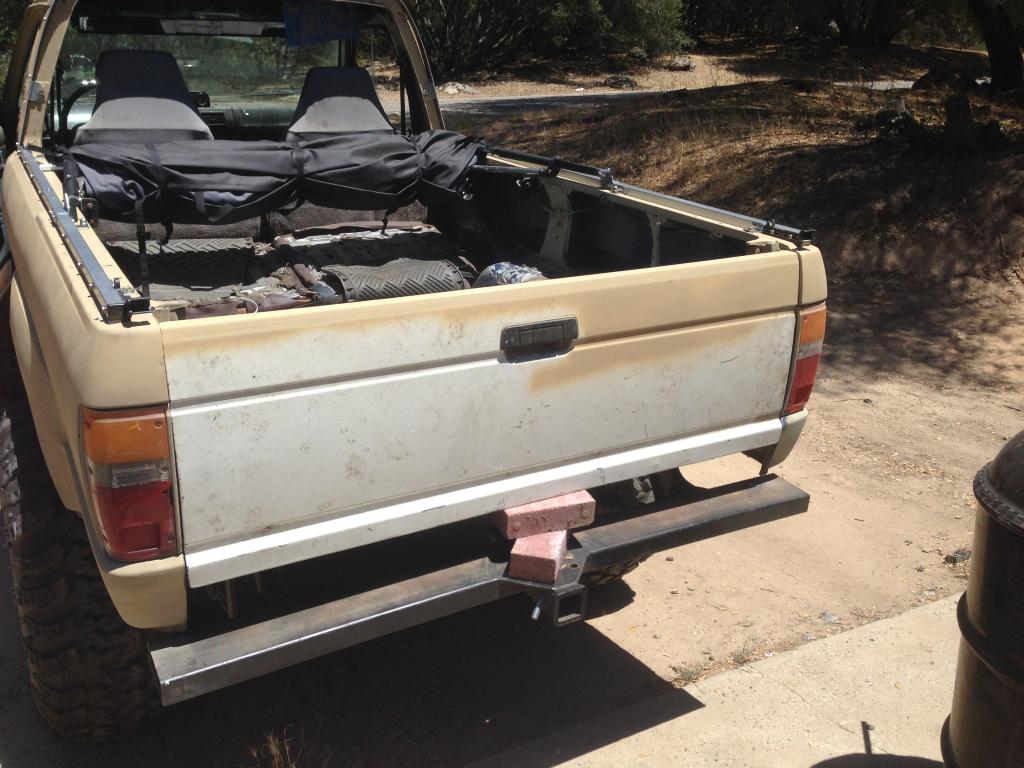
OK, I got a little more done. For those considering this, the bed extension should measure 5 1/4" by 52 3/4". There is a bit of leeway on the smaller measurement, but I wouldn't go over 5 1/4. I used 3/16 plate.
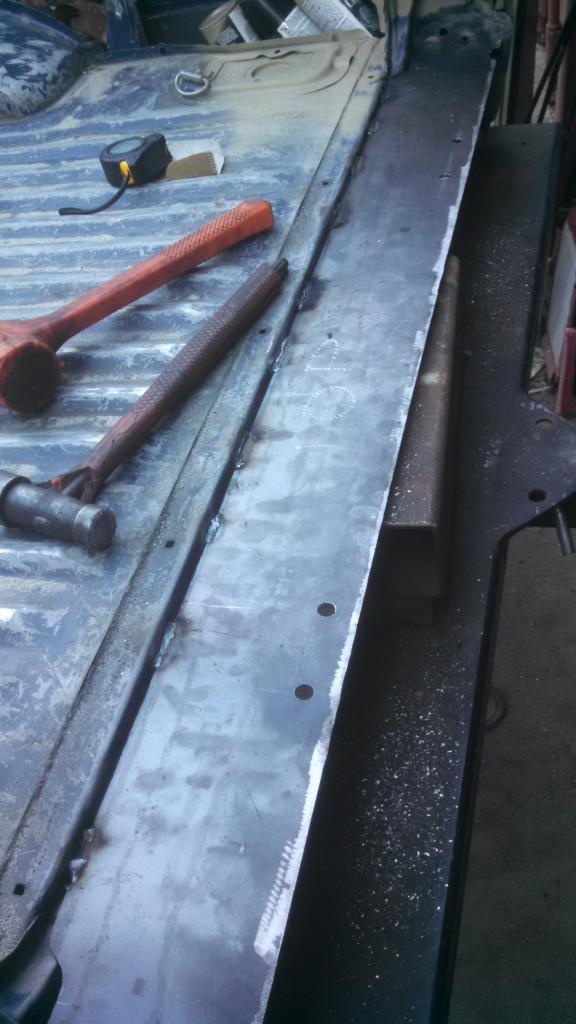
After removing the stock tailgate, I began fitting the extension. The leading edge sits flush against a small lip at the rear of the original bed. I tacked the extension to the lip after cleaning the factory paint a body filler off the lip and related seams. Hint: a small sandblaster gets the tight spots where a wire wheel doesn't. I didn't weld the sides at all at this point, as I'll be doing some fine altitude adjustment before making it permanent.
I drilled the hinge holes a bit large to allow for adjustment. I will likely weld carriage bolts in after everything is set, to make for a more snag-free surface.
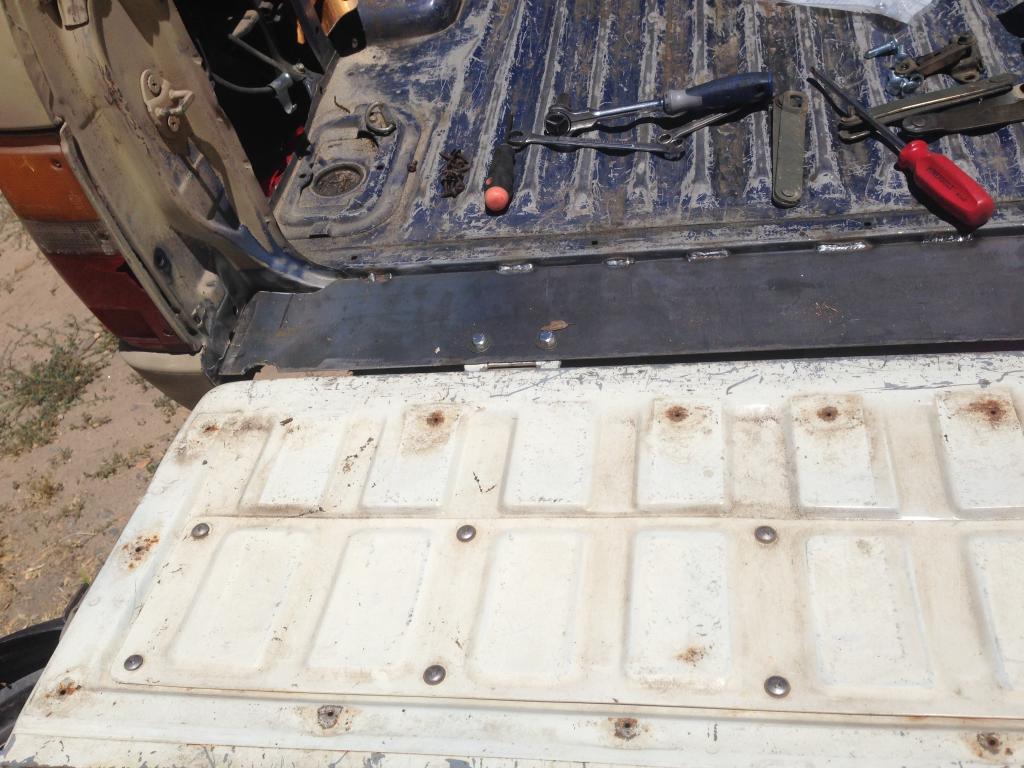
You will notice that the hinges bolt to the underside of the plate, not the top. This allows for some freedom in choosing the plate thickness. Next time I get to work on the truck, I will need to mark the slam plate locations and the location of the bolt for the stay that keeps the tailgate level when down.
It is just held up by a shim. No latch system yet.
As a side note, it is totally possible to haul a 16' culvert in the back of a 4runner.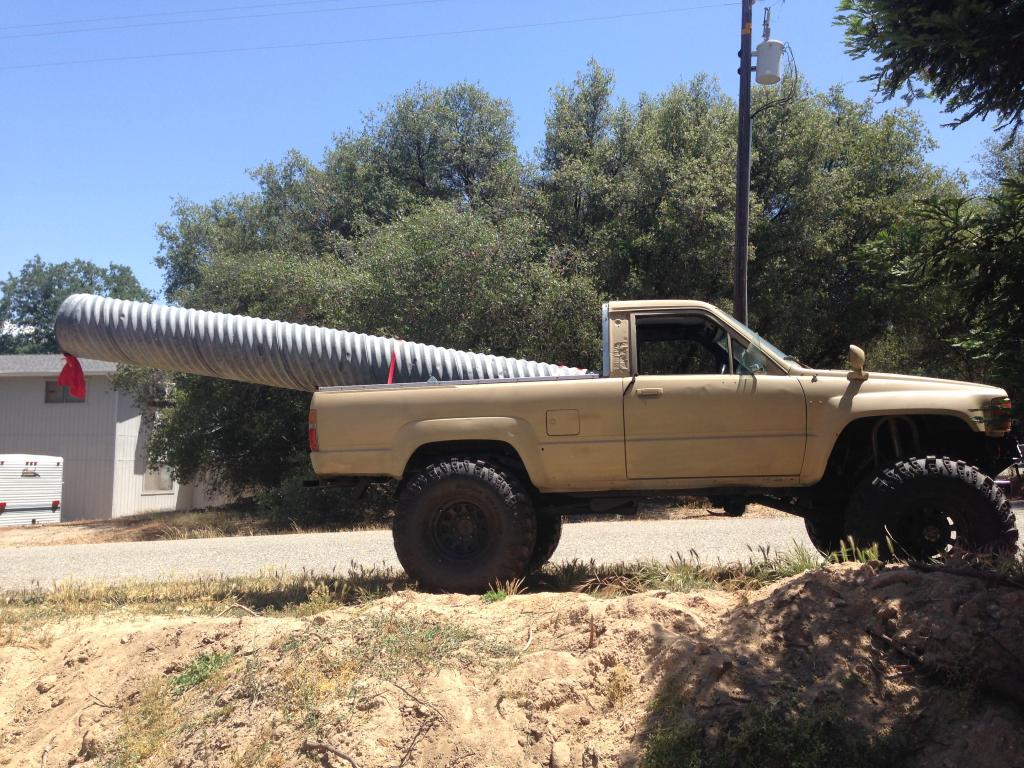


After removing the stock tailgate, I began fitting the extension. The leading edge sits flush against a small lip at the rear of the original bed. I tacked the extension to the lip after cleaning the factory paint a body filler off the lip and related seams. Hint: a small sandblaster gets the tight spots where a wire wheel doesn't. I didn't weld the sides at all at this point, as I'll be doing some fine altitude adjustment before making it permanent.

I drilled the hinge holes a bit large to allow for adjustment. I will likely weld carriage bolts in after everything is set, to make for a more snag-free surface.


You will notice that the hinges bolt to the underside of the plate, not the top. This allows for some freedom in choosing the plate thickness. Next time I get to work on the truck, I will need to mark the slam plate locations and the location of the bolt for the stay that keeps the tailgate level when down.
It is just held up by a shim. No latch system yet.

As a side note, it is totally possible to haul a 16' culvert in the back of a 4runner.

Last edited by Mountain Cop; Jun 19, 2014 at 02:55 PM.
Jun 19, 2014 | 03:32 PM
#436
Nice work on the modded tailgate, it's looking good! I'll have to admit I was a little bummed to hear that your DIY soft top is going to the wayside, I'm planning to build my own, and yours was one I was looking at for ideas, but I can understand you needing a little more versatility in being able to haul loads.
Keep up the good work, look forward to seeing your tailgate when its finished!
Keep up the good work, look forward to seeing your tailgate when its finished!
Last edited by rustED; Jun 19, 2014 at 03:39 PM.
Jun 19, 2014 | 04:02 PM
#437
Thread Starter
Registered User
Joined: Nov 2009
Posts: 504
Likes: 2
From: Central Sierra Nevadas (Oakhurst)
Nice work on the modded tailgate, it's looking good! I'll have to admit I was a little bummed to hear that your DIY soft top is going to the wayside, I'm planning to build my own, and yours was one I was looking at for ideas, but I can understand you needing a little more versatility in being able to haul loads.
Keep up the good work, look forward to seeing your tailgate when its finished!
Keep up the good work, look forward to seeing your tailgate when its finished!
Last edited by Mountain Cop; Jun 20, 2014 at 07:00 AM.
Jun 19, 2014 | 04:28 PM
#438
If you want to come see Yosemite, you can have the frame from mine. If I was to design it over, the hoops would be removable. I'd probably make receptacles that the tubing would fit in, held tight with a lynchpin. Also, I'd use thin wall round tubing instead of Sch40 pipe! I'm still glad I made mine. It was a lot of fun, and if I had a pickup, I probably would keep the ridgid frame for the top. Once you have one, I doubt you'll go back to the fiberglass.
I've booked marked about every DIY soft top thread I've come across and I was leaning towards building the frame like you were saying out of a thin wall tubing (I was thinking 1" square .065 wall) I want it somewhat light, but durable enough to hold a roof rack if I decide to build one. I was also wanting to make the hoops removable to make it easier to store during winter months. For fabric I found Sunbrella water proof canvass for 7.50/yard. I really like how you did the angle iron around the bottom for the snaps, I'll definately have to borrow that idea, lol. I was hoping to get started on one this summer, but I still have a 3 yr old trailer project to finish!
Last edited by rustED; Jun 19, 2014 at 04:31 PM.
Jun 20, 2014 | 06:59 AM
#439
Thread Starter
Registered User
Joined: Nov 2009
Posts: 504
Likes: 2
From: Central Sierra Nevadas (Oakhurst)
If you want to be able to support a load, you might want to consider something stronger than .065. I would suggest at least .120 wall hrew. The square stuff won't bend as nice as round, and will present the potential of increased canvas wear at the edges. Also, be aware that there are several different grades of Sunbrella. Make sure you get the right stuff. A boat canvas / awning shop might be able to point you in the right direction. I wouldn't change the angle iron bedrail design at all. It worked great.
Jun 21, 2014 | 01:01 PM
#440
If you want to be able to support a load, you might want to consider something stronger than .065. I would suggest at least .120 wall hrew. The square stuff won't bend as nice as round, and will present the potential of increased canvas wear at the edges. Also, be aware that there are several different grades of Sunbrella. Make sure you get the right stuff. A boat canvas / awning shop might be able to point you in the right direction. I wouldn't change the angle iron bedrail design at all. It worked great.


