
Locked_SR5 1987 4Runner Build-Up Thread
 Sep 10, 2011 | 09:03 AM
#41
Looking GREAT! I've not only subscribed(obviously, lol).... I've bookmarked this and have shared it with a buddy as well. I would love to do this, one day, but for now, it's a backburner thing, lol. This is VERY MUCH how I would like to do my 87, ....CLEAN AND GOOD2GO4GOOD! 
Sep 11, 2011 | 04:25 PM
#44
Thread Starter
Registered User
Joined: Aug 2010
Posts: 101
Likes: 1
From: Sacramento, CA
Sep 11, 2011 | 04:29 PM
#45
Thread Starter
Registered User
Joined: Aug 2010
Posts: 101
Likes: 1
From: Sacramento, CA
Looking GREAT! I've not only subscribed(obviously, lol).... I've bookmarked this and have shared it with a buddy as well. I would love to do this, one day, but for now, it's a backburner thing, lol. This is VERY MUCH how I would like to do my 87, ....CLEAN AND GOOD2GO4GOOD!
I think we have the exact same trucks. Does yours have the gold SR5 graphics?
Like you, I want my truck to be as clean as possible. Once I starting working on the exterior I plan on having it as clean as yours.
 Sep 11, 2011 | 05:33 PM
#47
Thread Starter
Registered User
Joined: Aug 2010
Posts: 101
Likes: 1
From: Sacramento, CA
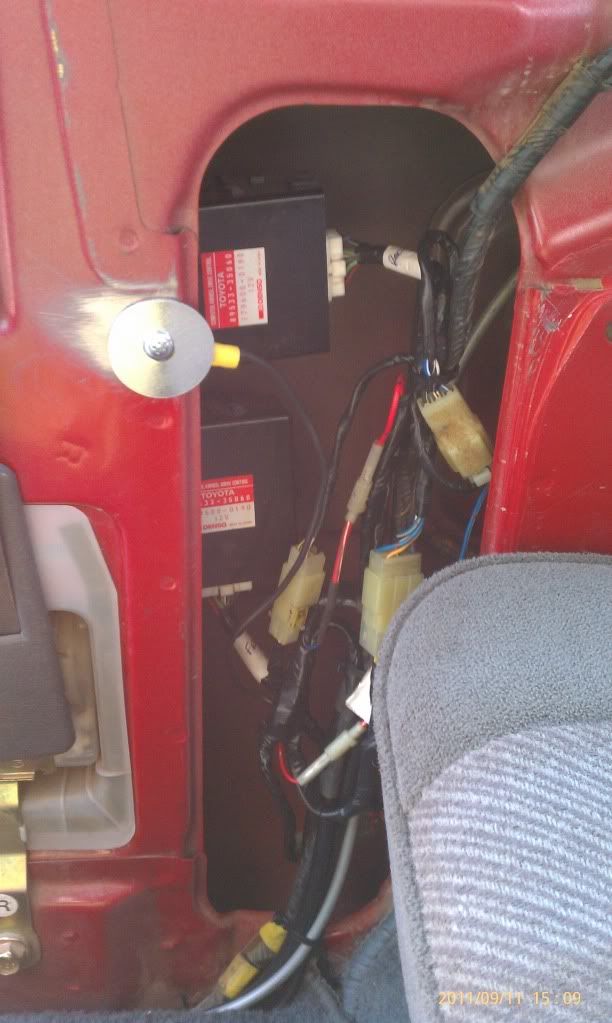
E-Locker Wiring
In my previous posts, I showed that I've been working on getting the e-locker wiring harness ready for the install. Well today is the day I got in all installed and working..
People may or may not agree with this, but for the wiring inside the truck and the wiring to the thirds, I used 10 strand solid copper sprinkler wire. I used it because the wire is fixed in place and is not conituously bending back and forth (won't get metal fatigue) and it's only 0.74 cents a foot Used 15' for the rear, 10' for the front, and 5' for the passenger compartment. If I were to do it all over again, I could have gotten away with only using the 7 strand sprinkler wire, as the E-lockers only required 6 strand wire (0.49 cents at Home Depot) . In the passenger compartment, I was able to run 1 line, combining the wires needed to run to the e-locker buttons (Only 3 wires per e-locker computer was run to the front).
The only wires the will be doing a lot of bending are the sections off the thirds (factory e-locker harness) and the sections were I used male and female connectors inside the passenger compartment (these wires are the normal stranded copper wire).
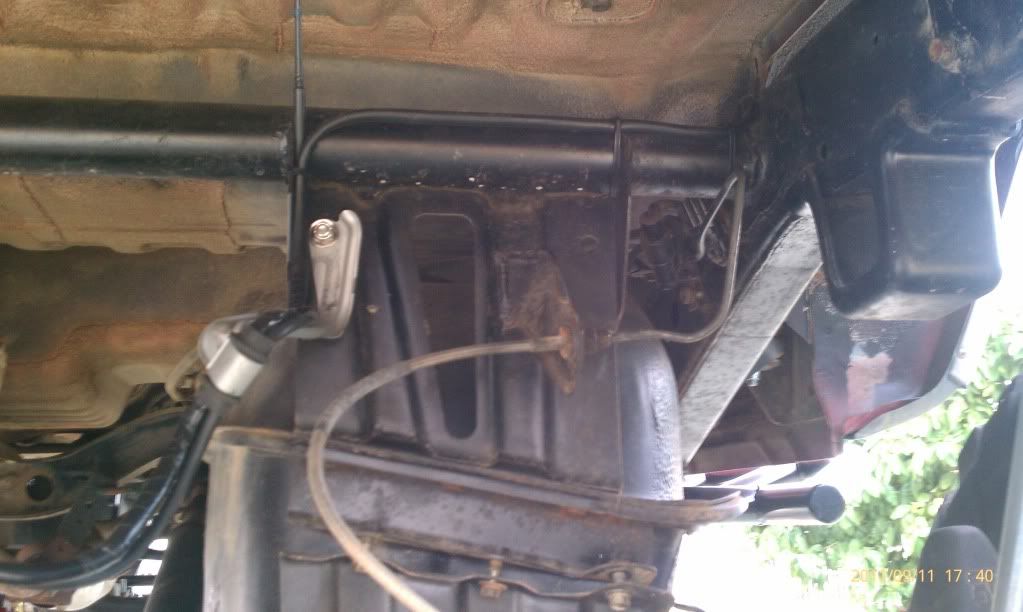
I was unable to source the male connector to the e-locker harness for a low price (Specialized Parts Planet in Rancho Cordova, CA wanted 75.00 a plug wow!). So I decided to hard-line the e-locker harness front and rear.
Front
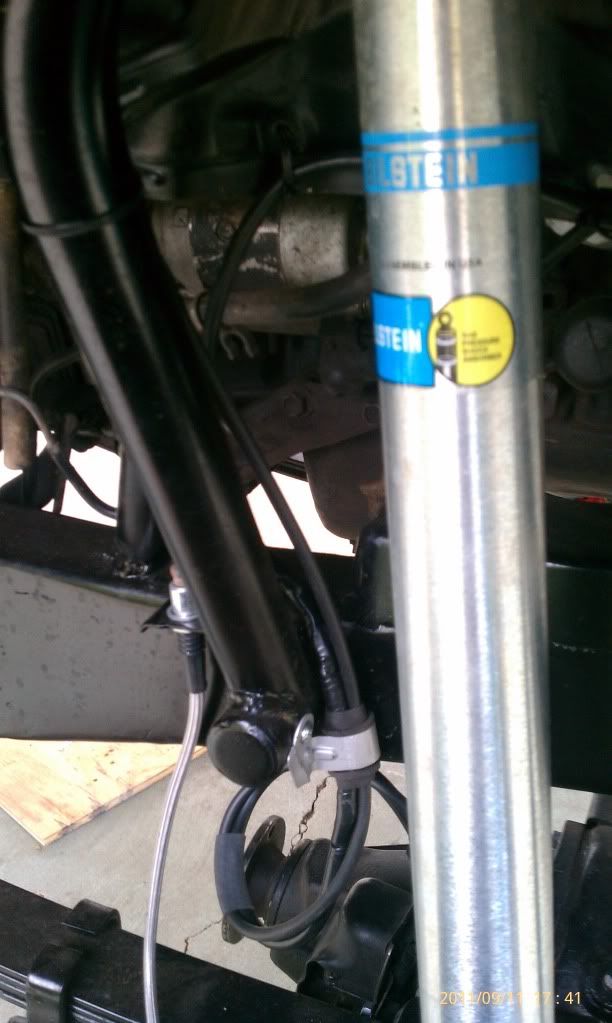
Rear
After taking care of the wires to the thirds, I started working on installing the passenger compartment wiring harness I showed in previous posts. Here are the two wiring diagrams I used to wire up my e-lockers.
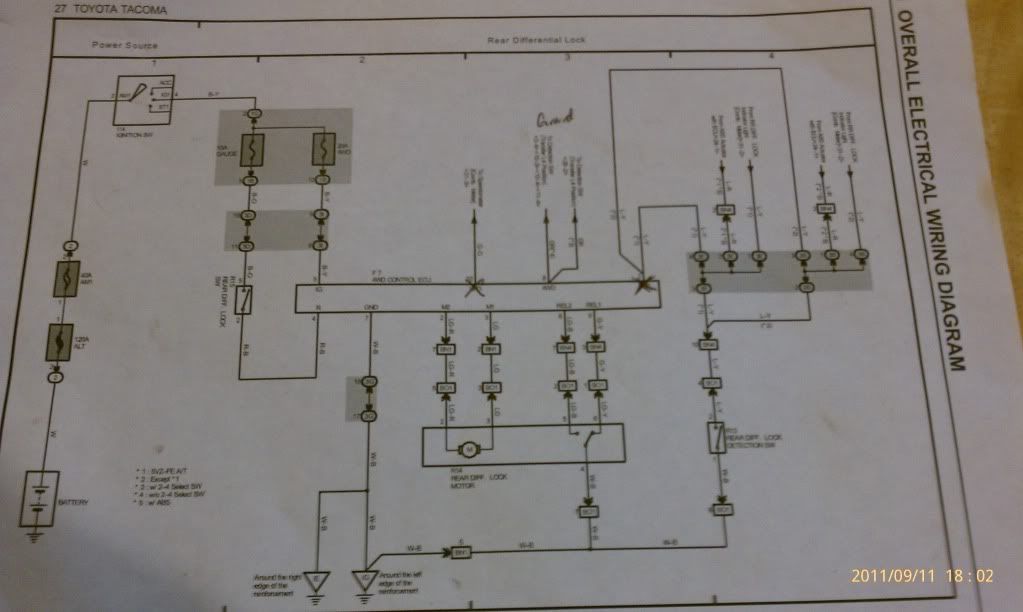
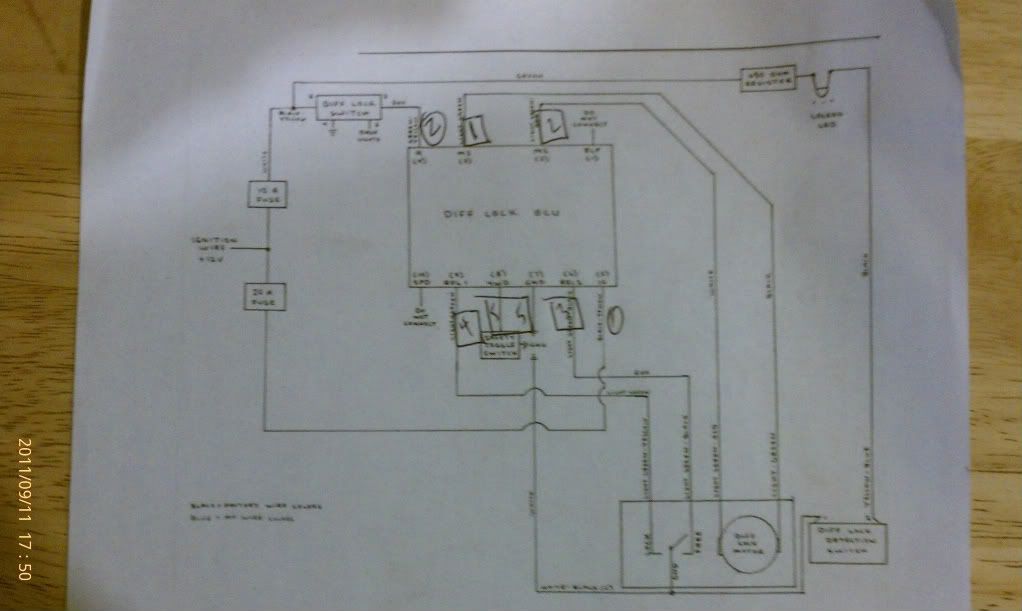
Connected to the factory e-locker computers (you're able to use just one grounding point for both e-lockers and e-locker computers, if anyone cares about that). Also, I connected and grounded the 7 and 8 wires (this allows you to engage the e-lockers at any speed, bypassing the speed control. So be careful. This was a mod I seen in another forum).
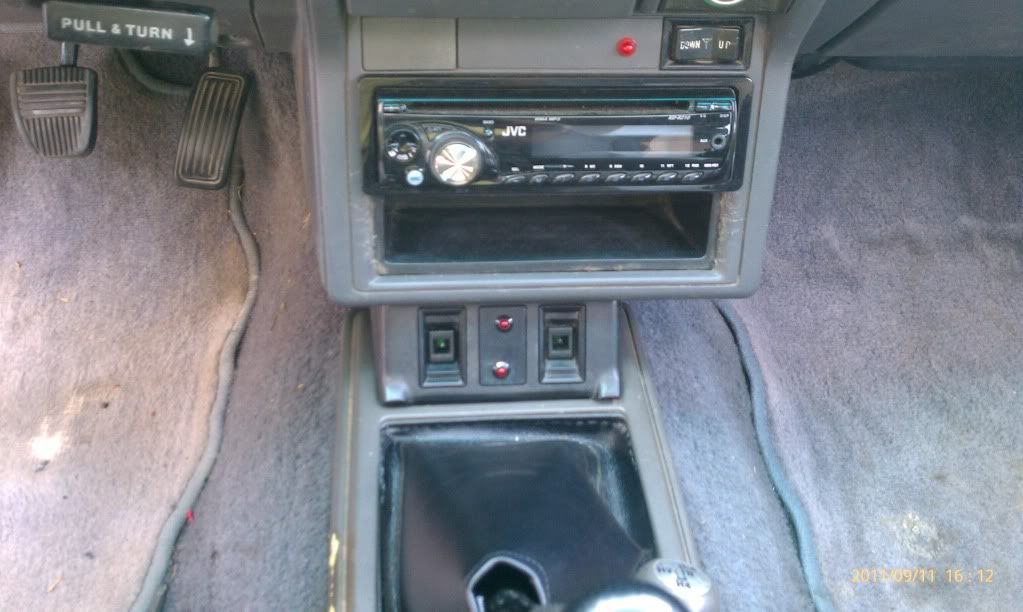
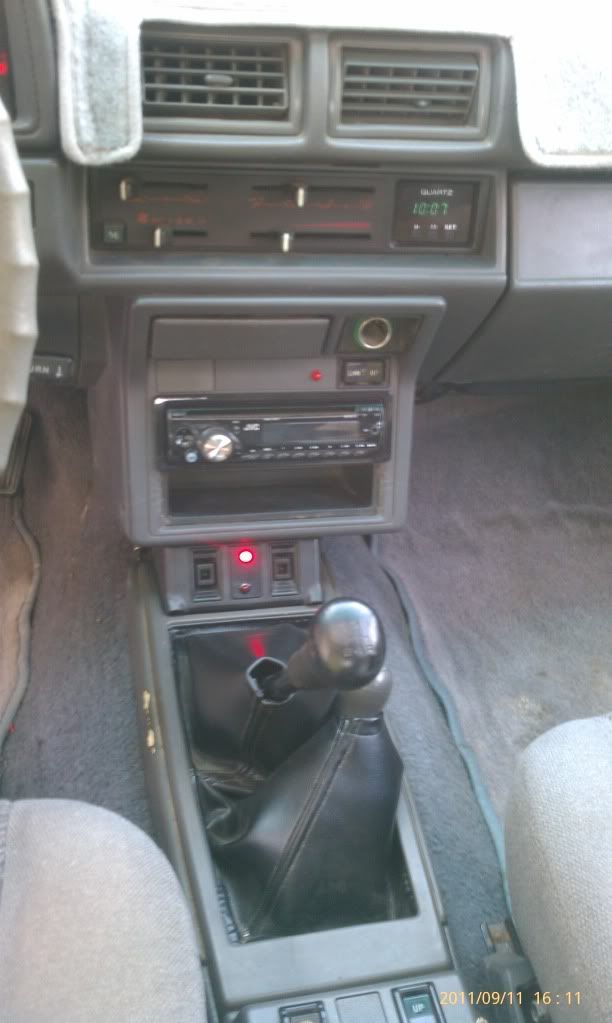
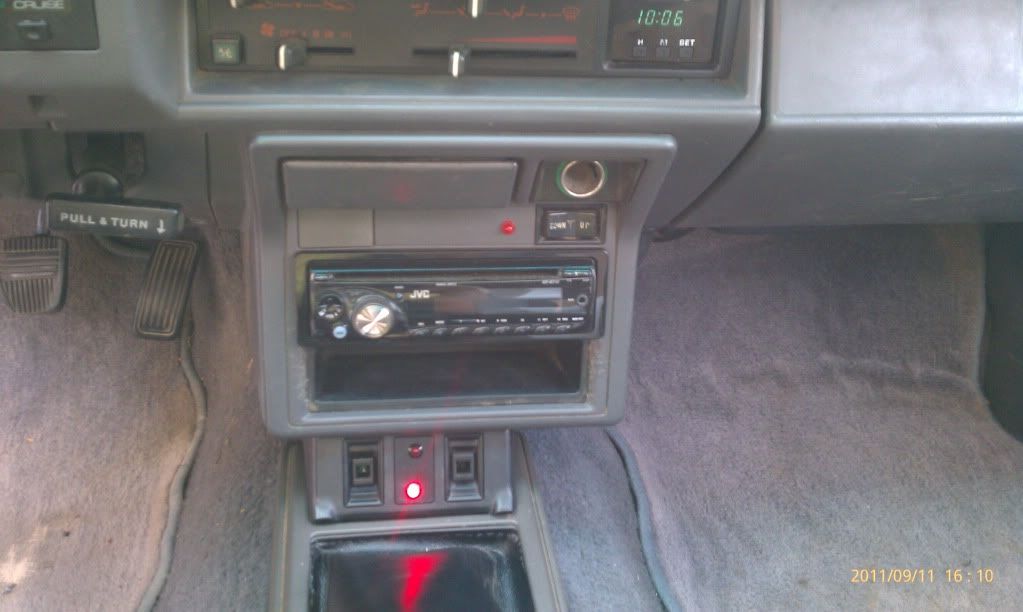
After installing and connecting the wire and plugs, I was able see if I wired everything up correctly. And guess what, it WORKED!!
E-lockers disengaged
Front E-locker engaged
Rear E-locker engaged
Both E-lockers engaged
Yes!
For those who care, I used the 4runner rear window lock buttons (save yourself some money and not buy the factory e-locker button). I was able to remove the plastic cover that said "window lock" with a really small standard screwdriver. I plan on making a plastic cover with an "F" and "R" for labeling purposes. Further down the line I plan to illuminate the LED in the bulb by connecting the wires to the dash lights .
.
People may or may not agree with this, but for the wiring inside the truck and the wiring to the thirds, I used 10 strand solid copper sprinkler wire. I used it because the wire is fixed in place and is not conituously bending back and forth (won't get metal fatigue) and it's only 0.74 cents a foot Used 15' for the rear, 10' for the front, and 5' for the passenger compartment. If I were to do it all over again, I could have gotten away with only using the 7 strand sprinkler wire, as the E-lockers only required 6 strand wire (0.49 cents at Home Depot) . In the passenger compartment, I was able to run 1 line, combining the wires needed to run to the e-locker buttons (Only 3 wires per e-locker computer was run to the front).
The only wires the will be doing a lot of bending are the sections off the thirds (factory e-locker harness) and the sections were I used male and female connectors inside the passenger compartment (these wires are the normal stranded copper wire).
I was unable to source the male connector to the e-locker harness for a low price (Specialized Parts Planet in Rancho Cordova, CA wanted 75.00 a plug
wow!). So I decided to hard-line the e-locker harness front and rear.Front
Rear
After taking care of the wires to the thirds, I started working on installing the passenger compartment wiring harness I showed in previous posts. Here are the two wiring diagrams I used to wire up my e-lockers.
Connected to the factory e-locker computers (you're able to use just one grounding point for both e-lockers and e-locker computers, if anyone cares about that). Also, I connected and grounded the 7 and 8 wires (this allows you to engage the e-lockers at any speed, bypassing the speed control. So be careful. This was a mod I seen in another forum).
After installing and connecting the wire and plugs, I was able see if I wired everything up correctly. And guess what, it WORKED!!
E-lockers disengaged
Front E-locker engaged
Rear E-locker engaged
Both E-lockers engaged
Yes!
For those who care, I used the 4runner rear window lock buttons (save yourself some money and not buy the factory e-locker button). I was able to remove the plastic cover that said "window lock" with a really small standard screwdriver. I plan on making a plastic cover with an "F" and "R" for labeling purposes. Further down the line I plan to illuminate the LED in the bulb by connecting the wires to the dash lights
.
Sep 11, 2011 | 05:56 PM
#48
Thread Starter
Registered User
Joined: Aug 2010
Posts: 101
Likes: 1
From: Sacramento, CA
To Do's
Regarding the E-lockers, I forgot to mention that the power sources I spliced into for power to the E-locker computers. The 15A line was spliced into the cigarette lighter Because it's close to the center console. For the 20A line, I was able to run a line to the drivers side kick panel and splice into the rear defroster line. Note: I was able to power both e-lockers from one line to each location.. Hope this helps.
Here's a list of things I still need to work on to get the 4Runner drivable are:
-Install brake pads on all corners
-Bleed entire braking system
-Fabricated transfer case parking brake bracket
-Order triple sticks
-Install dual cases
-Shorten and balance rear drive line
-Fabricate front drive line
-Do front end alignment
-Recheck and tighten all bolts to specs, and
-Redo head gasket before next Registration (SMOG check due).
For now, I'm going to order the Triple Sticks
Oh, and Never Forget!!!
Sep 11, 2011 | 06:27 PM
#49
Registered User
Joined: Dec 2009
Posts: 2,762
Likes: 1
congrats on the elockers. i still have mine that needs to be regeared. been lazy to order up the gears.. still need to mod the extra housing i have too. once i get back from pismo i need to hop on the lockers as winter is coming hehe
Sep 12, 2011 | 03:55 PM
#51
Thread Starter
Registered User
Joined: Aug 2010
Posts: 101
Likes: 1
From: Sacramento, CA
Triple Sticks.
I guess you can cross ordering the triple sticks off the list of things I still need. Last night I ordered them from RADesigns after some research. I think it would have taken too much time and effort to fabricate these myself (the portion that covers the back case is the most complicated part). I know Dave's Offroad makes them too, but I went with the RAD triple sticks because of the pricing which includes the knobs and boot (the boot itself is 36.00).
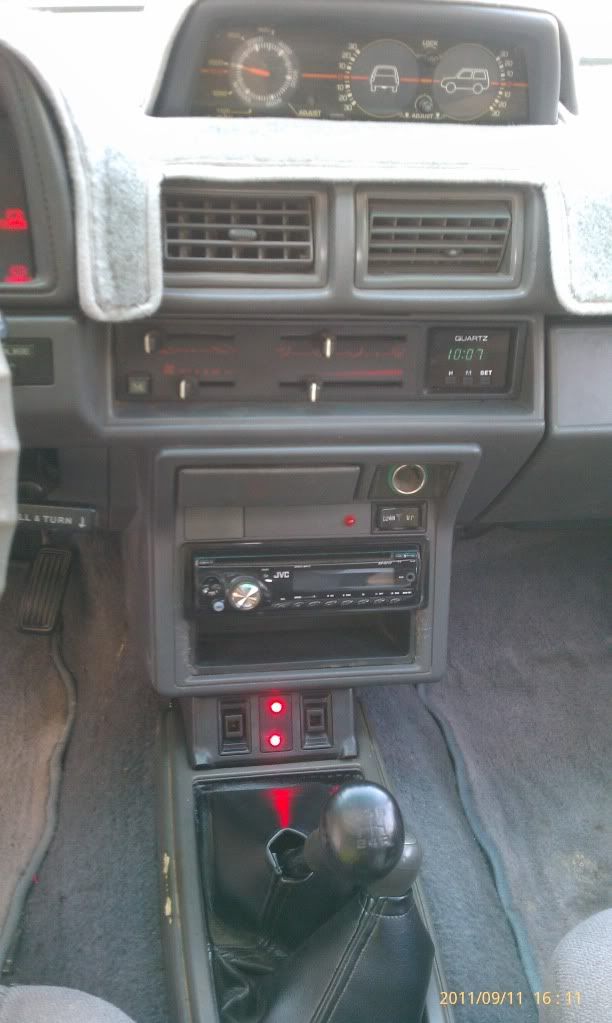
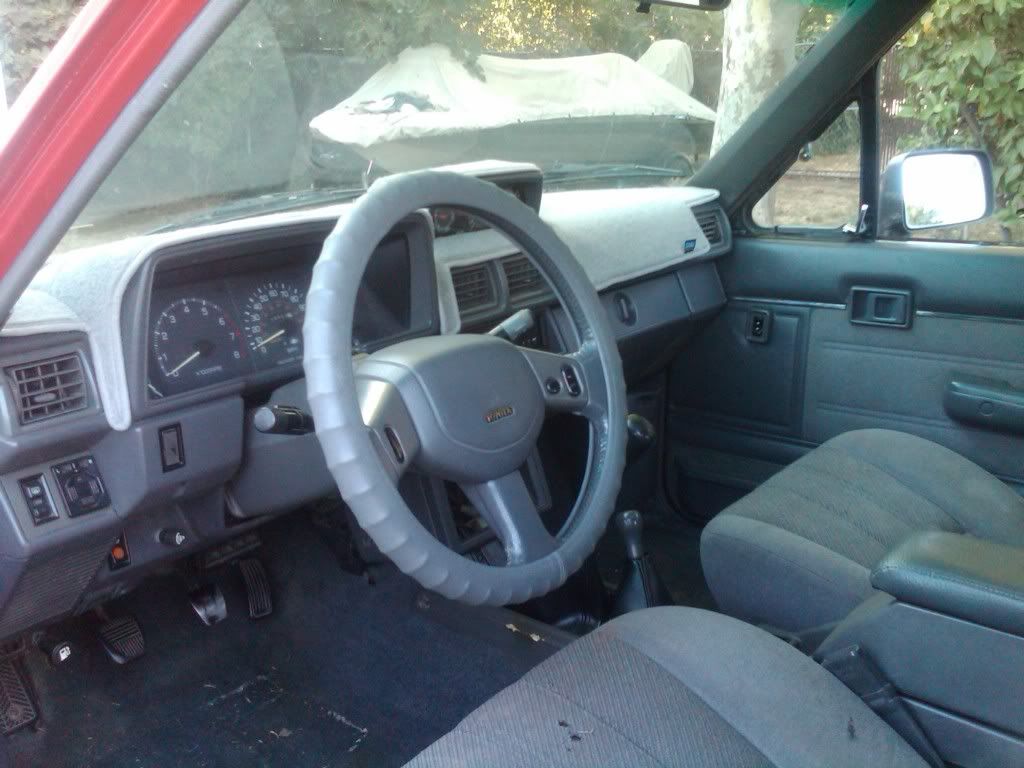
I want my interior to be as close to stock as possible and seeing this pic from DNTSDAD Runner instantly told me this is what I wanted to do.
'
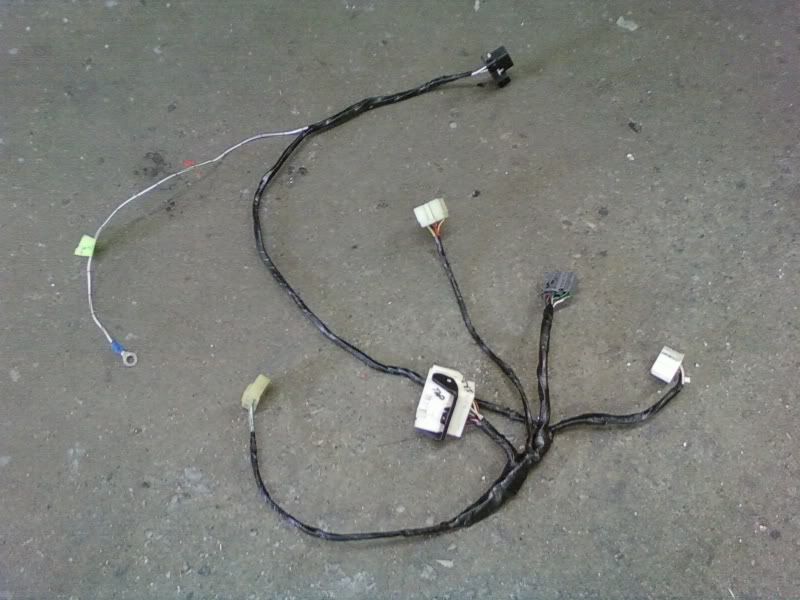
On a side note and for future planning in the 3.4 swap department. Does anyone have this big white plug shown in the pic laying around. It's the male IK2 plug. I need this to make my harness adapter (It's the only thing hanging up my wiring, as I have all the wires and plug pin-outs identified on the 3.4 and 4runner body harness). Also, if any one has an 87 4runner, I have the factory Toyota service manual and electrical wiring diagram manual. It made the 3.4 swap that much easier.
I plan on making a harness that looks like this
I guess you can cross ordering the triple sticks off the list of things I still need. Last night I ordered them from RADesigns after some research. I think it would have taken too much time and effort to fabricate these myself (the portion that covers the back case is the most complicated part). I know Dave's Offroad makes them too, but I went with the RAD triple sticks because of the pricing which includes the knobs and boot (the boot itself is 36.00).
I want my interior to be as close to stock as possible and seeing this pic from DNTSDAD Runner instantly told me this is what I wanted to do.
'
On a side note and for future planning in the 3.4 swap department. Does anyone have this big white plug shown in the pic laying around. It's the male IK2 plug. I need this to make my harness adapter (It's the only thing hanging up my wiring, as I have all the wires and plug pin-outs identified on the 3.4 and 4runner body harness). Also, if any one has an 87 4runner, I have the factory Toyota service manual and electrical wiring diagram manual. It made the 3.4 swap that much easier.
I plan on making a harness that looks like this
Sep 12, 2011 | 04:20 PM
#52
Thread Starter
Registered User
Joined: Aug 2010
Posts: 101
Likes: 1
From: Sacramento, CA
Interior Door panels
As I said before, I want my interior to be as close to stock as possible (IMO it helps keep prying eyes away). I've always been a fan of crisp, clean sounding music. With me being familiar with car stereo installs and building speaker boxes I started to think how I wanted my stereo system.
One of the first things I saw was how plain the stock 87 SR5 door panels were.
I knew I needed to upgrade those. So with that said, I was on the look out for the 88/89 door panels from a 4Runner with electric windows. After searching for some time I found a set of white 4runner doors with the panels for 80.00. That's a steal if you ask me... I plan on using these doors to make half doors and a custom hardtop for my 4Runner next spring.
With that said and me wanting to do things as nice as possible, I started to make pods for my front speakers.
Here's the rough cuts
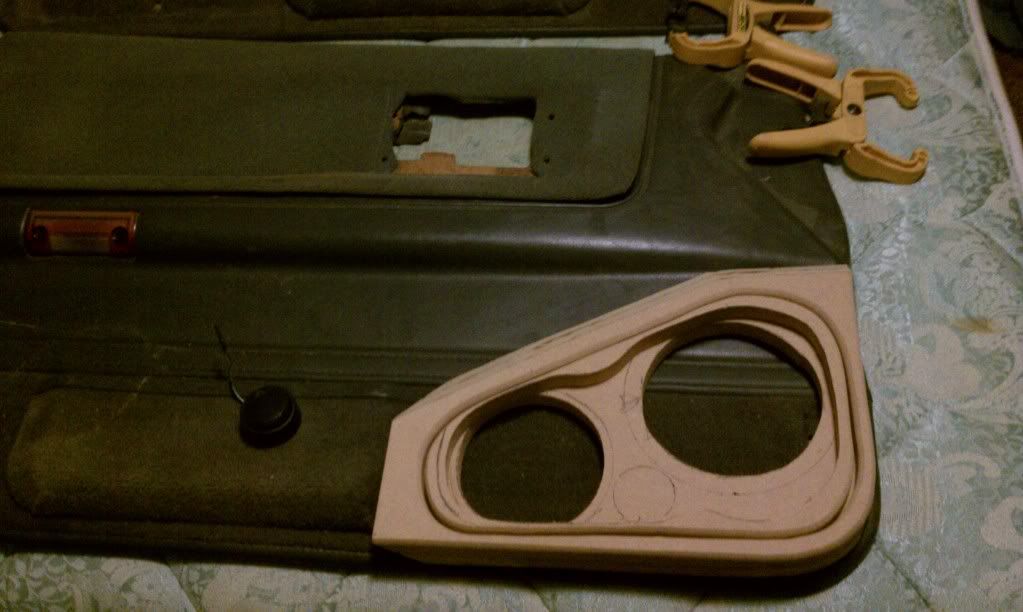
Here's how I planned on positioning the speakers
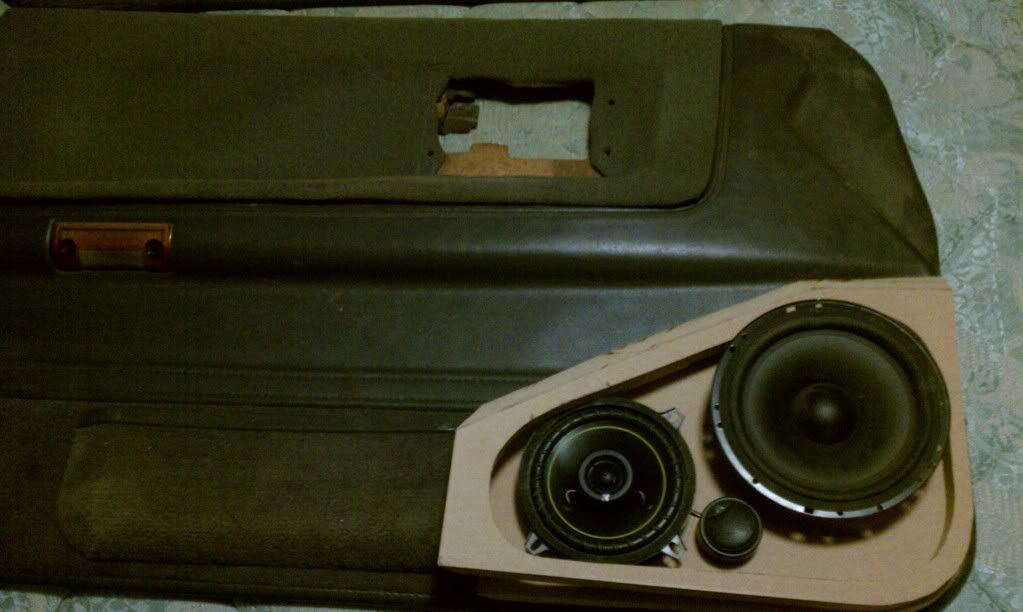
Got one pod built (Was able to keep the pocket in the door, just reattached it further back).
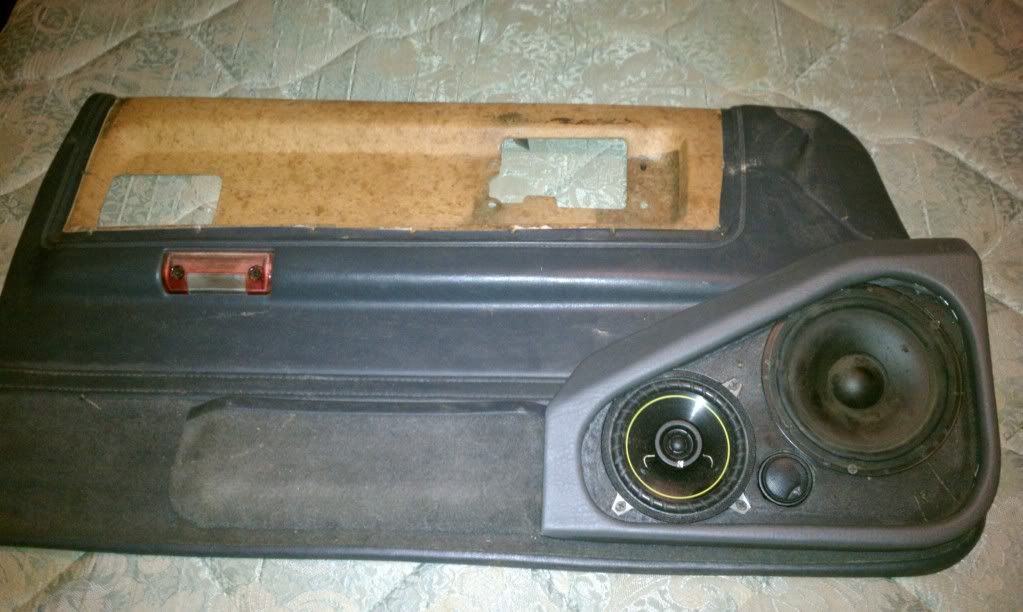
Got them both built and ready for install. Pretty good eh?
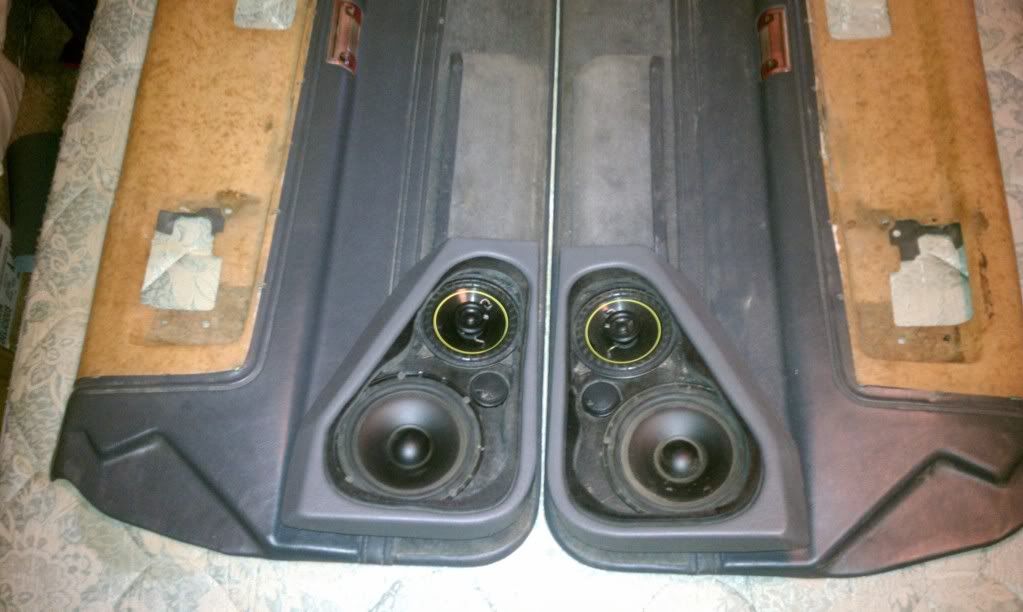
Future plans include adding speakers for the rear panels and custom made boxes out of wood/fiberglass for some 10"woofers that will go in between the two post of the roll bar, just above the rear wheel wells (I still want to be able to lay the back seats down so I can haul large objects if needed).
One of the first things I saw was how plain the stock 87 SR5 door panels were.
I knew I needed to upgrade those. So with that said, I was on the look out for the 88/89 door panels from a 4Runner with electric windows. After searching for some time I found a set of white 4runner doors with the panels for 80.00. That's a steal if you ask me... I plan on using these doors to make half doors and a custom hardtop for my 4Runner next spring.
With that said and me wanting to do things as nice as possible, I started to make pods for my front speakers.
Here's the rough cuts
Here's how I planned on positioning the speakers
Got one pod built (Was able to keep the pocket in the door, just reattached it further back).
Got them both built and ready for install. Pretty good eh?
Future plans include adding speakers for the rear panels and custom made boxes out of wood/fiberglass for some 10"woofers that will go in between the two post of the roll bar, just above the rear wheel wells (I still want to be able to lay the back seats down so I can haul large objects if needed).
Sep 14, 2011 | 02:33 PM
#55
Thread Starter
Registered User
Joined: Aug 2010
Posts: 101
Likes: 1
From: Sacramento, CA
Hey Toyo,
About the IFS parts... Went I bought the truck, the PO already had an IFS lift installed and those tabs you were asking about were cut off by him.. so I cant get you those.. However, I do have an IFS lift for sale.. prefer local sale though..
About the IFS parts... Went I bought the truck, the PO already had an IFS lift installed and those tabs you were asking about were cut off by him.. so I cant get you those.. However, I do have an IFS lift for sale.. prefer local sale though..
 im not looking for a bracket lift. thanks tho
Sep 18, 2011 | 08:51 PM
im not looking for a bracket lift. thanks tho
Sep 18, 2011 | 08:51 PM
#57
Thread Starter
Registered User
Joined: Aug 2010
Posts: 101
Likes: 1
From: Sacramento, CA
Triple sticks
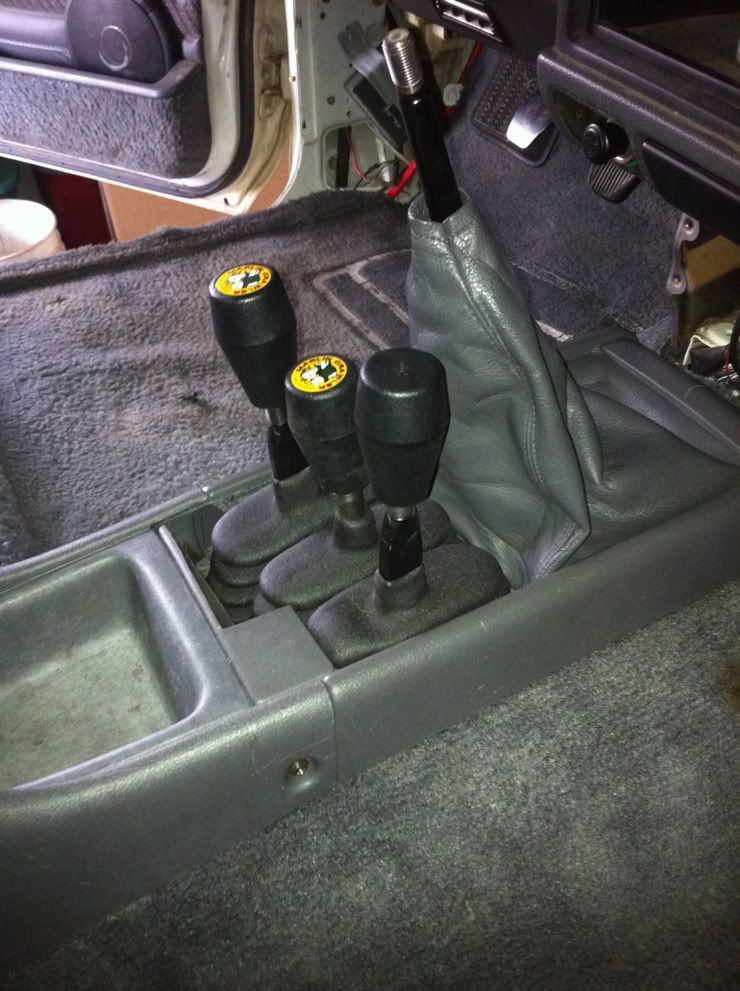
While I was out of town for a mini vacation, a package showed up to my house and was excited to put it together,,
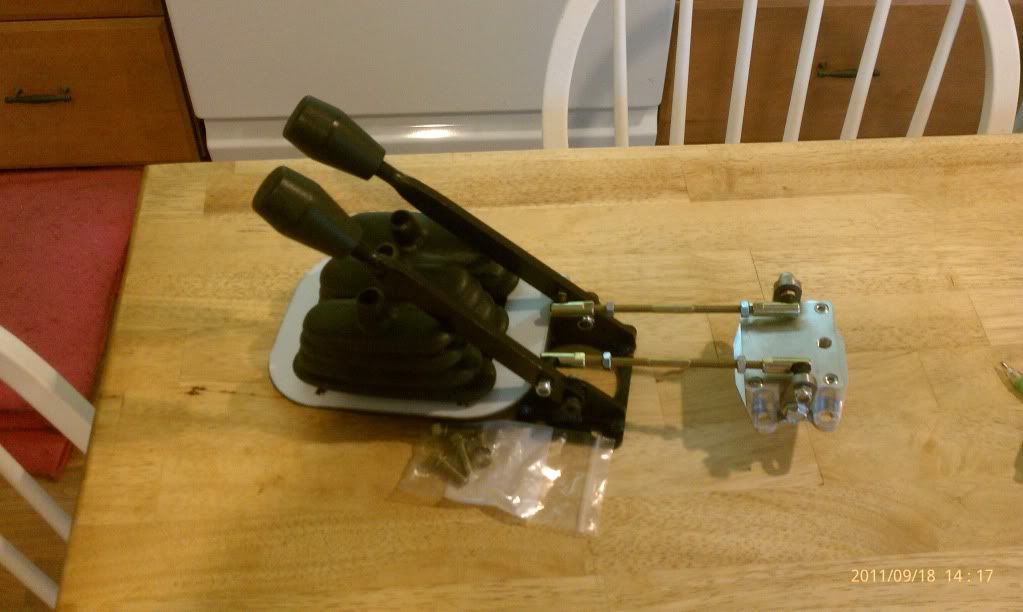
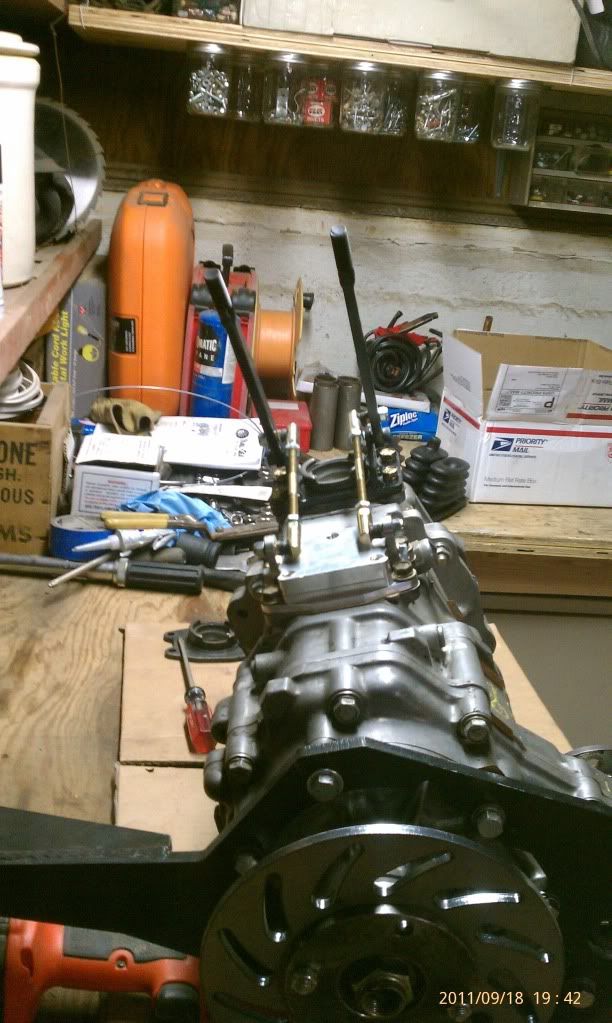
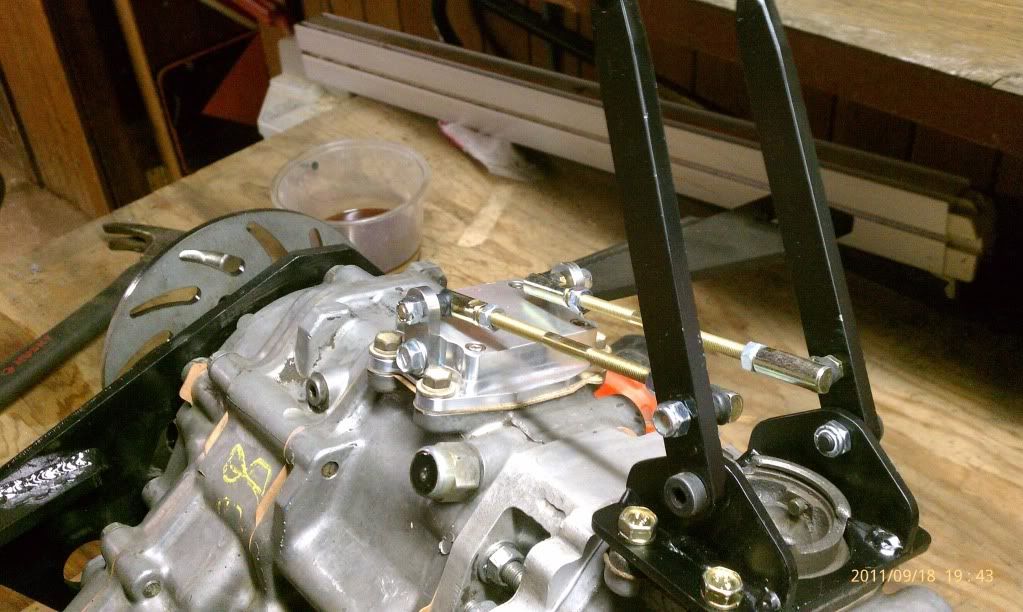
I wanted to show the details of the back shifter because there were not too many pics posted on the net.. The rest are more pics.. only complaint about the triple sticks is that the width were a tad too big and would not slide into the shifter forks. Needed to use a file to make it slide into the rails. Other than that, it looks really well built.

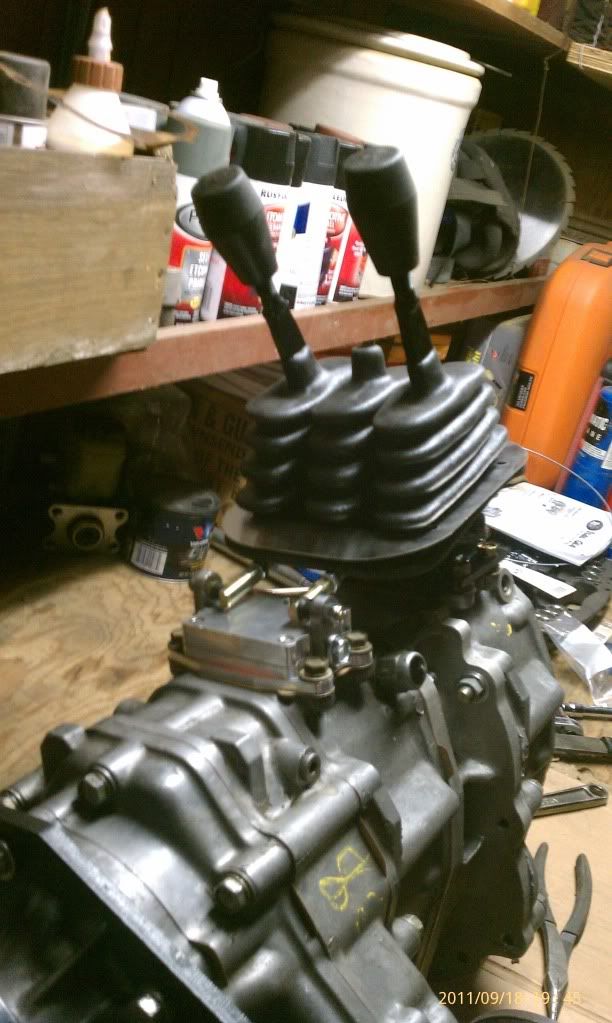
Boot looks pretty damn good..
I wanted to show the details of the back shifter because there were not too many pics posted on the net.. The rest are more pics.. only complaint about the triple sticks is that the width were a tad too big and would not slide into the shifter forks. Needed to use a file to make it slide into the rails. Other than that, it looks really well built.
Boot looks pretty damn good..
Sep 19, 2011 | 10:55 AM
#59
Thread Starter
Registered User
Joined: Aug 2010
Posts: 101
Likes: 1
From: Sacramento, CA
Yes i did just run SA rotors and calipers in the rear. There are several write ups on this on the net, but may be hard to find..When I rebuilt my rear axle I had the bearings pressed out and everything taken apart.
The rotor goes on the backside of the rear axle and when you do this you will see the need to grind the rotor a bit. Grind until the rotor is flush with the rear axle then install dust shield and use SA studs (I purchased mine from Napa Autoparts). When you use the front studs you will need to run a 1/4" spacer (this will also help with the caliper clearance on the rear wheel. There is no need to grind the caliper). I'm running 15x10 black rock crawler rims with no clearance issues.
As far as the caliper bracket goes. I purchased those on ebay for 30.00 a pair. My only complaint with those was that they were water jetted and the bolt holes were not exactly round (I reamed them so it really wasn't an issue). Hopefully you'll find this useful. Let me know if you have any other questions..
Kyle
Sep 19, 2011 | 05:07 PM
#60

Registered User
Joined: Mar 2011
Posts: 3
Likes: 0
From: Lowell/Houghton MI
Yeah I've looked for awhile and can't seem to find a good rear disc conversion like the one you did.
Sounds pretty straight foward and more importantly much cheaper.
What all did you have to grind and space?
Sounds pretty straight foward and more importantly much cheaper.
What all did you have to grind and space?


