Dutchbelly's 1988 4runner Build-up
 05-30-2011, 07:49 PM
#101
Registered User
Thread Starter
Join Date: Apr 2011
Location: Southern Ontario
Posts: 428
Likes: 0
Received 0 Likes
on
0 Posts
PS> I think 4wheelparts.com is having a deal on shock type stuff.... maybe they'll have a Skyjacker or Rancho, something that will 'like' the 33's better?(Not saying that'll be a problem,...just implementing some thought provocation! lol. I Just thought I'd throw that out there... (Buddy works there in Compton, CA,..... can't seem to get a hold of him though! lol)... But I've seen them for that application for like 30$ on sale!
 05-31-2011, 05:39 PM
#104
Registered User
Thread Starter
Join Date: Apr 2011
Location: Southern Ontario
Posts: 428
Likes: 0
Received 0 Likes
on
0 Posts
Sorry Twisted, totally missed your question the first time I read your post. It's not a good idea to try to reuse the sand for a few reasons. By the time you've collected it it's not just sand anymore, it's full of all the crap you've blasted off, and can give you problems with clumping and blockages, and you're bound to have your nozzle clog from particles that are bigger than the sand. Also moisture is key to the process. If the sand has any moisture content to it, it clumps and can bridge in the canister. The sand has to be very dry. I know people who won't use brand new sand bags if there is a tear in it because of the moisture. I suppose if you had a way to filter the sand you were to reuse, and maybe threw it onto a stove to remove the moisture, than I could see it working, but I find the unit I was using so finicky with brand new dry sand that I'm not sure it'd be worth the trouble.
05-31-2011, 05:51 PM
#105
Registered User
Thread Starter
Join Date: Apr 2011
Location: Southern Ontario
Posts: 428
Likes: 0
Received 0 Likes
on
0 Posts
Sandblasting went better this evening. I'm not going to lie I'm still not a big fan of the process, but the weather cooperated and the machine worked better than on most nights. I got pretty much everything done at the front of the truck, still have to do the back axle and probably touch up some stuff on the underside of things, but here's how it looks after tonight:
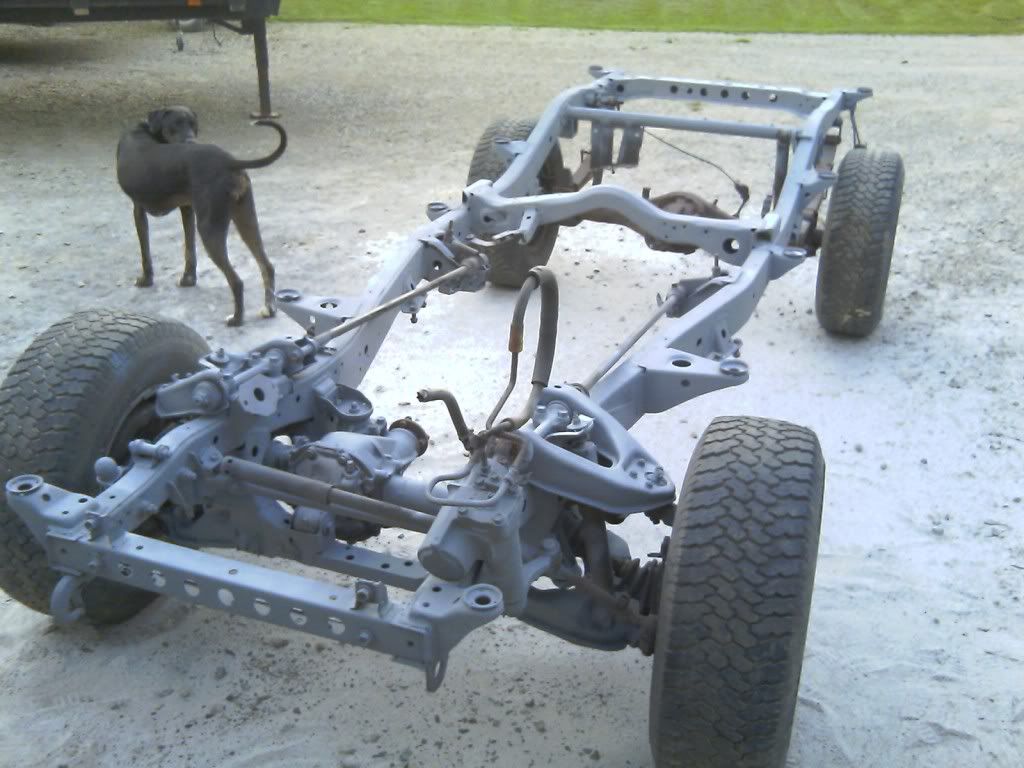
I'm still not done, but I felt better about tonight than the last two days. Trying to figure out what I'll be working on first after the frame's done. Ideally I'd do the suspension so I could figure out brake line clearances/travel before the brakes, and I don't really feel like putting the fuel lines in before the brakes are done (partially because I'll have to sandblast the darn tank and skidplate) so maybe I'll just swap out as much of the brakes as I can without doing the lines, like calipers drums, rotors etc. Suggestions?
I'm still not done, but I felt better about tonight than the last two days. Trying to figure out what I'll be working on first after the frame's done. Ideally I'd do the suspension so I could figure out brake line clearances/travel before the brakes, and I don't really feel like putting the fuel lines in before the brakes are done (partially because I'll have to sandblast the darn tank and skidplate) so maybe I'll just swap out as much of the brakes as I can without doing the lines, like calipers drums, rotors etc. Suggestions?
06-01-2011, 01:49 AM
#106
Super Moderator
Staff
iTrader: (1)
Join Date: Aug 2008
Location: Anderson Missouri
Posts: 11,788
Likes: 0
Received 23 Likes
on
21 Posts
Im sure the sandblasting was a pain, but that frame looks 300% better and can only make things a little easier. I had to use a wire brush on a drill, that WAS a pain.
Looking Great.
Looking Great.
06-01-2011, 01:55 PM
#107
Registered User
Thread Starter
Join Date: Apr 2011
Location: Southern Ontario
Posts: 428
Likes: 0
Received 0 Likes
on
0 Posts
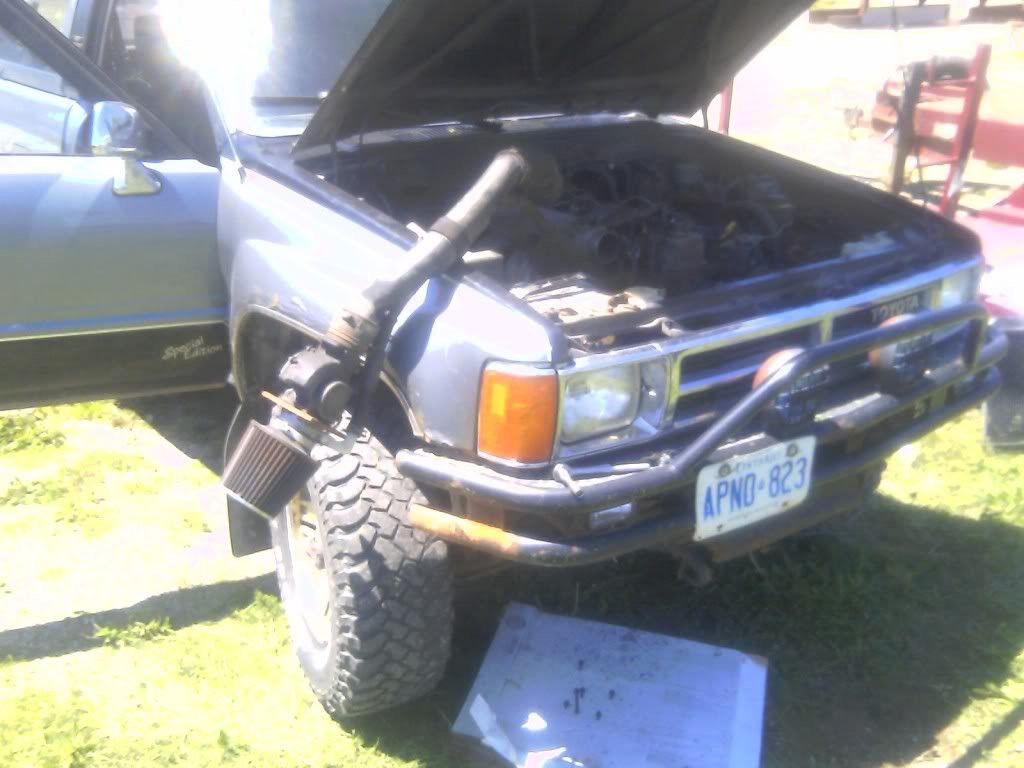
I won't be able to work on the truck tonight, I was pulling into the coffee shop this morning before work and heard some funny noises from under the hood of my '89 dd. Heard a whirr and a bit of clicking. I limped it a mile to where I work and popped the hood to see coolant everywhere. I turned the truck on for a sec to see where the leak was coming from, and as soon as the fan engaged I could hear it wobbling and slapping against things. I dc'd the battery, pulled the plastic piping for the air intake out of the way, and took out the shroud for the fan. I think the water pump is shot because the fan has a ton of play in it and it's leaking coolant from somewhere underneath it. I'm hoping that's all it is but I won't know for sure until I get the pump out of there. I'll probably have to just do it in the yard at work. If it's just the water pump I'll be relieved, I really don't have the time or the money to be working on two trucks at the same time.
I miss the nights where I got so much done I had an album worth of pics to post, but I'm seeing a lot of just text on my build lately...
06-02-2011, 01:23 PM
#110
Registered User
Thread Starter
Join Date: Apr 2011
Location: Southern Ontario
Posts: 428
Likes: 0
Received 0 Likes
on
0 Posts
Swapped out the pump today in the parking lot at work. Everything looks a-ok so far, so I"m going back out to work on the truck again tonight. Should be able to update with pics this evening.
06-02-2011, 06:59 PM
#113
Registered User
Thread Starter
Join Date: Apr 2011
Location: Southern Ontario
Posts: 428
Likes: 0
Received 0 Likes
on
0 Posts
Welcome aboard, Dark Fairytales.
I didn't take many pics, but I'll go through the waterpump change real quick in case anyone's interested. I pulled the air filter and piping off the top of the fan, and removed the fan shroud to take a look at the water pump.
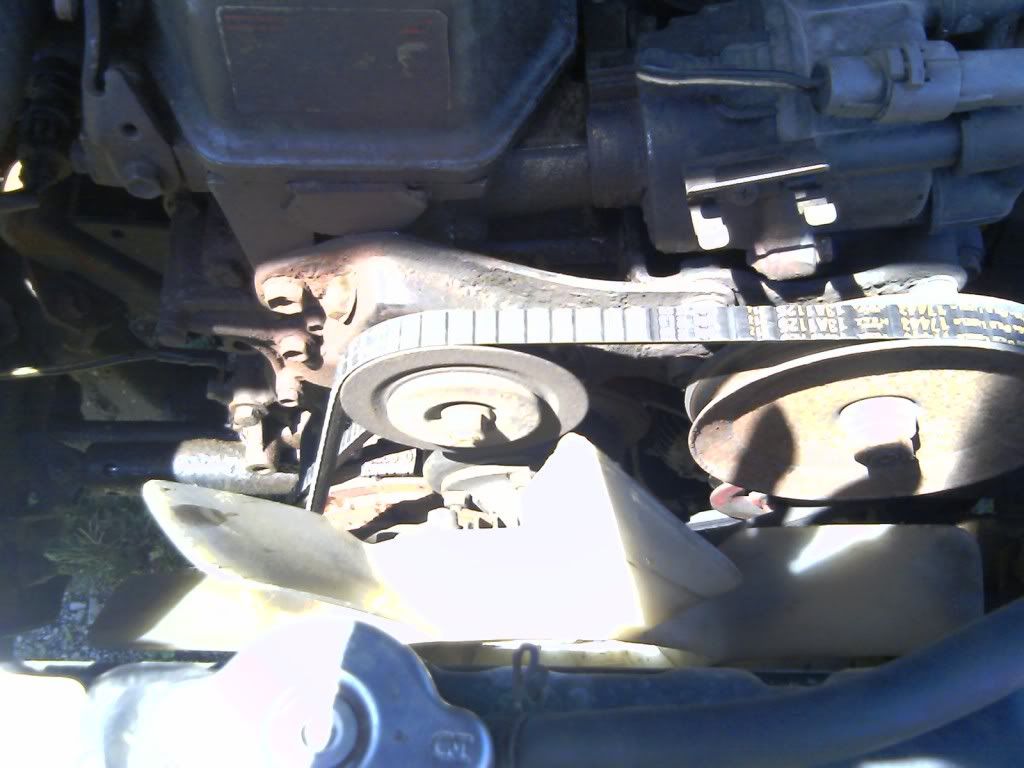
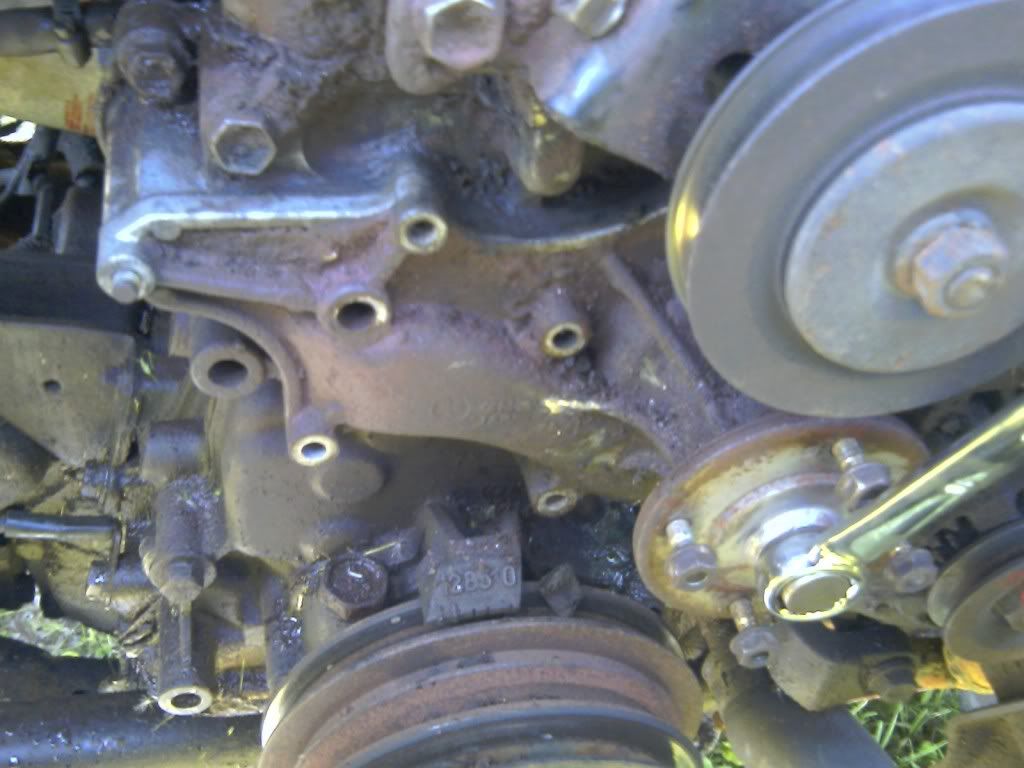
There was a lot of play in the pump bearing. I took the fan and fan clutch off:
I took the rad out, too. I've seen a lot of people on this site use a cardboard template to keep track of where bolts go, and not all the bolts on the water pump are the same size/length so I took the new water pump, and made a template with a screwdriver through the bolt holes:
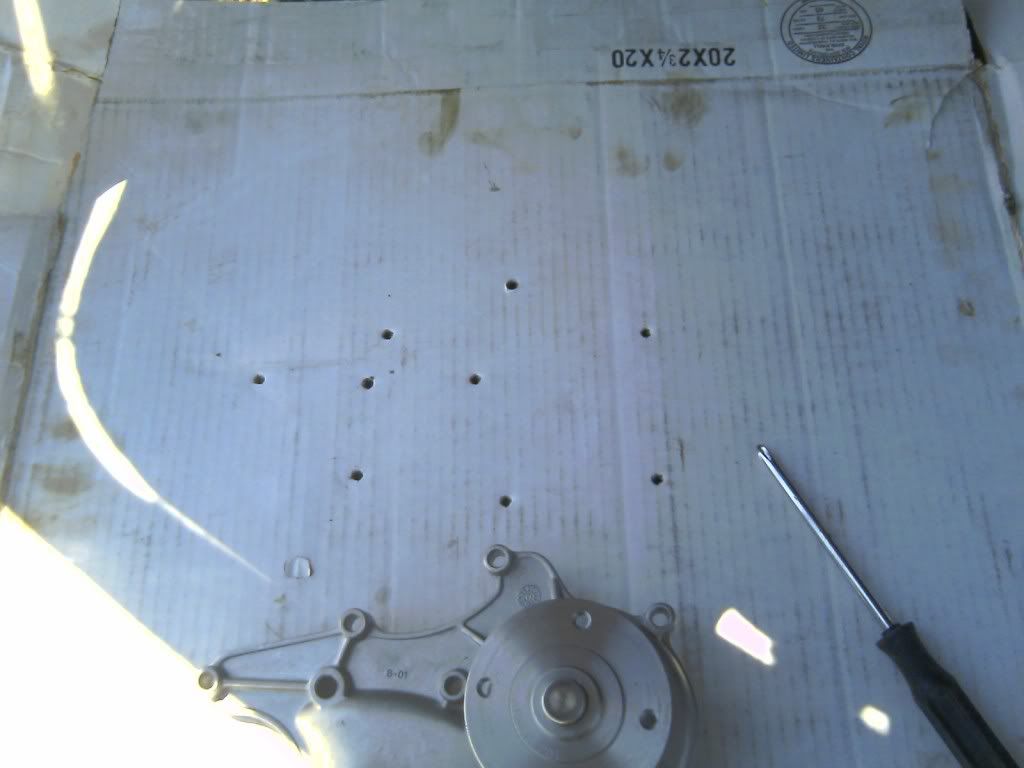
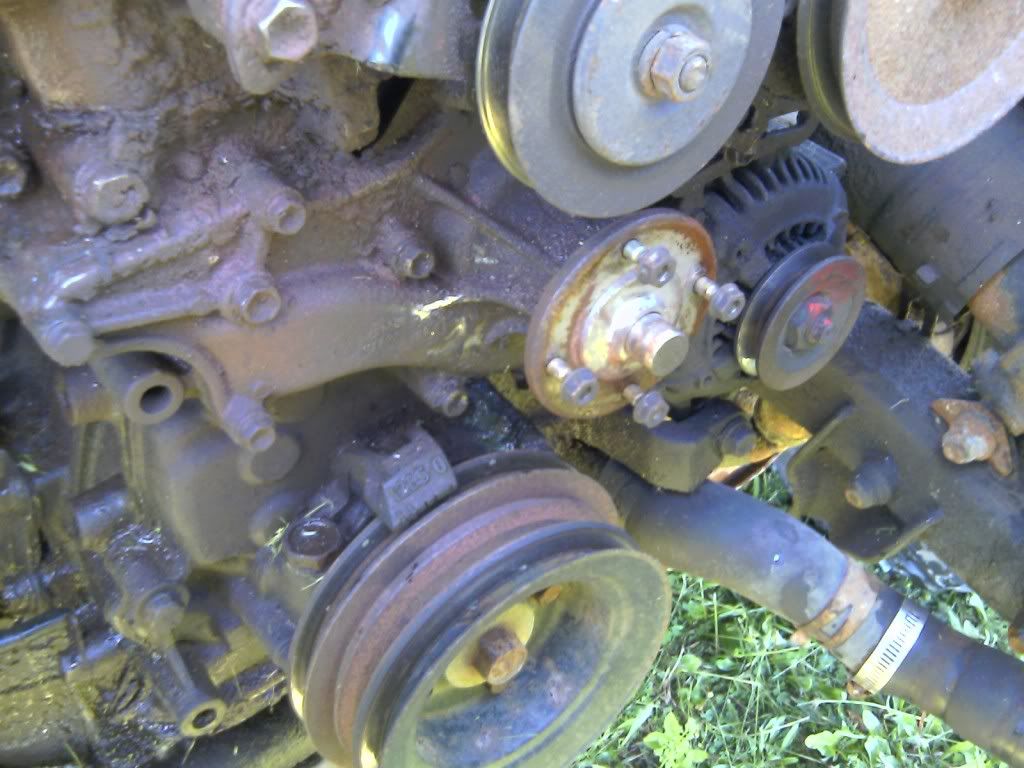
There were also three studs with nuts, I put the nuts aside. I used the box end of a 16mil wrench to wiggle the water pump free from the gasket. I didn't want to pry off the timing cover so I figured this was the best way:
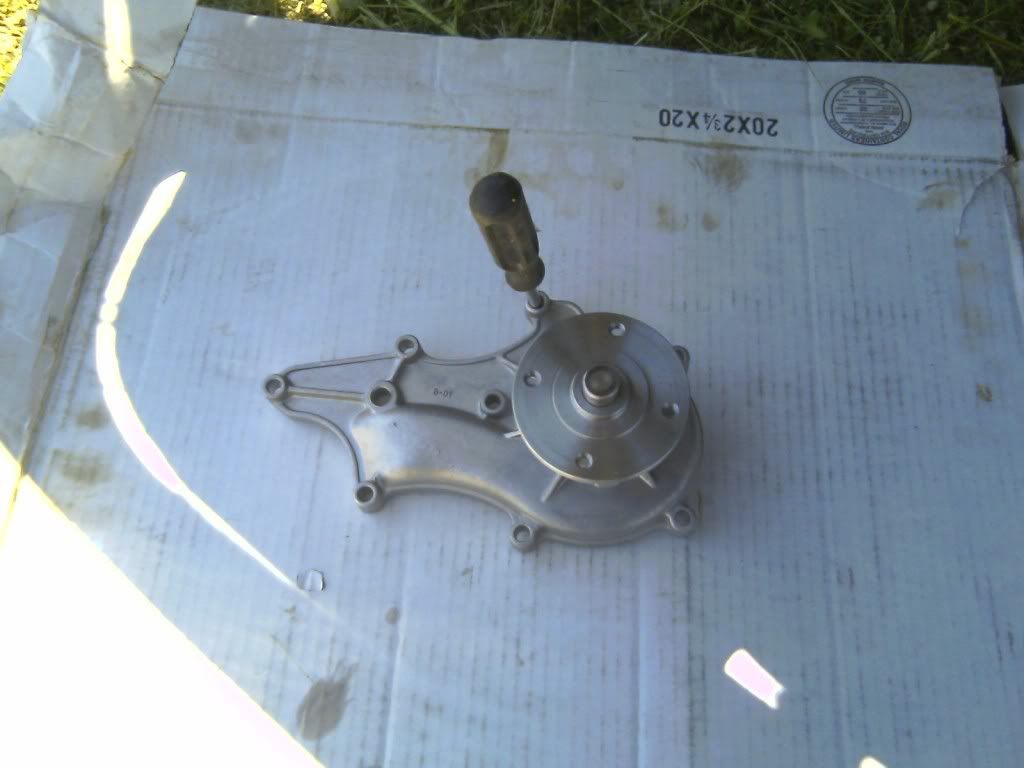
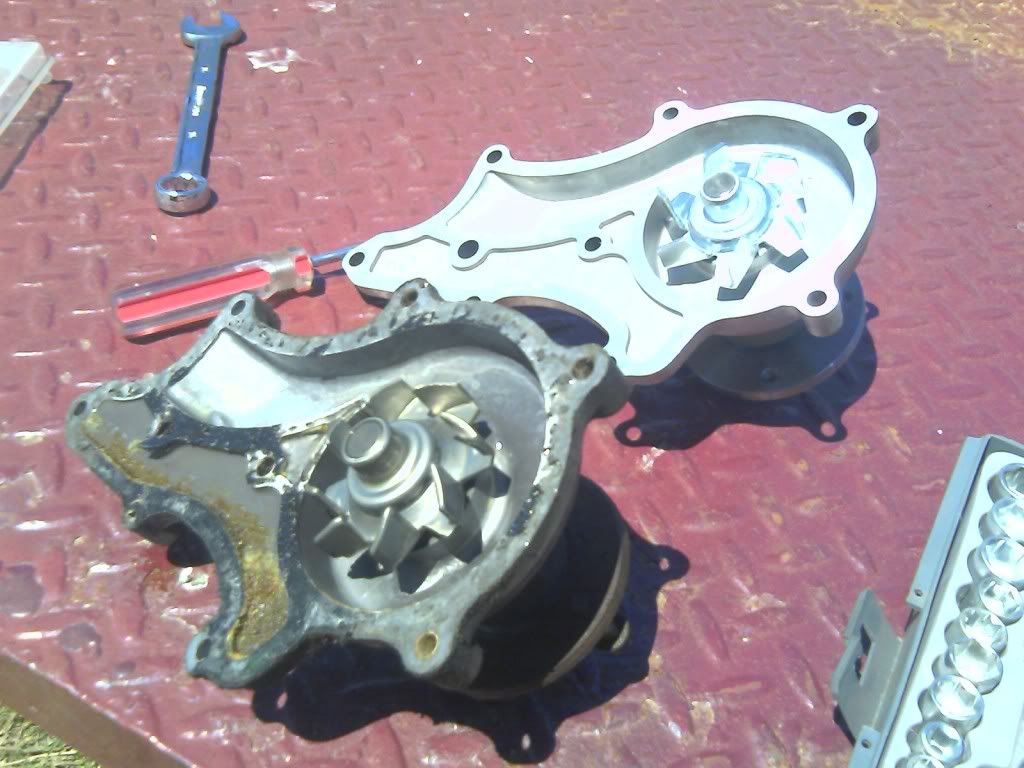
Here are the two water pumps side by side, you can see a lot of junk built up in the old one:
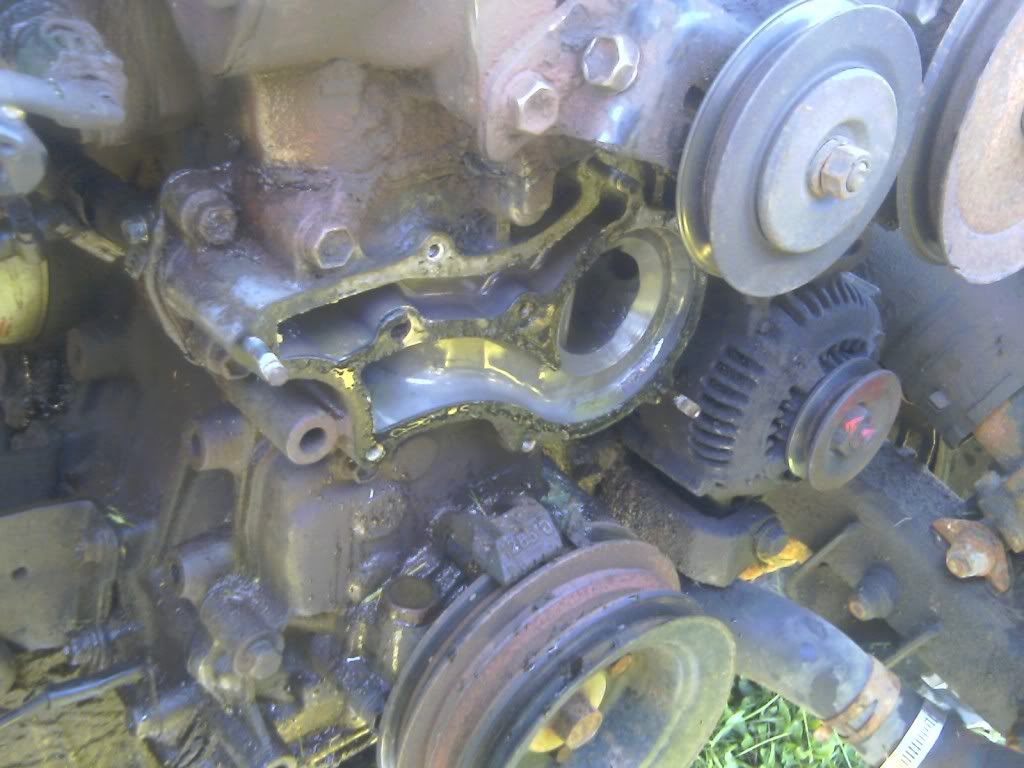
I think the p.o. put some sort of leak stop in the coolant at one point in time, because the heater core has never worked well in that truck either. There was almost no build up inside the timing cover end of the water pump cavity, thankfully:
This is the only pic I have to show where I did the water pump swap. Not the ideal location. You can see my cardboard template under the truck.
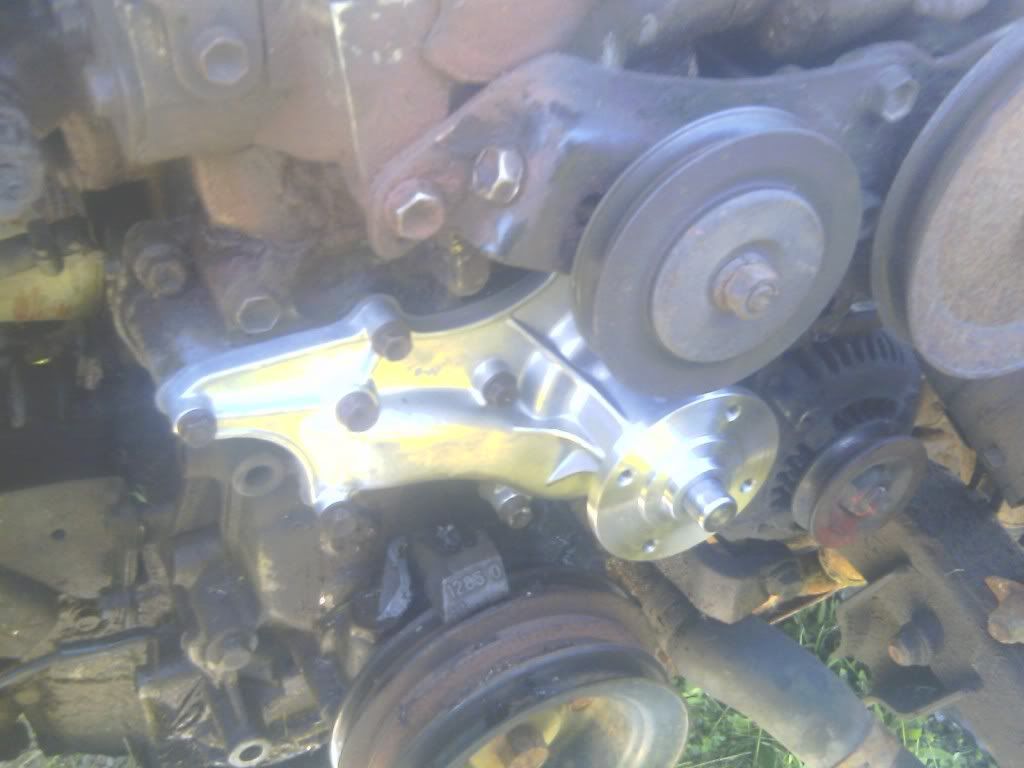
There's the new water pump installed. Took me a while to clean the old gasket off the engine. I used a razor blade. Seemed to go easier after I used a rag to dry off the old gasket. I didn't have a torque wrench either, so I used just a socket and my fingers to alternate between all the bolts on the water pump, and then put an extension on the socket for a better grip, again alternating all the bolts to tighten evenly, and then gave them all a small snug with a wrench. I'm pretty sure the torque is supposed to be around 12 lbs, and I was really worried I'd snap off one of the soft bolts/studs. I should throw some grease on that shiny water pump. It's making the rest of my engine look even worse. It's been that dirty since forever. I thought it had an oil leak when I first bought it, but the oil level never drops. I threw everything back together except the fan shroud for visibility sake, filled the rad with straight water and fired it up to check for leaks. Everything looked great so I pulled off the upper rad hose which let out some water, threw the fan shroud back on, and topped off what had leaked out with straight coolant after reconnecting the upper rad hose. I had a small panic attack at the end of the day when I was going to go home. The truck would not stay running for more than 5 seconds. I finally realized I had forgotten to reconnect the wiring clip to the air flow sensor when I had lifted up my air flow box to put the fan shroud back in.
All in all the fix took around 2hrs and cost me 60 bucks including the water pump and the coolant. I figure any repairs to a vehicle that cost less than a tank of gas is cheap maintenance.
I didn't take many pics, but I'll go through the waterpump change real quick in case anyone's interested. I pulled the air filter and piping off the top of the fan, and removed the fan shroud to take a look at the water pump.
There was a lot of play in the pump bearing. I took the fan and fan clutch off:
I took the rad out, too. I've seen a lot of people on this site use a cardboard template to keep track of where bolts go, and not all the bolts on the water pump are the same size/length so I took the new water pump, and made a template with a screwdriver through the bolt holes:
There were also three studs with nuts, I put the nuts aside. I used the box end of a 16mil wrench to wiggle the water pump free from the gasket. I didn't want to pry off the timing cover so I figured this was the best way:
Here are the two water pumps side by side, you can see a lot of junk built up in the old one:
I think the p.o. put some sort of leak stop in the coolant at one point in time, because the heater core has never worked well in that truck either. There was almost no build up inside the timing cover end of the water pump cavity, thankfully:
This is the only pic I have to show where I did the water pump swap. Not the ideal location. You can see my cardboard template under the truck.
There's the new water pump installed. Took me a while to clean the old gasket off the engine. I used a razor blade. Seemed to go easier after I used a rag to dry off the old gasket. I didn't have a torque wrench either, so I used just a socket and my fingers to alternate between all the bolts on the water pump, and then put an extension on the socket for a better grip, again alternating all the bolts to tighten evenly, and then gave them all a small snug with a wrench. I'm pretty sure the torque is supposed to be around 12 lbs, and I was really worried I'd snap off one of the soft bolts/studs. I should throw some grease on that shiny water pump. It's making the rest of my engine look even worse. It's been that dirty since forever. I thought it had an oil leak when I first bought it, but the oil level never drops. I threw everything back together except the fan shroud for visibility sake, filled the rad with straight water and fired it up to check for leaks. Everything looked great so I pulled off the upper rad hose which let out some water, threw the fan shroud back on, and topped off what had leaked out with straight coolant after reconnecting the upper rad hose. I had a small panic attack at the end of the day when I was going to go home. The truck would not stay running for more than 5 seconds. I finally realized I had forgotten to reconnect the wiring clip to the air flow sensor when I had lifted up my air flow box to put the fan shroud back in.
All in all the fix took around 2hrs and cost me 60 bucks including the water pump and the coolant. I figure any repairs to a vehicle that cost less than a tank of gas is cheap maintenance.
06-02-2011, 07:25 PM
#114
Registered User
Thread Starter
Join Date: Apr 2011
Location: Southern Ontario
Posts: 428
Likes: 0
Received 0 Likes
on
0 Posts
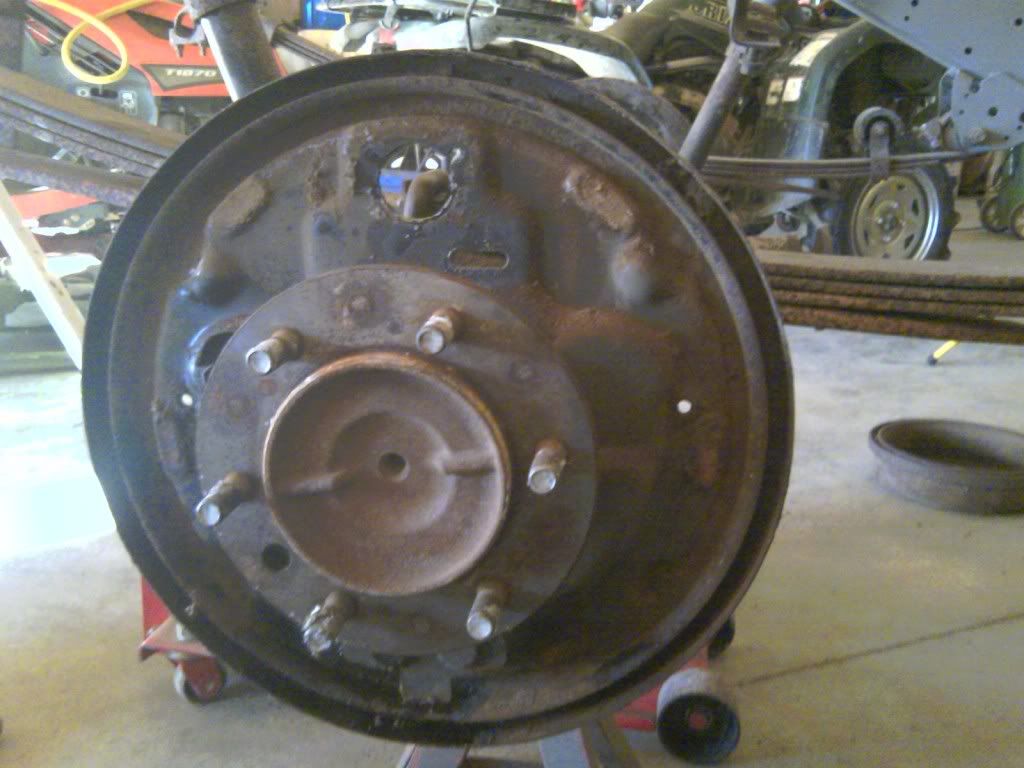
I was feeling really good about the water pump fix. I was pretty worried that I'd wrecked more than just the pump because the bearing had so much play the fan was smacking against things. I decided I was not going to ruin my good mood by sandblasting again, but I really wanted to continue work on the truck so I set out to remove the rear brakes.
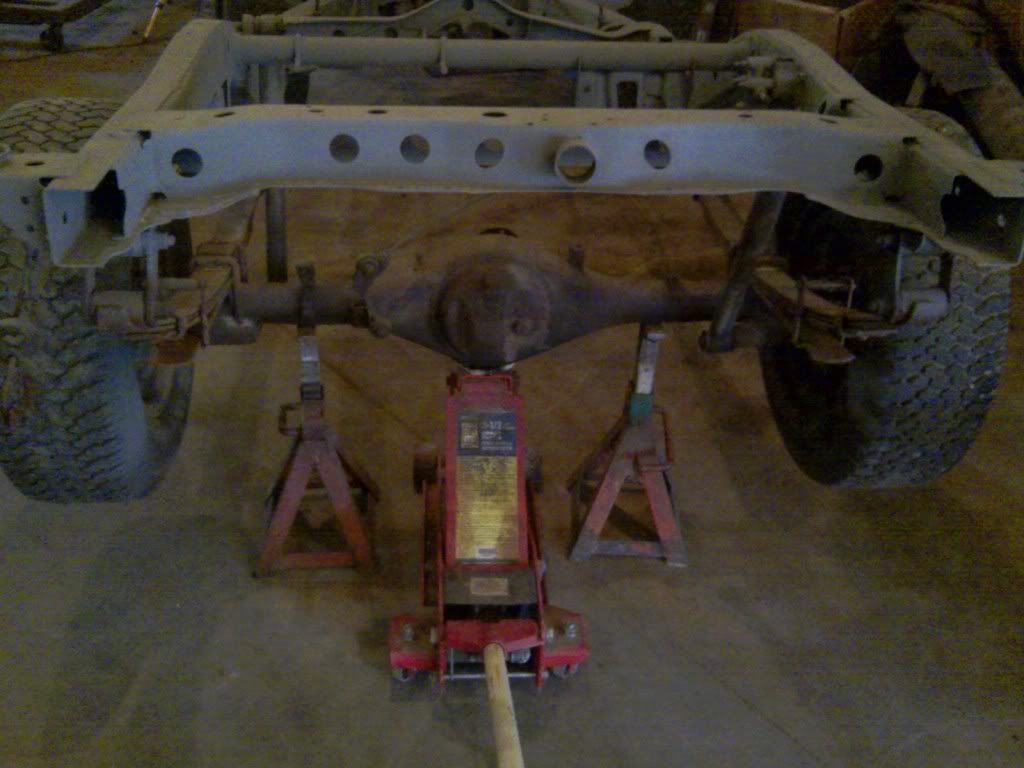
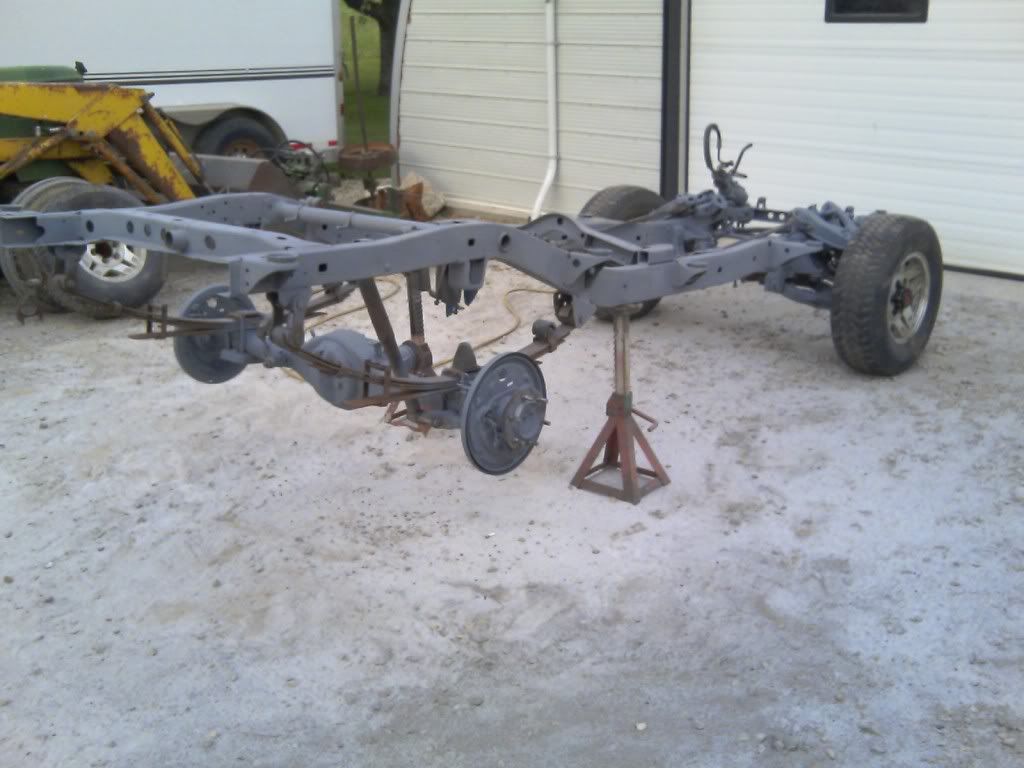
I hope that's enough support for that intense amount of weight. Lol
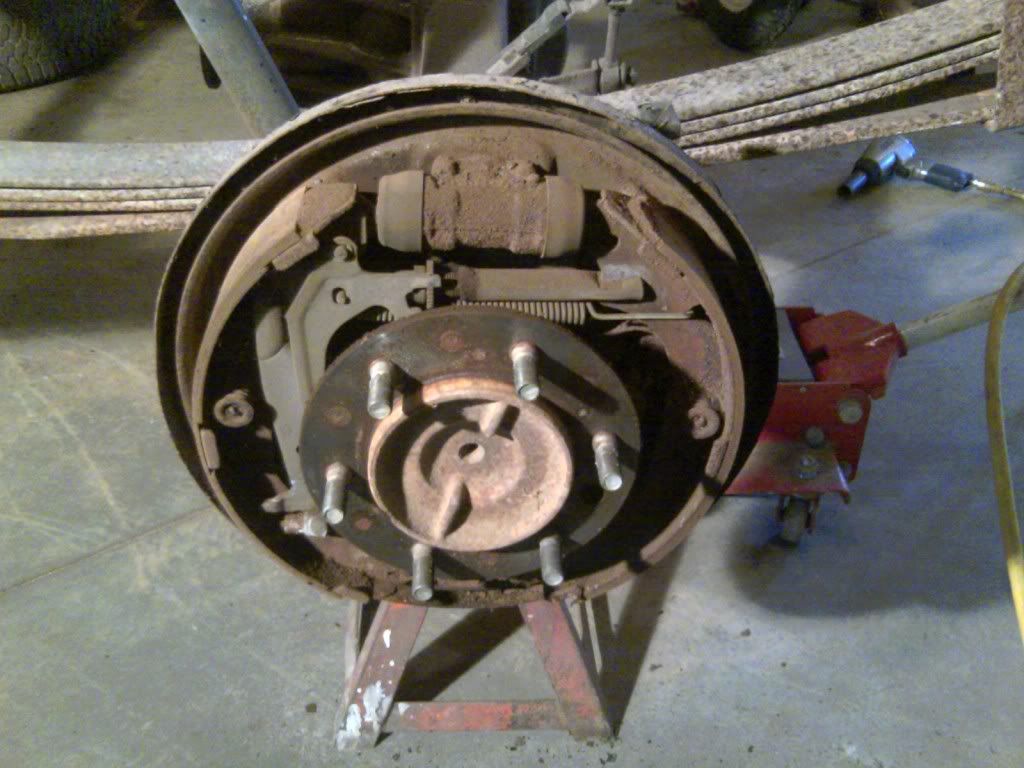
I was originally thinking I'd swap out the rear brakes tonight with the new brakes I'd bought, but then I realised I don't want to throw in new brakes and then fill them with sand when I finish cleaning up the rear axle, so I decided instead to just strip the brakes, and then sandblast the bare guards on a later night.
I stripped both sides. I would have liked to get more done that night but the father in law showed up with his buddy after picking up a batch of home made wine, and they decided they had to sample it. A lot of it. I ended up having to drive his buddy home. I did however have enough time to paint the brake drums. I bought some high temp paint. I thought it was just a flat grey. The cap looks shinier in this pic because my camera phone has difficulty focusing in bright light:
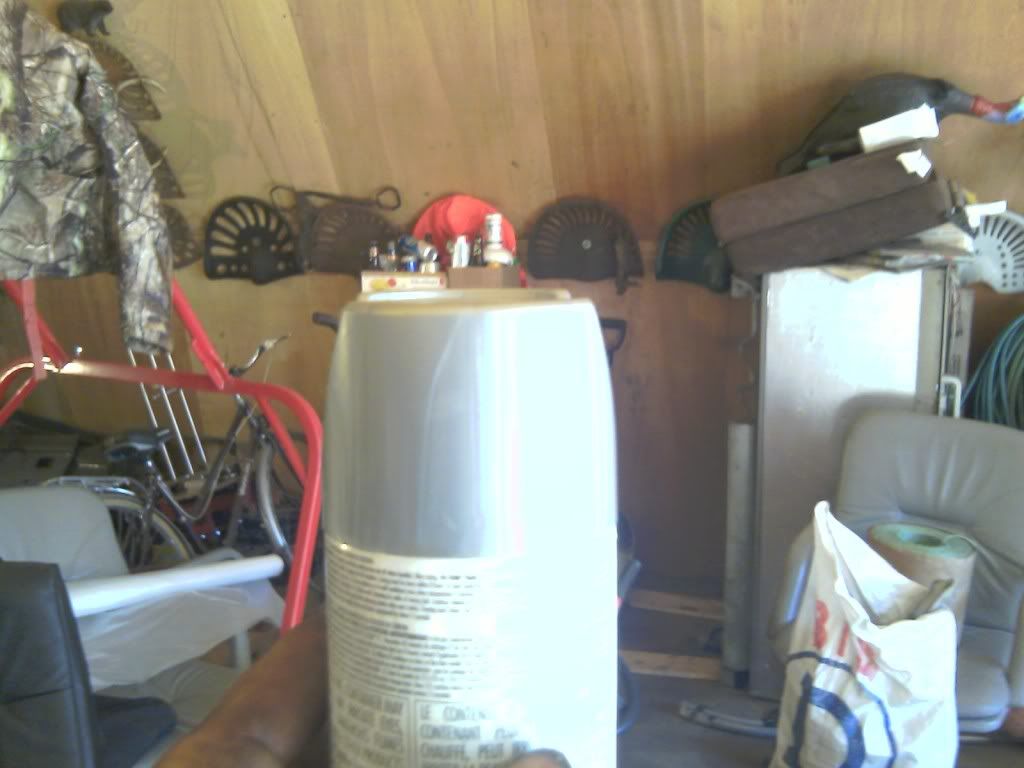
It wasn't flat grey.

I really wasn't looking to make a statement with my brake drums, just figured I'd paint them so they wouldn't rust up. I might have to paint them a different colour before people start using words like "bling".
That was it for the night. Hoping to finish the blasting this weekend, paint the rear axle and start throwing the new brakes on. Starting to feel like progress again.
I hope that's enough support for that intense amount of weight. Lol
I was originally thinking I'd swap out the rear brakes tonight with the new brakes I'd bought, but then I realised I don't want to throw in new brakes and then fill them with sand when I finish cleaning up the rear axle, so I decided instead to just strip the brakes, and then sandblast the bare guards on a later night.
I stripped both sides. I would have liked to get more done that night but the father in law showed up with his buddy after picking up a batch of home made wine, and they decided they had to sample it. A lot of it. I ended up having to drive his buddy home. I did however have enough time to paint the brake drums. I bought some high temp paint. I thought it was just a flat grey. The cap looks shinier in this pic because my camera phone has difficulty focusing in bright light:
It wasn't flat grey.
I really wasn't looking to make a statement with my brake drums, just figured I'd paint them so they wouldn't rust up. I might have to paint them a different colour before people start using words like "bling".
That was it for the night. Hoping to finish the blasting this weekend, paint the rear axle and start throwing the new brakes on. Starting to feel like progress again.
06-03-2011, 05:54 AM
#116
Registered User
Come on Dutch what's wrong with alittle bling in reality I bet the shiny will dull a bit once those drums get heated up. And if not the wheel covers them up so No one will know right.
06-03-2011, 08:12 AM
#117
Registered User
Join Date: Oct 2008
Location: Sacramento, Crawlifonia
Posts: 1,621
Likes: 0
Received 7 Likes
on
4 Posts
if that is the fake chrome paint I am thinking it is. you can just dull down the shine with a rag. It will rub right off super easy. The shiny particulates are suspended in the paint and float to the surface when drying. That fake chrome paint is meant as a two stage process. I wish I was closer to help you paint your Frame. Painting has been a profession and hobby of mine your many years.
If you want to protect your frame from future rust the best you can, you have two options. The cheap option is to grease the frame once or twice a year with axle grease. Its cheap and yucky but works great. the second more permanent option, three coats of high gloss Poly-acrylic clear paint. More coats the better, the stuff is pretty thin, but hard a quite beautiful if done right.
If you want to protect your frame from future rust the best you can, you have two options. The cheap option is to grease the frame once or twice a year with axle grease. Its cheap and yucky but works great. the second more permanent option, three coats of high gloss Poly-acrylic clear paint. More coats the better, the stuff is pretty thin, but hard a quite beautiful if done right.
06-03-2011, 04:50 PM
#118
Registered User
Thread Starter
Join Date: Apr 2011
Location: Southern Ontario
Posts: 428
Likes: 0
Received 0 Likes
on
0 Posts
It's high temperature exhaust/header paint. I'm not sure it's going to last anyway, apparently it needs to be heated within a day or so to cure or it doesn't last so I'll probably have to paint them again. I was thinking about painting the frame with a couple coats of rocker guard. Is this a bad idea? I figured it would be good for anti rust.
I tried to remove the front brakes today, but I could not for the life of me get the front wheels off. I soaked them in penetrating oil and sandblasted the back axle and brake guards instead:
hoping to get more done tomorrow and maybe Sunday.
I tried to remove the front brakes today, but I could not for the life of me get the front wheels off. I soaked them in penetrating oil and sandblasted the back axle and brake guards instead:
hoping to get more done tomorrow and maybe Sunday.
06-03-2011, 06:17 PM
#119
Hey man, GREAT WORK, seriously! You got LOTS done!!!
Sorry to hear about the lugs, ...... I would bet dollars to donuts(I'll make you some if I'm wrong! lol)...... Someone hit those with an "IMPACT FROM HELL"! lol. I went in one time for an oil change on a 4K mile trip... was just so tired, figured, 'what the heck!'.... The guy was checking my rear breaks and then installing the wheels afterward.... SNAPPED OFF TWO FREAKIN LUGS! ...then tried to say, "Yeah, we're not liable, it happens, and you signed a thing"............"WOOOOOOOOOE", I said, ..."Did you not hear me say, ...'DO NOT, UNDER ANY CIRCUMSTANCES USE AN IMPACT WRENCH ON MY LUGS!'... ????" ......... "Oh, yeah, ....but like I said....".......... Hand in face, .. "Where is your manager?"..... "That would be me, sir"..... "YOU ARE YOUR OWN MANAGER? THAT'S INCREDIBLE!'' ..... Needless to say, THEY REPLACED THEM BOTH, ...and then did the lugs by hand! lol. Funny thing though.... he had to borrow my torque wrench, ...didn't even have one! haha.
Sorry, rambling on my story, but I'm just saying,.....I BET that has something to do with it. (You've tried an Impact to get them off, right? Just back and forth a lil to loosen stuff up?)
BTW, .... fairly certain the W/pump bolts/nuts are 9#. VERY common for them to snap off.... Really happy for you that they didn't!


