Dutchbelly's 1988 4runner Build-up
 10-26-2011, 09:17 AM
#381
GREAT GATSBY! .... you're kickin rump, man! Looks great, ....and I can't wait, HONESTLY, to see you put her clothes back on! hahahaha.
Far as the issue... What year/model, etc., is this? 89 4Ruster? If so, is it a dual 02 model? My buddy had this issue with his and it was the primary 02 sensor. I've read many instances where hesitation was, indeed, rotor/cap/faulty plug wires, etc. None of them throw codes...... so I'd check that first, just to rule out. (PS> Dealers are having sales until Halloween... might wanna check into a new cap and rotor, right?... OH, and filters were 3.89$ or something... I grabbed 4, lol).
Maybe, if it's not the cap/rotor.... Check over the wires in the dark really well(or use a wire tester like I have... Clips on right before plug on wire cable and sets off light at your pre-set 'prerequisite' voltage/amperage.
If you rule those out, ..... I PERSONALLY have had issues with sputtering, hiccups, etc., due to a couple things.
1. TPS - Might be worth a quick test.... but not always revealing as the condition is not always there.... And especially when sitting with the rig off, lol... BUT STILL, why not check, right?)
2. CTS - The Coolant Temp Sensor, after a bit of leaking on mine, corroded up in there and failed(began to fail), and I suddenly had a 'sluggish on take off at times, then 'BAT OUT OF HELL' at 3000rpm and up...... Again, a free test, ya know?
3. My 02 sensor going out caused me problems and loss of power... But I'm not sure it would cause a miss like that.
Your issue seems more intermittent like "something is failing/has failed" ....something, maybeeee, that is not engaged all the time, like injectors are. I'd run though the EFI and IGN section with the bullet points in mind and try to rule out the most of it. I take it you have no "CEL" popping on and off, right?
 10-27-2011, 12:53 AM
#382
Registered User
Thread Starter
Join Date: Apr 2011
Location: Southern Ontario
Posts: 428
Likes: 0
Received 0 Likes
on
0 Posts
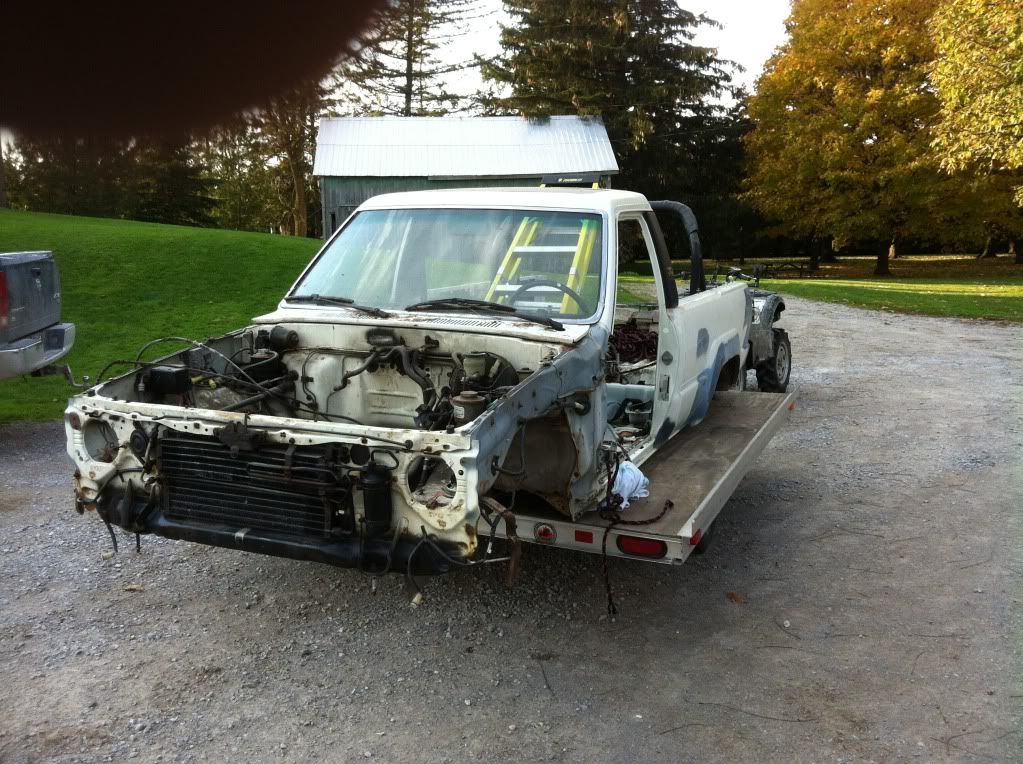
Lol Great Gatsby? That brings me back to high school literature class. Just a small update, my 4ruster had a few hiccups on the way to work, but they were intermittant and were over within the first 10 minutes of driving. It happened again on the way home, but even less. I'm pretty sure this is moisture in the distributor, because it's still wet out, but not near as wet as yesterday when I had worse symptoms.
In other news, I have a few more pics to throw up that I took last weekend. I'm looking into the future here, trying to prepare myself.
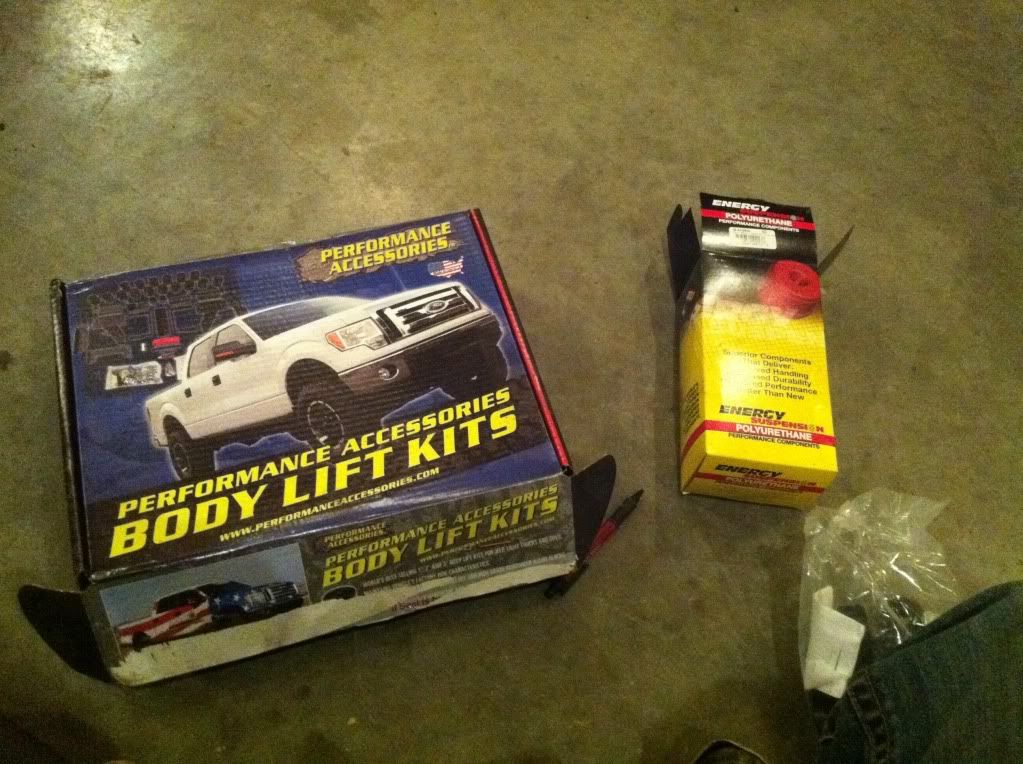
I've never installed a body lift before, so I'm familiarizing myself with the components. You'll notice I bought a new bushing kit so I won't have to try to reuse the old ones. I'm going to throw up a couple pics in a row and then talk about them.

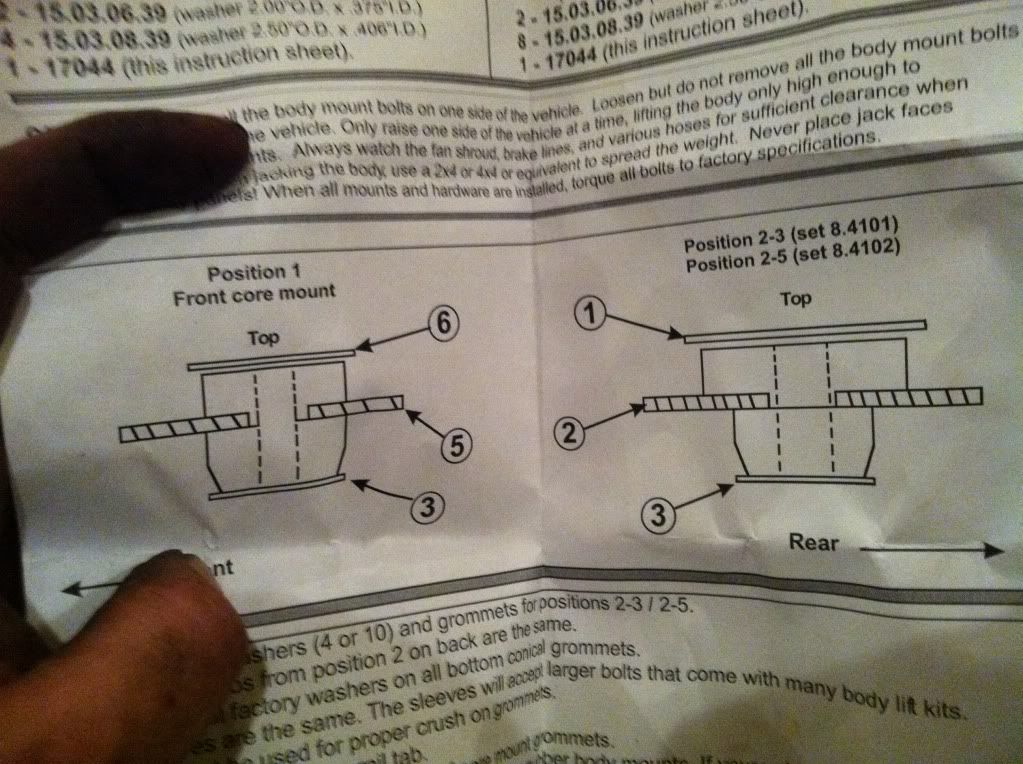
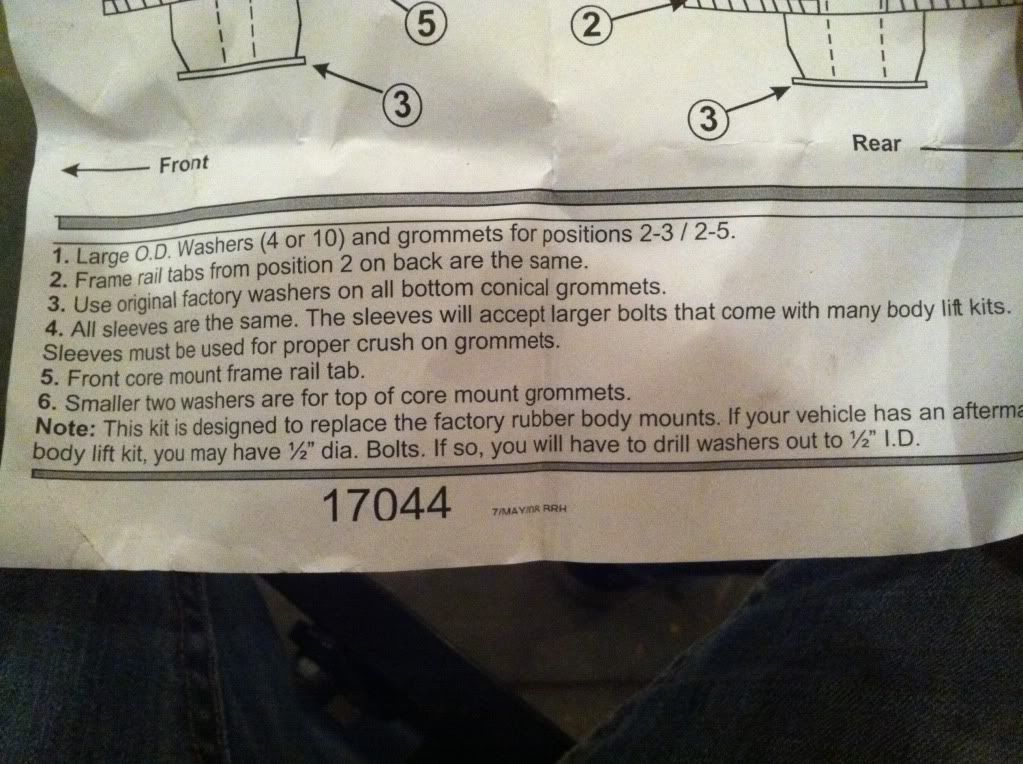
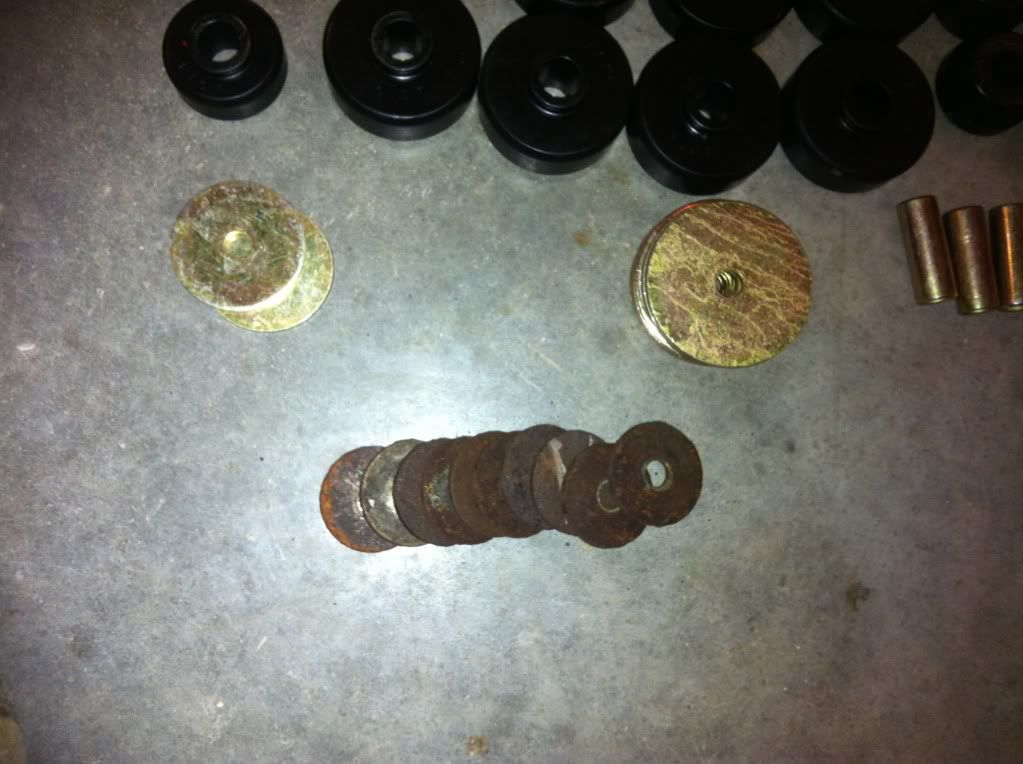
The instructions for the bushing kit were pretty good, especially when paired with the pictures showing the difference between the front body mounts and the rest of them. What really pisses me off, though is instruction number 3. The fact that they weren't willing to include 10 more washers in a kit that cost me 100 bucks blows my mind. I"m going to see if I can get new ones somewhere, because this is what my old ones look like:
I've got pics of the body mount kit, and some thoughts on that as well, but I'm out of time. I'm working 12 hr shifts atm, so I don't get much time to talk to you guys, but I'll try to update this thread more often than I have been.
In other news, I have a few more pics to throw up that I took last weekend. I'm looking into the future here, trying to prepare myself.
I've never installed a body lift before, so I'm familiarizing myself with the components. You'll notice I bought a new bushing kit so I won't have to try to reuse the old ones. I'm going to throw up a couple pics in a row and then talk about them.
The instructions for the bushing kit were pretty good, especially when paired with the pictures showing the difference between the front body mounts and the rest of them. What really pisses me off, though is instruction number 3. The fact that they weren't willing to include 10 more washers in a kit that cost me 100 bucks blows my mind. I"m going to see if I can get new ones somewhere, because this is what my old ones look like:
I've got pics of the body mount kit, and some thoughts on that as well, but I'm out of time. I'm working 12 hr shifts atm, so I don't get much time to talk to you guys, but I'll try to update this thread more often than I have been.
Last edited by Dutchbelly; 10-27-2011 at 12:56 AM.
 lol
10-27-2011, 07:36 PM
lol
10-27-2011, 07:36 PM
#384
Super Moderator
Staff
iTrader: (1)
Join Date: Aug 2008
Location: Anderson Missouri
Posts: 11,788
Likes: 0
Received 22 Likes
on
20 Posts
Always like seeing shiney new parts.
Just incase your missing problem comes back, I had a similar situation. Mine wound up being the fuel injector connections. These get very brittle. Make sure they are making good contact with the injectors. Try wiggling them when it is idling. It will cut out with a slight tug away from the injector and run great with a little pressure to the injector. Your problem sounds alot like what I had.
Mine was Number 1 injector as I had replaced my fuel filter and on my 2 wheel drive it is easier to get to the fuel filter from the front of the engine as I dont have AC on it and bumped the injector. Injectors 2,3,4, are pretty well protected by the way they sit down in the intake assembly. I would suspect Number 1 as it is least protected.
If it is by chance an 02 sensor, I have found the cheapest place is sparkplugs.com. Usually it will be so burnt and rusted to the pipe that it is best to have a new bung welded in and just install it. The shop I go to does it for $25 but you can weld so shouldnt be a problem for you. Chances are you arent going to get your old one out as it probably orginal and burnt to a crisp.
I had a California model and the code 27 isnt listed in Haynes manual. It is for the rear O2 sensor. 25 is for all other model and usually is refering to the front sensor and only sensor.
Will keep an eye on your thread and offer any help that I can. Being on work probation isnt the time for truck problems so any thing come up let us know. But hope it is just a bad wiring or cap. A dark nite is a good check. I think the damper the better. Maybe it is the dryer the better.
10-27-2011, 11:13 PM
#385
Registered User
Thread Starter
Join Date: Apr 2011
Location: Southern Ontario
Posts: 428
Likes: 0
Received 0 Likes
on
0 Posts
Hey guys I just got home from work (I work afternoons) and I'm happy to say that I had zero issues with the truck today. I'm about 99% sure it was just moisture in the distributor, as the only thing that changed was the weather- It was dry today. Thanks for all the trouble shooting tips, though, the next time I might not be so lucky.
I ran out of time last night, I'll try to continue where I left off.

That shows the contents of the body lift kit. I bought the 2" kit. My research showed most people suggested not going over a 3" lift kit, and I decided to go a step down to be even safer. It ended up making the drivetrain lift much easier, as well. If you'll recall, more than 2" lift would have made the transfer case crossmember mod much more complicated, and also the gas tank lift mod more difficult. A lot of that kit won't be necessary for me because I'm lifting the drivetrain as well. I won't need the fuel line extension or the rad lift brackets. I'm not sure yet about the brackets for the bumper. Here's a close up of that sticker.
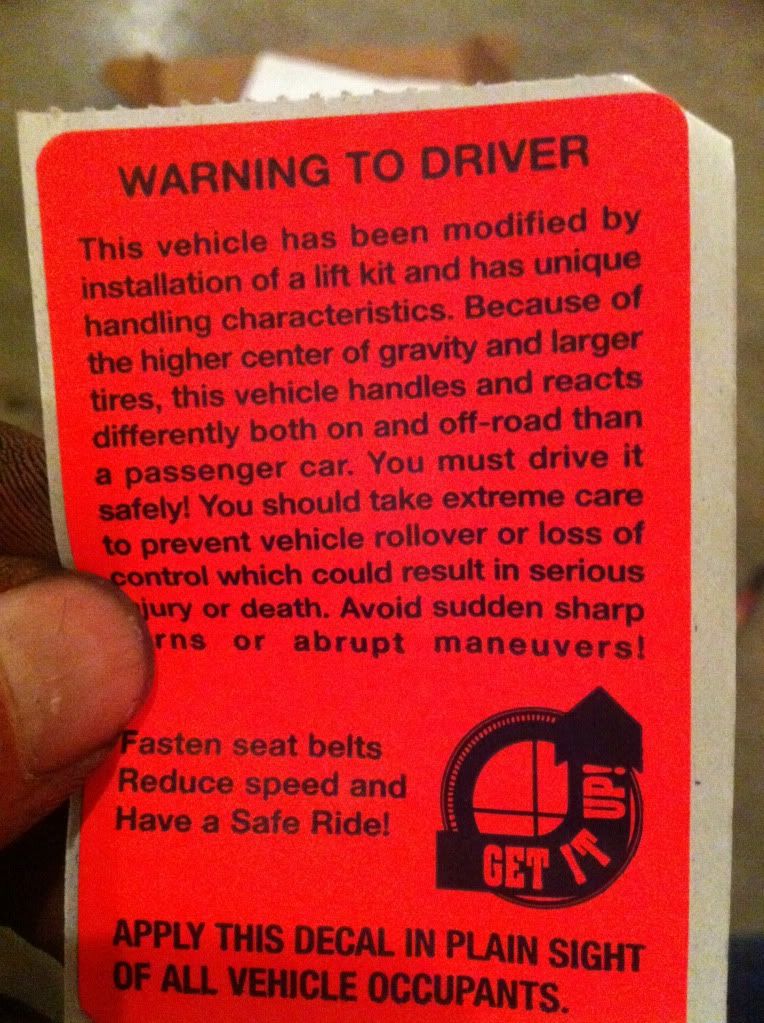
I don't plan on using that, but I kind of got a kick out of it.
Here's the instructions.
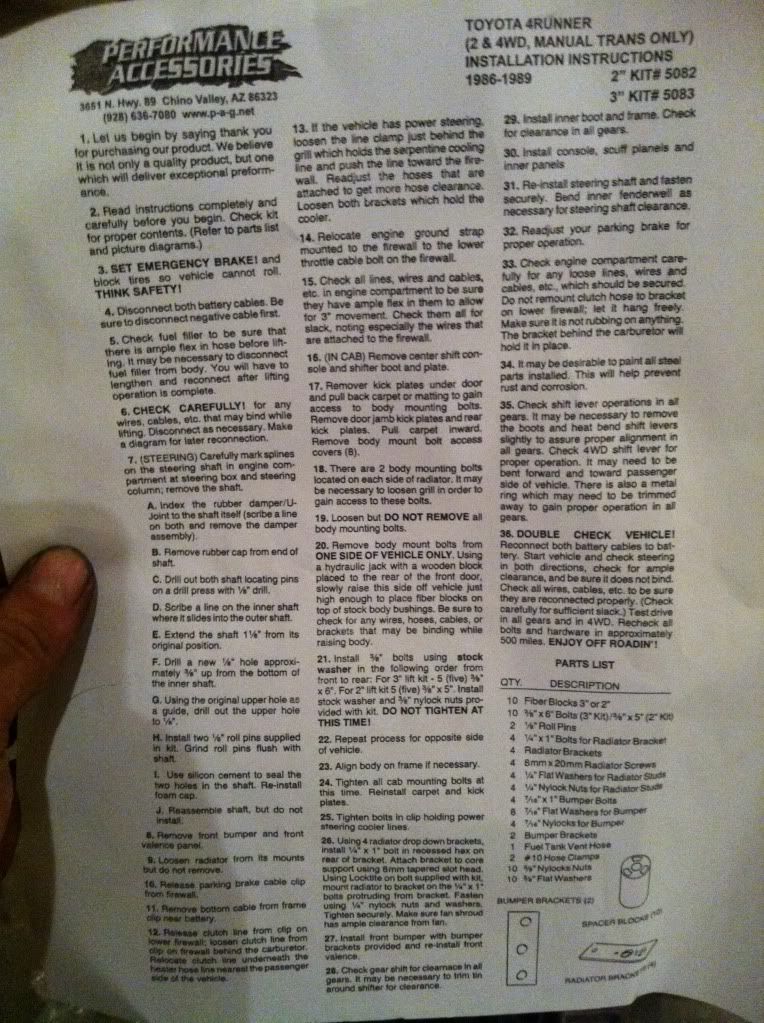
Talk about horrible directions. Yes, they're fairly step by step, but a couple pics really wouldn't hurt. Most of these directions are useless to me anyway, as 90% of the things they think I need to adjust aren't necessary because the engine is being lifted as well, and also because my truck is in pieces. This kit cost a little over a hundred. Probably closer to 150 after taxes.
If you look at step 20 it says to put the fiber blocks on top of the factory bushings, but this would allow the sleeves to travel up and down, so I'm assuming I should put the big washers inbetween. Like this:
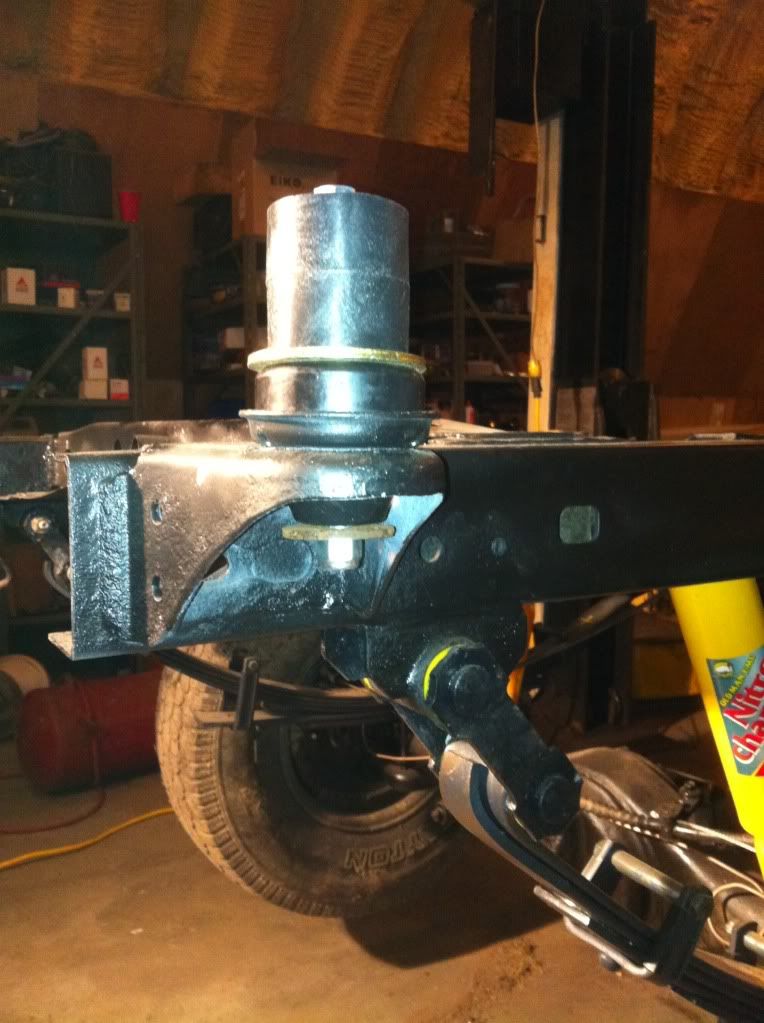
You can't see the sleeves, but hopefully you catch my meaning. That's the original washer on the bottom. I still haven't found replacements.
In other news I replaced a bunch of lights in my daily driver. I've really been letting the 4ruster slide because I was hoping to have the project truck on the road sooner, but some tlc was necessary. A year ago the light behind the fuel gauge blew, and I left it because I could just pay attention to the tripometer in the dark instead of pulling the dash apart to get the cluster out. I needed to replace the interior light as well, because I lost it when trying to install an aftermarket led style, which ended up not fitting inside the plastic cover. Then the light went behind the speedometer, and I went a couple weeks gauging my speed at night with the tach, but then decided enough was enough. I pulled it all apart and replaced all the bulbs but instead of the factory green bulbs I just used clear ones. I didn't take pics of the process, but I think it's Philbert that has a good thread on bulb replacement/cluster removal. He used amber lights if I recall correctly. If I think of it I'll put up a link. Here's a pic of the cluster with clear bulbs:
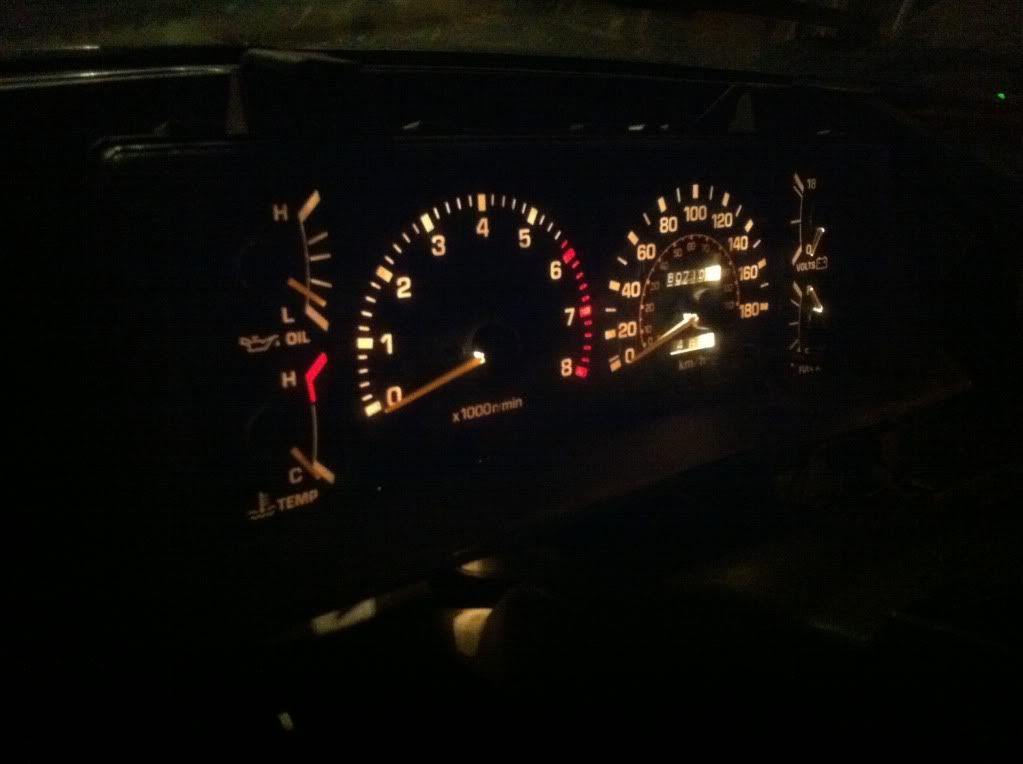
It actually glows a bit more orange in real life, but I'm ok with it. I didn't put all the screws back in, and I'm glad, because the next night when I tried it out I realised I must have bumped the right signal indicator light because it isn't working. I've kind of rambled around without any real direction tonight, but I hope to be making progress on the truck this weekend, so maybe I'll have more interesting things to say soon. Cheers!
I ran out of time last night, I'll try to continue where I left off.
That shows the contents of the body lift kit. I bought the 2" kit. My research showed most people suggested not going over a 3" lift kit, and I decided to go a step down to be even safer. It ended up making the drivetrain lift much easier, as well. If you'll recall, more than 2" lift would have made the transfer case crossmember mod much more complicated, and also the gas tank lift mod more difficult. A lot of that kit won't be necessary for me because I'm lifting the drivetrain as well. I won't need the fuel line extension or the rad lift brackets. I'm not sure yet about the brackets for the bumper. Here's a close up of that sticker.
I don't plan on using that, but I kind of got a kick out of it.
Here's the instructions.
Talk about horrible directions. Yes, they're fairly step by step, but a couple pics really wouldn't hurt. Most of these directions are useless to me anyway, as 90% of the things they think I need to adjust aren't necessary because the engine is being lifted as well, and also because my truck is in pieces. This kit cost a little over a hundred. Probably closer to 150 after taxes.
If you look at step 20 it says to put the fiber blocks on top of the factory bushings, but this would allow the sleeves to travel up and down, so I'm assuming I should put the big washers inbetween. Like this:
You can't see the sleeves, but hopefully you catch my meaning. That's the original washer on the bottom. I still haven't found replacements.
In other news I replaced a bunch of lights in my daily driver. I've really been letting the 4ruster slide because I was hoping to have the project truck on the road sooner, but some tlc was necessary. A year ago the light behind the fuel gauge blew, and I left it because I could just pay attention to the tripometer in the dark instead of pulling the dash apart to get the cluster out. I needed to replace the interior light as well, because I lost it when trying to install an aftermarket led style, which ended up not fitting inside the plastic cover. Then the light went behind the speedometer, and I went a couple weeks gauging my speed at night with the tach, but then decided enough was enough. I pulled it all apart and replaced all the bulbs but instead of the factory green bulbs I just used clear ones. I didn't take pics of the process, but I think it's Philbert that has a good thread on bulb replacement/cluster removal. He used amber lights if I recall correctly. If I think of it I'll put up a link. Here's a pic of the cluster with clear bulbs:
It actually glows a bit more orange in real life, but I'm ok with it. I didn't put all the screws back in, and I'm glad, because the next night when I tried it out I realised I must have bumped the right signal indicator light because it isn't working. I've kind of rambled around without any real direction tonight, but I hope to be making progress on the truck this weekend, so maybe I'll have more interesting things to say soon. Cheers!
10-29-2011, 06:11 PM
#386
Registered User
Thread Starter
Join Date: Apr 2011
Location: Southern Ontario
Posts: 428
Likes: 0
Received 0 Likes
on
0 Posts
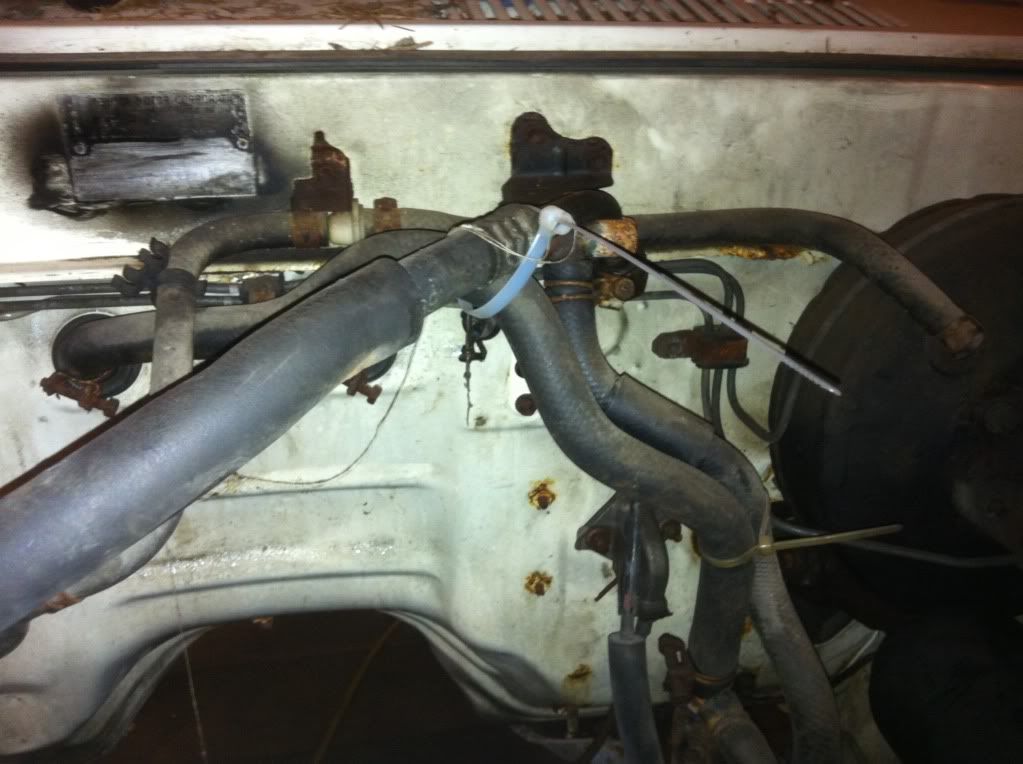
I was back out at the farm working on the truck again. I finally found the right fittings for the fuel lines which meant I could finish that part of the project.
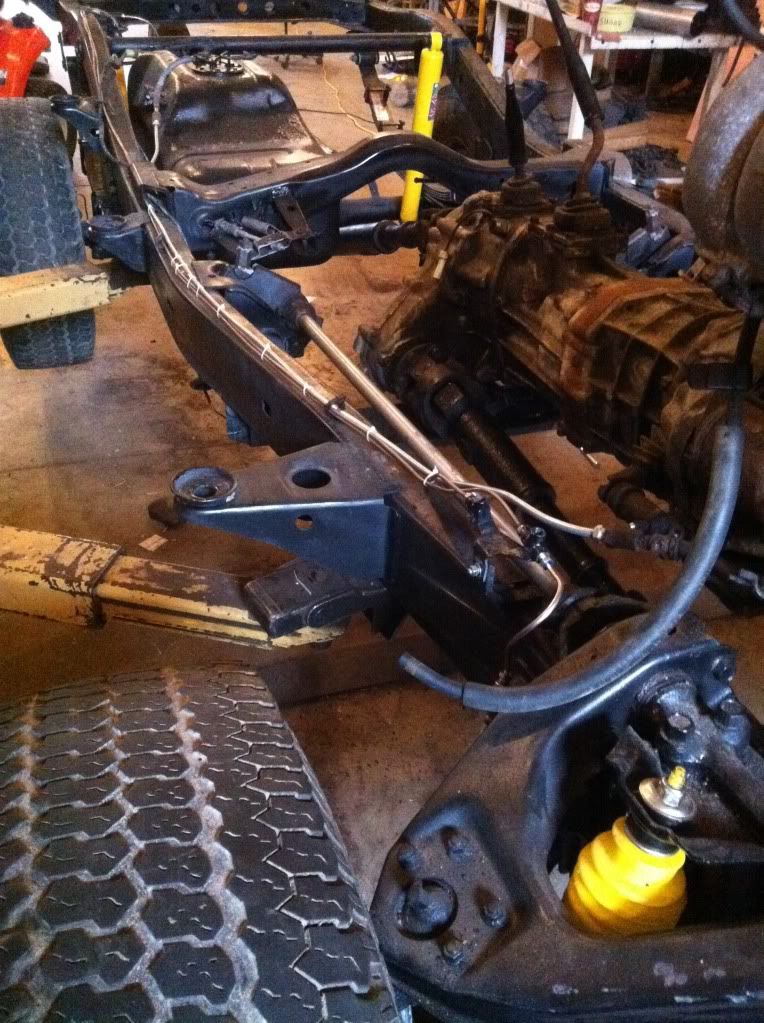
One other thing I needed to do before putting the body back on was put in a helicoil for one of the bolts for the engine mount. If you recall I had to move the engine mounts on the celica engine, and one of the bolt holes was rusted to the point where the threads would not hold the bolt. I was surprised to find out my auto parts store rented the helicoil kits.
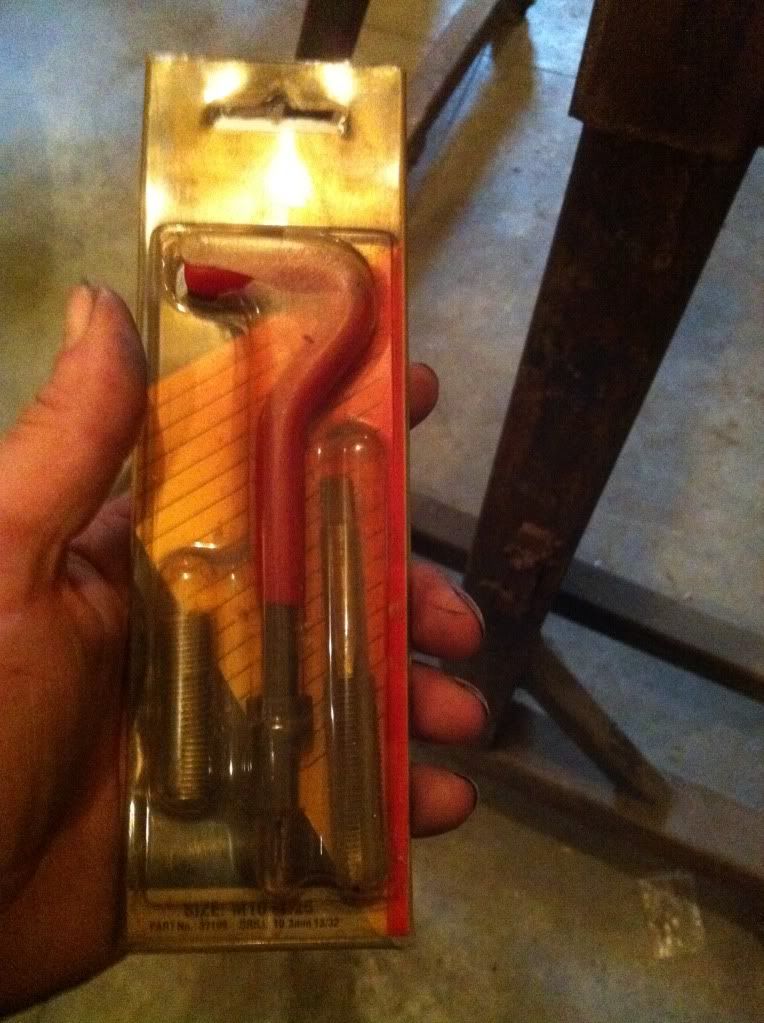

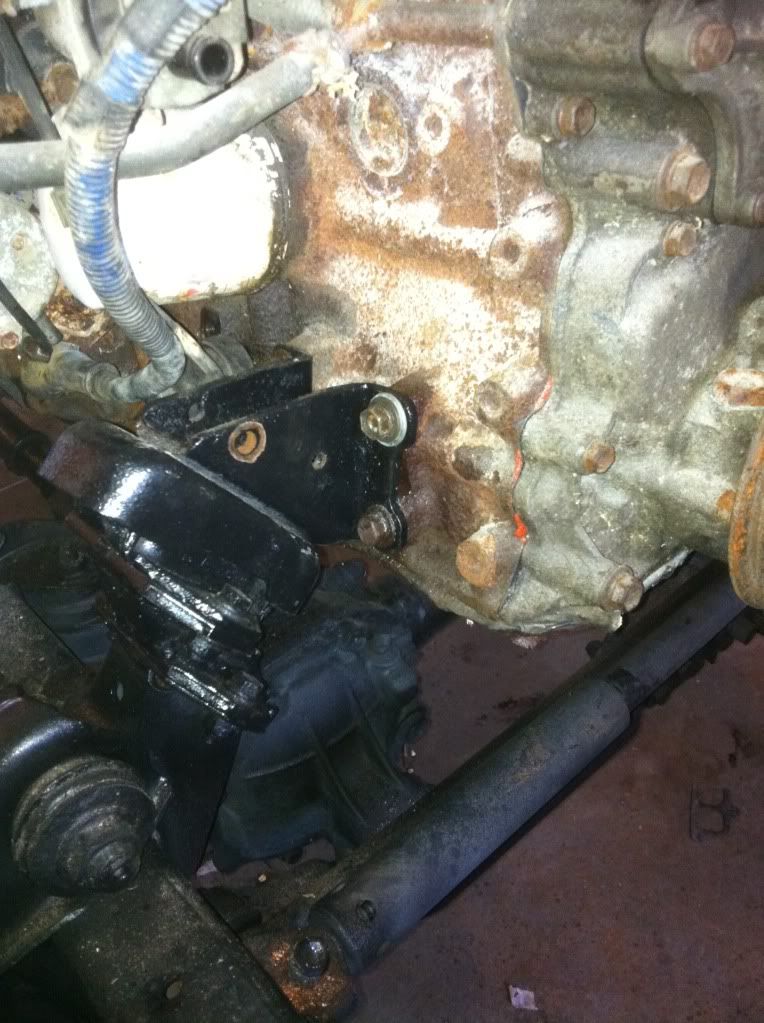
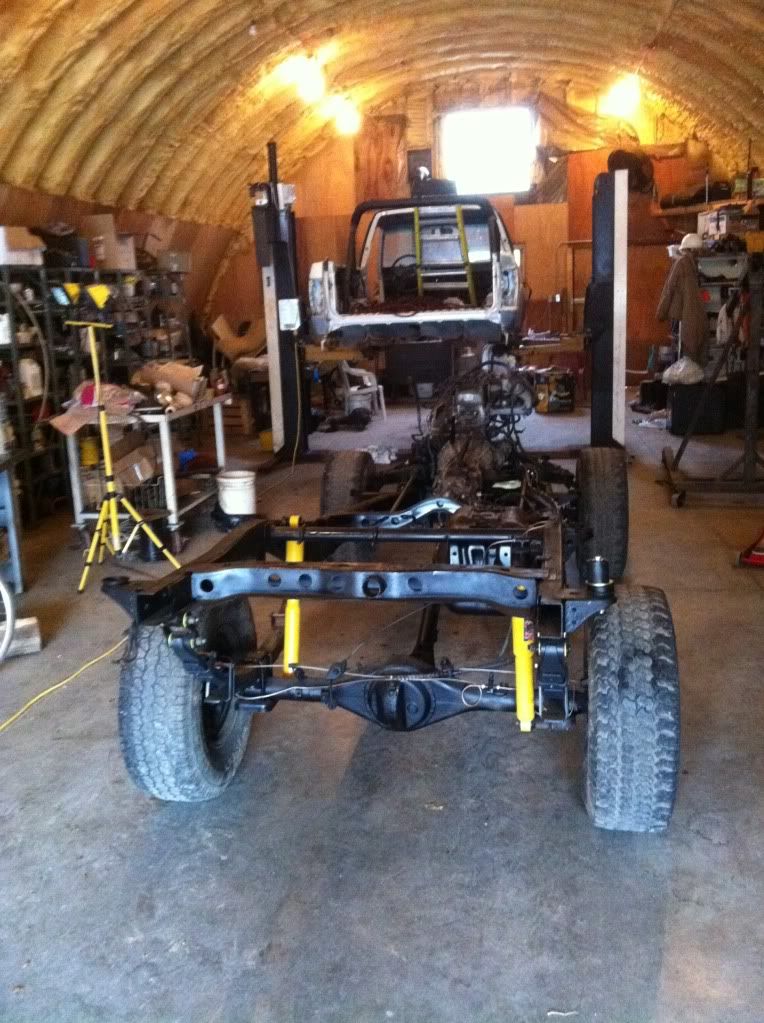
I used the tap, with liberal amounts of oil, and then inserted the helicoil and the bolt. I was happy to find out that I didn't need to take the body mounts off to do it. At that point I was ready to pull the frame outside and get the body from the shed where it was stored.
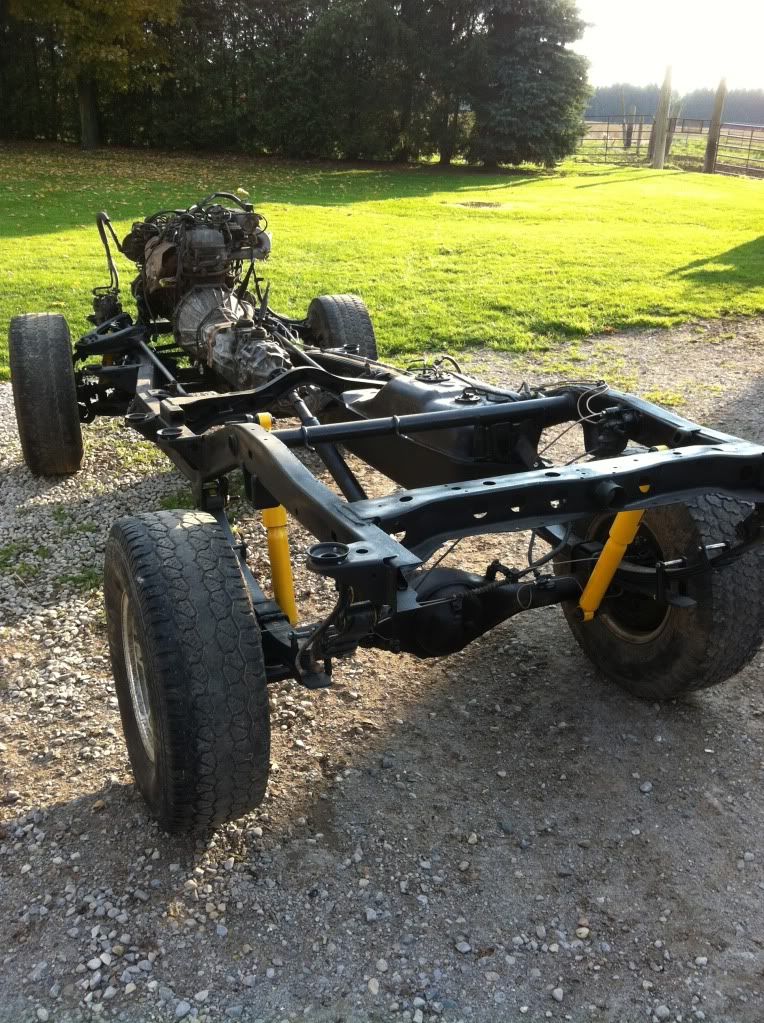
At some point I'll be taking a picture like this before putting the body back on:
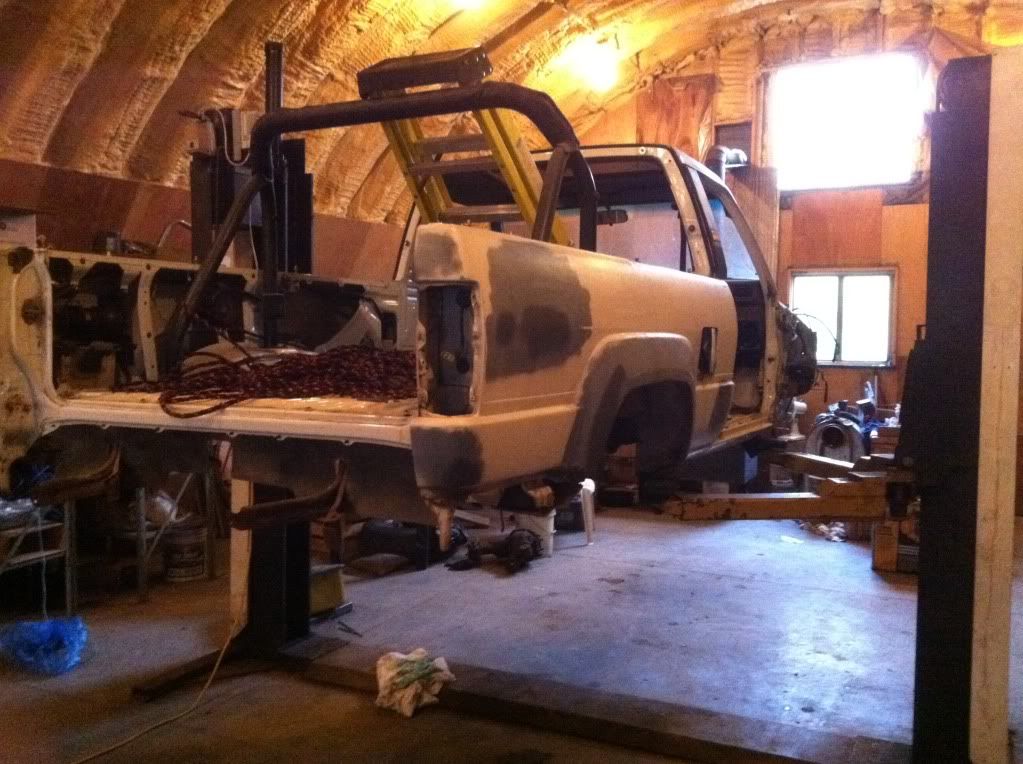
I decided I'm going to paint the engine bay black before putting the body back on. This means I needed to do a bunch of cleaning.
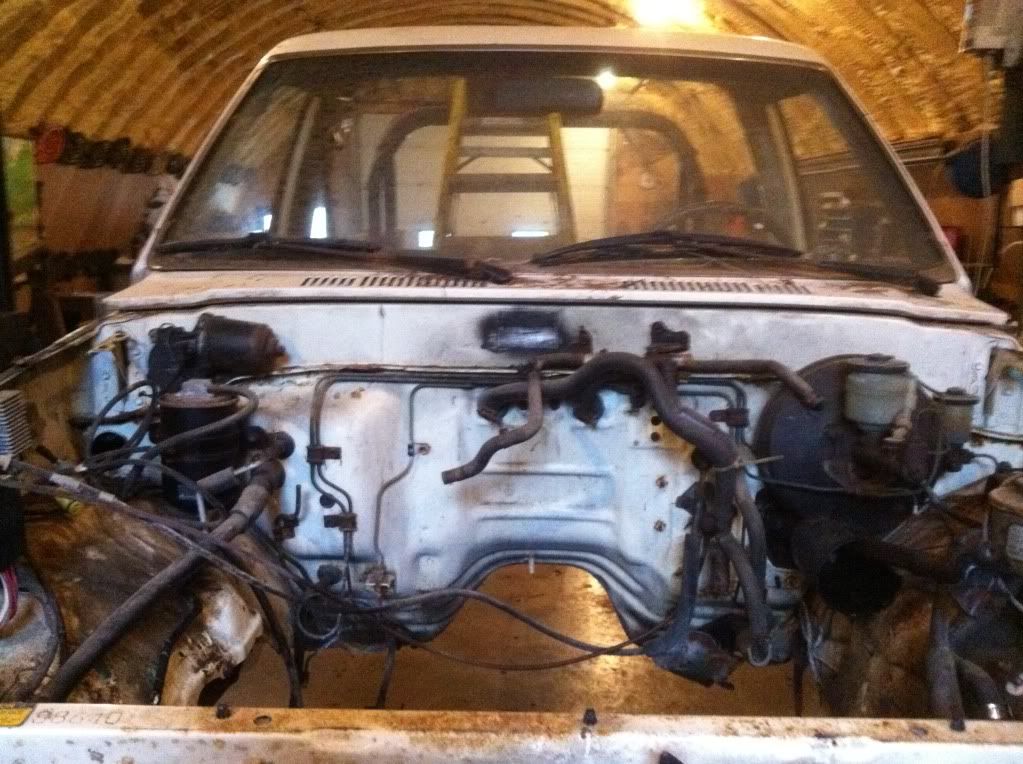
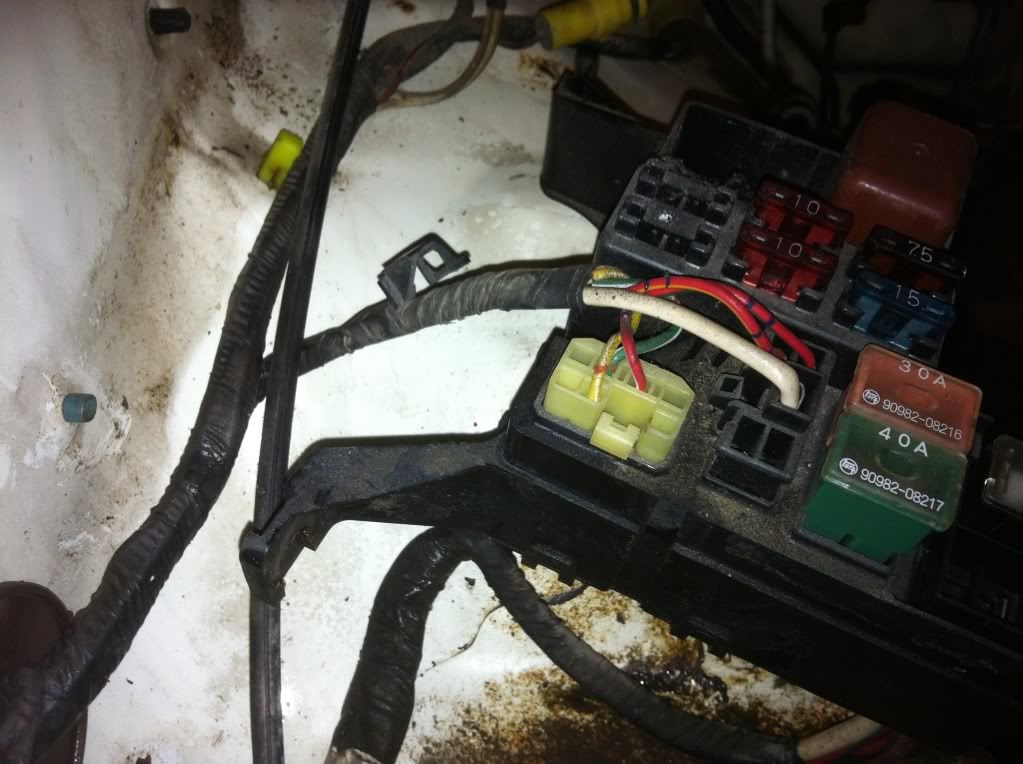
I found the easiest way to get things out of the way was to take what I could off the engine bay walls and bolt them to the back side.
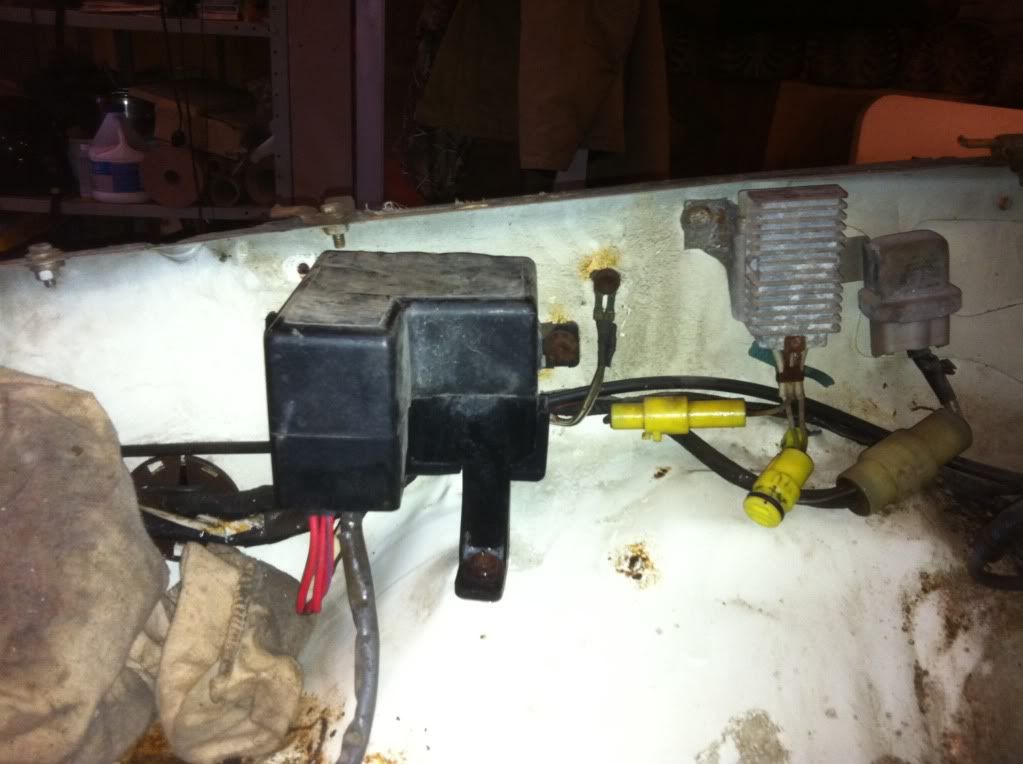
This meant I wouldn't lose any bolts or forget where things went. Couple pics for my own reference:
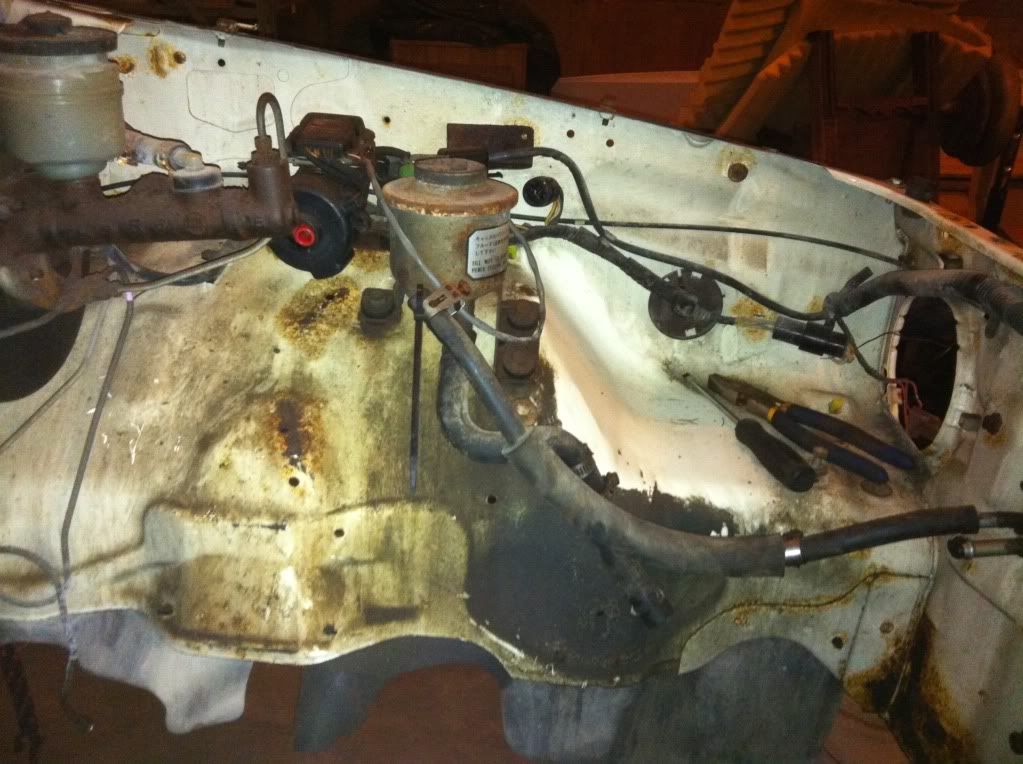
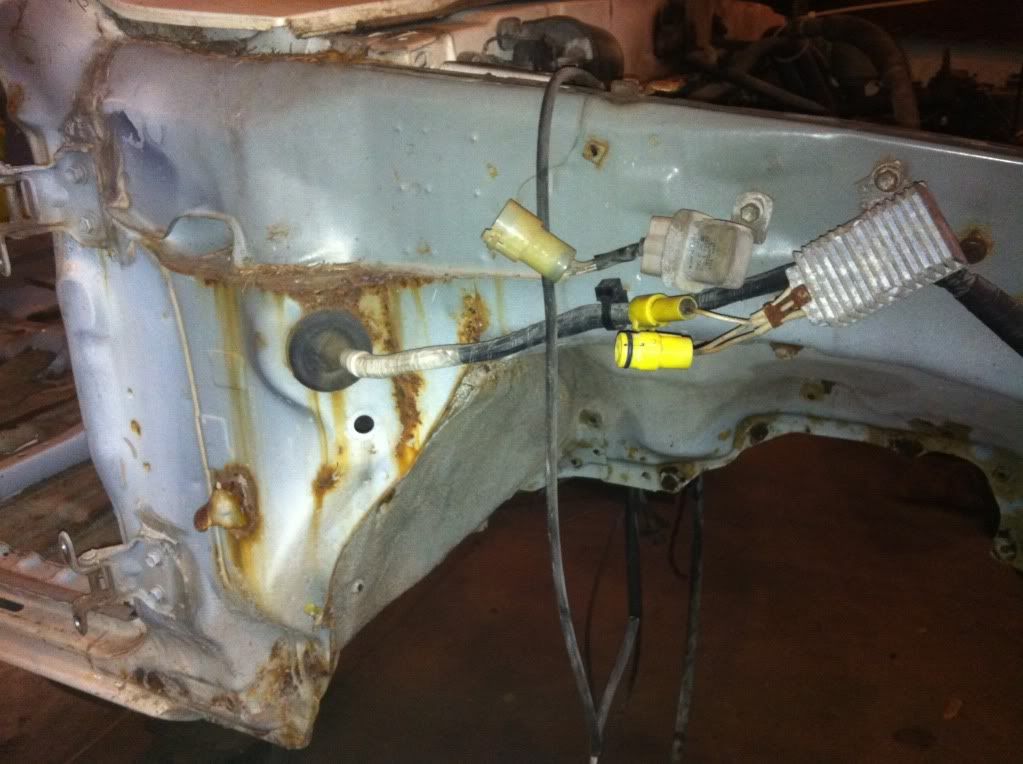
I didn't finish cleaning today, this is as far as I got:
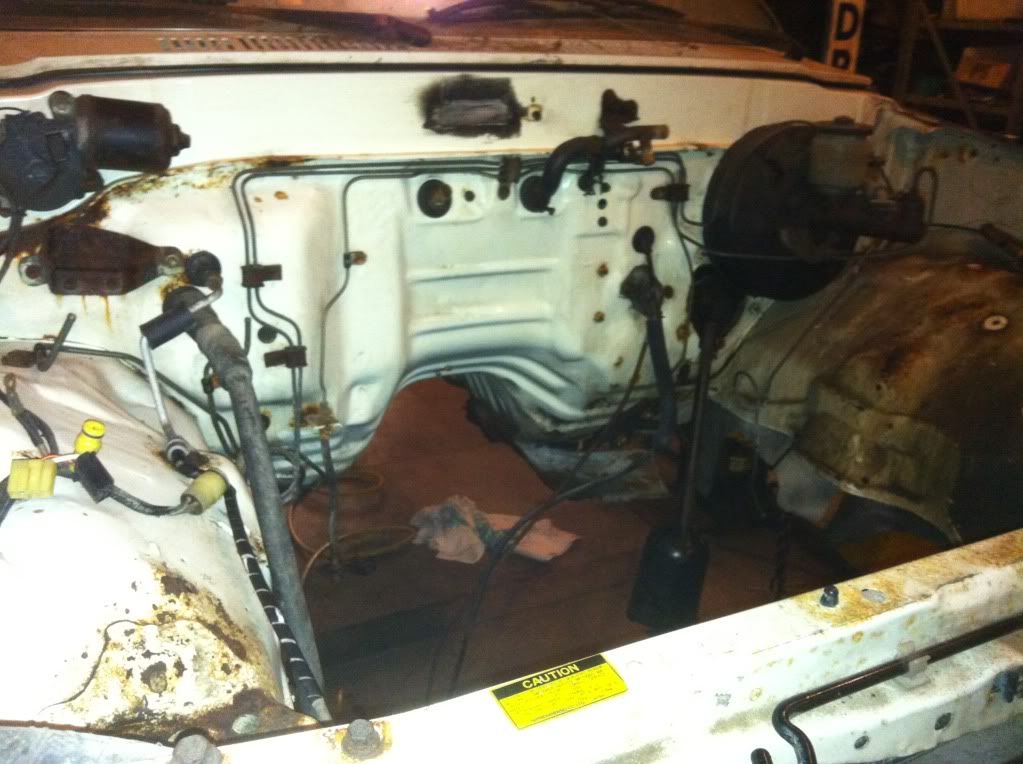
Hoping to be back tomorrow. I'll need to sand down the surface rust, and scuff up the paint. Do I need to use primer or will the black paint stick fine to the engine bay if I rough it up enough?
One other thing I needed to do before putting the body back on was put in a helicoil for one of the bolts for the engine mount. If you recall I had to move the engine mounts on the celica engine, and one of the bolt holes was rusted to the point where the threads would not hold the bolt. I was surprised to find out my auto parts store rented the helicoil kits.
I used the tap, with liberal amounts of oil, and then inserted the helicoil and the bolt. I was happy to find out that I didn't need to take the body mounts off to do it. At that point I was ready to pull the frame outside and get the body from the shed where it was stored.
At some point I'll be taking a picture like this before putting the body back on:
I decided I'm going to paint the engine bay black before putting the body back on. This means I needed to do a bunch of cleaning.
I found the easiest way to get things out of the way was to take what I could off the engine bay walls and bolt them to the back side.
This meant I wouldn't lose any bolts or forget where things went. Couple pics for my own reference:
I didn't finish cleaning today, this is as far as I got:
Hoping to be back tomorrow. I'll need to sand down the surface rust, and scuff up the paint. Do I need to use primer or will the black paint stick fine to the engine bay if I rough it up enough?
10-29-2011, 06:52 PM
#387
Registered User
Hey Dutch I used a red Scotch bright pad on mine I washed it good with a good oil and grease remover "dawn dish soap" first then the Scotch bright pad. Mine seems to be holding up good considering all the banging around I had to do after I got the engine back in. You are making awesome progress keep it up.
10-29-2011, 09:24 PM
#388
WOW! Not much else to say, other than, ..........'I'M EXCITED'! lol. I know, nowhere near what you're level of anticipation and such are... but nonetheless, I've ENJOYED watching this from the day I started!
GREAT WORK, man! Gonna be one SQUEAK FREE runner! lol.
GREAT WORK, man! Gonna be one SQUEAK FREE runner! lol.
10-29-2011, 10:47 PM
#389
Registered User

Join Date: Oct 2011
Location: Newport, WA
Posts: 95
Likes: 0
Received 0 Likes
on
0 Posts
Just read the thread, and i have to say this is AMAZING!!!
This makes me want to do this to my yota, but that wont be till after wyotech of course.
Awesome work, im excited to see whats to come!!!
This makes me want to do this to my yota, but that wont be till after wyotech of course.
Awesome work, im excited to see whats to come!!!
10-30-2011, 03:35 PM
#390
Super Moderator
Staff
iTrader: (1)
Join Date: Aug 2008
Location: Anderson Missouri
Posts: 11,788
Likes: 0
Received 22 Likes
on
20 Posts
Did the frames look that good new?lol..That was a great idea about bolting to the back side of the fender wells.
That is one thing I like about this site is all of the different ideas that come about. Great job. Looking forward to the body and frame getting to know each other again. Bet you are looking forward to your first drive.
That is one thing I like about this site is all of the different ideas that come about. Great job. Looking forward to the body and frame getting to know each other again. Bet you are looking forward to your first drive.
11-03-2011, 01:38 AM
#391
Registered User
Thread Starter
Join Date: Apr 2011
Location: Southern Ontario
Posts: 428
Likes: 0
Received 0 Likes
on
0 Posts
lol Thanks Terry. I didn't want to throw all the parts into a huge pile, and I always like to put the bolts back in the holes so they don't get lost, but they would have just gotten in the way while cleaning. And then suddenly I realised the fenders weren't on and I could put them on the opposite side. As always the frame doesn't look as good in real life as it does in the pics, but even in real life I'm very happy with it. The silver lining to the fact that this project is taking so long is the fact that if I did a bad job on eliminating the rust during the paint process I'll notice it coming through before the body goes back on. I waited a couple weeks after the first coat of primer, can't remember if I said this at the time, and a few rust spots showed through, so I blasted them again, re primed, and later painted the whole thing. It's not about building a show truck, its about building a truck that will last, and they throw crazy amounts of salt on the road where I live, so rust is inevitable, but I'm hoping if I'm careful I can buy myself enough time to really enjoy this truck.
I should also say thanks to Mdumaw for the kind words, and welcome aboard. I'm sure there are a few subscribers that wish they had found this thread when you did, there's been a lot of delays along the way. Who'd have thought taking a truck completely apart and then cleaning it part by part, and then putting it all back together with the wrong engine from a car of the wrong year would be time consuming... I'm sure many people will learn from my mistakes. I'm just to stubborn to turn around at this point.
I should also say thanks to Mdumaw for the kind words, and welcome aboard. I'm sure there are a few subscribers that wish they had found this thread when you did, there's been a lot of delays along the way. Who'd have thought taking a truck completely apart and then cleaning it part by part, and then putting it all back together with the wrong engine from a car of the wrong year would be time consuming... I'm sure many people will learn from my mistakes. I'm just to stubborn to turn around at this point.
11-04-2011, 03:27 AM
#392
Super Moderator
Staff
iTrader: (1)
Join Date: Aug 2008
Location: Anderson Missouri
Posts: 11,788
Likes: 0
Received 22 Likes
on
20 Posts
You have taken around 6 months to get it tore down and back to this point. With everything else that life throws at you, I think you have made great steps in getting it this far and in the quality of work you have done is great. Really good in my book.
When I lived in Chicago, and in the winter time, I had a spray bottle that you could pump up like that of a pest control guy or a weed killer type bottle. I would get the thinnest oil that I could find and coat under neath. I also did it in the rainey season, just because the tires would sling water everywhere and was sure there was salt in the water. Did it about once a month.
I lived there 3 years and had one spot of rust on the rear tire area about the size of a quarter. Everything else looked great. I still spend about as much time washing under the truck as I do the top.
I was looking at the thread below and got me to thinking of when were talking about fuel injectors. Did we get the oddball year.lol
22re injector thread... https://www.yotatech.com/forums/f116...ectors-127606/
11-04-2011, 06:14 AM
#393
getting closer to the end. this is one awesome build and nice that you have a huge place to work on it too. i need a barn and a lift lol. well i got a barn just need a lift but the barn is 45mins away  anyways cant wait to see this done with all the new upgrades it should be one awesome runner
anyways cant wait to see this done with all the new upgrades it should be one awesome runner
11-04-2011, 10:53 PM
#394
Registered User
Thread Starter
Join Date: Apr 2011
Location: Southern Ontario
Posts: 428
Likes: 0
Received 0 Likes
on
0 Posts
Thanks Toyo and welcome aboard. The shop is my father/mother in law's, and they're about 25mins away, so not too far, but far enough that I can't just pop over for 30mins whenever I feel like it. I helped him build it (the shop) when I was dating his daughter, so he's obliged to let me use it, and I'm sure he's regretting ever saying that at the time. I did repair and help him install the hoist though, so hopefully that means something. I really have taken it over on him...
In other news I did a test drive of a 2012 4runner today. I've been meaning to do this since they were redesigned in 2010, and so I was really looking forward to it. I'm going to have to say I was honestly disappointed in it, and my only justification for this was the truck was a limited edition, and not the trail edition. I was thrown off by the luxury feel, really couldn't be comfortable because I felt like I was driving a borrowed vehicle. I didn't feel like I was driving a truck, I felt like it was the mother in law's vehicle, all leather and nav systems and posh. I really do need to feel like I'm in a vehicle I can work with, and not something I feel underdressed in. I need to drive a trail edition, or even a Sr5 to be sure, because afterwards I drove a tacoma, and absolutely loved it. I honestly sat down in the tacoma after being in the limited edition 4runner, and sighed in relief without even realising it. My wife actually asked me, what was that? Before I realised I had sighed out loud. I felt like I was at home in the thing within 2 seconds. To be clear, I'm not even close to being ready to afford such a purchase, I just went out to try them for kicks, and I was very surprised by how I fealt about them. I told the dealer to give me a call when he gets a trail edition 4runner in, because I really need to know if this truck I dream about isn't what I even want to be in. Cheers!
Edit: while I'm dreaming about the future here: Anyone know how much I'd have to lift the tacoma to fit 33's under? I never really looked at the tacoma before, really liking what I'm reading now. 4.0l 265horses, 283ftlbs, optional supercharger for over 300 horses, towing for 6400+ lbs, electronic rear diff lock, really a nice truck. The new ones have a composite interior to the box, really an amazing idea. I test drove the tundra before and wasn't impressed. They toted it as the working man's 1/2 ton, and at the time I ran a steel rigging crew on jobsites. I hopped into the thing and instantly realised there's no space in the thing to drop your stuff. There isn't a working man alive that doesn't hop into his truck and chuck his gloves, maybe his hard hat, toolbelt, maybe his drill etc. on the floor between the seats. When you're working you're never empty handed. You can't throw stuff on the passenger seat because your buddy is sitting there already, looking for space for his own stuff. The console runs right between the seats to the dash, and the only storage option is inside the console itself. What I'm saying here is some engineer designed the buttons to be operated with work gloves on, and neglected to realise we'd rather take those gloves off when inside the truck, and put them somewhere. /end rant.
Last edited by Dutchbelly; 11-04-2011 at 11:16 PM.
11-04-2011, 11:40 PM
#395
Registered User
Thread Starter
Join Date: Apr 2011
Location: Southern Ontario
Posts: 428
Likes: 0
Received 0 Likes
on
0 Posts
I kinda feel the need to defend my bashing of the tundra. It really is mechanically an amazing truck. If you do your research you'll find it's basically a 1/2 ton built by 3/4 ton standards. Oversized ring gear, brakes and drivetrain components, with a respectable powerplant. It's really why my reaction was so fierce: I expected so much, and they screwed up on the simple stuff. I would be the first to admit that I'm biased towards toyota, but I'd be lying to say I'd pick the Tundra for a work truck. I'd probably work for the extra coin and buy a 3/4 ton Dodge with a Cummings.
11-05-2011, 04:55 PM
#396
i know what you mean about the distance to do minor work on it. its so much nicer when its within walking distance lol. i drove the newer 4runner recently, not sure which model, it was a customers lol, anyways it would be a great camping and dd but the extremely lower ground clearance even when lifted, i wouldnt take it to any real trails lol not a fan of the tacos, the tundra is too plastic-ee for my liking. it does have alot of big boy parts but i would do a 2wd lowered tundra if i had one
11-06-2011, 07:10 PM
#397
Registered User
Thread Starter
Join Date: Apr 2011
Location: Southern Ontario
Posts: 428
Likes: 0
Received 0 Likes
on
0 Posts
Hey guys I went out and got some more done. Not as much as I had hoped, but that should probably go without saying by now. I cleaned out, buffed primed and painted the engine bay in preparation to put the body back on:
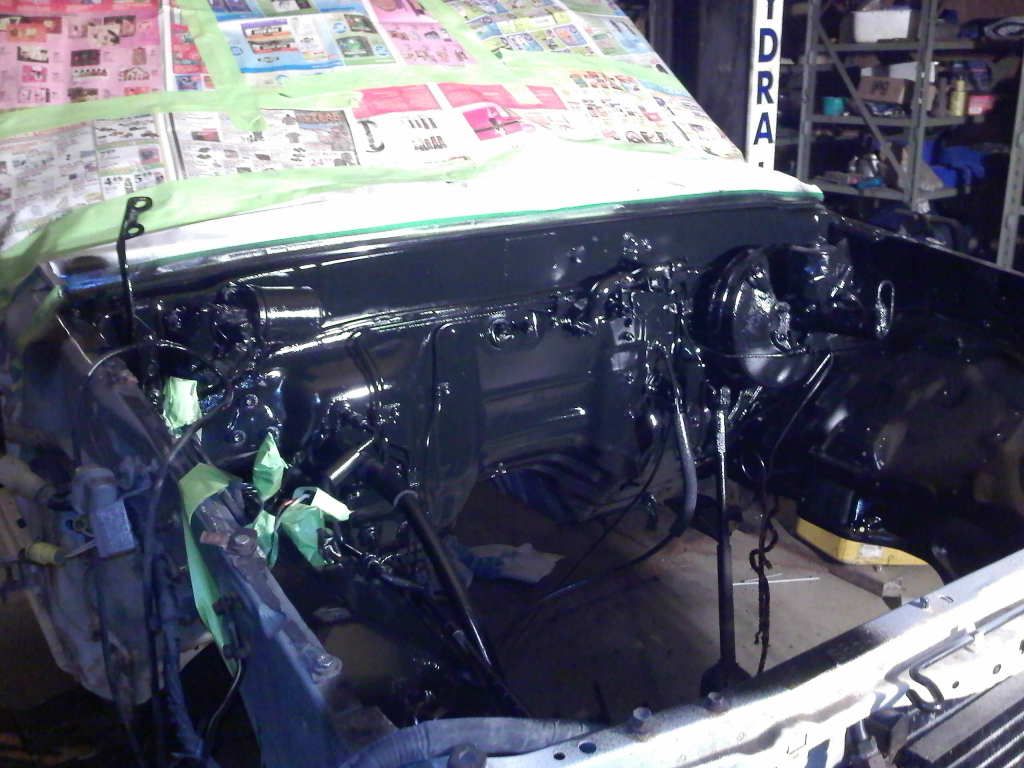
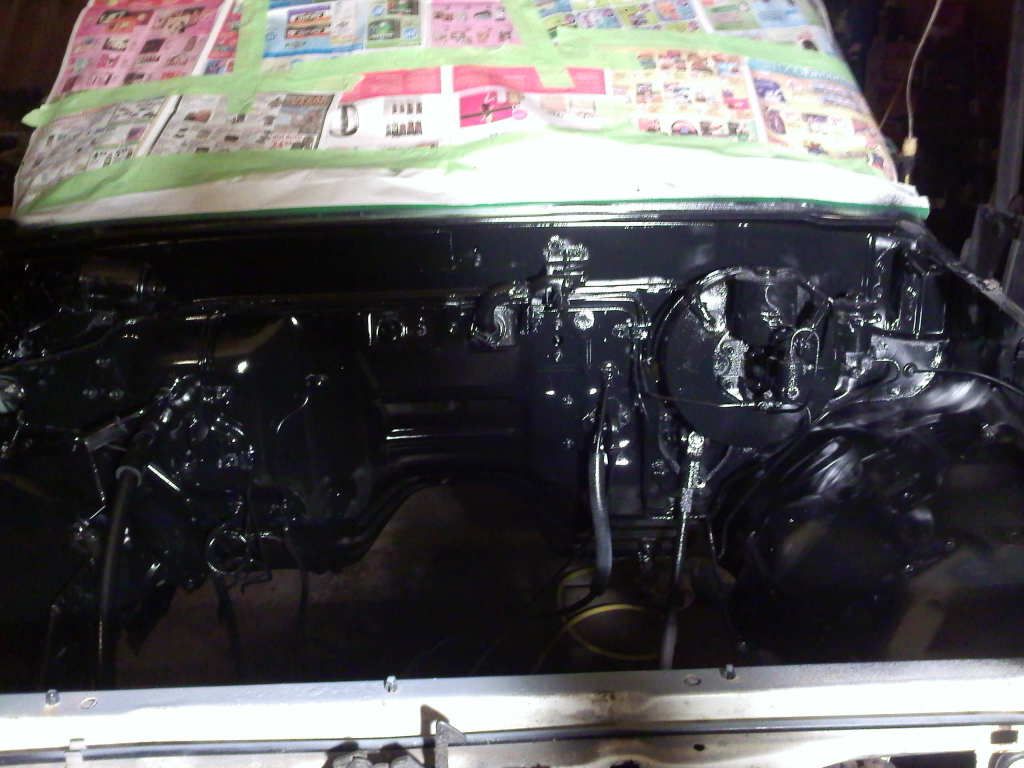
I took no pics of the process because my phone was dead. I had to ask my wife to take a couple pics with her phone at the end of the day. My next step will be cleaning up and prepping the underbody for the bedliner I'll be spraying on for undercoat.
I took no pics of the process because my phone was dead. I had to ask my wife to take a couple pics with her phone at the end of the day. My next step will be cleaning up and prepping the underbody for the bedliner I'll be spraying on for undercoat.
11-06-2011, 07:43 PM
#399
Registered User
Thread Starter
Join Date: Apr 2011
Location: Southern Ontario
Posts: 428
Likes: 0
Received 0 Likes
on
0 Posts
Thanks Toyo. The only thing that won't be redone during this rebuild will be the engine. I'm hoping to take the original engine and rebuild it after I get the truck on the road, and then the whole truck will be restored to the best of my amateur abilities.
11-06-2011, 07:56 PM
#400
well you have already done so much work already, im sure you wont have any issues pulling the motor down the road. im sure you want to get it back on the road and finally drive it lol


