85gijunk4x4's 1988 pickup buildup thread (Angus)
 07-27-2011, 06:21 PM
#81
Registered User
Thread Starter
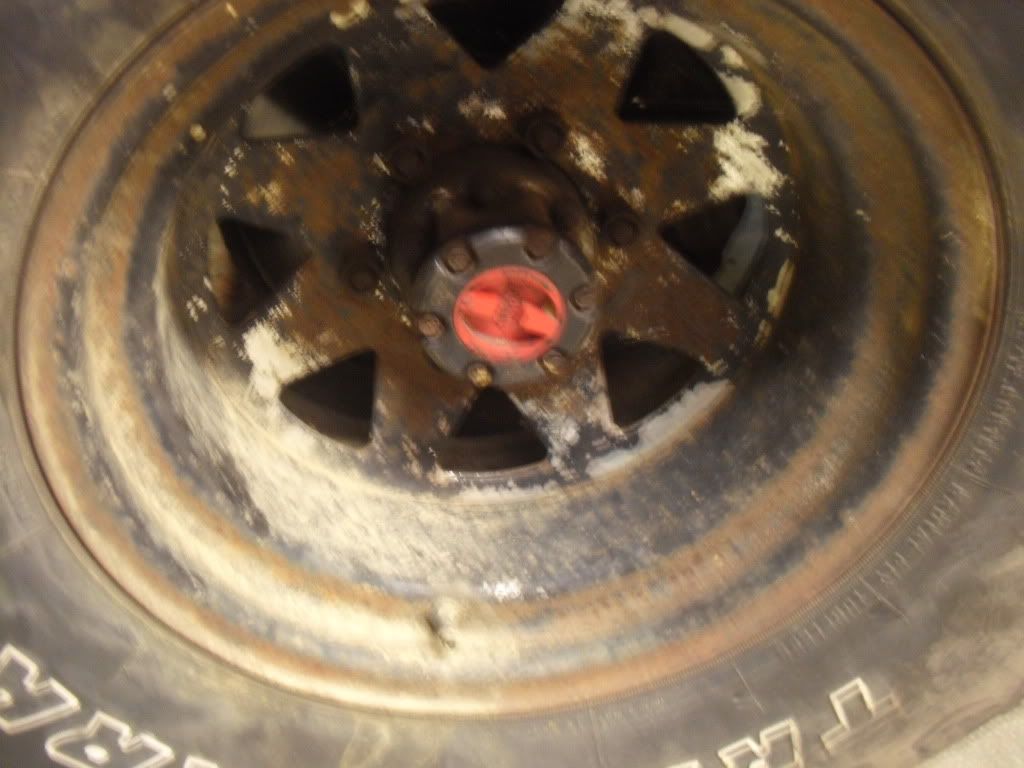
BEFORE:
AFTER:
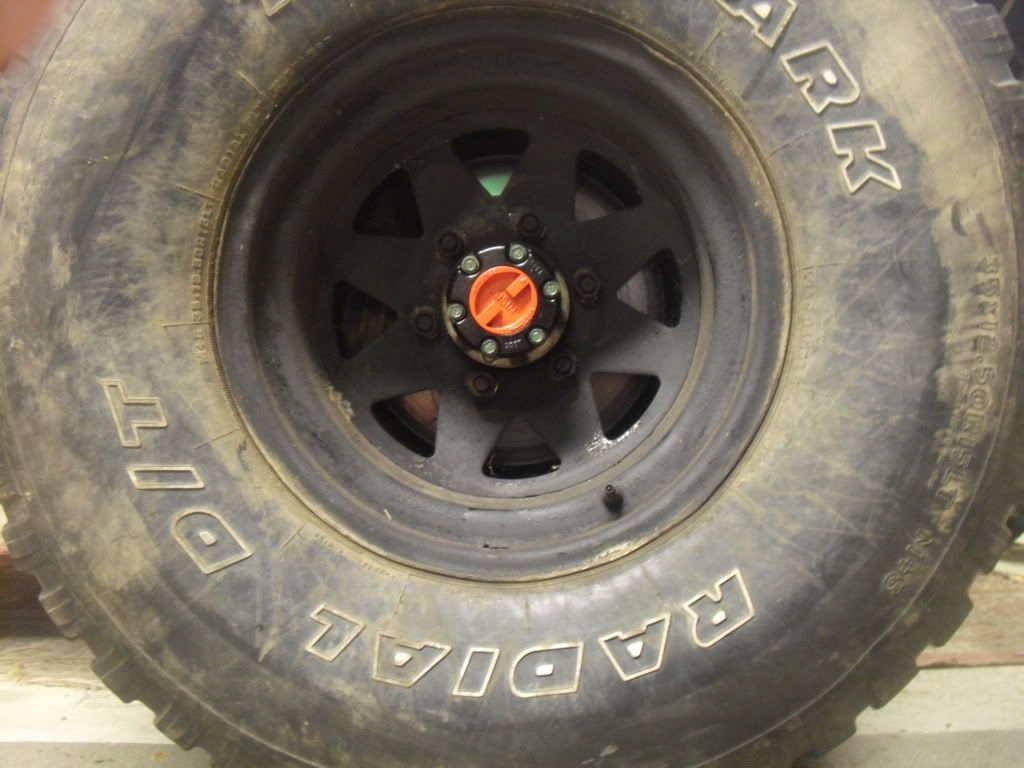
i also lubed everything up, i originally used regular bearing packing grease, but when i took of the passengers side, i had to pull it out with pliers, and i heard it slurp as it came out, so i relized it was alot too thick.
i used this other stuff called lithium multipurpose grease (it was actually left over marine grease i had, wich cant hurt).
it had a viscosity of melted butter, and i noticed a huge improvement of how smooth these things work now
AFTER:
i also lubed everything up, i originally used regular bearing packing grease, but when i took of the passengers side, i had to pull it out with pliers, and i heard it slurp as it came out, so i relized it was alot too thick.
i used this other stuff called lithium multipurpose grease (it was actually left over marine grease i had, wich cant hurt).
it had a viscosity of melted butter, and i noticed a huge improvement of how smooth these things work now
 07-28-2011, 07:38 PM
#84
Registered User
Thread Starter
thanks, and go for it!! the powdercoat gun i have was only like $95.00, and its a good one too. Its an eastwood, wich makes everything from industrial shop equiptment all the way to back yard tools. i actually got a good deal on mine because i called the place and swallowd my pride and asked for a discout
07-28-2011, 07:42 PM
#85
Registered User
Thread Starter

thanks, and yeah im gonna do the wheels, already have a color picked out! the same gloss black i used for my hubs

and naahh, i got 2 pounds of black powder (not that black powder) for like $10, and that should be plenty enough. I just dont have a stove big enough
 hopefully will one day though
07-29-2011, 07:28 PM
hopefully will one day though
07-29-2011, 07:28 PM
#86
Registered User
Thread Starter
cb antennas
got my cb tenners on, xxxtreme22r pointed me in the direction of the wilson flex, so far in my experiance i noticed they are very durable, but ive yet to hook them up to my cb so i cant tell you about the performance of them...yet!!
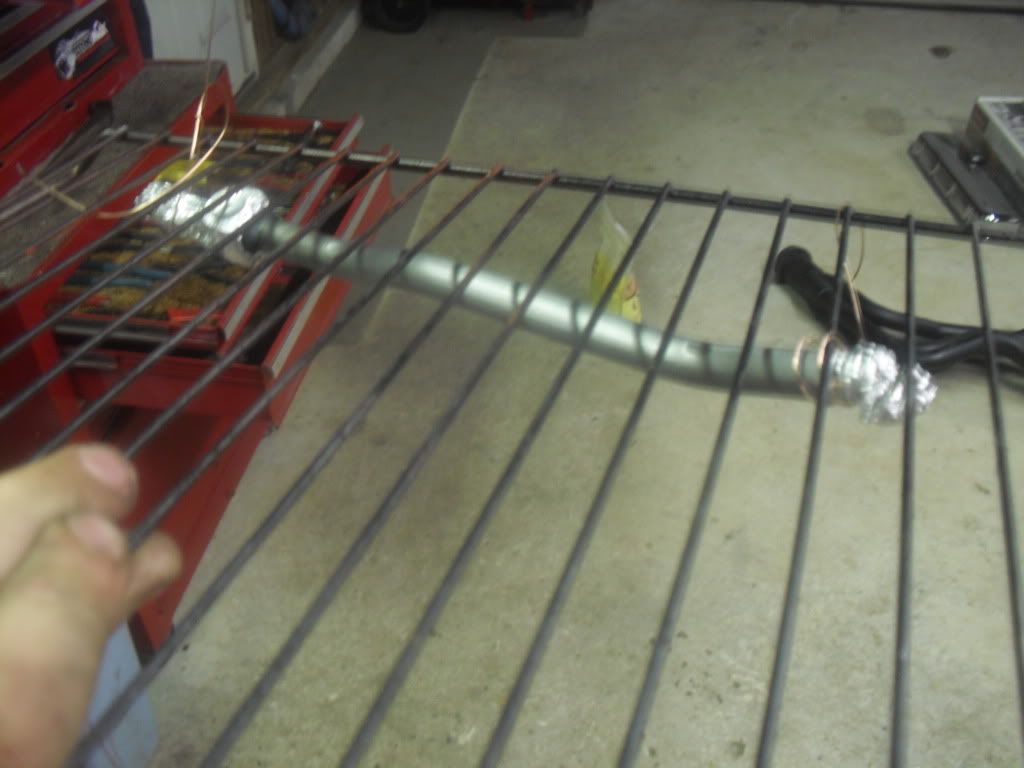
so anyway, boring stuff. started off by marking my holes and drilling.
put the antennas on just as a moch up
hard to see, but they're on there. when i put them on i noticed the antennas were on there like this /_____\ and one of my pet peeve's is to have the antennas straight up and down. i checked my bedsides and everything i could think of with an "L square" and saw that everything was straight. so then i checked the brand new mounts, they were at fault. i chose the mirror mounts, to the antenna is actually held on by 4 bolts AND clamped to the bedside rather then just screwed in with a stud.
the antennas i chose are 3ft. only one is for the cb, i didnt want to co-phase them due to the closeness. the other for now is just for looks, and maybe will be my stereo antenna if i ever get my stereo hooked up. in the future i will probably relocate the antenna to the rear bumper when i get that made, and just use one.
anyway, i then powdercoated the outside brakcet gloss black, and the bolts olive drab. i only did the bolt heads and the outside of the bracket, so that way it still has metal to metal contact. somehow i forgot to take a picture of the antennas on and the brackets blacked out, but i'll get it up.
fresh out of the stove
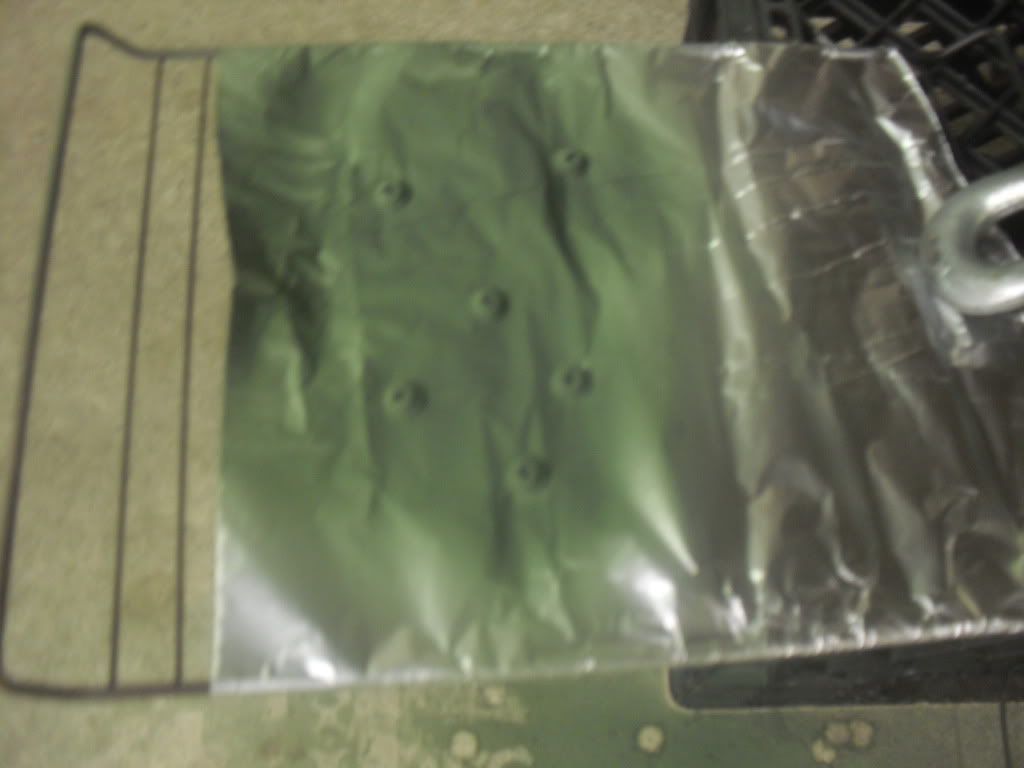
heres how i did my bolts, the same way as the hub bolts (this is actually a picture from when i did my hubs) but anyway, people are always trying to sell you and me high temperature tape to keep powdercoat off of bolt threads, but this is my solution i will share with you guys to help you and I save money. just use a peice of tinfoil and poke the bolts through, so that way only the heada are exposed

so anyway, boring stuff. started off by marking my holes and drilling.
put the antennas on just as a moch up
hard to see, but they're on there. when i put them on i noticed the antennas were on there like this /_____\ and one of my pet peeve's is to have the antennas straight up and down. i checked my bedsides and everything i could think of with an "L square" and saw that everything was straight. so then i checked the brand new mounts, they were at fault. i chose the mirror mounts, to the antenna is actually held on by 4 bolts AND clamped to the bedside rather then just screwed in with a stud.
the antennas i chose are 3ft. only one is for the cb, i didnt want to co-phase them due to the closeness. the other for now is just for looks, and maybe will be my stereo antenna if i ever get my stereo hooked up. in the future i will probably relocate the antenna to the rear bumper when i get that made, and just use one.
anyway, i then powdercoated the outside brakcet gloss black, and the bolts olive drab. i only did the bolt heads and the outside of the bracket, so that way it still has metal to metal contact. somehow i forgot to take a picture of the antennas on and the brackets blacked out, but i'll get it up.
fresh out of the stove
heres how i did my bolts, the same way as the hub bolts (this is actually a picture from when i did my hubs) but anyway, people are always trying to sell you and me high temperature tape to keep powdercoat off of bolt threads, but this is my solution i will share with you guys to help you and I save money. just use a peice of tinfoil and poke the bolts through, so that way only the heada are exposed
07-30-2011, 12:07 PM
#88
Registered User
Thread Starter
the only part i powdercoated is the outside of the outside bracket, so everything touching the bed is un-powdercoated, and the whole entire bracket that the antenna is on, is also unpowdercoated. i'll try to make pictures to explain it
08-01-2011, 07:36 PM
#92
Registered User
Thread Starter
here was my next project, painting my twin sticks!!
before pics.
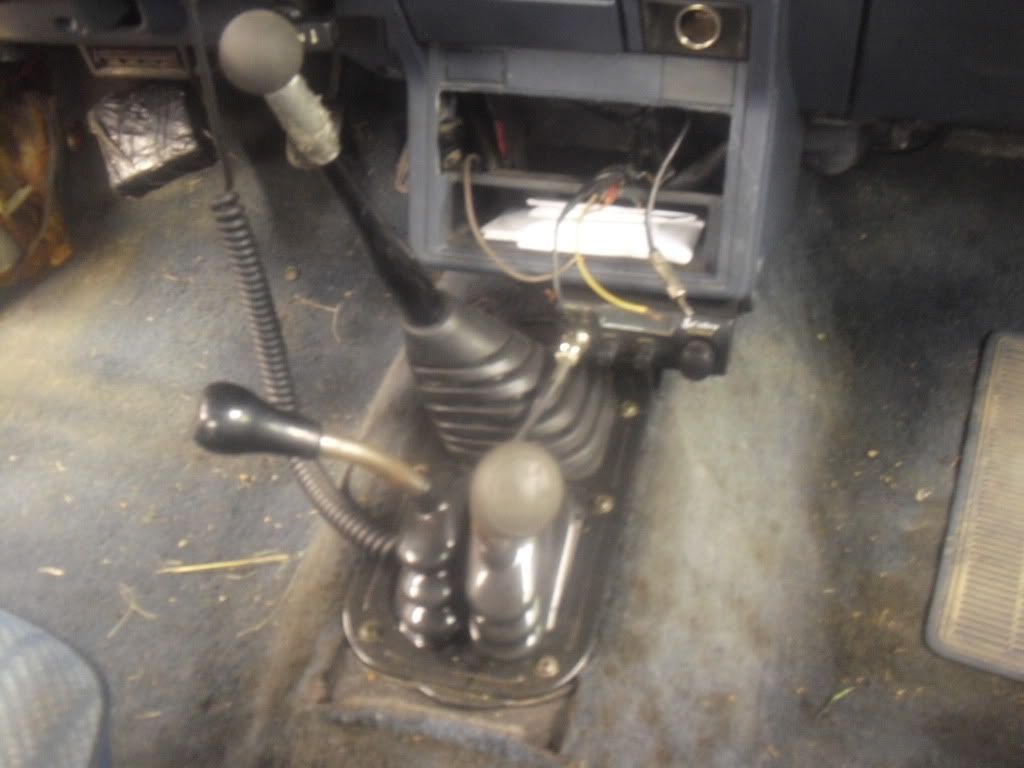
note how the twin stick boot cover was sitting in there. it was made for a 3x8 hole in the floor, most likely for running dual transfer cases. so it was bassicly useless in a stock application.
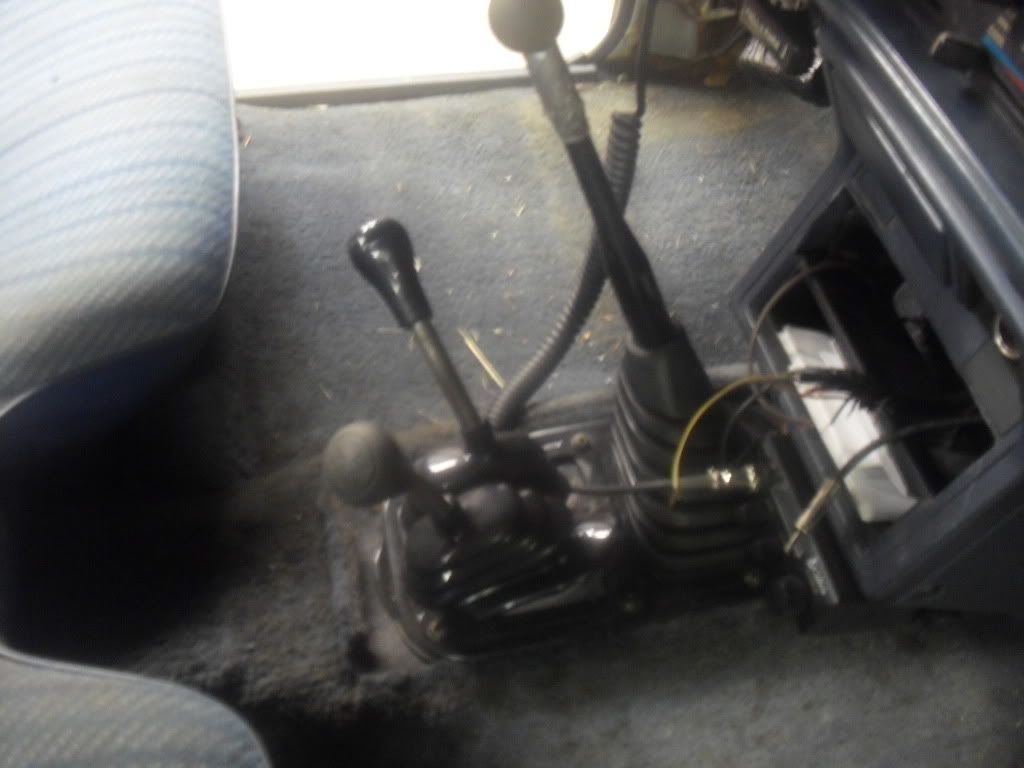
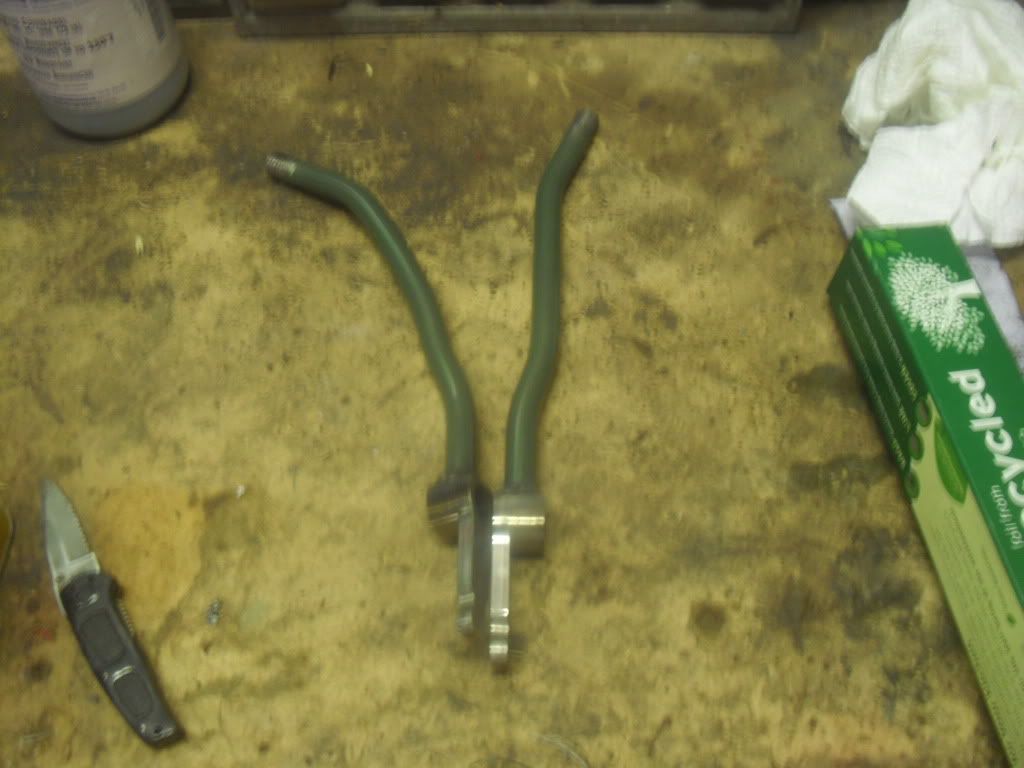
heres taredown.
then i got my sticks seperated, then sanded down, pre-washed and ready for powder. just as a picture, this is what i did. to keep the powder off of the vital parts i used high heat tape *cough cough* tinfoil. and then hung it on the rack with copper welding wire. did the same for both, but one picture is good enough.
fast forward. theyre all done.
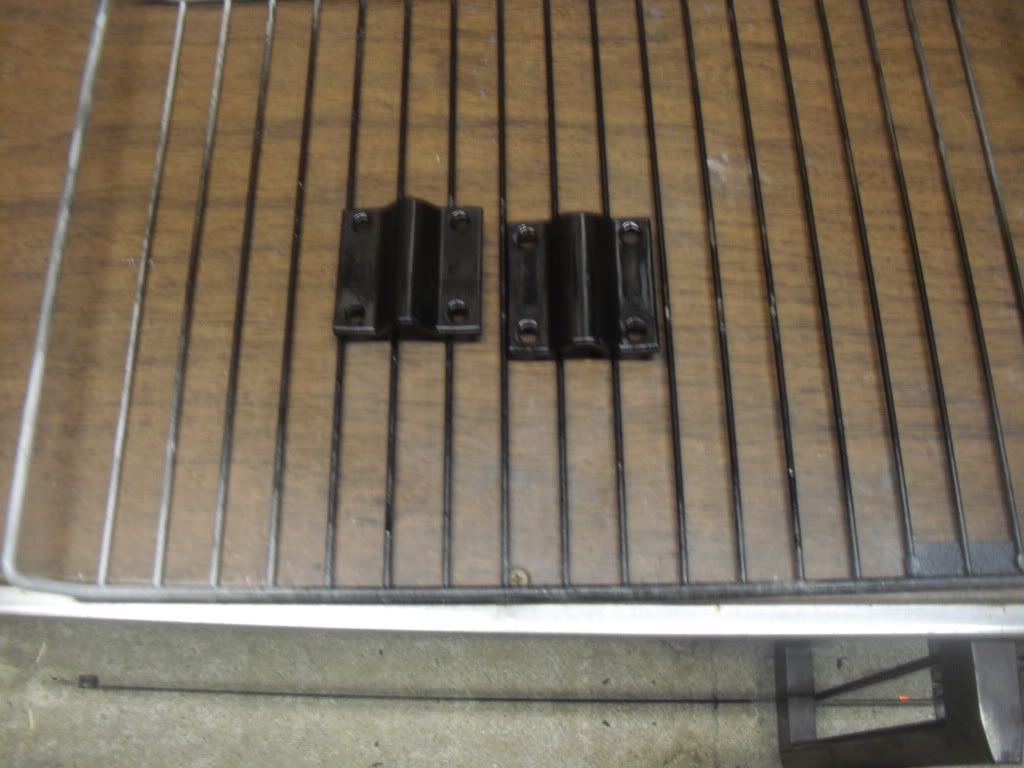
then took care of my trim ring screws.
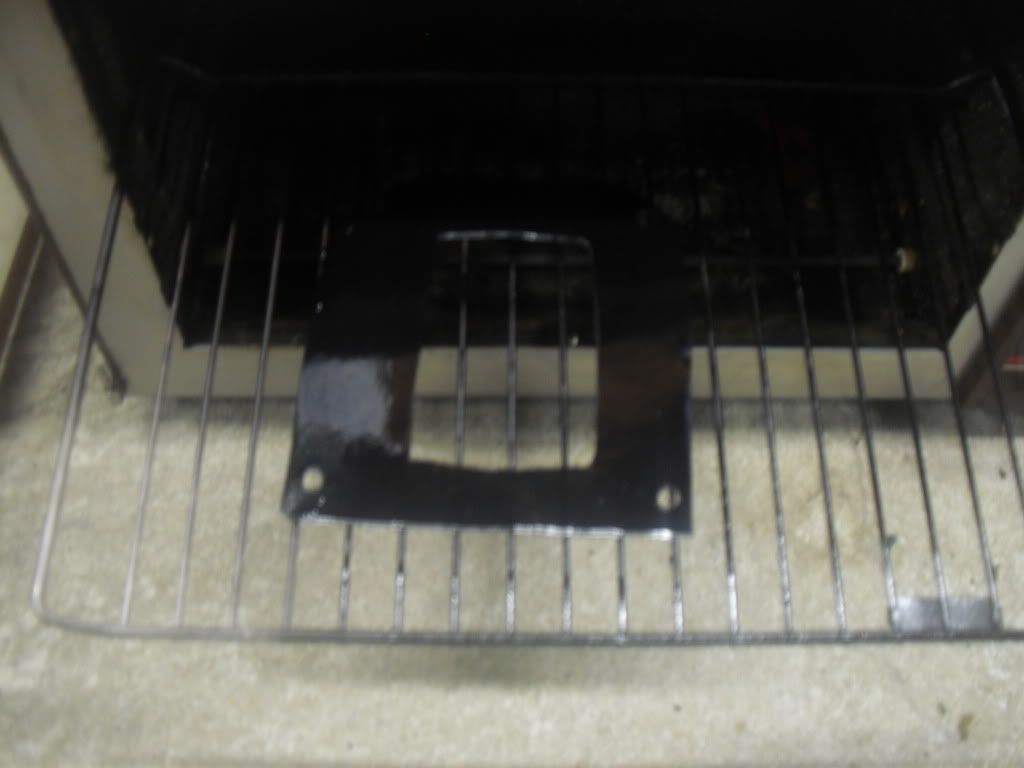
anyway. heres my solution to take care of my shift boot covers. dug this old peice out from the crap pile (same thing i used to make my lisence plate
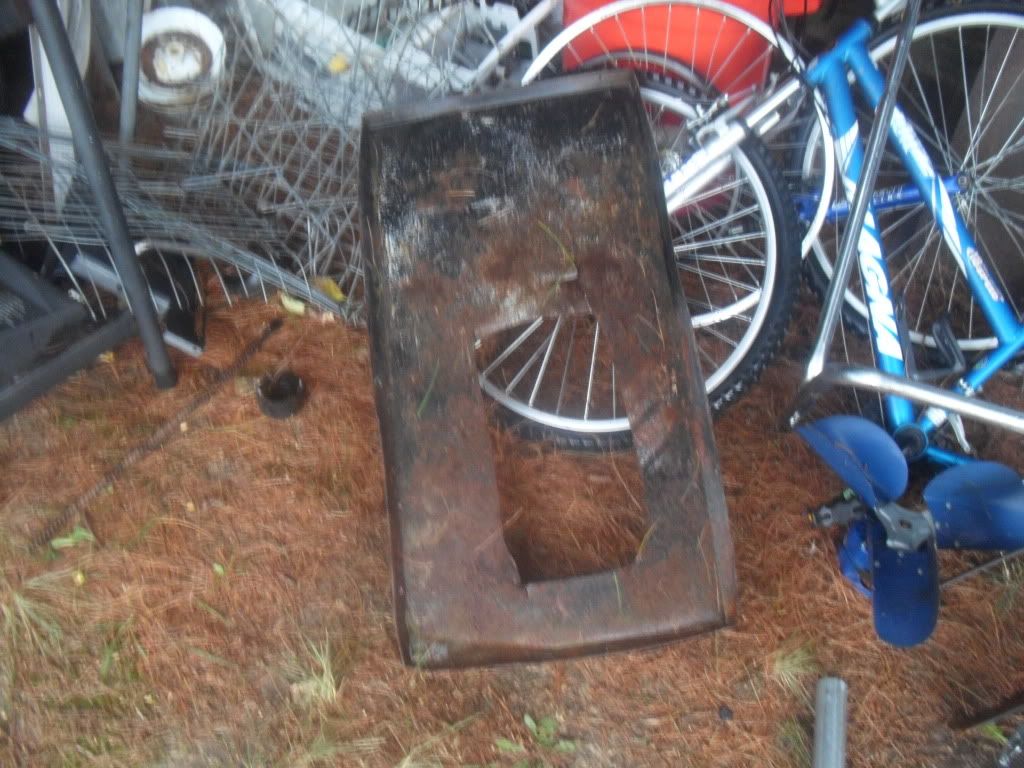
cut it to almost fit.

drilled holes, but out the big holes, and sent it for powder.
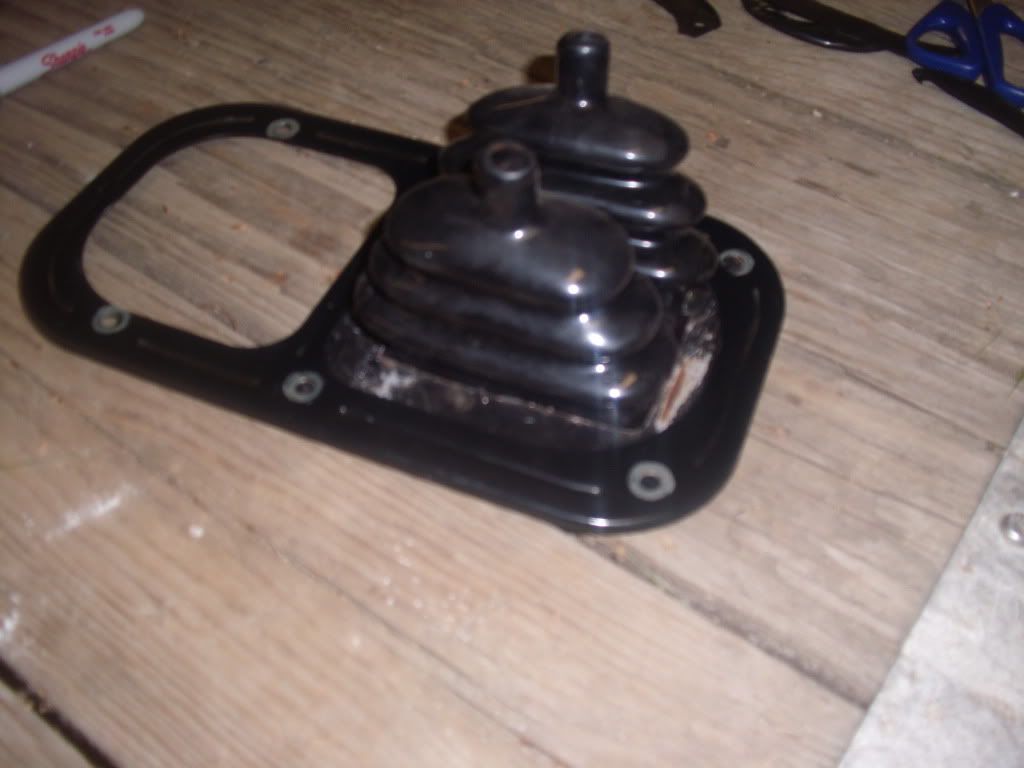
so this is how it fits, but of course, before i powdered it. (didnt bother to powder that trim ring. i rattlecanned it black gloss a few months ago and its good so far)
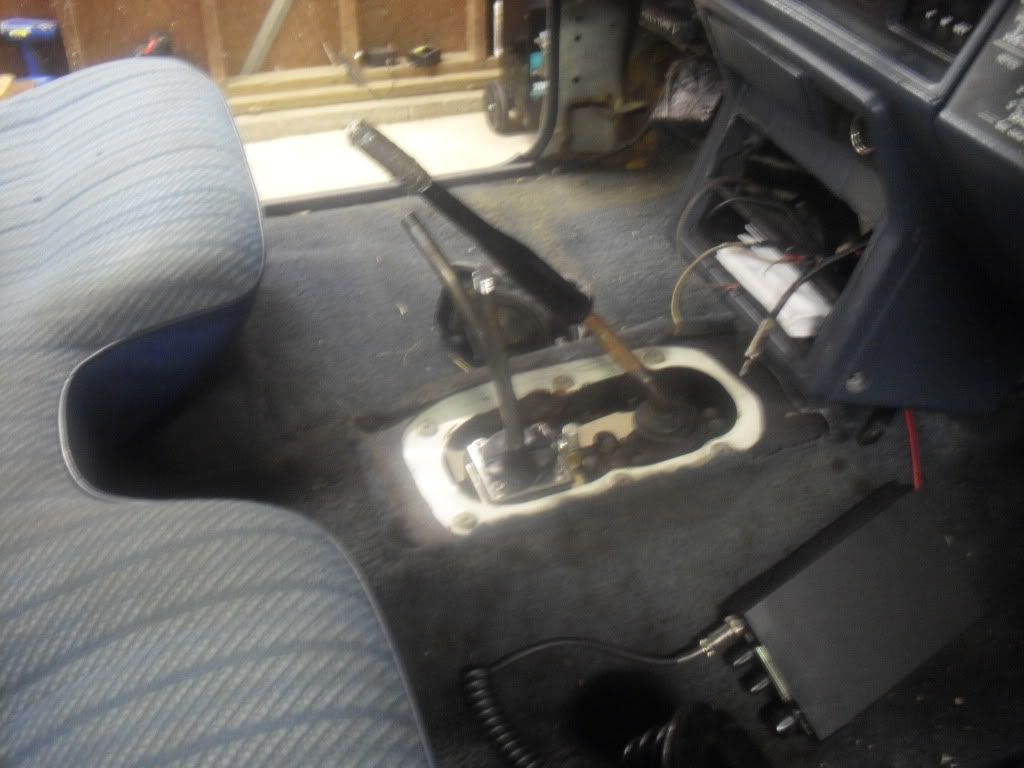
and now all back together. hard trying to get a decent picture of shifter for some reason, always had a problem with it.
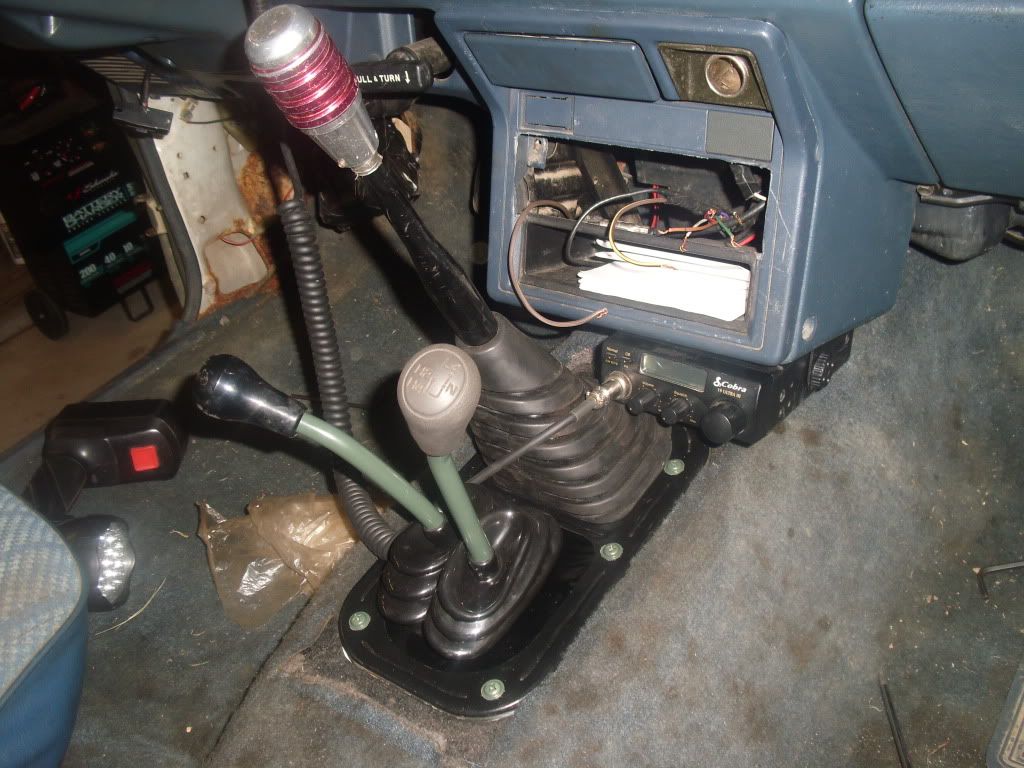
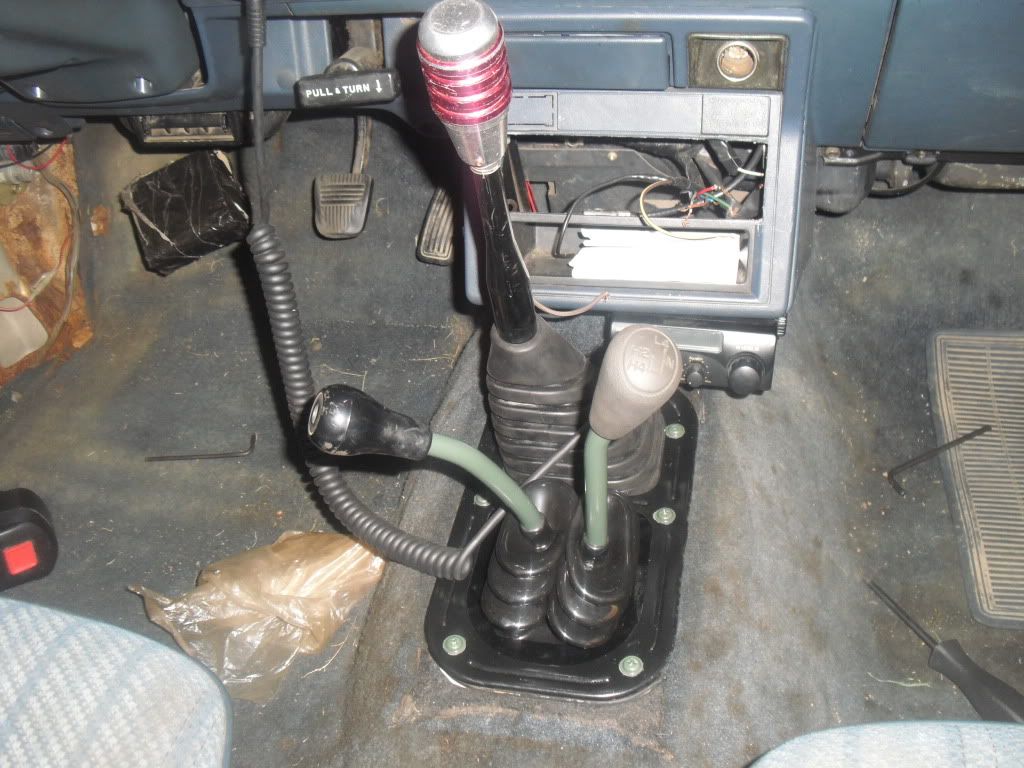
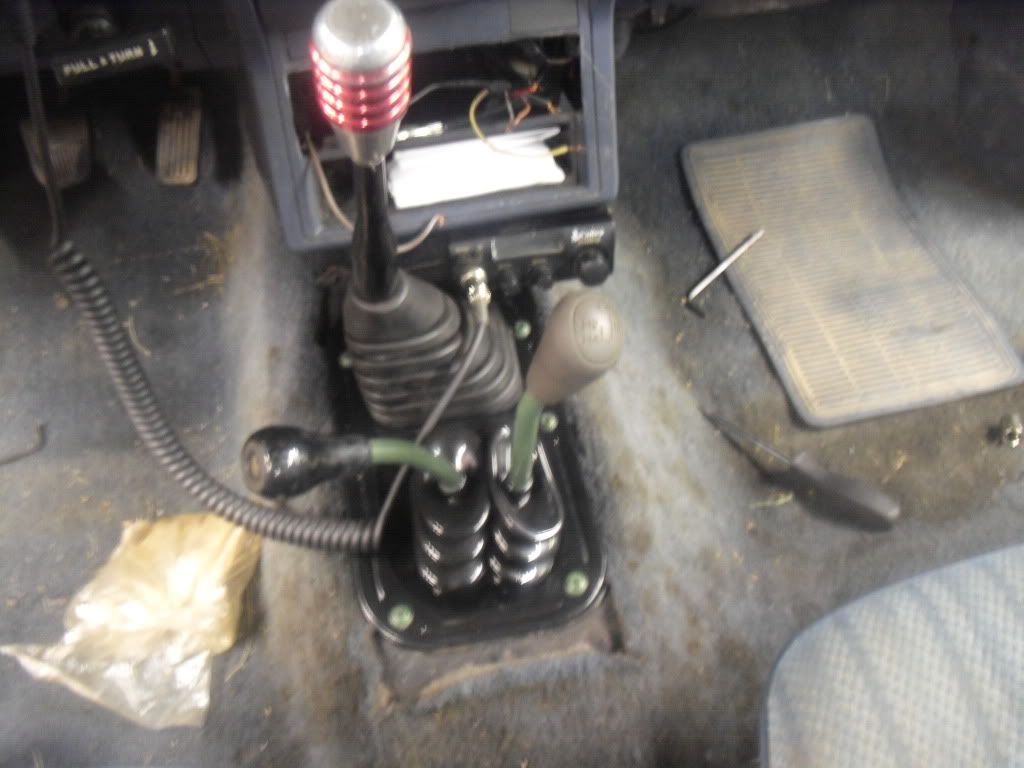
i had flash on, so thats why theyre so bright. they dont really pop out like that in real life LOL
and yes. i know. i have to clean my interior alittle bit.
before pics.
note how the twin stick boot cover was sitting in there. it was made for a 3x8 hole in the floor, most likely for running dual transfer cases. so it was bassicly useless in a stock application.
heres taredown.
then i got my sticks seperated, then sanded down, pre-washed and ready for powder. just as a picture, this is what i did. to keep the powder off of the vital parts i used high heat tape *cough cough* tinfoil. and then hung it on the rack with copper welding wire. did the same for both, but one picture is good enough.
fast forward. theyre all done.
then took care of my trim ring screws.
anyway. heres my solution to take care of my shift boot covers. dug this old peice out from the crap pile (same thing i used to make my lisence plate
cut it to almost fit.
drilled holes, but out the big holes, and sent it for powder.
so this is how it fits, but of course, before i powdered it. (didnt bother to powder that trim ring. i rattlecanned it black gloss a few months ago and its good so far)
and now all back together. hard trying to get a decent picture of shifter for some reason, always had a problem with it.
i had flash on, so thats why theyre so bright. they dont really pop out like that in real life LOL
and yes. i know. i have to clean my interior alittle bit.
08-22-2011, 07:36 PM
#95
Registered User
Thread Starter
ISR mod
got htis isr pip from fellow yt'er SCrunner12. got a good deal on it, and he's an awesome person to do business with. now anyway, the pipe was off a 4runner of an un-specified year, so i had to do some modifications.
start off with this picture (stolen from SCrunner12) here it is, this is the beginning product. Notice the fittings are sticking straight up.

That was orginally a problem because i had to either re-located the PCV fitting, so the pcv hose (the large vaccum line, coming off the valve cover) could fit. or i would have had to extend the pcv hose, wich would have costed money.
now my original plan was to JBweld the original hole, sand it flush, and then drill a new one, but figured that would be risky just incase it were to break apart and get sucked into the intake manifold. Now in the meantime i noticed the pipe was just a tad too long. it fit in there snug, but it was a pain to get on and off with the rubber boot things.
so i came up with a brilliant plan. i just cut the whole HOLE off, and shortened the pipe, all at the same time
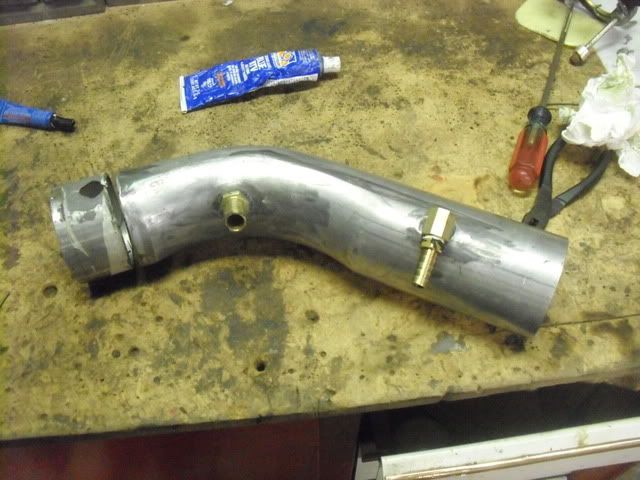
it would be nicer to have it about a 1/4 inch longer, but no complaints here.
so what i did instead of using those locknuts with rubber sealer, (wich was partly the p/o's idea) was to elminate the nuts, and just jb weld around it, and also make a good seal (no pics of that, but i have pictures of the other)
**note, i also tapped the hole i drilled in the pipe, so its in there extra good.
anyway, i got the pcv fitting moved, put it on the truck (didnt remove the intake silencer stuff off just yet, incase there was an ail leak) and started it. my seal worked good, and there was no leaks.
now when i went to shut the hood, the other vaccum line was hitting the hood, and wouldnt let it close...remeber, the fittings were up and down? instead of going through the trouble of jbwelding THAT hole, and re-drilling, i just went and found a 90 degree elbow i had, and did the same thing.
heres a picture of the jb-welded fitting
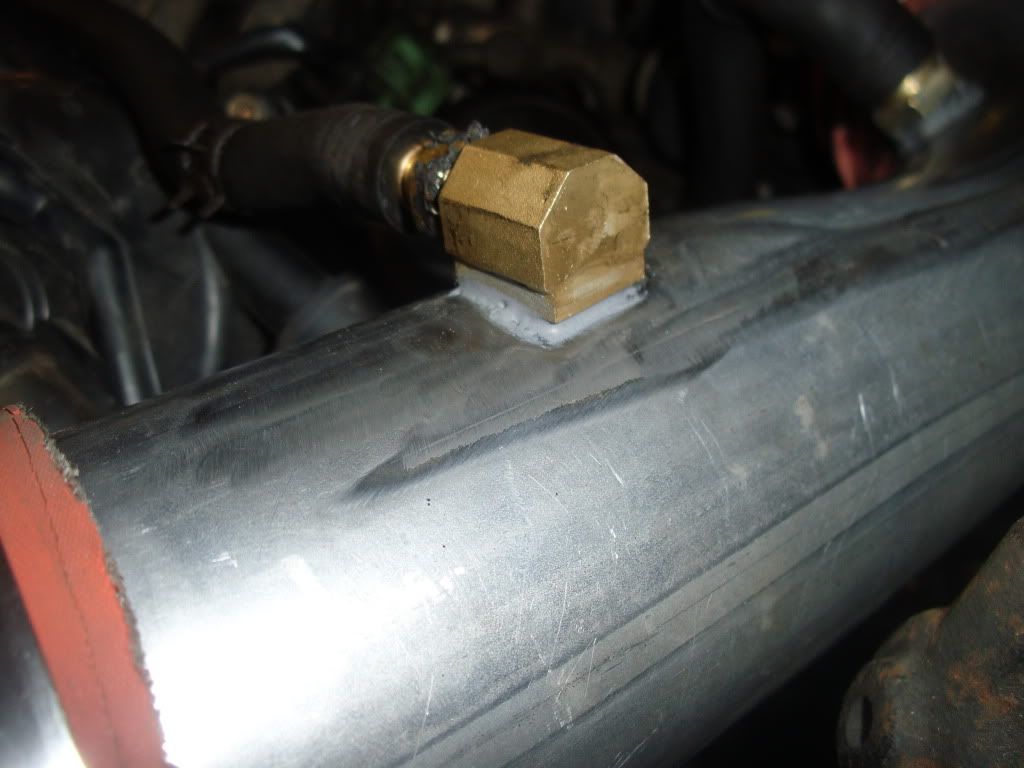
when i put the barbed nipple in the 90degree elbow, i also used teflon tape.
anyway, here she is now, everything works good, i guess i'll start documenting the removal of the intake silencer components, and post it here.
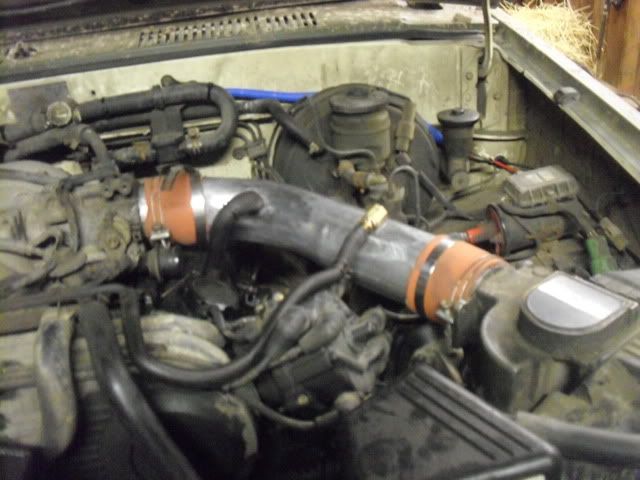
after that its ready for chevy orange engine enamel, with black rubber boots
start off with this picture (stolen from SCrunner12
) here it is, this is the beginning product. Notice the fittings are sticking straight up. That was orginally a problem because i had to either re-located the PCV fitting, so the pcv hose (the large vaccum line, coming off the valve cover) could fit. or i would have had to extend the pcv hose, wich would have costed money.
now my original plan was to JBweld the original hole, sand it flush, and then drill a new one, but figured that would be risky just incase it were to break apart and get sucked into the intake manifold. Now in the meantime i noticed the pipe was just a tad too long. it fit in there snug, but it was a pain to get on and off with the rubber boot things.
so i came up with a brilliant plan. i just cut the whole HOLE off, and shortened the pipe, all at the same time
it would be nicer to have it about a 1/4 inch longer, but no complaints here.
so what i did instead of using those locknuts with rubber sealer, (wich was partly the p/o's idea) was to elminate the nuts, and just jb weld around it, and also make a good seal (no pics of that, but i have pictures of the other)
**note, i also tapped the hole i drilled in the pipe, so its in there extra good.
anyway, i got the pcv fitting moved, put it on the truck (didnt remove the intake silencer stuff off just yet, incase there was an ail leak) and started it. my seal worked good, and there was no leaks.
now when i went to shut the hood, the other vaccum line was hitting the hood, and wouldnt let it close...remeber, the fittings were up and down? instead of going through the trouble of jbwelding THAT hole, and re-drilling, i just went and found a 90 degree elbow i had, and did the same thing.
heres a picture of the jb-welded fitting
when i put the barbed nipple in the 90degree elbow, i also used teflon tape.
anyway, here she is now, everything works good, i guess i'll start documenting the removal of the intake silencer components, and post it here.
after that its ready for chevy orange engine enamel, with black rubber boots
08-22-2011, 08:44 PM
#97
Registered User
Thread Starter
thanks chef!! just checked it out, that thing it sweet man! i like the look of the olive/black 2 tone, i guess you would call it.
and if you wanna covet a flatbed, check out toyotspearo's desert tan rig, that thing is my favorite truck on yotatech, but not by much. theres so many awesome rigs on this website.
my other 2 are hillbillyoter's red/black 87 and redneckoffroad's olive 1st gen...and of course, chefyota4x4's red runner, that thing is cherry!
08-22-2011, 10:48 PM
#98
Hahahah, ..thanks! Yeah, like all those.... but INDEED, Spearo's Flatbed is simply BEAUTIFUL! That guy is a FAB MONSTER~! His 81(?) also tan is BEAUTIFUL too!
Thanks again, GI, ..... keep wheeling....(just maybe, I don't know.... keep the mud on the outside? hahaha!)
Thanks again, GI, ..... keep wheeling....(just maybe, I don't know.... keep the mud on the outside? hahaha!)


