85gijunk4x4's 1988 pickup buildup thread (Angus)
 05-30-2011, 04:17 PM
#41
Registered User
Thread Starter
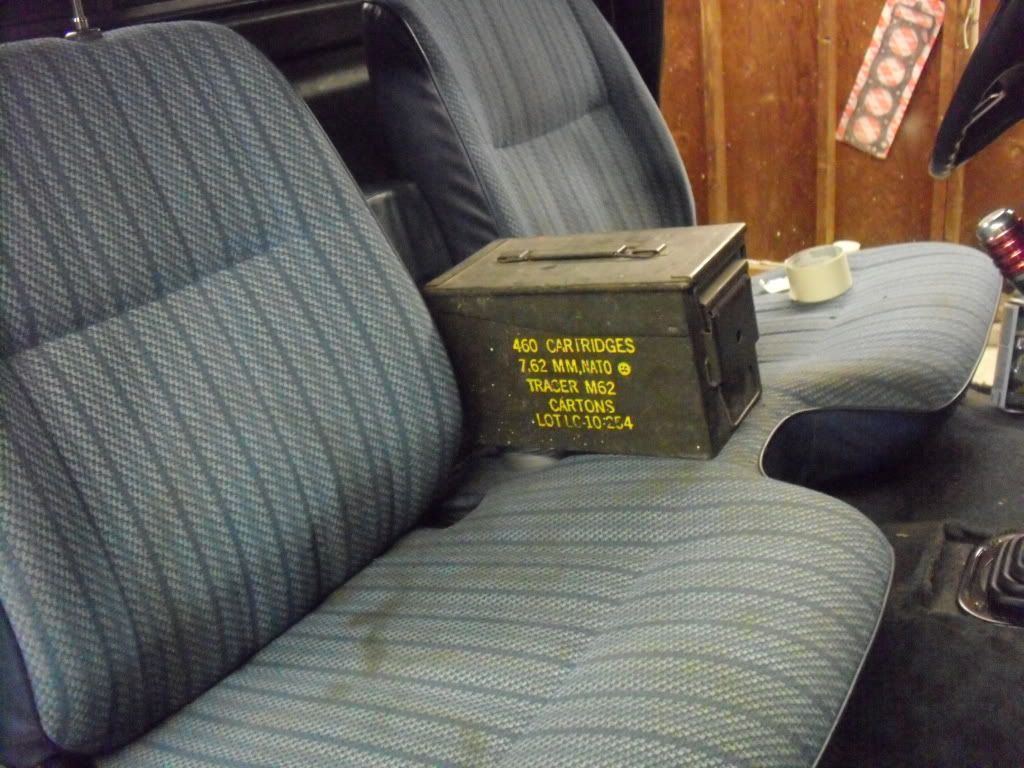
heres my ammo cans and my jerry can holders. i used carraige bolts to mount them. the ammo cans were $10ea. off craigslist and the carraige bolts were free from my buddy who works at the hardware store. The jerry can holders were free, the hardware was $0.75, and the one jerry can was free, the other was $10.00
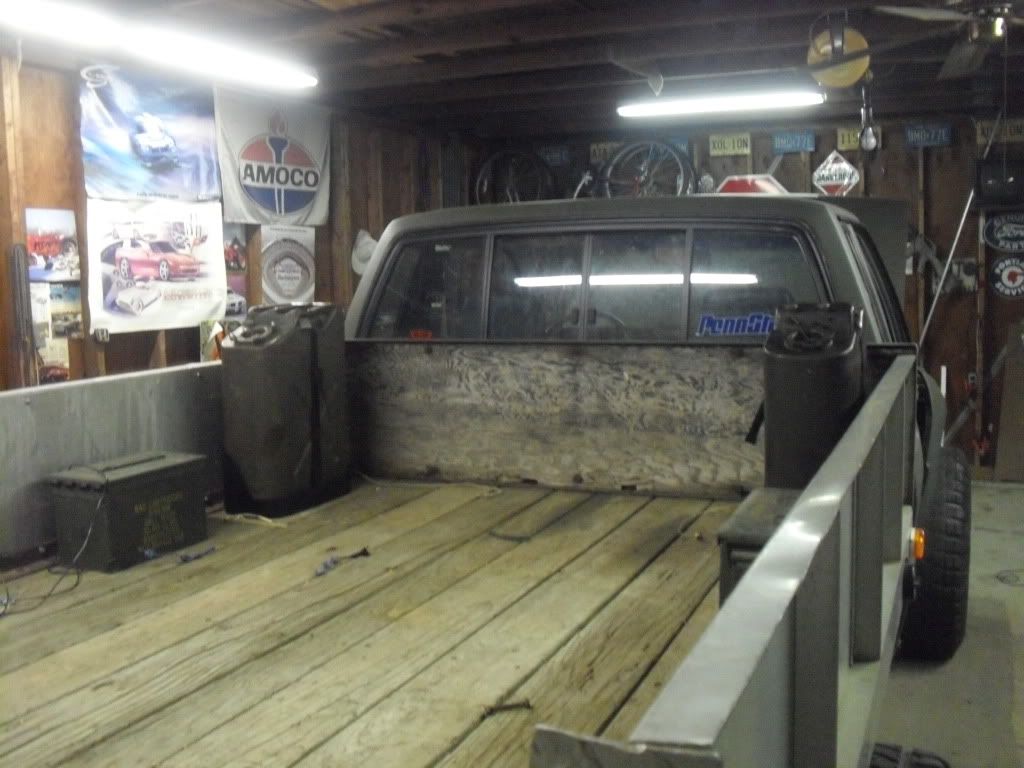
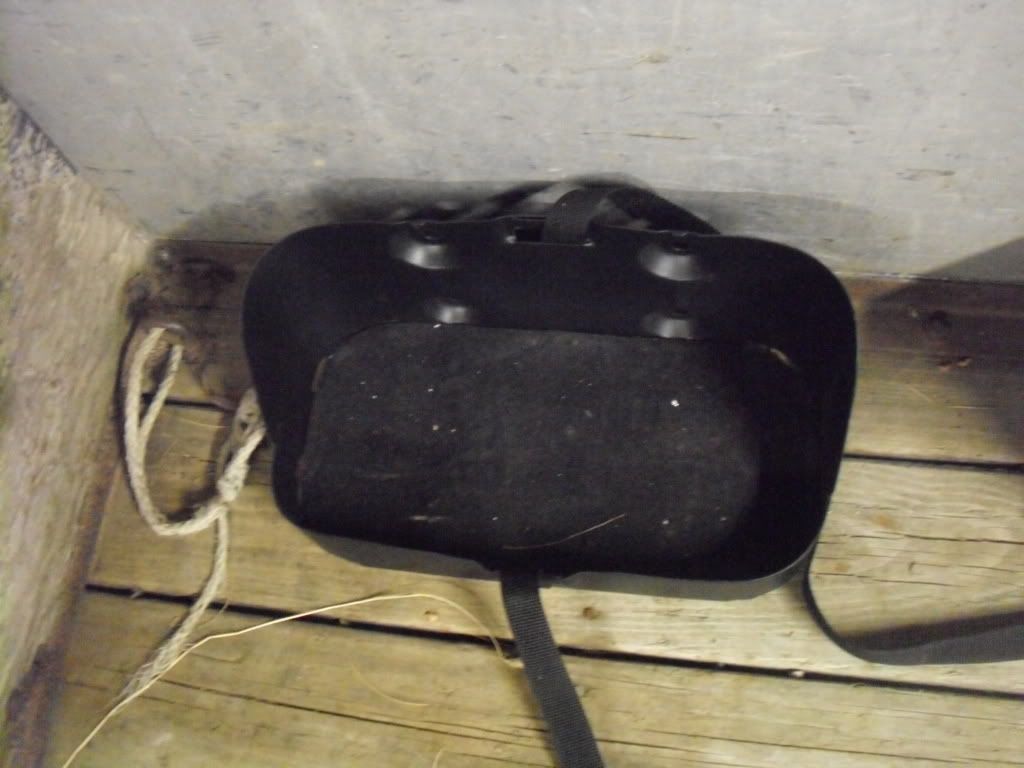
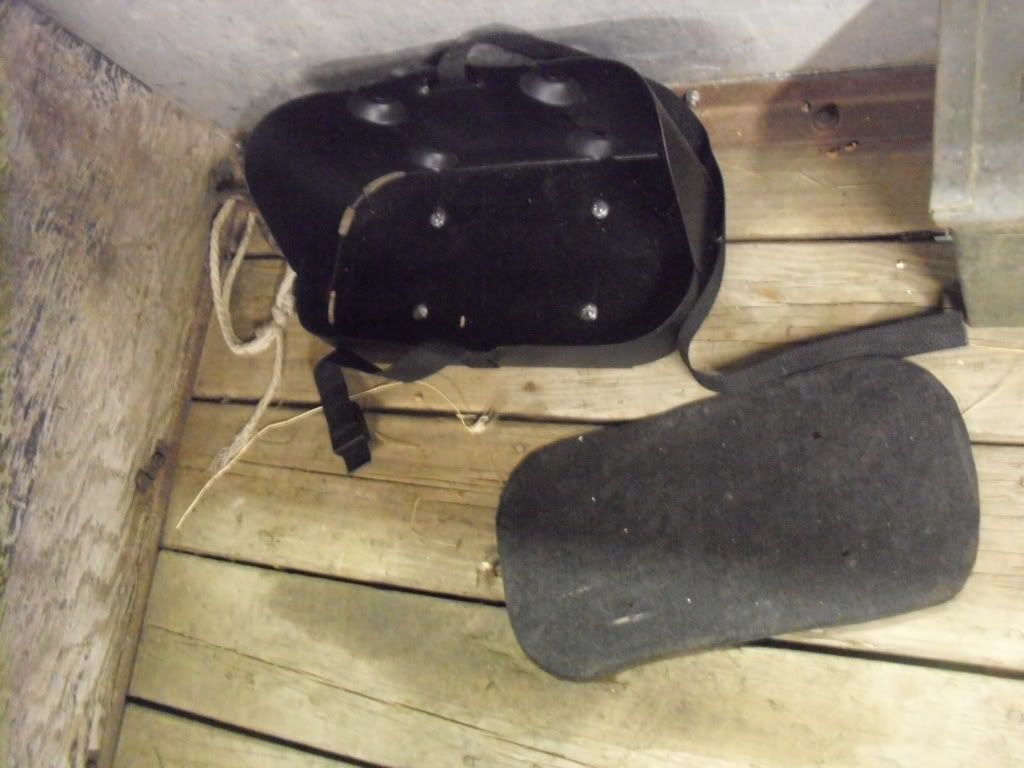
^^^cut out a little pad out of rubber, so the cans werent making metal to metal contact...
^^^cut out a little pad out of rubber, so the cans werent making metal to metal contact...
 05-30-2011, 04:20 PM
#42
Registered User
Thread Starter
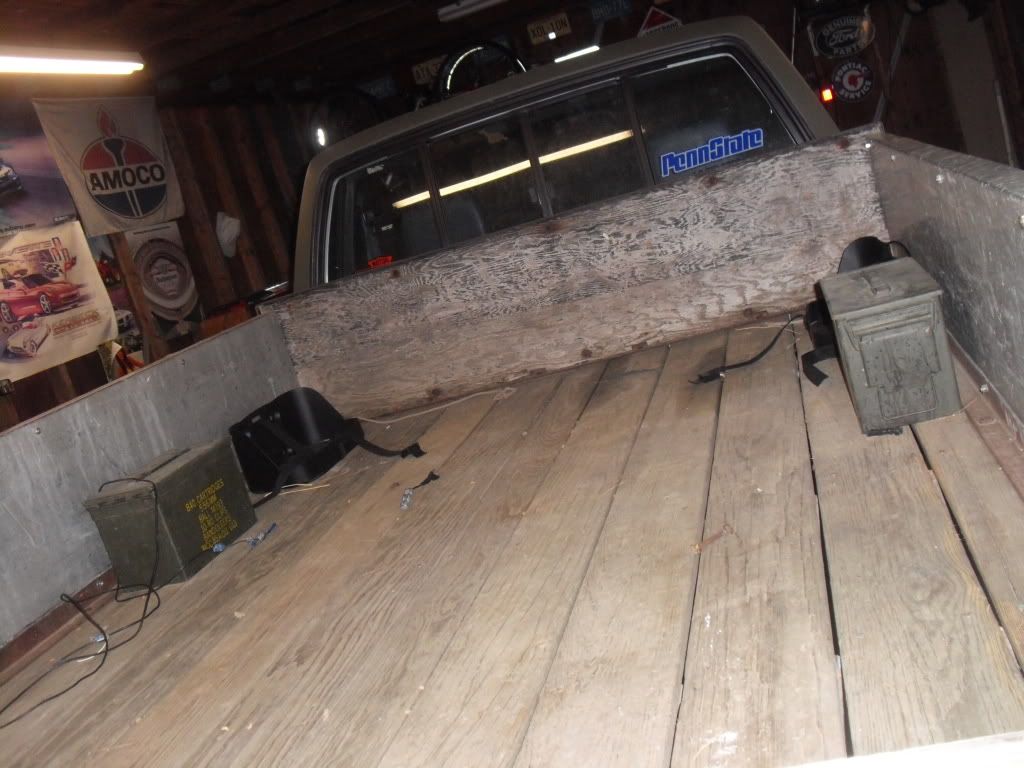
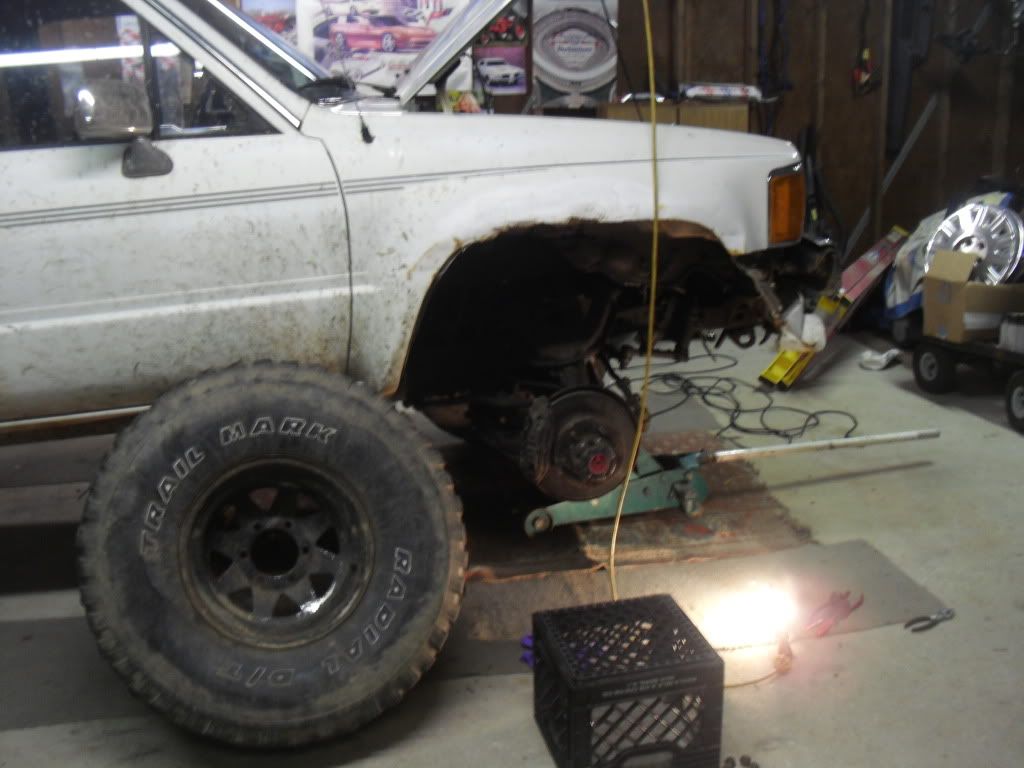
next i got to work on fixing the wiring on the bed. remeber this pic?
heres the after pic.
ran some new wires. check out the ppo's hack job. he had a thick black wire, spliced into a thin black wire, spliced into a thick brown wire.... pshh.
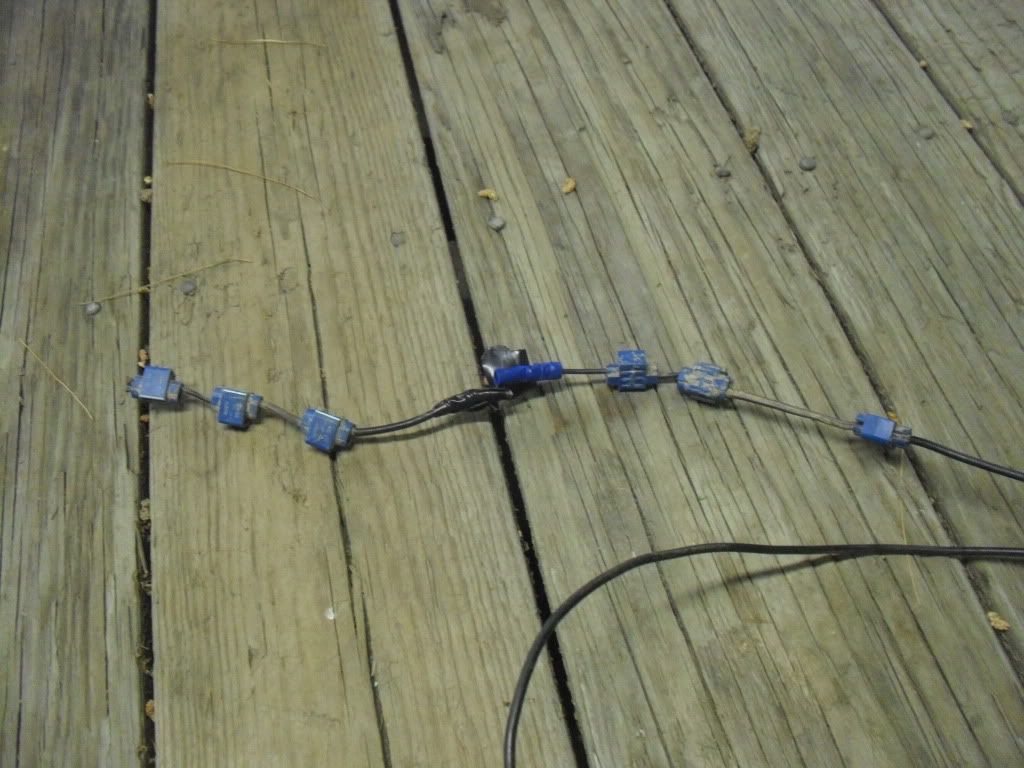
heres the after pic.
ran some new wires. check out the ppo's hack job. he had a thick black wire, spliced into a thin black wire, spliced into a thick brown wire.... pshh.
05-30-2011, 04:22 PM
#43
Registered User
Thread Starter
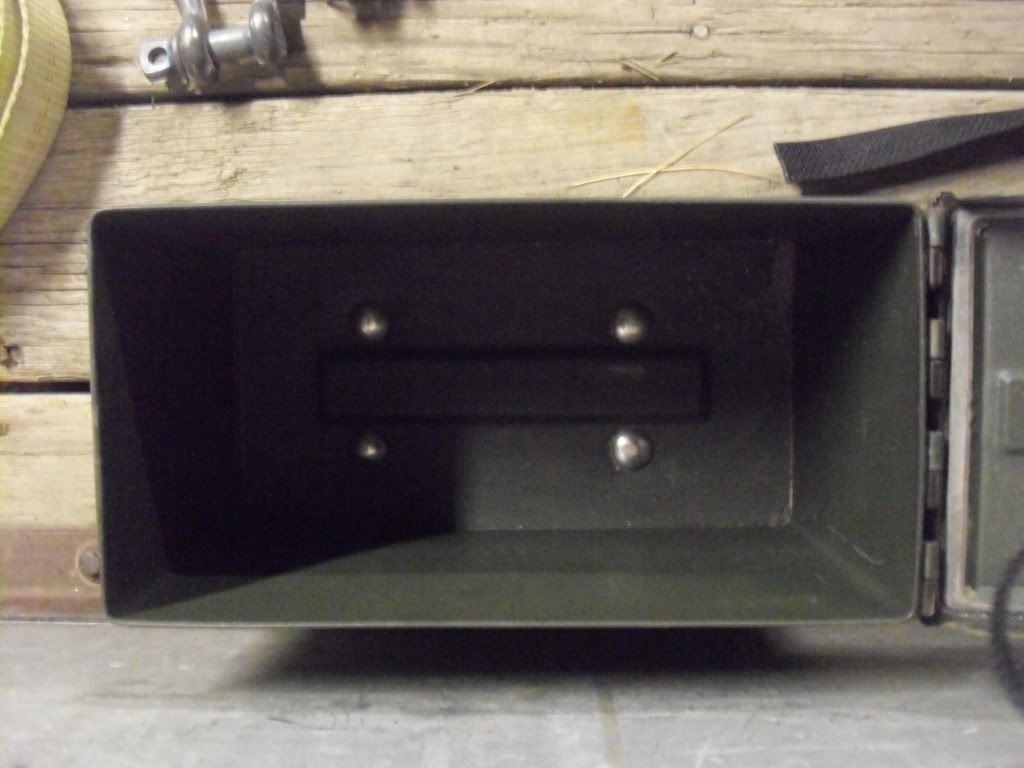
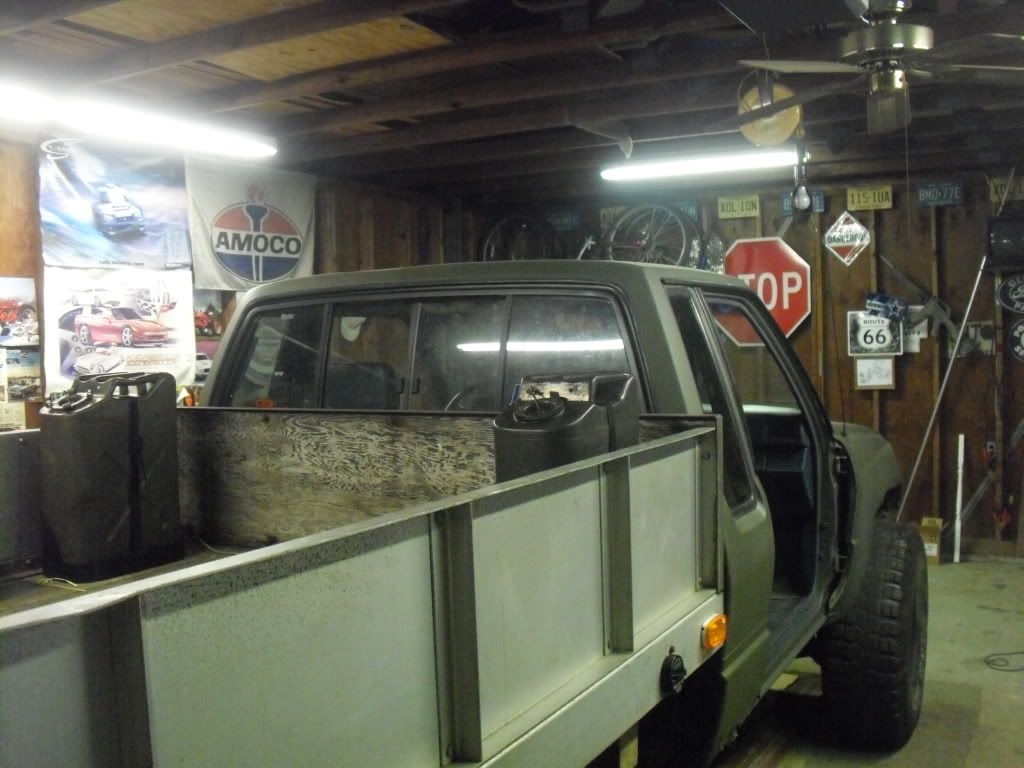
the next projects i want to do is get this ammo can mounted (its kinda just hangin in there for now)
get a set of rock sliders. get a twin stick t-case conversion. fabricate a rear towing/recovery bumper. cut out my bed and mount some fenders and run 37ish's. i'll keep you guys all updated
get a set of rock sliders. get a twin stick t-case conversion. fabricate a rear towing/recovery bumper. cut out my bed and mount some fenders and run 37ish's. i'll keep you guys all updated
05-30-2011, 08:29 PM
#46
Registered User
Thread Starter
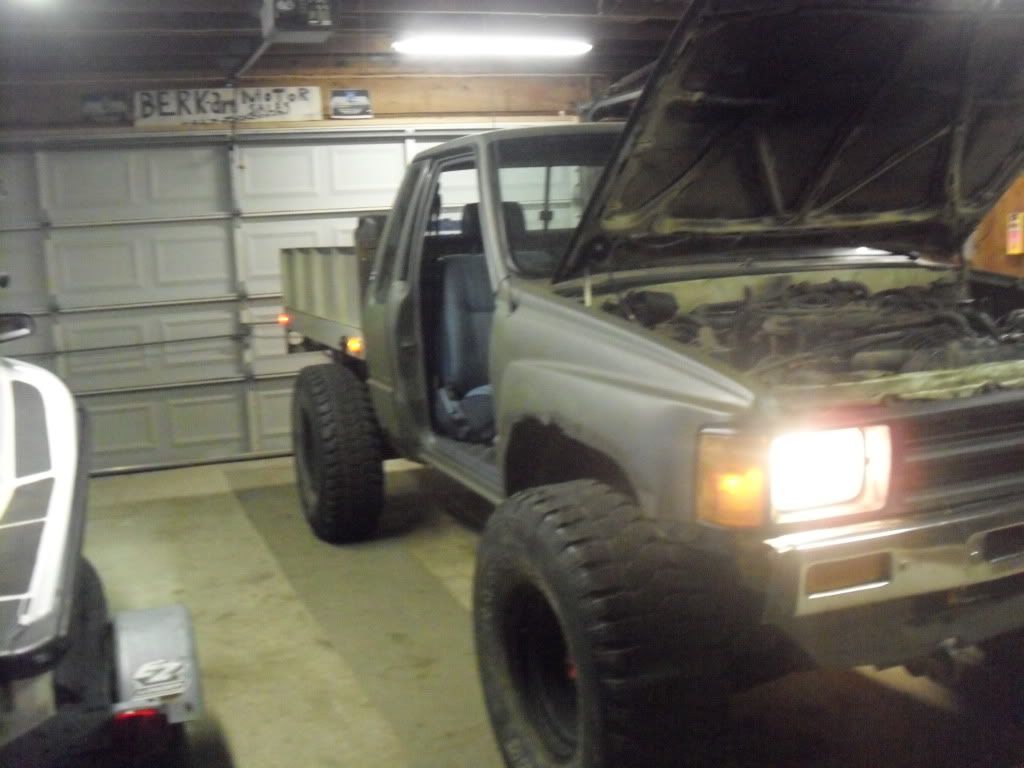
^^hey, thanks chef! i'll get some better pics, these didnt turn out to good, and you gotta see the o.d paint with the doors on, it looks pretty good not to toot my own horn or anything. so i guess your hinting i make a video, right? funny you should mention, ive been wanting to make a wheeling/trail riding/toyota/video/picture compilation video playing to hank jr's "Country state of mind" for awhile so i hope to get something goin soon!
05-30-2011, 08:35 PM
#47
^^hey, thanks chef! i'll get some better pics, these didnt turn out to good, and you gotta see the o.d paint with the doors on, it looks pretty good not to toot my own horn or anything. so i guess your hinting i make a video, right? funny you should mention, ive been wanting to make a wheeling/trail riding/toyota/video/picture compilation video playing to hank jr's "Country state of mind" for awhile so i hope to get something goin soon!
 lol.
06-16-2011, 07:38 PM
lol.
06-16-2011, 07:38 PM
#48
Registered User
Thread Starter
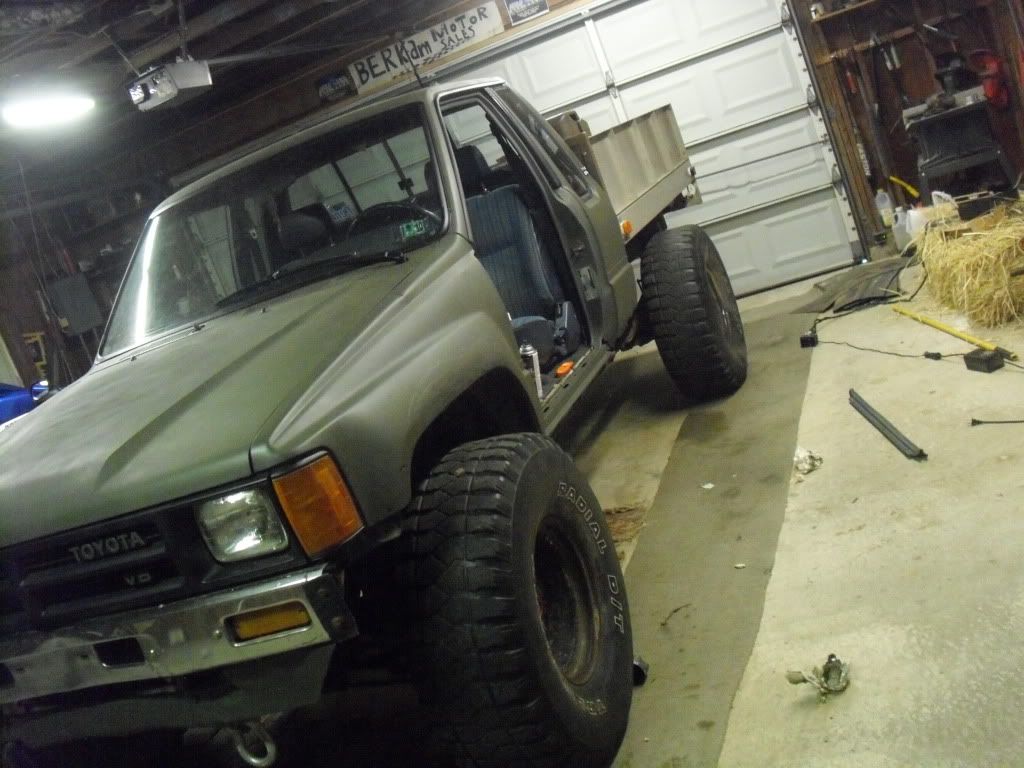
sorry i havnt updated in awhile. cell phone pics is all i have for now, so i'll just post them to keep the oh-so-unbearable-suspense to the minumum (ya right LOL)
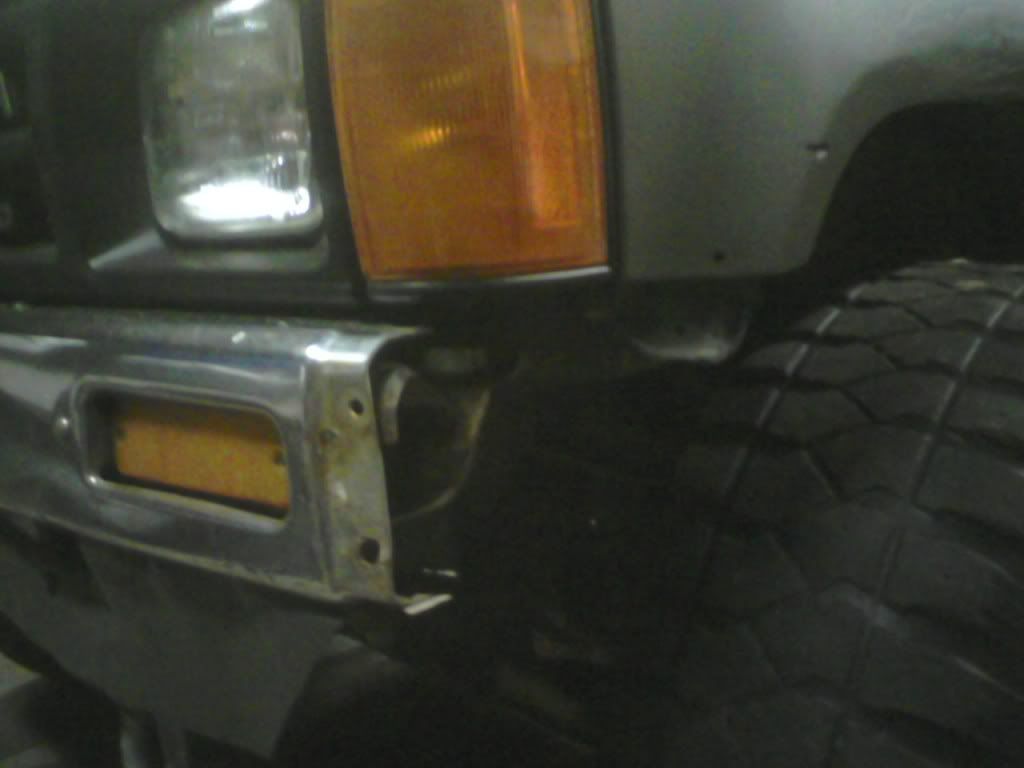
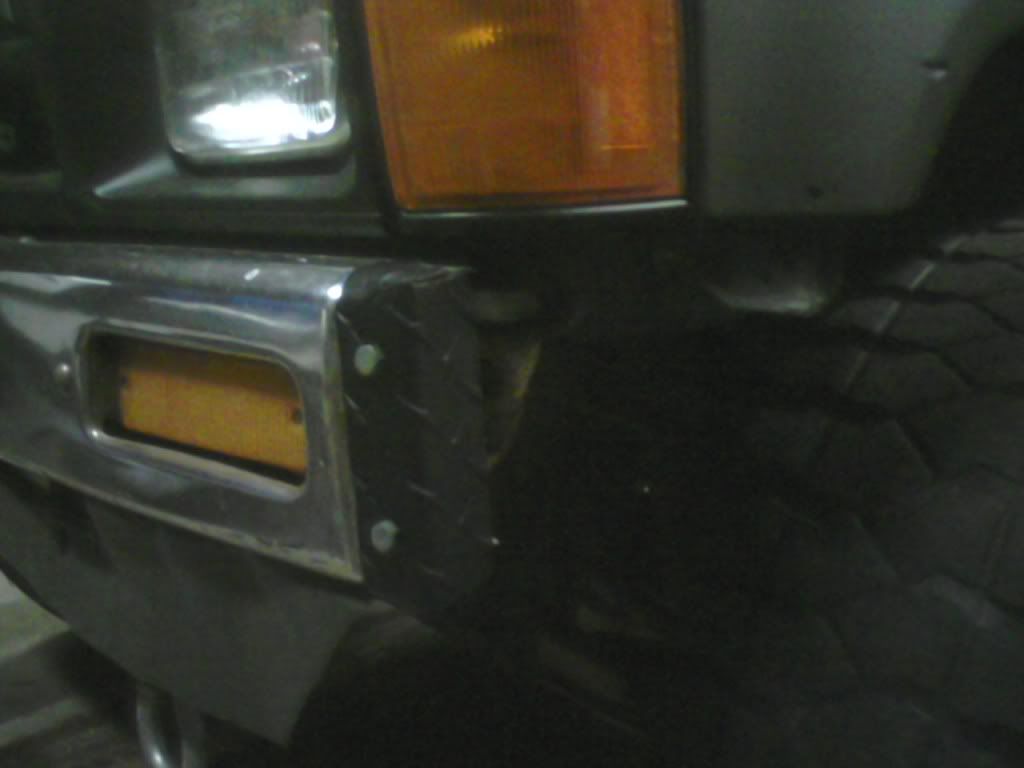
made some "bumper corners" or "caps" out of diomand plate i found on the side of the road. looks better then just having the bumper hangin there.
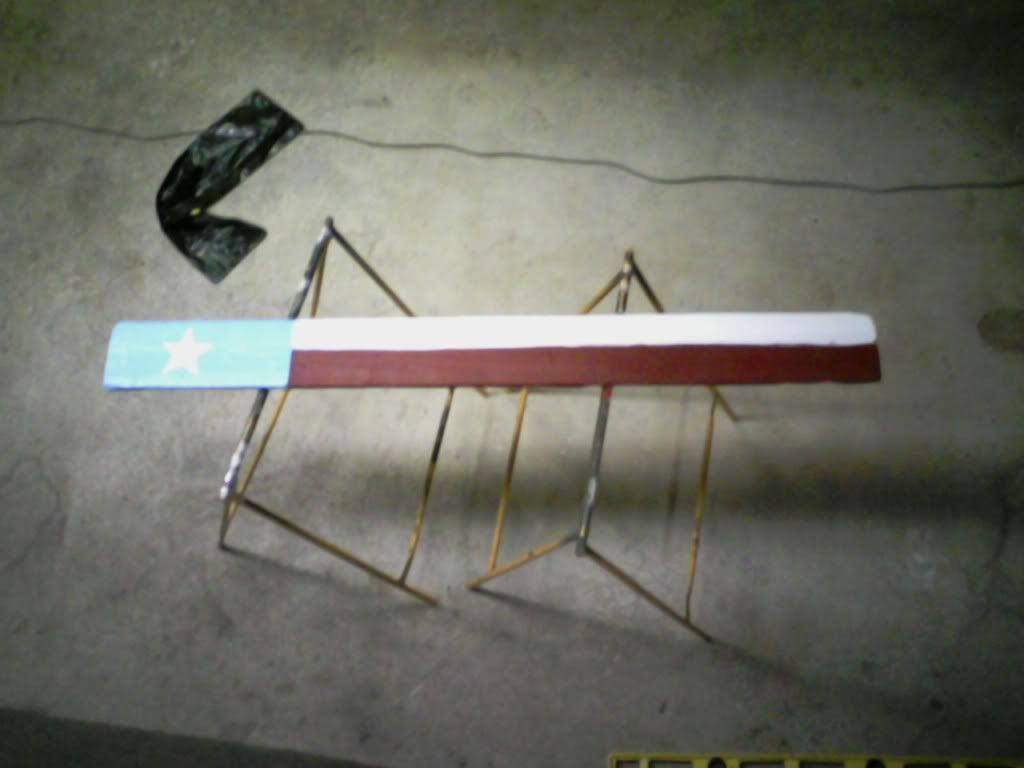
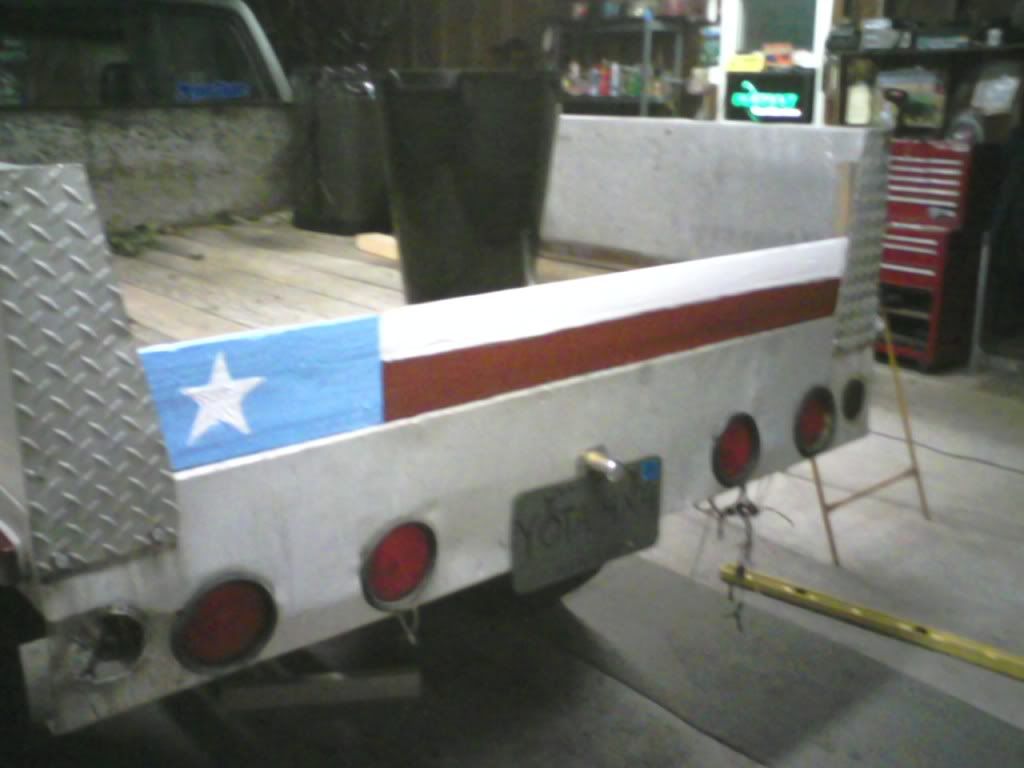
and so far for now, ive painted my tailgate.
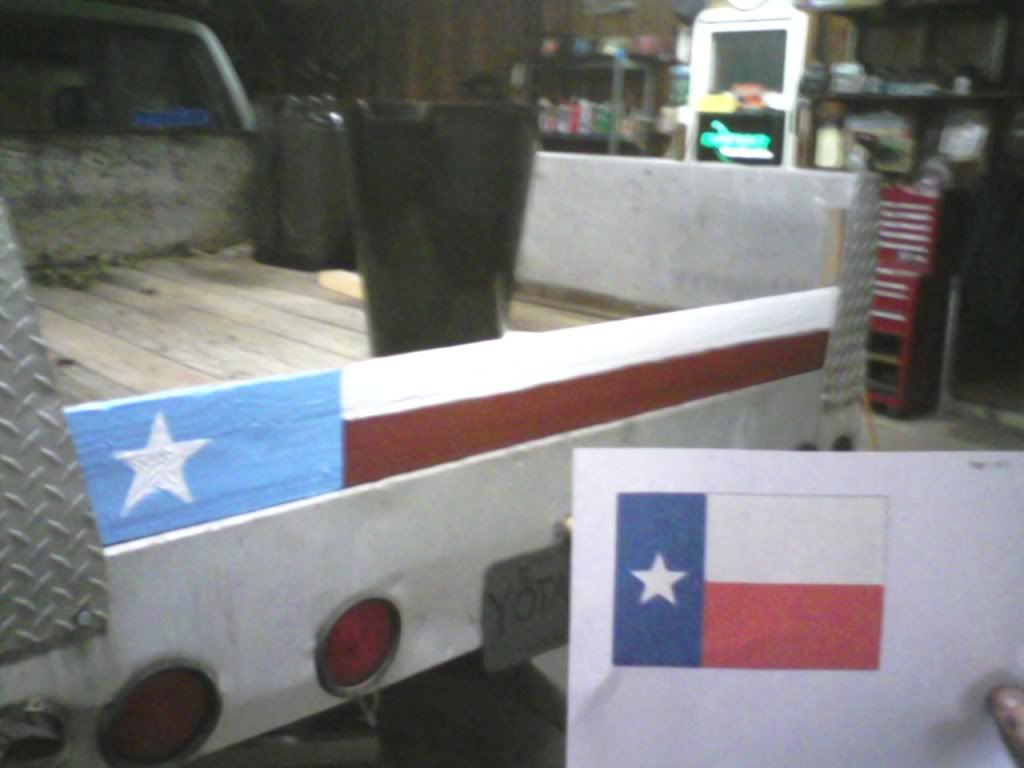
heres some pics of the toyota where it looks best. (wait where is it, oh yeah there it is...jk, that was corny.)
made some "bumper corners" or "caps" out of diomand plate i found on the side of the road. looks better then just having the bumper hangin there.
and so far for now, ive painted my tailgate.
heres some pics of the toyota where it looks best. (wait where is it, oh yeah there it is...jk, that was corny.)
07-11-2011, 06:43 PM
#51
Registered User
Thread Starter
soo. i havnt updated in awhile. here it goes. ive had full detailed pics of my truck (and plenty of them), step by step pics, beginning, middle end pics etc, but they all got deleted.
so i'll just post the pics NOW and explain what i did.
i'll start off in order from then to now.
so i'll just post the pics NOW and explain what i did.
i'll start off in order from then to now.
07-11-2011, 07:04 PM
#52
Registered User
Thread Starter
o.d. green paintjob
i started off my stripping the truck down, off the top of my head i'll list the things i removed.
and then these two were optional
the windsheild lovour is that peive of metal under the wipers, that have "slots" in them.
the reason i chose to remove them and paint them seperate, is because its hard to reach over and paint it decently (even strokes, no runs etc.) since its so big. so what i did was put them on horses, about knee height, so i could reach the whole thing in one shot, without having to run all around the truck to reach everything.
heres a picture of all the paint i used.
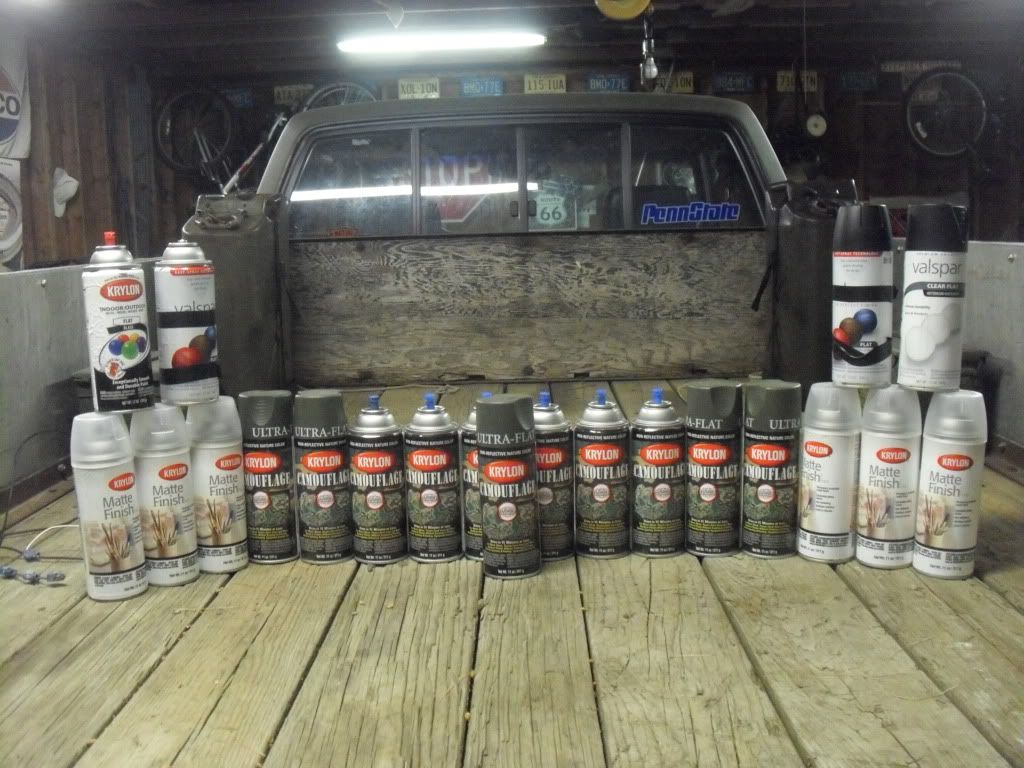
it came out to be only about $50, from walmart. i used the krylong olive drab green, and "matte" clearcoat. they didnt have flat clear when i was there. off the top of my head i cant reme,ber how many cans i used, but once i see the picture i'll remeber.
i started off by striping the above mentioned parts off the truck, sanding the whole entire thing with 220grit sandpaper (and yes i did it by hand ). I made the paint really thin, yet i tried to let the least amount of bare metal showing as possible.
there was some "pinspots" of rust on the doors and some parts of the cab, and i sanded that all the way to bare metal.
after it was all sanded, i washed the truck off with water to get all the dust off (and made the dumb mistake of getting my distributor wet, remeber, no hood LOL) then drove the truck into my garage and got a bunch of rags and wiped the whole entire thing down with after-wash.
i masked off the windows, the door handle and lock holes, and then went to town. i didnt prime the truck because flat paint is bassicly primer.
i did 2 coats on the truck and then wetsanded it. now why might you ask i wet sand while im still in the process of painting? as you apply flat paint, the more coats the rougher it gets. i wanted to do about 5 coats on the truck, wich wouldve been super rough, but 3 coats its just perfect, not too rough, but not to soft. (the softer it is, the more glossy it looks)
so i pretty much ended up with a 5 coat paintjob, that had the roughness of 2 or 3 coats. so anyway, after i wetsanded it, i washed, and after washed it all over again.
then i applied 3 more coats of o.d. (i did the coats pretty much minitues apart, by the time i got done doing the whole truck, i'd grab the next can and start all over)
after i got all the coats done, i waited 30mins and hit it with 2 coats of clear.
a tip i used, wich i know you enviormentalist and health freaks will hate, was painted the truck in a closed garage. i had all the doors and windows shut. now what that does, is keep the over spray contained, as as the air settles, the overspray evenly settles on your rig, making the paint look real even. only downfall to it though (besides MAJOR health risks) is your shop gets coated with a green dust, but i clean the crap out of my shop weekly, so the dust was gone soon enough.
overall i used ex. amount of cans
i did 4 coats on the whole truck, and 5 on the fenders and 6 on the hood. (did more on the front for chip protection)
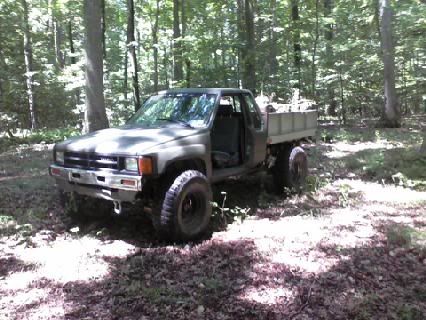
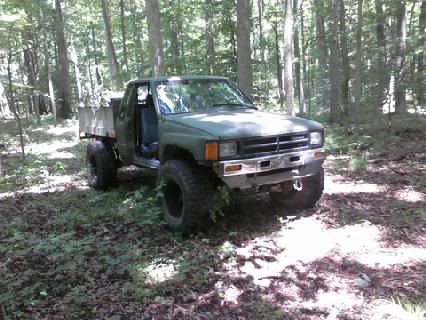
PICS!!!!
AFTER!!!
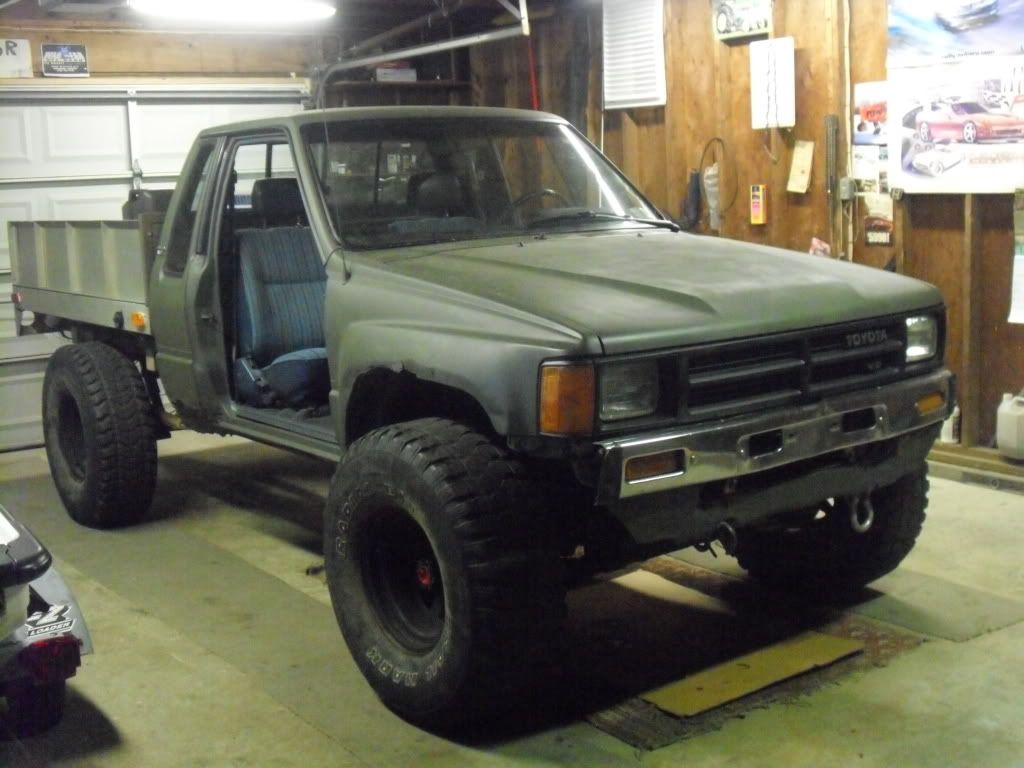
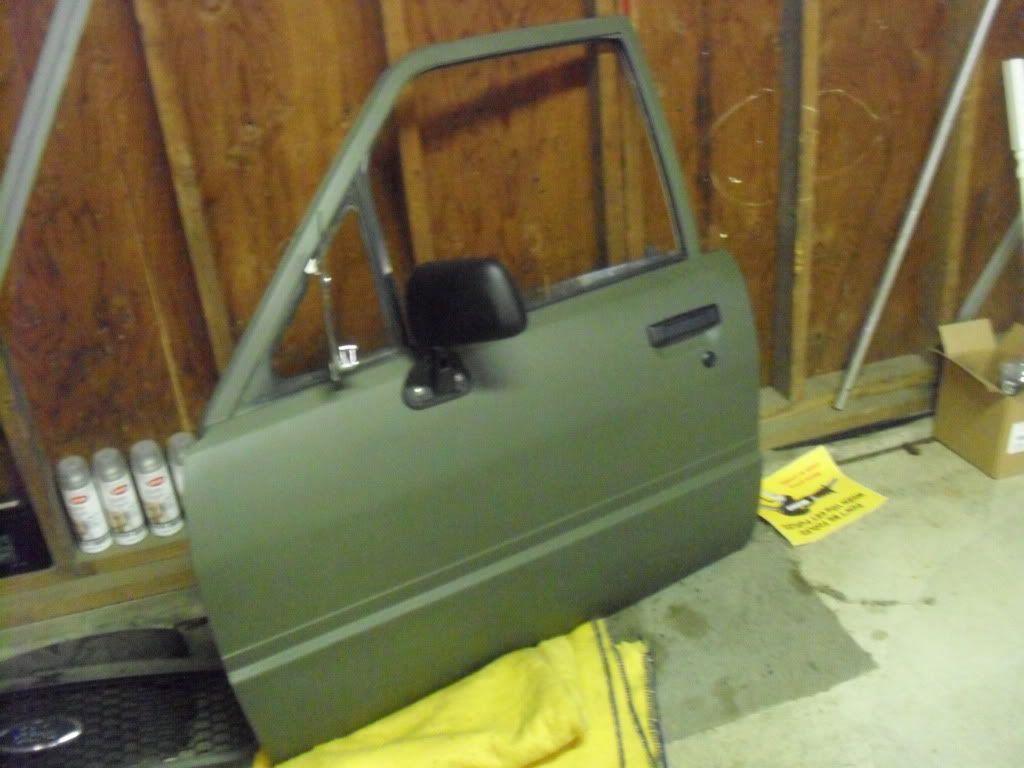
i did have the doors on when i painted it. they just happen to be off for now.
- door handles
- mirrors
- grille and headlight trim
- headlights
- corner lights
- windsheild trim
- stereo antenna
- door locks
- windsheild wipers
- the peice of plastic trim inbetween the door and the extra cab window (the "C pillar" i beleive)
and then these two were optional
- hood
- "windhsheild lovour"
the windsheild lovour is that peive of metal under the wipers, that have "slots" in them.
the reason i chose to remove them and paint them seperate, is because its hard to reach over and paint it decently (even strokes, no runs etc.) since its so big. so what i did was put them on horses, about knee height, so i could reach the whole thing in one shot, without having to run all around the truck to reach everything.
heres a picture of all the paint i used.
it came out to be only about $50, from walmart. i used the krylong olive drab green, and "matte" clearcoat. they didnt have flat clear when i was there. off the top of my head i cant reme,ber how many cans i used, but once i see the picture i'll remeber.
i started off by striping the above mentioned parts off the truck, sanding the whole entire thing with 220grit sandpaper (and yes i did it by hand
). I made the paint really thin, yet i tried to let the least amount of bare metal showing as possible.there was some "pinspots" of rust on the doors and some parts of the cab, and i sanded that all the way to bare metal.
after it was all sanded, i washed the truck off with water to get all the dust off (and made the dumb mistake of getting my distributor wet, remeber, no hood LOL) then drove the truck into my garage and got a bunch of rags and wiped the whole entire thing down with after-wash.
i masked off the windows, the door handle and lock holes, and then went to town. i didnt prime the truck because flat paint is bassicly primer.
i did 2 coats on the truck and then wetsanded it. now why might you ask i wet sand while im still in the process of painting? as you apply flat paint, the more coats the rougher it gets. i wanted to do about 5 coats on the truck, wich wouldve been super rough, but 3 coats its just perfect, not too rough, but not to soft. (the softer it is, the more glossy it looks)
so i pretty much ended up with a 5 coat paintjob, that had the roughness of 2 or 3 coats. so anyway, after i wetsanded it, i washed, and after washed it all over again.
then i applied 3 more coats of o.d. (i did the coats pretty much minitues apart, by the time i got done doing the whole truck, i'd grab the next can and start all over)
after i got all the coats done, i waited 30mins and hit it with 2 coats of clear.
a tip i used, wich i know you enviormentalist and health freaks will hate, was painted the truck in a closed garage. i had all the doors and windows shut. now what that does, is keep the over spray contained, as as the air settles, the overspray evenly settles on your rig, making the paint look real even. only downfall to it though (besides MAJOR health risks) is your shop gets coated with a green dust, but i clean the crap out of my shop weekly, so the dust was gone soon enough.
overall i used ex. amount of cans
i did 4 coats on the whole truck, and 5 on the fenders and 6 on the hood. (did more on the front for chip protection)
PICS!!!!
AFTER!!!
i did have the doors on when i painted it. they just happen to be off for now.
07-11-2011, 07:07 PM
#53
Registered User
Thread Starter
painting the trim peices
pretty much all the trim on this truck was chrome.
i'll make this one short and sweet, since i just raved step by step on how i painted my truck.
removed all the trim.
sanded it down with 220 grit.
rinsed and prewashed it.
applied 3 coats black to every thing, then 2 coats clear
applied 5 coats of black for the grille, and everything upfront, then 4 coats of clear.
re-assambled
07-11-2011, 07:10 PM
#54
Registered User
Thread Starter
painting the door jambs
since i painted everything with my doors on i didnt care about the door jambs, but once i took my doors off it looked like garbage.
i removed the doors, removed the floor trim peices, the rubber strip thing that goes under the a-pillar, all around the door jamb, and hold up part of the headliner (whatever its called, i have no idea)
then masked, sanded, washed, and sprayed. then blended it into my previous paint work
EDIT: here's a long lost picture of me truck WITHOUT the door jambs painted. Note the rims too, i used the leftover black paint on my rims, just to cover them up untill i get a chance to powdercoat them
Last edited by 85gijunk4x4; 07-14-2011 at 06:35 PM.
07-14-2011, 06:44 PM
#56
Registered User
Thread Starter
front range off road twin stick
so heres how i started with the twin stick. Got it from front range's website, for about $200 shipped.
i started off dissasmbly, wich i will list here.
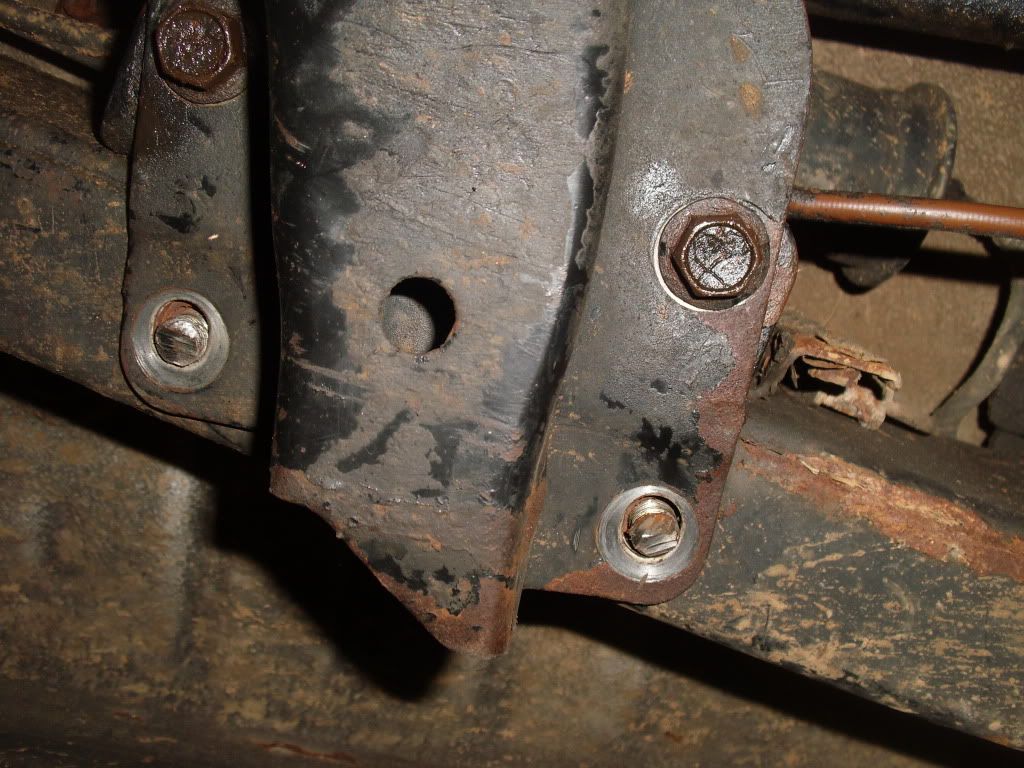
as you can see here, 4 of my crossmeber bolts seized up, and i had to cut them off. A thread on TTORA said its fine to run it with only 4 bolts, as long as every thing is torqued, and re-checked periodicly.
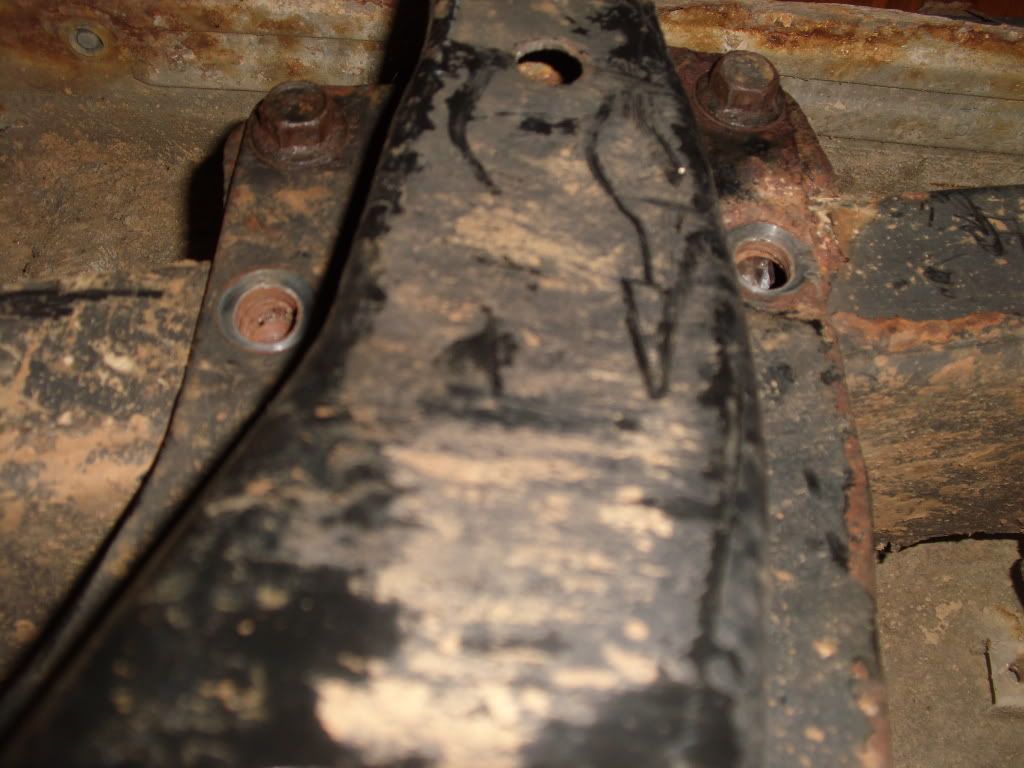
heres a picture of the back of the transfer case, you can see wich bolts i am referring too.
and heres a picture of my front driveshaft.
I took this picture from my smell phone, and sent it to a few lady freinds, telling them its my "Big Shaft"
REMEBER, your driveshafts are balanced, when you remove them, make match marks on the flanges, so you know that when you bolt them back on, they will be in the excact same spot.
i started off dissasmbly, wich i will list here.
- drain fluid from transfer case (didnt drain any from trans)
- remove front and rear driveshafts
- remove the skidplate with 2 bolts, bolted onto the transfer case
- unscrew the 4wd light, and speedo cable and truck them aside (i actually "tucked" my speedo cable aside so good, i couldnt find it)
- remove the shifter trim peices, and the shifter and shift plate (4 bolts)
- put a jack under the TRANSMISSION to support it, so when the crossmember is off, the weight of the transmission isnt just held up by the motor mounts
- break the 8 crossmember bolts loose
- loosen up and remove the (12, i think?) bolts on the rear of the transfer case (and place an oil catch underneath, where the tranny and t-case meet)
- once all 12? bolts are removed, support the crossmember and remove the 8 bolts
as you can see here, 4 of my crossmeber bolts seized up, and i had to cut them off. A thread on TTORA said its fine to run it with only 4 bolts, as long as every thing is torqued, and re-checked periodicly.
heres a picture of the back of the transfer case, you can see wich bolts i am referring too.
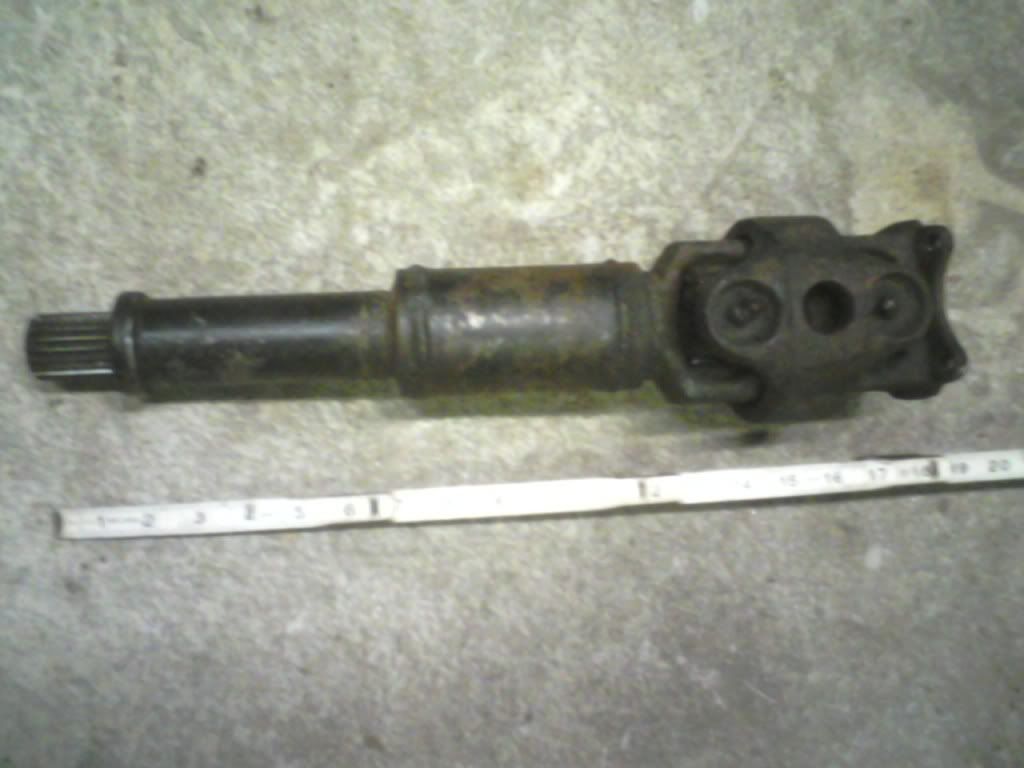
and heres a picture of my front driveshaft.
I took this picture from my smell phone, and sent it to a few lady freinds, telling them its my "Big Shaft"
REMEBER, your driveshafts are balanced, when you remove them, make match marks on the flanges, so you know that when you bolt them back on, they will be in the excact same spot.
Last edited by 85gijunk4x4; 07-16-2011 at 12:42 PM.
07-14-2011, 06:52 PM
#57
Registered User
Thread Starter
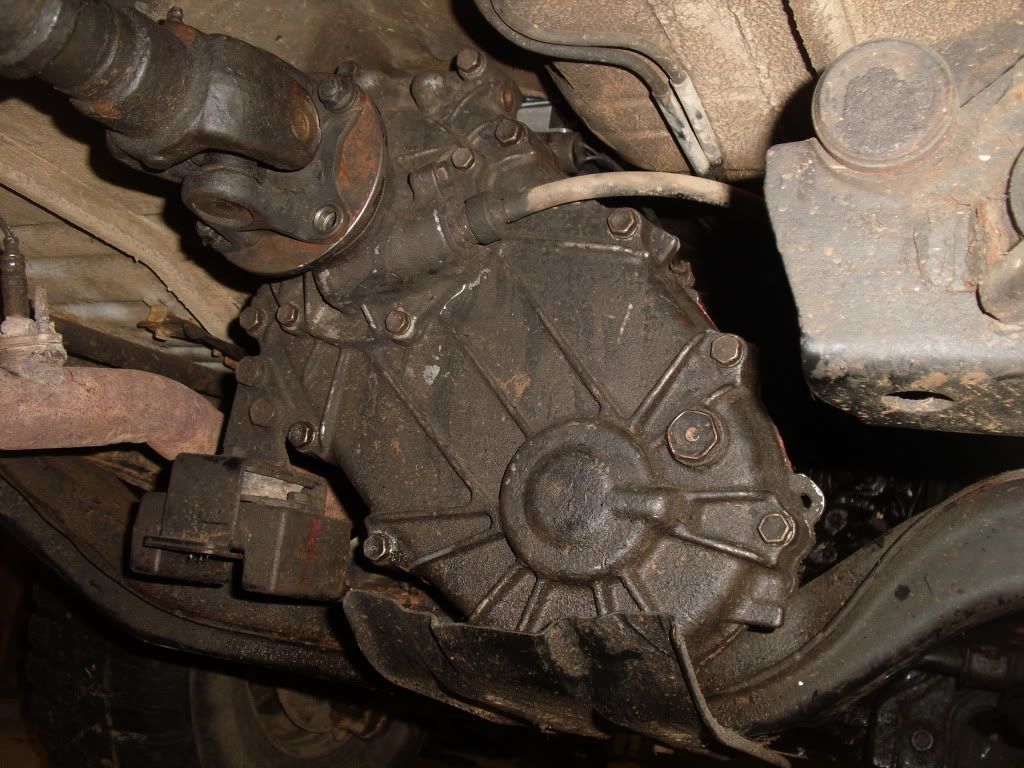
Transfer case removed!!
heres a picture of my transfercase on the ground. i laid under (well not under, but off to the side, in the general area) of the transfercase on the drivers side, while my father did the same on the Passenger's side.
we grabbed the crossmeber right about where the bolt holes are, and i slid the jack supports out from under it, and slid it back. theres a male shaft on the transmission, that goes INTO a female shaft on the transfer case a couple inches, so in order to get it off, you have to slide it back. So with both of us supporting the crossmeber, and the stands out of the way, we slid it back, then shifted one of our hands to the front of the transfer case, to keep it from "faceplanting" , then we slid it back the rest of the way, and let it down easy.
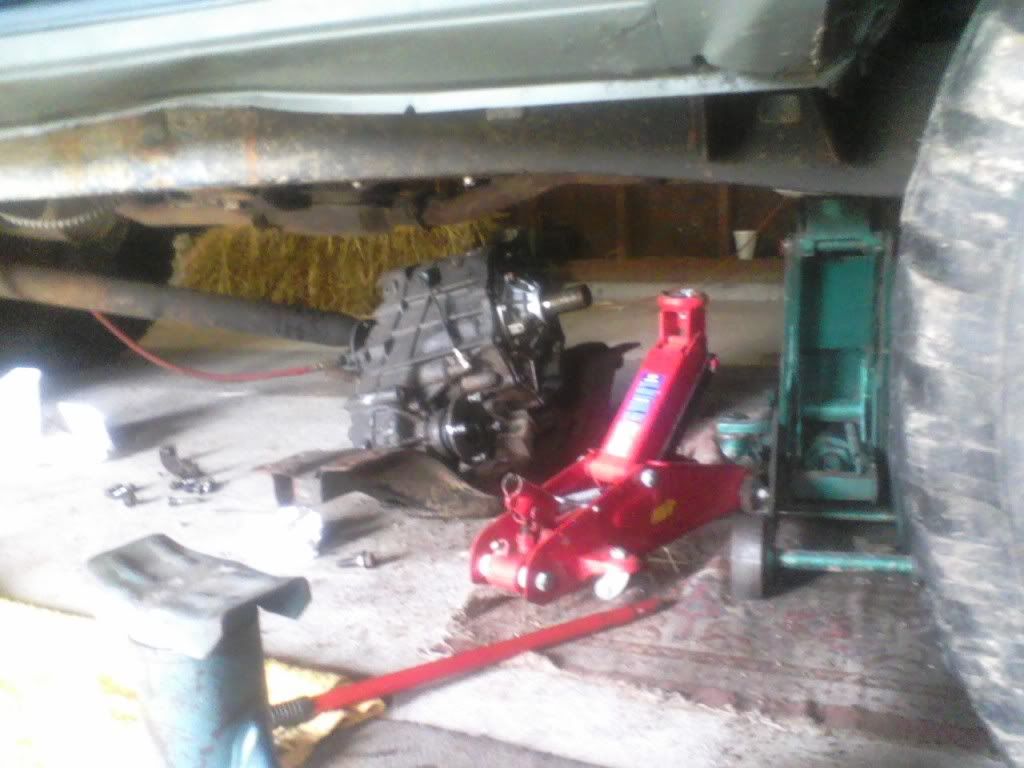
the big green jack was supporting the transmission. and yes, my rear driveshaft was removed, i got lazy and only removed the bolts on the flanges DIRECTLY on the transfer case, and left the driveshaft bolted to the flange on the 3rd member.
TIP!!! dont get lazy, do it the right way, not removing the driveshaft from the 3rd member resulted in me stripping one of the splined bolts that goes on the front of the driveshaft.
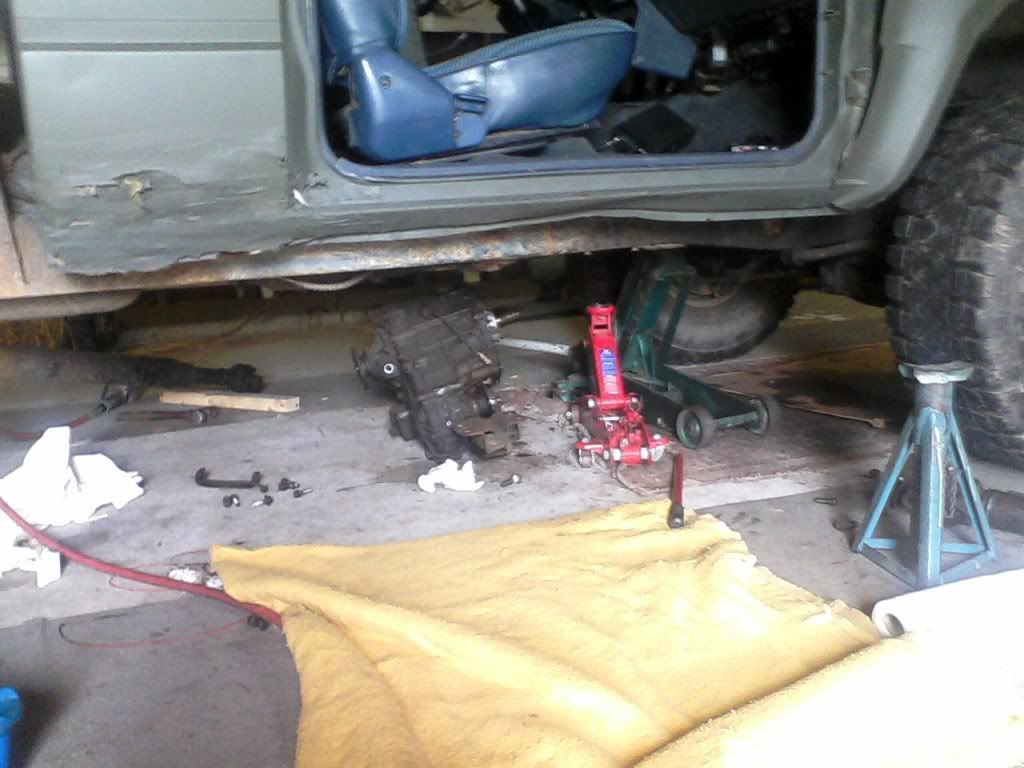
another pic, "for show" of my transfer case removed. at this point, you should find the hex heads on both sides of the transfer case and remove them, then remove them spring and detento balls, be sure not to lose them!!
we grabbed the crossmeber right about where the bolt holes are, and i slid the jack supports out from under it, and slid it back. theres a male shaft on the transmission, that goes INTO a female shaft on the transfer case a couple inches, so in order to get it off, you have to slide it back. So with both of us supporting the crossmeber, and the stands out of the way, we slid it back, then shifted one of our hands to the front of the transfer case, to keep it from "faceplanting" , then we slid it back the rest of the way, and let it down easy.
the big green jack was supporting the transmission. and yes, my rear driveshaft was removed, i got lazy and only removed the bolts on the flanges DIRECTLY on the transfer case, and left the driveshaft bolted to the flange on the 3rd member.
TIP!!! dont get lazy, do it the right way, not removing the driveshaft from the 3rd member resulted in me stripping one of the splined bolts that goes on the front of the driveshaft.
another pic, "for show" of my transfer case removed. at this point, you should find the hex heads on both sides of the transfer case and remove them, then remove them spring and detento balls, be sure not to lose them!!
Last edited by 85gijunk4x4; 07-16-2011 at 12:43 PM.
07-14-2011, 07:00 PM
#58
Registered User
Thread Starter
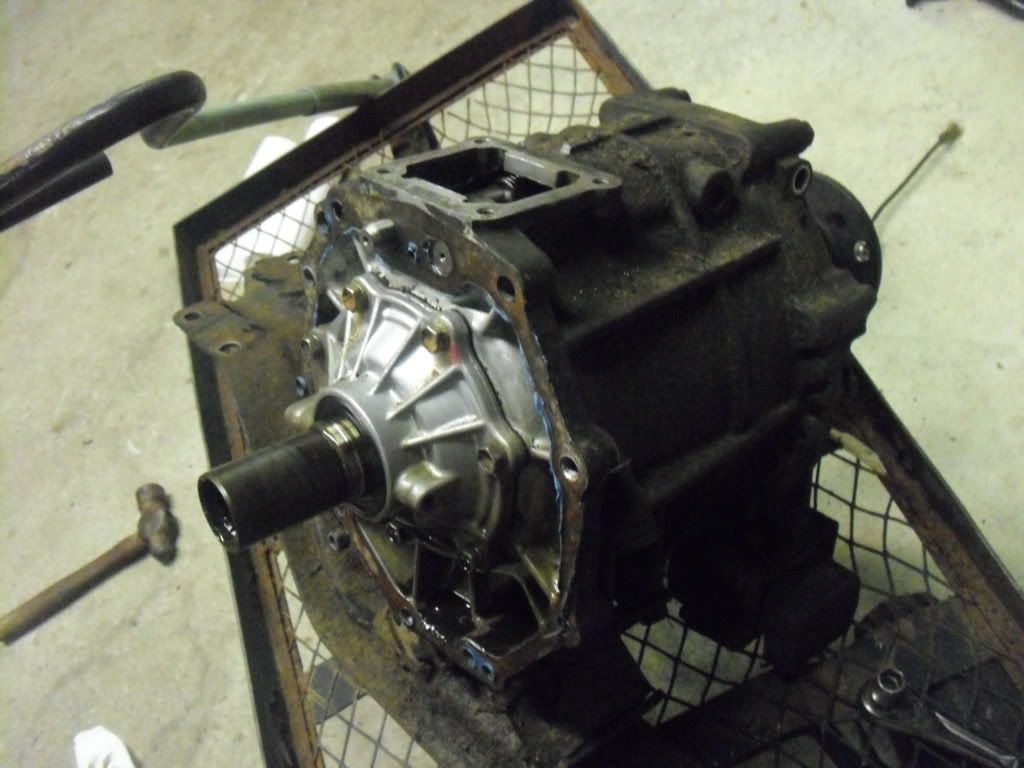
Generally, after you remove the transfer case, the goal is to remove the interlock pin, loacated in a very hard-to-acess area deep in the transfer case. it had a very hard time finding it thanks to F.R.O.R, who sent me the WRONG instuctions, insisted i was wrong, and then claimed insctructions for the r151 transmission were non-existent
if you want to find out how to remove the interlock pin, send me a p.m, I'll be glad to help
after the interlock pin is removed, you have to shave this overlapping peice off of the shift rail, or the shifters will "bind up" when you try to shift.
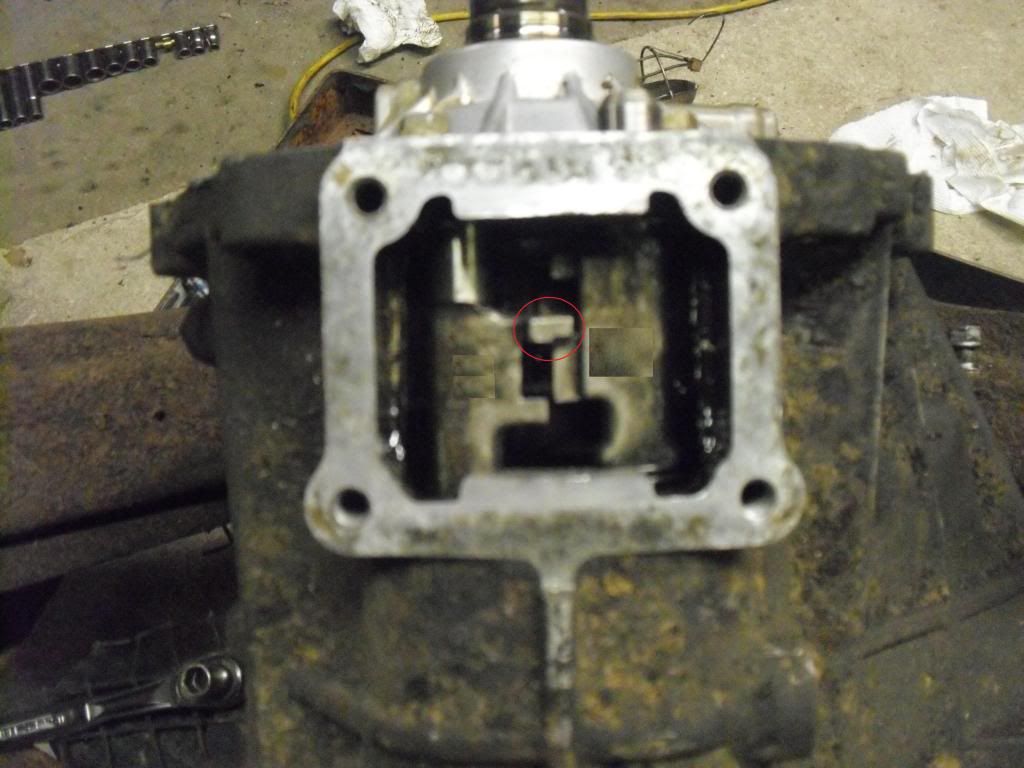
front range also failed to tell me that, so i had to figure it out myself.
Assymbley is the same as dissasymbly, MAKE SURE YOU TORQUE ALL YOUR CROSSMEMBER BOLTS, DRIVE FLANGES AND TRANSFER CASE BOLTS ACCORDINGLY.
to get the transfercase back up, i pretty much sat under the truck, lifted the whole thing ontop of me, "bench pressed" it up, and slid the transfer case shaft into the rear output shaft, then grabbed a jack that was close by to support it.
i had the transfer case in gear, so all it took to line the shaft splines back up, was apply forward pressure and give the drive flange as spin.
Make sure you put your detento ball and spring, back on the transfer case as soon as its all back together, once you have removed the interlock pin
It can be put back on at anytime, but you might as well do it now, whiule the transfer case is out, and you have plenty of room
TIP!! once your transfercase is in, and mostly re-assambled, instead of filing the fluid up from underneath, just put it in a cup, and bring it in the cab, and dump it down the hole pictured above, one cup at a time, CAREFULL not to spill any!!
saved me TONS of time and aggravation doing it that way!
if you want to find out how to remove the interlock pin, send me a p.m, I'll be glad to help
after the interlock pin is removed, you have to shave this overlapping peice off of the shift rail, or the shifters will "bind up" when you try to shift.
front range also failed to tell me that, so i had to figure it out myself.
Assymbley is the same as dissasymbly, MAKE SURE YOU TORQUE ALL YOUR CROSSMEMBER BOLTS, DRIVE FLANGES AND TRANSFER CASE BOLTS ACCORDINGLY.
to get the transfercase back up, i pretty much sat under the truck, lifted the whole thing ontop of me, "bench pressed" it up, and slid the transfer case shaft into the rear output shaft, then grabbed a jack that was close by to support it.
i had the transfer case in gear, so all it took to line the shaft splines back up, was apply forward pressure and give the drive flange as spin.
Make sure you put your detento ball and spring, back on the transfer case as soon as its all back together, once you have removed the interlock pin
It can be put back on at anytime, but you might as well do it now, whiule the transfer case is out, and you have plenty of room
TIP!! once your transfercase is in, and mostly re-assambled, instead of filing the fluid up from underneath, just put it in a cup, and bring it in the cab, and dump it down the hole pictured above, one cup at a time, CAREFULL not to spill any!!
saved me TONS of time and aggravation doing it that way!
Last edited by 85gijunk4x4; 07-16-2011 at 01:16 PM.
07-14-2011, 07:06 PM
#59
Registered User
Thread Starter
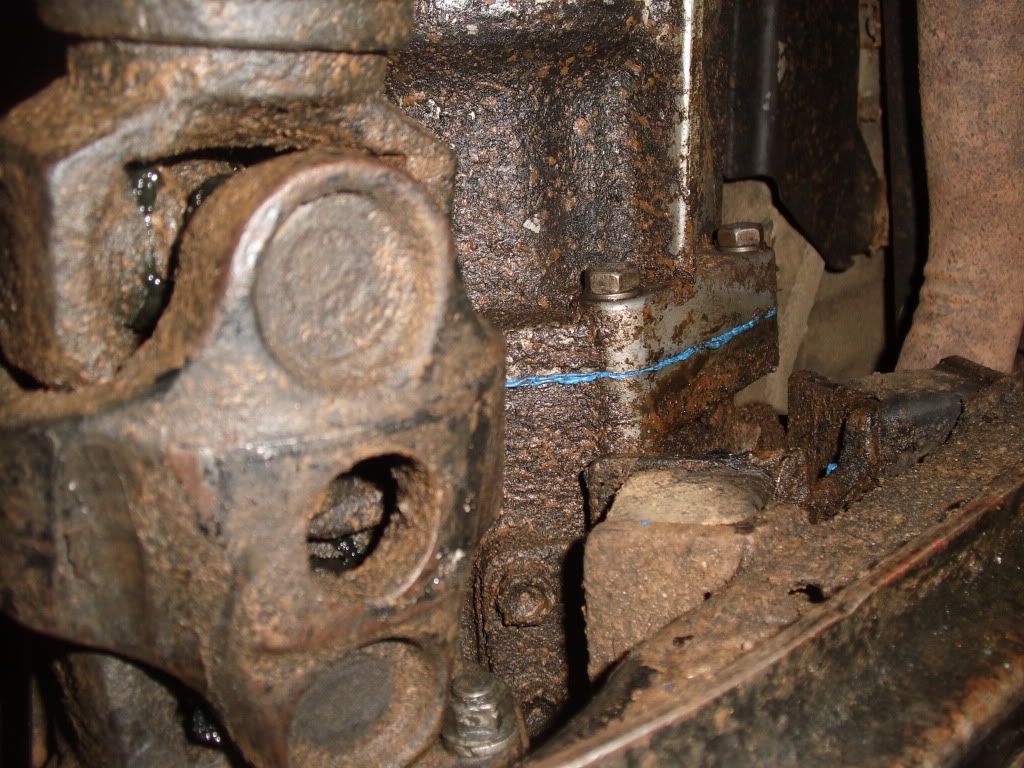
heres a picture to make you guys feel better, i put that stupid "blue RTV" gasket maker, between the mating surfaces of the transmission and transfer case. its not pretty, but it doesnt leak, so anybody who's nervous about it, mine turned out fine, so im sure yours will to.
that "cavity" between the transfer case and transmission, doesnt neccasarily hold transmission/transfer fluid, but if it happens to "slosh around" and find its way through the transmission rear mainseal, it will be held in that cavity.
i shall continue tomorrow....
EDIT: while i had all my driveshatfs off, i took advantage of that, and greased all my u-joints while they were sitting on the floor in my shop, that way, they'll be good to go for another few thousand, and i didnt have to climb under the truck to do it
Last edited by 85gijunk4x4; 07-16-2011 at 12:50 PM.


