
SCYOTA's 1985 Pickup Build-Up Thread
 Nov 19, 2007 | 09:18 PM
#1
Thread Starter
Registered User
Joined: Oct 2007
Posts: 150
Likes: 0
From: Santa Cruz
SCYOTA's 1985 Pickup Build-Up Thread
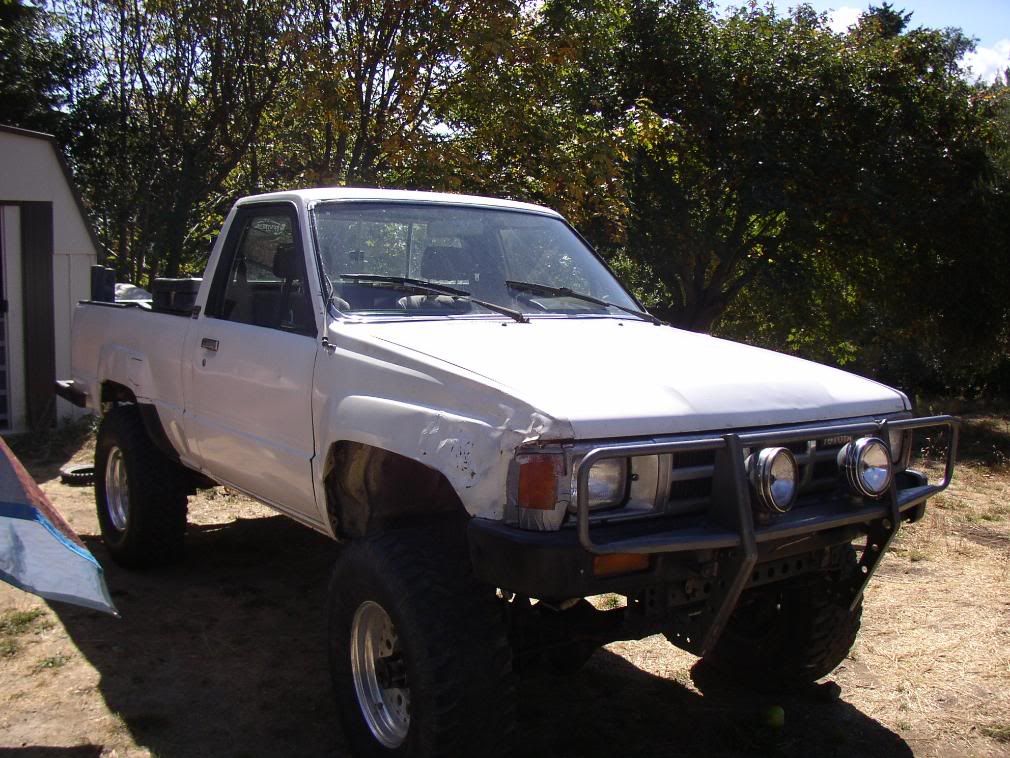
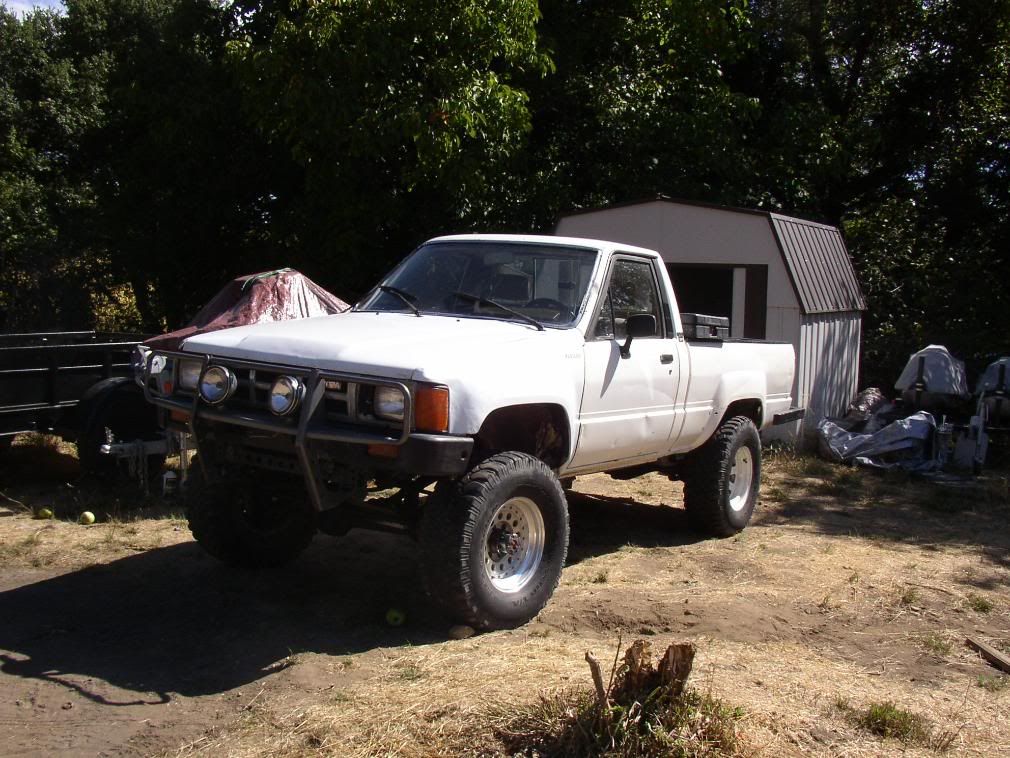
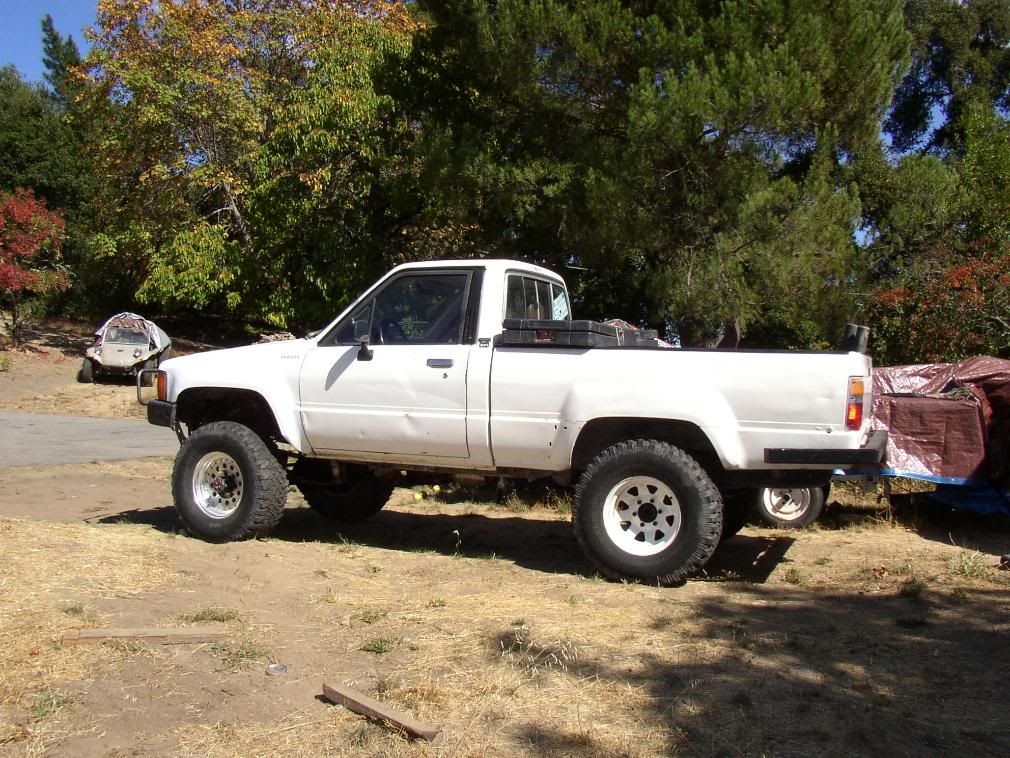
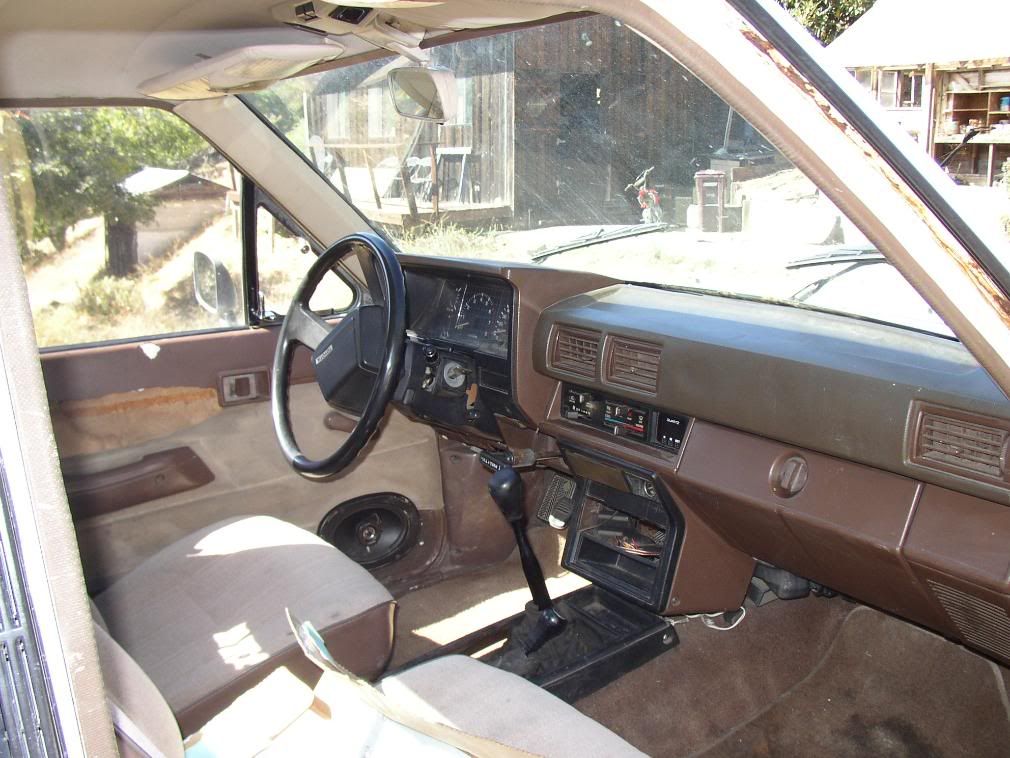
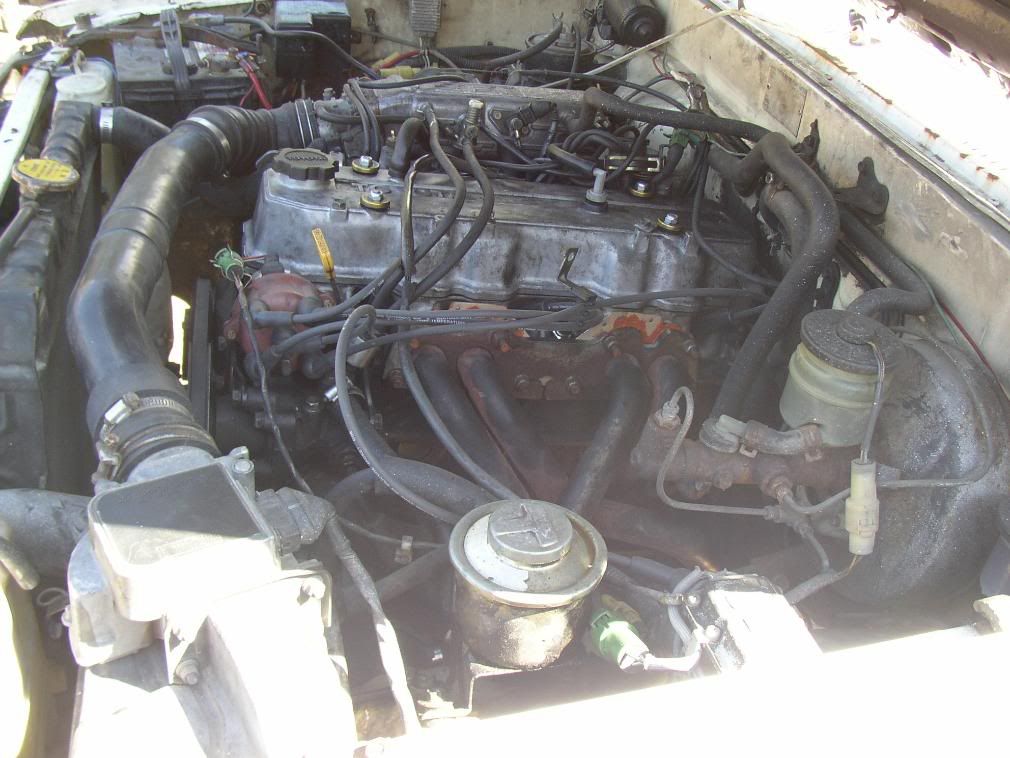
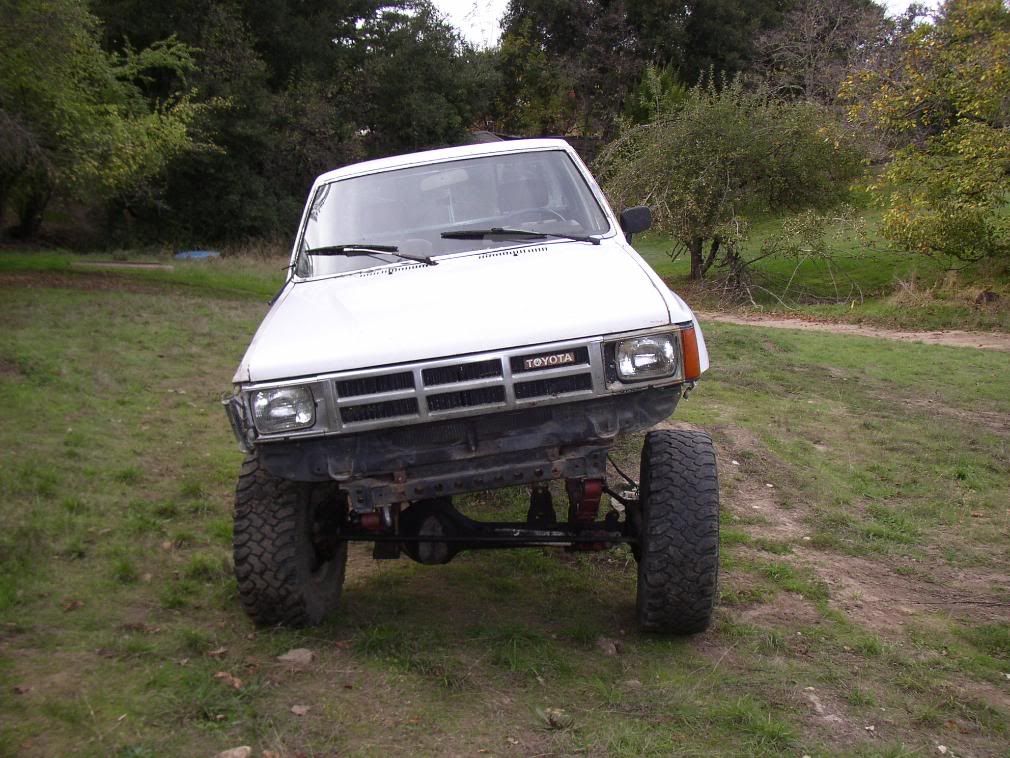
I decided it was time for me to share my buildup with everyone on YT. The truck is an 85 short bed with EFI. My plans are to make this truck a viable wheeler while still keeping road worthy. Here is a list of mods I am going to do: crossover steering, Chevy spring swap, gears, lockers, 4.7 gearing in t-case, custom bed, bumpers and of course some meaty tires. Here are some pics of my truck when I got it. I'll post up some pic's of my progress tomorrow.
Last edited by SCYOTA; Mar 29, 2008 at 01:46 PM.
Nov 21, 2007 | 12:27 PM
#3
Thread Starter
Registered User
Joined: Oct 2007
Posts: 150
Likes: 0
From: Santa Cruz
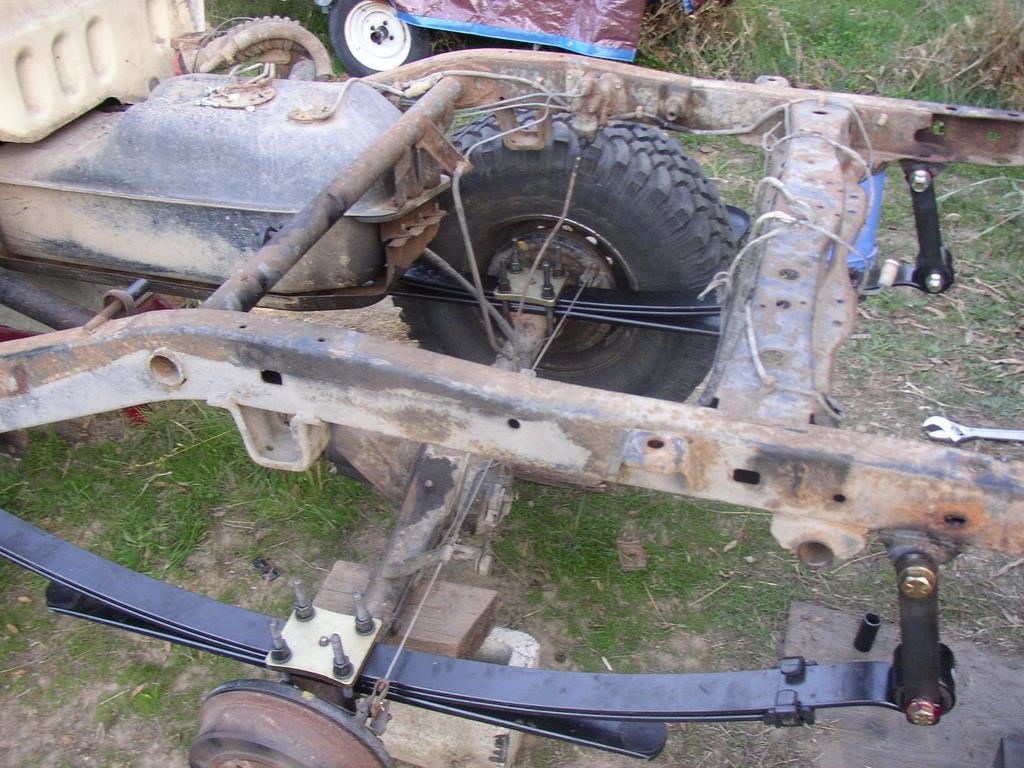
I got some Chevy springs and a pair of front lift springs. Don't have a pic of the Chevy's but here is a pic of the fronts. They are just primered for right now.
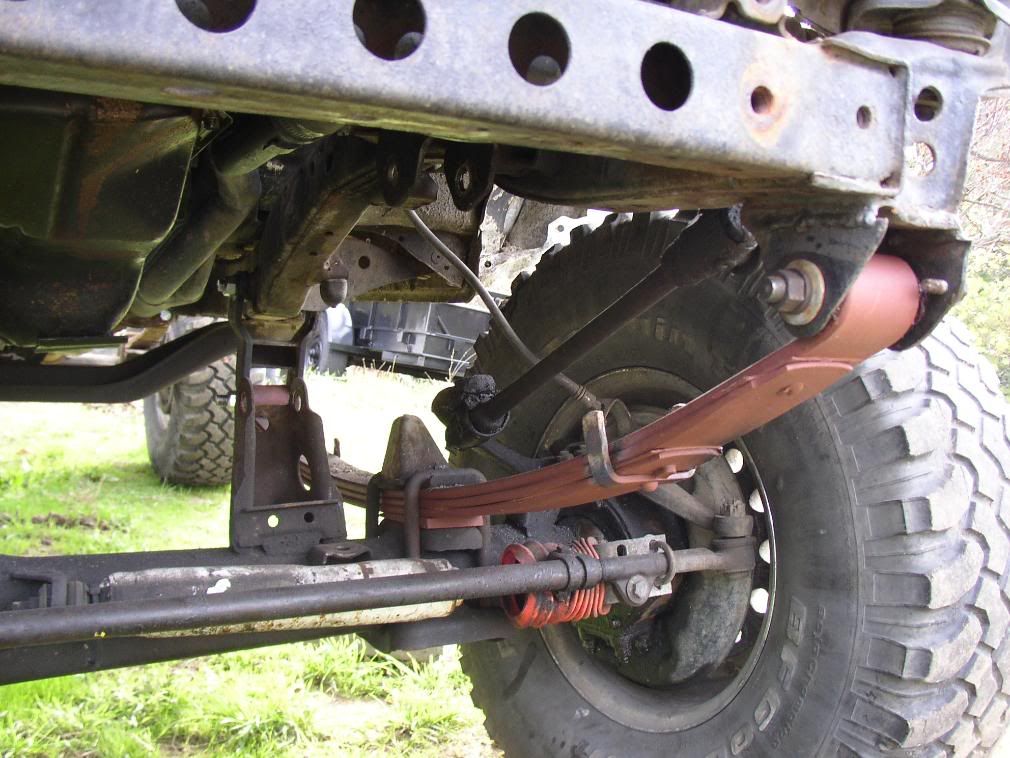
Here is a flex pic of them. They are not all the way flexed out but it's all I've got.
I got a set of new Ford shock mounts for $8 a piece. They would not fit inside my wheel wells so I decided to cut about 2" out of them and weld them back up.

I should have a bunch of parts that I ordered later on today. I'll post up some pics when I get them.
Here is a flex pic of them. They are not all the way flexed out but it's all I've got.
I got a set of new Ford shock mounts for $8 a piece. They would not fit inside my wheel wells so I decided to cut about 2" out of them and weld them back up.
I should have a bunch of parts that I ordered later on today. I'll post up some pics when I get them.
Last edited by SCYOTA; Mar 29, 2008 at 01:48 PM.
Nov 21, 2007 | 05:07 PM
#4
Thread Starter
Registered User
Joined: Oct 2007
Posts: 150
Likes: 0
From: Santa Cruz
New Parts!!
Well my parts came today and I can't wait to install them. I ordered these parts off of www.datinfab.com. He makes some of the parts that other companies sell so it is cheaper to go through him. Ed is a great guy and was more than happy to make up some custom stuff for me. Here's the pics of what UPS brought me.

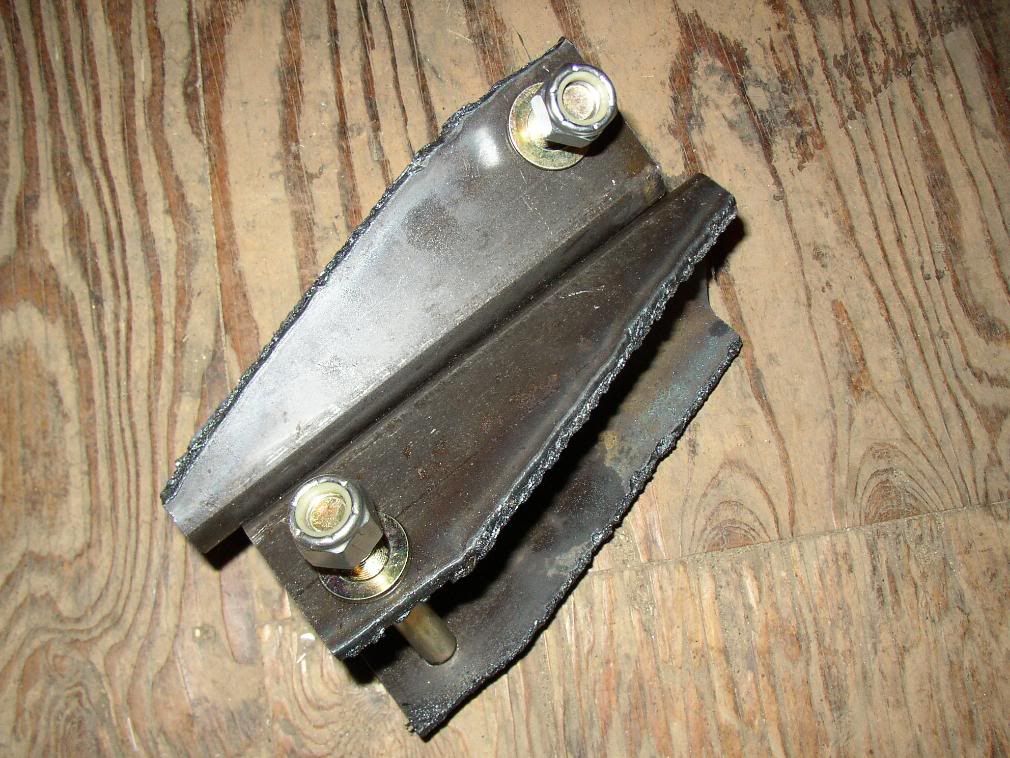
He custom made these shackle hangers to work with my Chevy springs. They measure 3" wide with the bushings pressed in.
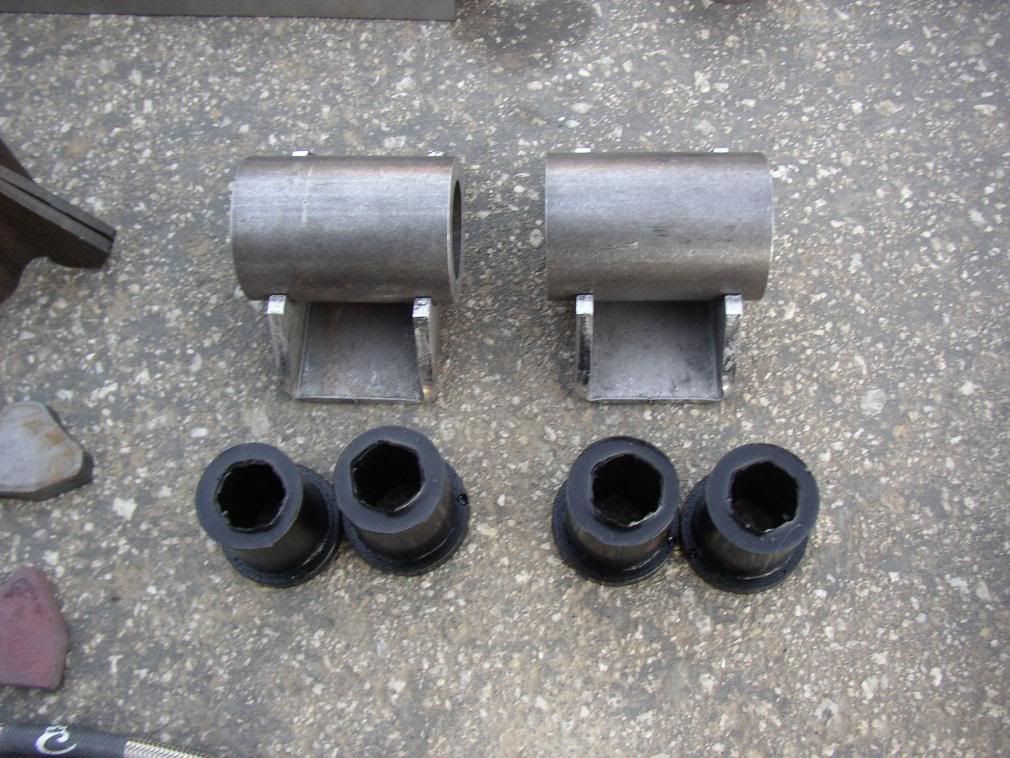
He custom made these shackle hangers to work with my Chevy springs. They measure 3" wide with the bushings pressed in.
Nov 26, 2007 | 05:58 PM
#6
Thread Starter
Registered User
Joined: Oct 2007
Posts: 150
Likes: 0
From: Santa Cruz
Well I didn't get around to working on my truck over the holiday weekend but I made up some more parts today. Instead of spending $120 on Sky's Chevy spring swap kit, I made my own. The Grade 8 hardware cost $20 and the metal $10. The only thing I didnt make was the shackle hangers with bushings. There is a pic of them in my previous posting. They cost $25 for the pair. I think everything came out great and I saved some money.
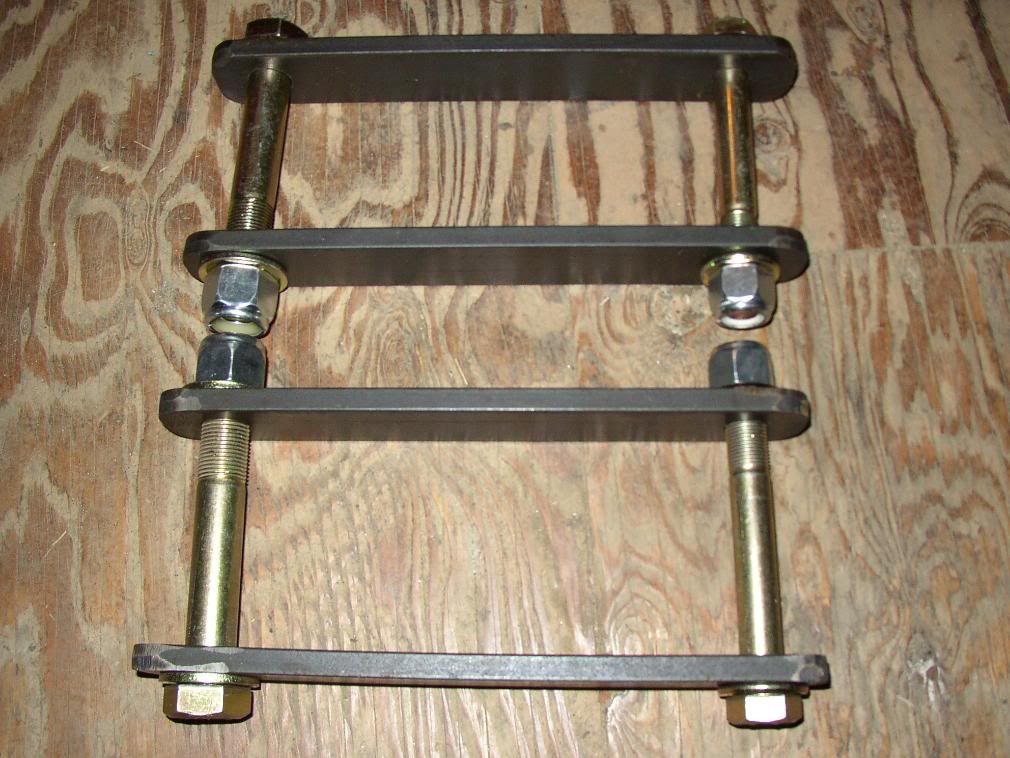
I flame cut these front hangers out of 3.5" square tubing with a .25" wall thickness. Then I drilled a 9/16" hole through them. I still have to do a little grinding to clean them up.

The shackles I made out of 1.5" x 3/8" band iron. They measure 8" center to center. I drilled a 3/4" hole on one end and a 5/8" hole on the other. My Chevy springs have a 5/8" eye on one end. The 3/4" (19mm) hole is for the shackle hanger side.

Let me know if you have any questions.
I flame cut these front hangers out of 3.5" square tubing with a .25" wall thickness. Then I drilled a 9/16" hole through them. I still have to do a little grinding to clean them up.
The shackles I made out of 1.5" x 3/8" band iron. They measure 8" center to center. I drilled a 3/4" hole on one end and a 5/8" hole on the other. My Chevy springs have a 5/8" eye on one end. The 3/4" (19mm) hole is for the shackle hanger side.
Let me know if you have any questions.
Last edited by SCYOTA; Nov 26, 2007 at 05:59 PM.
Nov 28, 2007 | 08:21 PM
#7

Registered User
Joined: Feb 2007
Posts: 124
Likes: 0
Well my parts came today and I can't wait to install them. I ordered these parts off of www.datinfab.com. He makes some of the parts that other companies sell so it is cheaper to go through him. Ed is a great guy and was more than happy to make up some custom stuff for me. Here's the pics of what UPS brought me.

Trending Topics
Nov 28, 2007 | 09:34 PM
#9
Thread Starter
Registered User
Joined: Oct 2007
Posts: 150
Likes: 0
From: Santa Cruz
I am not exactly sure what parts he makes for other companies. When I ordered through him, he did not have all of the parts in stock. The parts that were out of stock he had shipped directly from Trail Gear. So I got one box from him and the other from Trail Gear. Both boxes arrived the day after I ordered them. My understanding is that he can get any of the parts that TG sells.
Last edited by SCYOTA; Nov 28, 2007 at 09:35 PM.

 Nov 28, 2007 | 10:25 PM
#12
Thread Starter
Registered User
Joined: Oct 2007
Posts: 150
Likes: 0
From: Santa Cruz
Thanks guys! The bumper was on the truck when I bought it. I have no clue who makes it but it didn't look home built. Too bad I already scrapped it or you could have had it. The Chevy springs should be on tomorrow, as I picked up a U-bolt flip kit today.

 Dec 2, 2007 | 05:19 PM
#15
Thread Starter
Registered User
Joined: Oct 2007
Posts: 150
Likes: 0
From: Santa Cruz
 Jan 1, 2008 | 08:51 PM
#18
Thread Starter
Registered User
Joined: Oct 2007
Posts: 150
Likes: 0
From: Santa Cruz
I haven't had much time lately and the weather has been poor but I was able to work on the axle rebuild the last two days. I despise cleaning layers and layers of caked on grease but the effort is well worth it.
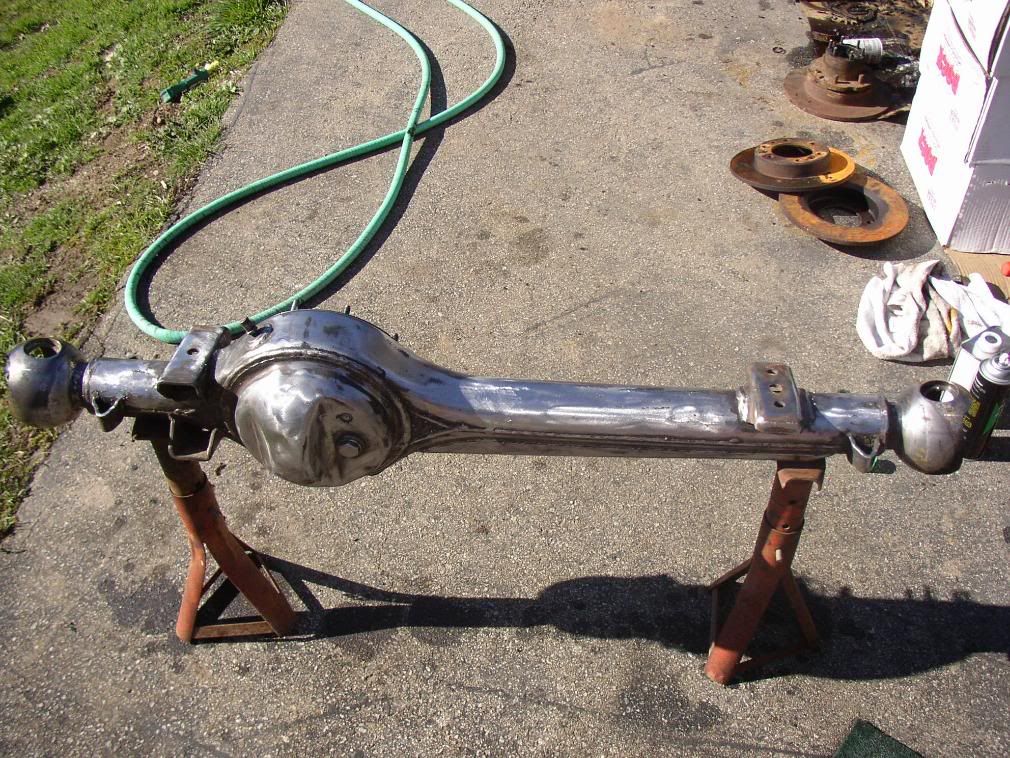
Here is the axle when i first pulled it.

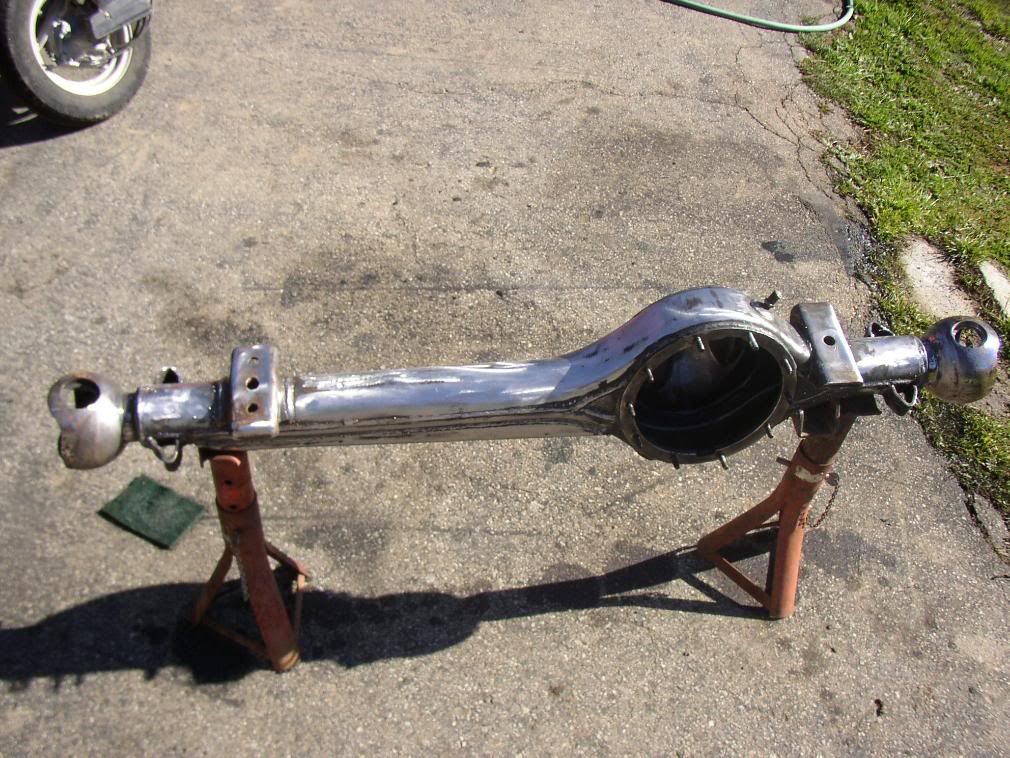
Then I had some fun tearing it apart.
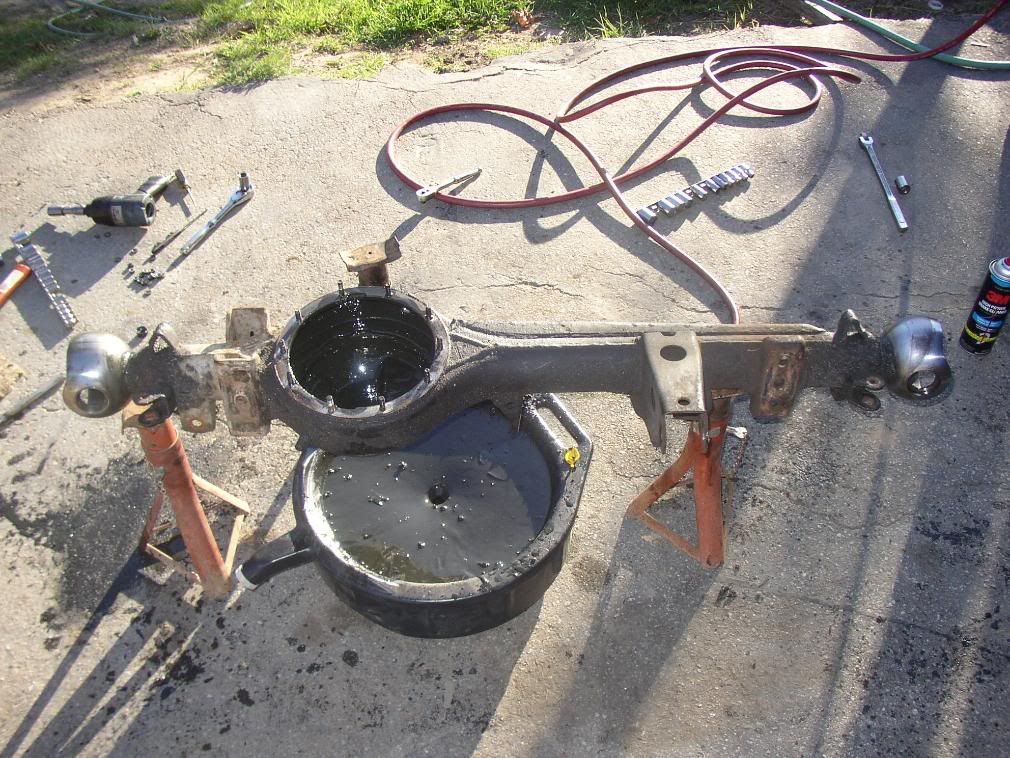
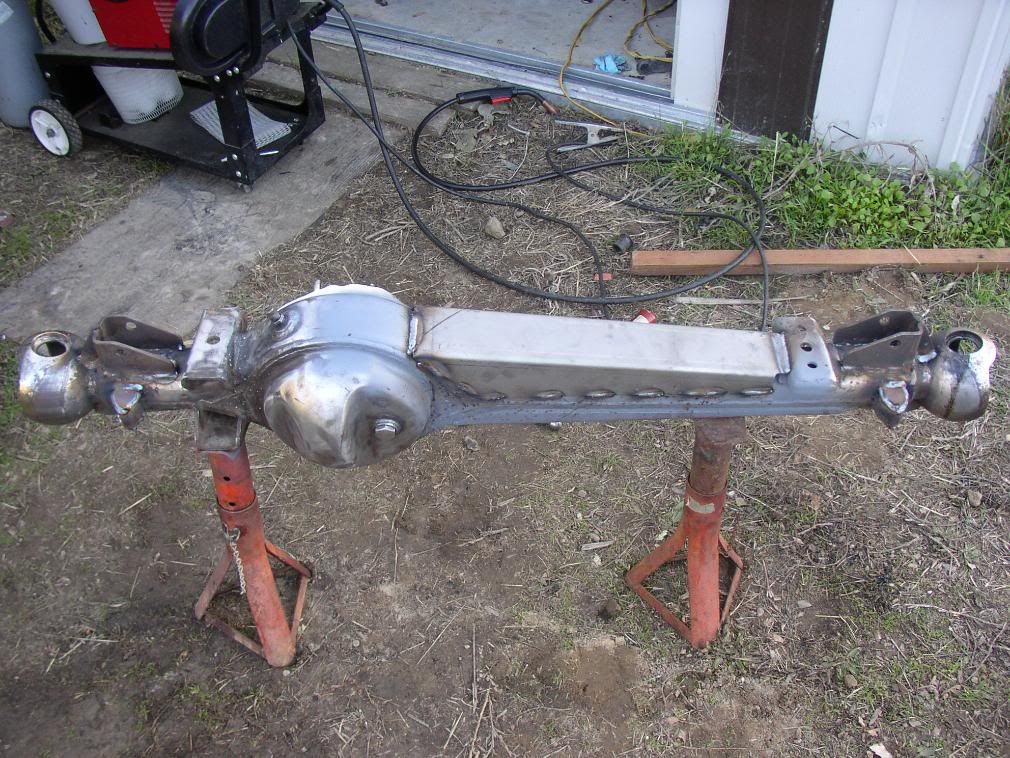
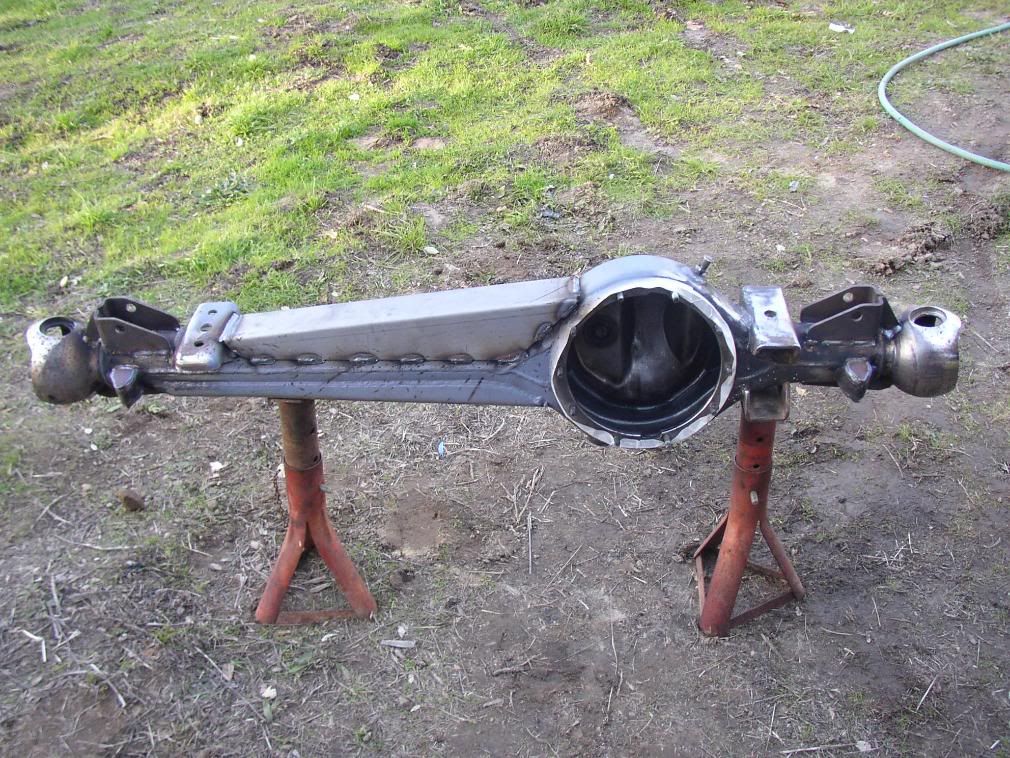
After it was torn down I scraped as much gunk as possible of and then washed it real good. Next step was removing the unneeded brackets that cluttered the axle housing. The I topped it off with an abrasive pad and wire wheel.
Next step was welding on all the gussets. I'm hoping to get it all painted up tomorrow before the storm hits.
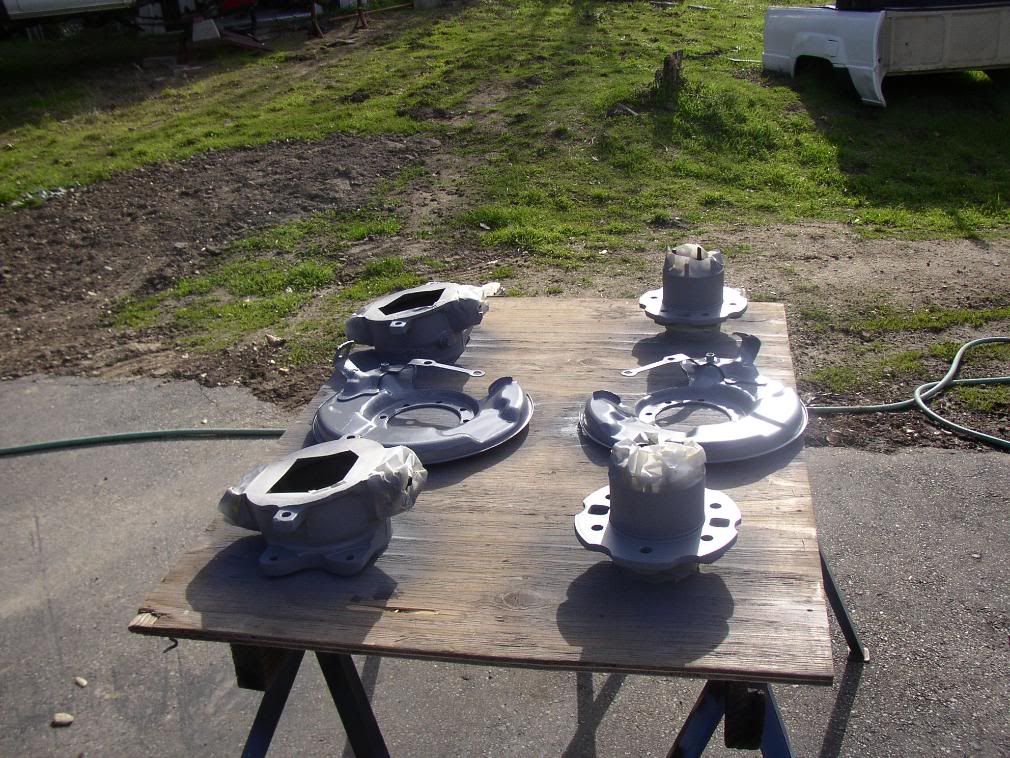
I also cleaned every bit of grime off of the knuckles, hubs, dust covers ect. and then primed and painted them. I don't have any pics of the final product but I snapped this pic while priming them.
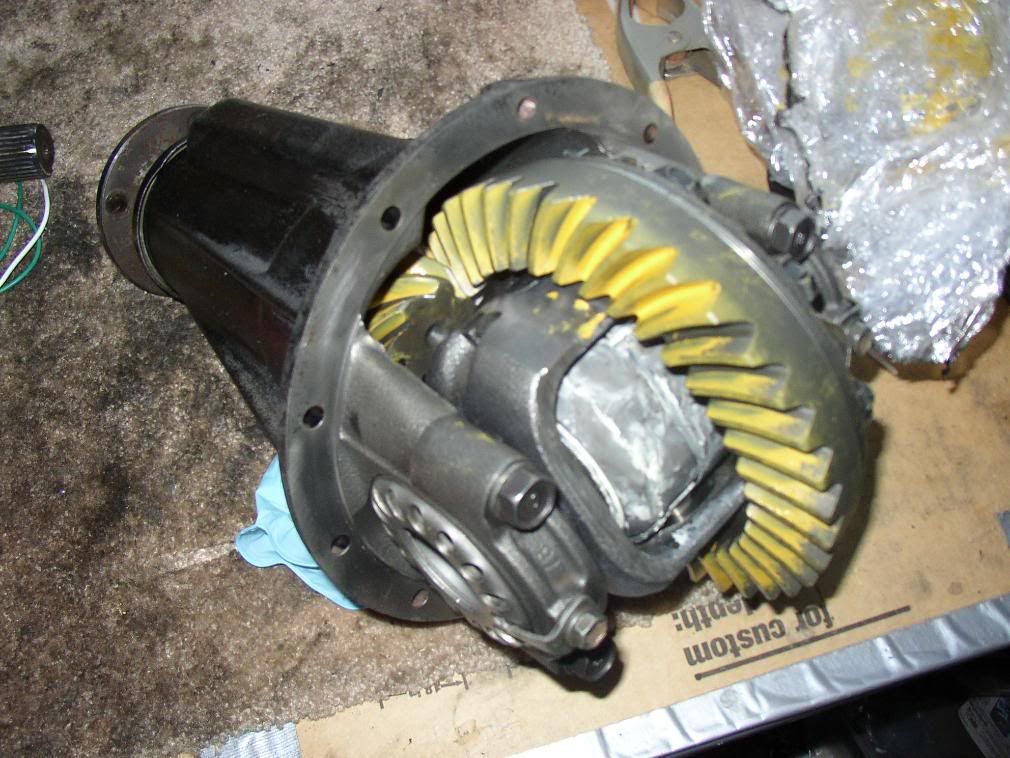
Last but not least is my 3rd member with 5.29 Yukon gears and Aussie Locker that is waiting for action.
Here is the axle when i first pulled it.
Then I had some fun tearing it apart.
After it was torn down I scraped as much gunk as possible of and then washed it real good. Next step was removing the unneeded brackets that cluttered the axle housing. The I topped it off with an abrasive pad and wire wheel.
Next step was welding on all the gussets. I'm hoping to get it all painted up tomorrow before the storm hits.
I also cleaned every bit of grime off of the knuckles, hubs, dust covers ect. and then primed and painted them. I don't have any pics of the final product but I snapped this pic while priming them.
Last but not least is my 3rd member with 5.29 Yukon gears and Aussie Locker that is waiting for action.
Jan 1, 2008 | 09:00 PM
#19
Registered User


Joined: Mar 2006
Posts: 2,586
Likes: 9
From: Atlanta, GA
nice man, i like how you are going about this one. should be a pretty good wheeler when you are done. ive been thinking about the chevy swap here for a little bit. ive read the pirate link, but how far foward did you weld on your hangers? and is the shackle in the stock locatoin, or moved back?
Jan 1, 2008 | 09:19 PM
#20
Thread Starter
Registered User
Joined: Oct 2007
Posts: 150
Likes: 0
From: Santa Cruz
I believe I moved the front hanger forward 11 inches and the rear back about 4. If you look at the pics of the swap you will see the factory shackle hanger is right in front of the new one.


