richf 1985 4runner build-up thread

 11-14-2010, 10:36 AM
#44
Registered User
Thread Starter
Join Date: Jan 2009
Location: Moyock,NC
Posts: 477
Likes: 0
Received 0 Likes
on
0 Posts
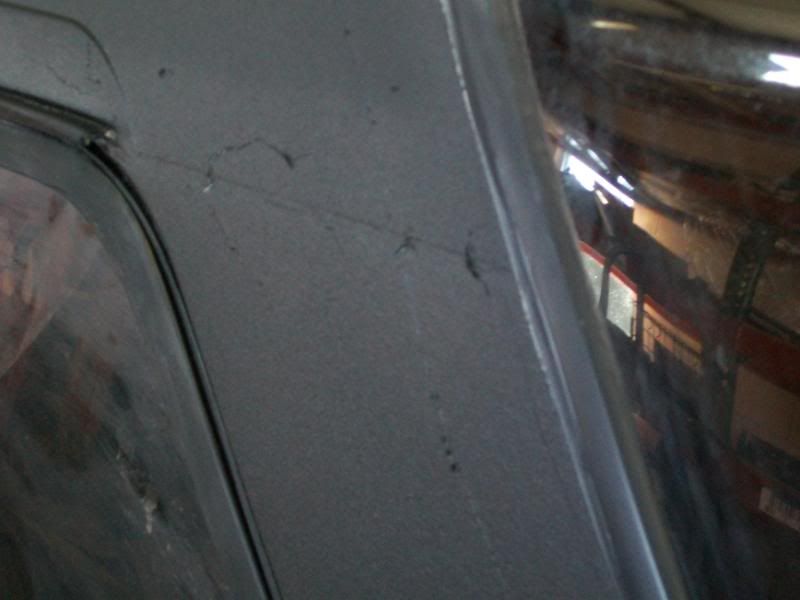
Corey those are pictures of the paint peeling up. I did not post pictures of the crack.
Here are some pics of the new wheels are tires. 35x12.50x15 KM2 - 15x10 Rock Crawlers flat black.


Here are some pics of the new wheels are tires. 35x12.50x15 KM2 - 15x10 Rock Crawlers flat black.
11-15-2010, 11:06 PM
#45
Registered User
iTrader: (2)
Join Date: Dec 2009
Location: Pleasanton, CA - SF Bay Area
Posts: 2,159
Likes: 0
Received 7 Likes
on
5 Posts
$30 slave cylinder fixed the problem. Runs like a top and shifts perfect. I also got rid of the water I was running in the cooling system and put the anti-freeze back in.
If anyone is having problems with the heater after putting in anti-freeze, loosen up the hose clamp and let the air out of the hose on the passenger side of the valve controlling the heating system.
If anyone is having problems with the heater after putting in anti-freeze, loosen up the hose clamp and let the air out of the hose on the passenger side of the valve controlling the heating system.
Glad it was that simple! Lots of times, cars that are sitting for a long time, their seals dry out and crack/fail - they need regular use/lubrication to stay alive. My buddy's 76 280Z that he got from his dad (orginal owner) after years of non use had its clutch just stop working....he was at wit's end until I replaced the master and slave for him and **BAM** it worked like new

Your build is looking good - really digging the wheel/tire combo you went with!
 11-16-2010, 07:34 AM
#48
Registered User
Thread Starter
Join Date: Jan 2009
Location: Moyock,NC
Posts: 477
Likes: 0
Received 0 Likes
on
0 Posts
Thanks. So far so good with the paint on the dash, console and seats. I have banged them around a bit with taking the them in and out over and over again. It's pretty stout paint when you give it time to cure.
I should have more done this weekend if I don't go hunting Saturday. I still need to get the ground wire for my 130amp alternator and install that setup, install my new valve cover studs from LC, paint tall gate and re-install everything that goes with that. I'm going to hold off on the interior panels and my stereo for now. I have had the head unit and speakers sitting in my shop for about 6 months now but it's just not my top priority right now.
Anyone have any suggestions on how to install the studs? Do I lock tight them in?
11-23-2010, 12:25 PM
#50
Registered User
Thread Starter
Join Date: Jan 2009
Location: Moyock,NC
Posts: 477
Likes: 0
Received 0 Likes
on
0 Posts
Well after much fustration I have the truck running back to normal. I replaced the alternator with a 130amp model, alternater charge wire, battery to engine, engine to passenger fender well, positive to starter and positive to fuse, all with 4 gauge wire. I also made some repairs from the PO. One of the issues I ran into is the PO spliced some important wires in the orginal alternator charing wire for what every reason????? I did not know this and unhooked the original wire and replaced it with my new wire thinking nothing of it.
The two splices.


Were they come from.


I had to find a place for the two spliced in wires and they both need power going to them so I used the spare fuse slot. The two white wires are on the left side and the power from the battery is on the right.

I worked on it this last weekend but couldn't figure it out till today so not much got done.
The two splices.
Were they come from.
I had to find a place for the two spliced in wires and they both need power going to them so I used the spare fuse slot. The two white wires are on the left side and the power from the battery is on the right.
I worked on it this last weekend but couldn't figure it out till today so not much got done.
Last edited by richf; 01-04-2011 at 11:13 AM.
11-24-2010, 08:31 AM
#52
Registered User
Thread Starter
Join Date: Jan 2009
Location: Moyock,NC
Posts: 477
Likes: 0
Received 0 Likes
on
0 Posts
GrandRebuilders.com out of CA. I think it's a rebuilt Denso unit so....plug and play. I think it was $99 to my door with a 1 year warranty. I can't really say much about it right now cause my truck sits in the shop but my head lights no longer dim when I turn on the heater or turn signals.

 12-03-2010, 01:33 AM
#54
Registered User
Join Date: Jul 2009
Location: Eastern NC
Posts: 832
Likes: 0
Received 0 Likes
on
0 Posts
Looks good man, I can wait until I get to the point that I can paint mine black. But that is last on the list. Yours is looking really nice, I dig the color scheme.
Later
Later
12-06-2010, 01:33 PM
#57
Registered User
Thread Starter
Join Date: Jan 2009
Location: Moyock,NC
Posts: 477
Likes: 0
Received 0 Likes
on
0 Posts
I put the 2nd coat on the back side of the tail gate tonight and it's done. Tomorrow I will paint the other side and put the final coat on Wednesday. This tail gate is only temp. until I find one in good condition.

I'm loving how the color combo turned out. Can't wait to get the all black soft top for it.

I'm loving how the color combo turned out. Can't wait to get the all black soft top for it.
12-08-2010, 06:50 AM
#59
Registered User
Thread Starter
Join Date: Jan 2009
Location: Moyock,NC
Posts: 477
Likes: 0
Received 0 Likes
on
0 Posts
I just saw a picture of a guy who did that and it did look good but I'm not about to sand, tape and repaint the top of the doors.
Anyone have any pictures of how the stock rear bump mounts to the truck?? I didn't take it off and it's been about 3 years since its been on. It's the last piece I need to do so I can get it inspected on Monday. I do have two "Y" shaped brackets that I think go to the rear bumper but they don't seem to line up with any bolt holes.
Thanks.
12-08-2010, 07:40 AM
#60
Registered User
the y shaped brackets are what you need. The rear of the 4Runner was different then the pick-up of the same vintage. I can't find the diagram i thought i saw in the FSM, but my bumper had brackets that slid into the frame, then the y pieces attach to that...i think. Neither of my runners had stock bumpers when i got them.
Why are you getting it inspected? Just curious, does NC have Historic plates? In MD Historic plates wave emissions, and inspection. Historic in MD means vehicles older then 20 years.
Sorry not much of a help.
Why are you getting it inspected? Just curious, does NC have Historic plates? In MD Historic plates wave emissions, and inspection. Historic in MD means vehicles older then 20 years.
Sorry not much of a help.


