
DIRTCO's 1985 4Runner Build-Up Thread
 Mar 10, 2008 | 08:14 PM
#81
Thread Starter
Registered User
Joined: May 2007
Posts: 1,441
Likes: 0
From: Summit County, Colorado
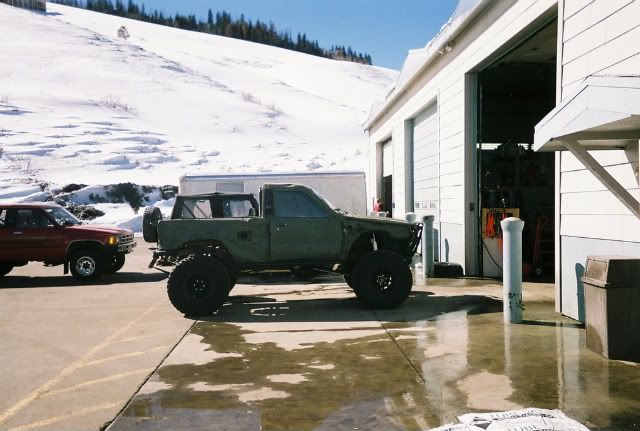
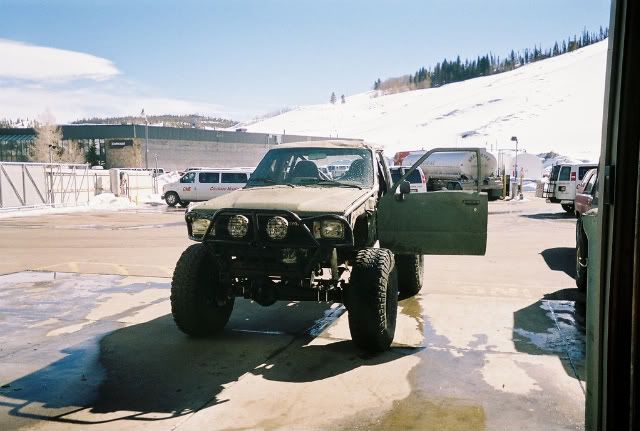
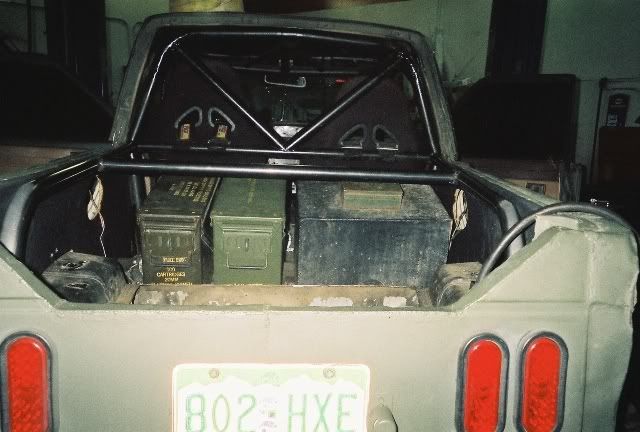
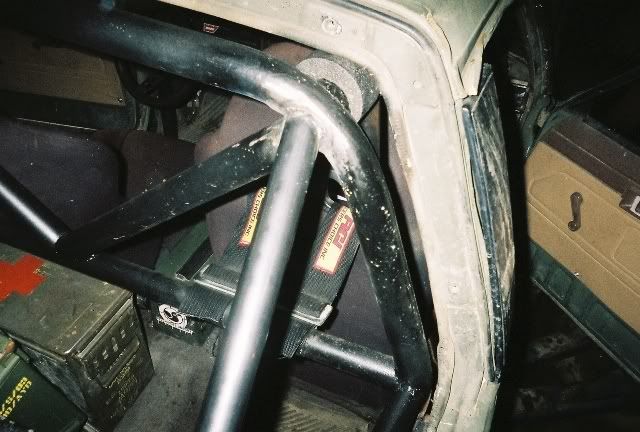
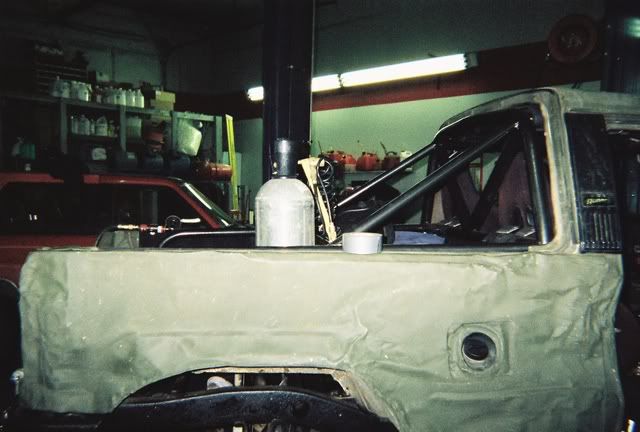
I then took the 4Runner for a quick drive on some of the back streets in town. I wanted to make sure nothing weird was going on with the front end. Even though the rear driveshaft is bent (mainly the slip section), I was still able to get up to around 30 with no vibration. It will need some more testing, but for the most part, it tracked straight and there were no problems.
Now for the bad part, it drives straight but runs like total crap. Whenever you come to a stop it wants to die, you have to shift into neutral and rev the gas while you brake. I have run into this problem before but not this bad, I will figure it out, but it's just another thing to add to the list.
Here a couple pictures after I got back to the shop.
Mar 10, 2008 | 08:38 PM
#82
Thread Starter
Registered User
Joined: May 2007
Posts: 1,441
Likes: 0
From: Summit County, Colorado
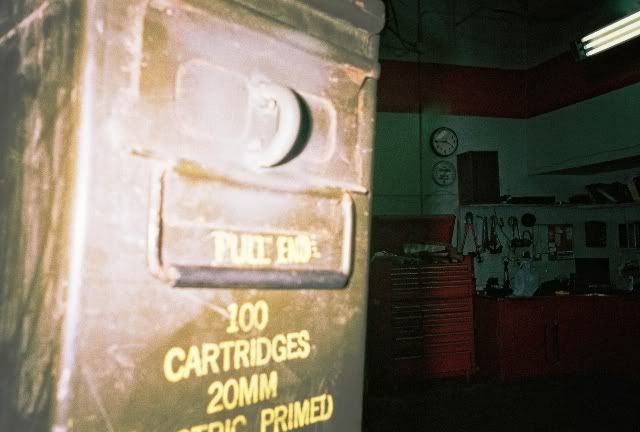
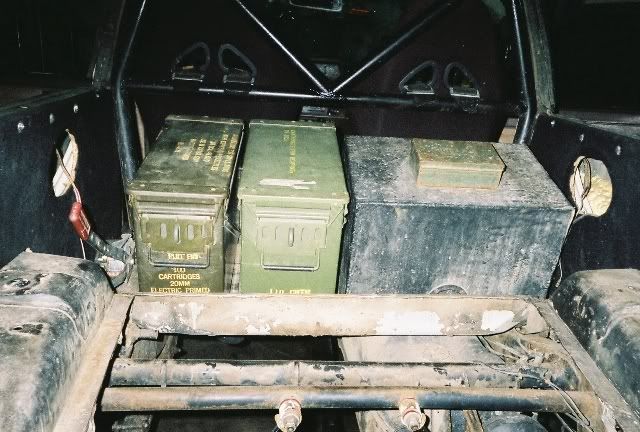
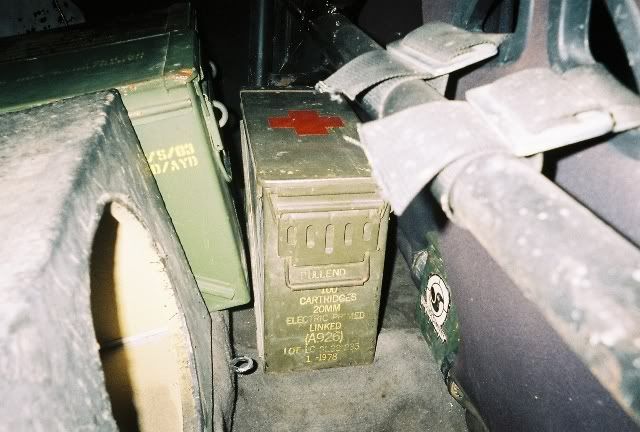
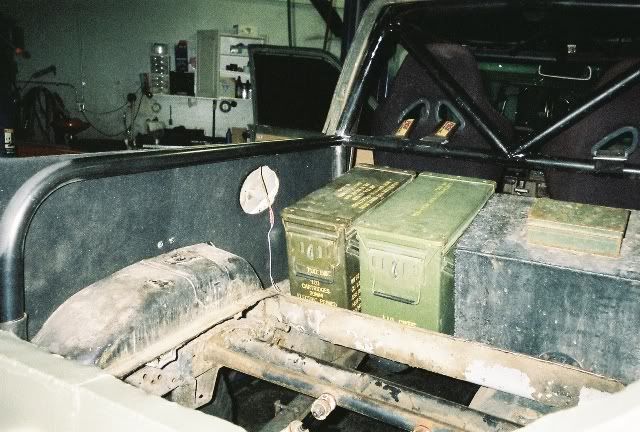
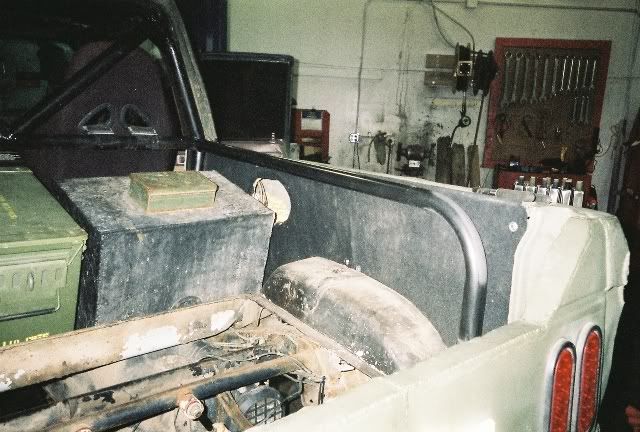
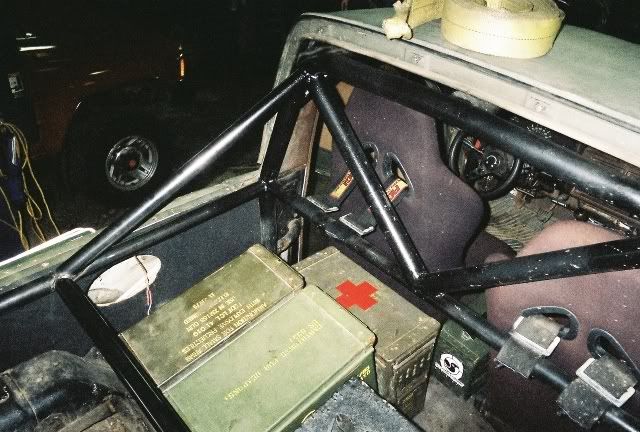
The last project for that weekend was to get the rest of the ammo boxes mounted. Before I bolted them down I welded some hoops to the boxes so I can lock them up. There are slots on the lid and when you close it, the lid drops past the loop.
Mar 10, 2008 | 09:14 PM
#83
Thread Starter
Registered User
Joined: May 2007
Posts: 1,441
Likes: 0
From: Summit County, Colorado
Now on to this last weekend!
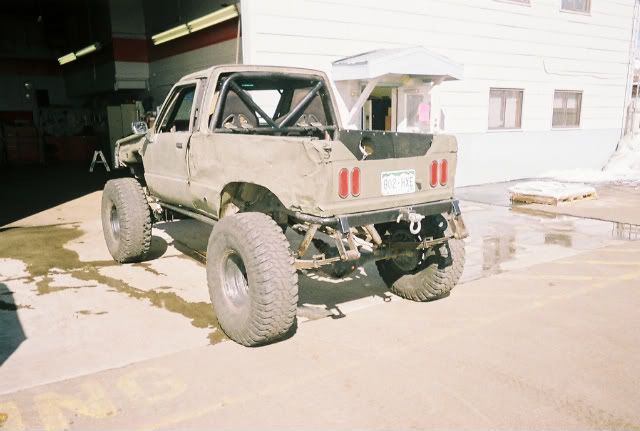
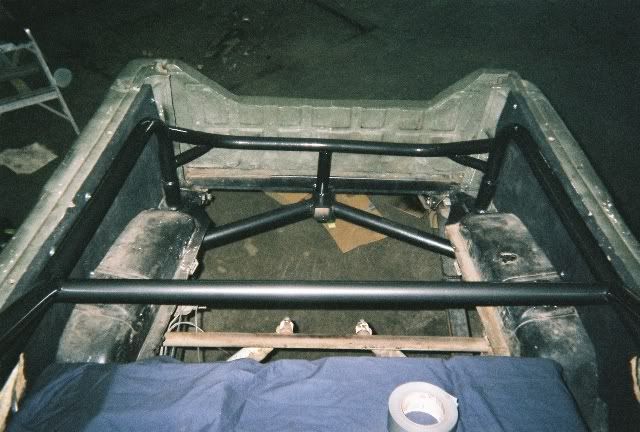
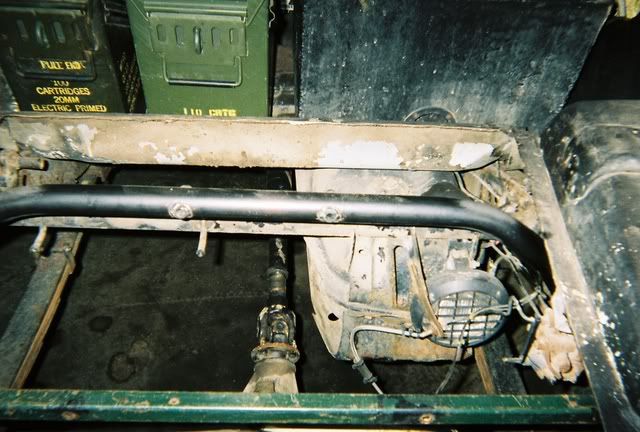
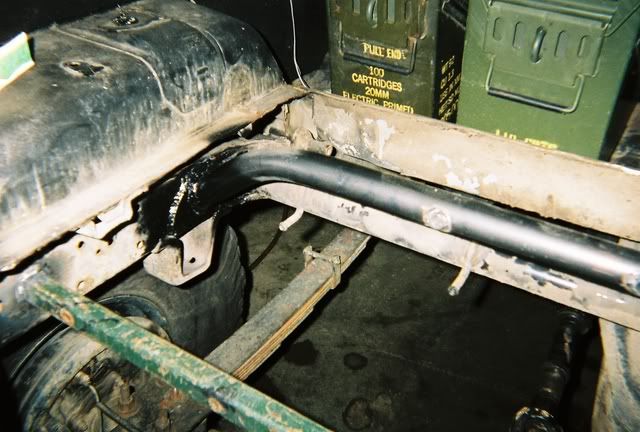
I figured it was time to tube out the back of the 4Runner. This is one of the projects that I was looking forward to the most. I guessed it would take me two weekends to complete; well things just started falling together and 90% of the rear tube work is done in a day and a half I guess that makes up for the front end that kicked my ass. There is still some more work to be done, but only a couple pieces.
Here's the start
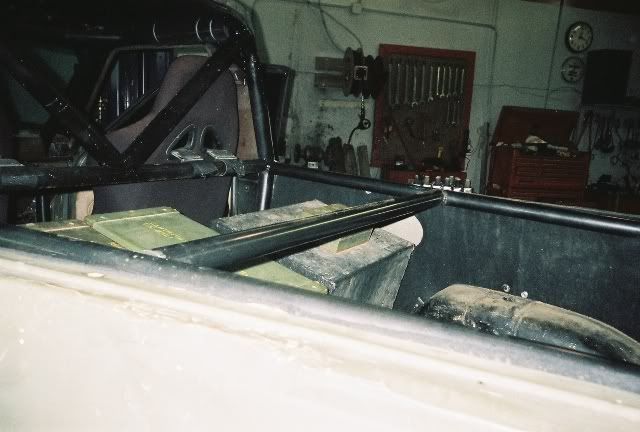
I figured it was time to tube out the back of the 4Runner. This is one of the projects that I was looking forward to the most. I guessed it would take me two weekends to complete; well things just started falling together and 90% of the rear tube work is done in a day and a half
I guess that makes up for the front end that kicked my ass. There is still some more work to be done, but only a couple pieces.Here's the start
Last edited by DIRTCO; Mar 10, 2008 at 10:03 PM.
 Mar 10, 2008 | 10:02 PM
#85
Thread Starter
Registered User
Joined: May 2007
Posts: 1,441
Likes: 0
From: Summit County, Colorado
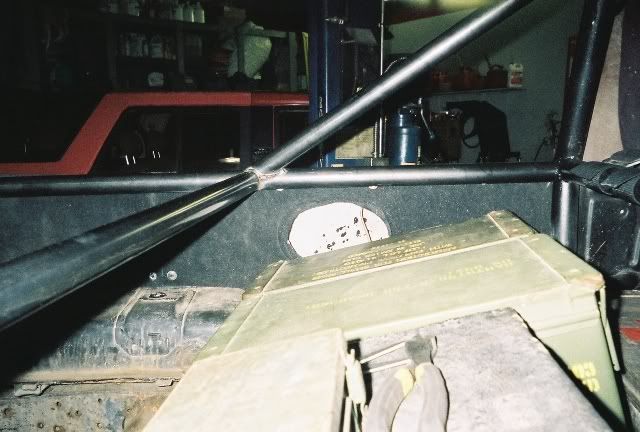
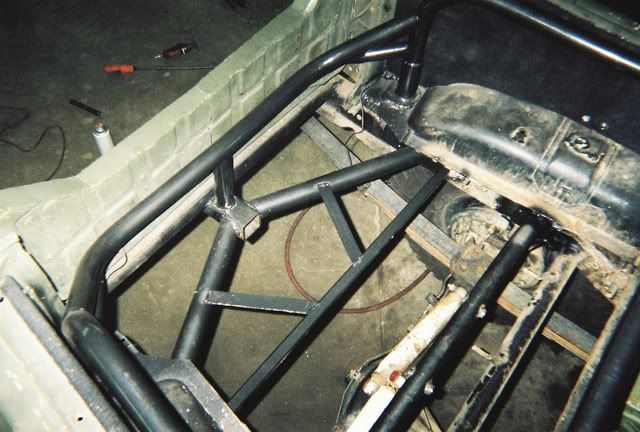
I wanted to do something a little different at the very back, I also did not want to block access to the cooler.
At this point everything is sprayed with "Hammered Black spray paint"
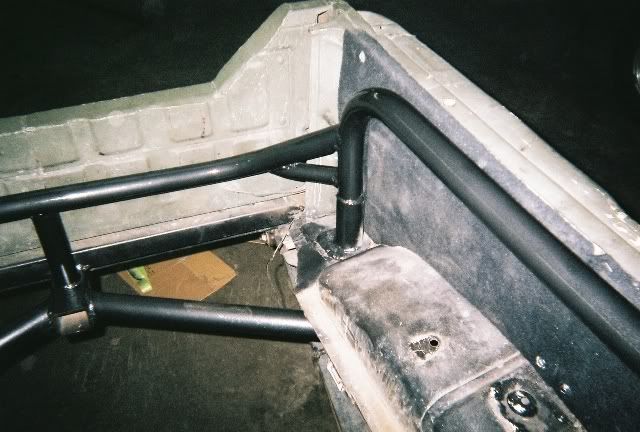
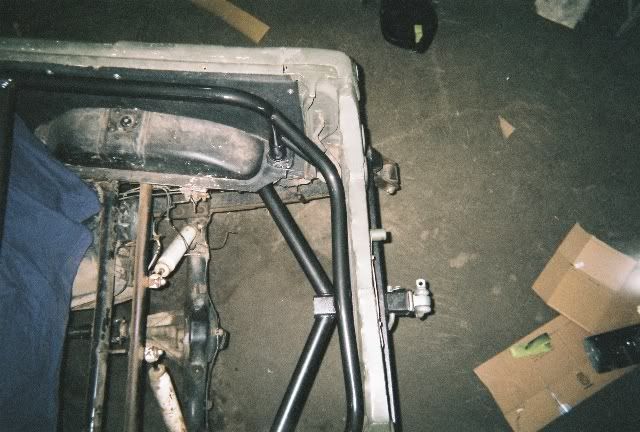
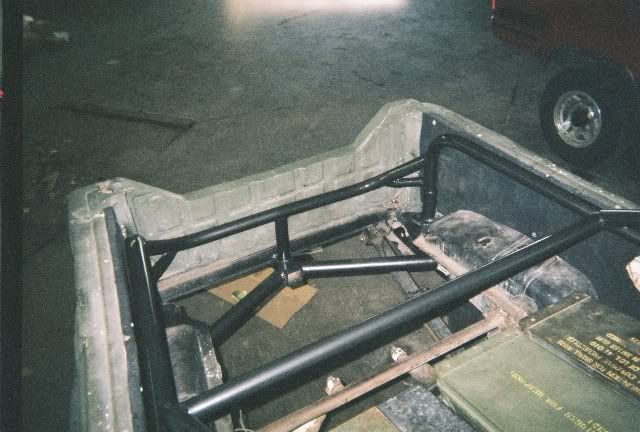
At this point everything is sprayed with "Hammered Black spray paint"
Mar 12, 2008 | 07:45 PM
#86
Thread Starter
Registered User
Joined: May 2007
Posts: 1,441
Likes: 0
From: Summit County, Colorado
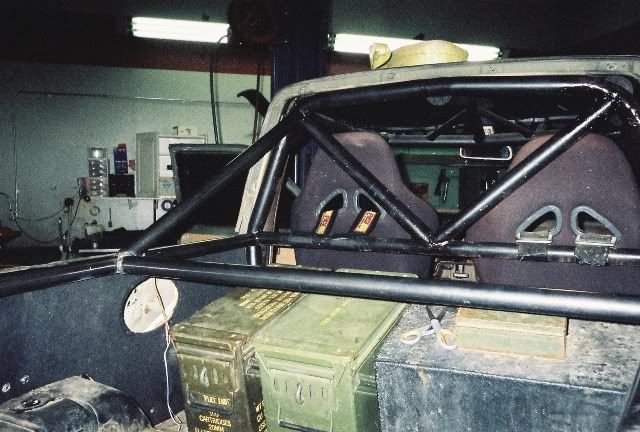
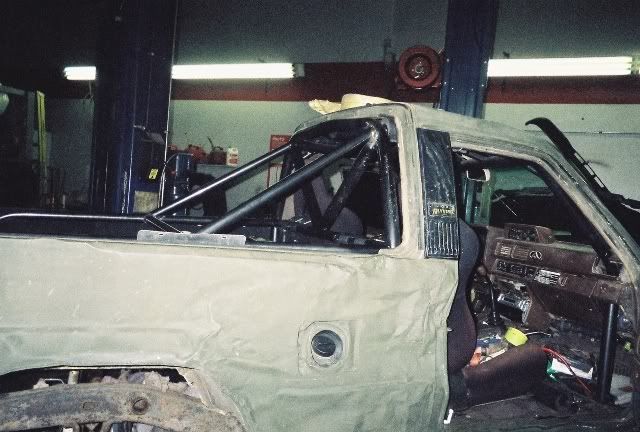
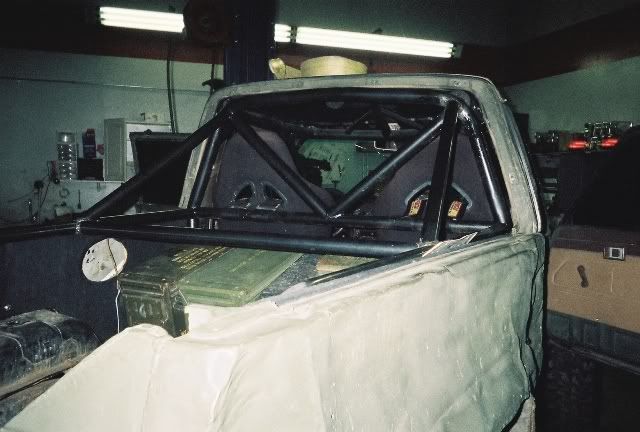
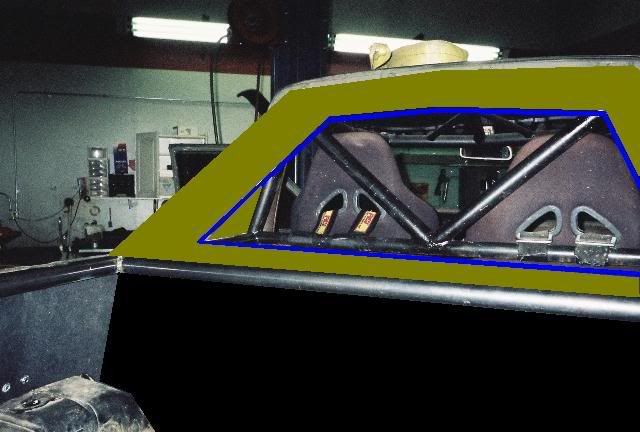
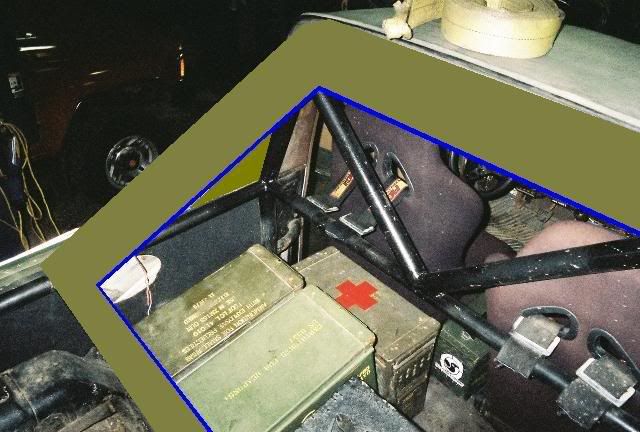
Since I don't have a tow rig and I love snow wheeling, I've been trying to find a way to enclose the cab when needed. Here is the idea I have, it's part of the reason I built the cage the way I did. All of the panels will attach by tabs on the cage. The large open area in the middle will be plexiglass, while the area's behind the seats will be sheetmetal. The large section on top of the Ammo boxes will open up to get items under it.
The gap between the cage and cab will get filled with roll bar padding. While the set up will not be 100% weather proof, it should still stay nice and warm.
Here's an idea of how it wll look (it will be black not green ). This will be one of the last steps after everything is mounted.
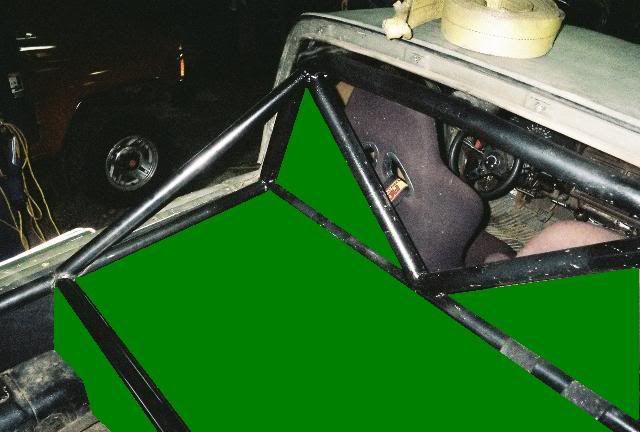
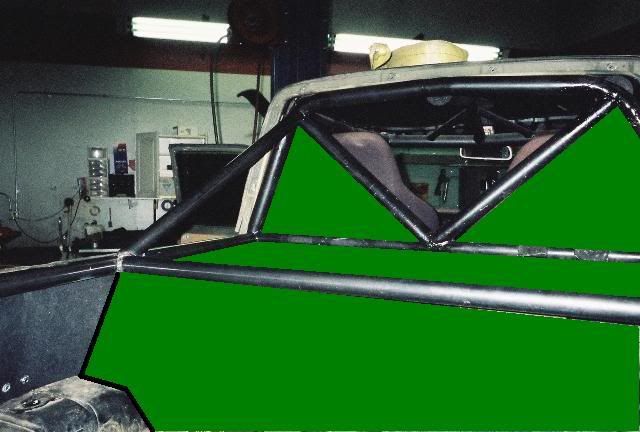
The gap between the cage and cab will get filled with roll bar padding. While the set up will not be 100% weather proof, it should still stay nice and warm.
Here's an idea of how it wll look (it will be black not green
). This will be one of the last steps after everything is mounted.
 Mar 13, 2008 | 04:08 PM
#89
Thread Starter
Registered User
Joined: May 2007
Posts: 1,441
Likes: 0
From: Summit County, Colorado
Thanks, I think  . I figure that it can't be much worse than the cut up hardtop. The bedsides were so beat up that the top would not bolt on any more, it would hang over the side a couple inches. I also never came up with a good way to have a back window after the pickup tailgate swap. I had a piece of plexiglass that would fit in the rear window channel ,but it was a real PITA to deal with and it ended up breaking in half.
As long as I can get everything to fit tight I think it should work pretty well. The space the heater will have to heat will be 1/3 to 1/2 the size, which should keep the cab plenty warm. The whole set up will be a lot lighter and I will be able to install it by myself (unlike the hardtop). And my favorite part; no more broken topper windows. It seems like every other trip I broke one
. I figure that it can't be much worse than the cut up hardtop. The bedsides were so beat up that the top would not bolt on any more, it would hang over the side a couple inches. I also never came up with a good way to have a back window after the pickup tailgate swap. I had a piece of plexiglass that would fit in the rear window channel ,but it was a real PITA to deal with and it ended up breaking in half.As long as I can get everything to fit tight I think it should work pretty well. The space the heater will have to heat will be 1/3 to 1/2 the size, which should keep the cab plenty warm. The whole set up will be a lot lighter and I will be able to install it by myself (unlike the hardtop). And my favorite part; no more broken topper windows. It seems like every other trip I broke one
Last edited by DIRTCO; Mar 16, 2008 at 06:12 PM.
Mar 13, 2008 | 04:21 PM
#90
Thread Starter
Registered User
Joined: May 2007
Posts: 1,441
Likes: 0
From: Summit County, Colorado

We will see how it works out, as long as I have it figured out by next October I'll be happy
Mar 13, 2008 | 08:15 PM
#91

Registered User
Joined: Mar 2007
Posts: 182
Likes: 0
From: Vero Beach, Florida
I had a soft top made for my rig for $300, yours could probably be done for a lot less than that. Check it out, https://www.yotatech.com/forums/f115...thread-134004/
Mar 13, 2008 | 08:17 PM
#92
Registered User
Joined: Mar 2007
Posts: 182
Likes: 0
From: Vero Beach, Florida
Actually you could probably just get the center section that you were going to make out of plexiglass made from the clear vinyl and then you could remove it in the summer. I've been pleasantly surprised at how crystal clear the vinyl is.
Mar 16, 2008 | 06:57 PM
#93
Thread Starter
Registered User
Joined: May 2007
Posts: 1,441
Likes: 0
From: Summit County, Colorado
I had a soft top made for my rig for $300, yours could probably be done for a lot less than that. Check it out, https://www.yotatech.com/forums/f115...thread-134004/
I would try to go for something like this, the black section would steel or wood.
 Mar 17, 2008 | 03:47 PM
#94
Registered User
Joined: Mar 2007
Posts: 182
Likes: 0
From: Vero Beach, Florida
Yeah you could probably get that made pretty easily. Remember the simpler it is, the cheaper it is. Thats why I went without zippers, and just snaps with velcro in between. Look around the internet and yellow pages for a boat cover place, or tent and awning place. Mine is made of a truck tonneau cover material.
Mar 17, 2008 | 04:50 PM
#95
Thread Starter
Registered User
Joined: May 2007
Posts: 1,441
Likes: 0
From: Summit County, Colorado
Yeah you could probably get that made pretty easily. Remember the simpler it is, the cheaper it is. Thats why I went without zippers, and just snaps with velcro in between. Look around the internet and yellow pages for a boat cover place, or tent and awning place. Mine is made of a truck tonneau cover material.
Mar 17, 2008 | 05:43 PM
#96
Thread Starter
Registered User
Joined: May 2007
Posts: 1,441
Likes: 0
From: Summit County, Colorado
I spent this last weekend working on the rear of the truck. I'm very happy how it all turned out. There is still some more work to do, but I got most of the large projects out of the way.
I first needed to get the rear shock mount in place. I way have raised it a little too high but I will need to get it on the trail to know for sure. I'm guessing that at most it's only an inch too tall. The shocks have seen better days, so if there is a problem I will get a new set that is a little longer.
The old set up, yeah it's a little bent
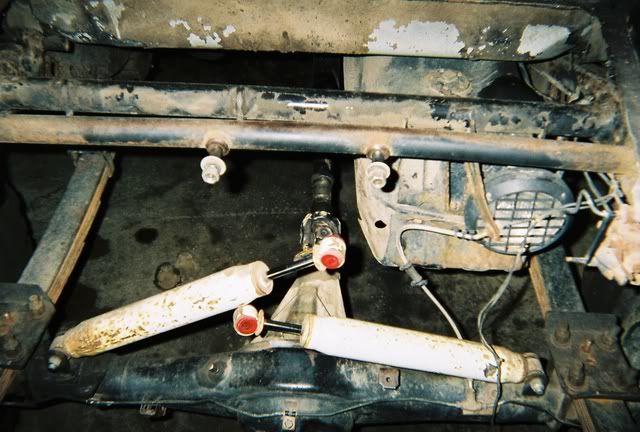
And the new
I first needed to get the rear shock mount in place. I way have raised it a little too high but I will need to get it on the trail to know for sure. I'm guessing that at most it's only an inch too tall. The shocks have seen better days, so if there is a problem I will get a new set that is a little longer.
The old set up, yeah it's a little bent
And the new

 Mar 17, 2008 | 06:04 PM
#98
Thread Starter
Registered User
Joined: May 2007
Posts: 1,441
Likes: 0
From: Summit County, Colorado
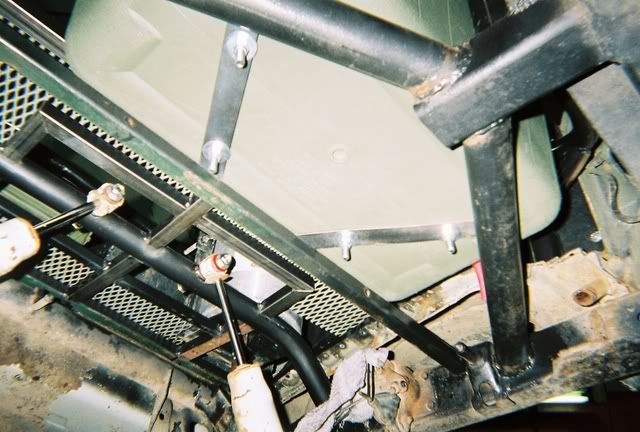
I then built the frame for the floor.
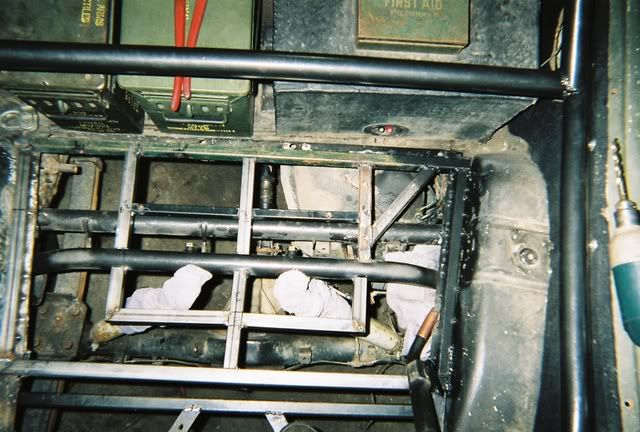
And some expanded steel
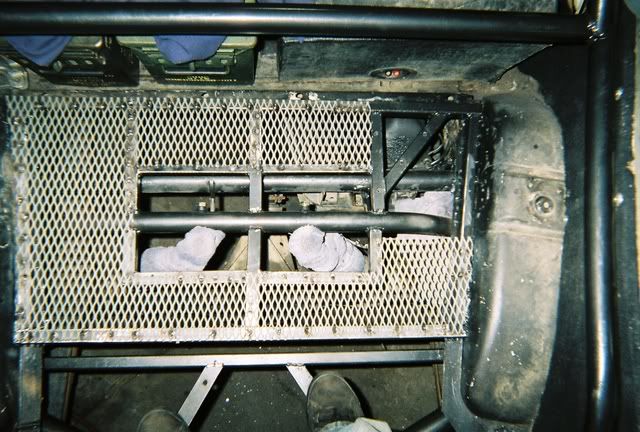

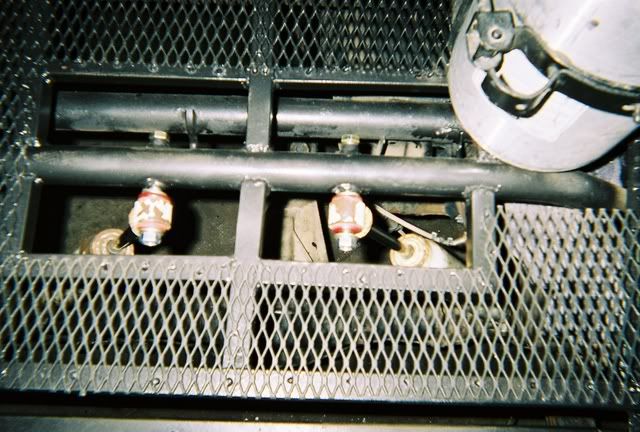
I kept an opening to get to the shocks, you can still stand on it and not notice them there.
And some expanded steel
I kept an opening to get to the shocks, you can still stand on it and not notice them there.
Last edited by DIRTCO; Mar 18, 2008 at 05:29 AM.
Mar 17, 2008 | 07:13 PM
#99
Thread Starter
Registered User
Joined: May 2007
Posts: 1,441
Likes: 0
From: Summit County, Colorado
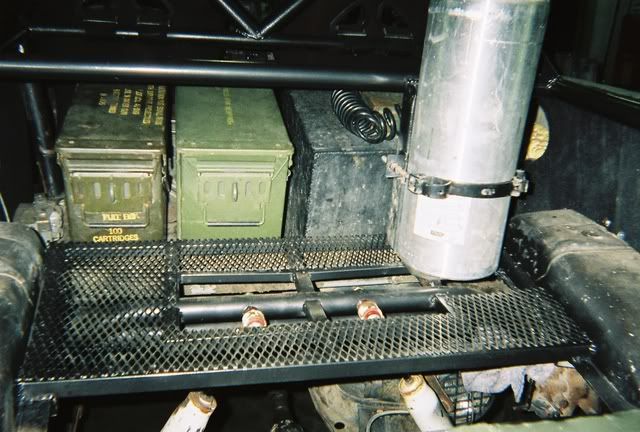
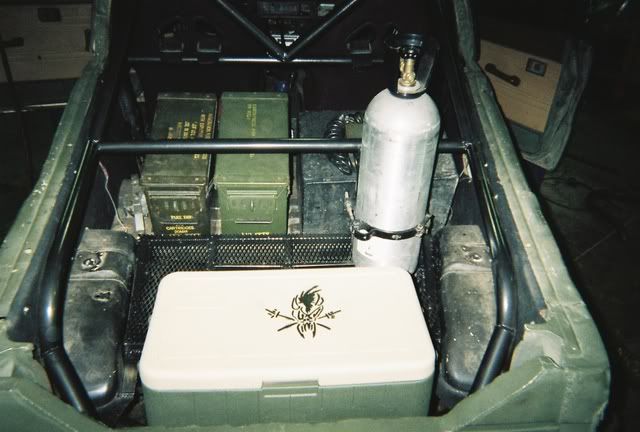
Then it was time to get the Co2 tank mounted. It sets a little higher than I wanted but part of that is an illusion because the back of the truck is shorter and narrow. It's only one inch taller than it used to be. I do have a plan to protect the tank from rocks and rollovers 

Mar 17, 2008 | 07:37 PM
#100
Thread Starter
Registered User
Joined: May 2007
Posts: 1,441
Likes: 0
From: Summit County, Colorado
With the floor and Co2 tank done, it was time to finish the cooler.
Here is how the cooler looked before. Just your average $5.00 garage sale special.
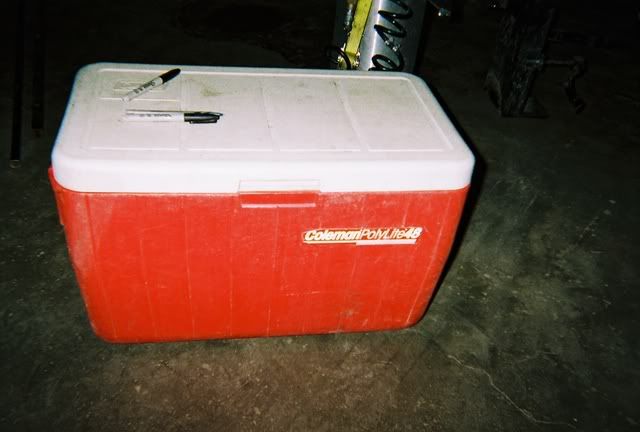
I was going to bolt it down so I removed the handles and added some paint. The bottom is OD Green and the top is desert storm tan (it looks white in the picture). I'm sure the paint will get scratched off but it's worth a try
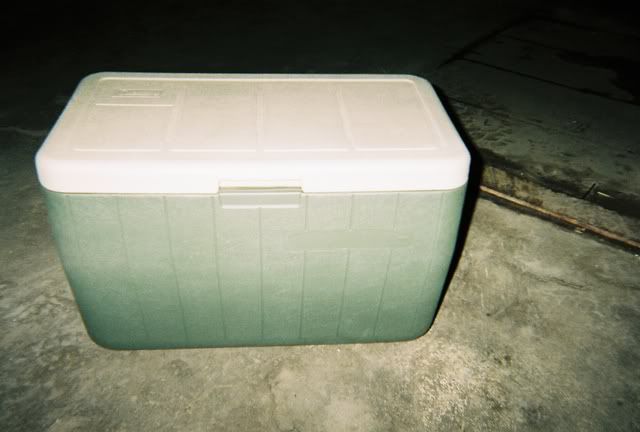
Here is how the cooler looked before. Just your average $5.00 garage sale special.
I was going to bolt it down so I removed the handles and added some paint. The bottom is OD Green and the top is desert storm tan (it looks white in the picture). I'm sure the paint will get scratched off but it's worth a try


