KawaZX636's 1983 Toyota Pickup Restoration
 03-10-2015, 10:34 PM
#1161
Registered User
Join Date: Sep 2013
Posts: 69
Likes: 0
Received 0 Likes
on
0 Posts
Beautiful! Great to see what a "cut no corners" 83 restoration looks like. Hope mine will be reborn in like fashion one day. Probably when I'm at retirement age. Hahaha! Gonna be in Hawaii any time?
 03-11-2015, 06:12 AM
#1162
Thanks Shaun! It's been a long project, but I think it has been worth it so far.
I'm not going to get back down to Hawaii until at least next Spring. My friend has property with separate units directly on Sunset - he lives in one for about 6 months out the year and rents it out when he is back in Maryland and the other two are full time rentals year round. He was getting sick of all his friends coming down at random throughout the year and having to play "tour guide" every other week so he didn't rent out the two extra units for the past two weeks so that everybody could just come and stay all at once. About 12 of my friends were down there last week, but I couldn't go because I didn't want to leave my 8month pregnant wife home alone. Kind of sucked for me seeing all the pictures of everybody having fun without me, but I'll be having my fun when all those guys are busy raising their kids in the next 5-10 years.
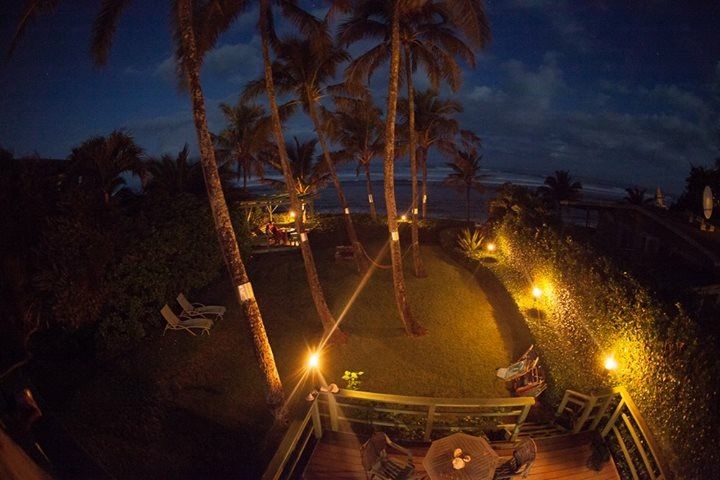
This is the view of Sunset Beach that he gets to wake up to every morning... Pretty dope!


I'm not going to get back down to Hawaii until at least next Spring. My friend has property with separate units directly on Sunset - he lives in one for about 6 months out the year and rents it out when he is back in Maryland and the other two are full time rentals year round. He was getting sick of all his friends coming down at random throughout the year and having to play "tour guide" every other week so he didn't rent out the two extra units for the past two weeks so that everybody could just come and stay all at once. About 12 of my friends were down there last week, but I couldn't go because I didn't want to leave my 8month pregnant wife home alone. Kind of sucked for me seeing all the pictures of everybody having fun without me, but I'll be having my fun when all those guys are busy raising their kids in the next 5-10 years.
This is the view of Sunset Beach that he gets to wake up to every morning... Pretty dope!


Last edited by kawazx636; 03-11-2015 at 06:18 AM.
03-11-2015, 07:19 PM
#1163

Truck is looking bad ass!!!
03-12-2015, 01:10 AM
#1164
Registered User
Join Date: Sep 2013
Posts: 69
Likes: 0
Received 0 Likes
on
0 Posts
Thanks Shaun! It's been a long project, but I think it has been worth it so far.
I'm not going to get back down to Hawaii until at least next Spring. My friend has property with separate units directly on Sunset - he lives in one for about 6 months out the year and rents it out when he is back in Maryland and the other two are full time rentals year round. He was getting sick of all his friends coming down at random throughout the year and having to play "tour guide" every other week so he didn't rent out the two extra units for the past two weeks so that everybody could just come and stay all at once. About 12 of my friends were down there last week, but I couldn't go because I didn't want to leave my 8month pregnant wife home alone. Kind of sucked for me seeing all the pictures of everybody having fun without me, but I'll be having my fun when all those guys are busy raising their kids in the next 5-10 years.
This is the view of Sunset Beach that he gets to wake up to every morning... Pretty dope!
 03-16-2015, 10:49 PM
#1166
No holidays for me Corey - my friends went to Hawaii, but I missed out on the trip this year.
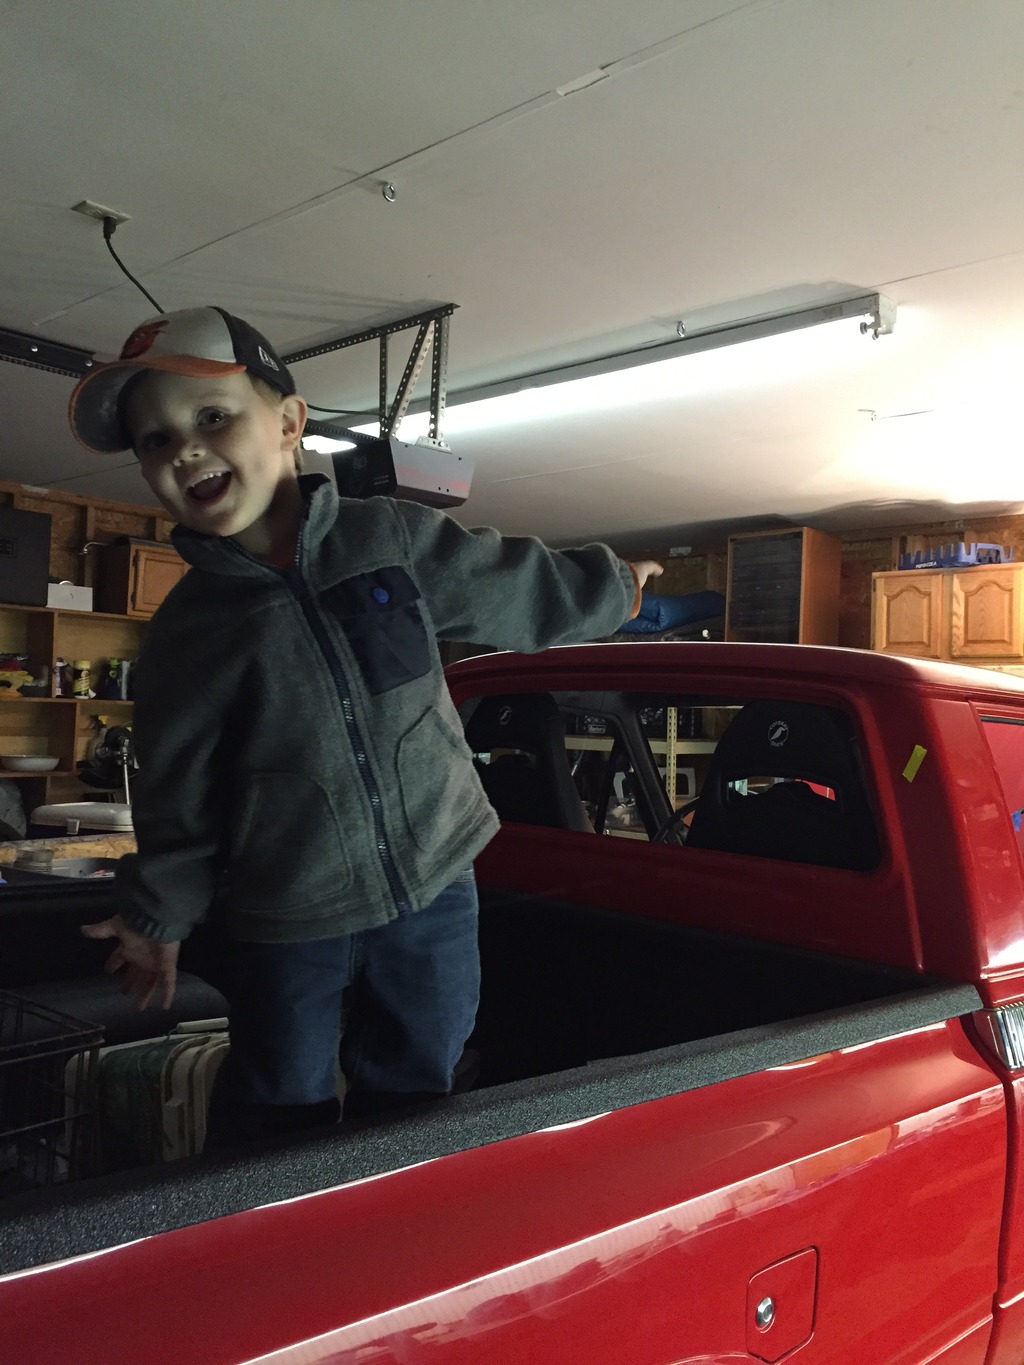
I had my little helper with me this evening - not exactly much help, but after my wife picked him up I was able to get some work done.
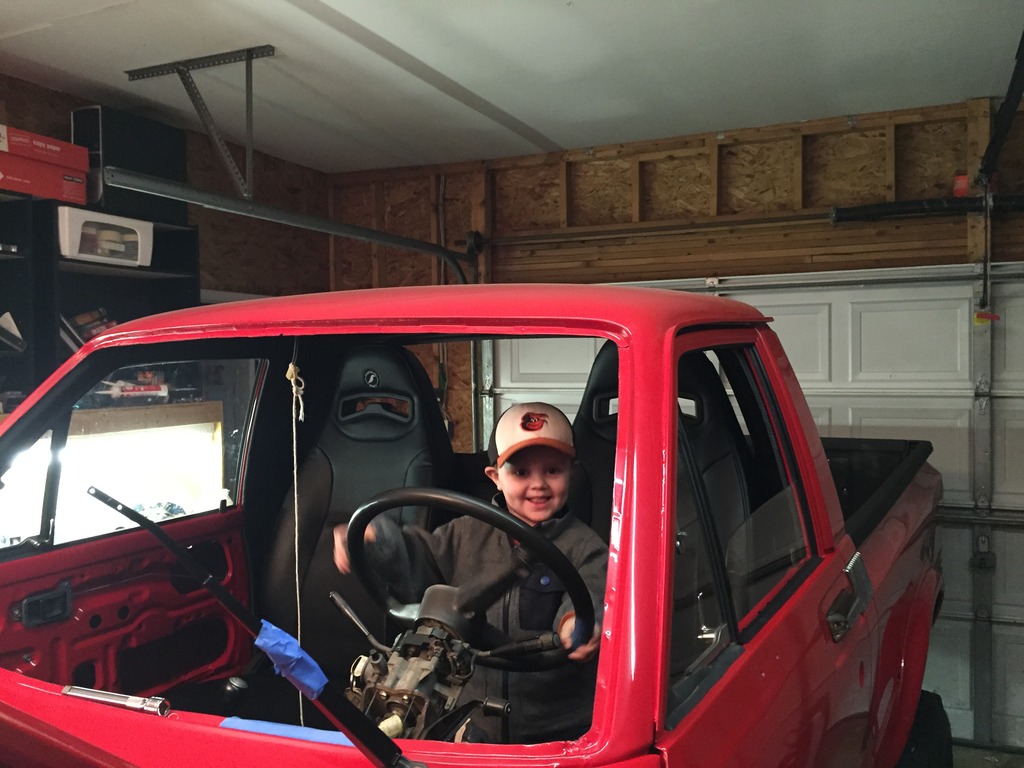
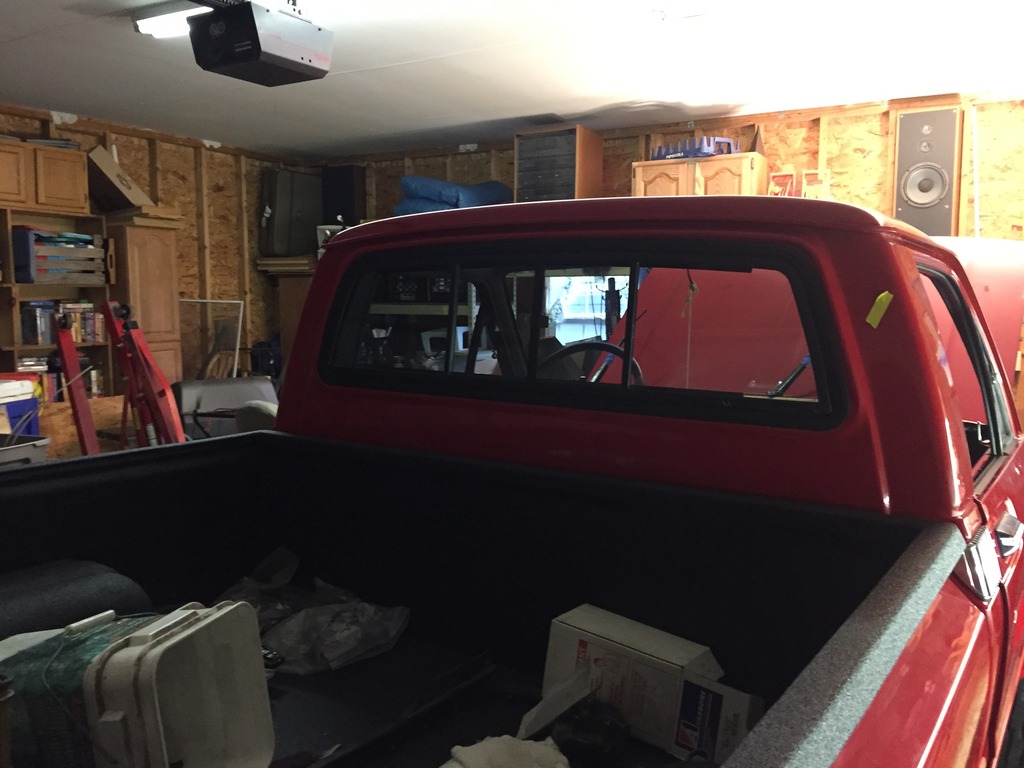
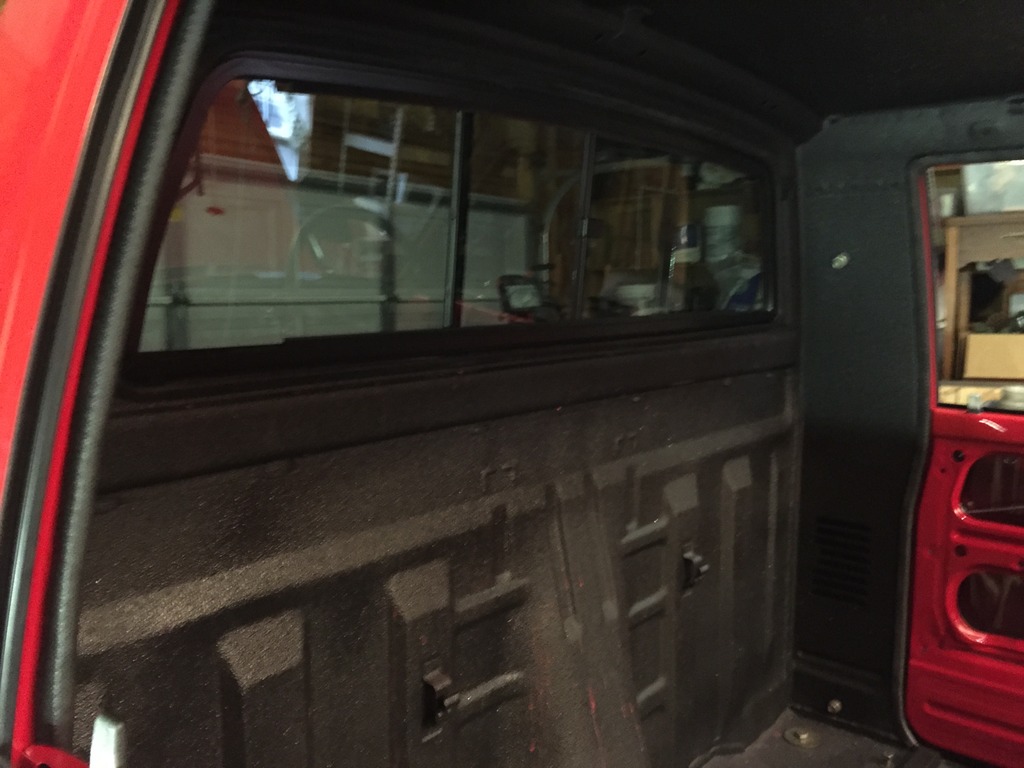
Rear sliding glass installed - went pretty easy with the soapy string technique:
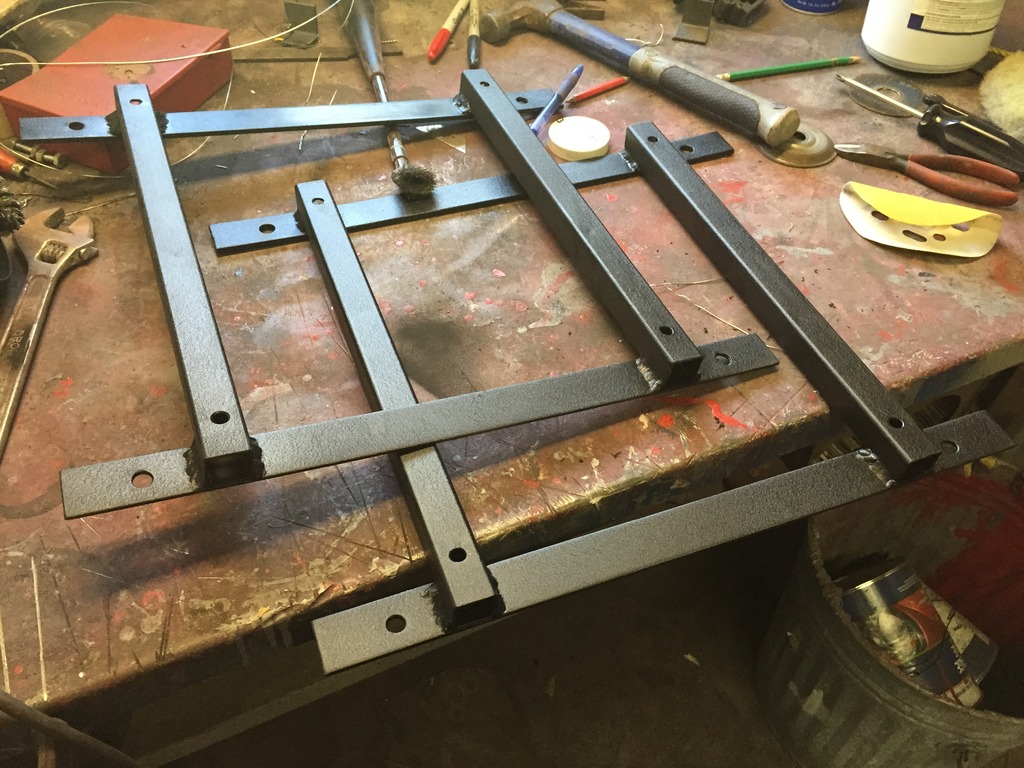
Powdercoated my seat brackets. I got some new "wrinkle" powder from Eastwood so I decided to use my seat brackets as a test coat before I did anything else since they won't be seen too much. The stuff is a little tricky - it can't be hot coated like I normally like to do my powdercoat (found that out the hard way and had to strip it off). The trick is to apply a couple medium coats of powder and bake, cure and cool between each coat in order to get good coverage and maintain the wrinkle. I also used this stuff on my console and gauges but I forgot to get a picture before I installed them.
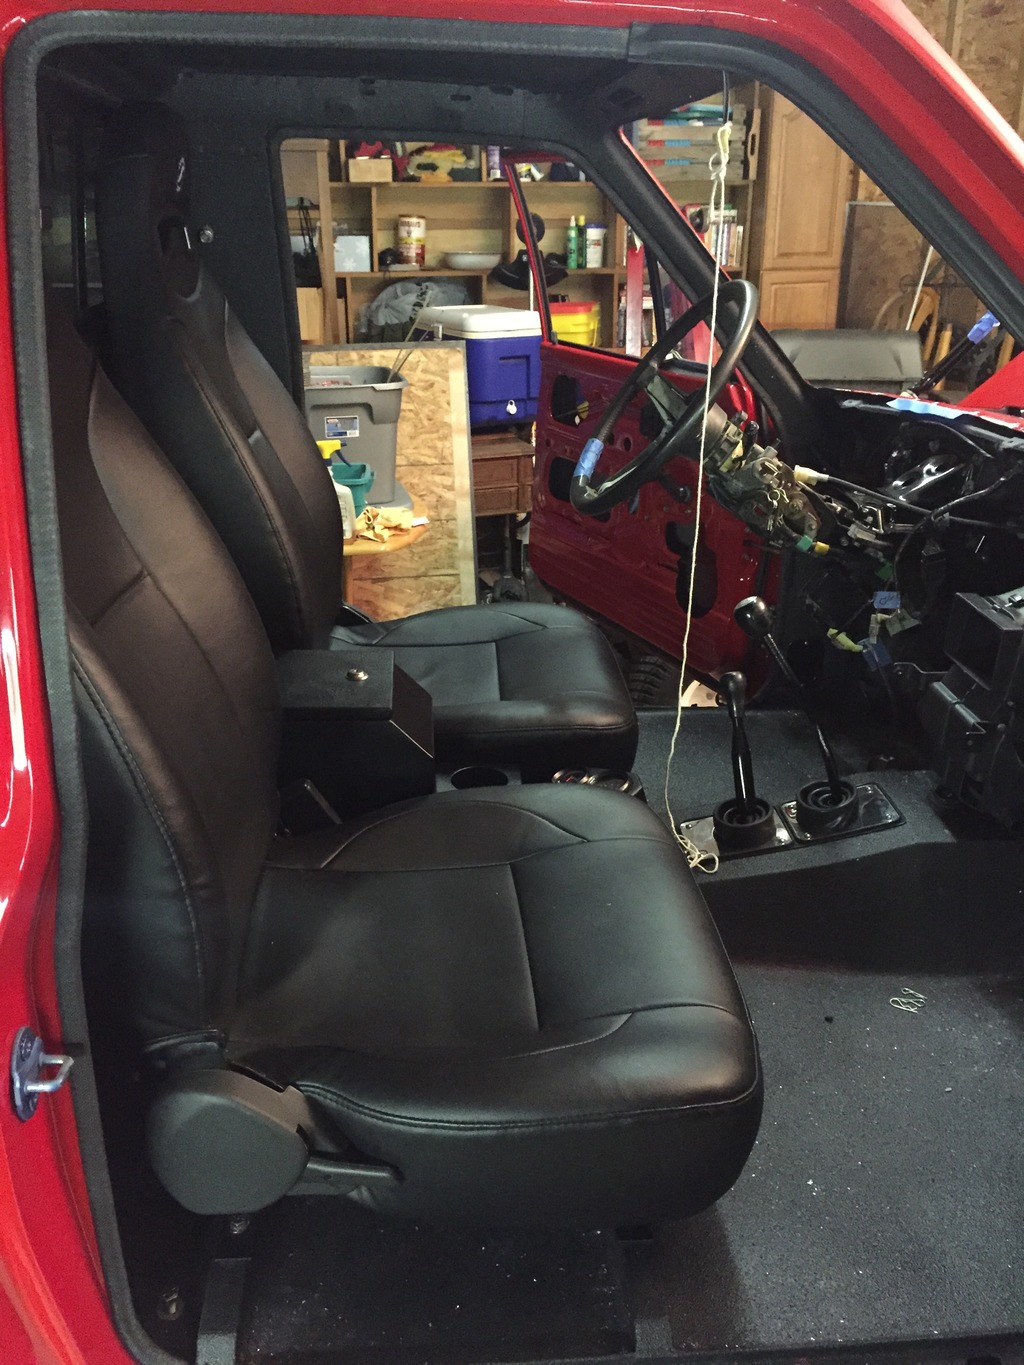
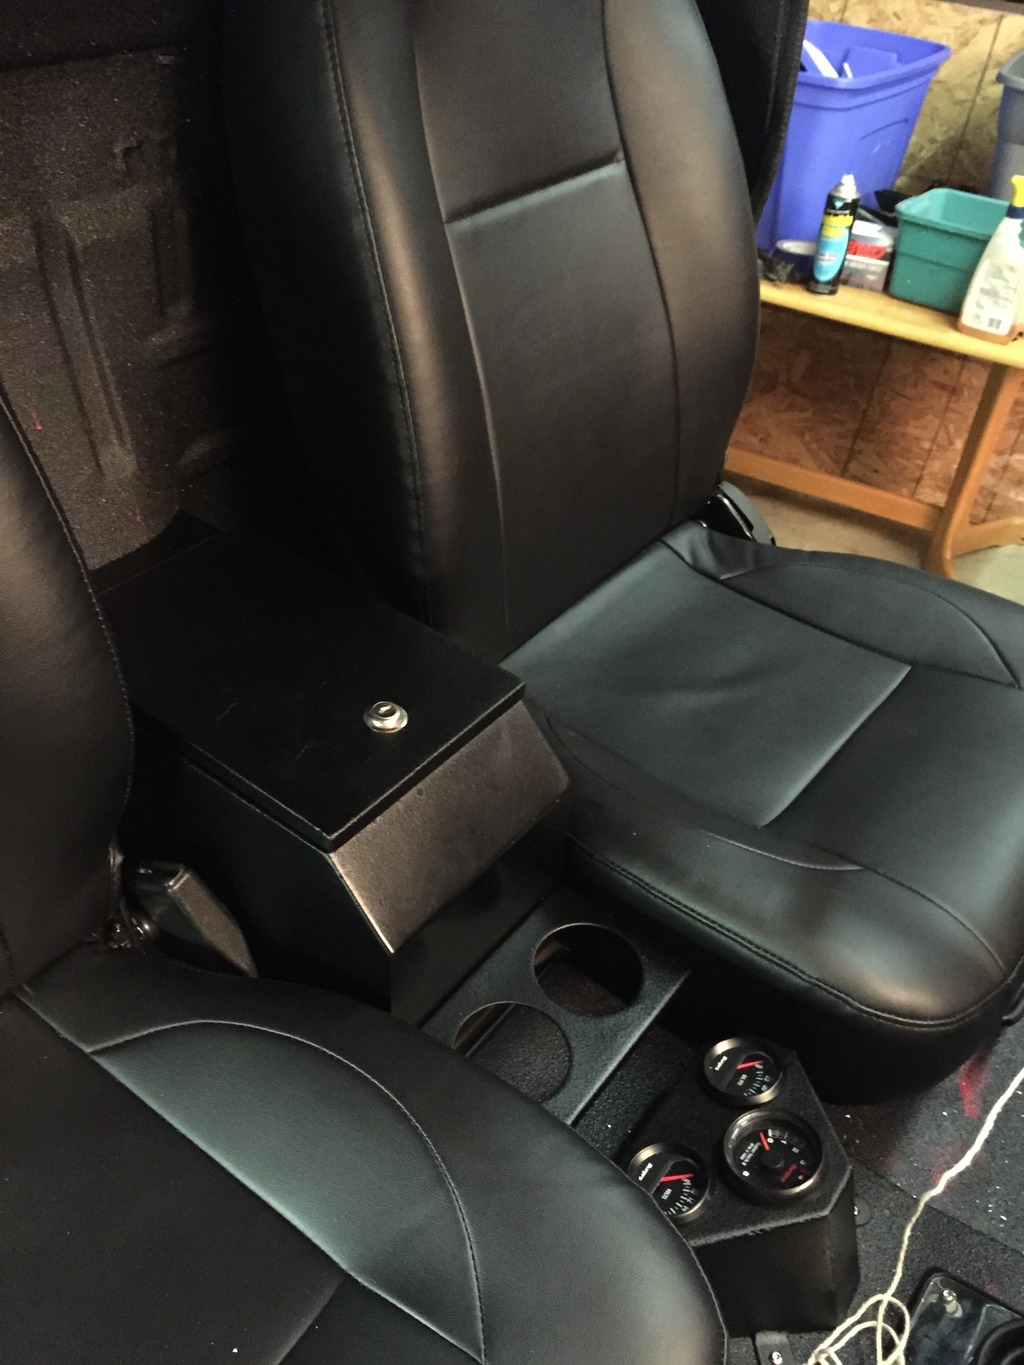
So then I installed my seats, console and gauges. Everything looks great!
Glass guy comes tomorrow morning so that's pretty exciting stuff right there! Getting close-may fire it up and go for a ride this weekend!
I had my little helper with me this evening - not exactly much help, but after my wife picked him up I was able to get some work done.


Rear sliding glass installed - went pretty easy with the soapy string technique:


Powdercoated my seat brackets. I got some new "wrinkle" powder from Eastwood so I decided to use my seat brackets as a test coat before I did anything else since they won't be seen too much. The stuff is a little tricky - it can't be hot coated like I normally like to do my powdercoat (found that out the hard way and had to strip it off). The trick is to apply a couple medium coats of powder and bake, cure and cool between each coat in order to get good coverage and maintain the wrinkle. I also used this stuff on my console and gauges but I forgot to get a picture before I installed them.

So then I installed my seats, console and gauges. Everything looks great!


Glass guy comes tomorrow morning so that's pretty exciting stuff right there! Getting close-may fire it up and go for a ride this weekend!
03-17-2015, 09:20 AM
#1167
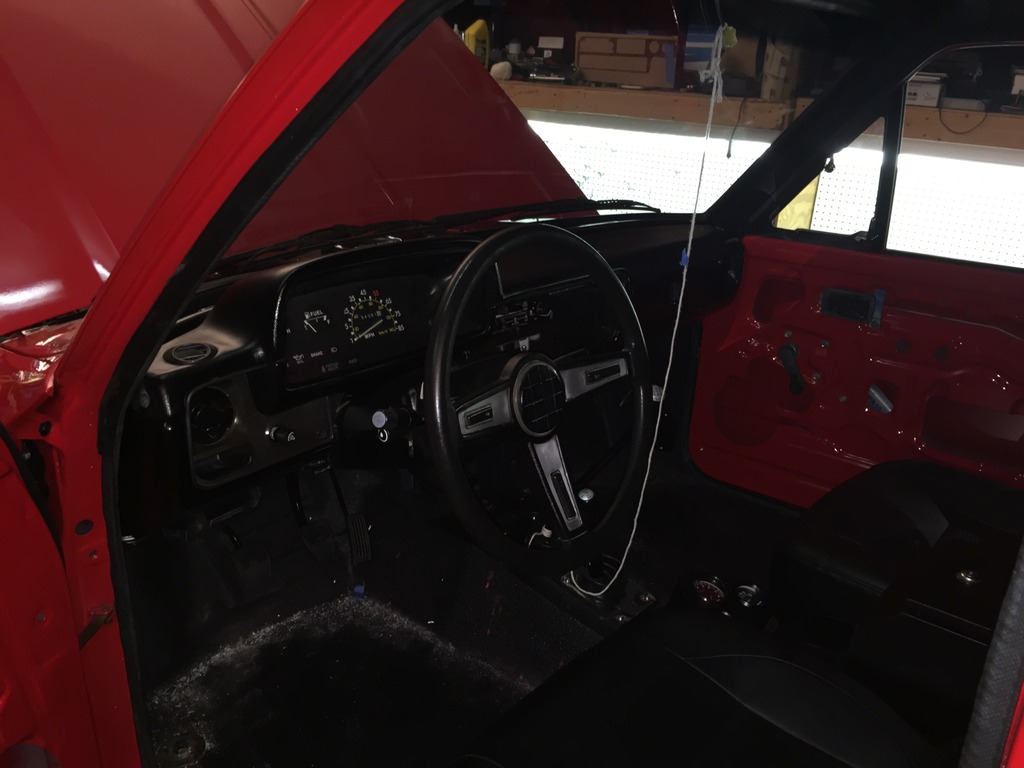
And the glass guy installed my windshield this morning. I was going to do it myself but after looking all over at the cost of the windshield and gasket it only cost me around $30 more to have it plus it is warrantied and guaranteed not to leak. So for $285 I have a nice shiney new windshield and a little piece of mind. Although it would have been nice (and cheaper) if my son didn't crack the one that I took out - I suppose that is what I get for leaving it vulnerable to two-year-old destruction in the house.

Just another step closer to rolling down the road!!
Quick question for you all - I plugged in my gauges today and noticed that my charge light was on when I turned the key to the ACC position. It did not turn off like I THINK it should, so I was wondering if it stays on until the engine cranks over or is it supposed to turn off after a few seconds in the ACC position? I should probably also note that my starter cable is NOT connected (don't want to accidentally turn over the engine yet) but I'm not sure if that matters. I'm hoping that it goes away once started and isn't a relay or something. Any help is greatly appreciated. Thanks guys!
Last edited by kawazx636; 03-17-2015 at 09:22 AM.
03-17-2015, 09:39 AM
#1168
Registered User
Join Date: Jan 2011
Location: Memphis, TN
Posts: 1,051
Likes: 0
Received 0 Likes
on
0 Posts
Assuming they work similarly, my 89 pickup's CEL and charge light both stay on until I start the engine. That charge light will probably go off when it starts!
 03-24-2015, 11:33 PM
#1174
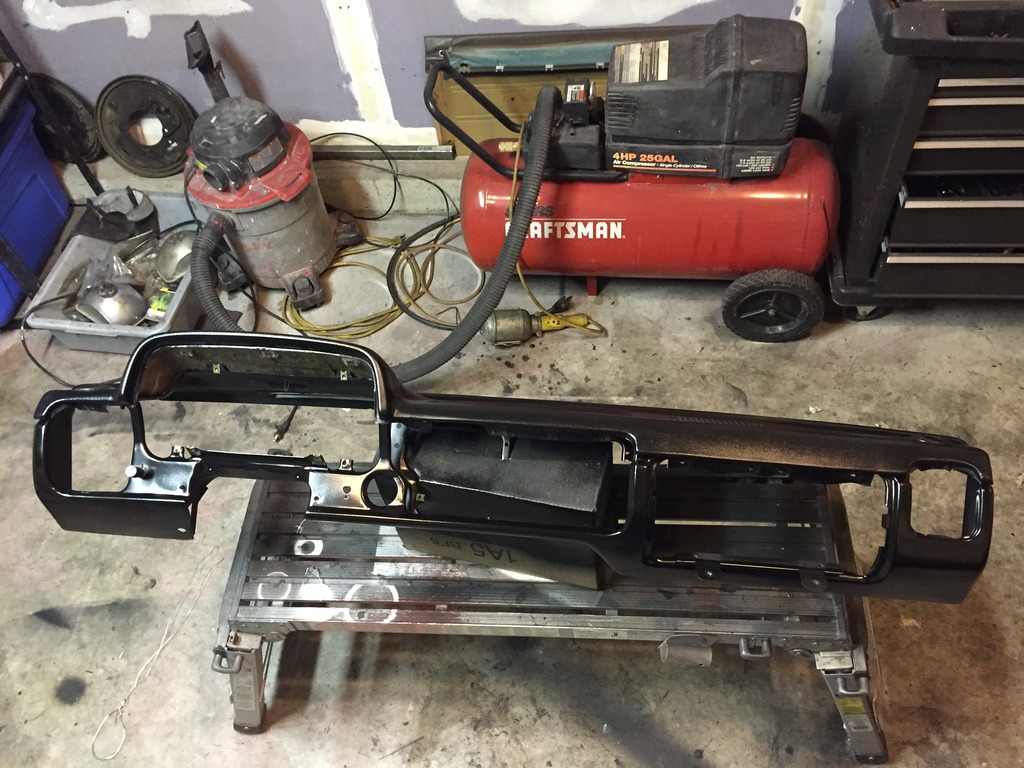
Welded up the holes that the PO drilled in the dash, sanded it down and prepped for paint:
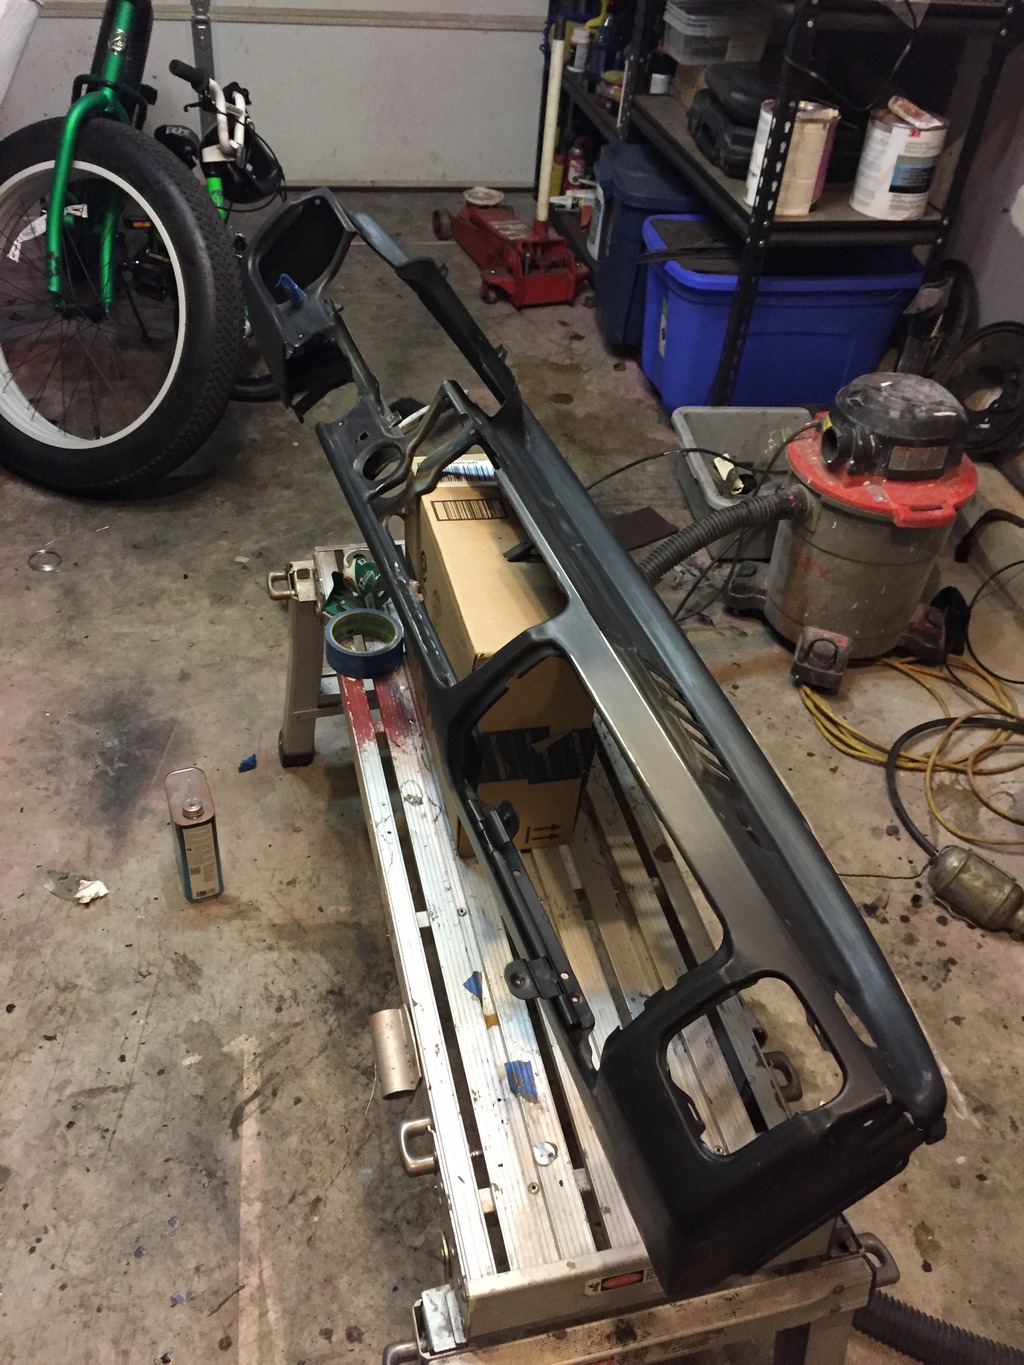
Cleaned up and re-installed the dash pad. Folks, if you are planning on painting your truck do the next owner a favor and properly mask off (better yet, REMOVE) anything that you don't want overspray on! The PO failed to do such and damn near ruined an almost perfect dash pad with overspray from his crappy blue paint job. It took a lot of elbow grease and a few different products to remove the overspray from the dash and other parts.
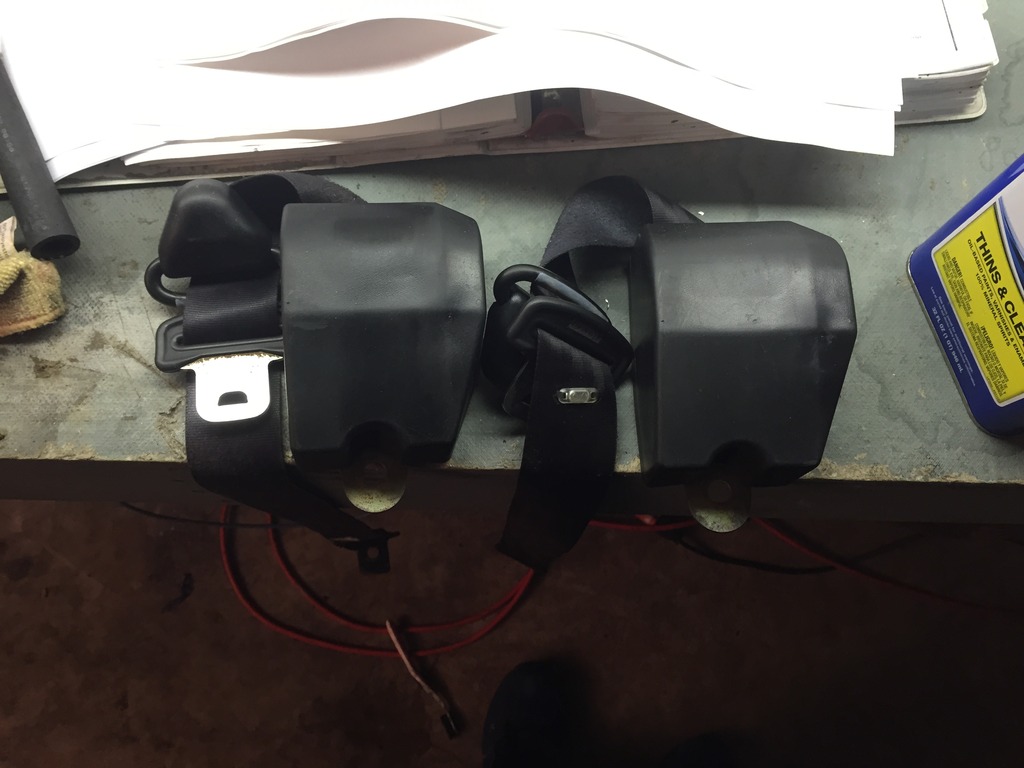
Cleaned up the seat belts - again, tons of overspray had to be removed:
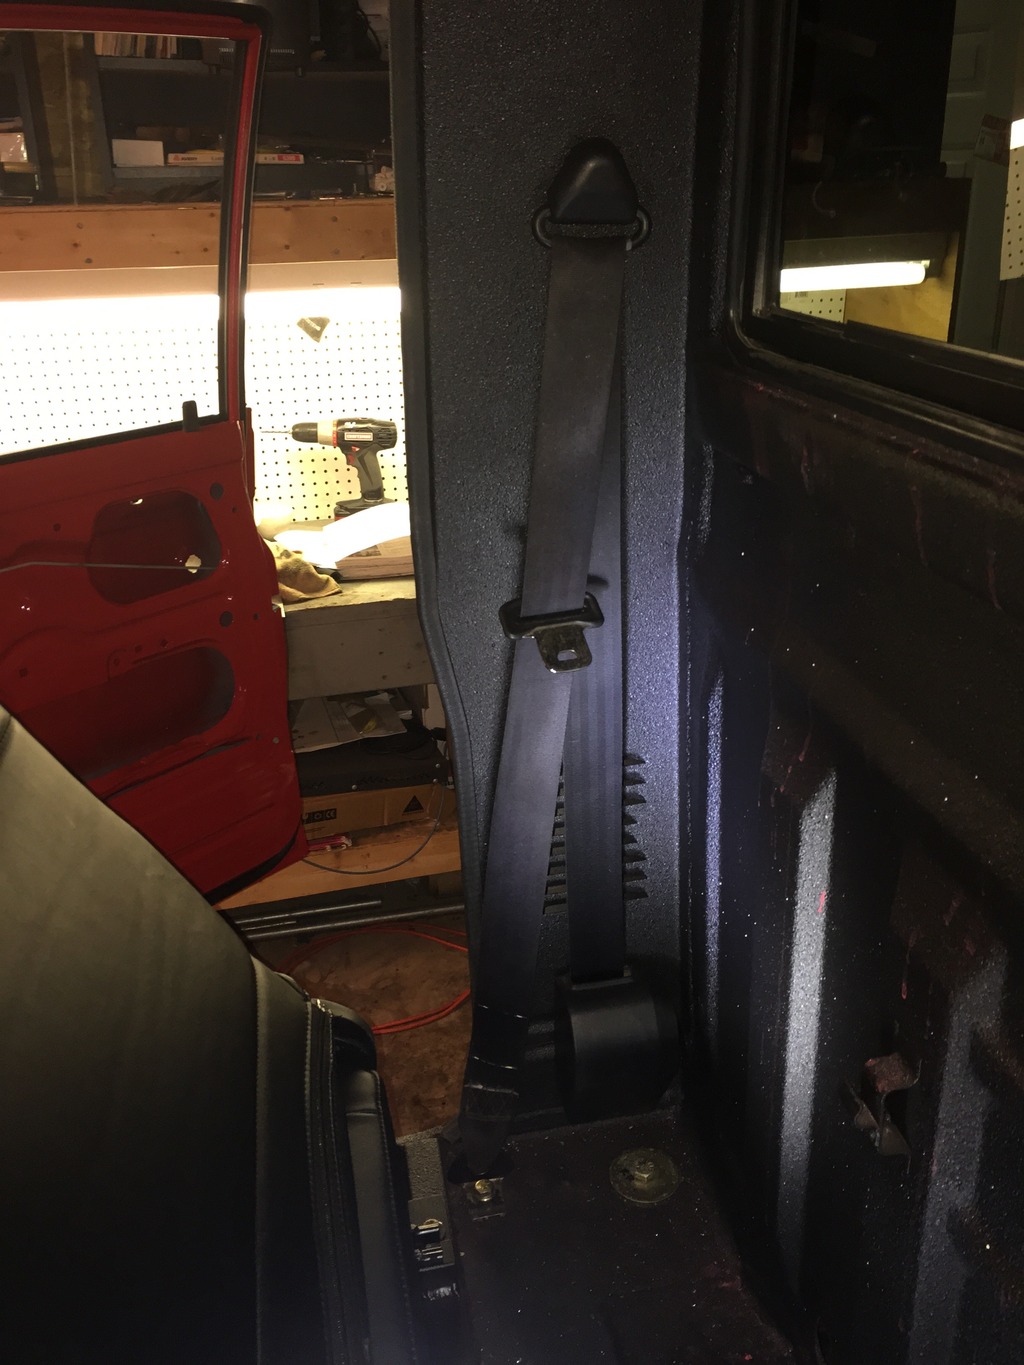
Seatbelts installed:
Dash halfway done:
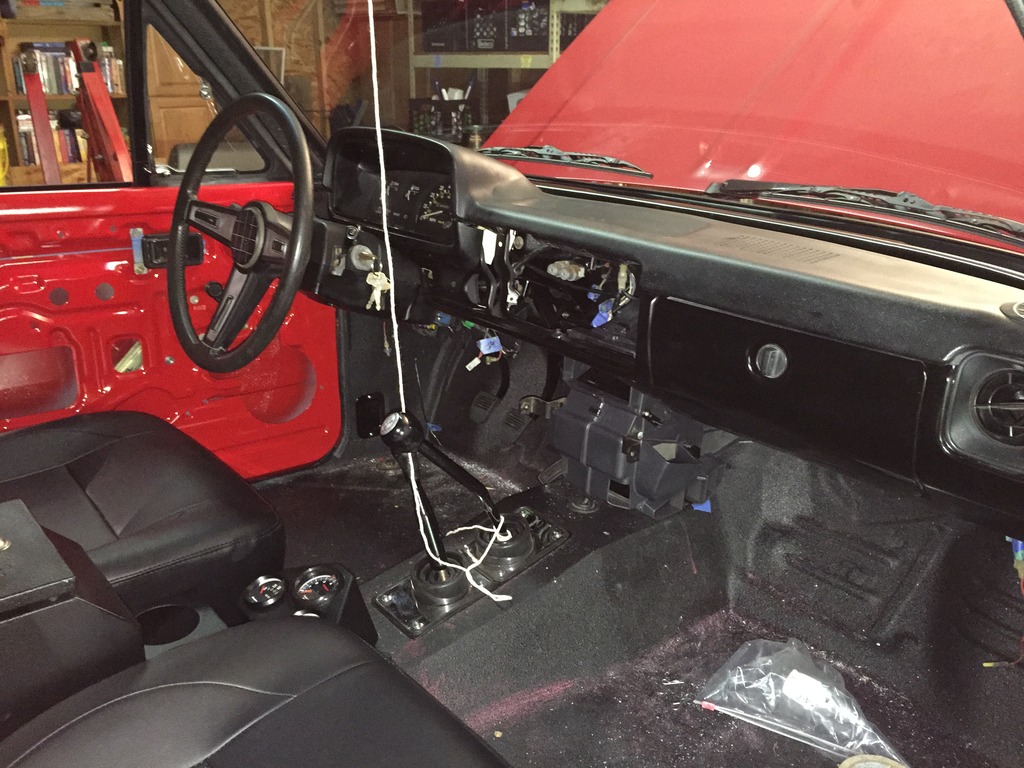
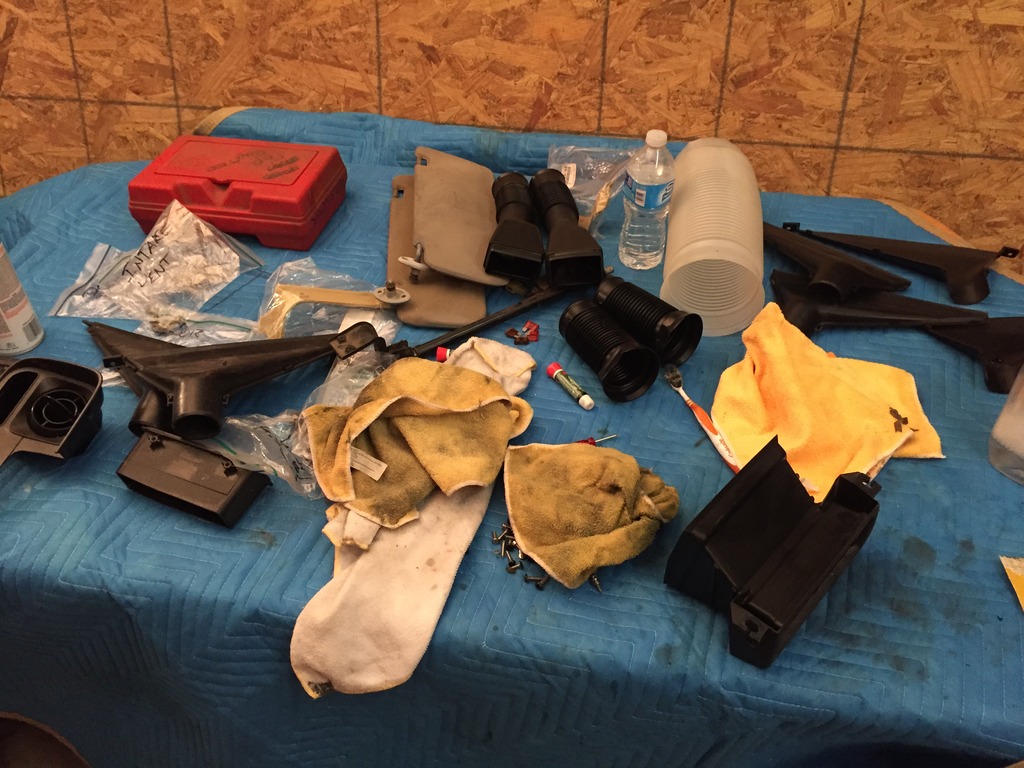
Spent a couple hours tonight cleaning off the 32 years of grime that has collected in the heat and ventilation equipment:
Dash and components put back together minus the ash tray, radio and dash pocket above the radio - if anybody has these in good condition please let me know - I am very interested in procuring those parts!
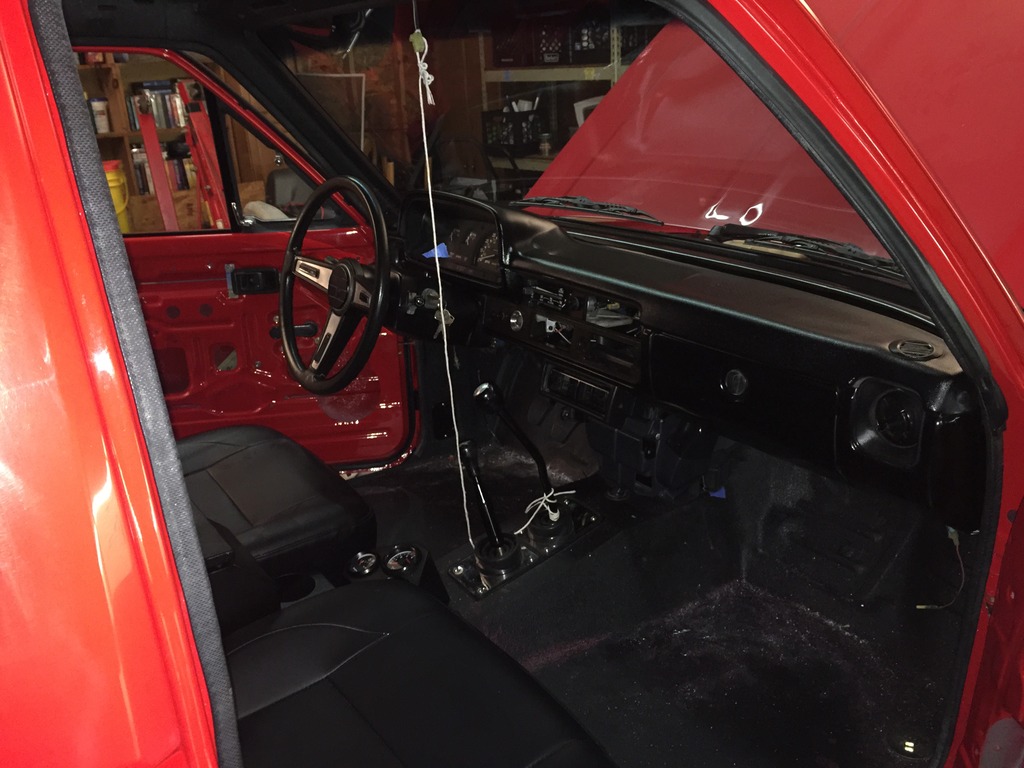
The interior is now essentially done for now until I get the rest of the dash parts I need. I will be making door panels later on when I get the time. I also tested the blower motor to make sure it was functioning properly. Before I took everything apart I either had low or high heat (nothing in between). A new blower motor resistor seemd to fix that issue so now the fan operates at all speeds like it should.
Tomorrow night I am going to pop the valve cover off and double check to make sure my timing is set properly at the chain - it should be but I just want to make sure. Also, since it has been over two years since I built the motor I want to make sure that I didn't get and moisture in there. I'm also go back through the valve lashing and re-torque everything just to be sure. Then fill her up with fluids, say a little prayer and cross my fingers! This week isn't looking good for starting it. I'd like to have at least a 60 degree day so I don't have to fight the cold on the first start up, but the weather doesn't look good for me there and warmer days are looking like rain. I want to be able to fire it up, make some adjustments and put a couple hundred miles on it to break in the engine - I definitely don't want my first road test to be in the rain - for both cosmetic and safety reasons. Every component of this truck has been modified, replaced or adjusted so I'm bound to have some adjustments and tweaks to make.
Hopefully the weather will go my way for once so that I can enjoy my 2.5 years of a labor!

Cleaned up and re-installed the dash pad. Folks, if you are planning on painting your truck do the next owner a favor and properly mask off (better yet, REMOVE) anything that you don't want overspray on! The PO failed to do such and damn near ruined an almost perfect dash pad with overspray from his crappy blue paint job. It took a lot of elbow grease and a few different products to remove the overspray from the dash and other parts.

Cleaned up the seat belts - again, tons of overspray had to be removed:

Seatbelts installed:

Dash halfway done:

Spent a couple hours tonight cleaning off the 32 years of grime that has collected in the heat and ventilation equipment:

Dash and components put back together minus the ash tray, radio and dash pocket above the radio - if anybody has these in good condition please let me know - I am very interested in procuring those parts!


The interior is now essentially done for now until I get the rest of the dash parts I need. I will be making door panels later on when I get the time. I also tested the blower motor to make sure it was functioning properly. Before I took everything apart I either had low or high heat (nothing in between). A new blower motor resistor seemd to fix that issue so now the fan operates at all speeds like it should.
Tomorrow night I am going to pop the valve cover off and double check to make sure my timing is set properly at the chain - it should be but I just want to make sure. Also, since it has been over two years since I built the motor I want to make sure that I didn't get and moisture in there. I'm also go back through the valve lashing and re-torque everything just to be sure. Then fill her up with fluids, say a little prayer and cross my fingers! This week isn't looking good for starting it. I'd like to have at least a 60 degree day so I don't have to fight the cold on the first start up, but the weather doesn't look good for me there and warmer days are looking like rain. I want to be able to fire it up, make some adjustments and put a couple hundred miles on it to break in the engine - I definitely don't want my first road test to be in the rain - for both cosmetic and safety reasons. Every component of this truck has been modified, replaced or adjusted so I'm bound to have some adjustments and tweaks to make.
Hopefully the weather will go my way for once so that I can enjoy my 2.5 years of a labor!
03-26-2015, 05:27 PM
#1176
Registered User
Join Date: Jun 2011
Location: Brew city,Wisconsin
Posts: 57
Likes: 0
Received 0 Likes
on
0 Posts
Wow, your so close to firing it up. I've been following your thread for awhile and read thru it all. If I had half the knowledge of you and could make my truck look anywhere close to yours I would be happy. My truck is just sitting waiting for me to give it some love. All in due time I guess. On your dash parts, I may be able to help you out. I do have an old radio that came with an '83 dash I picked up. Not sure if it's original or if it works. It says Toyota electronic receiver on it. No date, but I do have a model #. It is dirty and I won't clean it up as you would just do that anyway. It is just an am/fm receiver. I also have the pocket and ashtray but I may need them. The previous owner hacked up the interior and not sure what I need. I can ck this weekend if you'd still B interested. Good luck with it and let me know if u want the radio.
03-26-2015, 10:53 PM
#1177
Did a final check on everything tonight. Re-torqued the entire drivetrain to spec, popped off the valve cover to re-torque the head bolts and double check the timing and valve lashing, checked to make sure there was still a good coating of assembly lube on the camshaft, bathed the head with oil, double checked all the belts and hoses, filled the power steering fluided and poured in some Toyota Red coolant. All I need to do now is grab some distilled water to dilute the coolant and track down some zinc oil additive for break-up. I think that all systems are go - Hopefully I'll get it fired up tomorrow night! How am I going to possibly get any sleep tonight and any work done tomorrow with this on my mind?!
Last edited by kawazx636; 03-26-2015 at 11:12 PM.
03-27-2015, 09:16 PM
#1180
Well here we go guys!!! I got some zinc additive and finished topping off my radiator tonight and I thought to myself "you know, tonight would be a good night to hear my engine again for the first time in 2.5 years..." So I pulled the coil wire and started cranking to prime the oil pump. I cranked for a good 45 seconds and I still wasn't getting any pressure at the gauge and the idiot light wouldn't go off. So I hunted down my oil pressure test gauge thinking that maybe the gauge wasn't working properly and the idiot light was just being an idiot. Hooked it up and turned it over for about 7 sections and BOOM! Idiot light went off, the oil pressure gauge came alive and the mechanical gauge verified the exact same pressure! I was freaked out for a minute because I knew I didn't forget "the plug" (you know, the one that people like to forget to re-install in the block when they rebuild their engine) and there was really no reason why I shouldn't get pressure other than possibly my pump being bad. So after I did my little happy dance I went ahead and plugged the coil back in, put 5 gallons of fuel in the tank, poured a little fuel down the carb and pulled the fuel up through the fuel lines from the tank with a vacuum tool. Turned the key for about 5 seconds and VROOOOOOOM! Fired right up to a hearty idle with no choke in 38* weather! After another an even more extravagant happy dance I brought the idle up to about 1600 RPM to start the break in. Ran it flawlessly for about 25 minutes. No smoke out of the exhaust, no pinging, no misfires and no diesiling when I shut it down. Now I know all of you guys just was so see videos so here you go:
This is a few moments after start-up:

Here we are during break in at about 1,600rpm (it really isn't as loud as it sounds in the video):

And here is what the exhaust sounds like at about 1,200rpm. I still need to weld on a tail pipe but I haven't decided if I want to dump it out the side or just flip it down under the bed. It sounds really good - nice and throaty!

Now for the problems... I haven't had a chance to research them yet, but maybe some of you can help and save me some time:
1) My timing is all over the place! The timing mark on the pull jumps randomly all over the place when I put a light on it (ie - like 25* advanced then 10* retarded and then 5* advanced). I've never seen anything like this before! The motor obviously isn't tuned yet, but it runs rather well so I'm hoping that my timing light is just screwed up. Anybody seen this before?
2) My charge light stays on. I put a meter on the alternator and it putting out a charge at the post. I put the meter on the charge wire at the battery (disconnected of course) and I have charge there. So why would the charge light stay on?
3) My tach that I installed isn't working. I connected it to the factory tach test plug off of the coil but it doesn't read anything. Is that not the right way to wire an aftermarket tach??
4) I have a super gooshy brake pedal! Keep in mind that I have a GM rear disc conversion, 1" bore MC and manual proportioning valve. It won't even pump up at all now. Doesn't feel like air in the lines but I'm going to bleed them again anyway. I do not have a residual valve installed on the rear because I thought that I didn't need one if I have the proportioning valve. Do I need one anyway? Anything else that could be causing this problem!
Any answers to the above would be greatly appreciated - especially the brakes! Tomorrow, well today now (it's 1am) is my sons's third birthday and I told him that I would take him for a ride for his birthday so obviously Safety first when I comes to my son!
Still more work to do, but at least the most worrisome part is over with!!
This is a few moments after start-up:
Here we are during break in at about 1,600rpm (it really isn't as loud as it sounds in the video):
And here is what the exhaust sounds like at about 1,200rpm. I still need to weld on a tail pipe but I haven't decided if I want to dump it out the side or just flip it down under the bed. It sounds really good - nice and throaty!
Now for the problems... I haven't had a chance to research them yet, but maybe some of you can help and save me some time:
1) My timing is all over the place! The timing mark on the pull jumps randomly all over the place when I put a light on it (ie - like 25* advanced then 10* retarded and then 5* advanced). I've never seen anything like this before! The motor obviously isn't tuned yet, but it runs rather well so I'm hoping that my timing light is just screwed up. Anybody seen this before?
2) My charge light stays on. I put a meter on the alternator and it putting out a charge at the post. I put the meter on the charge wire at the battery (disconnected of course) and I have charge there. So why would the charge light stay on?
3) My tach that I installed isn't working. I connected it to the factory tach test plug off of the coil but it doesn't read anything. Is that not the right way to wire an aftermarket tach??
4) I have a super gooshy brake pedal! Keep in mind that I have a GM rear disc conversion, 1" bore MC and manual proportioning valve. It won't even pump up at all now. Doesn't feel like air in the lines but I'm going to bleed them again anyway. I do not have a residual valve installed on the rear because I thought that I didn't need one if I have the proportioning valve. Do I need one anyway? Anything else that could be causing this problem!
Any answers to the above would be greatly appreciated - especially the brakes! Tomorrow, well today now (it's 1am) is my sons's third birthday and I told him that I would take him for a ride for his birthday so obviously Safety first when I comes to my son!
Still more work to do, but at least the most worrisome part is over with!!


