
541SR5's 1981 Pickup Build-Up Thread
 Sep 15, 2011 | 08:59 AM
#1
Thread Starter
Registered User
Joined: Dec 2010
Posts: 114
Likes: 0
From: Houston, TX
541SR5's 1981 Pickup Build-Up Thread
I've been a YotaTech member here for a few months and I'm finally getting around to starting a build thread on my '81 4x4 pickup. I've actually been working on it and documenting everything for over a year now so I will start from the beginning and add to this thread until I get it up to present day and so on.
First, a little history on the truck. It's an '81 4x4, SR5, 22R with 136,000 original miles. My uncle bought it new here in Houston as a dealer demo and used it mainly as a truck to get him back and forth to work and for duck and goose hunting around Katy. I remember riding in it serveral times as a little kid and thought it was the coolest truck ever. After a few years the truck starting burning oil pretty bad (he had to put a quart of oil in it every 2 weeks or so). Slowly, the truck started seeing the driveway more than road and eventually it was parked. I was in high school when we pushed it in the garage in '97 where it sat for 13 years.
In early 2010, I had just gotten on another deer lease and at a family get-together my uncle and I were talking about the lease and whatnot and he said, "you know, if y'all want to get that old Toyota running and use it up there y'all can." The more I thought about it the less I wanted to just leave the truck at the lease, so I considered making it where I could use a tow bar and tow it up there on the weekends with my DD. Again, the more I thought about that idea, I figured why not just get it road worthy again and drive it up there (no sense in taking 2 trucks to the lease, right?).
I'll have to say, the more I got into the truck the more I realized how much was rusted, worn out and had to be replaced. So my final idea (and the plan I'm building for now) is to make it my weekend vehicle I can drive around town Friday-Sunday and still take hunting. It'll look good on the street, but I won't be afraid to get it muddy either. After doing some online research and reading and also decided to do a few of the more common upgrades to the truck, however I really wanted the final product to keep its stock appearance. So I guess you can say I'm doing a resto mod.
I'll be adding pictures and details of what I did in the coming weeks.
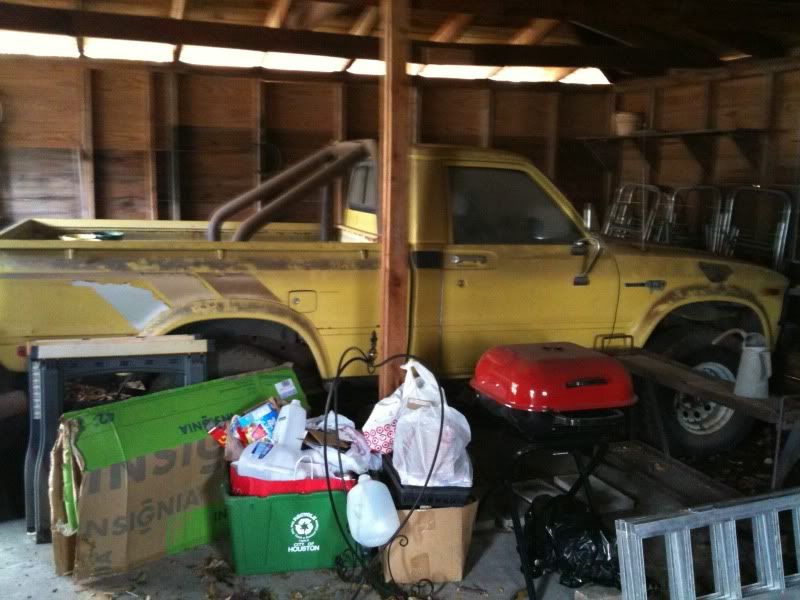
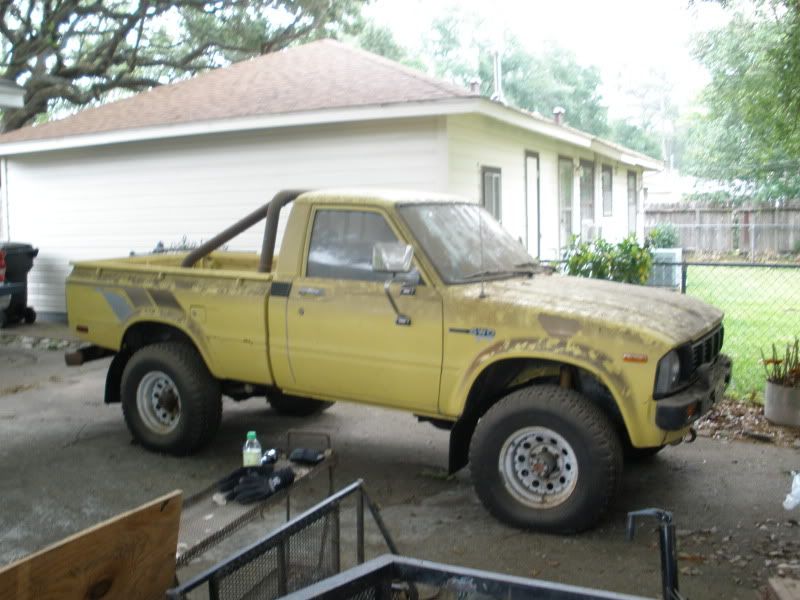
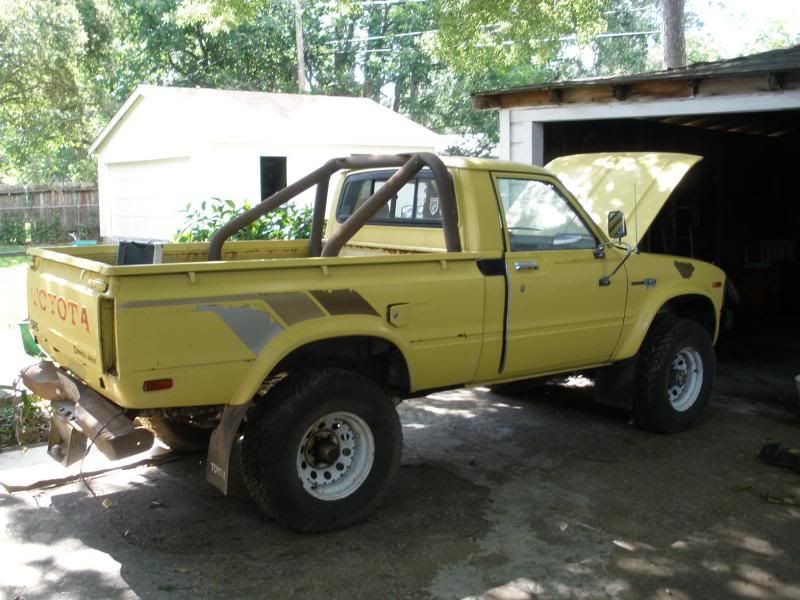
This is how the truck looked when I pulled it out of the garage in April 2010. 13 years worth of dirt, spider webs, rust, oil and God knows what else. But overall, the truck was in pretty good condition (I guess being in a garage helped out).

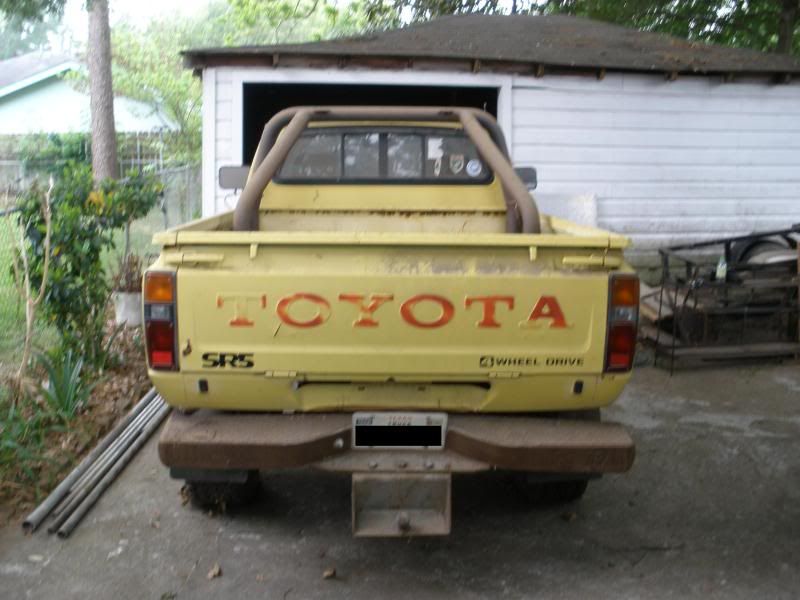
First, a little history on the truck. It's an '81 4x4, SR5, 22R with 136,000 original miles. My uncle bought it new here in Houston as a dealer demo and used it mainly as a truck to get him back and forth to work and for duck and goose hunting around Katy. I remember riding in it serveral times as a little kid and thought it was the coolest truck ever. After a few years the truck starting burning oil pretty bad (he had to put a quart of oil in it every 2 weeks or so). Slowly, the truck started seeing the driveway more than road and eventually it was parked. I was in high school when we pushed it in the garage in '97 where it sat for 13 years.
In early 2010, I had just gotten on another deer lease and at a family get-together my uncle and I were talking about the lease and whatnot and he said, "you know, if y'all want to get that old Toyota running and use it up there y'all can." The more I thought about it the less I wanted to just leave the truck at the lease, so I considered making it where I could use a tow bar and tow it up there on the weekends with my DD. Again, the more I thought about that idea, I figured why not just get it road worthy again and drive it up there (no sense in taking 2 trucks to the lease, right?).
I'll have to say, the more I got into the truck the more I realized how much was rusted, worn out and had to be replaced. So my final idea (and the plan I'm building for now) is to make it my weekend vehicle I can drive around town Friday-Sunday and still take hunting. It'll look good on the street, but I won't be afraid to get it muddy either. After doing some online research and reading and also decided to do a few of the more common upgrades to the truck, however I really wanted the final product to keep its stock appearance. So I guess you can say I'm doing a resto mod.
I'll be adding pictures and details of what I did in the coming weeks.
This is how the truck looked when I pulled it out of the garage in April 2010. 13 years worth of dirt, spider webs, rust, oil and God knows what else. But overall, the truck was in pretty good condition (I guess being in a garage helped out).
Last edited by 541SR5; Feb 5, 2012 at 05:06 AM.
Sep 15, 2011 | 10:35 AM
#5
Thread Starter
Registered User
Joined: Dec 2010
Posts: 114
Likes: 0
From: Houston, TX
Sep 15, 2011 | 10:52 AM
#6


-go to a picture hosting site, such as photobucket.com, and create an account (free)
-upload your pictures
-click on the "[img]" code, and the word "copied" should appear
-in your post here, paste the code, which should look like this:
[img]https://photobucket.com/irab88/albums/truck1.jpg[/lmg]
-when you click "post", you'll see the image
-upload your pictures
-click on the "[img]" code, and the word "copied" should appear
-in your post here, paste the code, which should look like this:
[img]https://photobucket.com/irab88/albums/truck1.jpg[/lmg]
-when you click "post", you'll see the image
Trending Topics
Sep 15, 2011 | 05:27 PM
#8
always like to see another first Gen build, especially an 81
on flat towing...sure it would be easy but don't, unless you pull the rear driveshaft at the diff or have a rear driveshaft disconnect.
1) the transfer case doesn't get properly lubed with the rear output shaft spinning
2) you run the risk of it going into gear. I was too lazy to pull the rear shaft (it was raining hard and I was tired) tranmission or T/C slipped into gear and I trashed a transmission and one of my dual cases....
1) the transfer case doesn't get properly lubed with the rear output shaft spinning
2) you run the risk of it going into gear. I was too lazy to pull the rear shaft (it was raining hard and I was tired) tranmission or T/C slipped into gear and I trashed a transmission and one of my dual cases....
Sep 16, 2011 | 04:45 AM
#9
Thread Starter
Registered User
Joined: Dec 2010
Posts: 114
Likes: 0
From: Houston, TX
on flat towing...sure it would be easy but don't, unless you pull the rear driveshaft at the diff or have a rear driveshaft disconnect.
1) the transfer case doesn't get properly lubed with the rear output shaft spinning
2) you run the risk of it going into gear. I was too lazy to pull the rear shaft (it was raining hard and I was tired) tranmission or T/C slipped into gear and I trashed a transmission and one of my dual cases....
Thanks! I'll keep these tips in mind just in case I ever have to pull it.
Jan 21, 2012 | 03:01 AM
#10
Thread Starter
Registered User
Joined: Dec 2010
Posts: 114
Likes: 0
From: Houston, TX
The Work Begins...
I haven't posted any updates in awhile so now that's hunting season is over it's time to get my thread up to speed.
The first thing I did, after making sure the truck wasn't too far gone for a rebuild, was remove the bed. Don't ask me why I started on the business end first, I guess because it would let me to save up some cash before I started on the front.


The frame wasn't in that bad of shape, just some expected surface rust. I was also able to see what all needed to be replaced which looked like everything...
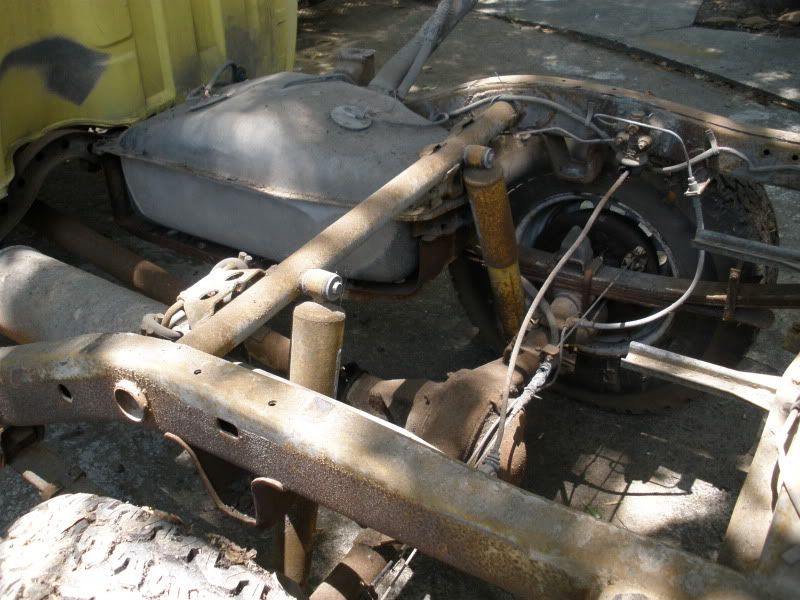
The first thing I did, after making sure the truck wasn't too far gone for a rebuild, was remove the bed. Don't ask me why I started on the business end first, I guess because it would let me to save up some cash before I started on the front.
The frame wasn't in that bad of shape, just some expected surface rust. I was also able to see what all needed to be replaced which looked like everything...
Last edited by 541SR5; Feb 5, 2012 at 04:48 AM.
 Jan 25, 2012 | 10:02 AM
#12
Thread Starter
Registered User
Joined: Dec 2010
Posts: 114
Likes: 0
From: Houston, TX
Thanks, it's been a fun truck work on for the most part (there's been a few times where we disagreed, but I usually came out on top). I think got really lucky because the truck was all original (minus the wheels and rollbar) and it was stored in a garage the whole time. Very little bad rust, mostly surface rust.
Jan 25, 2012 | 03:12 PM
#13
Thread Starter
Registered User
Joined: Dec 2010
Posts: 114
Likes: 0
From: Houston, TX
Rear POR-15
Once I got the bed off, I started by draining all the gas out of the gas tank...lucky for me, it was 3/4 full 
While looking up places to take the tank to get it fixed, I came across some stuff called POR-15. The more I read, the more I liked what I heard about it's rust prevention and how you could paint over rust. Even better was that the shop and was dropping the tank off to have fixed also sold POR-15, so I bought a starter kit to try out. I have a painting background, so I was a little unsure of how the paint would work by just brushing it on.

Much to my surprise, it layed down really easy and once it dried I had zero brush strokes. I just followed the directions..knocked down all the loose scaley rust with a wire brush and sandpaper then hit it with marine clean and metal prep. After that I put on 1 coat of silver (to fill in any pits in the metal), then put on 2 coats of the gloss black, and finished it with 2 coats of the Chassis Coat Black (sorry I didn't take any pictures between coats).
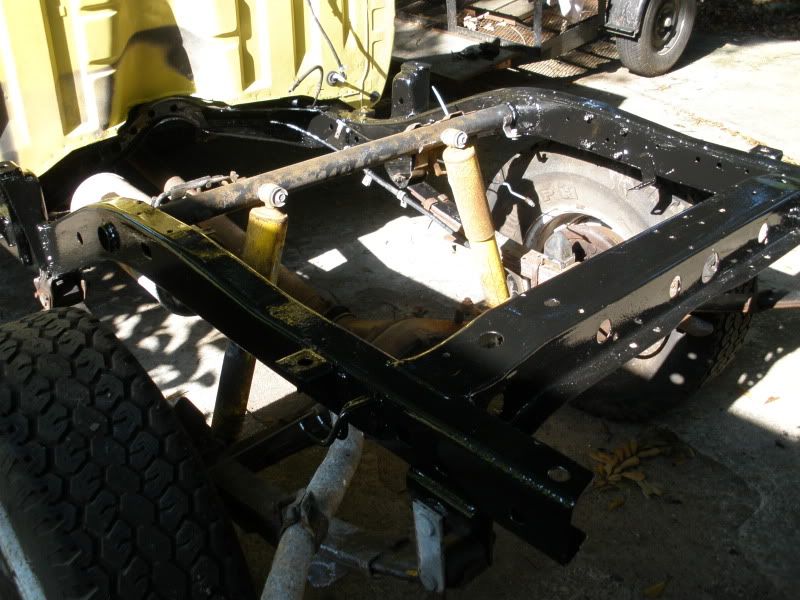
While I had the shocks, brake lines, emergency brake cable and other parts out of the way, I decided to go ahead and paint the rear axle and springs with POR-15 also.
Those turned out just as nice as the frame and the rearend went back under the truck. During this time I also ordered new shocks for the rear...Bilstein HDs. After about a week, I got a call my gas tank was ready. I had it "Renewed" as they called it, which is basically fixing any holes or leaks and then spraying the tank inside and out with a rubberized coating.
That weekend I put the new shocks on and put the gas tank back in. I left out that I replaced all the rubber hoses and clamps going to the gas tank, as well as replaced the sending unit and fuel filter. I also cleaned up, painted, or replaced all the hardware holding the rear axle to the springs.
A shot of it looking all nice and new

While looking up places to take the tank to get it fixed, I came across some stuff called POR-15. The more I read, the more I liked what I heard about it's rust prevention and how you could paint over rust. Even better was that the shop and was dropping the tank off to have fixed also sold POR-15, so I bought a starter kit to try out. I have a painting background, so I was a little unsure of how the paint would work by just brushing it on.
Much to my surprise, it layed down really easy and once it dried I had zero brush strokes. I just followed the directions..knocked down all the loose scaley rust with a wire brush and sandpaper then hit it with marine clean and metal prep. After that I put on 1 coat of silver (to fill in any pits in the metal), then put on 2 coats of the gloss black, and finished it with 2 coats of the Chassis Coat Black (sorry I didn't take any pictures between coats).
While I had the shocks, brake lines, emergency brake cable and other parts out of the way, I decided to go ahead and paint the rear axle and springs with POR-15 also.
Those turned out just as nice as the frame and the rearend went back under the truck. During this time I also ordered new shocks for the rear...Bilstein HDs. After about a week, I got a call my gas tank was ready. I had it "Renewed" as they called it, which is basically fixing any holes or leaks and then spraying the tank inside and out with a rubberized coating.
That weekend I put the new shocks on and put the gas tank back in. I left out that I replaced all the rubber hoses and clamps going to the gas tank, as well as replaced the sending unit and fuel filter. I also cleaned up, painted, or replaced all the hardware holding the rear axle to the springs.
A shot of it looking all nice and new
Last edited by 541SR5; Feb 5, 2012 at 04:47 AM.
 Feb 4, 2012 | 02:24 AM
#15
Thread Starter
Registered User
Joined: Dec 2010
Posts: 114
Likes: 0
From: Houston, TX
I took the tank to Don Hart radiator (do a google search and his website will come up). They have some kind of process called Renu where they take a gas tank, fix any holes or leaks then they put some kind of rubberized coating on it inside and out (that's what you see). If I was to guess what that coating is, it might be that Lizard Skin undercoating because they are a dealer for that too. And they might have POR-15'd it before they put that coating on. I wasn't smart enough to ask them when I had my tank done, I just saw a tank after it was done and I was sold, plus it has a lifetime warranty.

 Feb 5, 2012 | 04:36 AM
#19
Thread Starter
Registered User
Joined: Dec 2010
Posts: 114
Likes: 0
From: Houston, TX
The Engine
Once a had the rear painted, gas tank in, and new rubber fuel lines replaced, I decided to turn my attention to the engine.

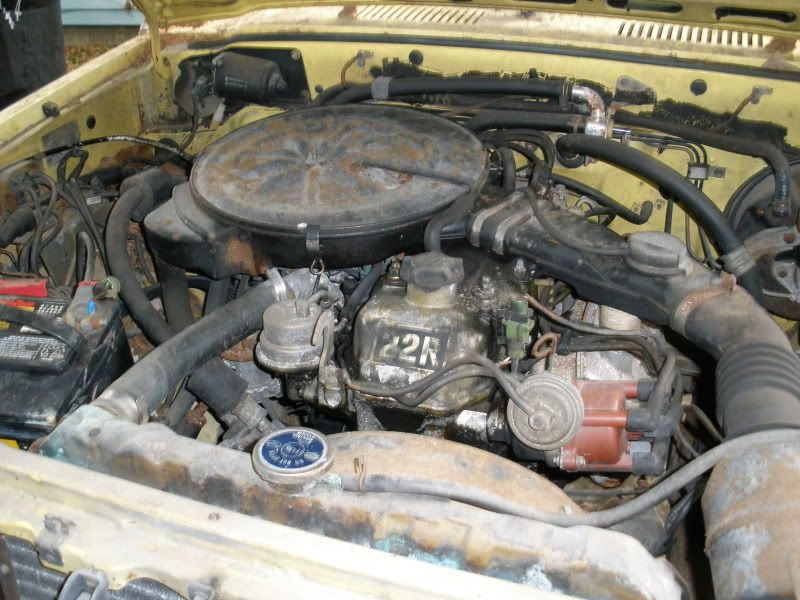
First I looked at rebuilding the engine myself, because it really didn't look that bad. However, before I got too deep into it, I went to a local engine shop just for grins to see how much they would charge. To my surprise, they weren't that much more than what it was going to cost me to rebuild it, if I had the machine work done, buy the rebuild kit, rent (or buy) the tools I would need (engine hoist, stand, etc.). Plus I would get 3yr/36,000 miles warranty and a lot less headaches
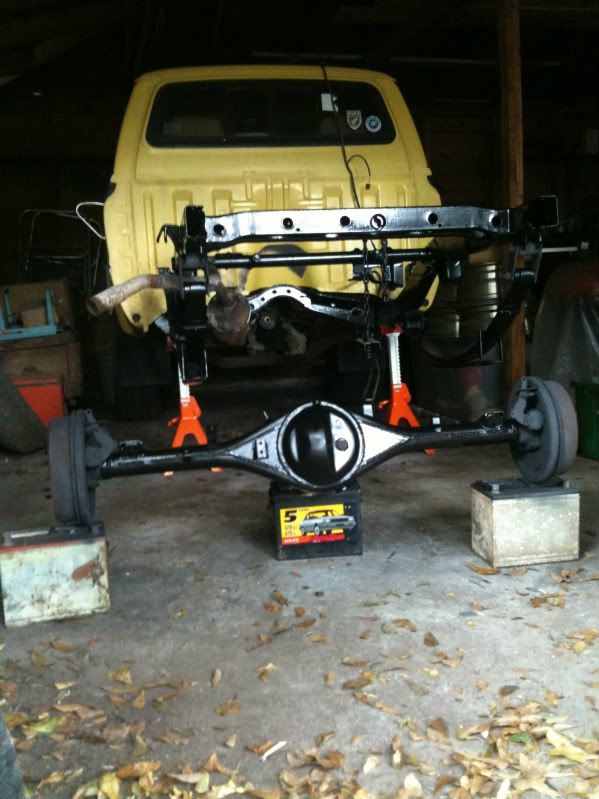
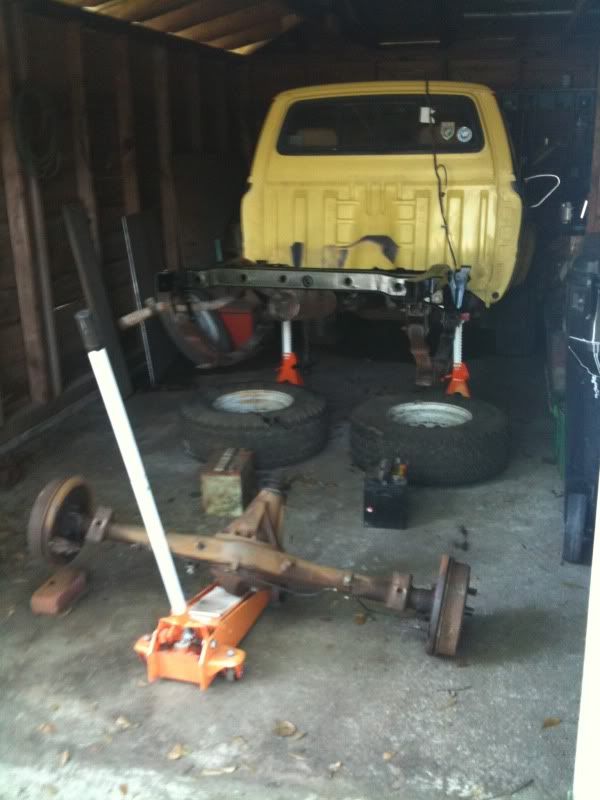
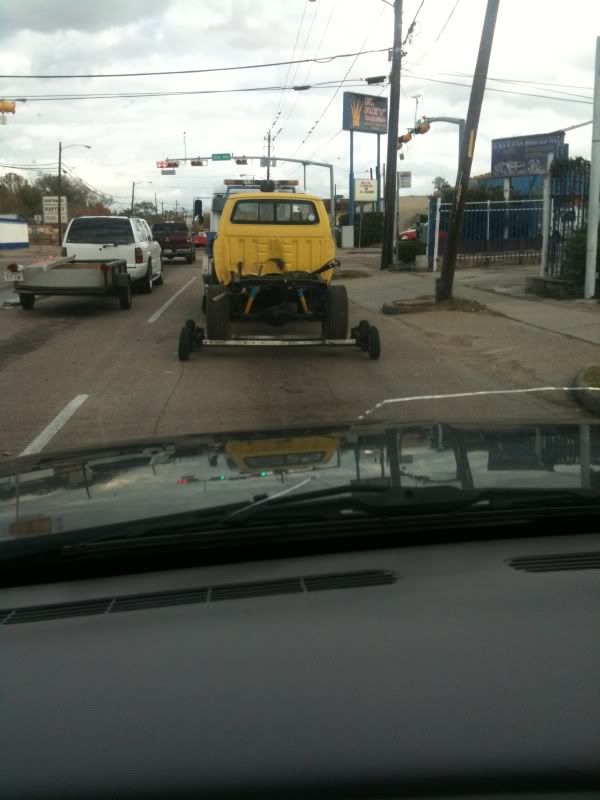
Before I took it to the shop, I also decided to take off a parts exterior parts too...bumper, grill, headlights, mirrors, radiator, and a few other misc. things.


On the way to the engine shop...
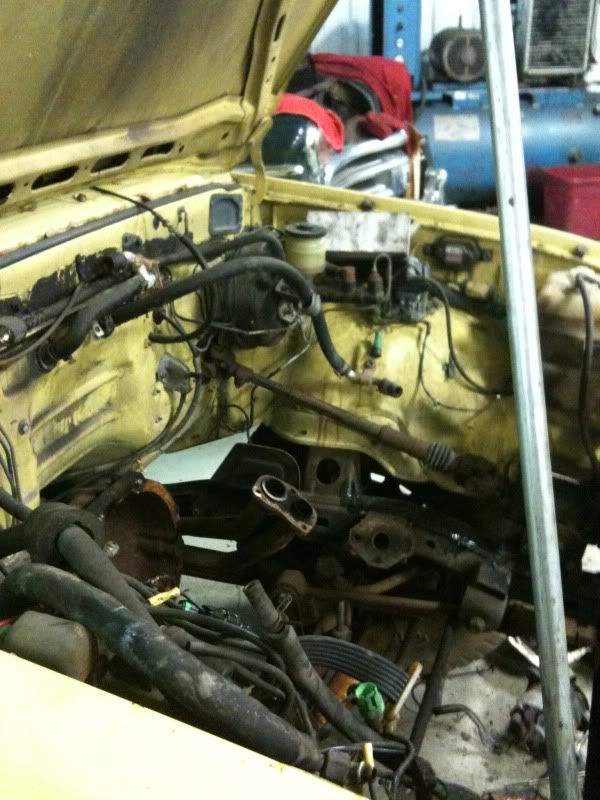
A couple weeks later I got a call that my engine was a "rust bucket" and might be smarter if I put a new long block in it. I happened to be off of work that day, so I drove over to the engine shop to take a look and discuss. After taking a look at my engine torn apart, I had to agree that it looked pretty bad. It could be saved, but it would cost more than putting a new one in . So I decided to put the new one in.
Engine gone...


Couple weeks later, I got a call that the truck was ready to come get and it was running! I was super excited, because I hadn't heard it running since the late 90s (and I was glad nothing was wrong with the electrical).
New engine

I plan on doing a few things to detail the engine before it makes it debute, but for now, it'll work.
First I looked at rebuilding the engine myself, because it really didn't look that bad. However, before I got too deep into it, I went to a local engine shop just for grins to see how much they would charge. To my surprise, they weren't that much more than what it was going to cost me to rebuild it, if I had the machine work done, buy the rebuild kit, rent (or buy) the tools I would need (engine hoist, stand, etc.). Plus I would get 3yr/36,000 miles warranty and a lot less headaches
Before I took it to the shop, I also decided to take off a parts exterior parts too...bumper, grill, headlights, mirrors, radiator, and a few other misc. things.
On the way to the engine shop...
A couple weeks later I got a call that my engine was a "rust bucket" and might be smarter if I put a new long block in it. I happened to be off of work that day, so I drove over to the engine shop to take a look and discuss. After taking a look at my engine torn apart, I had to agree that it looked pretty bad. It could be saved, but it would cost more than putting a new one in
. So I decided to put the new one in.Engine gone...
Couple weeks later, I got a call that the truck was ready to come get and it was running! I was super excited, because I hadn't heard it running since the late 90s (and I was glad nothing was wrong with the electrical).
New engine
I plan on doing a few things to detail the engine before it makes it debute, but for now, it'll work.
Last edited by 541SR5; Feb 5, 2012 at 04:46 AM.


