
Living Overland's Recipes, Reviews, & Techniques
 Jan 11, 2012 | 09:33 AM
#83
Thread Starter
Registered User
Joined: Aug 2006
Posts: 375
Likes: 0
From: The Big Wonderful
Jalapeno Black Beans
Well we are back working on recipes for the blog. We hope you enjoy!
Jalapeno Black Beans

Ingredients:
1 15oz can black beans
1 medium jalapeno pepper, finely diced
3 cloves garlic, finely minced
1/4 cup onion, diced
1/2 Tbsp vegetable oil
Pre-Trip Preparation:
Open and rinse the can of black beans in cold water, placing them in a plastic container. If you are on the trail, as we were when we purchased the fixings for this dish, simply open the can part way, drain the liquid and add water to rinse.
Cooking Instructions:
Dice the jalapeno pepper, onion, and garlic and set aside. In a small saucepan heat vegetable oil on high heat to the point when it begins to shimmer; add diced vegetables. Saute, stirring constantly, for one minute or until the garlic and jalapenos become fragrant. Lower heat to medium and stir in the black beans, cooking while stirring constantly until heated through. Serve with your favorite fajita fixings!
For more recipes be sure to check out the recently updated Menu section of our blog by visiting www.LivingOverland.com
Jalapeno Black Beans
Ingredients:
1 15oz can black beans
1 medium jalapeno pepper, finely diced
3 cloves garlic, finely minced
1/4 cup onion, diced
1/2 Tbsp vegetable oil
Pre-Trip Preparation:
Open and rinse the can of black beans in cold water, placing them in a plastic container. If you are on the trail, as we were when we purchased the fixings for this dish, simply open the can part way, drain the liquid and add water to rinse.
Cooking Instructions:
Dice the jalapeno pepper, onion, and garlic and set aside. In a small saucepan heat vegetable oil on high heat to the point when it begins to shimmer; add diced vegetables. Saute, stirring constantly, for one minute or until the garlic and jalapenos become fragrant. Lower heat to medium and stir in the black beans, cooking while stirring constantly until heated through. Serve with your favorite fajita fixings!
For more recipes be sure to check out the recently updated Menu section of our blog by visiting www.LivingOverland.com
Jan 24, 2012 | 09:25 AM
#84
Thread Starter
Registered User
Joined: Aug 2006
Posts: 375
Likes: 0
From: The Big Wonderful
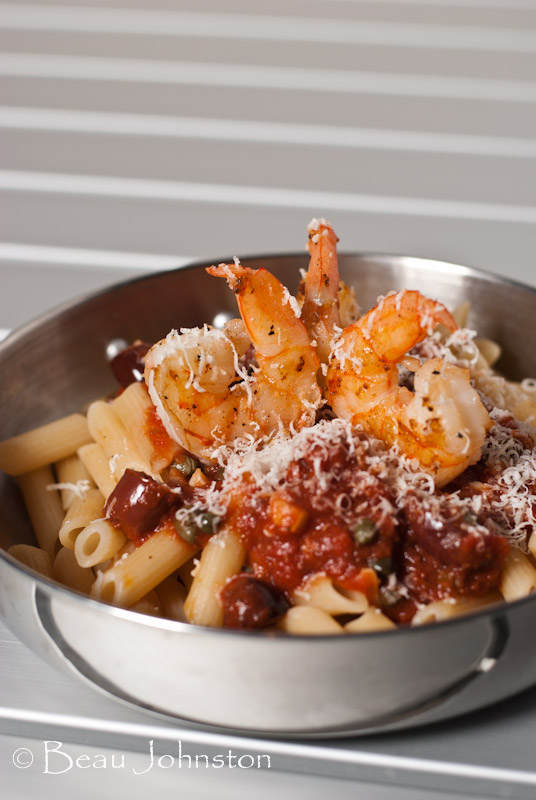
Pasta with Shrimp and Puttanesca Sauce
Pasta with Shrimp and Puttanesca Sauce
Ingredients:
2 Tbsp olive oil
4 cloves garlic, finely minced
� tsp red pepper flakes
1 28 oz can crushed tomatoes with Italian seasonings
1 � cups kalamata olives, drained and cut into halves or thirds
� cup capers, drained
1 � lbs large uncooked shrimp (we use 16-20), deveined and peeled
1 lb penne pasta
Serves 4
Pre-trip preparation:
Drain capers and olives at home; olives can be cut at home as well.
Cooking Instructions:
Bring a large pot of water to a boil; when boiling season with a tablespoon of salt and cook pasta until al dente, drain.
In a small or medium saucepan, heat 1 tablespoon oil over medium-high heat until shimmering. Add garlic and red pepper flakes and stir constantly until aromatic, about one minute. Add the crushed tomatoes and cook until simmering, about 4-5 more minutes. Simmer for 5 minutes, stirring occasionally.
Lightly salt and pepper shrimp, set aside. In a large skillet (preferably non-stick) heat remaining tablespoon of oil until over high heat until shimmering; add shrimp. Cook shrimp until pink on each side, making sure not to overcook, about two minutes on each side.
Once sauce is simmering add the olives and capers and continue to simmer another two minutes. Spoon sauce over pasta and place shrimp on top of sauce.
For additional recipes and gear reviews be sure to check out our blog at www.LivingOverland.com
Jan 26, 2012 | 05:27 AM
#87
Thread Starter
Registered User
Joined: Aug 2006
Posts: 375
Likes: 0
From: The Big Wonderful
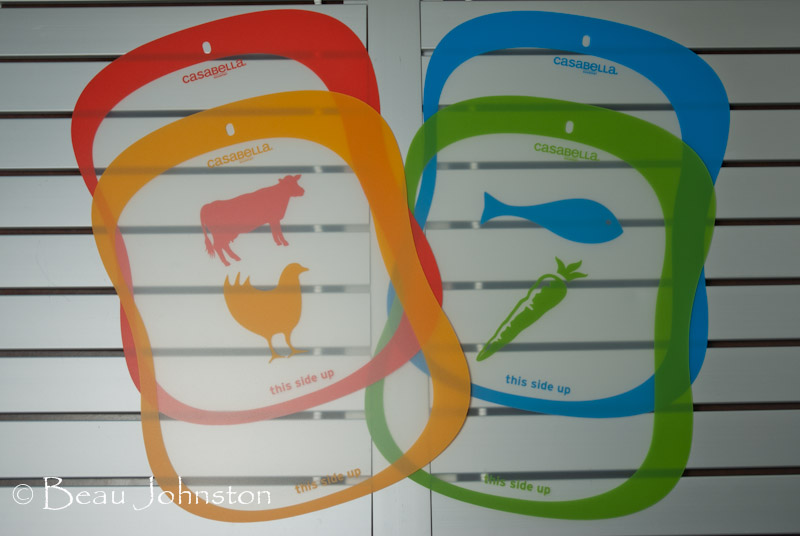
Review of Cutting Boards by Casabella
Review of Cutting Boards by Casabella
As with preparing meals at home, food safety is a critical aspect of a trip's overall success. Sometimes a clean work surface for food prep can be difficult to find when traveling in the back country. Space is valuable when traveling in the 4Runner and often limits the amount of equipment we are able to take with us into the field. For years we traveled around with two small, but heavy, white plastic cutting boards for our meal preparation. We have tried various designs over the years, but nothing seemed to really stand out until we found the line of silicone-backed cutting boards by Casabella.
Features:
Material: Silicone backed plastic
Size: 16"x12-1/4"
Price: $14.99/set of four
Color-coded to prevent contamination; there is a cutting board for fish, meat, chicken, and vegetables.
Our Thoughts:
We have been using the Casabella cutting boards on our trips for about six months now, and the set of four has replaced the two heavy cutting boards we used to carry with us. The silicone backing does a great job of keeping them in place, even during the most vigorous of dicing--they don't slip or slide at all, even when wet. Having four cutting boards allows us the flexibility to prepare multiple dishes at once without cluttering up a single work surface. We found the hole, located at the top of each board, to be great for hanging the unused ones from a screw on the side of a drawer ready for use.
You can read the rest of our review on our blog, www.LivingOverland.com, or by clicking here.
Jan 26, 2012 | 07:59 AM
#88
Contributing Member
Joined: Mar 2003
Posts: 11,334
Likes: 0
From: COTKU,Ontario,Canada
Interesting product Beau...
personally though as long as you do any cold foods like salad/desert prep first then cooked food prep contamination really should'nt be an issue since cooking to proper temp will deal with any potential food borne pathogens...
but it still a good idea to be careful...
have you thought of using a pickling vinegar/lemon juice/water spray bottle for quick clean-up between steps? would take care of almost any bugs and is all natural...
Jan 28, 2012 | 08:01 PM
#89
Thread Starter
Registered User
Joined: Aug 2006
Posts: 375
Likes: 0
From: The Big Wonderful
Paul, you bring up some good points. Cutting food to be eaten raw first followed by meat is a great way to prevent food contamination. As far as acidic sprays go, it is my understanding that vinegar/lemon juice isn't as easy as one would think. The cutting board and knife would need to be free of any food pieces (chicken or meat) and then a liberal amount of the acidic solution would need to be applied. I would think this solution would need to be applied for several minutes for it to kill any bacteria on the surface. This is why we have chosen to use separate cutting boards, to save time and eliminate any possibility of contamination.
Feb 1, 2012 | 12:24 PM
#90
Thread Starter
Registered User
Joined: Aug 2006
Posts: 375
Likes: 0
From: The Big Wonderful
Antipasto Pasta Salad
Antipasto Pasta Salad
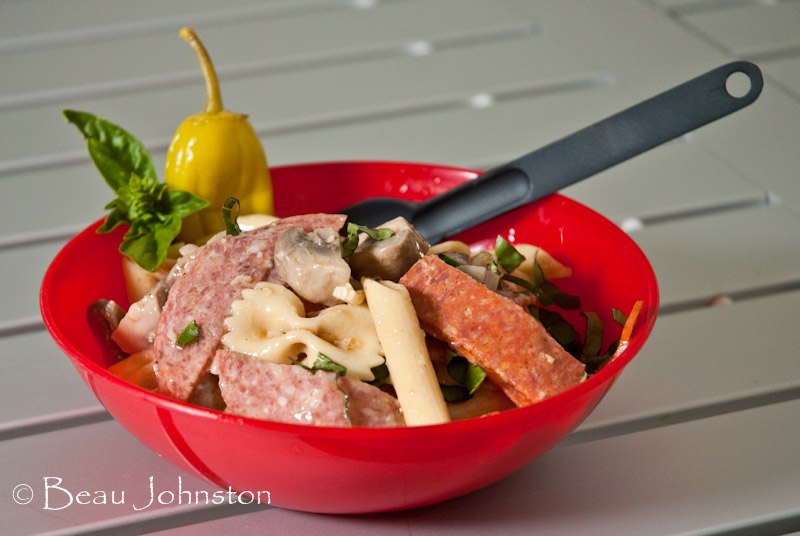
Looking for a great meal you can prepare ahead of time and serve the first night on the trail? This Antipasto Pasta Salad is sure to be a hit with everybody in your group.
Ingredients:
8 ounces sliced pepperoni
8 ounces salami
10 tablespoons red wine vinegar
6 tablespoons olive oil
3 tablespoons mayonnaise
1-12 ounce jar pepperoncini with 2 tablespoons juice reserved, drained, stemmed, and chopped coarse
4 garlic cloves, minced
� teaspoon red pepper flakes
Salt and pepper
1 pound penne or campanelle pasta
1 pound white mushrooms, quartered
1 cup shredded provolone cheese
12 ounces roasted red peppers, drained, patted dry, and chopped coarse
1 cup chopped fresh basil
Serves 6-8
Cooking Instructions:
In order to remove the excess fat from the pepperoni and salami, place one paper towel on a microwave-safe plate. Arrange pepperoni in a single layer on towel, cover with another layer of paper towel , and layer with salami. Cover with one more paper towel then microwave on highest power for one minute. Allow to cool slightly then cut pepperoni and salami into � inch strips. Set meat aside.
Whisk 5 tablespoons vinegar, oil, mayonnaise, pepperoncini juice, garlic, red pepper flakes, � teaspoon salt, � teaspoon pepper in a medium bowl.
In a large pot bring 5 quarts of water to a boil. Season with 1 tablespoons of salt and add pasta. Cook until al dente. Drain pasta, return to pot, and toss with � cup of dressing and remaining vinegar. Spread dressed pasta across rimmed baking sheets and refrigerate until chilled, about 45 minutes.
Meanwhile, bring remaining dressing to a simmer in a large skillet over medium high heat. Add mushrooms and cook until they release their juices and are lightly browned, about 8 minutes. Transfer to a large bowl and cool.
Add meat, provolone, roasted red peppers, chopped pepperoncini, basil, and cooled pasta to mushrooms and toss well. Season with salt and pepper.
For additional recipes and gear reviews be sure to check out our blog at www.LivingOverland.com
Feb 1, 2012 | 12:40 PM
#91
Contributing Member
Joined: Mar 2003
Posts: 11,334
Likes: 0
From: COTKU,Ontario,Canada
Antipasto pasta salad?
sounds tasty... for a little more rustic flavour you could substitute Hunter Sausage for the pepperoni and use Hungarian Salami instead of Italian Salami...
sounds tasty... for a little more rustic flavour you could substitute Hunter Sausage for the pepperoni and use Hungarian Salami instead of Italian Salami...
Last edited by aviator; Feb 1, 2012 at 12:41 PM.
Apr 11, 2012 | 08:30 AM
#93
Thread Starter
Registered User
Joined: Aug 2006
Posts: 375
Likes: 0
From: The Big Wonderful
Well it has been a while since I posted a recipe. We just got back from our trip to New Zealand.
Yakisoba Bowl

Ingredients
1 5.6oz Yakisoba Noodle package
1lb grilled chicken breast, cut into 1/4in strips
1/3 head Napa cabbage, cut into 1/2in strips
1 red bell pepper, seeded and cut into 1/4in strips
1 Tbsp ginger, finely diced
3 cloves garlic, finely diced
1 Serrano pepper - diced
2 Tbsp vegetable oil
2 Tbsp soy sauce or tamari
1Tbsp oyster sauce
Cooking Instructions
Heat 1 TBS oil over high heat in a wok. When the oil begins to shimmer, remove the noodles from the package, pull them apart and place in the wok. A little water may need to be added to help separate the noodles. Remove the noodles from the wok and set aside.
Reheat the wok over high heat and add 1 Tbsp stir the garlic, ginger, and Serrano pepper into the wok and saut� until aromatic. Add the Napa cabbage and red bell pepper; stir frying until tender. Note: It is important not to overload the wok with vegetables as this increases the cooking time. If required, break the ingredients into multiple batches.
Move vegetables to one side and add the chicken and noodles to the open side. Cover the chicken and noodles with vegetables and add remaining ingredients. Cook until chicken and noodles are heated through, stir to combine.
For more recipes, visit our blog at www.LivingOverland.com!
Yakisoba Bowl
Ingredients
1 5.6oz Yakisoba Noodle package
1lb grilled chicken breast, cut into 1/4in strips
1/3 head Napa cabbage, cut into 1/2in strips
1 red bell pepper, seeded and cut into 1/4in strips
1 Tbsp ginger, finely diced
3 cloves garlic, finely diced
1 Serrano pepper - diced
2 Tbsp vegetable oil
2 Tbsp soy sauce or tamari
1Tbsp oyster sauce
Cooking Instructions
Heat 1 TBS oil over high heat in a wok. When the oil begins to shimmer, remove the noodles from the package, pull them apart and place in the wok. A little water may need to be added to help separate the noodles. Remove the noodles from the wok and set aside.
Reheat the wok over high heat and add 1 Tbsp stir the garlic, ginger, and Serrano pepper into the wok and saut� until aromatic. Add the Napa cabbage and red bell pepper; stir frying until tender. Note: It is important not to overload the wok with vegetables as this increases the cooking time. If required, break the ingredients into multiple batches.
Move vegetables to one side and add the chicken and noodles to the open side. Cover the chicken and noodles with vegetables and add remaining ingredients. Cook until chicken and noodles are heated through, stir to combine.
For more recipes, visit our blog at www.LivingOverland.com!
Apr 12, 2012 | 07:34 AM
#95
Thread Starter
Registered User
Joined: Aug 2006
Posts: 375
Likes: 0
From: The Big Wonderful
New Zealand was wonderful. 16 days isn�t nearly enough time to explore a new country. If your cousin likes the outdoors, she is going to LOVE New Zealand! It is very much a country centered around the outdoors. It is another one of those countries I could see myself living in. I wish I could afford to spend 6 months traveling around and really see the country.
Apr 12, 2012 | 10:51 PM
#96
Contributing Member
Joined: Mar 2003
Posts: 11,334
Likes: 0
From: COTKU,Ontario,Canada
She and her bf are total outdoor types... both jocks... she was being scouted by several ncaa schools and our olympic team for hurdling until she wrecked her knee and had to give it up... big skier/snowboarder now... bf a cook at an outward-bound type year round camp... camp offering to send him to chef school next yr... full tuition... I think they want him back...lol...
May 2, 2012 | 08:03 AM
#98
Thread Starter
Registered User
Joined: Aug 2006
Posts: 375
Likes: 0
From: The Big Wonderful
Roasted Hatch Chili Soup
Roasted Hatch Chili Soup

Ingredients:
1 ounce unsalted butter
1 ounce all-purpose flour (substitute fine brown rice flour for gluten-free)
1 cup whipping cream
1.5 cups whole milk
1/2 teaspoon instant chicken bouillon granules
1 tablespoon extra-virgin olive oil
1/2 cup finely diced purple onion
1 teaspoons garlic, chopped
1/2 cup carrots, finely diced
1 cup roasted Hatch chilies, finely diced
1/2 teaspoon each salt, black pepper and cayenne pepper
pinch of white pepper
1/2 cup red bell pepper, finely diced
3/4 cup Monterey Jack cheese, shredded
1/2lb grilled chicken breast, sliced (Optional)
Serves 4
For the rest of our recipe, visit our blog at www.LivingOverland.com or by clicking here.
May 29, 2012 | 11:36 AM
#99
Thread Starter
Registered User
Joined: Aug 2006
Posts: 375
Likes: 0
From: The Big Wonderful
Gluten Free Chipotle and Chocolate No-Bake Cookies
Gluten Free Chipotle and Chocolate No-Bake Cookies

Ingredients:
1 cup sugar
4 tablespoons cocoa
1/4 cup butter
1/4 cup milk
1/2 cup chunky peanut butter
1/2 cup salted, roasted peanuts
2 teaspoons vanilla
1 teaspoon Chipotle Chili Powder
3 cups gluten free rolled oats (standard rolled oats work just as well)
Makes 20-30 cookies
Pre-Trip Preparation:
At home, measure out all of your dry ingredients and place them in individual plastic zipper bags. Small plastic nalgeen bottles make great storage containers for the pre-measured wet ingredients.
Directions:
Place a cutting board in your cooler to chill. You will form the cookies on this and the chilled cutting board will help the cookies setup.
In a medium sized heavy saucepan bring to a boil, the sugar, cocoa, butter, chipotle powder and milk. Let boil for 1-2 minutes, but be careful not to burn it. Add the peanut butter and vanilla mix until combined. Add the peanuts and oatmeal to the pan and mix together till completely coated in chocolate. Using a � measuring cup lightly sprayed with vegetable oil or a small scoop, drop cookies onto the smooth cutting board. Allow to cool. If it is hot outside, place the cutting board and cookies back into the cooler to help cool.
For more great recipes, be sure to visit our blog at www.LivingOverland.com!
May 30, 2012 | 11:43 AM
#100
Thread Starter
Registered User
Joined: Aug 2006
Posts: 375
Likes: 0
From: The Big Wonderful
Peppercorn Caramelized Pears with Blue Cheese
Peppercorn Caramelized Pears with Blue Cheese
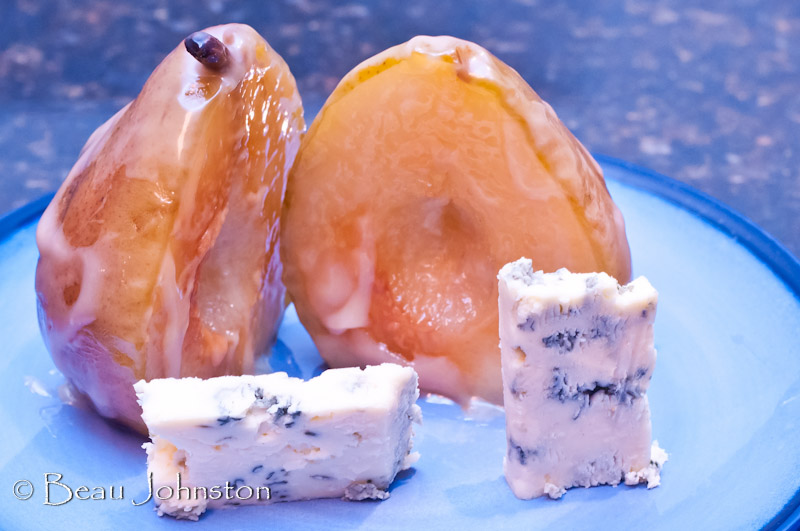
I know, I need to find a photo of this from camping!
Ingredients:
1/4 cup water
1/3 cup sugar
2 ripe but firm pears
1/3 cups heavy cream
3 whole black peppercorns, roughly crushed
1.5 ounces blue cheese
Serves 4
Cooking Instructions:
Cut pears in half lengthwise and remove core.
In a 10-12in nonstick skillet over high heat, bring water to a boil over high heat. Add sugar to the center of the skillet, slowly stirring in to dissolve. Add pears, cut side down, reduce heat medium-high and cover. Check periodically for doneness by piercing with a knife. You are looking for a slight resistance when inserting. Check to verify cut side of the pears are caramelizing and turning golden brown.
Uncover and add heavy cream and peppercorns, stirring in with a spatula. Once the sauce has reduced to a light caramel color, about 3 to 5 minutes, remove from the stove and plate. Carefully place each pear half on a plate with a wedge of blue cheese and drizzle caramel sauce over the top.
For even more recipes, be sure to check out our blog at www.LivingOverland.com!


