
Installing a Tachometer in a 86 4Runner DLX (in progress)
 Feb 6, 2013 | 11:16 PM
#1
Thread Starter
Registered User
Joined: Nov 2008
Posts: 247
Likes: 0
From: Vancouver< WA
Installing a Tachometer in a 86 4Runner DLX
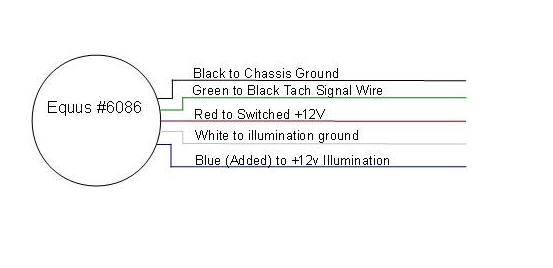
Step 1. Modify the tach to be compatible with Toyota's dimmer circuitry.
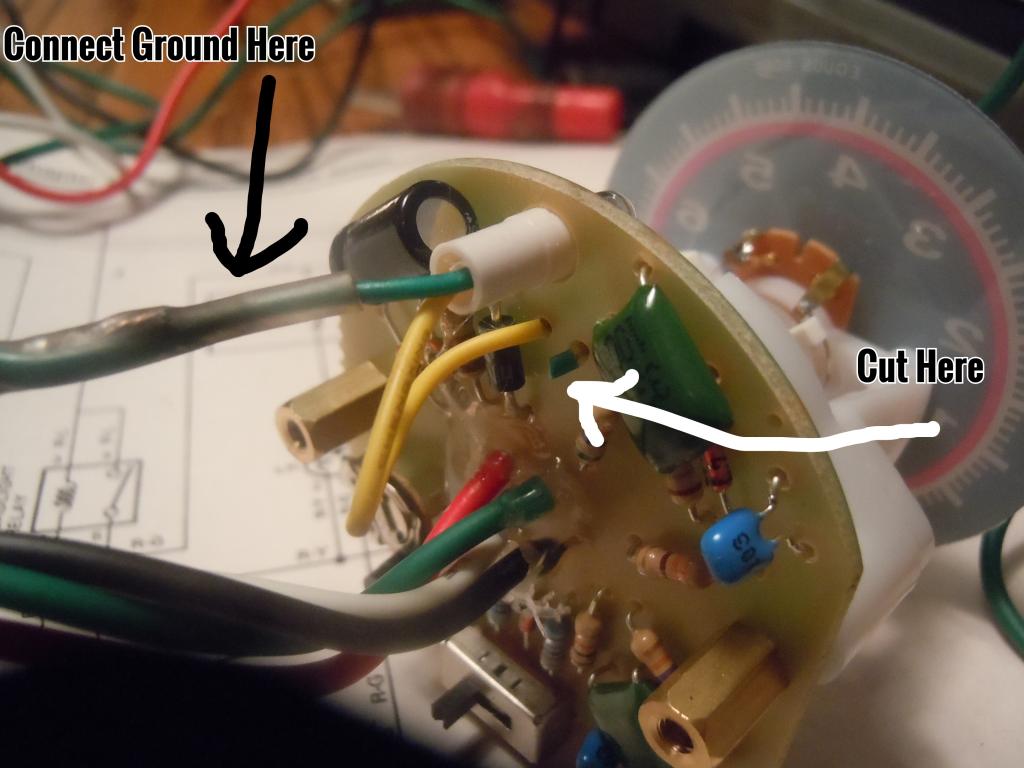
The Tach came with a +12v illumination lead and one ground wire.
It is modified by cutting the ground side of the bulb and connecting a ground lead to it. I chose to use solder and heat shrink tubing.
Step 2. Attach the wires temporarily to make sure it works before cutting up your dash!
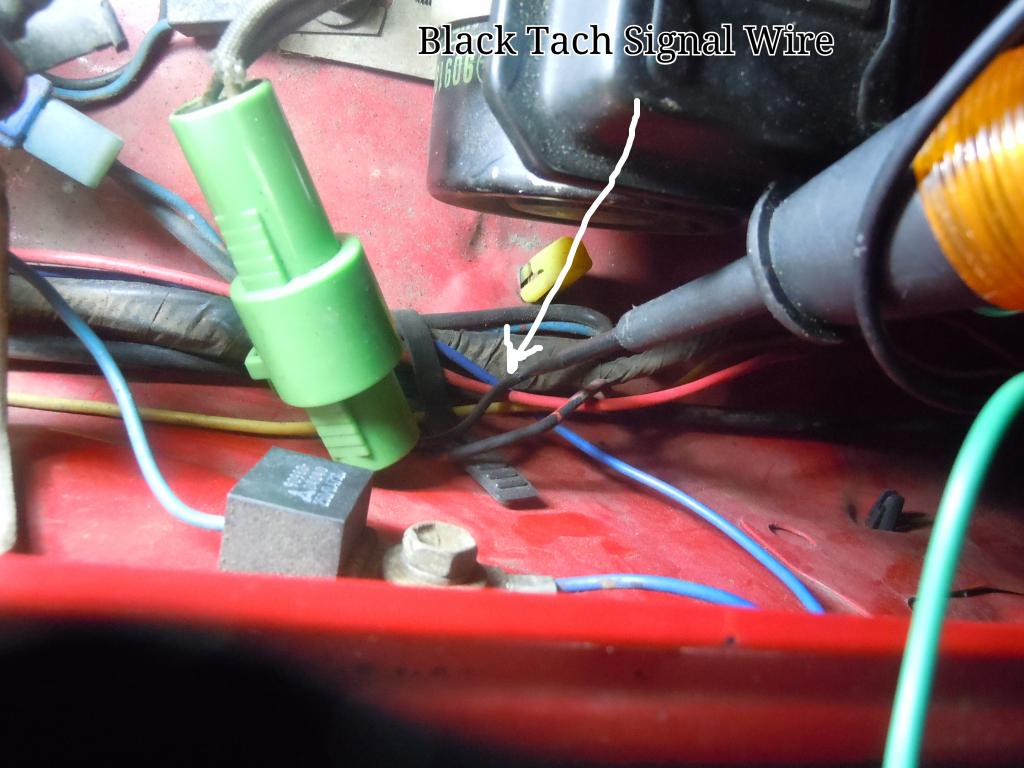
On my '86 the tach signal is a black wire that comes off the igniter. Instead of cutting the wire here, I tapped into it with a voltage tester. I was hoping to find a more convenient tach signal wire at the instrument cluster.
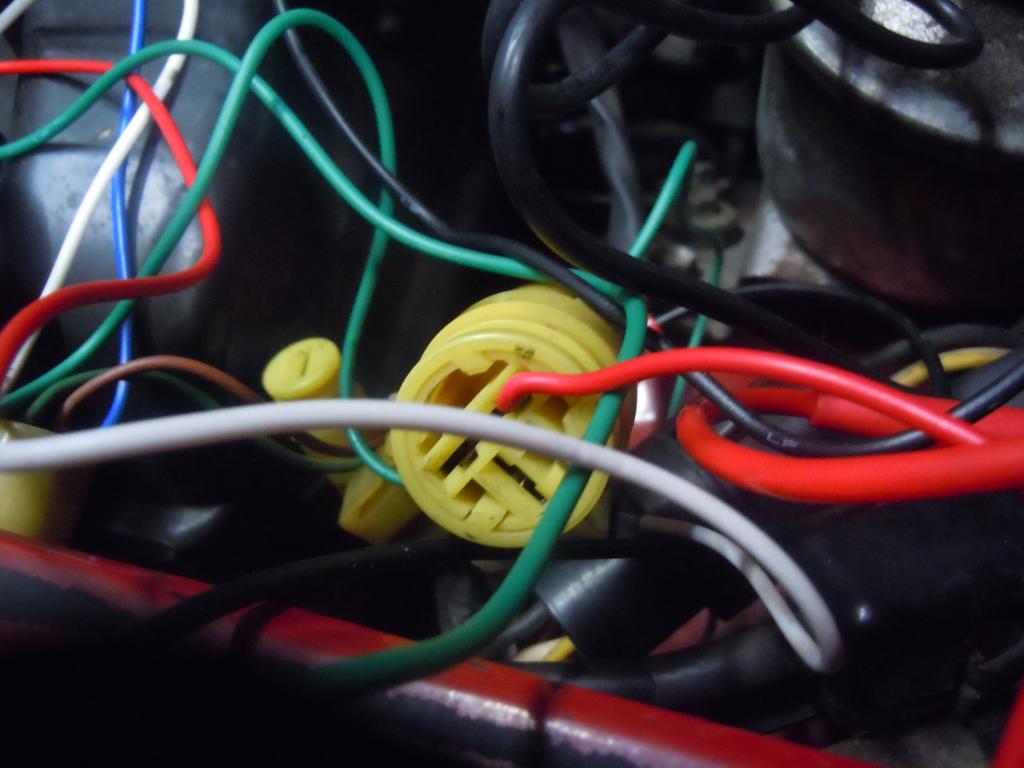
One of the test connectors had a switched +12v connection.
Then connect the ground to a good chassis ground and when the truck starts up the tach should register rpms.
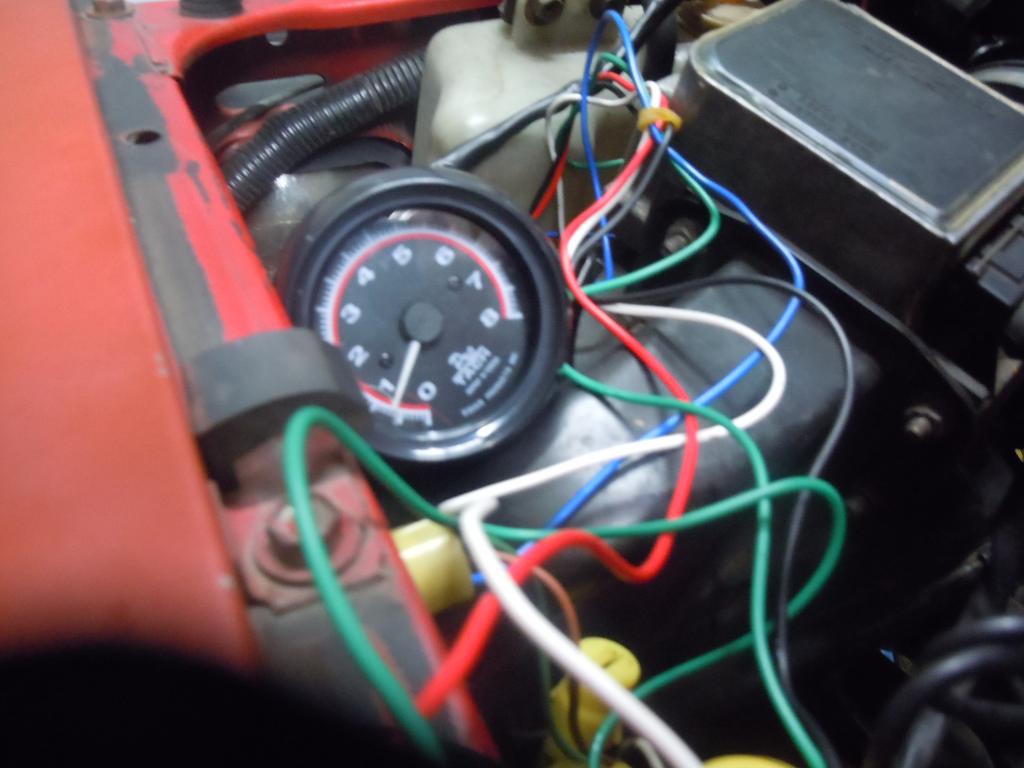
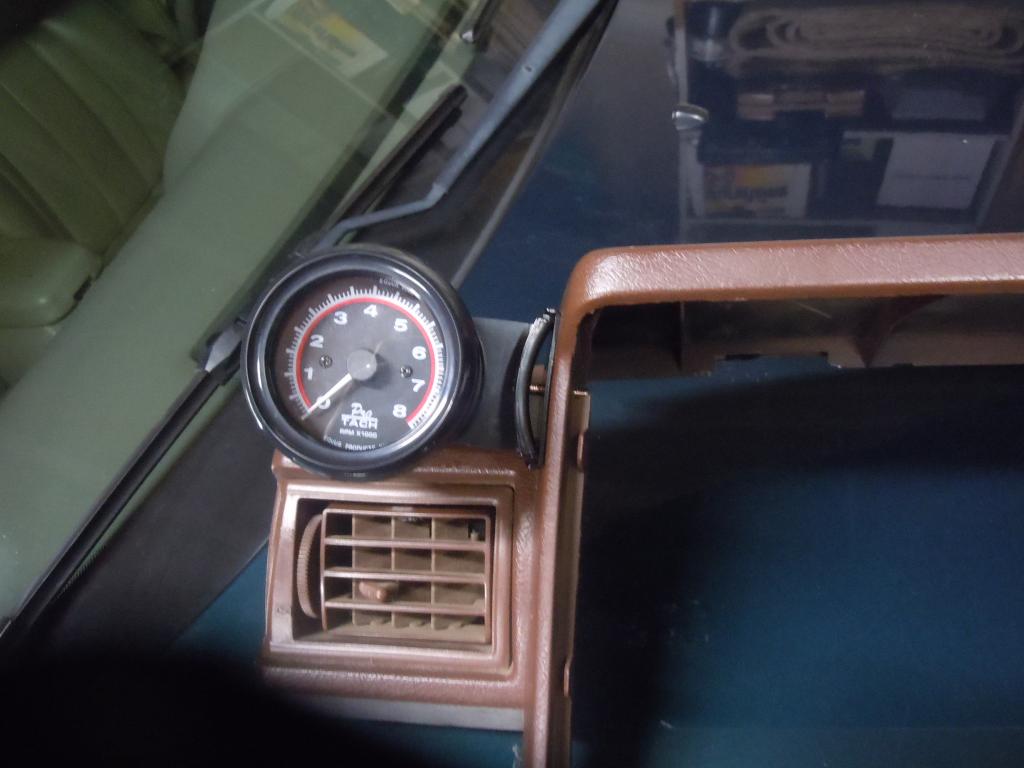
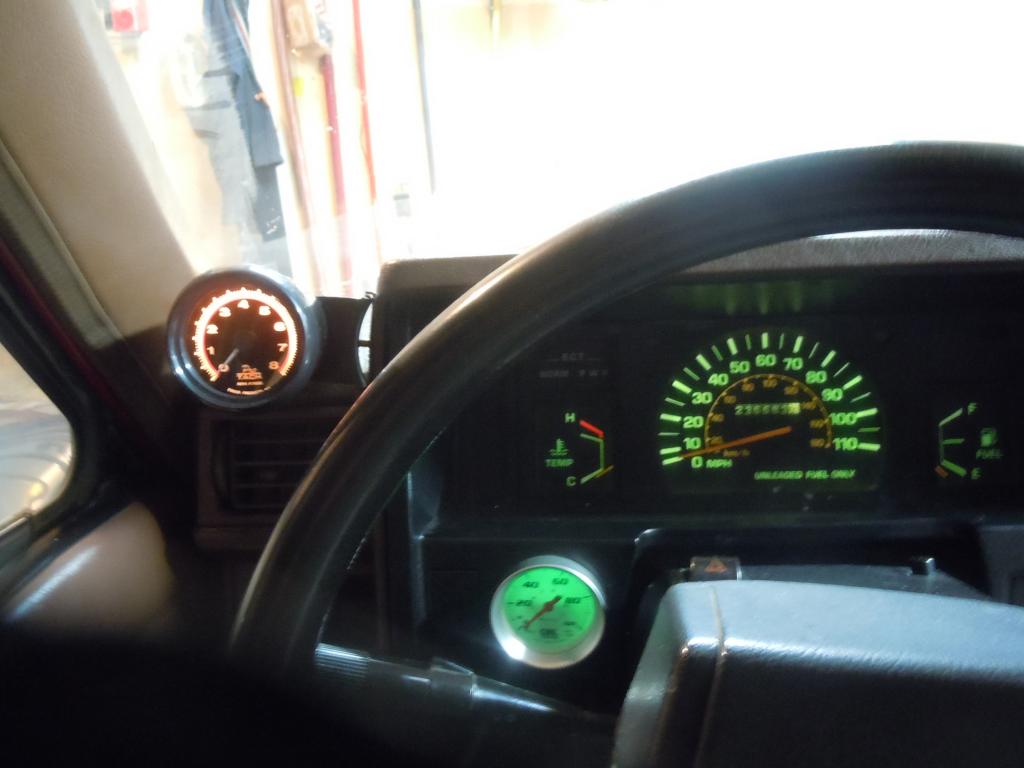
Step 3: Mounting the Tach.
I chose to mount it on the left side of the cluster. Pretty easy.
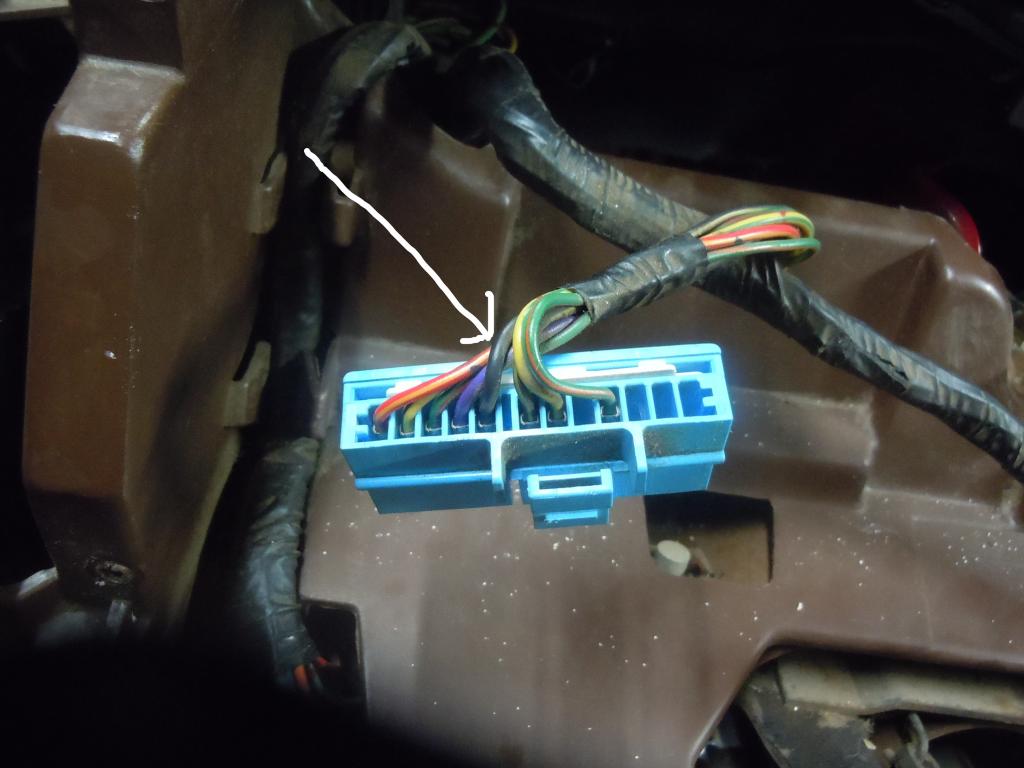
Step 4: Connecting the 5 Wires
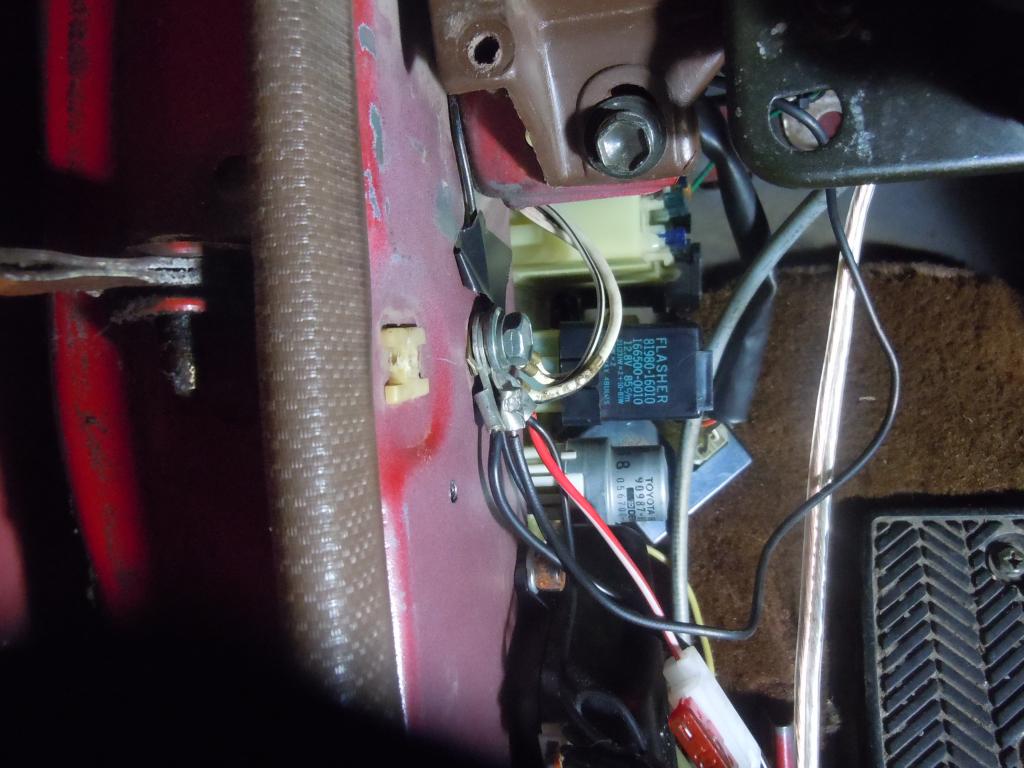
I found a +12v switched power wire and a Tach signal wire connected to the instrument cluster.
Black Tach Signal Wire
+12v switched power wire connection
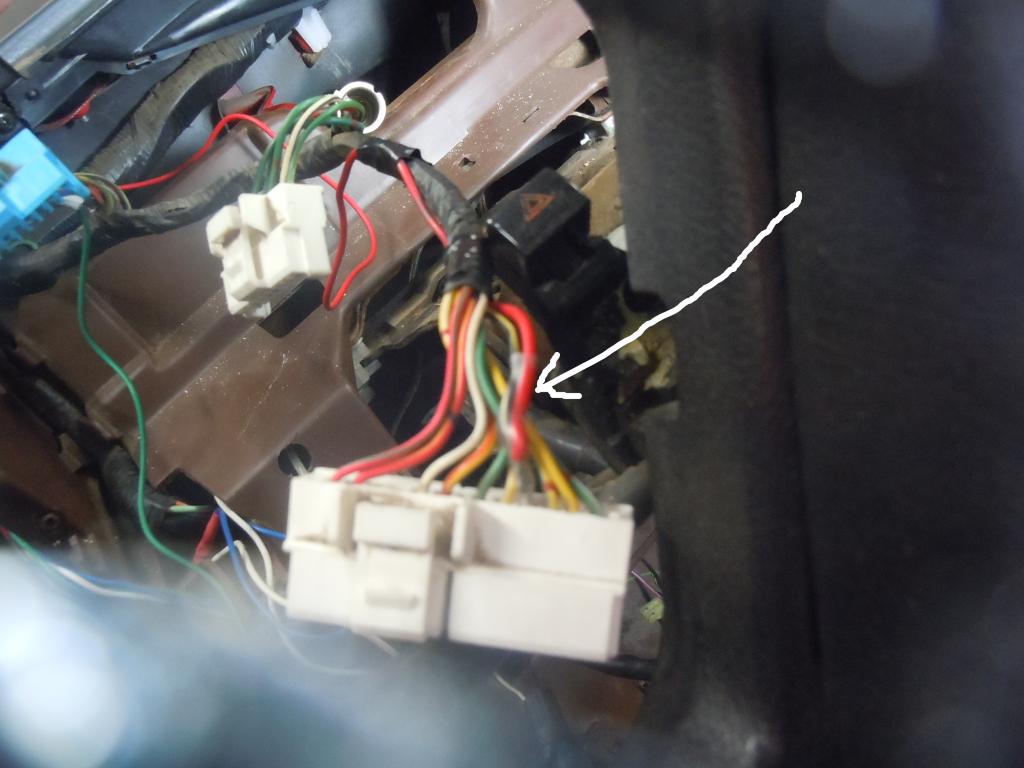
The 2 illumination leads I connected in parallel with connections previously made for an oil pressure gauge.
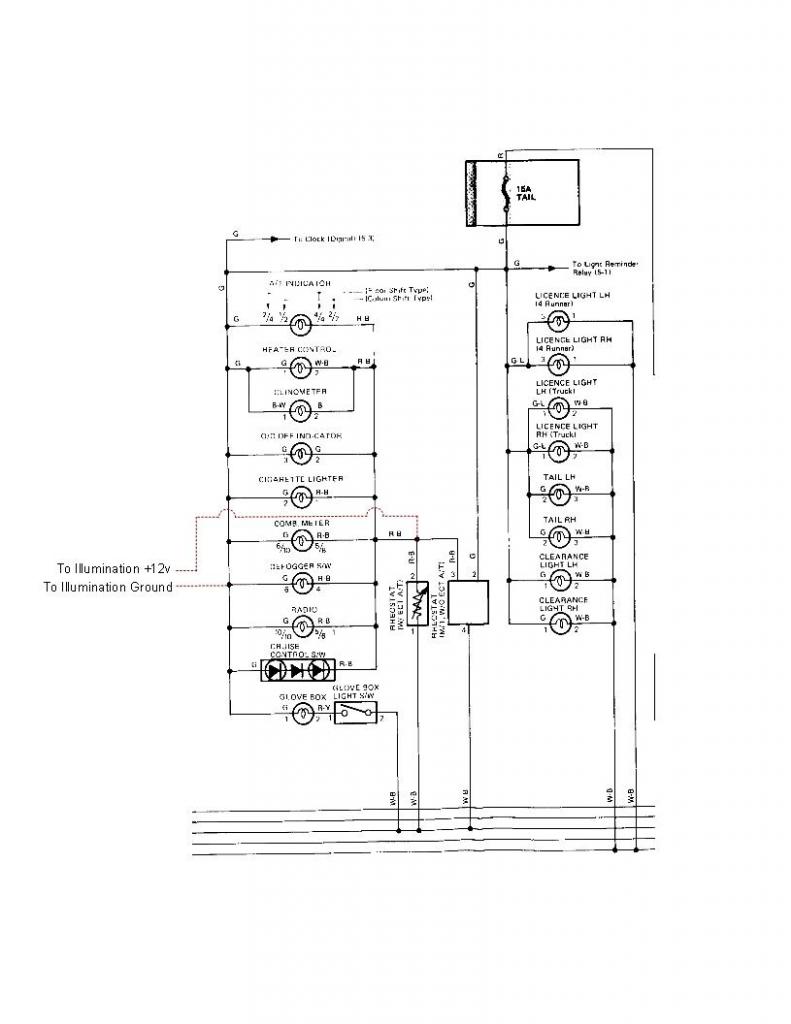
The white Tach illumination lead connects to the green defogger switch wire.
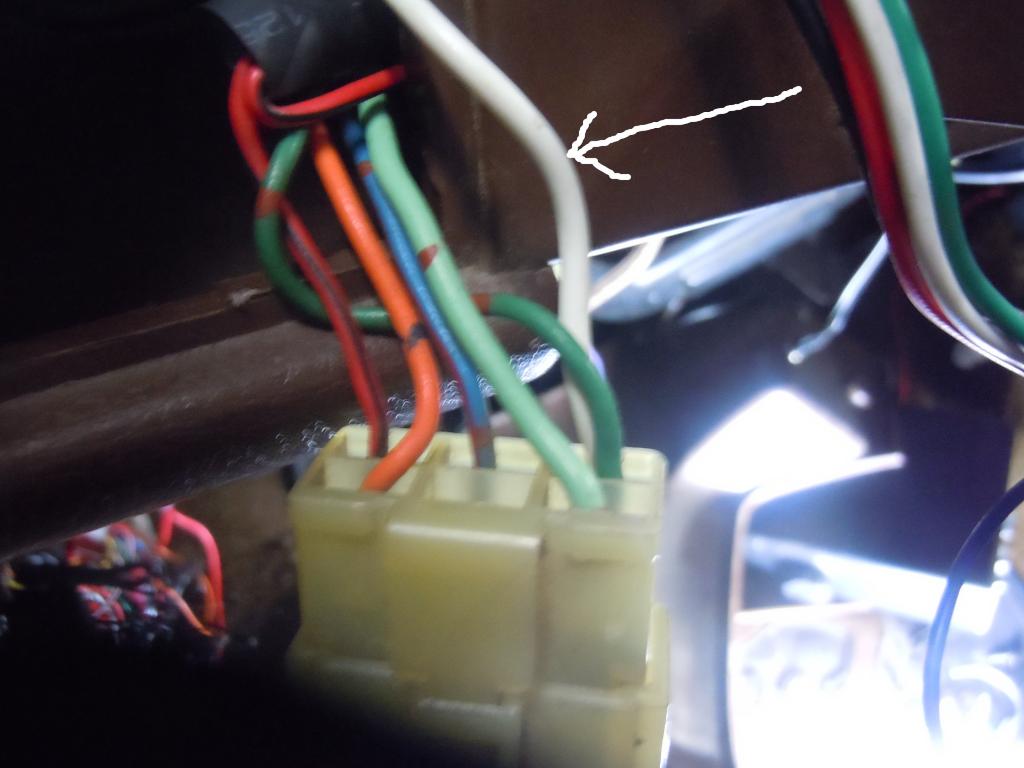
The illumination ground connects to the Red/Black dimmer switch wire.
For the main ground i used a ground behind the lower left cover next to the main fuse panel.
The wires fit neatly in the crack between the dash and A pillar without having to drill a hole.
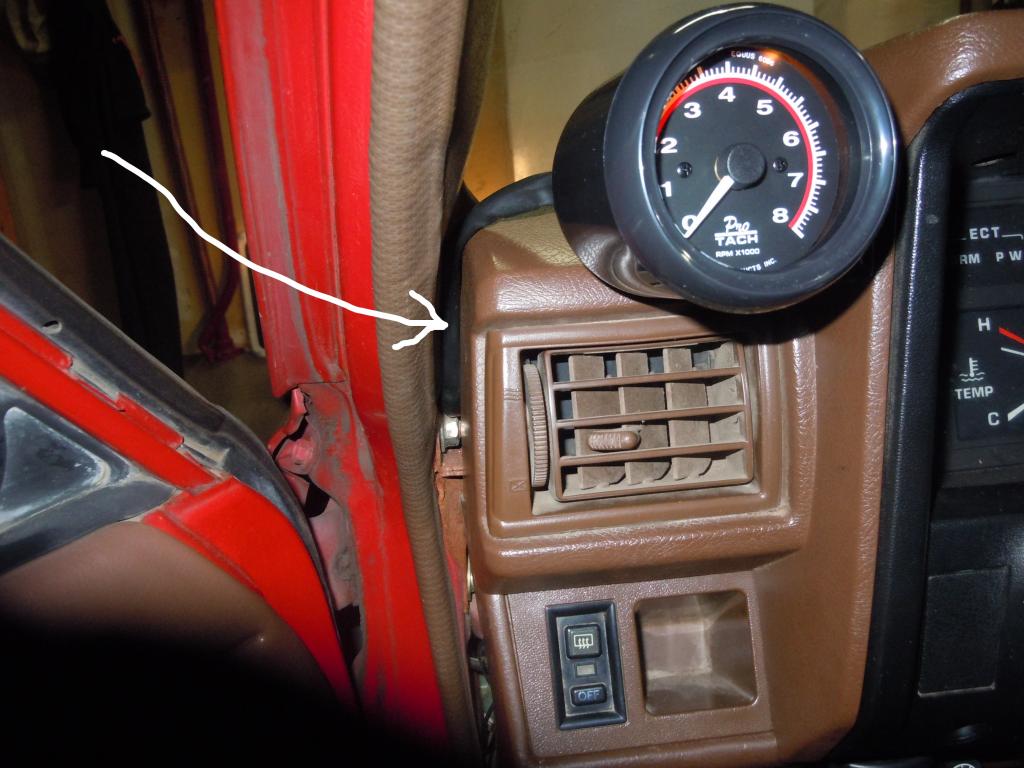
Final product.
The Tach came with a +12v illumination lead and one ground wire.
It is modified by cutting the ground side of the bulb and connecting a ground lead to it. I chose to use solder and heat shrink tubing.
Step 2. Attach the wires temporarily to make sure it works before cutting up your dash!
On my '86 the tach signal is a black wire that comes off the igniter. Instead of cutting the wire here, I tapped into it with a voltage tester. I was hoping to find a more convenient tach signal wire at the instrument cluster.
One of the test connectors had a switched +12v connection.
Then connect the ground to a good chassis ground and when the truck starts up the tach should register rpms.
Step 3: Mounting the Tach.
I chose to mount it on the left side of the cluster. Pretty easy.
Step 4: Connecting the 5 Wires
I found a +12v switched power wire and a Tach signal wire connected to the instrument cluster.
Black Tach Signal Wire
+12v switched power wire connection
The 2 illumination leads I connected in parallel with connections previously made for an oil pressure gauge.
The white Tach illumination lead connects to the green defogger switch wire.
The illumination ground connects to the Red/Black dimmer switch wire.
For the main ground i used a ground behind the lower left cover next to the main fuse panel.
The wires fit neatly in the crack between the dash and A pillar without having to drill a hole.
Final product.
Last edited by LITLRED; Feb 7, 2013 at 09:48 PM. Reason: in progress

Thread
Thread Starter
Forum
Replies
Last Post


