
Dmarsh4X4's OM617 swap to 1988 4Runner
 Jan 3, 2012 | 07:03 PM
#41

Thread Starter
Registered User
Joined: Jul 2011
Posts: 91
Likes: 3
From: West Texas
bigshrek, no updates yet, starting tomorrow we are doing a major overhaul where I work and I dont thinkI will have more than three or four days off until the middle of February, so untill after then I won't have any time to work on the swap, but if you have any questions I would be happy to answer them.
 Jan 28, 2012 | 09:22 AM
#43
Thread Starter
Registered User
Joined: Jul 2011
Posts: 91
Likes: 3
From: West Texas
Well bobbybouche - No trailer queen here this will be a dd at 120 miles a day, since this truck is a mix of different veichles I will try to reg. as special construction then it smog's to the year and model motor. I should have more up dates starting next week.
Feb 7, 2012 | 05:32 PM
#45
Contributing Member
Joined: Dec 2008
Posts: 2,505
Likes: 16
From: San Jose ,Ca
nice looking lathe!! what kind is that ? ive been playing with an old Dalton B-6 and really enjoy messing with it, its only 9 x 30 or so ..
Nice workon the swap ,Not to much into Diesels myself but really like your thinking on solving some of the problems .. those transfer bolts are simple and get the job done .. Good luck man!
subscribed!
Nice workon the swap ,Not to much into Diesels myself but really like your thinking on solving some of the problems .. those transfer bolts are simple and get the job done .. Good luck man!
subscribed!
Feb 7, 2012 | 05:35 PM
#46
Contributing Member
Joined: Dec 2008
Posts: 2,505
Likes: 16
From: San Jose ,Ca
ohh and what type of bit did you use with the router on the aluminum.. ive only seen wood bits at home depot.. and that type i see in your pic looks like the one i use to trim formica laminate when making counter tops.
Feb 8, 2012 | 07:09 AM
#47
Thread Starter
Registered User
Joined: Jul 2011
Posts: 91
Likes: 3
From: West Texas
RMA - Thanks for the kind words, The lathe is a 1947 Clausing, before Atlas took over, size is 12" X 36" and for the router bits any good name brand carbibe bit will work, it is helpfull to use a variable speed router so you can match the speed to the size bit, you need to run it a little slower than for wood and use some WD-40 on your cut.
Feb 23, 2012 | 06:15 PM
#48
Thread Starter
Registered User
Joined: Jul 2011
Posts: 91
Likes: 3
From: West Texas
Well it has been a while, but I have finaly found some time to work on the swap
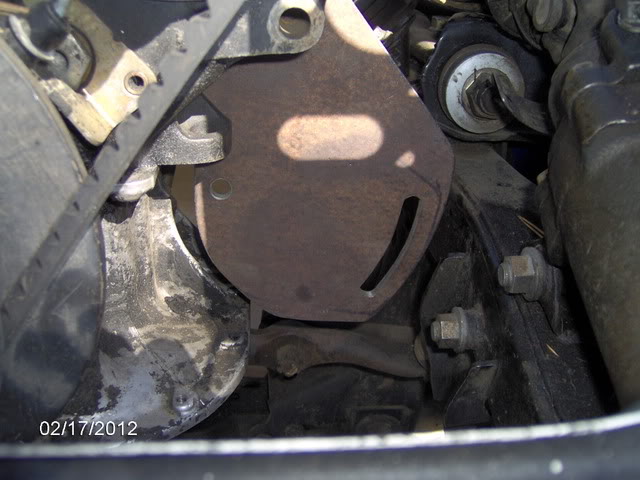
This is the top alternator bracket

Power Steering pump mount
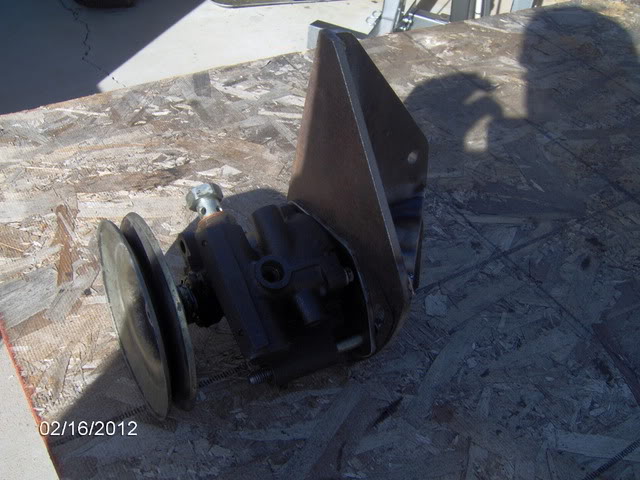
P/S mounts where stock Benz A/C was
Here is one with pump installed
I should be finishing up the alt bracket tommorrow, then on to the trasfercase mount.
This is the top alternator bracket
Power Steering pump mount
P/S mounts where stock Benz A/C was
Here is one with pump installed
I should be finishing up the alt bracket tommorrow, then on to the trasfercase mount.
Feb 24, 2012 | 07:16 PM
#49
Thread Starter
Registered User
Joined: Jul 2011
Posts: 91
Likes: 3
From: West Texas
It is realy nice to be working on this swap again, things have been real hectic with a lot of OT at work the last couple months
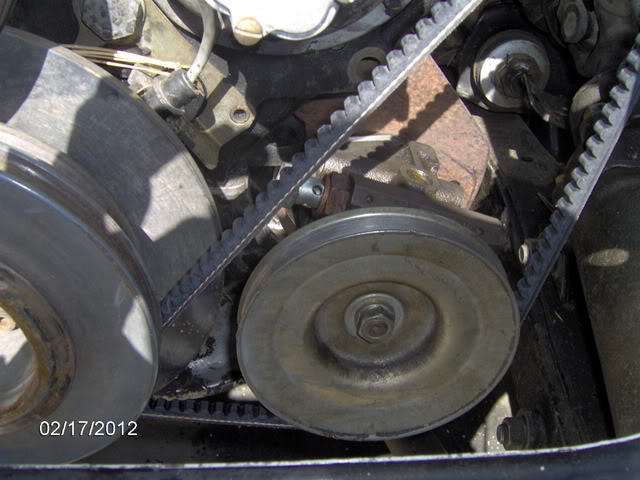
Well I finished the alternator bracket here is a picture of it
Here is one showing all the belts

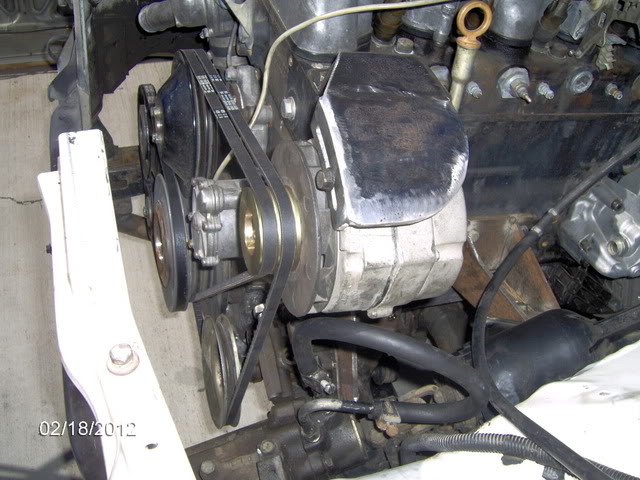
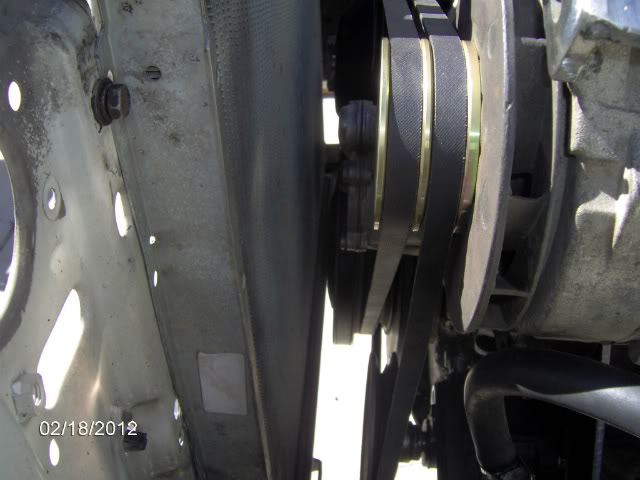
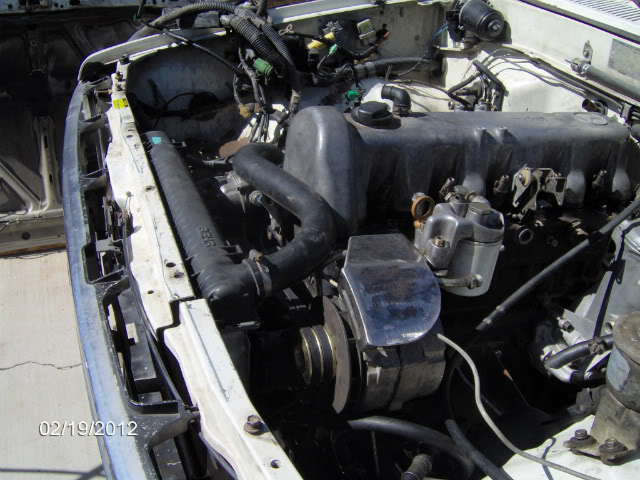
This one shows my clearance to the radiator, not quite enough room for a fan, but at least I was able to mount the radiator in the stock location
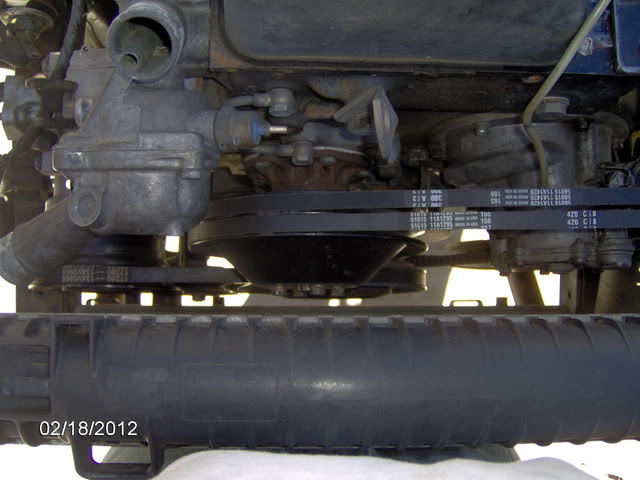
Here is another one of my radiator clearance
Well I finished the alternator bracket here is a picture of it
Here is one showing all the belts
This one shows my clearance to the radiator, not quite enough room for a fan, but at least I was able to mount the radiator in the stock location
Here is another one of my radiator clearance
Feb 24, 2012 | 08:01 PM
#50

Registered User
Joined: Dec 2011
Posts: 10
Likes: 0
Looks great. Super clean work.
What alternator is that?
Is there enough adjustment for the power steering belt to keep it from making noise?
What style of fan are you planning on running, and how many CFM's?
Keep up the amazing work,pics and updates.
What alternator is that?
Is there enough adjustment for the power steering belt to keep it from making noise?
What style of fan are you planning on running, and how many CFM's?
Keep up the amazing work,pics and updates.
Last edited by bigshrek; Feb 24, 2012 at 08:05 PM.
Feb 24, 2012 | 11:06 PM
#51
Registered User

Joined: Jan 2010
Posts: 610
Likes: 0
From: Nebraska
How are you goin to mount the fuel filter now?
And so your saying the stock radiator didn't need to be moved? Guess I should ask what tranny you're using. That would dictate how far forward the engine sits unless you made new tranny mounts. I wouldn't mind bolting the tranny to the engine in the truck if it means not cutting my front clip.
And so your saying the stock radiator didn't need to be moved? Guess I should ask what tranny you're using. That would dictate how far forward the engine sits unless you made new tranny mounts. I wouldn't mind bolting the tranny to the engine in the truck if it means not cutting my front clip.
Last edited by pyrojoe22; Feb 25, 2012 at 08:48 AM.
Feb 25, 2012 | 11:57 AM
#52
Thread Starter
Registered User
Joined: Jul 2011
Posts: 91
Likes: 3
From: West Texas
Bigshrek, that is a 94 amp GM alternator, soon to be replaced with 120 amp for power welder.
Pyrojoe, I am using R150 trans, motor and trans are moved back as far as it can be and still get the valve cover off with out problems, about 4 inches from stock, since my original build was to include dual transfercase's I will be doing drive shaft and transfercase mount work anyways, and the fuel filter mounts to alternator bracket, also radiator is from Mercedes donor car I got the motor from, it fits a little better than the stock Toyota one does
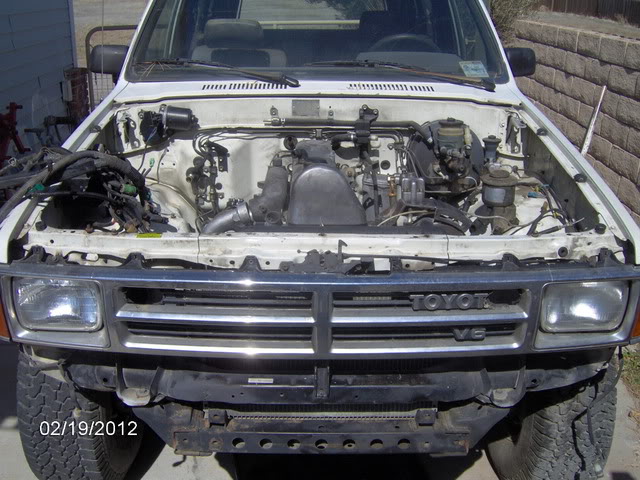
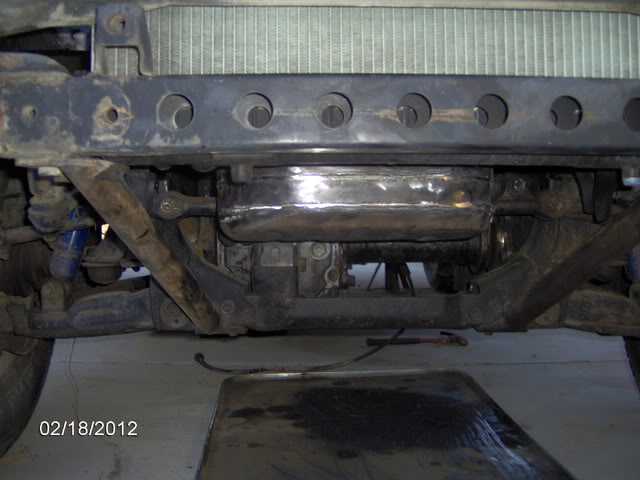
Here are a couple more pictures

Front view there is plenty of room for pusher fans without A/C condensor. so I will have to get creative and see what I can do when I mount the A/C condensor
Pyrojoe, I am using R150 trans, motor and trans are moved back as far as it can be and still get the valve cover off with out problems, about 4 inches from stock, since my original build was to include dual transfercase's I will be doing drive shaft and transfercase mount work anyways, and the fuel filter mounts to alternator bracket, also radiator is from Mercedes donor car I got the motor from, it fits a little better than the stock Toyota one does
Here are a couple more pictures
Front view there is plenty of room for pusher fans without A/C condensor. so I will have to get creative and see what I can do when I mount the A/C condensor
Feb 25, 2012 | 10:48 PM
#53
Registered User
Joined: Jan 2010
Posts: 610
Likes: 0
From: Nebraska
Oh snap, well is that alt bracket the toyota to gm conversion bracket from Trail Gear or Sky? And would it be possible for you to get a measurement from your valve cover to the firewall? I'm going to figure out how far forward my engine will be with the W56 in stock location. I'm really hoping you figure out a way to mount the rad, ac condensor, oil cooler, and pusher fans behind the grill. It will be AWESOME if it works. And could you by chance pull the measurements off your merc radiator please  ? I'd like to compare it to the 22-RTE rad I'm looking at.
THANKS!
? I'd like to compare it to the 22-RTE rad I'm looking at.THANKS!
 Mar 2, 2012 | 05:56 PM
#55
Thread Starter
Registered User
Joined: Jul 2011
Posts: 91
Likes: 3
From: West Texas
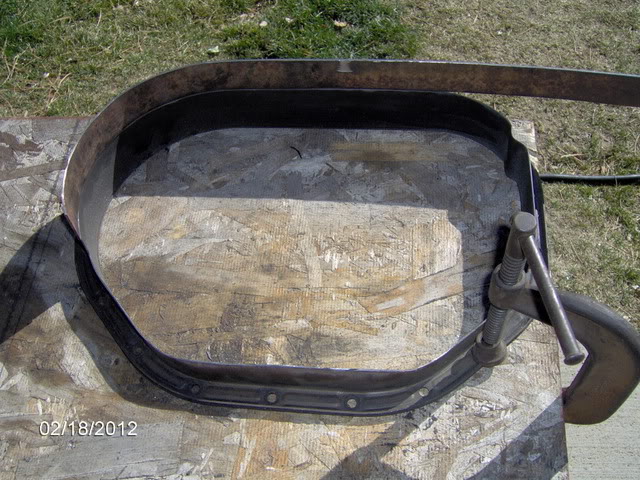
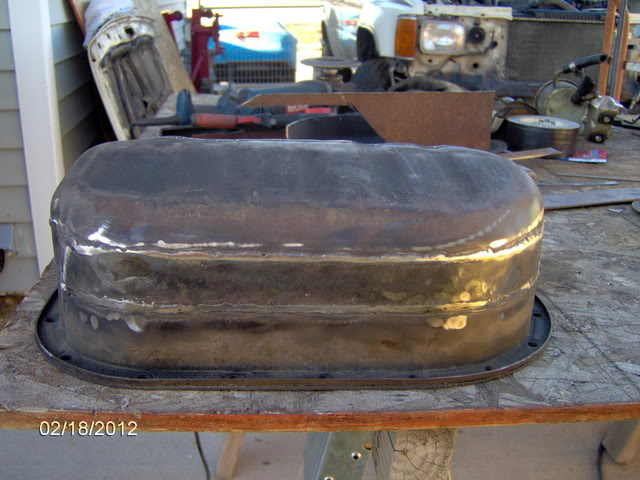
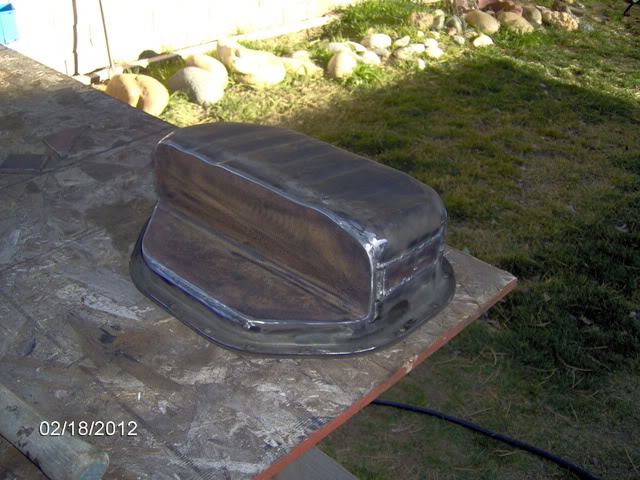
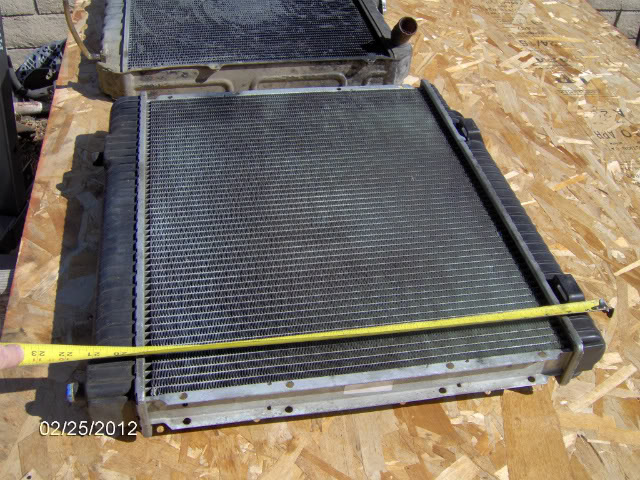
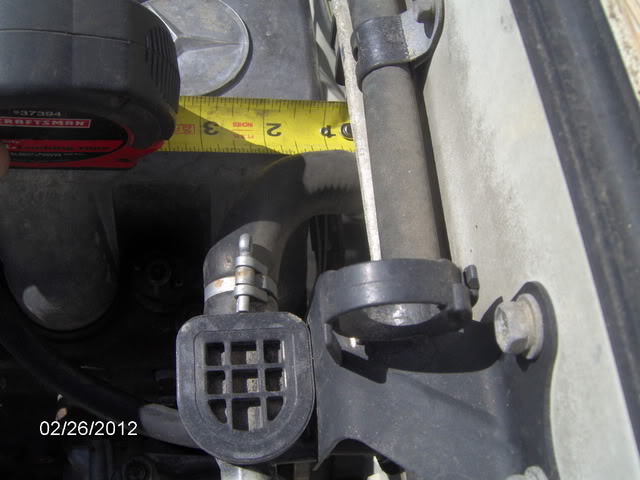
Pyrojoe - the mearsuments on the radiator are about 22" wide and about 22" tall and 1 3/4" thick Here are some pictures

The other advantage of this radiator is the the hose connections work for the motor in fact I will use the Mercedes top hose
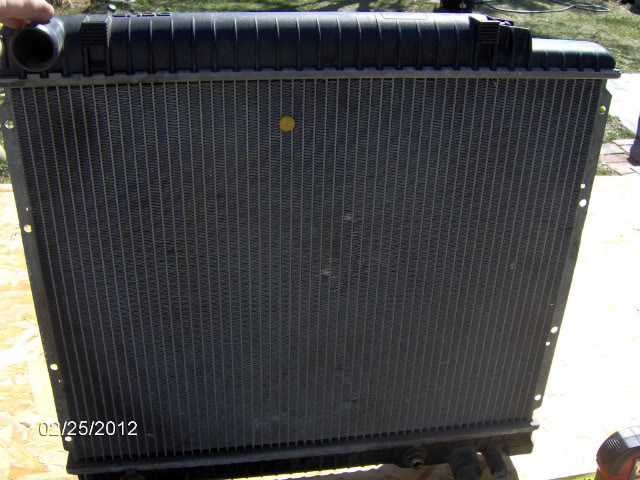
Here is one with hose attached
The other advantage of this radiator is the the hose connections work for the motor in fact I will use the Mercedes top hose
Here is one with hose attached
Mar 3, 2012 | 08:13 PM
#57
Thread Starter
Registered User
Joined: Jul 2011
Posts: 91
Likes: 3
From: West Texas
Pyrojoe - Here is the valve cover clearance, I will let the pictures do the talking
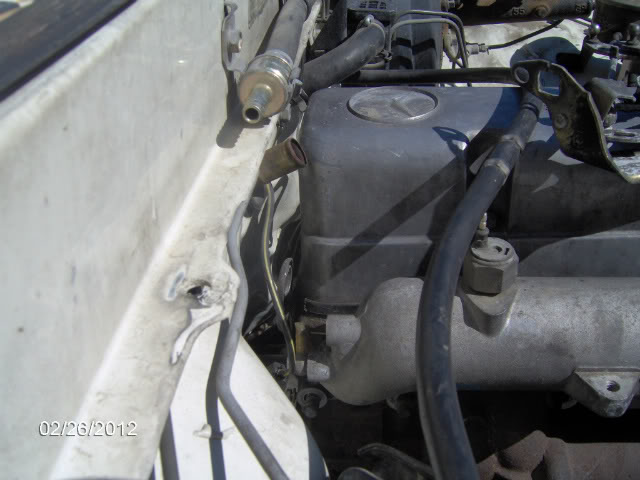
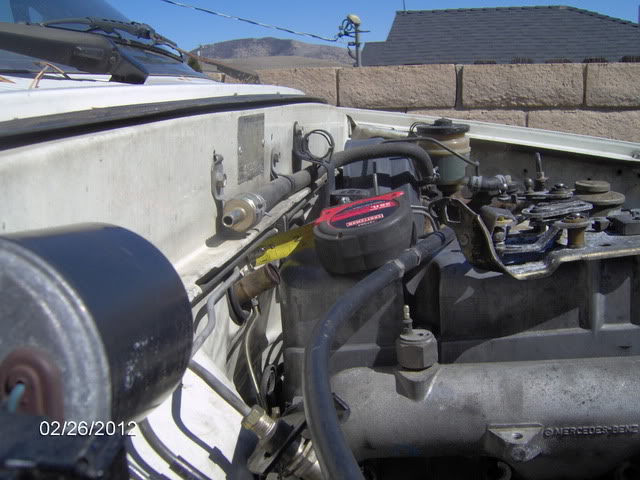
To get it this close I had to move my Tcase mount back about 4 inches, I just moved the whole cross member back and made new mounts to the frame, I hope this helps
To get it this close I had to move my Tcase mount back about 4 inches, I just moved the whole cross member back and made new mounts to the frame, I hope this helps
Mar 3, 2012 | 09:50 PM
#58
Registered User
Joined: Jan 2010
Posts: 610
Likes: 0
From: Nebraska
Thanks a bunch sir, that'll really help me with mounting stuff this week. Did you ever run a compression test? And would there be any benefit of running your engine oil through the radiator since you won't be using the auto-tranny cooler part of the radiator?
Last edited by pyrojoe22; Mar 3, 2012 at 10:35 PM.
Mar 10, 2012 | 06:33 AM
#60
Thread Starter
Registered User
Joined: Jul 2011
Posts: 91
Likes: 3
From: West Texas
Thanks Carl, The clearance on the oil filter is about the same as valve cover 1" from the fire wall, as far as fans go if you do not want A/C (I want it) it would be as simple as using two 10" pushers in front of the radiator, right now I am looking at two options, if I move the radiator towards the motor about 1/2 " and move the A/C condensor into the grill about 3/4" I can use two 10" pushers in front of the radiator between radiator and A/C condensor, but that involves modifiying the grill and A/C lines, the other option I am looking at is moving the radiator towards the A/C condensor about 1 1/2" but that involves modifying the core support and notching the front frame cross support a little for clearance on the radiator bottom tank, but that would let me run a 12" flex fan on the motor or a 18" to 20" electric fan behind the radiator, I am also looking at this new fan called the sidwinder it has the motor mounted off to the side and is only 1 5/8 thick at the fan, since I am thinking of producing complete kits for this swap when mine is completed I am trying to do every thing with as little modification to the base vehicle as possible, that way any one who does not have all the fabrication skills or equipment can simply buy what ever componets need for their appliaction, bolt every thing in and go, which ever way I go I will post up dates as I make progress.


