Project: 85 5VZ-FE 4Runner
 11-17-2007, 11:33 AM
#21
Registered User
Thread Starter
Join Date: Jun 2006
Posts: 141
Likes: 0
Received 0 Likes
on
0 Posts
Next we moved under the hood. For the battery cables we used the 3.4L battery cable harness. We routed this harness in its stock location on the engine then under the steering shaft and up to the battery. We used 2 closed clamps to ensure the harness cannot contact the rotating steering shaft. Sometimes the battery harness is damaged or too short for this; ORS does offer and enhanced replacement of the Battery Harness.
Next was the fuse box wiring. We spliced into the ?85 fuse box main cable and extended this cable (8 ga) across the front of the engine bay to the new battery area. We will be installing about 3? of the proper size fusible link wire at the battery for added protection. The alternator wiring was simple. We simply mated the ?85 harness to the connections on the 3.4L battery harness. There are 3 small wires and one larger cable. Luckily, wire colors match on all EFI Toyota trucks. We recommend running the alternator main cable back into the vehicle?s original cable so that it?s fused properly.
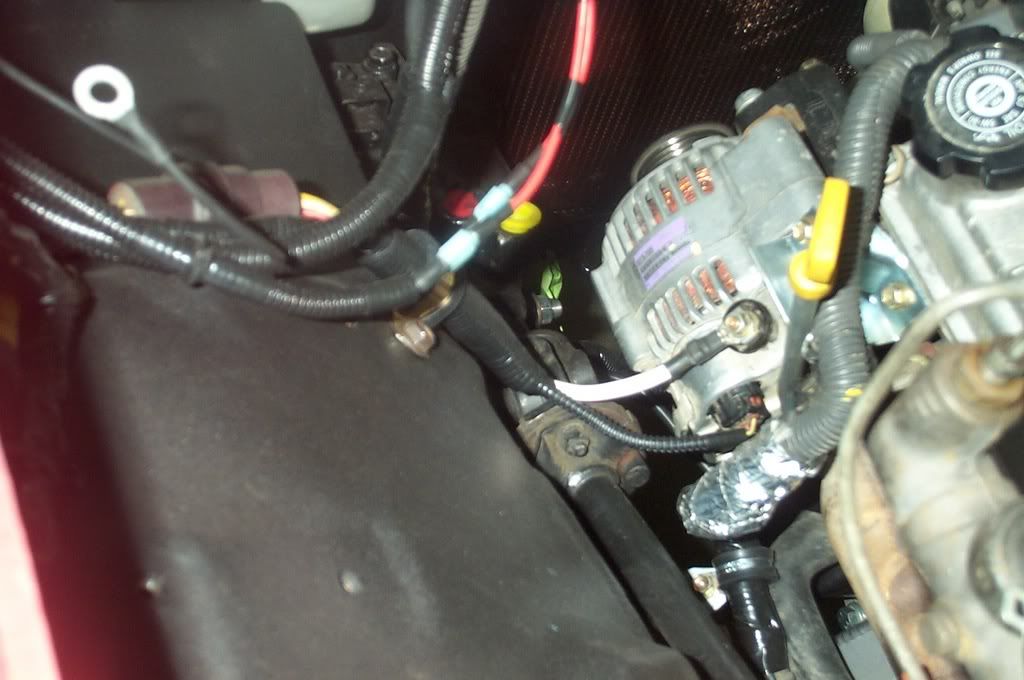
Next was the fuse box wiring. We spliced into the ?85 fuse box main cable and extended this cable (8 ga) across the front of the engine bay to the new battery area. We will be installing about 3? of the proper size fusible link wire at the battery for added protection. The alternator wiring was simple. We simply mated the ?85 harness to the connections on the 3.4L battery harness. There are 3 small wires and one larger cable. Luckily, wire colors match on all EFI Toyota trucks. We recommend running the alternator main cable back into the vehicle?s original cable so that it?s fused properly.
 11-19-2007, 10:44 AM
#22
Registered User
Thread Starter
Join Date: Jun 2006
Posts: 141
Likes: 0
Received 0 Likes
on
0 Posts
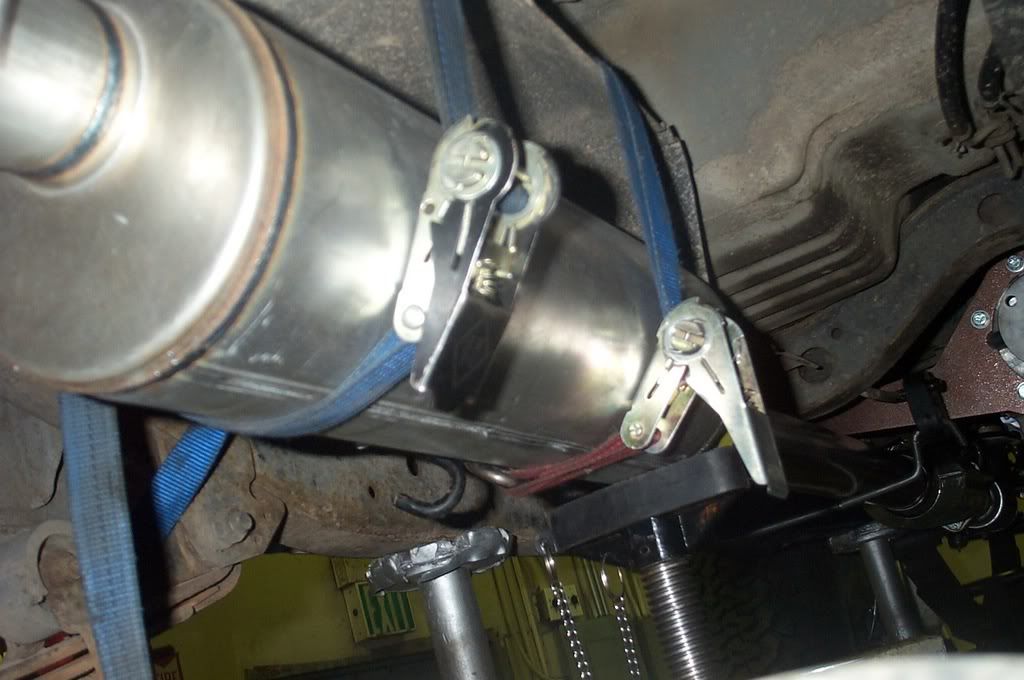
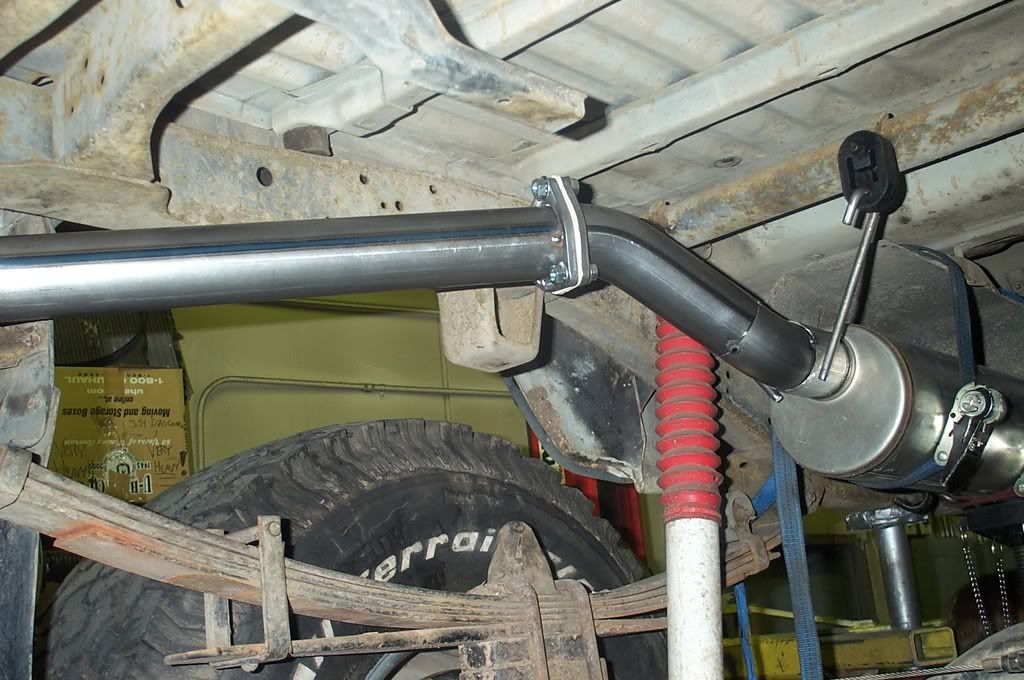
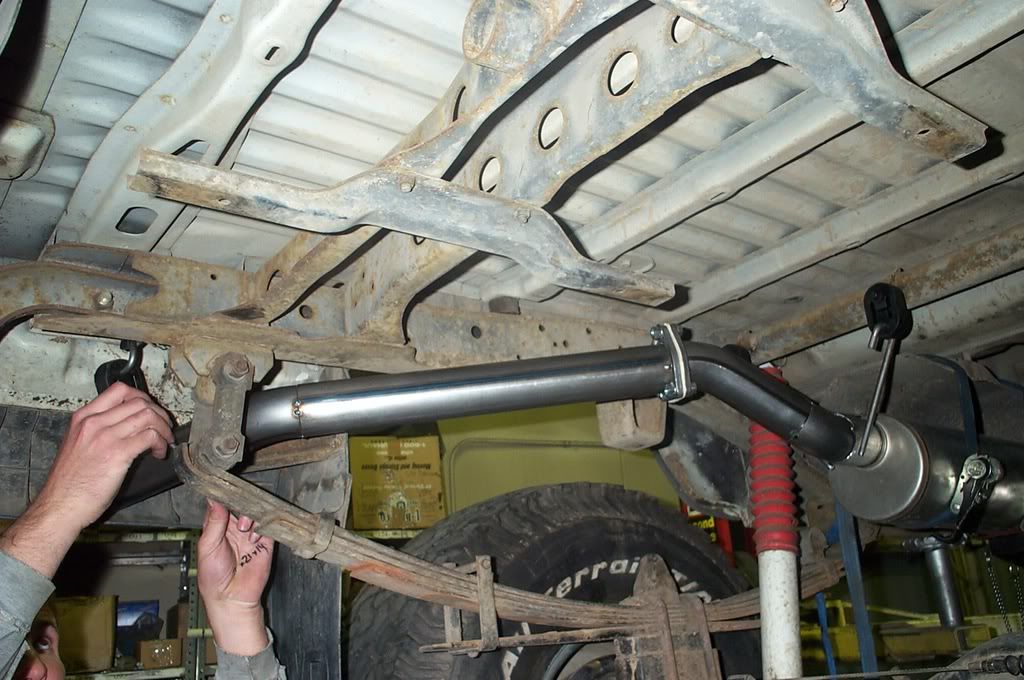
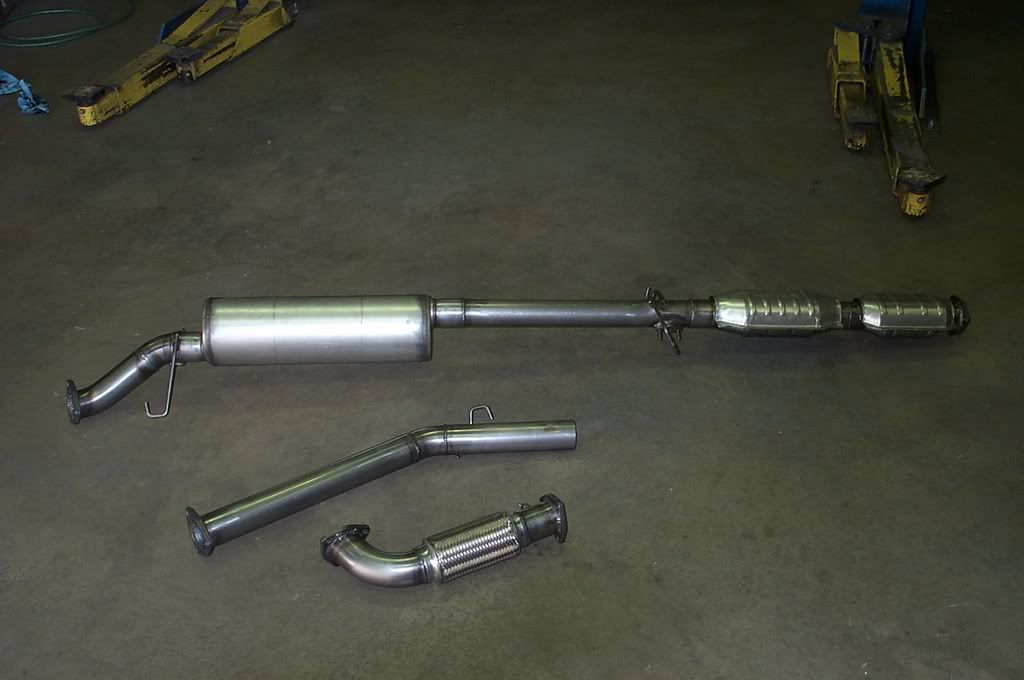
EXHAUST
We really enjoy this part, we get to make sparks.
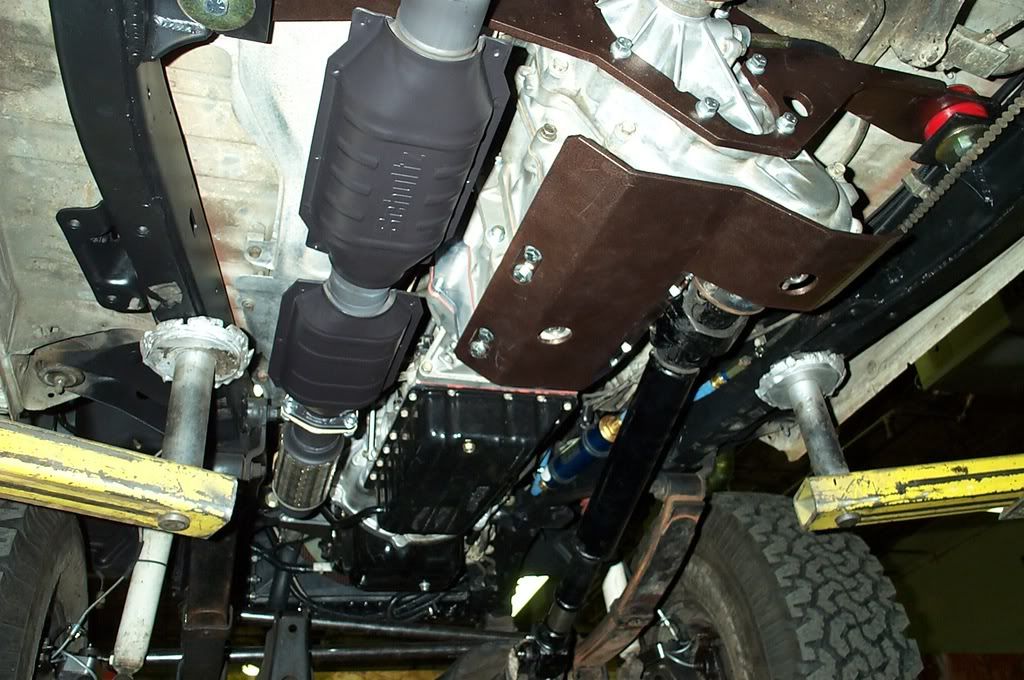
This exhaust required the use of 2 catalytic converters (some �00 California models and all �01 and later models require the use of 2 converters). The ORS Exhaust Crossover Pipe includes and additional weld-on flange to build the exhaust system from. We started there, then added a flex coupler; we start all exhaust systems that way. Whether using headers or our crossover pipe, the flex is cheap insurance against the life of the headers or crossover.
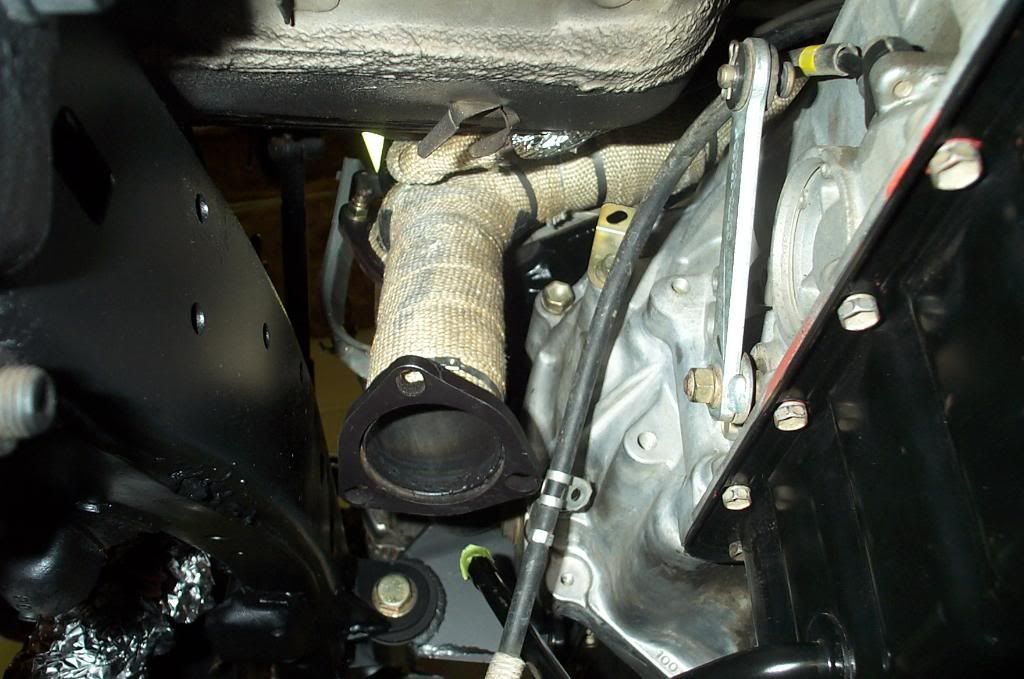
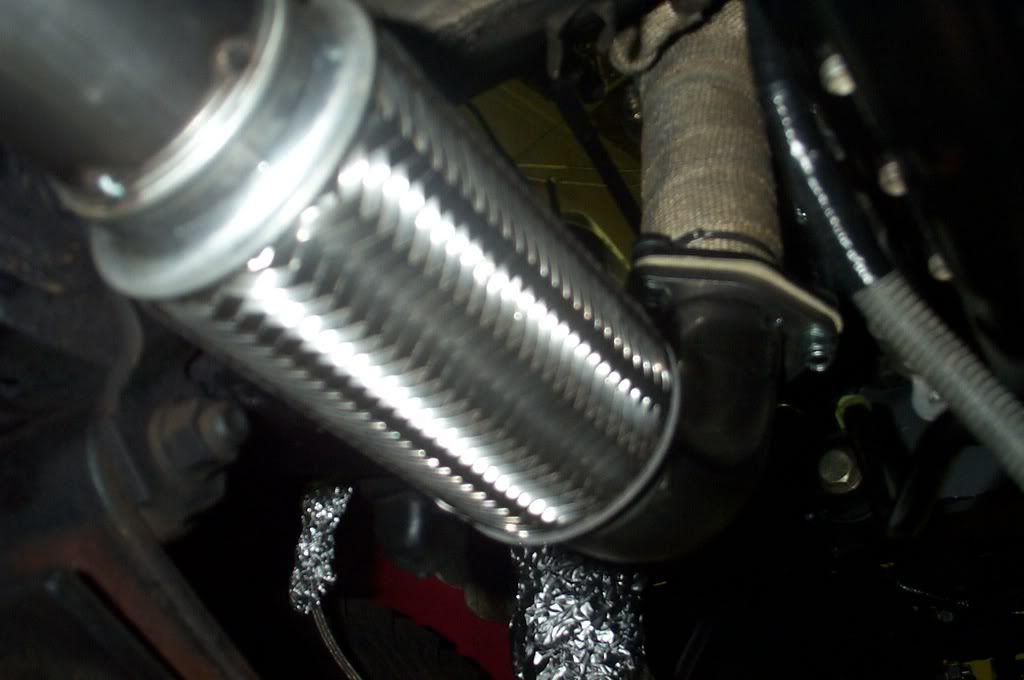
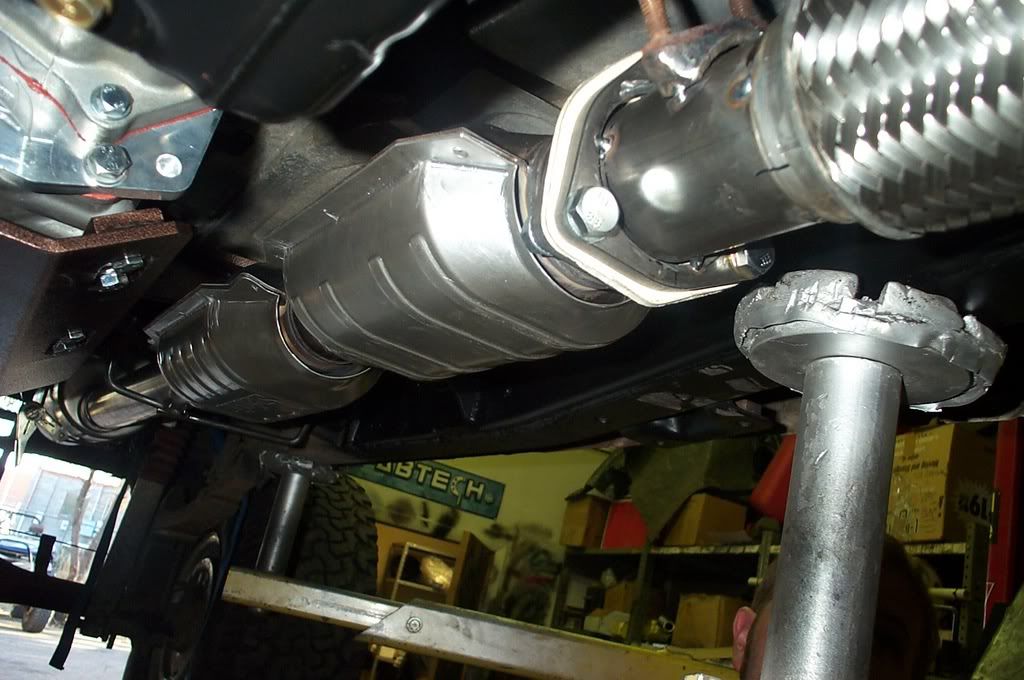
Next we installed both converters, then a flange, then the muffler, another flange, then the tailpipe.
We really enjoy this part, we get to make sparks.
This exhaust required the use of 2 catalytic converters (some �00 California models and all �01 and later models require the use of 2 converters). The ORS Exhaust Crossover Pipe includes and additional weld-on flange to build the exhaust system from. We started there, then added a flex coupler; we start all exhaust systems that way. Whether using headers or our crossover pipe, the flex is cheap insurance against the life of the headers or crossover.
Next we installed both converters, then a flange, then the muffler, another flange, then the tailpipe.
11-19-2007, 10:59 AM
#23
Registered User
Thread Starter
Join Date: Jun 2006
Posts: 141
Likes: 0
Received 0 Likes
on
0 Posts
Here are some approximate costs for A/T swaps:
http://www.offroadsolutions.com/tech...#average_costs
M/T swaps:
http://www.offroadsolutions.com/tech...#average_costs
This project in particular is a little more than the higher end of what you are reading. The following made it cost even more:
-truck originally 4 cylinder (trans and motor mount issues)
-upgraded transmission
-custom transfer case work/parts
-3.4L performance motor mounts, FROR transfer case crossomember
Hope that helps!
http://www.offroadsolutions.com/tech...#average_costs
M/T swaps:
http://www.offroadsolutions.com/tech...#average_costs
This project in particular is a little more than the higher end of what you are reading. The following made it cost even more:
-truck originally 4 cylinder (trans and motor mount issues)
-upgraded transmission
-custom transfer case work/parts
-3.4L performance motor mounts, FROR transfer case crossomember
Hope that helps!
11-19-2007, 04:41 PM
#25
Registered User
Thread Starter
Join Date: Jun 2006
Posts: 141
Likes: 0
Received 0 Likes
on
0 Posts
Thanks Dale!
If possible there would certainly be no harm in using that. This bracket doesn't fit our latest crossovers real well and requires some fab.
However, our crossover pipes come with a flex coulper in the middle and we always install another coupler just after the crossover. With these in place we feel there is no danger to the crossover.
11-19-2007, 04:42 PM
#26
Registered User
Thread Starter
Join Date: Jun 2006
Posts: 141
Likes: 0
Received 0 Likes
on
0 Posts
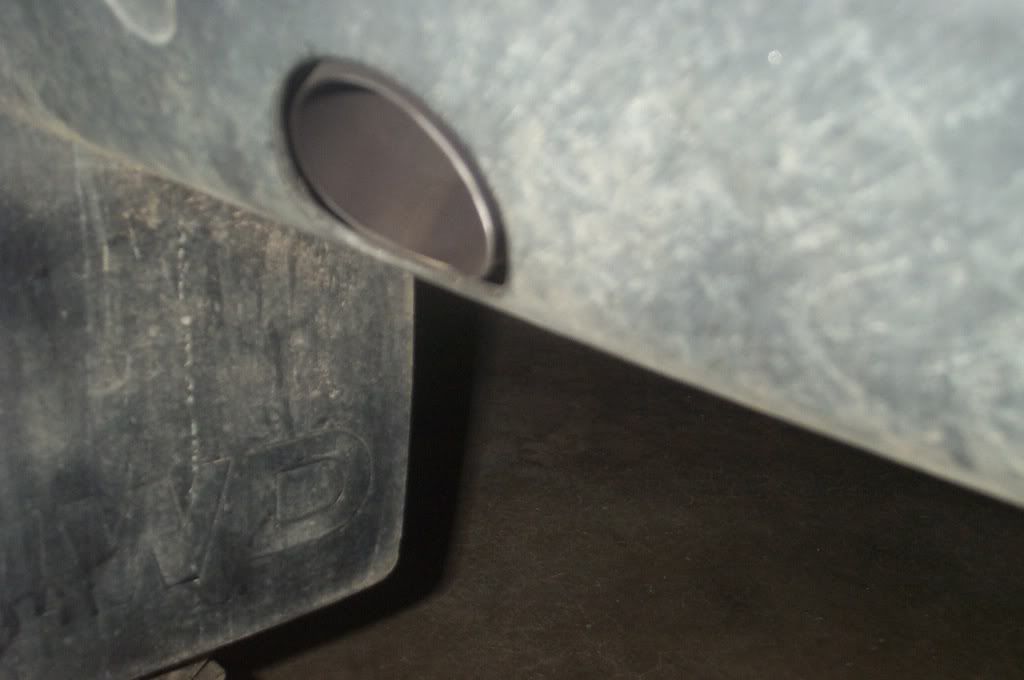
Our fabricator was pretty excited about the trick tailpipe exit. The customer may be adding an aftermarket bumper soon and didn�t want the tailpipe hanging very low at that point. We fixed that problem by exiting the exhaust through the plastic valance thingy.
Here is the initial rough cut.
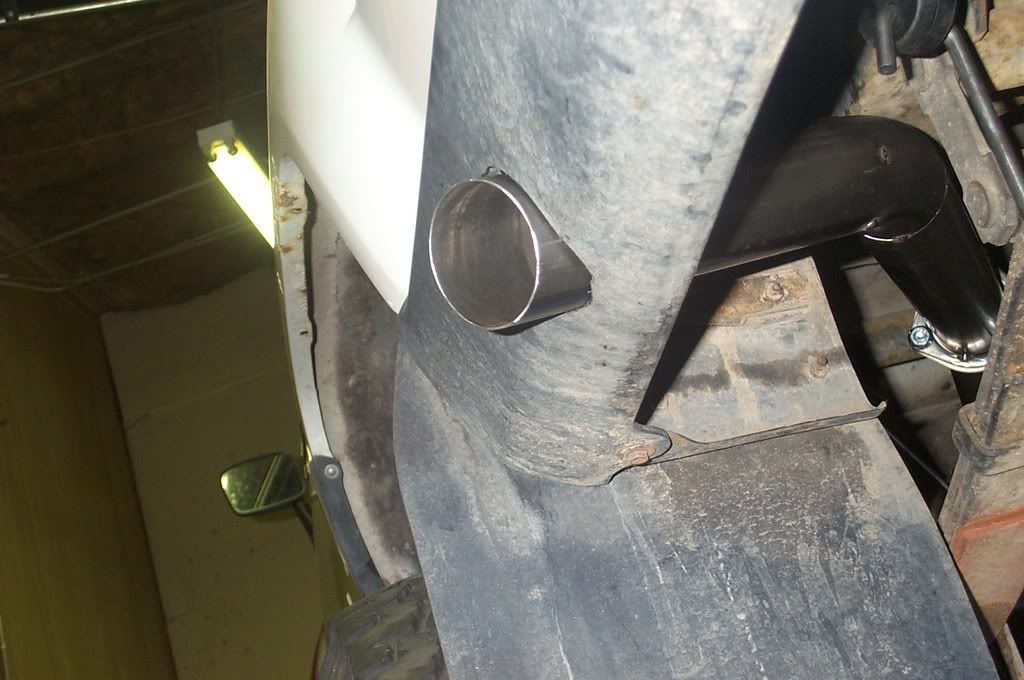
Here the system after welding, before paint (high-temp spray paint).
Here is the finished product, sorry for the blurry pic.....
Here is the initial rough cut.
Here the system after welding, before paint (high-temp spray paint).
Here is the finished product, sorry for the blurry pic.....
11-20-2007, 04:03 PM
#28
Registered User
Thread Starter
Join Date: Jun 2006
Posts: 141
Likes: 0
Received 0 Likes
on
0 Posts
Funny you should mention, we are talking about "stage 2" of this build right now w/ the customer. He is looking at Alcan's, LT shocks & mounts, bumps, etc. He may do this work himself, maybe here, but soon either way.
He bought the truck as is to build, it should be a sweet rig when complete!
 11-20-2007, 04:05 PM
#29
Registered User
Thread Starter
Join Date: Jun 2006
Posts: 141
Likes: 0
Received 0 Likes
on
0 Posts
We have sold a decent amount of parts to customers installing the 3.4L into a 79-83. Most of our parts can be used in this application, certainly give us a call or email if interested and we can go over in more detail.
11-21-2007, 04:49 PM
#30
Registered User
Thread Starter
Join Date: Jun 2006
Posts: 141
Likes: 0
Received 0 Likes
on
0 Posts
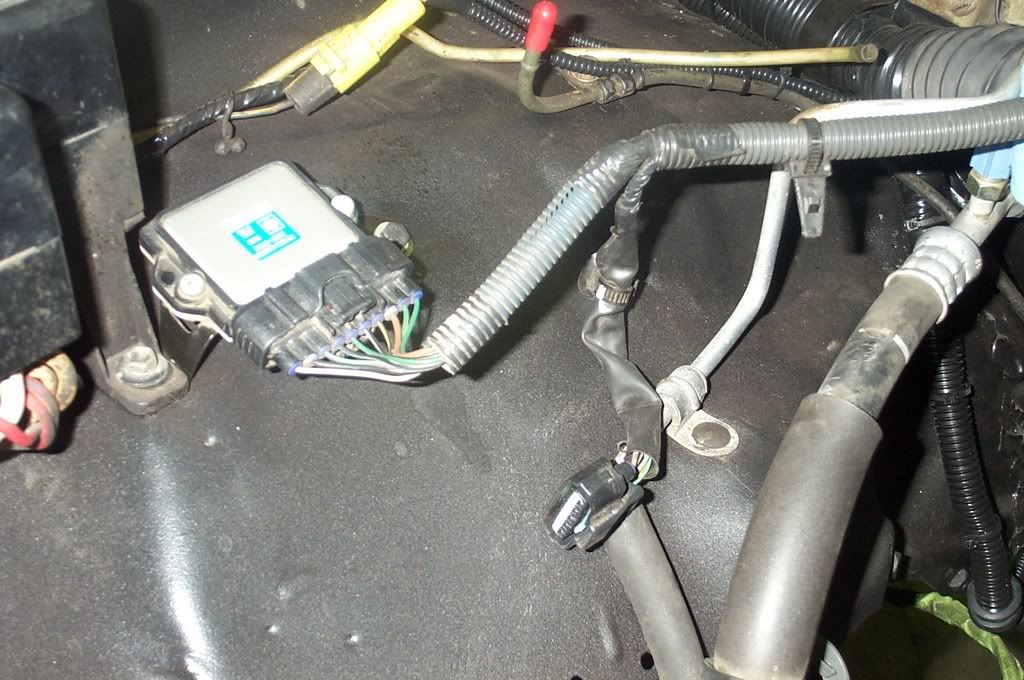
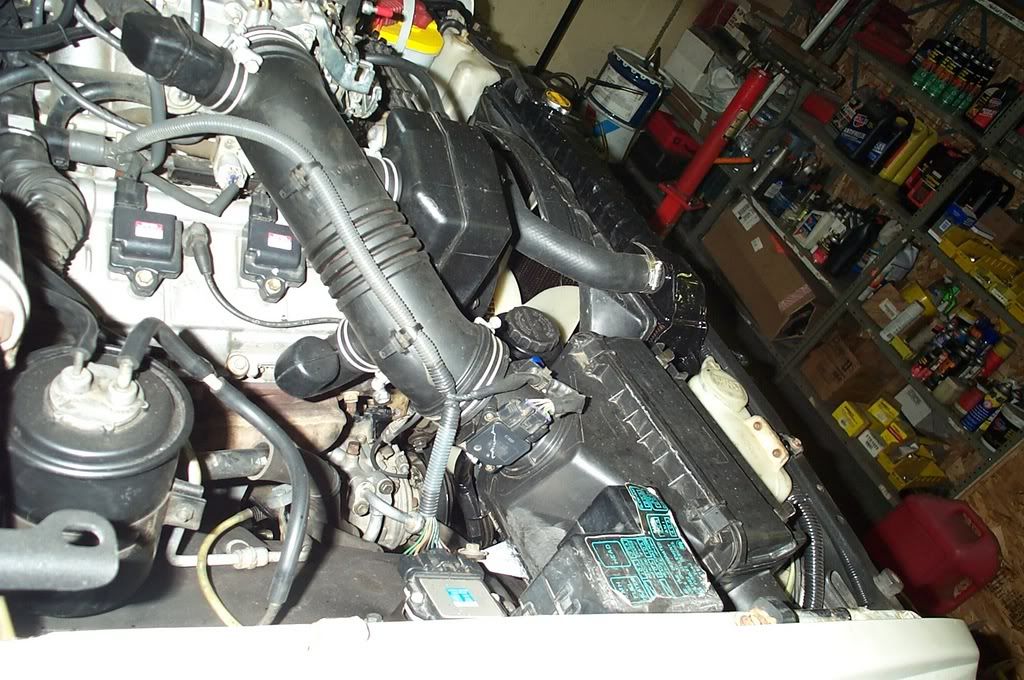
We started installing the under-hood components. We drilled holes and mounted the 3.4L igninter.
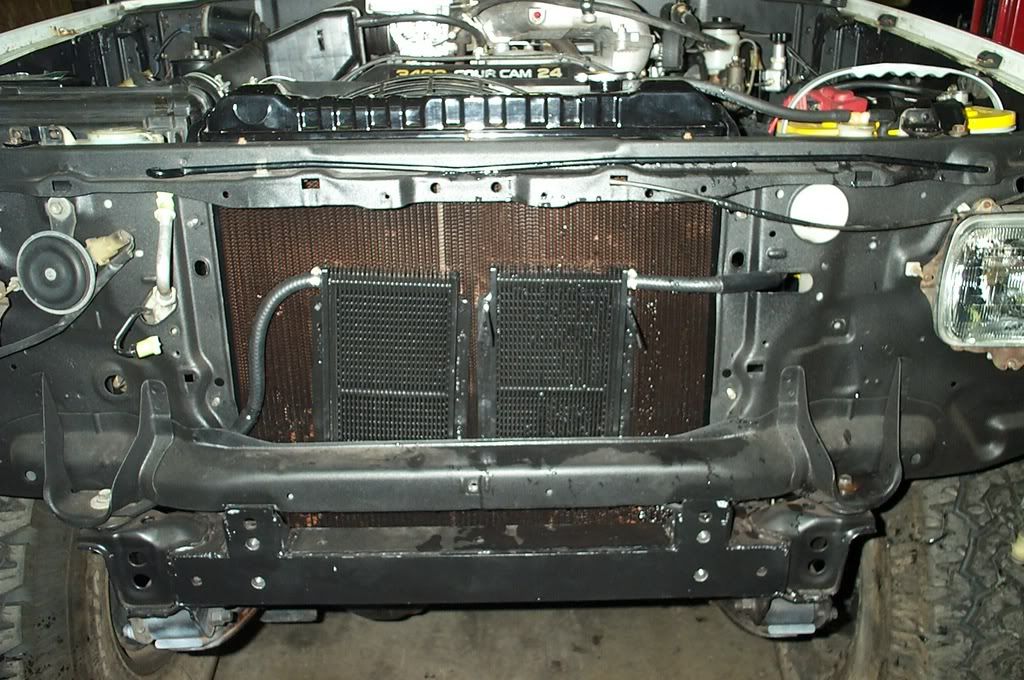
We installed the 90-95 model 3.0L V6 radiator. These are nice because they bolt directly up and provide enough cooling even for AZ w/ A/C. The fan and pulleys were installed. We will be trimming the matching radiator shroud to fit the larger 3.4L fan.
For the A/C we acquired lines/hoses, and the compressor fitting �bulkhead� from a 2nd gen 4Runner. After swapping the fitting bulkhead on the 3.4L compressor for the �93 bulkhead we were able to connect the lines directly to the vehicle and the A/C hoses directly to the compressor..
.
We installed the ORS heater hoses with only a little trimming. Next we mounted the EVAP electrical parts (3). These will be plumbed soon.
11-21-2007, 04:50 PM
#31
Registered User
Thread Starter
Join Date: Jun 2006
Posts: 141
Likes: 0
Received 0 Likes
on
0 Posts
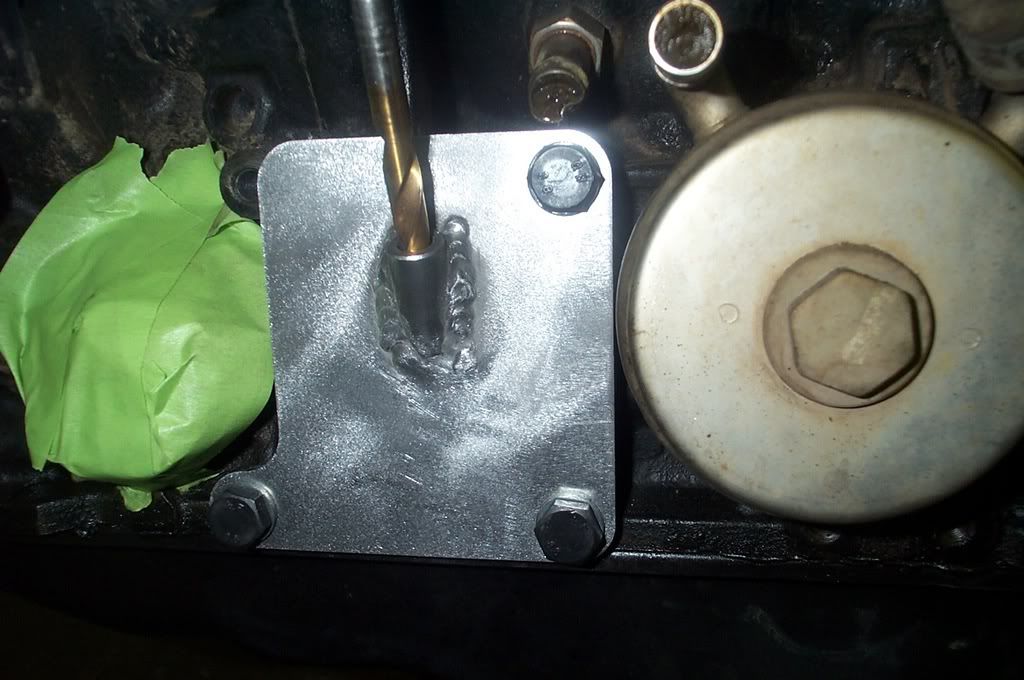
As a side note, we have developed a new product for these swaps. As many may know, the '00 and newer versions of the 3.4L require a hole be drilled into the block to accept the dipstick tube during a swap like this.
We have drilled many of these and don't enjoy how tedious it can be. We developed a drill guide to assist this operation. Simply bolt it on and drill. Truly, worth it's weight in gold if you drilled these before......
We'll have more info and pricing next week.
We have drilled many of these and don't enjoy how tedious it can be. We developed a drill guide to assist this operation. Simply bolt it on and drill. Truly, worth it's weight in gold if you drilled these before......
We'll have more info and pricing next week.
11-21-2007, 05:34 PM
#32
Contributing Member
As a side note, we have developed a new product for these swaps. As many may know, the '00 and newer versions of the 3.4L require a hole be drilled into the block to accept the dipstick tube during a swap like this.
We have drilled many of these and don't enjoy how tedious it can be. We developed a drill guide to assist this operation. Simply bolt it on and drill. Truly, worth it's weight in gold if you drilled these before......
We'll have more info and pricing next week.
We have drilled many of these and don't enjoy how tedious it can be. We developed a drill guide to assist this operation. Simply bolt it on and drill. Truly, worth it's weight in gold if you drilled these before......
We'll have more info and pricing next week.
 12-11-2007, 01:23 PM
#33
Registered User
Thread Starter
Join Date: Jun 2006
Posts: 141
Likes: 0
Received 0 Likes
on
0 Posts
MORE PLUMBING
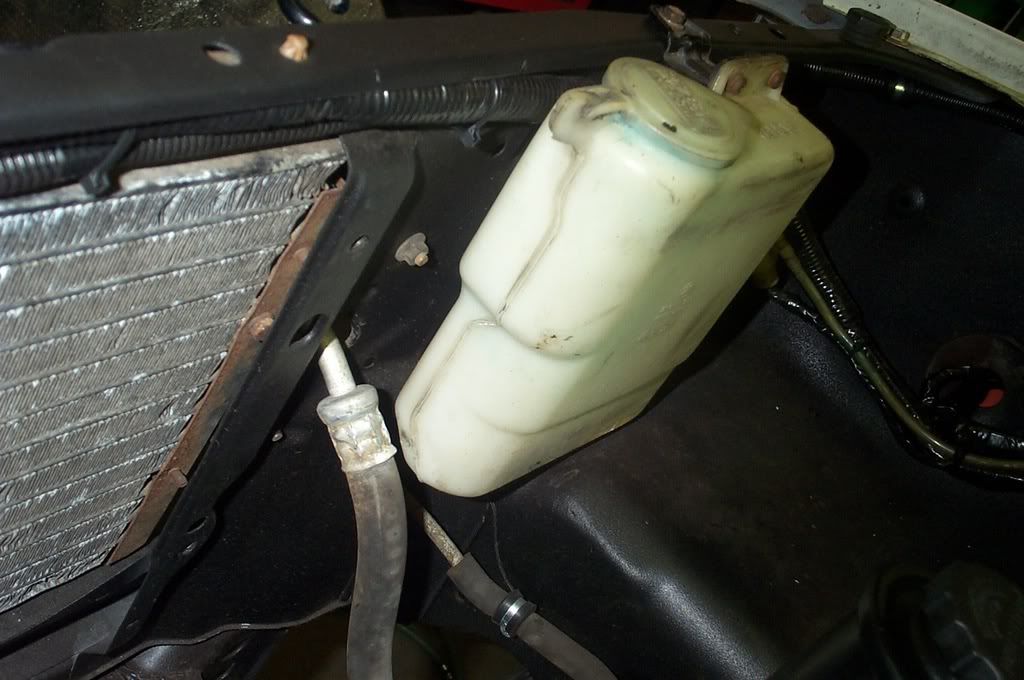
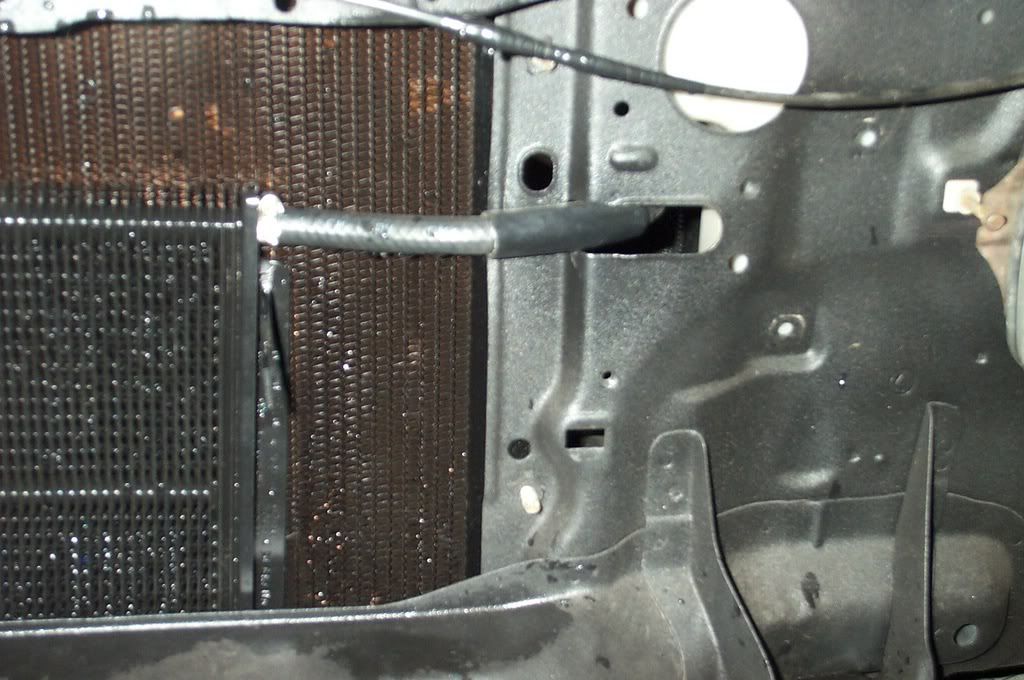
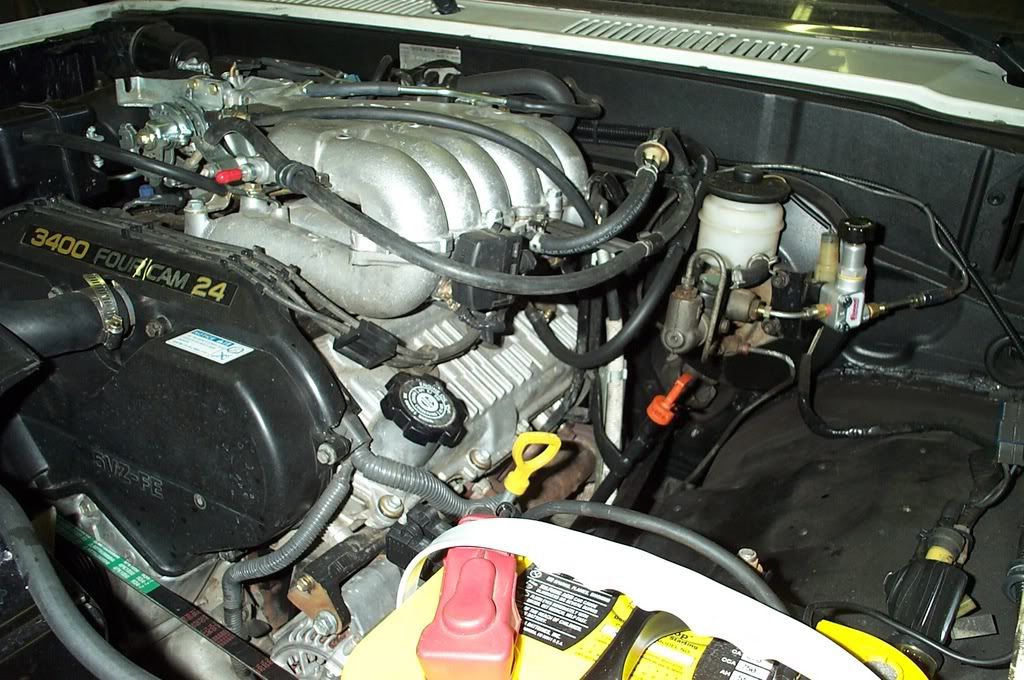
Since this truck was going to see off-road and big tires we decided to run a small transmission cooler as the P/S cooler. We also decided to run an auxiliary transmission cooler for the same reasons. The only place we found suitable to mount these was between the condenser and the radiator. We first mounted them with zip ties for mocking up. Once we start the truck and everything is bled we�ll mount them with the handy radiator ties that the coolers come with and re-install the A/C condenser.
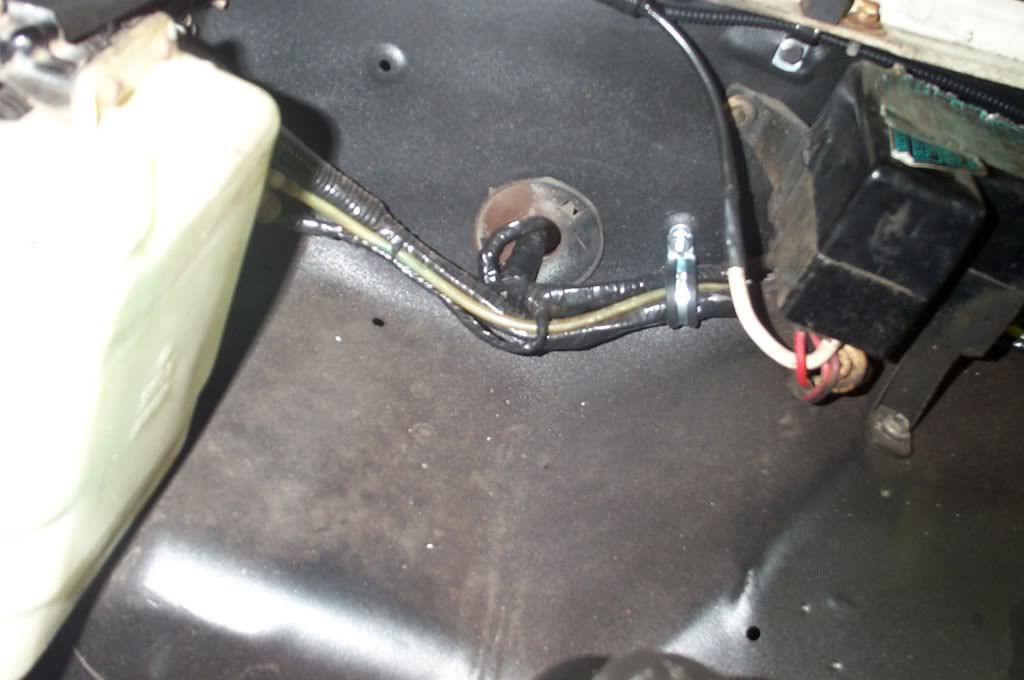
We had to cut holes in the body on each side to run the hoses back to the engine bay. You never think of this stuff when it would be the easiest (before painting)������ As you can see we went to great lengths to properly route and shield these hoses to prevent any premature problems.
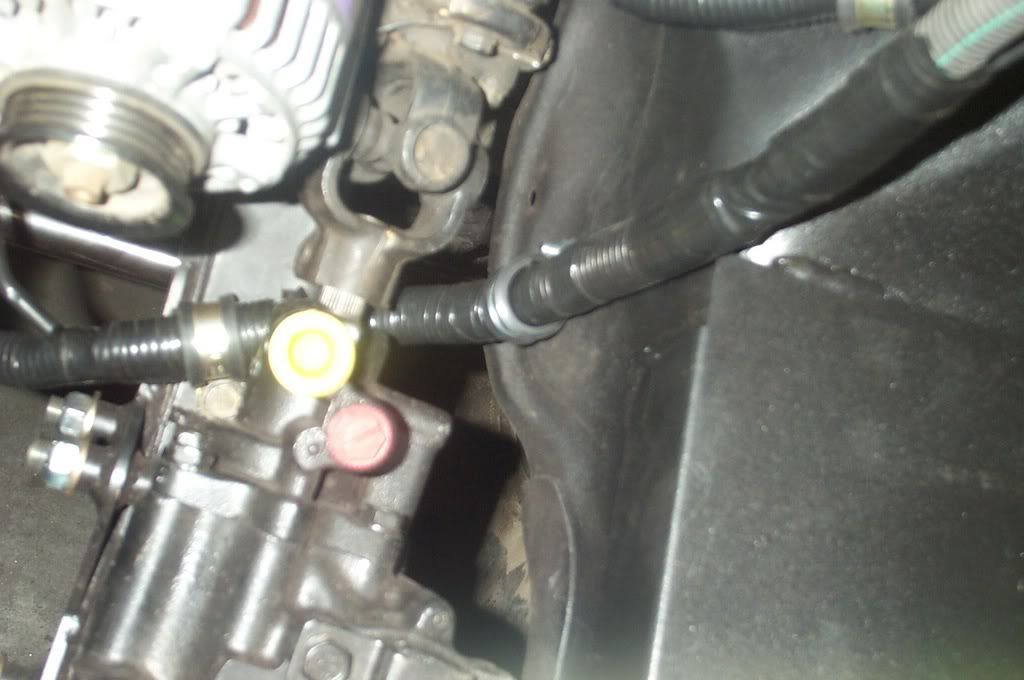
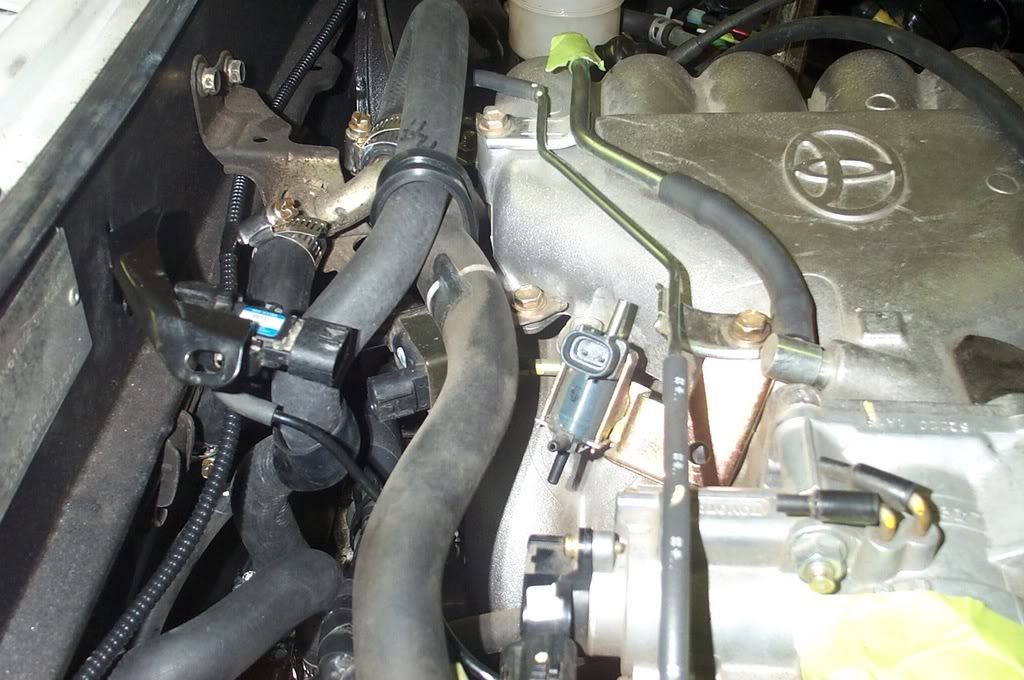
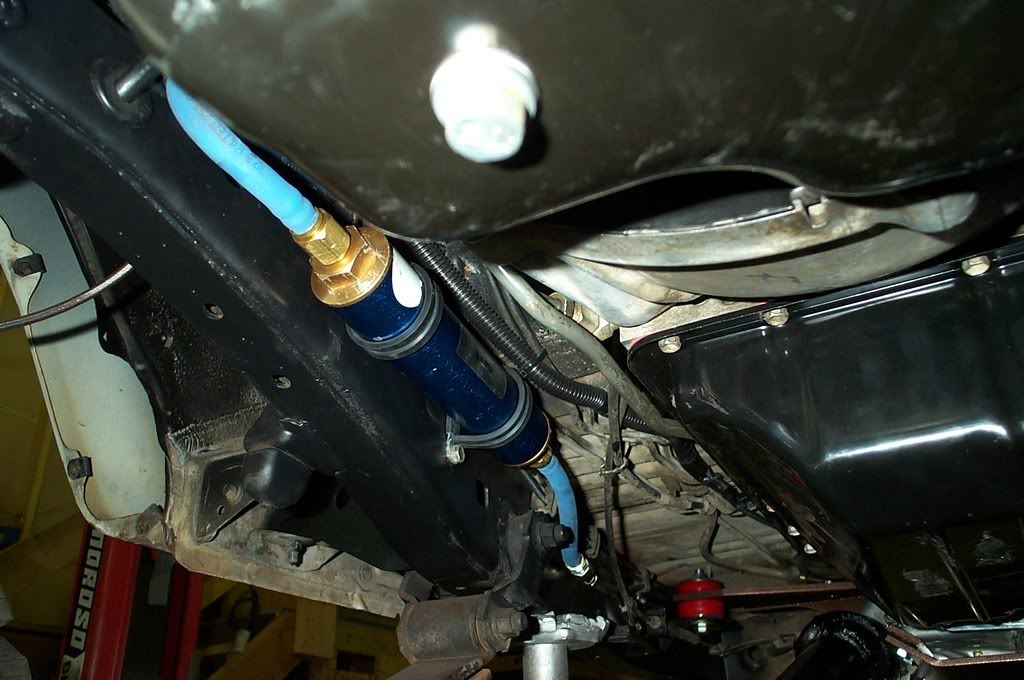
From there we routed the trans fluid from the transmission fluid lines through the radiator trans cooler and aux. cooler. We also installed the ORS high pressure power steering hose and return hoses. We plumbed the P/S cooler on the return side. We use 3/8� oil cooler hose (cut to length) for our transmission cooler hose and P/S return hose. This is also included in our kits. We carefully shielded and routed all these hoses, it was quite and ordeal but worth the trouble savings down the road.

Next came the fuel hoses. We normally sell a fuel hose extension with our kits that mates the 3.4L fuel hose to the frame high-pressure side. 4cyl trucks require the installation of a fuel filter, the 3.0L�s don�t. We normally flare the fuel lines near the tank and install a 3.0L filter. We thought we�d try something different this time. We tried out a large racing fuel filter. The nice part is that it fits the ORS fuel hose fittings. It�s also easy to service and simpler to install. It�s also pretty huge��..
Since this truck was going to see off-road and big tires we decided to run a small transmission cooler as the P/S cooler. We also decided to run an auxiliary transmission cooler for the same reasons. The only place we found suitable to mount these was between the condenser and the radiator. We first mounted them with zip ties for mocking up. Once we start the truck and everything is bled we�ll mount them with the handy radiator ties that the coolers come with and re-install the A/C condenser.
We had to cut holes in the body on each side to run the hoses back to the engine bay. You never think of this stuff when it would be the easiest (before painting)������
As you can see we went to great lengths to properly route and shield these hoses to prevent any premature problems.From there we routed the trans fluid from the transmission fluid lines through the radiator trans cooler and aux. cooler. We also installed the ORS high pressure power steering hose and return hoses. We plumbed the P/S cooler on the return side. We use 3/8� oil cooler hose (cut to length) for our transmission cooler hose and P/S return hose. This is also included in our kits. We carefully shielded and routed all these hoses, it was quite and ordeal but worth the trouble savings down the road.
Next came the fuel hoses. We normally sell a fuel hose extension with our kits that mates the 3.4L fuel hose to the frame high-pressure side. 4cyl trucks require the installation of a fuel filter, the 3.0L�s don�t. We normally flare the fuel lines near the tank and install a 3.0L filter. We thought we�d try something different this time. We tried out a large racing fuel filter. The nice part is that it fits the ORS fuel hose fittings. It�s also easy to service and simpler to install. It�s also pretty huge��..
12-19-2007, 05:15 PM
#34
Registered User
Thread Starter
Join Date: Jun 2006
Posts: 141
Likes: 0
Received 0 Likes
on
0 Posts
INTAKE AND FINISH WORK
This customer is interested in a snorkel down the road. Although something would have to be retro-fitted, the best starting place is the stock intake box. The donor intake box had a crack in it from the rollover. We decided to repair it using our plastic welder. It went very smooth.
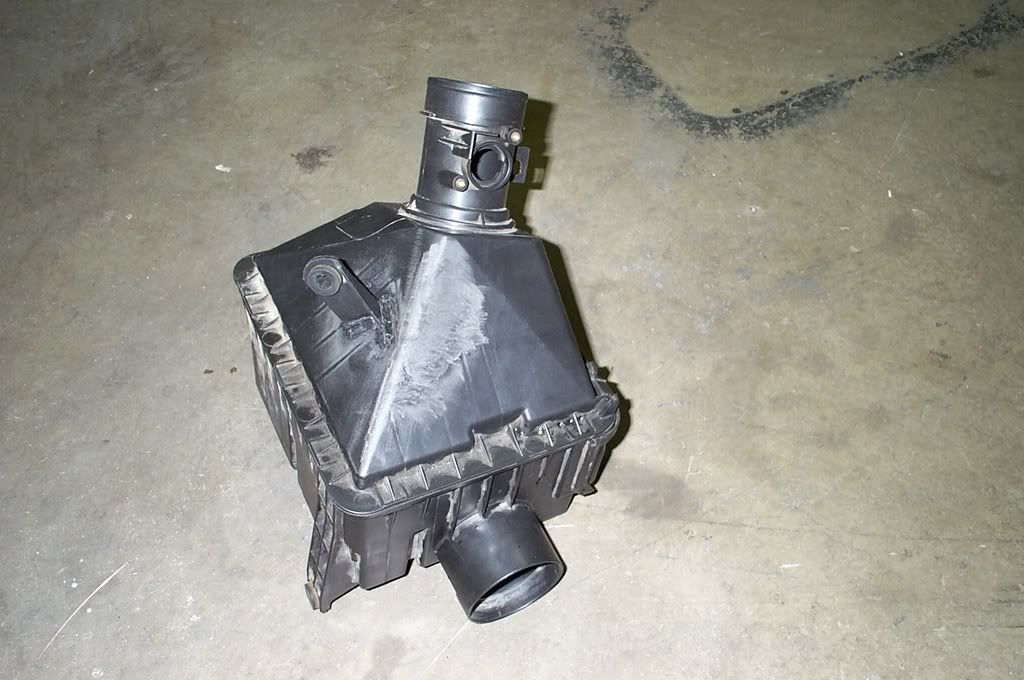
These stock 3.4L intake boxes fit but the mounts don�t line up with anything useful. The lower mount can be left in place. We drilled a hole to accommodate this one. The other 2 mounts were removed and re-welded (oh yeah..) to a useful place. Now the intake mounts quite nicely.

We have everything plumbed, wired, routed, mounted, etc. We filled the fluids and turned the key. It wouldn�t start. After some thinking, the boss� wife asked if it was out of gas�� It was. We wish we could say this was the first time this happened in a swap. After some fuel, it fired right up and ran great.
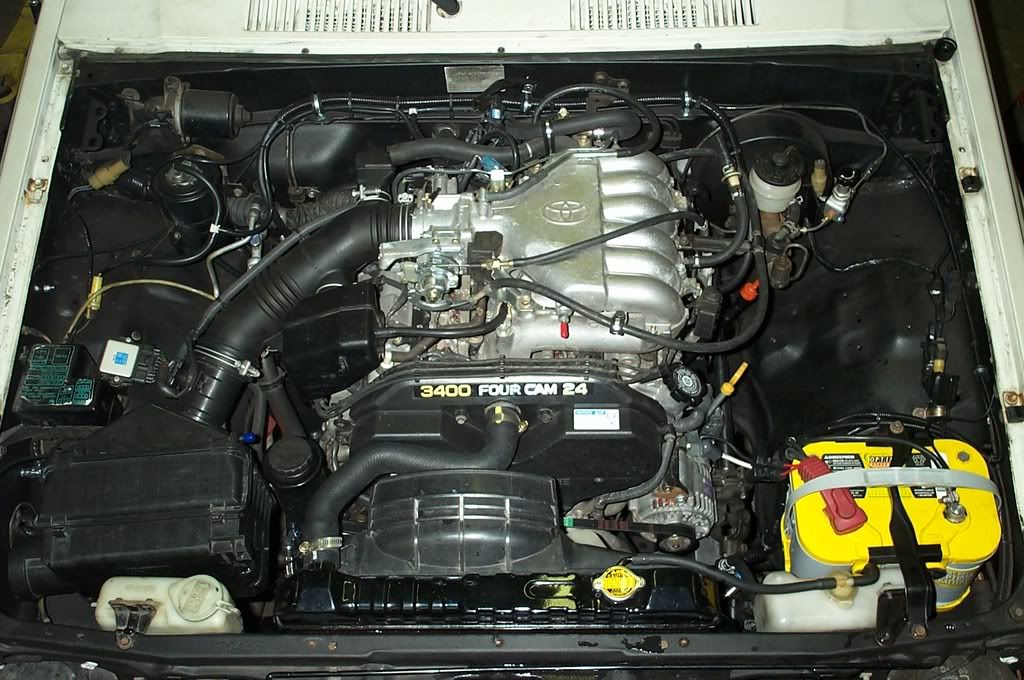
Next we�ll be cutting/scooping the hood and testing everything out!
This customer is interested in a snorkel down the road. Although something would have to be retro-fitted, the best starting place is the stock intake box. The donor intake box had a crack in it from the rollover. We decided to repair it using our plastic welder. It went very smooth.
These stock 3.4L intake boxes fit but the mounts don�t line up with anything useful. The lower mount can be left in place. We drilled a hole to accommodate this one. The other 2 mounts were removed and re-welded (oh yeah..) to a useful place. Now the intake mounts quite nicely.
We have everything plumbed, wired, routed, mounted, etc. We filled the fluids and turned the key. It wouldn�t start. After some thinking, the boss� wife asked if it was out of gas�� It was. We wish we could say this was the first time this happened in a swap. After some fuel, it fired right up and ran great.
Next we�ll be cutting/scooping the hood and testing everything out!
12-21-2007, 05:43 PM
#35
Contributing Member
We have everything plumbed, wired, routed, mounted, etc. We filled the fluids and turned the key. It wouldn’t start. After some thinking, the boss’ wife asked if it was out of gas…… It was. We wish we could say this was the first time this happened in a swap. After some fuel, it fired right up and ran great.
12-21-2007, 07:34 PM
#36
Registered User
Join Date: Aug 2006
Location: Colorado Springs, Co
Posts: 1,691
Likes: 0
Received 0 Likes
on
0 Posts
Want to swap the 4.0 v6 into my 96 4runner next  ?
?
Just kidding. I'm always impressed by the guys that can do this. My hat goes off to you guys for a great build.
?Just kidding. I'm always impressed by the guys that can do this. My hat goes off to you guys for a great build.
02-28-2008, 06:59 AM
#38
Registered User
Thread Starter
Join Date: Jun 2006
Posts: 141
Likes: 0
Received 0 Likes
on
0 Posts
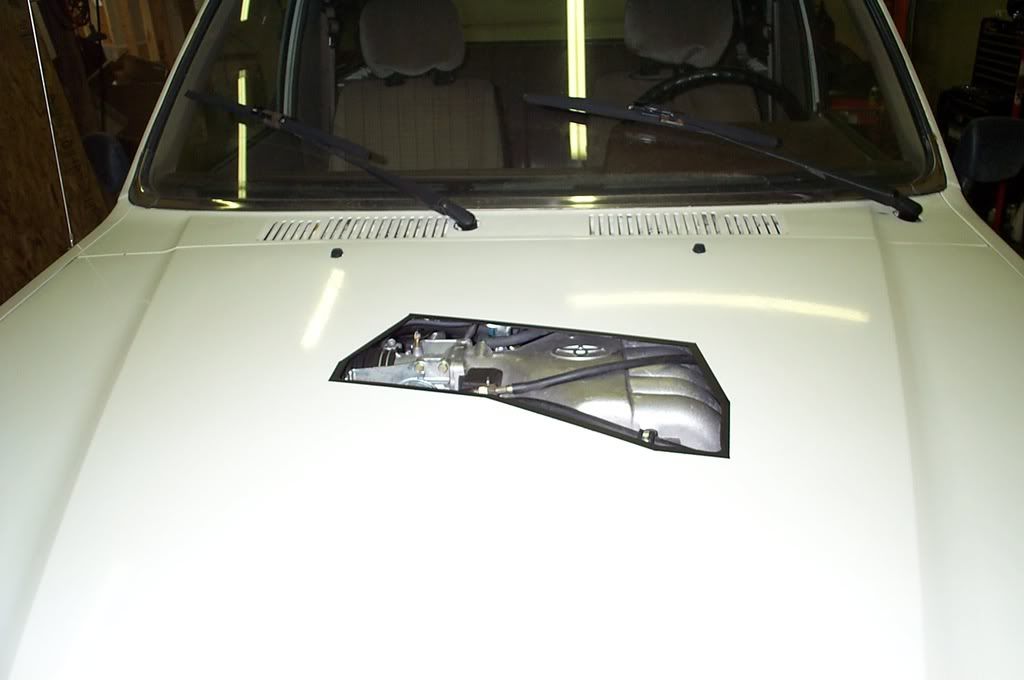
We have been very busy here at the shop and are finally finding time to finish these updates. The hood cutting went well. We simply mask/shield the engine, install the hood and slowly trim until everything clears. It�s a good idea to make the hole as small as possible to avoid having to use an enormous hood scoop. With this body style (�84-�89) there is usually a little more trimming necessary than with the next generation body style.
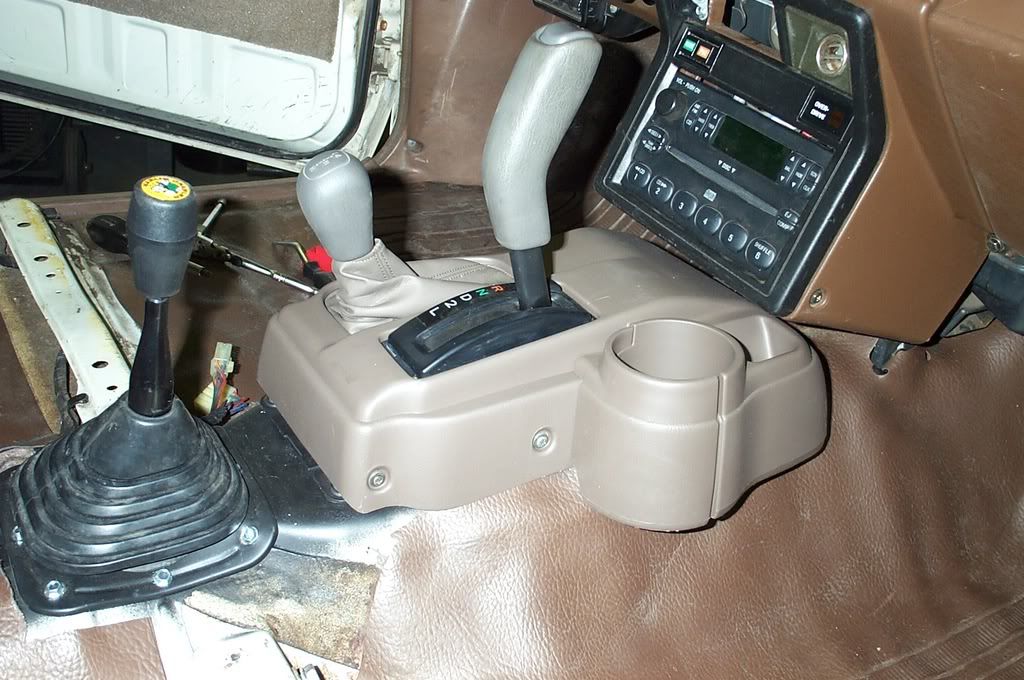
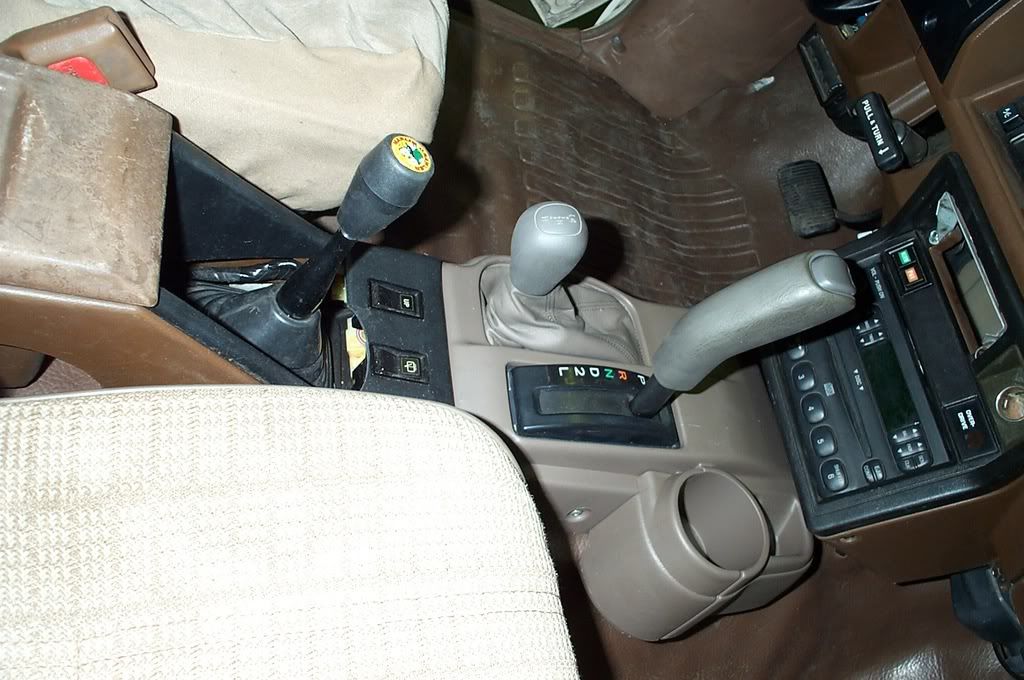
We wanted to make the shifters look a little nicer. The original shifter console wasn�t even close to fitting the newer shifter assembly. We purchased a shifter console from an �01 Tacoma (yes, we opted for the cool cup holder). This console required that 3 of 5 mounts be fabricated but was worth the time. If they only offered the original brown for interiors���
The truck has been driving around Colorado for a couple of months now; without problem. The ability to meet and exceed the speed limit up our Colorado mountain passes is certainly a new thing for this 4Runner��
We are already arranging for Rob to return for a long travel suspension and upgraded axles/differentials����.


