
3.4 swap in the style of Breknraj

 Feb 13, 2009 | 12:08 PM
#63
Contributing Member
Joined: Nov 2002
Posts: 10,666
Likes: 5
From: Oklahoma State
I don't think so. You do have an OBDII plug right? If so, try an auto parts place, some will check it for free. Get the actual code#.
Last edited by mt_goat; Feb 13, 2009 at 12:09 PM.
Feb 13, 2009 | 01:26 PM
#64

Thread Starter
Registered User
Joined: Apr 2007
Posts: 1,580
Likes: 1
From: Park City, UT
Yeah, it's got the plug from ORS. I'm almost certain it's from the rear O2 sensor, though. Right now the exhaust ends 6 inches after it, so it's probably freaking out. Anyway, I gotta get insurance back on this puppy before I go traipsing around to parts places!
Feb 13, 2009 | 06:21 PM
#65
Thread Starter
Registered User
Joined: Apr 2007
Posts: 1,580
Likes: 1
From: Park City, UT
So today was hood installation and power steering bleeding day. Here's the hood stuff I had to do with no body lift.
First, cut the bracing and install cardboard:

Here's a handy trick I picked up a few years ago. If you like the alignment of your hood when you're gonna take it off, drill a hole through the hinge and into the bottom of the hood first(I used 1/8" 'cause I had 2 of 'em). When you go to reinstall, use the drill bit as pilot to align it how it was before. Especially useful when you're doing it by yourself!

Push the hood on down and get an idea where you need to cut. I had to eyeball it a lil, make sure you put your cardboard over far enough, unlike me:

I cut out the pen line in the cardboard, then traced around it on the hood. There's your line to cut:

My eyeballing sucks!

I also had this guy against the hood in the back, holding it from lining up with the cowl:


The cruise control bracket hit the hood too, as well as the throttle body, forgot to get pics of them.
The final product(notice I gave up on the circular ends...I was using an angle grinder):

The PS I'll have to work more on, there was a ton of air in the lines, so I didn't finish before dark.
First, cut the bracing and install cardboard:
Here's a handy trick I picked up a few years ago. If you like the alignment of your hood when you're gonna take it off, drill a hole through the hinge and into the bottom of the hood first(I used 1/8" 'cause I had 2 of 'em). When you go to reinstall, use the drill bit as pilot to align it how it was before. Especially useful when you're doing it by yourself!
Push the hood on down and get an idea where you need to cut. I had to eyeball it a lil, make sure you put your cardboard over far enough, unlike me:
I cut out the pen line in the cardboard, then traced around it on the hood. There's your line to cut:
My eyeballing sucks!
I also had this guy against the hood in the back, holding it from lining up with the cowl:
The cruise control bracket hit the hood too, as well as the throttle body, forgot to get pics of them.
The final product(notice I gave up on the circular ends...I was using an angle grinder):
The PS I'll have to work more on, there was a ton of air in the lines, so I didn't finish before dark.
Feb 15, 2009 | 07:23 PM
#66
Thread Starter
Registered User
Joined: Apr 2007
Posts: 1,580
Likes: 1
From: Park City, UT
No pics today, all I did was screw around trying to bleed the power steering system, to no avail. Then the light bulb came on, I remembered that when I picked up the engine the guy had a hard time steering it when he pulled the Taco into his garage. So I'ma try a new ps pump tomorrow if Napa can get one for me. Then hopefully the last thing to do is visit and exhaust shop!
Feb 15, 2009 | 08:14 PM
#68
Thread Starter
Registered User
Joined: Apr 2007
Posts: 1,580
Likes: 1
From: Park City, UT
It's a definite upgrade, and so worth it I don't even think it's funny. I s'pose I could've fixed the head gasket and geared to 4.56 so I'd match the 31's instead of the 225/75r15's that were stock and all. That might have been about the same price since I'd get lockers while I had the diff's out, but this way I don't have to worry about the next head gasket repair.
I got on it a lil leaving the gas station today, and I'm very happy with it.
I got on it a lil leaving the gas station today, and I'm very happy with it.
Feb 17, 2009 | 06:40 PM
#69
Thread Starter
Registered User
Joined: Apr 2007
Posts: 1,580
Likes: 1
From: Park City, UT
A lil update, got the exhaust finished today at a local shop. Looks great, didn't have my camera so no pics though. Tomorrow. Sounds freaking fantastic! All I have to do now is finish putting the dash back together and put some miles on it before I move on the 27th.
Going home from the exhaust shop I tried it out at hwy speed, and even with 4.10's and 31's it held speed in 5th where I used to have to run at it in 4th.
Going home from the exhaust shop I tried it out at hwy speed, and even with 4.10's and 31's it held speed in 5th where I used to have to run at it in 4th.
Feb 19, 2009 | 10:28 AM
#70
Thread Starter
Registered User
Joined: Apr 2007
Posts: 1,580
Likes: 1
From: Park City, UT
So here's the finished exhaust:


I'm stoked about how high up he was able to route it all, the old exhaust took a few hits last time I did any halfways serious wheeling.
Got the tach mod to work now, I did a crappy job last time and the solder broke on one end. Did a crappy job this time too, but it worked at least.
I think something's up, not sure what, but every once in awhile it seems like it misses under hard acceleration and mid to high rpm(haven't taken it above 4,000 yet, so still technically mid rpm)
I'm gonna check out my plugs and probably replace the wires, they look like they might be factory original. Guess I shoulda thought of that one sooner, but as far as the swap stuff goes, she's done 'til I can afford to supercharge!
Feb 19, 2009 | 04:49 PM
#71
Thread Starter
Registered User
Joined: Apr 2007
Posts: 1,580
Likes: 1
From: Park City, UT
Cute, 3 oem plugs, look about like they were put in on the assembly line then never touched, and 3 NGK's.

And here's the worst one, from the #2 cylinder

So it runs better at all loads and rpms now, but I got a cel, code p0135. Hopefully it's just the routing of my wires and they got a lil hot or something, I don't wanna buy a front O2 sensor.
Oh yeah, the first cel I got was because I didn't have the front O2 sensor plugged in.
And here's the worst one, from the #2 cylinder
So it runs better at all loads and rpms now, but I got a cel, code p0135. Hopefully it's just the routing of my wires and they got a lil hot or something, I don't wanna buy a front O2 sensor.
Oh yeah, the first cel I got was because I didn't have the front O2 sensor plugged in.
Feb 24, 2009 | 04:31 PM
#72
Thread Starter
Registered User
Joined: Apr 2007
Posts: 1,580
Likes: 1
From: Park City, UT
Got the O2 sensor problem figured out, it was just one of the pins in the connection not staying seated all the way, so it would get pushed out the back of the connector.
So I went about getting my smog check done. I thought Oregon went by whichever was more strict/newer for the emissions requirements, but when I told the tech what was up with it being a 2000 Taco engine, he just asked what year the car was and went with that:

So I went about getting my smog check done. I thought Oregon went by whichever was more strict/newer for the emissions requirements, but when I told the tech what was up with it being a 2000 Taco engine, he just asked what year the car was and went with that:
Jul 10, 2009 | 11:57 AM
#73
Thread Starter
Registered User
Joined: Apr 2007
Posts: 1,580
Likes: 1
From: Park City, UT
So, an update. While climbing some rocks out in the Desert last week, the power steering hose broke. I had it secured away from the fenderwell with a ziptie, but apparently that broke some time ago. The braided hose rubbed itself there from the flex of the motor mounts long enough it wore through and split. Went to the local Napa and they fabbed a new hose, but they didn't have any braided stainless line. Instead, I got reinforced hydraulic hose like used on tractors/dozers and such, something like 5,000 psi rating!
Just an fyi, make sure you have your high pressure line away from the body!
Just an fyi, make sure you have your high pressure line away from the body!
Sep 17, 2009 | 03:11 PM
#75
Thread Starter
Registered User
Joined: Apr 2007
Posts: 1,580
Likes: 1
From: Park City, UT
So, with the power steering hose breakage due to engine movement, and just plain not liking how much the engine moved around still rubbing my hood a little, I decided on a course of action.
http://www.trail-gear.com/mounts.html
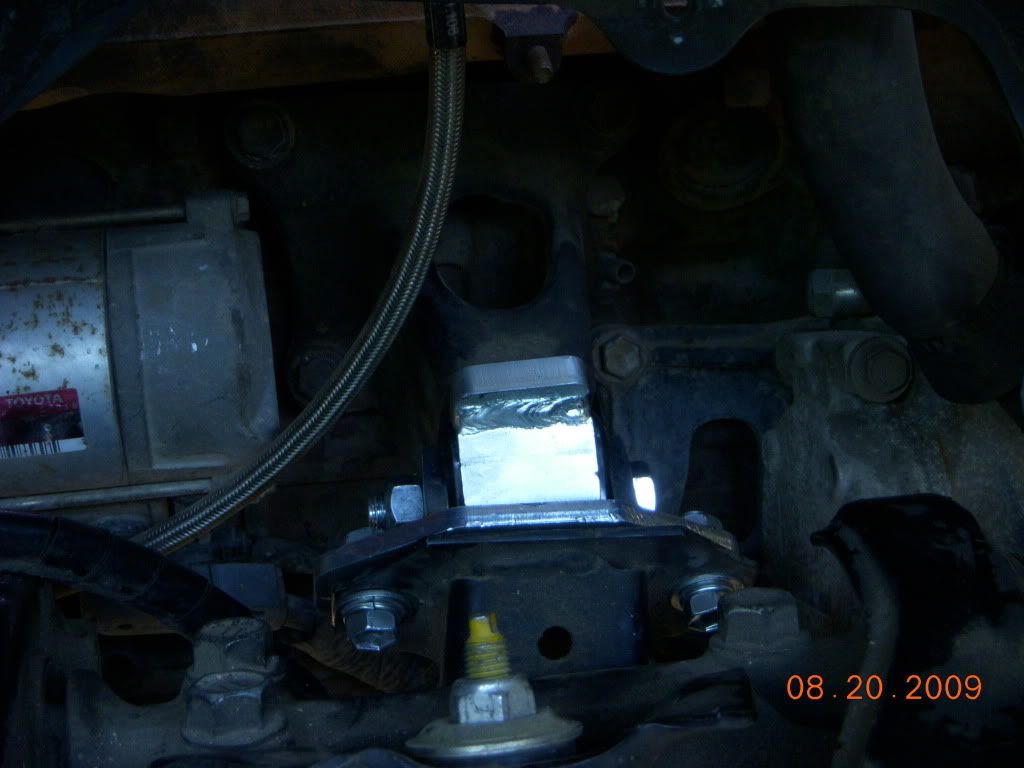

Problem is that they are taller than the stock rubber mounts by a little bit, so the engine could not set in far enough to line up all the holes. Here is what I did to fix it, though I wish they'd had their fitment better so I didn't have to.


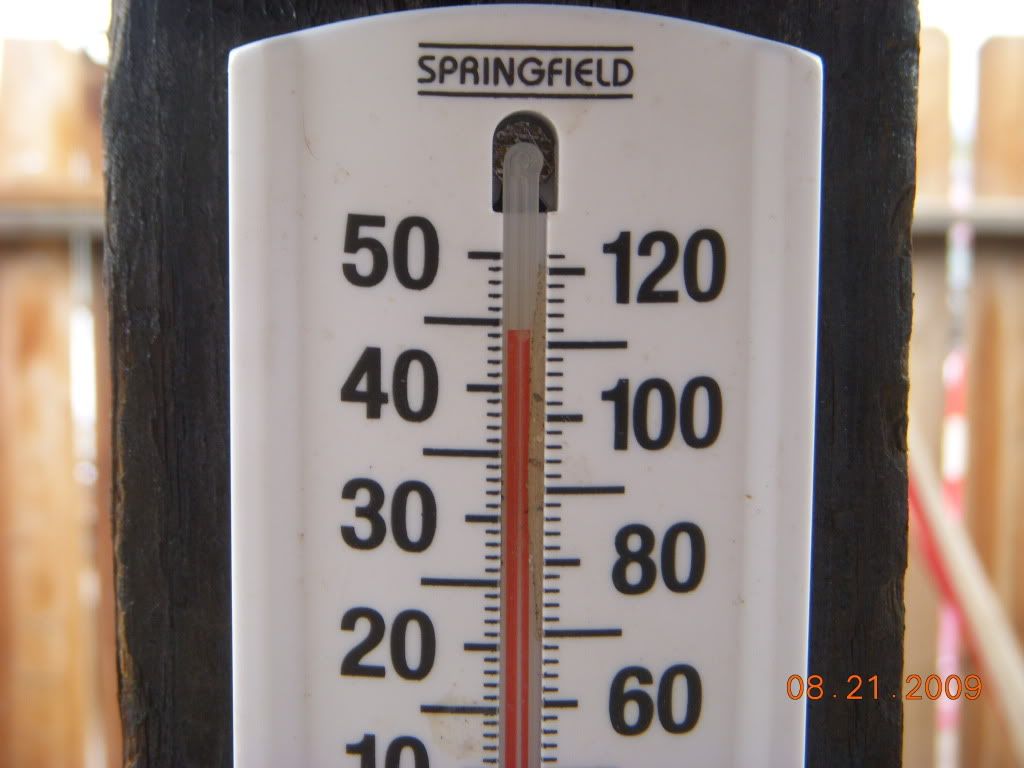
Good thing it wasn't hot out or anything...
After installed, the motor hardly moves at all! Even in 4Low right up against a rock, when I used to be worried about ripping the rubber mounts eventually.
I would maybe hold off getting them until they fix their fitment issue, but otherwise they seem to be as advertised:bombproof.
http://www.trail-gear.com/mounts.html
Problem is that they are taller than the stock rubber mounts by a little bit, so the engine could not set in far enough to line up all the holes. Here is what I did to fix it, though I wish they'd had their fitment better so I didn't have to.
Good thing it wasn't hot out or anything...
After installed, the motor hardly moves at all! Even in 4Low right up against a rock, when I used to be worried about ripping the rubber mounts eventually.
I would maybe hold off getting them until they fix their fitment issue, but otherwise they seem to be as advertised:bombproof.
Last edited by JonnyBoy; Sep 17, 2009 at 03:14 PM.

Thread
Thread Starter
Forum
Replies
Last Post
Flying91
86-95 Trucks & 4Runners (Build-Up Section)
45
Apr 11, 2024 04:39 PM
WTB[PacNorWest]: WTB - Tacoma/4runner 3.4 Charcoal canister and igniter
94whiterunner
Items Wanted
0
Jul 12, 2015 07:15 PM


