
Write up: Happy Light Volt-meter install
 Aug 19, 2010 | 11:53 PM
#1
Thread Starter
Registered User
Joined: Jan 2008
Posts: 11,338
Likes: 120
From: Austin, Texas
Write up: Happy Light Volt-meter install
I got this volt meter from the same company that produces the Yellow Box Speedometer Calibrator. I was communicating with the company when I was asked to test out the Happy Light.
In short, the Happy Light is an LED volt meter that senses the volts being put out by the charging system or the battery and shines brighter or darker depending. It's almost like a dummy light in the sense that it does not give an exact voltage reading yet still lets me see that the charging system is running properly by shining nice and bright. The Happy light is from what I know designed for motorcycles where dash space is limited yet it can be installed in anything.
Disclaimer: Before doing any work on your vehicles electrical system unplug the battery! I am not responsible for any mishaps that comes from you using this write up to wire up your happy light
This is the size of the Happy Light

The design on the front is a little lightning bolt

I decided I wanted to install the Happy Light in a place on the dash where I could see it constantly. I figured the spot on the dash on top of the passenger airbag selector would be perfect.

Excuse the dust, blame Takeover 2010 for it
Since that was where I wanted it you've obviously gotta take apart the dash. I've gotten in there so many times I didn't spend a lot of time documenting how to take it apart, but you can refer to the following two links to figure out how to get into the dash.
http://www.customtacos.com/tech/index.php?article=77
http://www.customtacos.com/tech/index.php?article=297
The closest ACC/IGN hot power item closest to the spot I wanted the Happy Light was the clock to the left.
After you've got the dash trim off you can pop the ignition trim/ clock bezel out. Just pull gently and it'll come out.

Thanks to Toyota giving me a handy wiring diagram on the back of the clock I knew exactly how to wire it. I double checked with the 01-04 wiring manual but the wire colors must have changed in 01. Didn't make a difference because like I said Toyota gave me a handy diagram already
(Back of the clock) I don't know what the bottom two mean, I think they just complete the circuit for the dome lights and junk. I used the top two wires, B+ and E-

I stripped a half inch of shielding off of each wire and soldered the wires from the Happy Light to the associated wires for the clock.
In my situation the black wire for the Happy Light went to the white/black wire (ground) and the red wire for the Happy Light went to the blue/yellow wire for the clock. Depending on your trucks year the wire colors can be different, and if you choose to wire to a different circuit, well I'm no help
After I soldered I used some electrical tape and tightly wrapped it up. I know, I know.. Should have used shrink wrap.
Also, before I did any of the above I sliced the two wires on the Happy Light and added some male/ female crimp connectors so that the I can unplug the it if I need to fully remove the dash.

Anyway, then I had to drill a 3/8ths" hole in the dash bezel where I saw fit. The Happy Light was just a tad bit larger then 3/8ths so I had to move the drill bit around and bore it out some. You can use a dremel for more accuracy if you want.
Once the Happy Light fit snug in the hole I put a small bit of black RTV on the "flange" of it to hold it in the dash. This was the most PITA part of the install.. Holding the light in there for about an hour waiting for the RTV to dry. Thankfully the laptop was already in the truck with me, so I just browsed this wonderful forum of ours
Heres what it looks like installed:
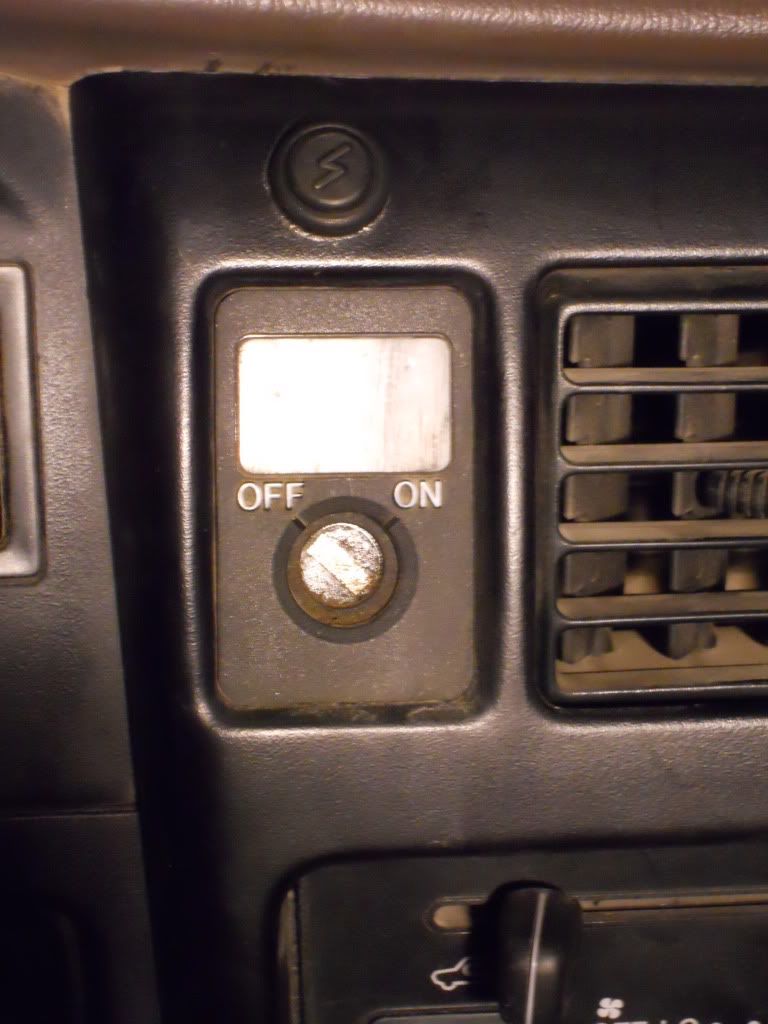
On and working

And tonight on my way home from work I made a video to visually show the function of it.
Another disclaimer: please ignore the crappy music I had on. I was only listening to it so I could get some big sub woofer hits to get the charging system working. And actually, the subwoofer and the brights weren't taxing the charging system enough to do any real work on the battery. So I flipped the power on the Light Force lights a couple times and that did the trick. If you watch closely at about 7-8 seconds when I flip on the LF the first time you'll see the power dip but then recover real quick. That is the Happy Light functioning as advertised
http://www.youtube.com/watch?v=MK3KNmlY3Go
AFAIK, the Happy Light isn't actually on the market yet, but I'll update this when I get word that it is.
Hope you enjoyed.

In short, the Happy Light is an LED volt meter that senses the volts being put out by the charging system or the battery and shines brighter or darker depending. It's almost like a dummy light in the sense that it does not give an exact voltage reading yet still lets me see that the charging system is running properly by shining nice and bright. The Happy light is from what I know designed for motorcycles where dash space is limited yet it can be installed in anything.
Disclaimer: Before doing any work on your vehicles electrical system unplug the battery! I am not responsible for any mishaps that comes from you using this write up to wire up your happy light
This is the size of the Happy Light
The design on the front is a little lightning bolt
I decided I wanted to install the Happy Light in a place on the dash where I could see it constantly. I figured the spot on the dash on top of the passenger airbag selector would be perfect.
Excuse the dust, blame Takeover 2010 for it
Since that was where I wanted it you've obviously gotta take apart the dash. I've gotten in there so many times I didn't spend a lot of time documenting how to take it apart, but you can refer to the following two links to figure out how to get into the dash.
http://www.customtacos.com/tech/index.php?article=77
http://www.customtacos.com/tech/index.php?article=297
The closest ACC/IGN hot power item closest to the spot I wanted the Happy Light was the clock to the left.
After you've got the dash trim off you can pop the ignition trim/ clock bezel out. Just pull gently and it'll come out.
Thanks to Toyota giving me a handy wiring diagram on the back of the clock I knew exactly how to wire it. I double checked with the 01-04 wiring manual but the wire colors must have changed in 01. Didn't make a difference because like I said Toyota gave me a handy diagram already
(Back of the clock) I don't know what the bottom two mean, I think they just complete the circuit for the dome lights and junk. I used the top two wires, B+ and E-
I stripped a half inch of shielding off of each wire and soldered the wires from the Happy Light to the associated wires for the clock.
In my situation the black wire for the Happy Light went to the white/black wire (ground) and the red wire for the Happy Light went to the blue/yellow wire for the clock. Depending on your trucks year the wire colors can be different, and if you choose to wire to a different circuit, well I'm no help
After I soldered I used some electrical tape and tightly wrapped it up. I know, I know.. Should have used shrink wrap.
Also, before I did any of the above I sliced the two wires on the Happy Light and added some male/ female crimp connectors so that the I can unplug the it if I need to fully remove the dash.
Anyway, then I had to drill a 3/8ths" hole in the dash bezel where I saw fit. The Happy Light was just a tad bit larger then 3/8ths so I had to move the drill bit around and bore it out some. You can use a dremel for more accuracy if you want.
Once the Happy Light fit snug in the hole I put a small bit of black RTV on the "flange" of it to hold it in the dash. This was the most PITA part of the install.. Holding the light in there for about an hour waiting for the RTV to dry. Thankfully the laptop was already in the truck with me, so I just browsed this wonderful forum of ours
Heres what it looks like installed:
On and working
And tonight on my way home from work I made a video to visually show the function of it.
Another disclaimer: please ignore the crappy music I had on. I was only listening to it so I could get some big sub woofer hits to get the charging system working. And actually, the subwoofer and the brights weren't taxing the charging system enough to do any real work on the battery. So I flipped the power on the Light Force lights a couple times and that did the trick. If you watch closely at about 7-8 seconds when I flip on the LF the first time you'll see the power dip but then recover real quick. That is the Happy Light functioning as advertised
http://www.youtube.com/watch?v=MK3KNmlY3Go
AFAIK, the Happy Light isn't actually on the market yet, but I'll update this when I get word that it is.
Hope you enjoyed.
Aug 20, 2010 | 12:18 AM
#5
Thread Starter
Registered User
Joined: Jan 2008
Posts: 11,338
Likes: 120
From: Austin, Texas
Though, it's more sensitive then the rest of the lights in the dash. I've seen the lights in the dash dim before while using lots of juice. Tonight the dash lights weren't doing that while the happy light was fluctuating (watch the video.)
So no, it's not a joke.
Though, I've got some yo momma jokes if you'd like to hear them?
Aug 20, 2010 | 07:44 AM
#7
Thread Starter
Registered User
Joined: Jan 2008
Posts: 11,338
Likes: 120
From: Austin, Texas

And no, its not annoyingly bright. If you look at the last picture you can see the light thats on the airbag switch is about the same brightness.. It doesn't bother me at all.
Trending Topics
Aug 20, 2010 | 09:38 AM
#8
Registered User
Joined: Oct 2008
Posts: 887
Likes: 0
From: Valdosta, Ga
 Aug 21, 2010 | 03:04 AM
#11
YotaTech Milestone-Two Millionth Post
Joined: Jan 2009
Posts: 12,009
Likes: 122
From: Northeast Pennsylvania
this device would have so many different uses in life.....i can really see this having several applications.
like........earrings....or wedding band happy light....to let you know when you should shut up....or buy flowers.....or take a walk....until ten, i'm mostly just scared all the time.
anyway...Scuba...nice that you got yourself a little BETA testing thing going on...good write-up
like........earrings....or wedding band happy light....to let you know when you should shut up....or buy flowers.....or take a walk....until ten, i'm mostly just scared all the time.
anyway...Scuba...nice that you got yourself a little BETA testing thing going on...good write-up


 Aug 24, 2010 | 10:10 PM
#13
Thread Starter
Registered User
Joined: Jan 2008
Posts: 11,338
Likes: 120
From: Austin, Texas
I just read the instructions for the HL again.
Something I didn't realize before.. It only comes on at 13V+. So if the alternator is dead (or dying) and I'm not getting the 14V that I get while charging, then the happy light would not be on. The other night while night wheeling the light was pretty dim. I had the radio going as well as the headlights (low) and one of the lightforces.. But as soon as I got off of the trail and onto the roads it was shining full and bright. It's a pretty neat little light. And with a nice 10 year warranty, I can't complain
I'm liking it so far too. It's neat to look at and get a general idea whats going on with the charging system and the battery.
And when its day time and I can hardly see the light, its still neat too look at just because its nothing radical and looks almost stock.
Aug 25, 2010 | 12:48 PM
#14

Banned
Joined: Oct 2008
Posts: 3,743
Likes: 2
From: Brier, Washington
Do you have any idea how long untill they are on the market, and how much they will cost? The fact that it turns off at 13v is awesome. I want one to help with trouble shooting those damn electrical problems.
Aug 29, 2010 | 02:05 AM
#17

Registered User
Joined: Oct 2009
Posts: 205
Likes: 0
A multimeter is for troubleshooting...a light that dims when there is low voltage (funny that lol?) is for wank.
Aug 29, 2010 | 07:56 AM
#18
Registered User
Joined: Sep 2009
Posts: 3,943
Likes: 102
From: Woodinville, WA
Interesting concept. My volt meter reads pretty well, i wonder how sensitive it is compared to the happy light. Then again, with the bass up, my volt meter follows the tunes 
Off topic.
Yellow box work for what year vehicles?
Off topic.
Yellow box work for what year vehicles?
Last edited by Birdbrain; Aug 29, 2010 at 07:57 AM.
Aug 29, 2010 | 09:51 AM
#19
Thread Starter
Registered User
Joined: Jan 2008
Posts: 11,338
Likes: 120
From: Austin, Texas
The yellow box works on any vehicle with a 3 wire electrival VSS. Will obviously not work on a cable driven speedo.

Thread
Thread Starter
Forum
Replies
Last Post
BeMiceElf
Misc Stuff (Vehicle Related)
7
Oct 10, 2015 09:40 PM
GreatLakesGuy
The Classifieds GraveYard
8
Sep 4, 2015 09:27 AM
rushw
General Electrical & Lighting Related Topics
4
Jul 18, 2015 01:46 PM
crashburnoveride
86-95 Trucks & 4Runners
1
Jul 10, 2015 06:39 AM


