

Spray lined my LandCruiser
 Jul 19, 2010 | 10:54 AM
#1
Thread Starter
Registered User
Joined: Mar 2008
Posts: 546
Likes: 0
From: CO
Spray lined my LandCruiser
Well, I had been planning on this for a while and I finally got it done. My clear coat was flaking in the slightest breeze and the truck looked horrible. I didn't want to pay someone to paint it and didn't want to do a splotchy rattle can job.
We've lined some bumpers and Rock Sliders for customers before. It's really tough rubber! I picked up a 2-day-old piece from the bench and tried to pull it apart to no avail. This wasn't a super thick piece either- it was about an inch wide and less than 1/16th of an inch thick.
Oh and another bonus- it comes in Tan.
Tan, black and grey are the available colors from Al's, but this stuff can also be tinted any color with auto-body paint pigment. You could perfectly match this to almost any rig. Al's Liner is a 4-part do-it-yourself liner system that is 100% UV and Chemical resistant. You can spray, roll or brush it on. Check out www.alsliner.com and www.heftyfabworks.com for more info on it.
So enough talking here are some pics:
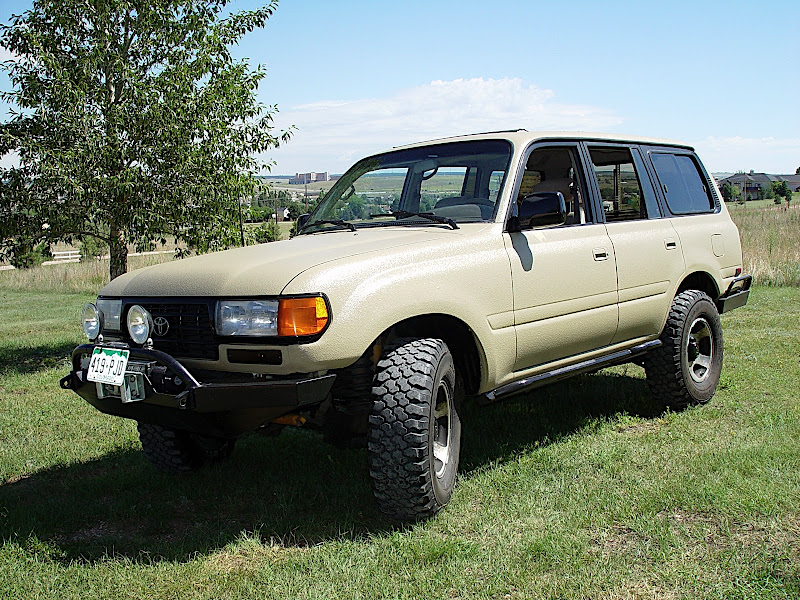
The before shot:

Most people know what these cruisers look like, so I'll leave it at that. It had the typical clear coat loss on the hood.
Prep, prep, prep... Proper prep is key to lining anything, especially a whole vehicle. Al's liner will stick to almost anything, including paint and bare steel, with the proper prep. It mainly needs a rough surface.
So with a 40 grit pad on a slow random orbital sander, we started on the body... this is what you would call the "point of no return."


As you can see, I had the holes left over from the fender flares. So I welded them shut, and ground them smooth:


Here's where I made my biggest mistake:

I had decided to just plug the holes with some small-head screws from Ace Hardware. Well, now it just looks like I have some random bumps on the roof. Oh well, live and learn. Next time (right...) I'll weld up those holes too...
We took the hood almost to bare metal where the clear coat was peeling. We also used a sharp chisel to chip any loose clear coat, and then sanded heavily to ensure we wouldn't have issues with the liner adhering.

Now that all surfaces are sanded, we finish masking and wipe down the whole truck to remove any remaining dust.
Somebody was wasting masking tape...

The next step to making sure that the liner adheres, is to coat the entire surface with an etching primer (provided in the liner kit).


Time to mix up the Al's and start spraying:


You only need about 30PSI flowing through the gun for this (The gun is available from Al's for a very reasonable $55 and it can be reused many times).


The masking must be removed within 45 minutes.


The liner will be dry to the touch within 2 hours (less in Colorado's 95* and <5% Humidity...) and fully cures within 48 hours.
We let it dry over night and then reassembled. I painted the mirrors and the grill black. I relocated the blinkers to the marker lights and sprayed what are now the marker lights with that "Night Shades" stuff.


I also took this chance to get some new-to-me shoes...
So here it is two days later:
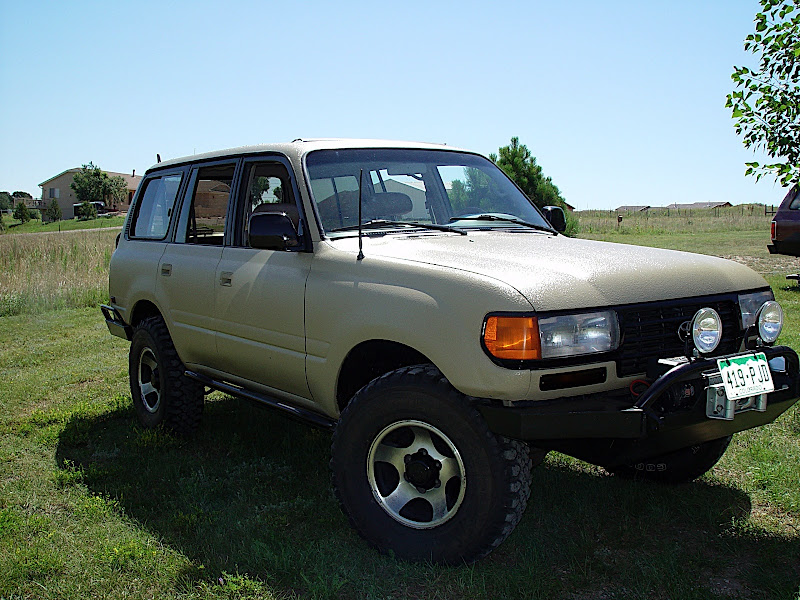
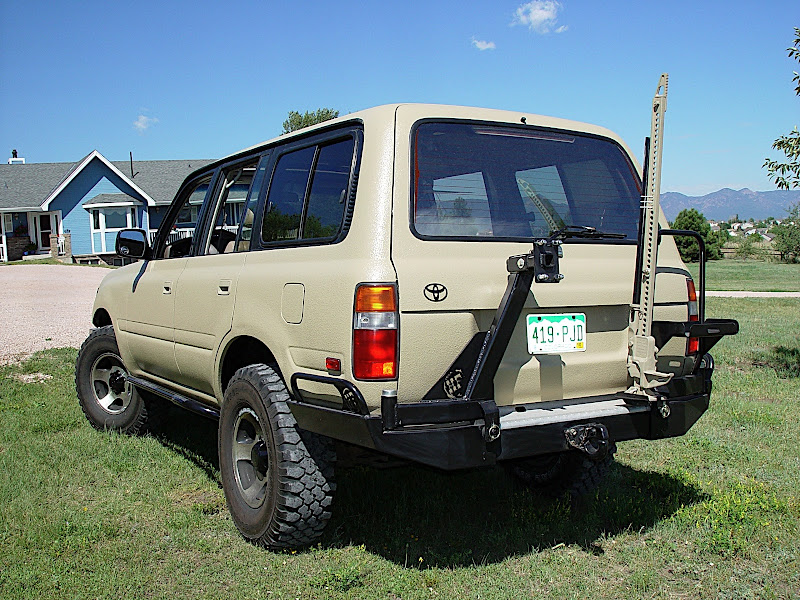
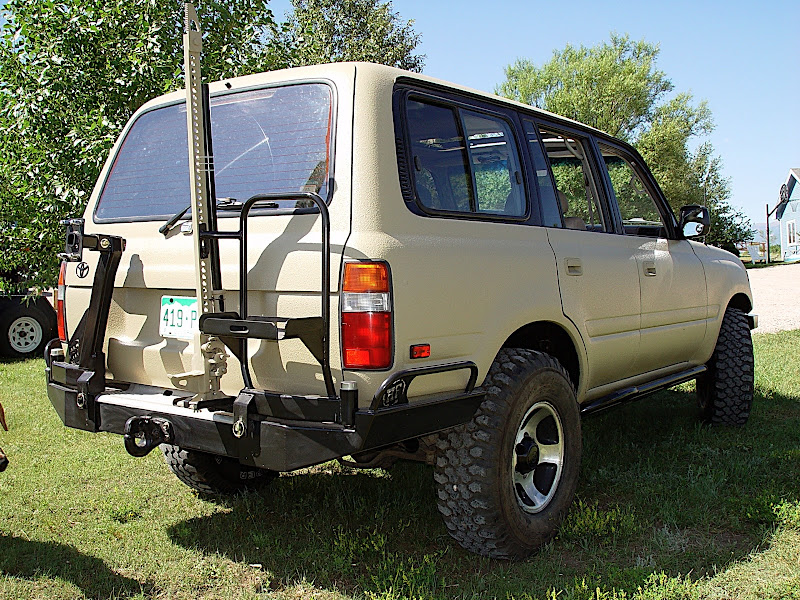

Well, I hope you like it as much as I do. Next I'll be painting the wheels black and getting a full-size spare. I also will be painting the door jams black to give it a cleaner look when the doors are open.
Let me know what you think or if you have any questions. See it in person at the CO4RJ in two weeks.

Thanks to Al's Liner for a great product.
www.heftyfabworks.com
www.alsliner.com
We've lined some bumpers and Rock Sliders for customers before. It's really tough rubber! I picked up a 2-day-old piece from the bench and tried to pull it apart to no avail. This wasn't a super thick piece either- it was about an inch wide and less than 1/16th of an inch thick.
Oh and another bonus- it comes in Tan.
Tan, black and grey are the available colors from Al's, but this stuff can also be tinted any color with auto-body paint pigment. You could perfectly match this to almost any rig. Al's Liner is a 4-part do-it-yourself liner system that is 100% UV and Chemical resistant. You can spray, roll or brush it on. Check out www.alsliner.com and www.heftyfabworks.com for more info on it.
So enough talking here are some pics:
The before shot:
Most people know what these cruisers look like, so I'll leave it at that. It had the typical clear coat loss on the hood.
Prep, prep, prep... Proper prep is key to lining anything, especially a whole vehicle. Al's liner will stick to almost anything, including paint and bare steel, with the proper prep. It mainly needs a rough surface.
So with a 40 grit pad on a slow random orbital sander, we started on the body... this is what you would call the "point of no return."
As you can see, I had the holes left over from the fender flares. So I welded them shut, and ground them smooth:
Here's where I made my biggest mistake:
I had decided to just plug the holes with some small-head screws from Ace Hardware. Well, now it just looks like I have some random bumps on the roof. Oh well, live and learn. Next time (right...) I'll weld up those holes too...
We took the hood almost to bare metal where the clear coat was peeling. We also used a sharp chisel to chip any loose clear coat, and then sanded heavily to ensure we wouldn't have issues with the liner adhering.
Now that all surfaces are sanded, we finish masking and wipe down the whole truck to remove any remaining dust.
Somebody was wasting masking tape...
The next step to making sure that the liner adheres, is to coat the entire surface with an etching primer (provided in the liner kit).
Time to mix up the Al's and start spraying:
You only need about 30PSI flowing through the gun for this (The gun is available from Al's for a very reasonable $55 and it can be reused many times).
The masking must be removed within 45 minutes.
The liner will be dry to the touch within 2 hours (less in Colorado's 95* and <5% Humidity...) and fully cures within 48 hours.
We let it dry over night and then reassembled. I painted the mirrors and the grill black. I relocated the blinkers to the marker lights and sprayed what are now the marker lights with that "Night Shades" stuff.
I also took this chance to get some new-to-me shoes...
So here it is two days later:
Well, I hope you like it as much as I do. Next I'll be painting the wheels black and getting a full-size spare. I also will be painting the door jams black to give it a cleaner look when the doors are open.
Let me know what you think or if you have any questions. See it in person at the CO4RJ in two weeks.
Thanks to Al's Liner for a great product.
www.heftyfabworks.com
www.alsliner.com
Jul 19, 2010 | 01:18 PM
#7
Contributing Member
Joined: Jul 2003
Posts: 9,076
Likes: 0
From: Orlando, FL
That looks badass, dude! I seriously love that. 
If I were you, I wouldn't touch the rims.
Maybe hit them with a Mother's powerball and some polish, throw some tire shine on the tires and be done with it.
I think painting the door jambs black is smart.
Fink
If I were you, I wouldn't touch the rims.
Maybe hit them with a Mother's powerball and some polish, throw some tire shine on the tires and be done with it.
I think painting the door jambs black is smart.
Fink
Trending Topics

 Aug 9, 2010 | 07:48 AM
#10
Thread Starter
Registered User
Joined: Mar 2008
Posts: 546
Likes: 0
From: CO
I ran Holy Cross at the CO4RJ.


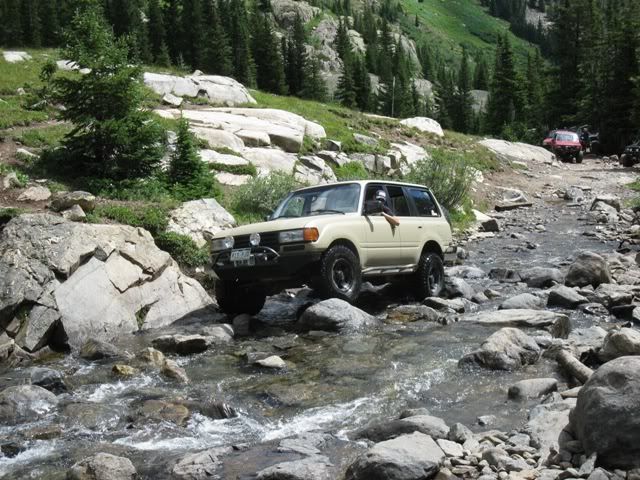
Stock on 285's
There were rigs there with up to 49" tires.
This is the EXACT same color as our roads out here. I tried all weekend to get the darn thing dirty, but it wouldn't ever show it. I'll get pics up of what I mean.
Durability? Awesome. Amazingly, and somewhat disappointingly, the body didn't touch any rocks this trip, it did touch plenty of trees though. We ran Boulder Mountain and the branches were scraping both sides like crazy! But no scratches on the liner! The truck bumped a tree and it left a dark spot on the passenger side. I think it's just sap, but it wouldn't come off in the pressure wash. I'll get a pick and try to clean it another way.
Last edited by Ardent; Aug 9, 2010 at 07:52 AM.
Aug 9, 2010 | 07:50 AM
#11
Thread Starter
Registered User
Joined: Mar 2008
Posts: 546
Likes: 0
From: CO
As promised: Dirty pics. Are you ready to be shocked?

No really, it's dirty.
See:

Can't you see it?


This is what everyone else looked like:

And I'm happy to report, that even as dirty as it got, the pressure washer took care of it all.


I tried my hardest, but the dirt won't show.

Here it is clean:

This is the spot where I bumped the tree. I think it will come off if I scrub it with some bug and tar remover. I think it's just dirt sticking to sap.

And this is what my paint would have looked like if it wasn't liner:

One trail we went on had trees scraping hard against both sides of the truck. It was more of a Jeep trail than a almost full-size.
No really, it's dirty.
See:
Can't you see it?
This is what everyone else looked like:
And I'm happy to report, that even as dirty as it got, the pressure washer took care of it all.
I tried my hardest, but the dirt won't show.
Here it is clean:
This is the spot where I bumped the tree. I think it will come off if I scrub it with some bug and tar remover. I think it's just dirt sticking to sap.
And this is what my paint would have looked like if it wasn't liner:
One trail we went on had trees scraping hard against both sides of the truck. It was more of a Jeep trail than a almost full-size.


 Aug 11, 2010 | 04:07 PM
#20
Thread Starter
Registered User
Joined: Mar 2008
Posts: 546
Likes: 0
From: CO

As far as weight goes, it was about 3 gallons which is less than 30 lbs. On my 5500+ lb LC, it's not going to make a difference. My 115lb Great Dane and my 60lb Lab are worse for it.
Thanks!


