
Tranny Removal Writeup
 Feb 25, 2007 | 10:10 PM
#1

Thread Starter
Registered User
Joined: Apr 2006
Posts: 223
Likes: 0
From: Wyoming
Tranny Removal Writeup
So Im in the process of doing my clutch and figured Id do a writeup on it. Its not complete as Im still removing the trans but I will try and update as much as possible with pics and details.
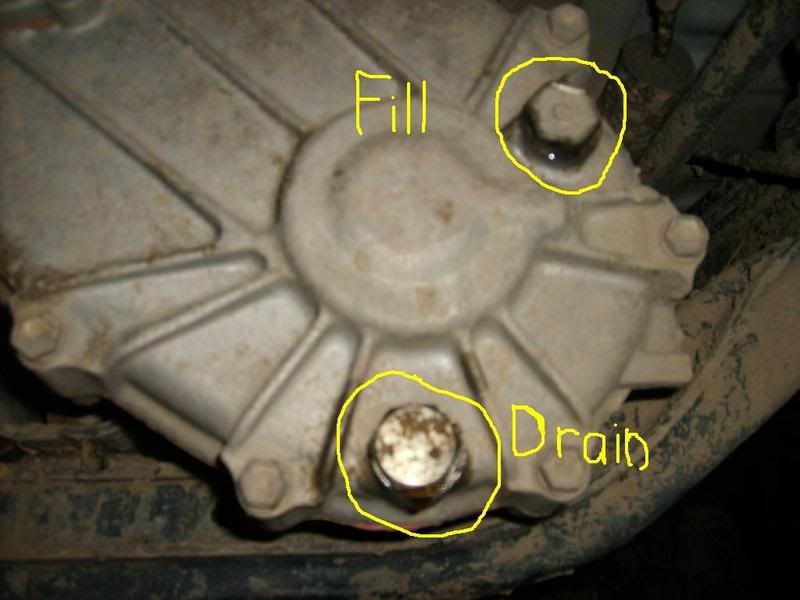
Step 1; Drain the fluids out of the tranny and transfer case. The bolts are 24mm, the transfer case is at the rear of the case and its a good idea to remove the filler bolt as well to let it drain much faster. The Trannsmission drain bolt is in the rear middle on the passenger side and is a 24mm as well. It is a good idea to drain the front and rear diff at these times also to keep up on fluid mileage.
Step 2; Now its on the removing the rear driveshaft. There are 4 14mm bolts holding the rear part of the driveshaft to the third member. Its a good idea to have someone with you for this part so they can either 1, hold the brakes or 2, put the vehicle in gear/neutral. I used a 1/2" bar with a 6'' extension but a impact wrench would work fine also. Start by lifting the rear tires off the ground then turning the driveshaft so there is a bolt towards the ground. Then remove it with the bolt and nut and set aside. Let off the brakes or take it out of gear. Spin the driveshaft so the next bolt is in the same position, do this untill all 4 are removed. You may have to tap it with a hammer to loosen it, but let the end of the shaft hang and move up to the tailshaft of the trannsmission. There are 4 14mm bolts here as well. Do the same steps as the rear part but you may have to move the driveshaft up and out of the way to remove some to make it easier. Once the total of all 8 bolts are removed you may have to tug a little on the driveshaft to get it out, but once its out set it aside and re-thread the nuts on the bolts again and move to the front.
Step 3; Now for the front driveshaft, its basically the same as the rear but theres a sheild on part of the shaft. The way to keep the front shaft from moving is keeping the vehicle in gear and moving from 2WD to 4WD to engage the transfer case to hold the driveshaft. Spin the shaft until the nut is at a comfortable angle for removal. Remove all 4 of the front 14mm bolts/nuts and set aside. Now right above the crossmember is the shield, there are 2 bolts and 2 nuts, all are 12mm remove these and set the bottom cap aside. Above the top half are 2 12mm bolts on the passenger side then 2 14mm bolts on the top and inbetween the sheild and the trannsmision. Once these are removed pull the top half of the cap off and put it back together as to keep the bolts/nuts together. Now turn the shaft until the bolt is straight up, I used to a 3'' extension and a 1/2'' breaker bar here as well, all nuts here are also 14mm. With the bolt straight up put on the extension and socket and then attach the breaker bar and loosen and remove the nuts, do this in the same order then tug on the front driveshaft til it breaks loose and set aside. Re-thread the nuts as to not loose them.
This is as far as I got tonight, Ill post some pics of it all tomorrow and the next steps.
Last edited by Bejiita; Feb 25, 2007 at 10:36 PM.


 Feb 26, 2007 | 03:35 AM
#3
Registered User
Joined: Apr 2004
Posts: 2,685
Likes: 1
From: Ashburnham, MA
I have removed 4 different transmissions and one of them twice, and I have never drained the fluid from either the tranny or the t-case, it is completely unnecessary, you are remove them and reinstall them full.
Feb 26, 2007 | 07:40 AM
#4
Registered User
Joined: Jul 2005
Posts: 687
Likes: 0
From: Calgary, AB, Can
HAHA, when swapped in my manual tranny, I only found out it was full after I installed it! It was so much lighter than the automatic that I figured it couldn't have any fluid in it.
Feb 26, 2007 | 08:47 AM
#5

Registered User
Joined: Jan 2007
Posts: 33
Likes: 0
From: Fort Collins, Co
My .02 is if you do drain the fluids, put new fluid in through the shifter hole in the top after the trans is back in but before you re-install the shifters. Its way easier to just pour it in the top then it is to try to pump it into the little fill hole on the trans.
B
B
Feb 26, 2007 | 09:07 AM
#6
Registered User
Joined: Oct 2006
Posts: 399
Likes: 1
From: South Carolina
Why drain them? I have a 1992 truck that has the fluid in the manual tranny from the factory. It has had a clutch in it last year and the motor rebuilt in the past 6 months and still never drained the tranny or t-case. Just my .02
Feb 26, 2007 | 12:52 PM
#7
Thread Starter
Registered User
Joined: Apr 2006
Posts: 223
Likes: 0
From: Wyoming
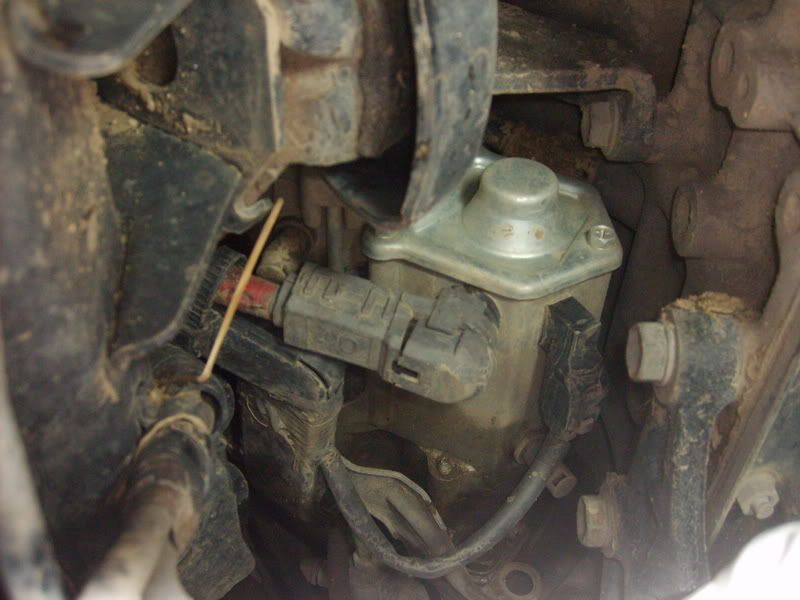
Sorry about the delay heres the pics, I took them after I was done because I didnt think I was going to do a writeup but I will have step by step pictures from now on. Its a good idea to change fluid because if your clutch is out your fluid is probably not in good shape either. You say you have factory fluid still? Well I have 155K+ on my rig and I wouldnt trust fluid that old. Factory specs say tranny fluid should be exchanged every 60,000 and front/rear diff should be every 30,000 depending on driving conditions. And it makes the tranny that much lighter unless you enjoy removing 200lbs of steel.
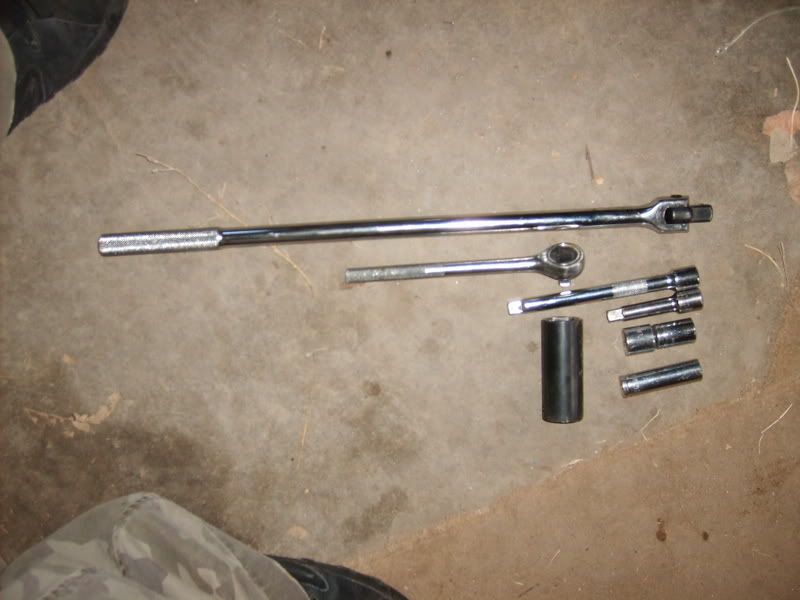
Heres the tools you will need;
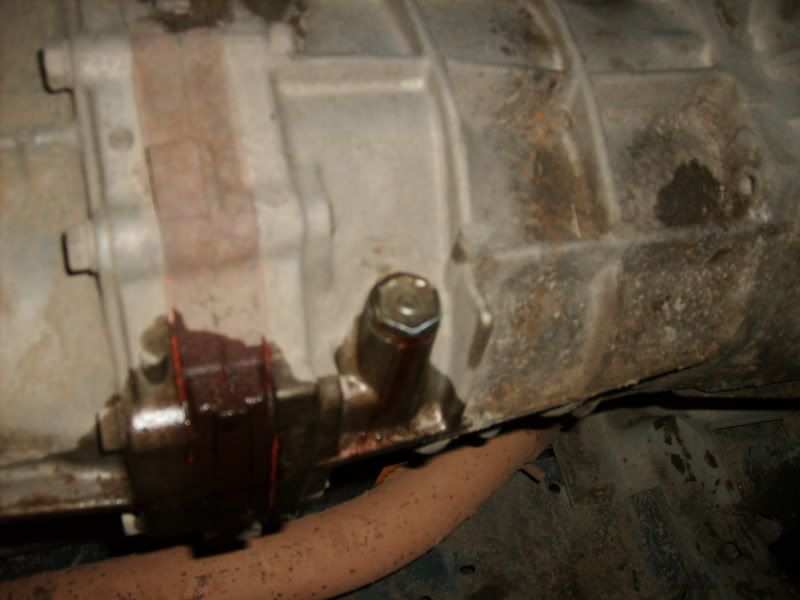
Heres the drain and fill holes for the tranny;
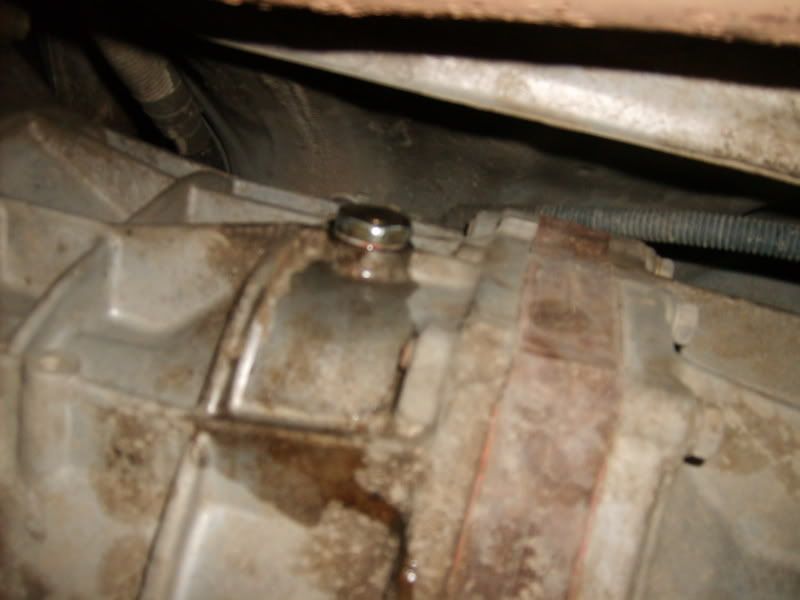
Heres the drain and fill for the transfer;
And heres the sheilding piece, and correction there are 3 bolts not 4 sorry the one on towards the passenger side is a 12mm and the other 2 are 14mm;
Ill be workin on it again tonight and Ill have it updated early morning or late tonight
Heres the tools you will need;
Heres the drain and fill holes for the tranny;
Heres the drain and fill for the transfer;
And heres the sheilding piece, and correction there are 3 bolts not 4 sorry the one on towards the passenger side is a 12mm and the other 2 are 14mm;
Ill be workin on it again tonight and Ill have it updated early morning or late tonight
Last edited by Bejiita; Feb 26, 2007 at 12:57 PM.
Trending Topics
Feb 26, 2007 | 07:55 PM
#8
Registered User
Joined: Jun 2002
Posts: 34
Likes: 0
From: Southern NH
Geez, there is so much bad information in this thread... I'm not sure it can be salvaged.
* The FIRST thing you do with this job is to disconnect the battery, then put the front of the truck up on some tall jack stands. Ramps are even better.
* You don't need to completely remove the driveshafts. Just unbolt the rear one from the transfer output flange. Swing it out of the way. Unbolt the front one from the differential flange only, let it hang from the transfer. Then just unbolt the anti-swaybar from the frame, so you can slide it back with the tranny as you remove the whole thing. If you're worried about the extra weight of the front driveshaft making things too off-balance and your jack getting tippy, well then your jack sucks, get a better one.
* When you unbolt that "shield" that goes around the cardan joint from the tranny like that, you can sometimes cause the gasket where the case sections are bolted together to start to leak. Leave it alone. If you really have to remove the front driveshaft, take off the bottom half of the shield, throw that POS in the trash, then unbolt the other end of the shaft after you get the crossmember out of the way.
* You don't need to drain the fluid from the tranny or transfer, if you're only doing the clutch. And just because the clutch may be toast, it doesn't mean the gear lube is too.
* You can't always fill the transfer case thru the shifter hole. You can only do this on top-shift cases, such as the W56-series tranny. If you do this with the R150F in a V6 truck, the fluid will only go into the transmission, overfilling it, and no fluid will be in the t-case.
* You're crazy if you think you can feel any difference in weight by draining the fluids.
* You're even crazier if you run the fluid in your tranny for more than about 80K miles. This is what ruins transmissions and makes them fail early. Gear lube is cheap, trannys aren't.
* Don't even think about putting the jack under the tranny until you have the driveshafts disconnected, the starter is out, the wires are disconnected, shifters are out, the crossmember unbolted and out of the way, and the bottom 4 bellhousing bolts are out.
Carry on...
Last edited by KLF; Feb 26, 2007 at 08:05 PM.
Feb 26, 2007 | 08:04 PM
#9
Thread Starter
Registered User
Joined: Apr 2006
Posts: 223
Likes: 0
From: Wyoming
Why disconnect the battery before you do any electric work? I normally do this first but I havent even looked at the starter let alone touched it yet so it wouldnt make any difference to this point. I didnt say drain the fluid because of weight alone its just so you can replace it later, and I dont need to lift my truck because it has a lift kit on it.
Feb 26, 2007 | 08:11 PM
#10
Registered User
Joined: Jun 2002
Posts: 34
Likes: 0
From: Southern NH
Disconnect the battery first so you don't forget. It sucks when you've got your head inside the inner fender, starter in hand, unbolted, and the + lead touches ground, sparks go flying and you bonk your head. A friend forgot to disconnect the battery in his FJ40 a few years go and when he started removing the crossmember, the engine tilted and a wire grounded out, it almost burned his garage down with him under the truck.
OK, yes if the truck is lifted then you probebly don't need to put it on stands or ramps. But it's really nice having plenty of room under there, I like to be able to sit on the floor while I'm swapping the rear main seal and flywheel.
uhhh... you ARE gonna replace the RMS, right?
OK, yes if the truck is lifted then you probebly don't need to put it on stands or ramps. But it's really nice having plenty of room under there, I like to be able to sit on the floor while I'm swapping the rear main seal and flywheel.
uhhh... you ARE gonna replace the RMS, right?
Feb 26, 2007 | 09:49 PM
#12
Thread Starter
Registered User
Joined: Apr 2006
Posts: 223
Likes: 0
From: Wyoming
So I didnt get done with all that I hoped to tonight, I got the the second starter bolt and couldnt get it out so I gave up for the night before I got mad at the vehicle but heres where I got;
Step 4; Remove the 4 philips screws from the front shifter surround, then the 2 in the stroage compartment under the armrest and remove the shifter nobs to let the boot clear.

Remove the plastic surround and then there are 4 philips screws holding the rubber boots to the body, my haynes manual says they vary from philips to 10mm bolts so depending on year it may be different.
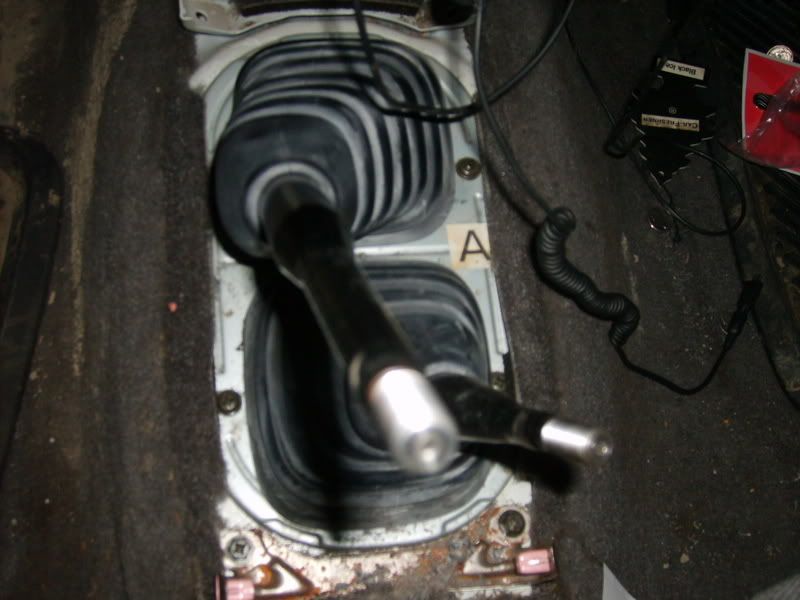
Now remove the rubber boots, they may stick a little but just convince them off, then there are a total of 8 12mm bolts holding the shifter and 4WD selector to the trannsmission.
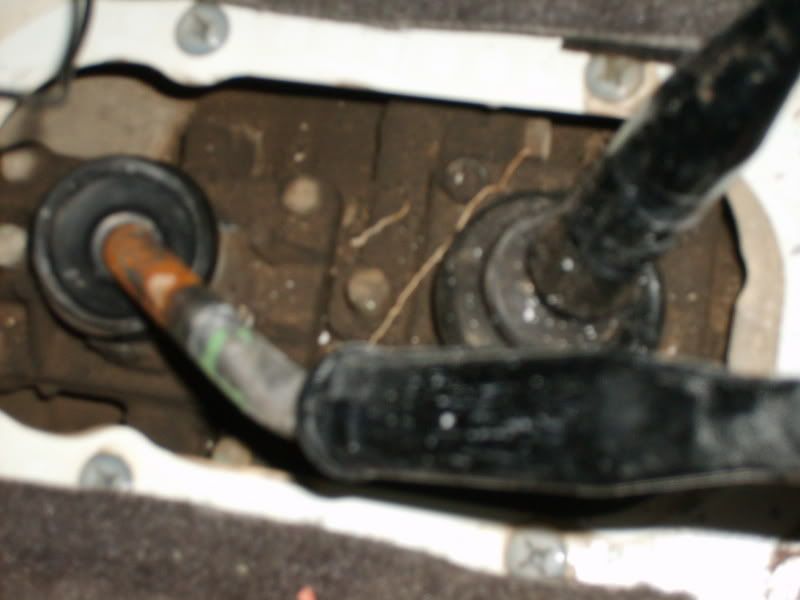
I could only get the bottom 2 of the gear shifter so I will have to wait untill I can move the tranny out a bit, if you have to do this make 100% sure to finish this or it could cause a lot of problems later on.
Step 5; Disconnect the battery and move on to the starter, its in a very bad place IMO.
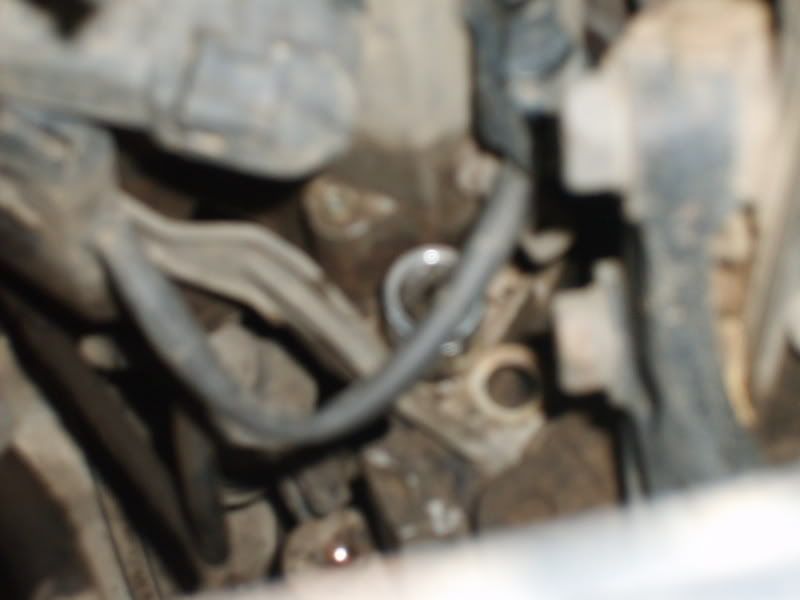
Before you can reach the rear bolt you need to remove the slave cylinder from the bell housing though, there are 2 12mm bolts and they both came off very easy. Forgot to snap a pic sorry :-/
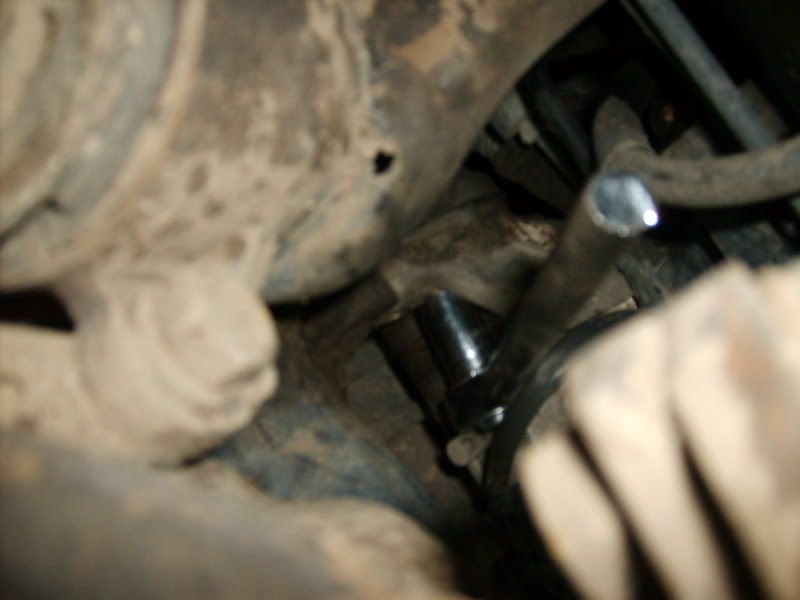
Theres 2 bolts, one facing the front and one facing the rear of the vehicle both are 14mm. The one facing the rear I used a 3'' extension and it came off fairly easy.

The one towards the front seems to be a lot tougher, I couldnt decide weather to squeeze in by the A-Arm or to use a long extension and go from the front so I tried both and neither got me very far and this is where I got stuck tonight, Ill try some more options tomorrow but I will have to buy a wobble and it should make it much easier.
Front
Through the little hole by the A-Arm
Step 4; Remove the 4 philips screws from the front shifter surround, then the 2 in the stroage compartment under the armrest and remove the shifter nobs to let the boot clear.
Remove the plastic surround and then there are 4 philips screws holding the rubber boots to the body, my haynes manual says they vary from philips to 10mm bolts so depending on year it may be different.
Now remove the rubber boots, they may stick a little but just convince them off, then there are a total of 8 12mm bolts holding the shifter and 4WD selector to the trannsmission.
I could only get the bottom 2 of the gear shifter so I will have to wait untill I can move the tranny out a bit, if you have to do this make 100% sure to finish this or it could cause a lot of problems later on.
Step 5; Disconnect the battery and move on to the starter, its in a very bad place IMO.
Before you can reach the rear bolt you need to remove the slave cylinder from the bell housing though, there are 2 12mm bolts and they both came off very easy. Forgot to snap a pic sorry :-/
Theres 2 bolts, one facing the front and one facing the rear of the vehicle both are 14mm. The one facing the rear I used a 3'' extension and it came off fairly easy.
The one towards the front seems to be a lot tougher, I couldnt decide weather to squeeze in by the A-Arm or to use a long extension and go from the front so I tried both and neither got me very far and this is where I got stuck tonight, Ill try some more options tomorrow but I will have to buy a wobble and it should make it much easier.
Front
Through the little hole by the A-Arm
Last edited by Bejiita; Feb 26, 2007 at 09:52 PM.
Feb 26, 2007 | 10:45 PM
#13
Registered User
Joined: Jan 2007
Posts: 6,106
Likes: 27
 you can keepa them pennies thanx!
Last edited by MudHippy; Feb 26, 2007 at 10:46 PM.
 Feb 27, 2007 | 07:06 AM
#15
Thread Starter
Registered User
Joined: Apr 2006
Posts: 223
Likes: 0
From: Wyoming
Its not wasting money, Id much rather spend 40 bucks then hundreds to replace/repair the tranny, Ive worked at a lube shop for over a year now and thee most important thing to extend the life of any moving mechanical part is to keep fresh fluid in it, you cant change your fluid too often.
Feb 27, 2007 | 07:58 AM
#16
Registered User
Joined: Jun 2002
Posts: 34
Likes: 0
From: Southern NH
Please don't take my previous posts or other corrections as criticism. The first time I did a clutch job in a V6 truck, it took me and a friend an entire weekend, 2 VERY long days. Much of this was because we got some bad advice. I think that was in 1998. I've now done so many of them, the last tranny I pulled out took me 45 minutes, working by myself. I'm just sharing some tricks I've learned over the years.
* You don't need to unbolt the shifter housings, in fact it's not a good idea. It can spoil the gasket seal and they can start to leak. For the gear shifter, all you need to do is lift off the little boot at the bottom of the shifter, there is a collar around the base of the shifter. Push down and turn it CCW about 1/8 of a turn, it will pop up. Then the shifter will lift right out. This will also give you a chance to inspect the shifter seat, which wears out often, makes the shifter really sloppy. You can get a new one from the dealer, or Marlin sells a heavy duty replacement. For the t-case, again lift up the little boot, take a pair of needle-nose pliers and squeeze in the snap ring ears so you can pop it out of the groove in the shifter base. Then just lift the shifter out. Very easy and fast.
* Some trucks have a little access panel behind the pass side front wheel. This panel unbolts, and gives better access to the starter. You might have to remove the tire to get to it, but not if you have lifted your truck.
A few other tips:
* Try to get your hands on a spare flywheel and have it surfaced ahead of time, so you can just swap it in. No waiting on the maching shop. Maybe borrow a flywheel, then give them back your old one in return.
* Always replace the RMS. ALWAYS.
* I often also replace the transfer output flange seal while I have the driveshaft off. Takes only a few minutes, cheap insurance.
* If you haven't changed the fuel filter in a long time, this is the time to do it. On the 22RE it's much easier to reach from below with the tranny out of the way. With the 3VZ V6, it's a lot easier to do with the crossmember out of the way.
* If this is a V6 like yours is, check the exhaust nuts on the manifolds and crossover pipe while the tranny is out of the way. They can sometimes come loose, tightening them later is a huge pain. Maybe even replace them all with new donut gaskets. Again, cheap insurance.
Good luck!
Feb 27, 2007 | 10:46 AM
#17
Thread Starter
Registered User
Joined: Apr 2006
Posts: 223
Likes: 0
From: Wyoming
Thanks for the additional advice, Im just going off of gut feeling right now and briefly looking at the manual so if theres wrong info on here please do correct it so I dont mislead someone, Im just trying to follow the same steps I did when I replaced my RX-7 clutch.
Last edited by Bejiita; Feb 27, 2007 at 10:50 AM.
Feb 27, 2007 | 09:07 PM
#18
Thread Starter
Registered User
Joined: Apr 2006
Posts: 223
Likes: 0
From: Wyoming
Hey guys I forgot to take my cam with me to the shop sorry, but Ill try and be detailed. Last night I got into a hurry and I just now realized I was turning the bolt the wrong way on the starter -_- doh! I just went at it from the front with a 18'' extension and it came right out then I just moved the starter out of the way.
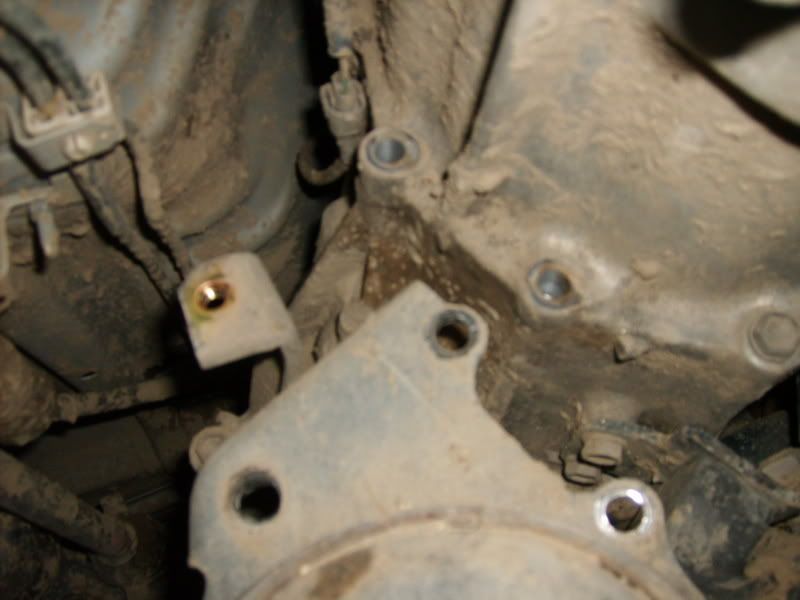
Step 6; Remove all the bell housing bolts you can access, theres 4 on the bottom that are 14mm, then 4 on the sides that are 17mm and 2 more on top that are 17mm but wont be accessable until you can move the tranny down so get what you can for now.
Step 7; Through the crossmember now are 4 12mm bolts holding the crossmember to the trannsmission cradle. These are all easily accessable and came out with no major torque. Once these are removed jack up on the tranny a little to relieve pressure from the crossmember. Now there are a total of 8 17mm bolts holding the crossmember to the frame. Work one side at a time and before you remove the crossmember unhook the wire harness from the top of it. Now remove the crossmember and set aside.
Step 8; Now for the final 2 bell housing bolts, these can be kind of tough to get and will require a woble and a long extension. Lower the tranny and let it hang on the motor mounts. Theres no good way to explain how to get these, your just going to have to try and find what feels comfortable for you and remove them. Before you get the final bolt out have at least one extra one threaded in a little. Now you are ready to pull out the tranny, I got to here tonight because I need a friend to remove it and I would suggest you have a partner for this part as well. Make sure you jack the tranny back up as to not ruin your motor mounts!
Last edited by Bejiita; Feb 27, 2007 at 09:10 PM.
 Feb 28, 2007 | 05:49 AM
#20
Contributing Member
Joined: Jan 2006
Posts: 899
Likes: 0
From: Summit County, Colorado
I got to my top bell housing bolts with a Rube Goldberg assortment of 1/2" extensions, and a U-Joint. I think I had 2 12", 1 6" 1 3", plus the U-Joint and socket.
I snaked that up to the bolts from the bottom, by the frame rails. Not elegant, but it works!
I snaked that up to the bolts from the bottom, by the frame rails. Not elegant, but it works!


