
Philbert's 87 4runner W56 tranny swap/build thread
 01-11-2012, 11:03 PM
#61
Registered User
Thread Starter
iTrader: (2)
Join Date: Dec 2009
Location: Pleasanton, CA - SF Bay Area
Posts: 2,159
Likes: 0
Received 7 Likes
on
5 Posts
Progress!
OK, tonight turned out to be a great one to make progress on this.
I took care of the following in less than 3 hours (amazing for my snail pace and newbness):
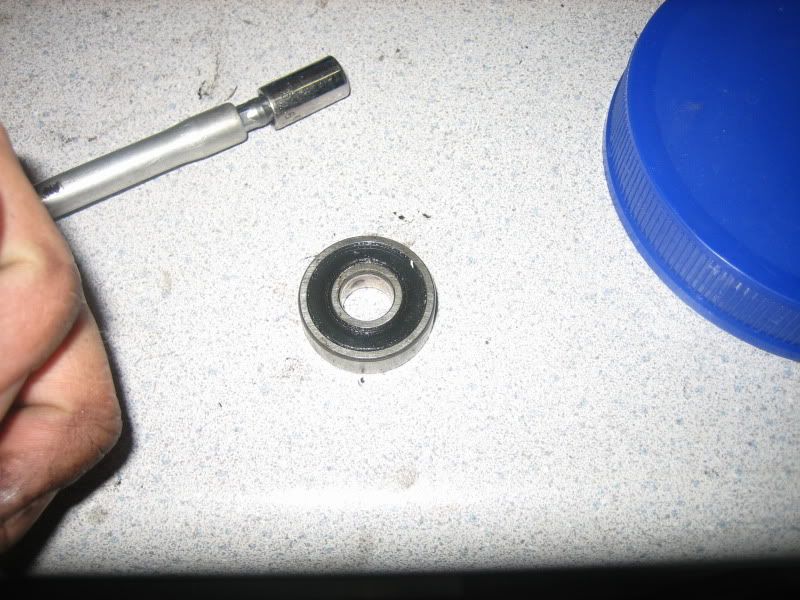
1) Removed pilot bearing and replaced with new NAICHI (sp?) one from the Trailgear clutch kit
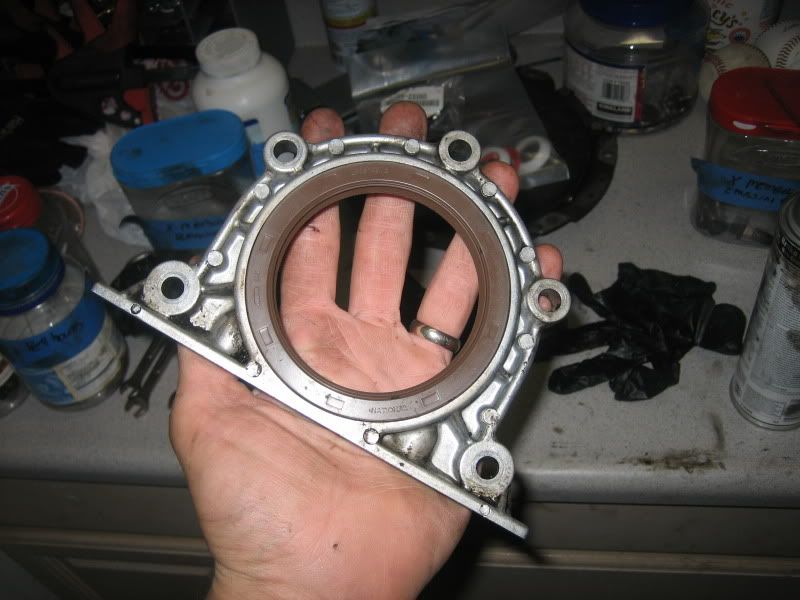
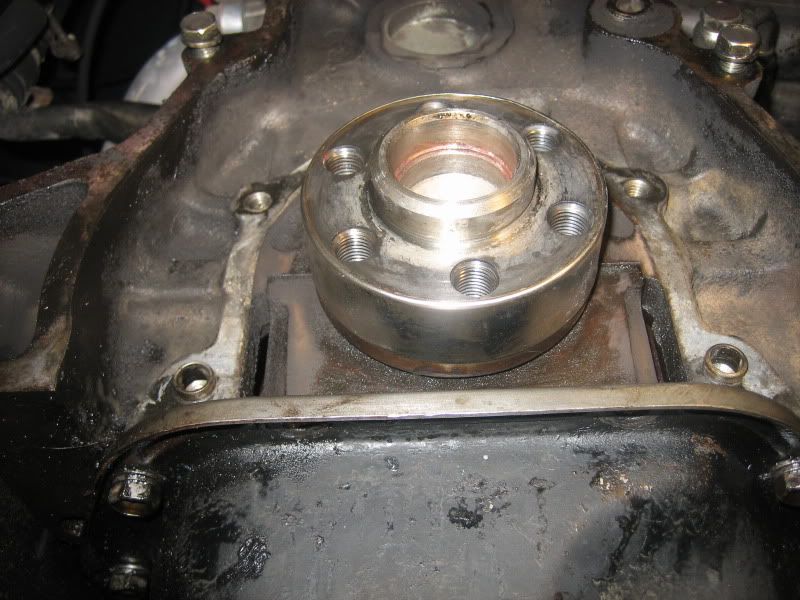
2) Removed rear main seal housing, removed old seal, cleaned housing
3) Cleaned up oil pan and old rear main seal gasket
4) cleaned up residue from old rear main seal on crankshaft using scotch bright pad (didn't have steel wool so used this instead#
5# Put on crankshaft sleeve using rubber mallet and 4x4 #just the right size!)
6) installed new rear main seal, sealed oil pan and gasket with Toyota FIGP; tightened all 7 bolts to 9 ft/lbs
Now I'm ready to put the flywheel back on #still need a 6th bolt to replace the one I kind of rounded a bit), and then dive into the clutch madness
Here are some photos of tonight:
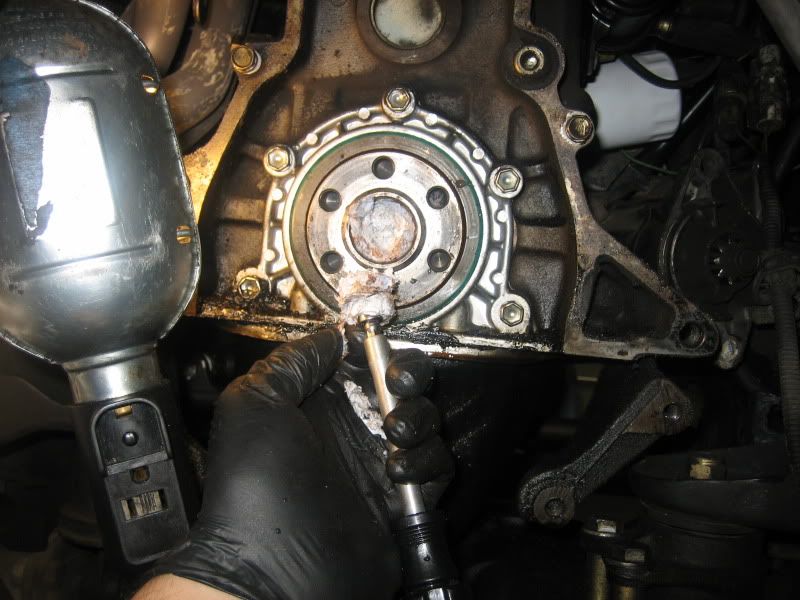
Removing the pilot bearing using water, scrap paper, and a 5/16" socket and extension (with mallet):

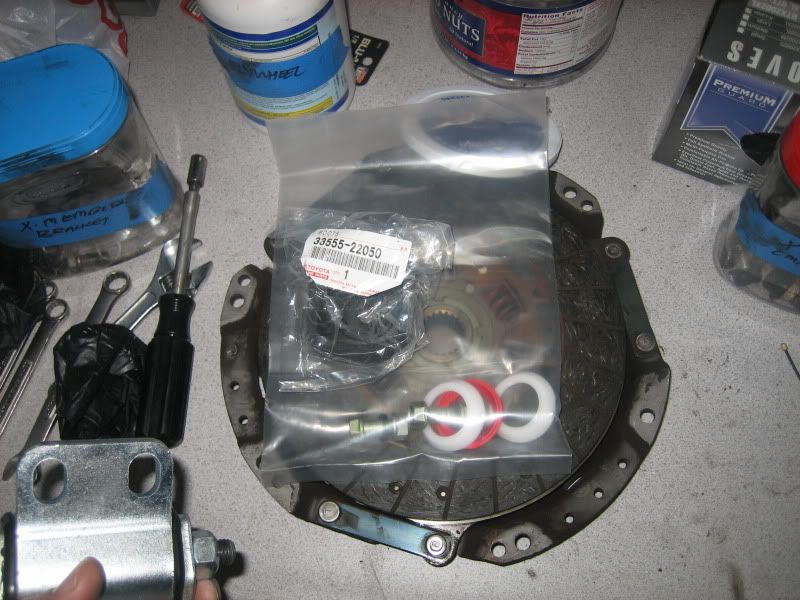
Marlin goodies (Shifter boot, shifter seat):
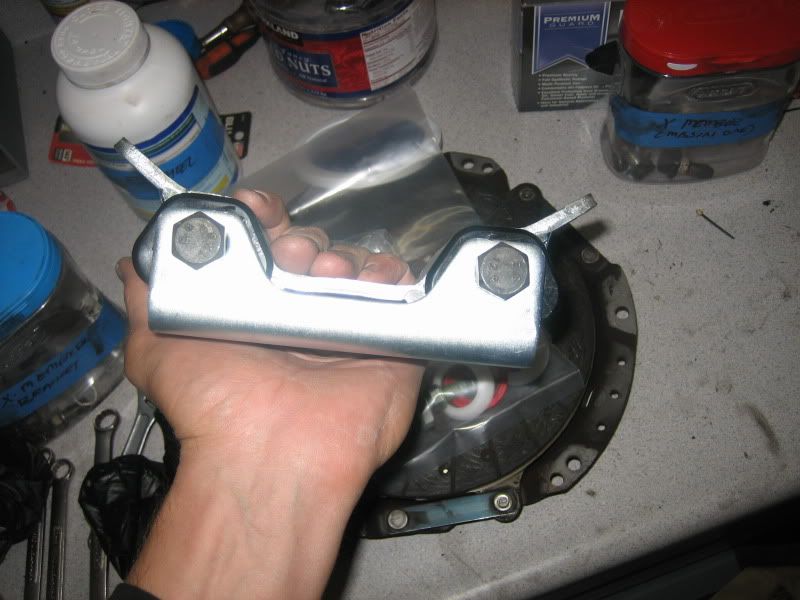
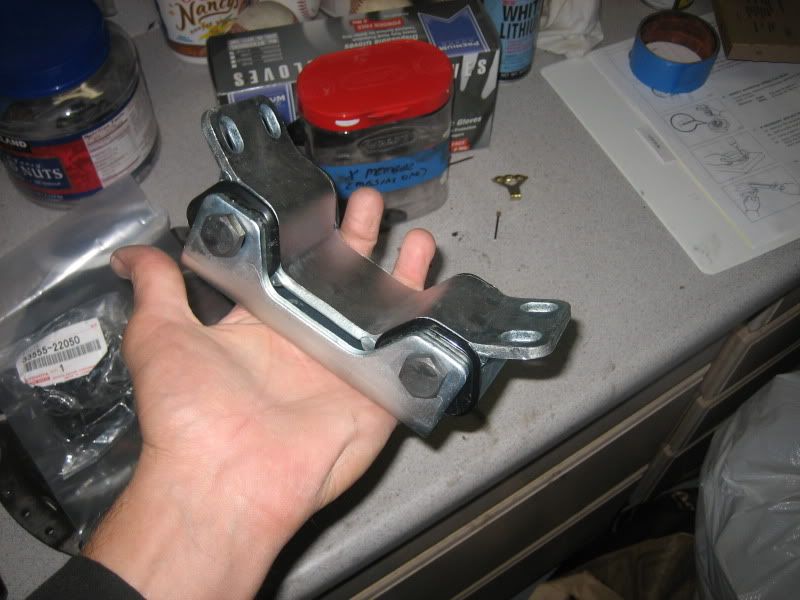
Trailgear crossmember "Bombproof" brace (looks and feels bombproof):

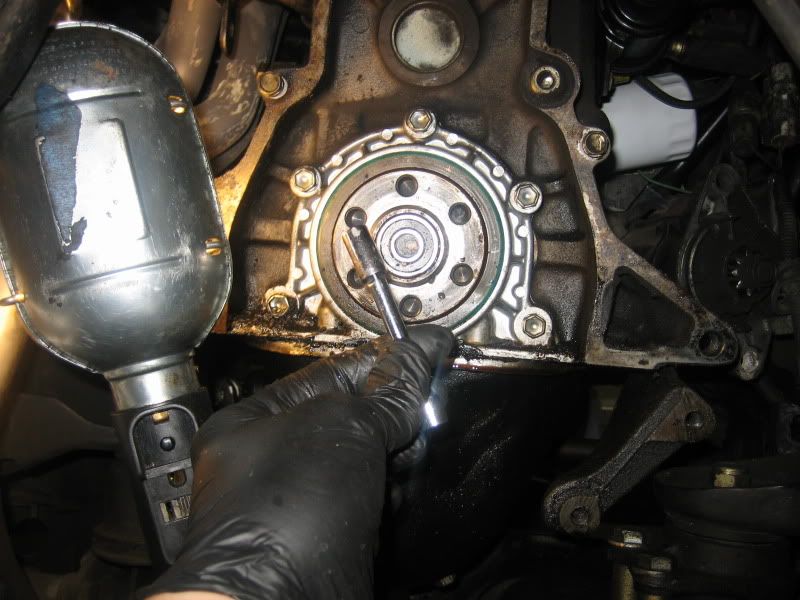
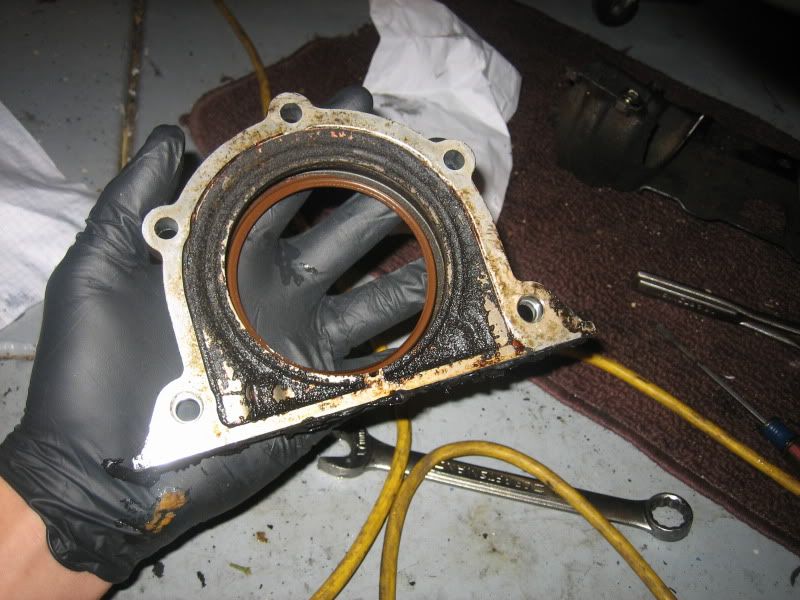
Old rear main seal removed:
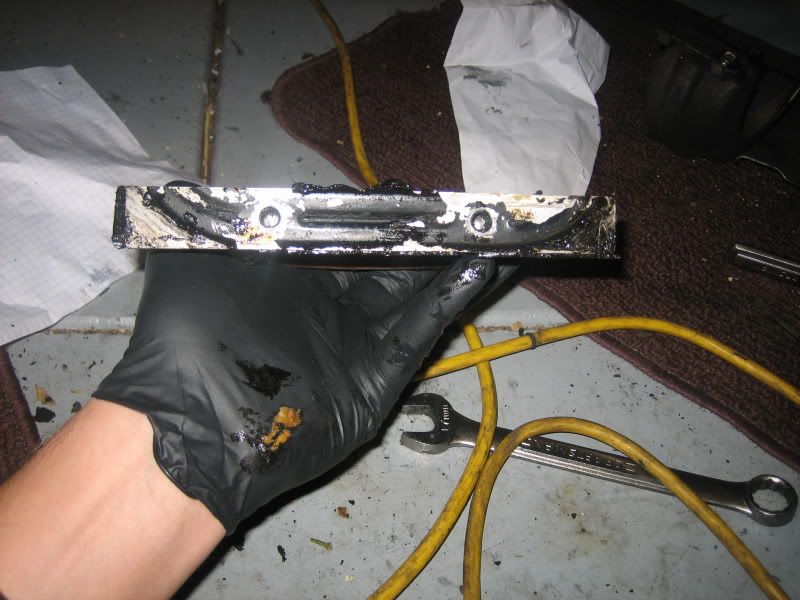
Mallet, large flathead screwdriver, and some 4x4 blocks...tap, tap...bye, bye old rear main seal!
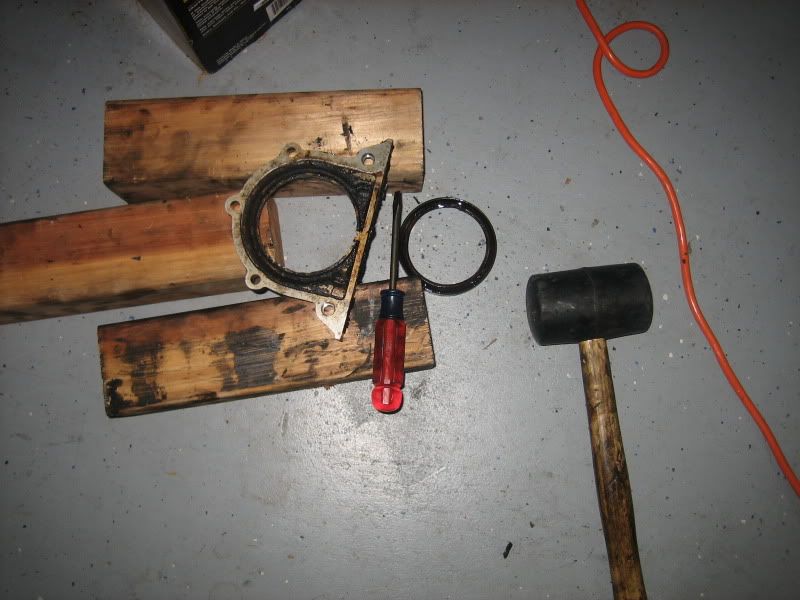
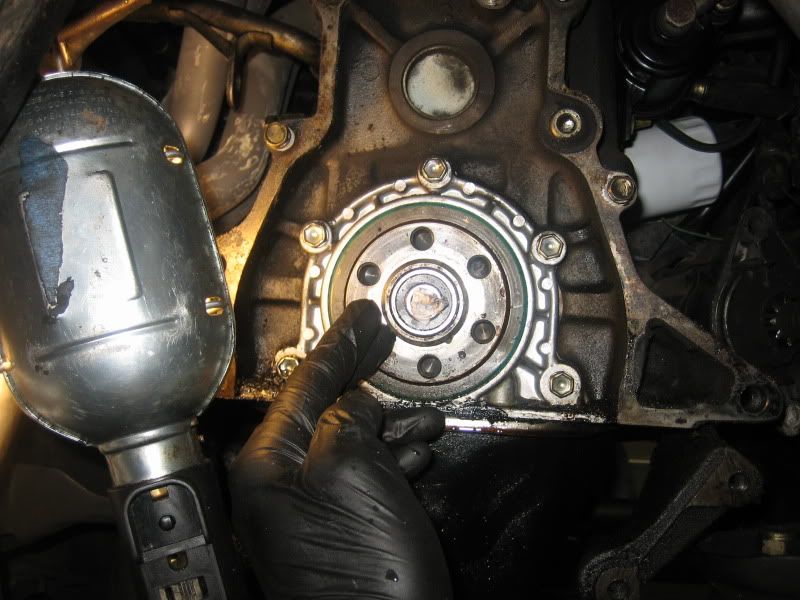
New rear main seal IN!
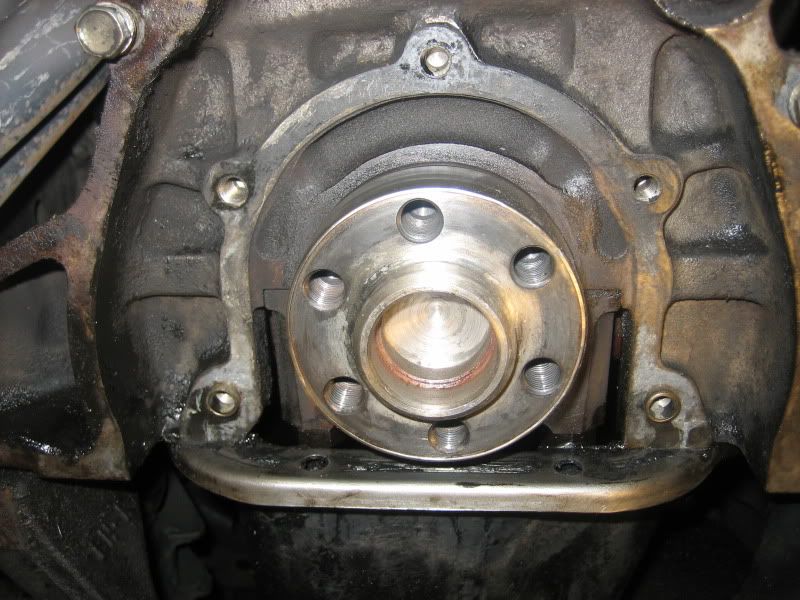
The crankshaft sleeve:
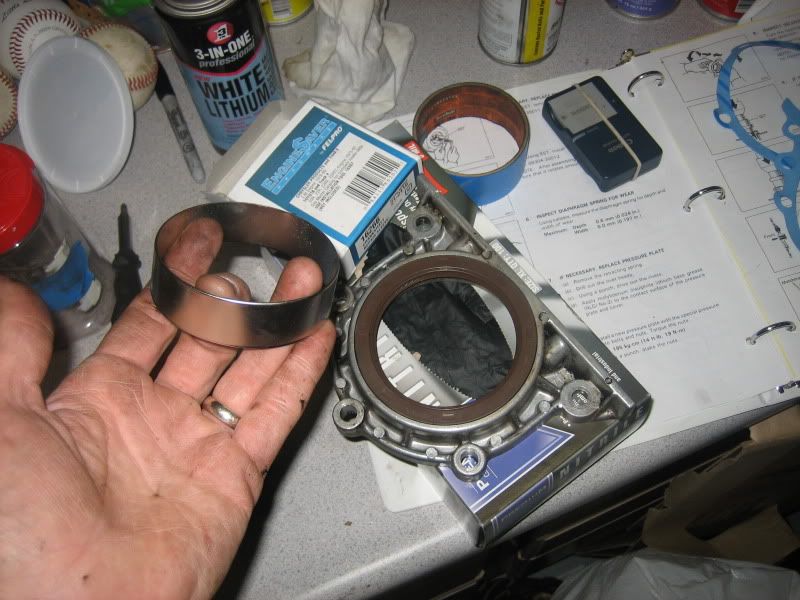
Check out the edge of the crankshaft - not smooth:
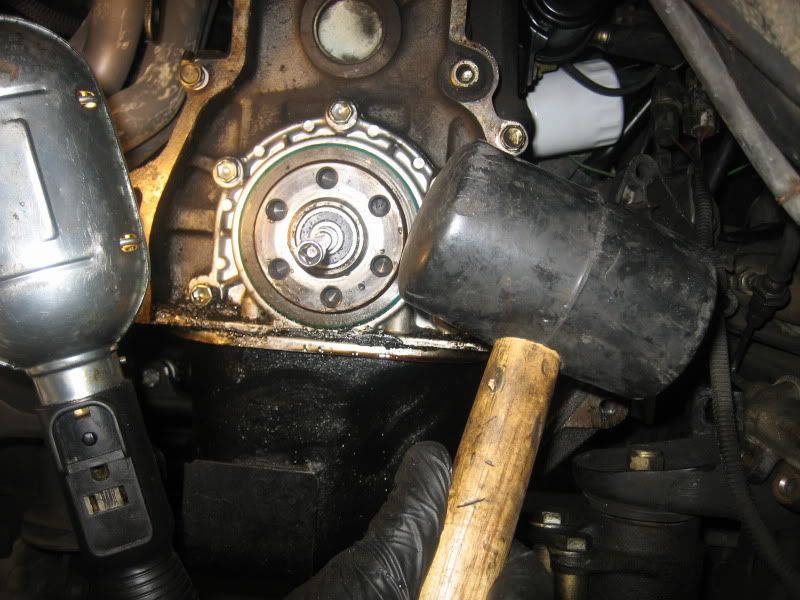
Slowly started tapping the sleeve onto the crank with a 4x4:
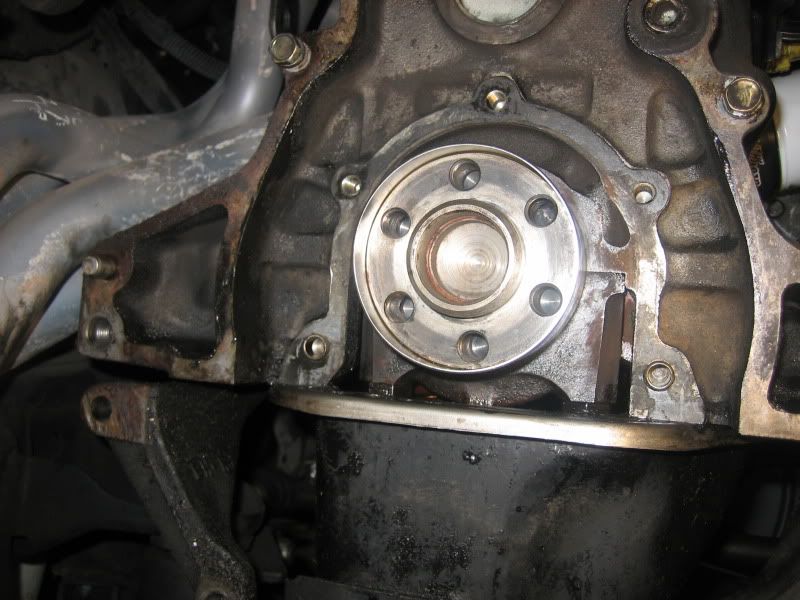
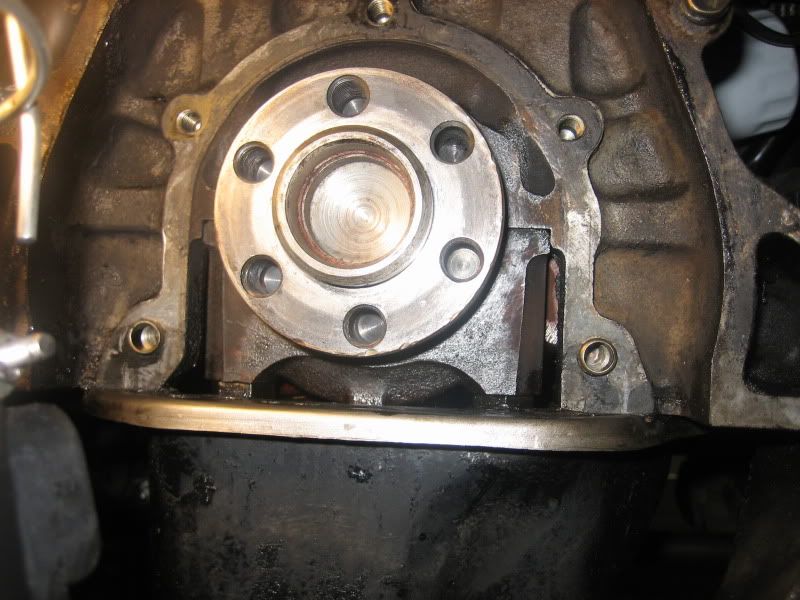
And it's ON!
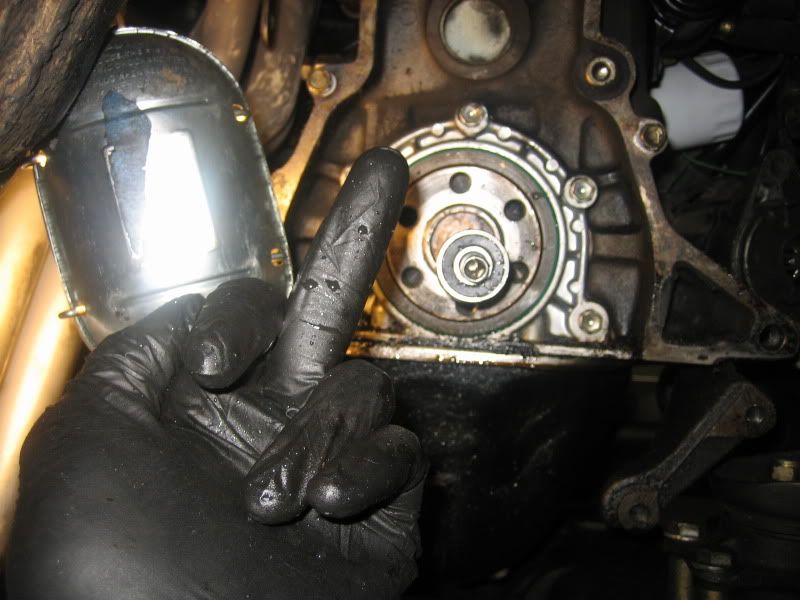
And that's how we end tonight!

I took care of the following in less than 3 hours (amazing for my snail pace and newbness):
1) Removed pilot bearing and replaced with new NAICHI (sp?) one from the Trailgear clutch kit
2) Removed rear main seal housing, removed old seal, cleaned housing
3) Cleaned up oil pan and old rear main seal gasket
4) cleaned up residue from old rear main seal on crankshaft using scotch bright pad (didn't have steel wool so used this instead#
5# Put on crankshaft sleeve using rubber mallet and 4x4 #just the right size!)
6) installed new rear main seal, sealed oil pan and gasket with Toyota FIGP; tightened all 7 bolts to 9 ft/lbs
Now I'm ready to put the flywheel back on #still need a 6th bolt to replace the one I kind of rounded a bit), and then dive into the clutch madness
Here are some photos of tonight:
Removing the pilot bearing using water, scrap paper, and a 5/16" socket and extension (with mallet):
Marlin goodies (Shifter boot, shifter seat):
Trailgear crossmember "Bombproof" brace (looks and feels bombproof):
Old rear main seal removed:
Mallet, large flathead screwdriver, and some 4x4 blocks...tap, tap...bye, bye old rear main seal!
New rear main seal IN!
The crankshaft sleeve:
Check out the edge of the crankshaft - not smooth:
Slowly started tapping the sleeve onto the crank with a 4x4:
And it's ON!
And that's how we end tonight!
 01-12-2012, 08:03 AM
#64
Registered User
Thread Starter
iTrader: (2)
Join Date: Dec 2009
Location: Pleasanton, CA - SF Bay Area
Posts: 2,159
Likes: 0
Received 7 Likes
on
5 Posts
ROFL!!
I love that thing - it's come in more handy than any other tool I can think of, save for the breaker bar...
Ordering flywheel bolt and crossmember bolt from dealer today. Flywheel bolt is over $8 - JEEZ!!
When I sealed up the rear main bracket, I used FIPG on the gasket where it mounts to the block, on the oil pan, and on the tips of the 2 oil pan bolts. I didn't see any other places there that it may leak from....before the flywheel goes back on, any tips on where ELSE to apply some FIPG or RTV to avoid turning my driveway into a tar pit later?
01-12-2012, 08:36 AM
#66
Registered User
Thread Starter
iTrader: (2)
Join Date: Dec 2009
Location: Pleasanton, CA - SF Bay Area
Posts: 2,159
Likes: 0
Received 7 Likes
on
5 Posts
Thanks - and thanks again for the info on the crank/sleeve - that thing went on so easy I couldn't believe it - whew!
There was an awesome video (linked above) that I found, and then was taken down (WTF??). Here's what you do:
1) get a 1/4" drive 5/16" socket (deep or regular - deep if you're worried about it getting stuck), and a 1/4" extension, and rubber mallet.
2) take some scrap paper (I used 3 or so sheets) and soak in water
3) tear up the bits of wet paper and cram them into the hole in the middle of the bearing. Every third piece or so, stick your "tool" in there and tap/wack it to press the wet mass further in, and make more room for more paper.
4) after about 5-8 of these sessions, you'll notice the bearing start to move out of its housing....keep going
5) It took me about 20 minutes and maybe 12-15 "stuffings" of the bearing/crank end to get the thing out - it just pops out onto your "tool"
6) Clean out the end of the crank of all the wadded up wet paper (I used a small flathead)
7) Dry it out, and tap in the new bearing with a mallet and 4x4
Again, totally easy (if I can do this right the first try, anyone can!).
And, as noted above, you can use grease instead of water, but who would want grease all over themselves
Later,
Phil
01-12-2012, 09:05 AM
#67
Registered User
Thread Starter
iTrader: (2)
Join Date: Dec 2009
Location: Pleasanton, CA - SF Bay Area
Posts: 2,159
Likes: 0
Received 7 Likes
on
5 Posts
Side note
So, you may notice in the photo below that in the gear from Marlin, they sent me one red shifter seat (what I need for my truck) and two white ones by mistake. They also left out the shifter bushing that I'd ordered.
I just got off the phone with Zach over there - really nice - and he's sending me a shifter bushing to replace the missing one. I offered to send him the two extra seats that don't apply to my truck and I don't need ($10 parts each) but he told me it wouldn't be worth it to him and to give them to my buddies
Kudos to Marlin's service team - love it!
SOOOO....I have two of these white seats that I don't need and would happy to mail to someone who does, as long as they send me a self addressed, postage paid envelope.
Here's the product link and the truck it applies to:
http://www.marlincrawler.com/transmi...ver-ball-seats
Most 1981+ top shift Toyota transmissions
including, but not limited to...
* 1981-83 L-series, * 1984-95 G-series, * 1989-2004 W-series,
* all 1987+ R-series, all * 2005+ RA-series
In general, this fits all 1981 and newer Toyota 2WD and 4WD
FR manual transmissions (front engine rear wheel drive),
including T100s, Tacomas, FJ Cruisers, and 4Runners, but
excluding the 1985-88 W56-equipped Hilux which uses a red seat.
So, if you're interested, PM me and I'll hook it up
Phil
01-15-2012, 10:11 PM
#70
Registered User
Thread Starter
iTrader: (2)
Join Date: Dec 2009
Location: Pleasanton, CA - SF Bay Area
Posts: 2,159
Likes: 0
Received 7 Likes
on
5 Posts
good news and bad news....
had a few hours tonight to wrench on the truck and had some ups and downs.
The GOOD:
Installed dust shield and new flywheel with ease
Installed clutch relatively with ease (followed the fsm and the alignment tool slides in and out easily now that the pressure plate is torqued down).
The BAD:
I tried to drill out that crossmember to frame bolt that was turning loosely....Drilled through it with a 1/4" bit, and then took a small punch to the hollowed out shell. After about 15 whacks, the whole thing popped off the frame. I can likely just find a nut and lock washer to replace it with, but disappointing all the same.
The other thing I wanted to get down was mount up the crossmember, Trail-Gear mount and replaement transmission, so it would be easier to work on/move around. I mounted it up and started tightening the 4 bolts that hold the TG mount to the crossmember....the first one tightened fine, but the second one I tried to tighten stripped out the TG mount! It could not have been more than 10 lb-ft before it started getting loose again. I'm pretty bummed about it....has anyone had experiences with TG customer service for thsi sort of thing? I'm shocked because this thing is solid steel and BEEFY...and the bolts are tiny 8x1.25.....
Without that to do tomorrow, I think I will tackle the input shaft seal....anyone done that and have guidance? Did not see anything in my FSM about just the seal.
Phil
01-16-2012, 10:40 AM
#73
Registered User
Thread Starter
iTrader: (2)
Join Date: Dec 2009
Location: Pleasanton, CA - SF Bay Area
Posts: 2,159
Likes: 0
Received 7 Likes
on
5 Posts
Photos and TG update
I spoke with trail gear today (Alex) and they told me they would ship me another one free, but that I had to ship my stripped mount to them first (on my dime). Not really liking that part, but we'll see how the "now questions asked" warranty pans out.
On to some photos from last night!
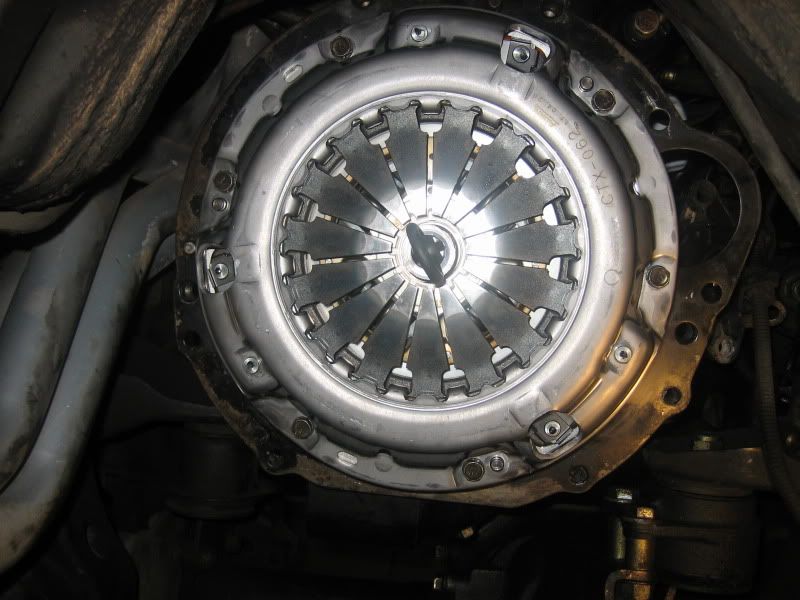
The pressure plate and clutch installed:
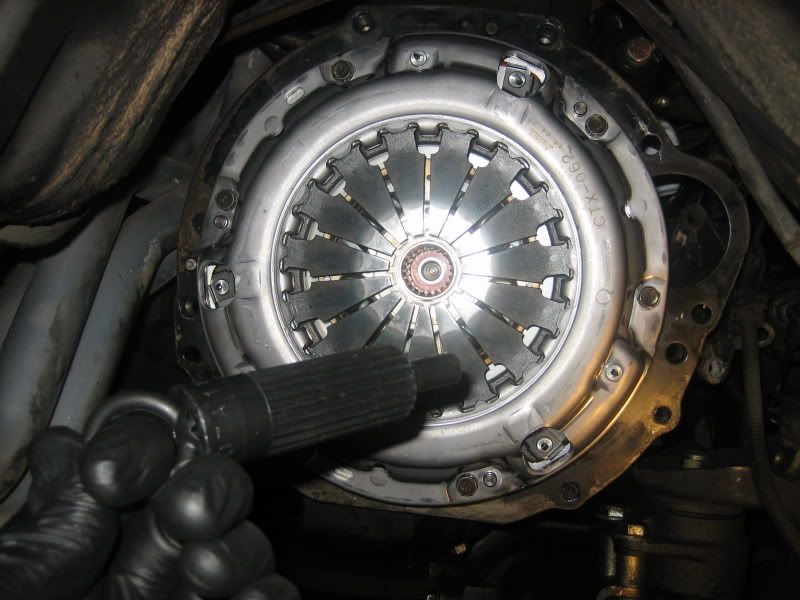
Alignment tools slides in and out without problems:
Here is the crossmember frame mount "nut" that popped off while I was trying to free the free-spinning bolt:
You can see I'd hollowed out the bolt with a 1/4" bit and had started using a small punch to try and collapse it on itself...and the whole thing just popped off the frame:
The TG mount with the stripped out thread:
I'm going to try and get to the input shaft seal today if I have time...any tips from those who have done it?
On to some photos from last night!
The pressure plate and clutch installed:
Alignment tools slides in and out without problems:
Here is the crossmember frame mount "nut" that popped off while I was trying to free the free-spinning bolt:
You can see I'd hollowed out the bolt with a 1/4" bit and had started using a small punch to try and collapse it on itself...and the whole thing just popped off the frame:
The TG mount with the stripped out thread:
I'm going to try and get to the input shaft seal today if I have time...any tips from those who have done it?
01-16-2012, 03:10 PM
#74
Registered User
Thread Starter
iTrader: (2)
Join Date: Dec 2009
Location: Pleasanton, CA - SF Bay Area
Posts: 2,159
Likes: 0
Received 7 Likes
on
5 Posts
Booooo
Had some time this afternoon and decided to tackle prepping the donor transmission with the new input shaft seal and dealing with the throwout bearing.
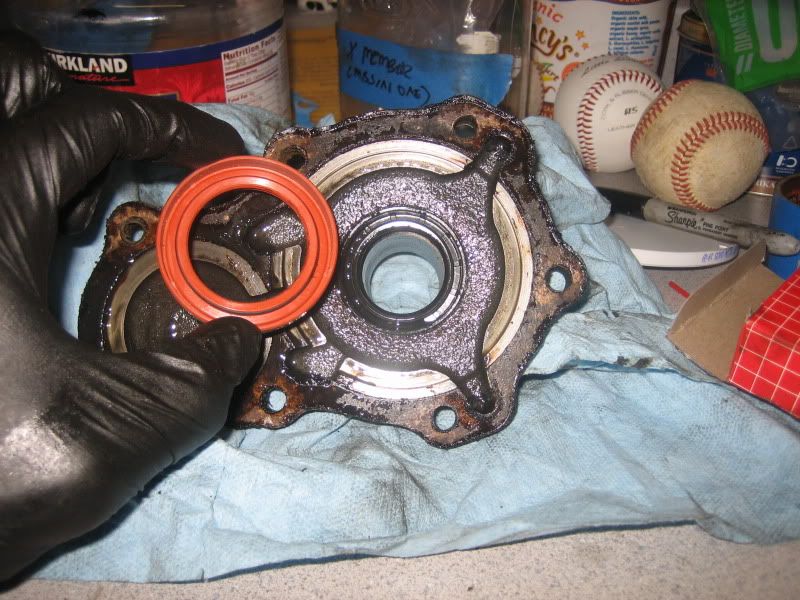
Made some killer progress, and then realized that the seal the auto parts store gave me was too large by about 1/4"....dangit!! New one on order....
Here's some photos for those curious (and for my reference when I put it back together....
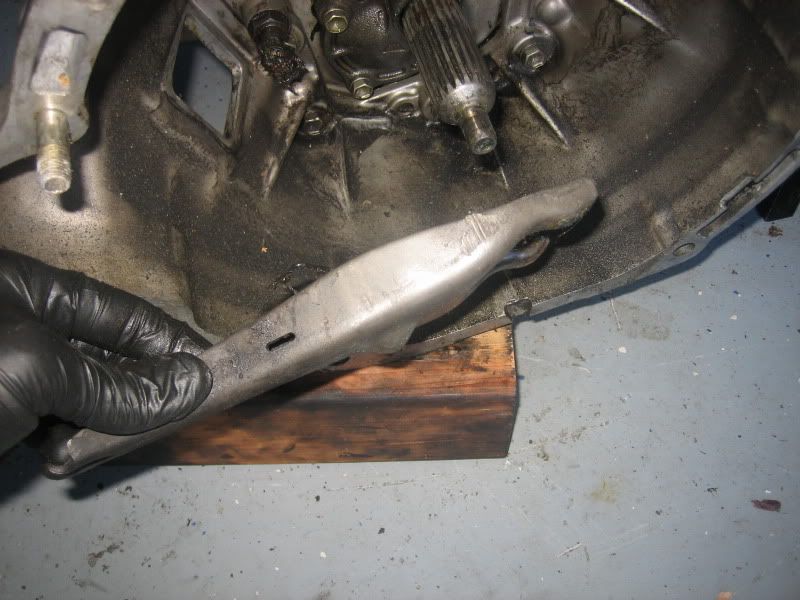
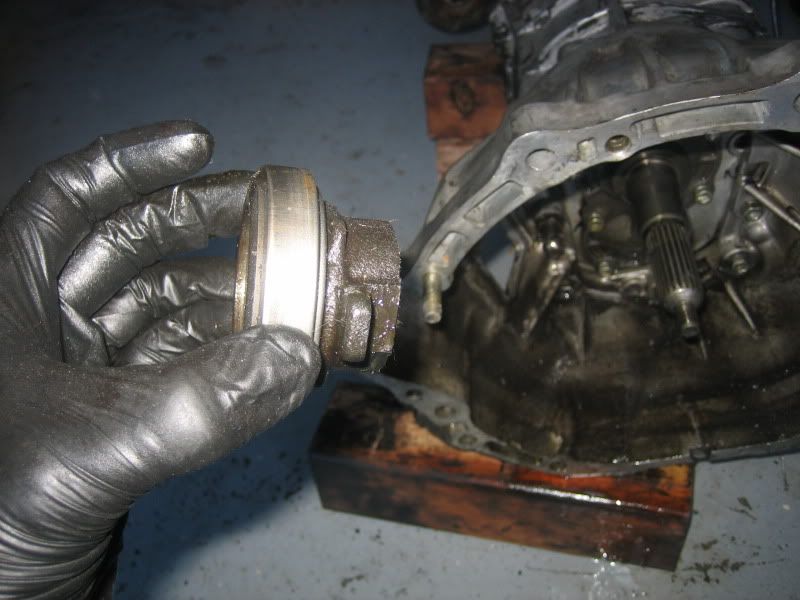
The clutch fork and throwout bearing:
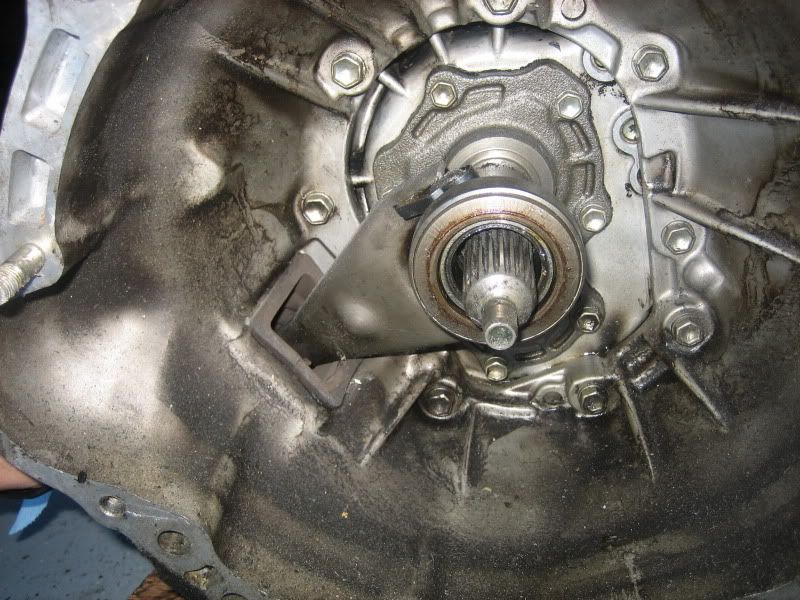
Removing the clips (2) from the clutch fork (noting the orientation for later):

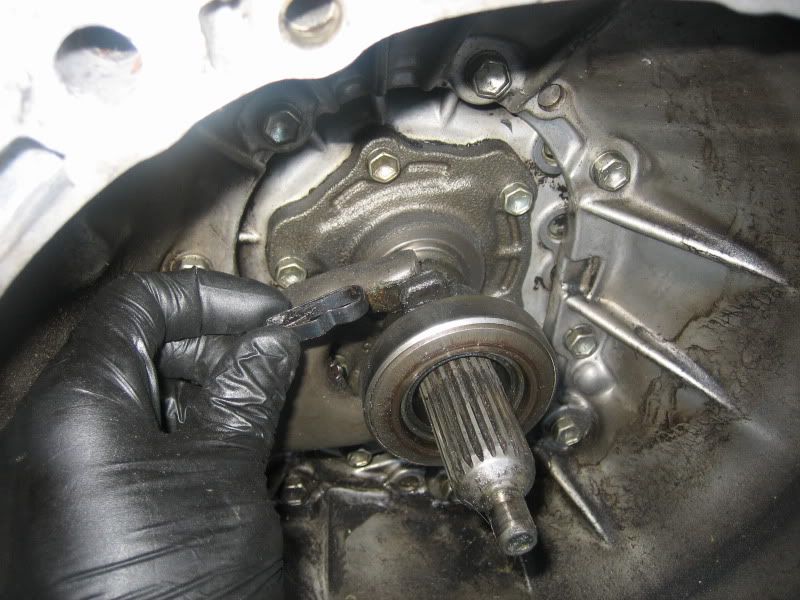
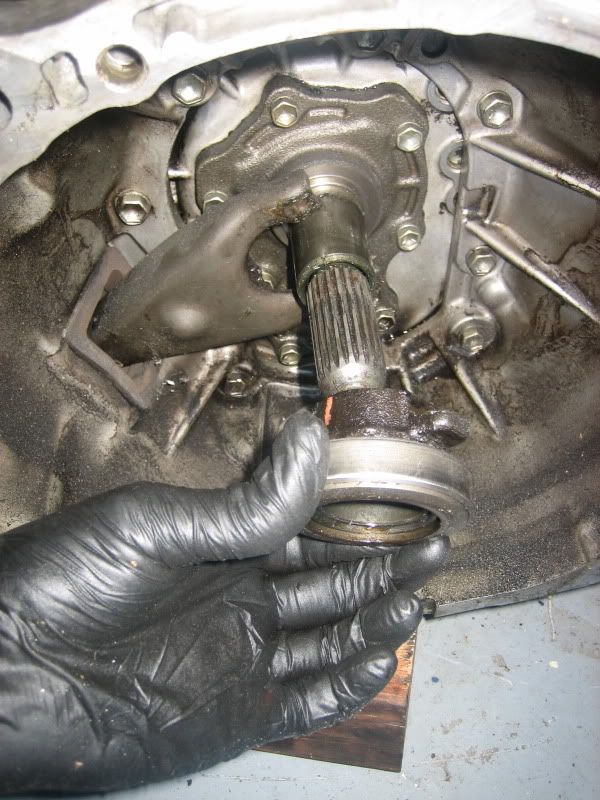
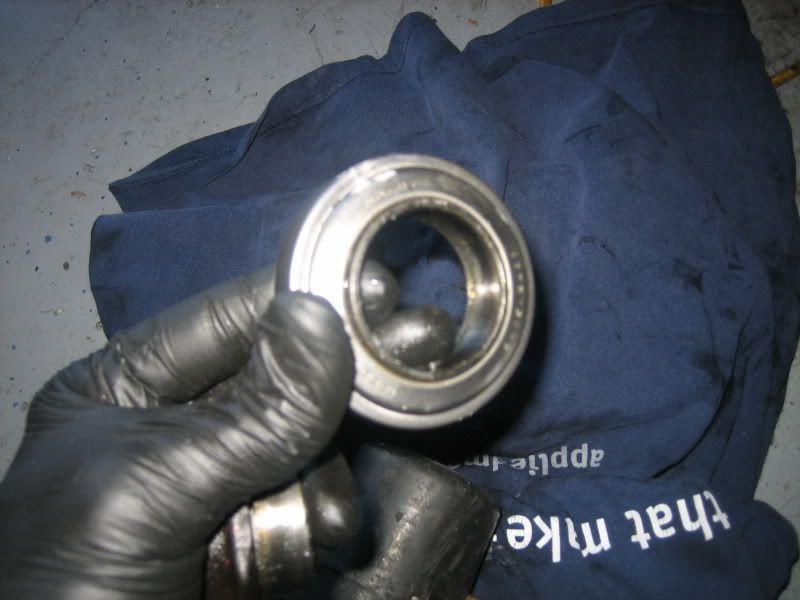
And with the clips off the fork, we can now slide the carrier with the release throwout bearing together:
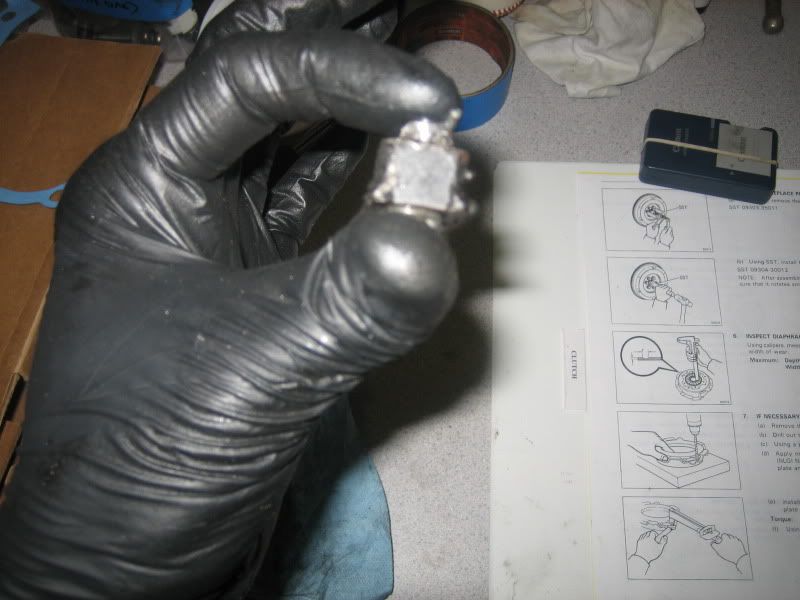
The clutch fork pivots on the greasy ball you see in the background there, above the square hole...it's clipped into place by that paper clip looking device (again, noting the orientation for later):


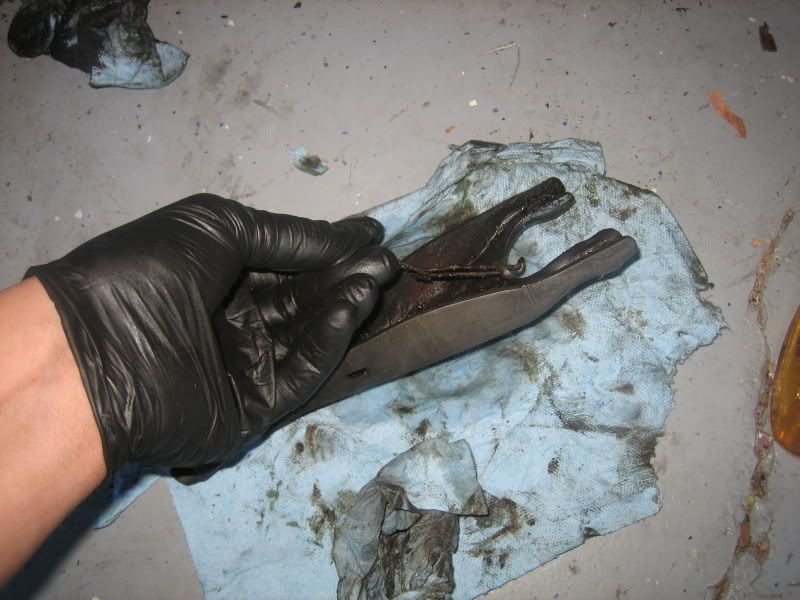
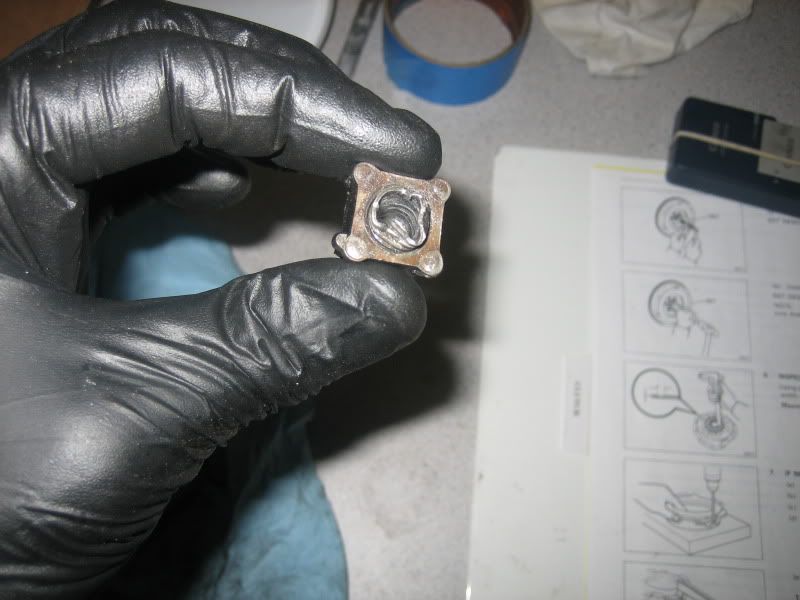
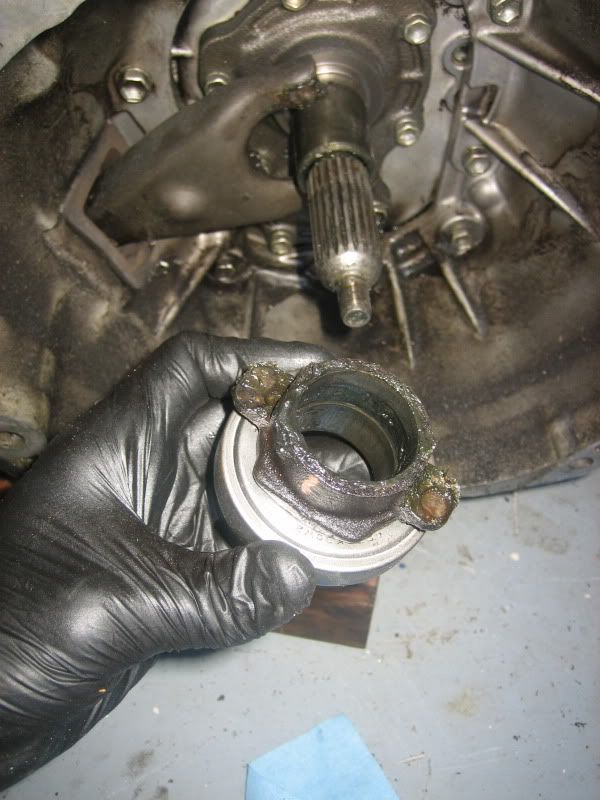
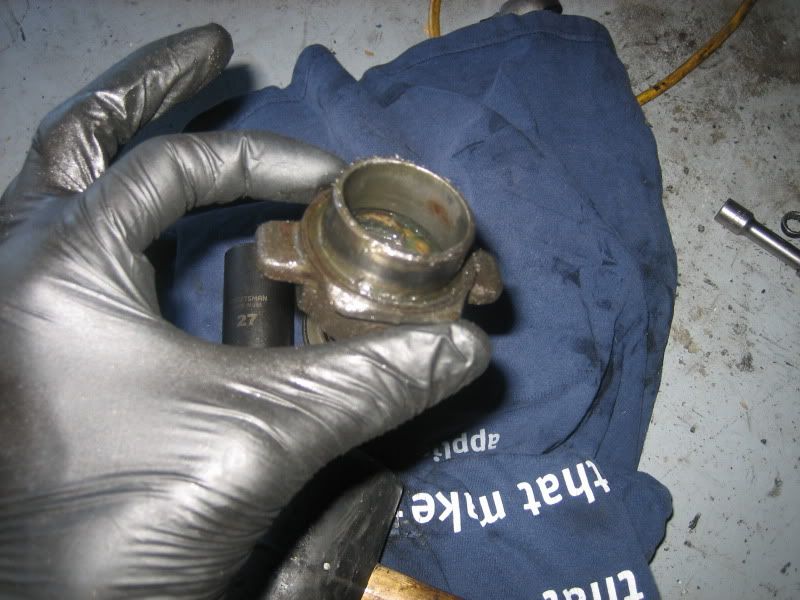
How to separate the bearing from the carrier...EASY!
- Mallet
- 2 blocks
- 27mm impact socket (or socket that is the same size as the carrier but not the bearing)
BEFORE:
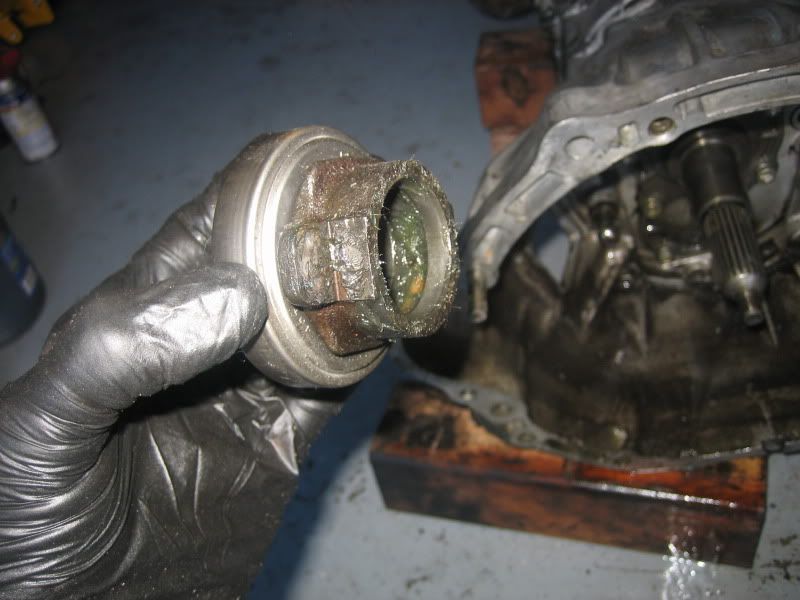
Tap, tap, tap!
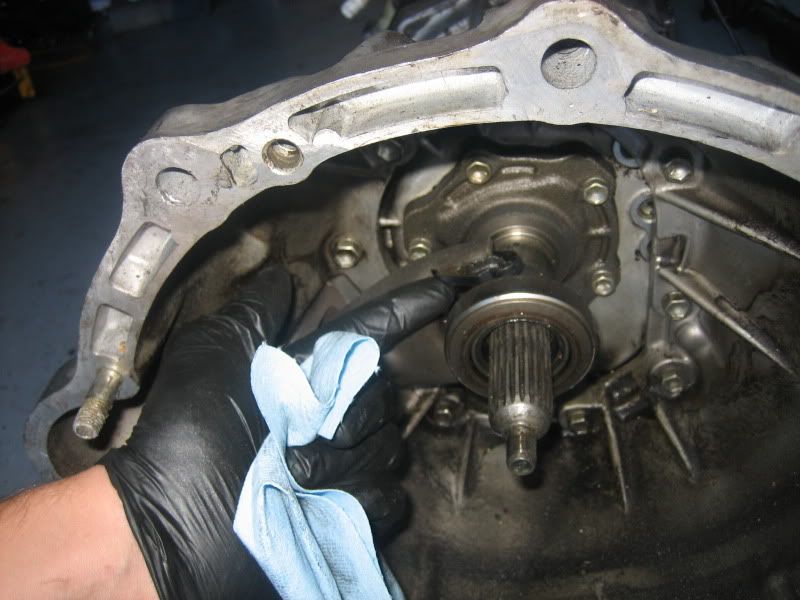
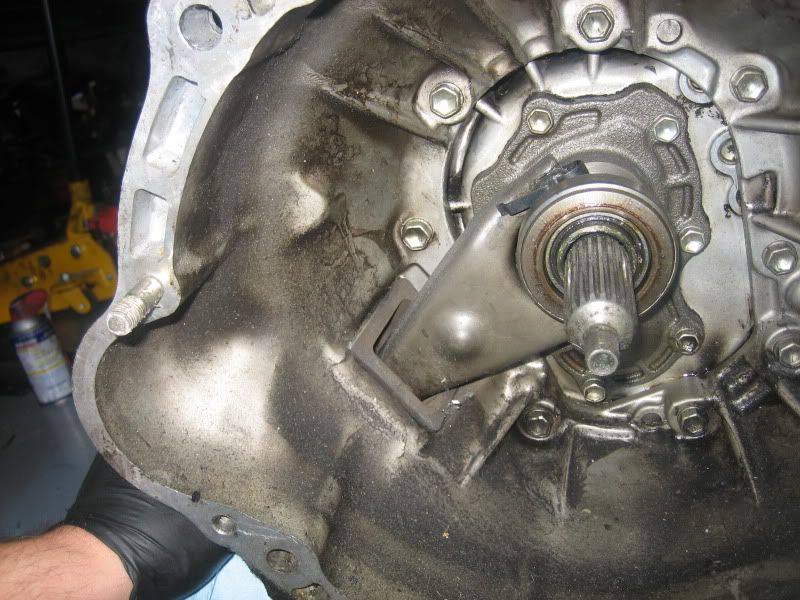
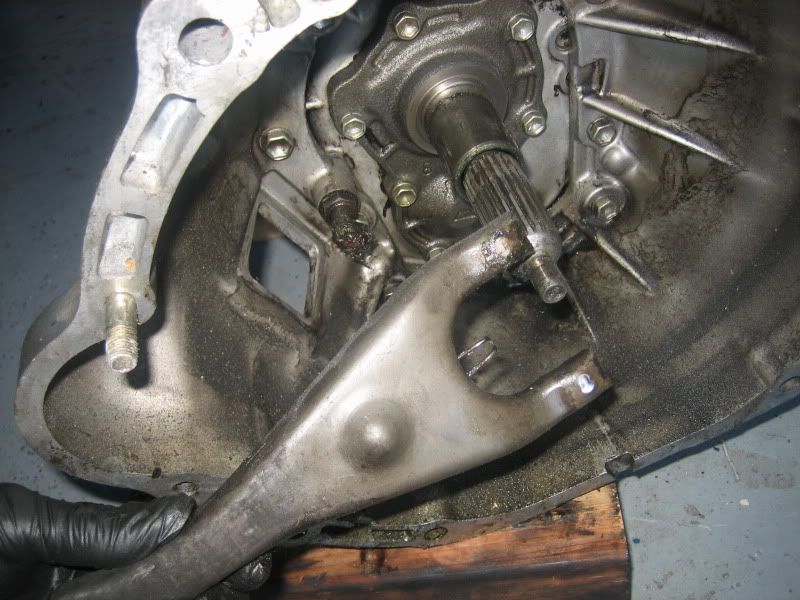
Cleaned up the bellhousing a little with some degreaser:
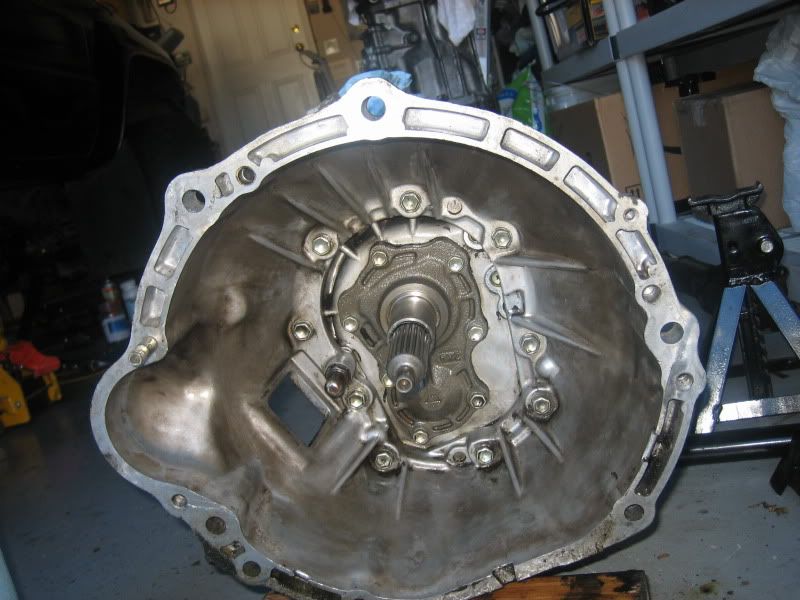
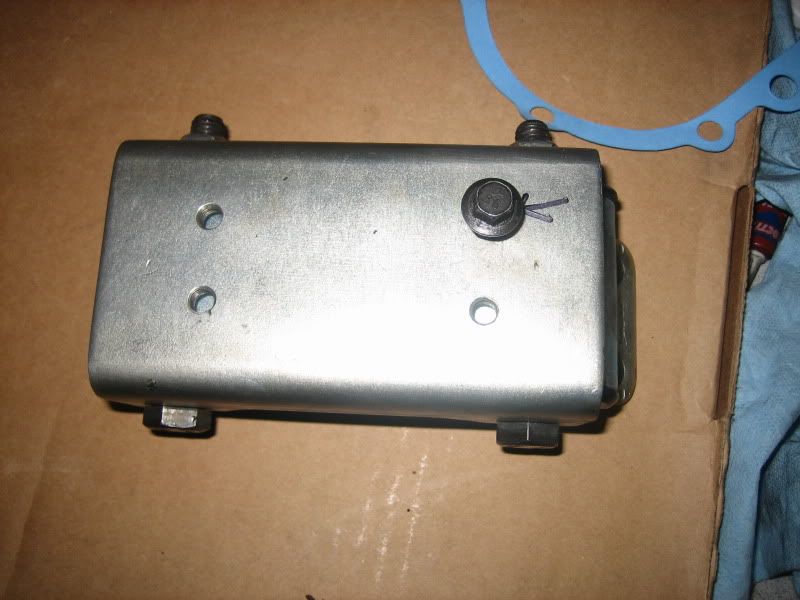
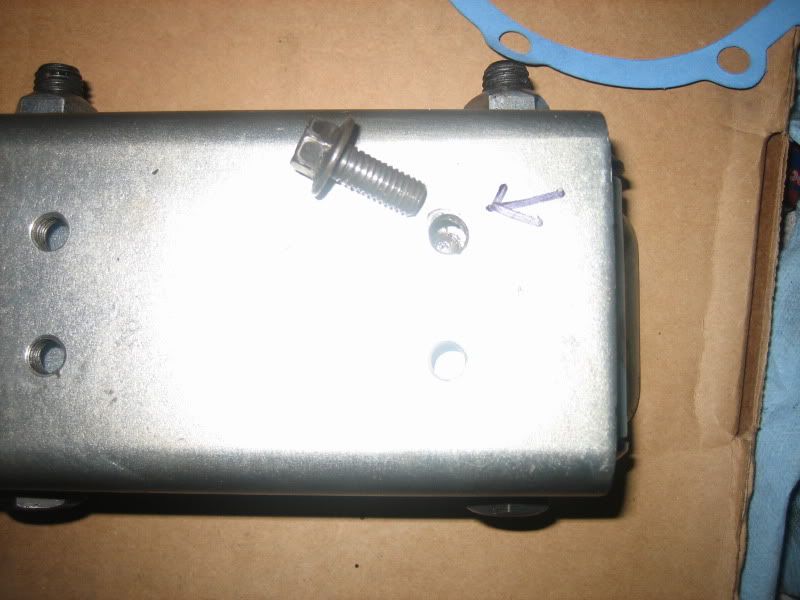
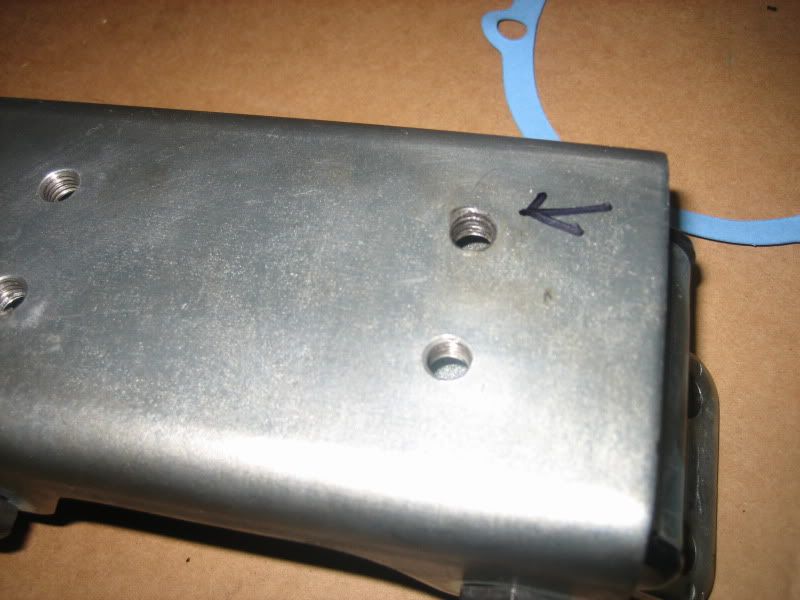
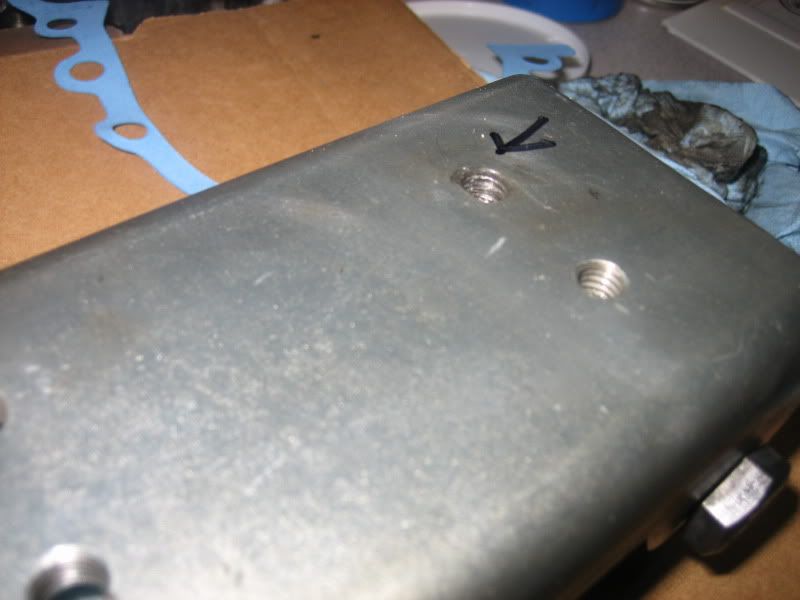
Removed the 7 12mm bolts that hold the seal:
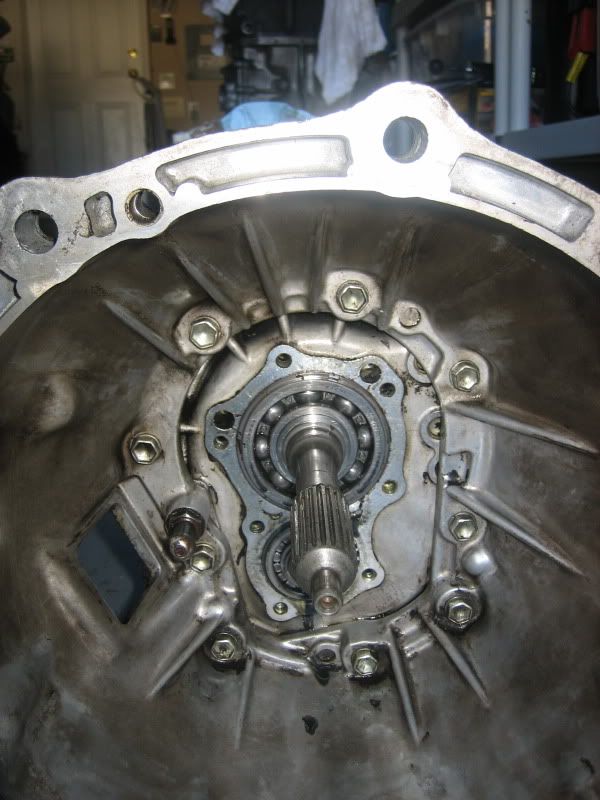
There's the little seal:
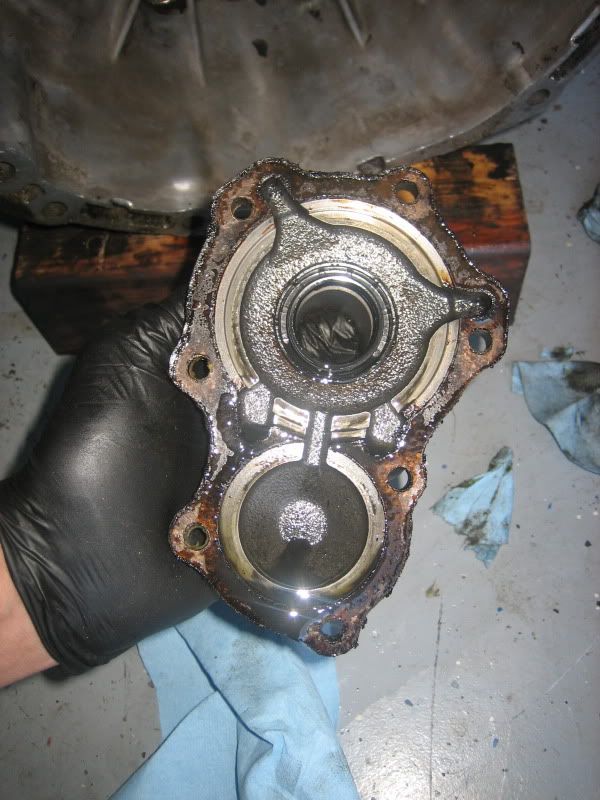
Houston, we have a problem!
So, nothing more I can do in the next couple days except mail the transfer case mount back to Trailgear (lame), and wait for my correct seal to come in stock at the auto parts store on Wednesday.
Couple questions in the meantime:
- There is a thin gasket on the seal holder - can I just use FIPG instead when I put it back together?
- Looks like the torque specs on teh bearing/seal retainer is 18 ft/lbs in the FSM and it recommends locktite when putting screws back in - any objections?
Made some killer progress, and then realized that the seal the auto parts store gave me was too large by about 1/4"....dangit!!
New one on order....Here's some photos for those curious (and for my reference when I put it back together....
The clutch fork and throwout bearing:
Removing the clips (2) from the clutch fork (noting the orientation for later):
And with the clips off the fork, we can now slide the carrier with the release throwout bearing together:
The clutch fork pivots on the greasy ball you see in the background there, above the square hole...it's clipped into place by that paper clip looking device (again, noting the orientation for later):
How to separate the bearing from the carrier...EASY!
- Mallet
- 2 blocks
- 27mm impact socket (or socket that is the same size as the carrier but not the bearing)
BEFORE:
Tap, tap, tap!
Cleaned up the bellhousing a little with some degreaser:
Removed the 7 12mm bolts that hold the seal:
There's the little seal:
Houston, we have a problem!
So, nothing more I can do in the next couple days except mail the transfer case mount back to Trailgear (lame), and wait for my correct seal to come in stock at the auto parts store on Wednesday.
Couple questions in the meantime:
- There is a thin gasket on the seal holder - can I just use FIPG instead when I put it back together?
- Looks like the torque specs on teh bearing/seal retainer is 18 ft/lbs in the FSM and it recommends locktite when putting screws back in - any objections?
Last edited by Terrys87; 09-24-2015 at 05:07 AM.
01-16-2012, 04:39 PM
#76
01-16-2012, 04:50 PM
#77
from what i've looked up, the seal is on the correct side, there is no housing gasket, and i think blue loctite would be fine.
i went ahead and ordered the trans overhaul gasket set from toyotapartseast, and it has all seals and gasket needed. the only gasket is the one for the shifters.
as long as you stay away from the oil passages, i think you'll be fine with fipg
i went ahead and ordered the trans overhaul gasket set from toyotapartseast, and it has all seals and gasket needed. the only gasket is the one for the shifters.
as long as you stay away from the oil passages, i think you'll be fine with fipg
01-16-2012, 06:01 PM
#78
Nope; he's got it right. Parts guy got the wrong #.
Just use some black goop to seal it up, but thats false economy. However the parts guy should get you a new gasket with the seal. Safer that way since a leak now would be costly. Cheaper to call parts guy and get new gasket.
Just use some black goop to seal it up, but thats false economy. However the parts guy should get you a new gasket with the seal. Safer that way since a leak now would be costly. Cheaper to call parts guy and get new gasket.
01-16-2012, 06:47 PM
#79
Registered User
Join Date: Dec 2002
Location: Hawaii
Posts: 229
Likes: 0
Received 0 Likes
on
0 Posts
Wow looks good so far I just installed a r150f transmission in my 88 truck.I used a NAPA transmission adapter purchased for $20 on the craiglist to remove and install the transmission.I did the job by myself with some problems putting it back on but I aligned everything correctly for a smooth installation.I put on a new turbo throwout bearing,Marlin Crawler blue shifter seat,reused my Wabfab/Ceramic 6 puck clutch.Filled the tranny with Redline MT-90 gear oil.
Everything feels great on the drive,just a oil seal leak on the front driveshaft transfercase side.Good luck with your installation and want to see more of your pictures.
Everything feels great on the drive,just a oil seal leak on the front driveshaft transfercase side.Good luck with your installation and want to see more of your pictures.


