
Gassy gas tank mess...need insight
 Dec 17, 2007 | 06:52 AM
#22

Thread Starter
Registered User
Joined: Oct 2006
Posts: 380
Likes: 1
The pics...
Ok, so here goes:
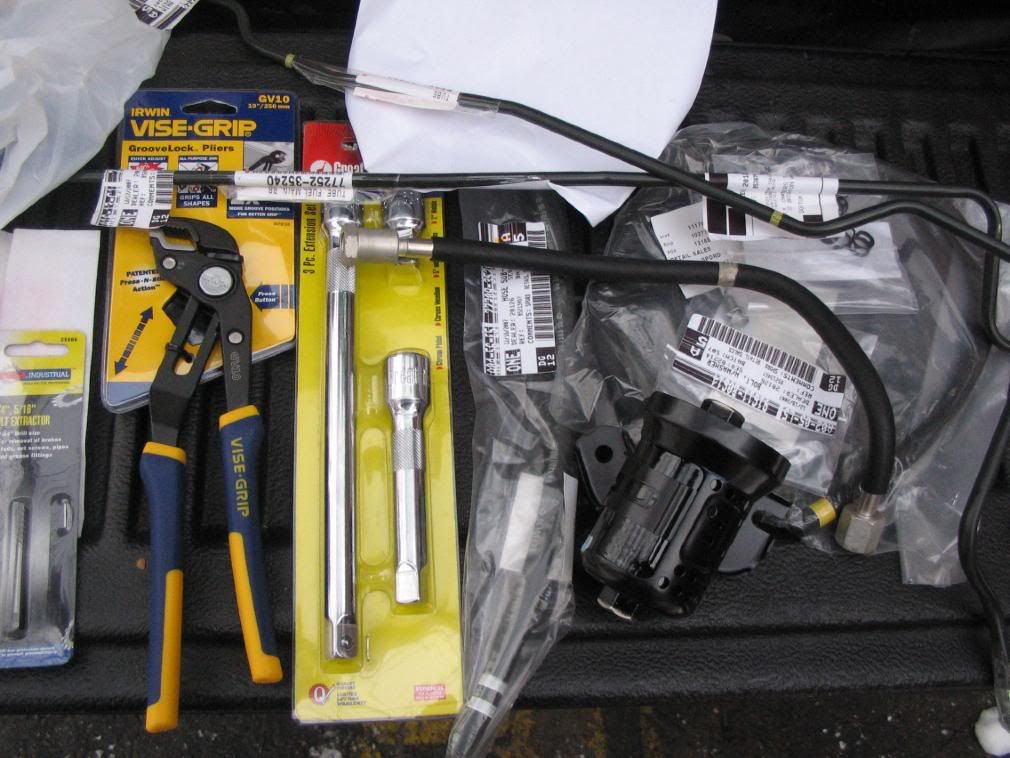
1) Parts. Note extension high pressure hose on right, didn't put on cuz couldn't get off at upstream end:
2) Rust on brackets = flog: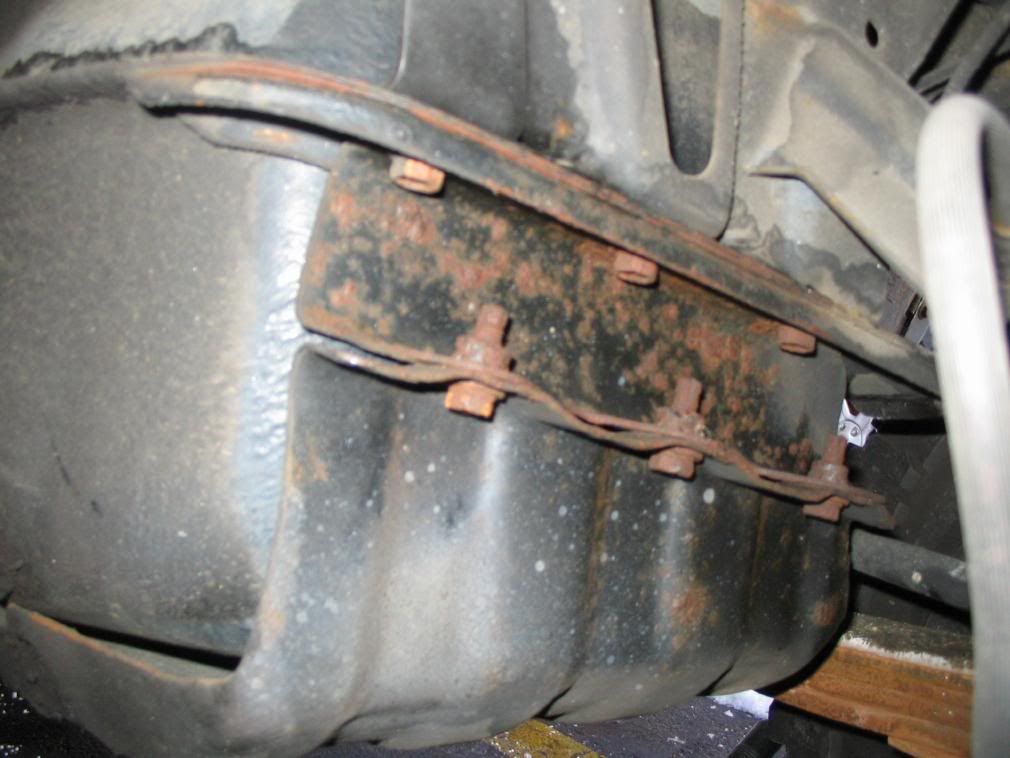
3)IDeal working conditions? and a reaaaaally good friend: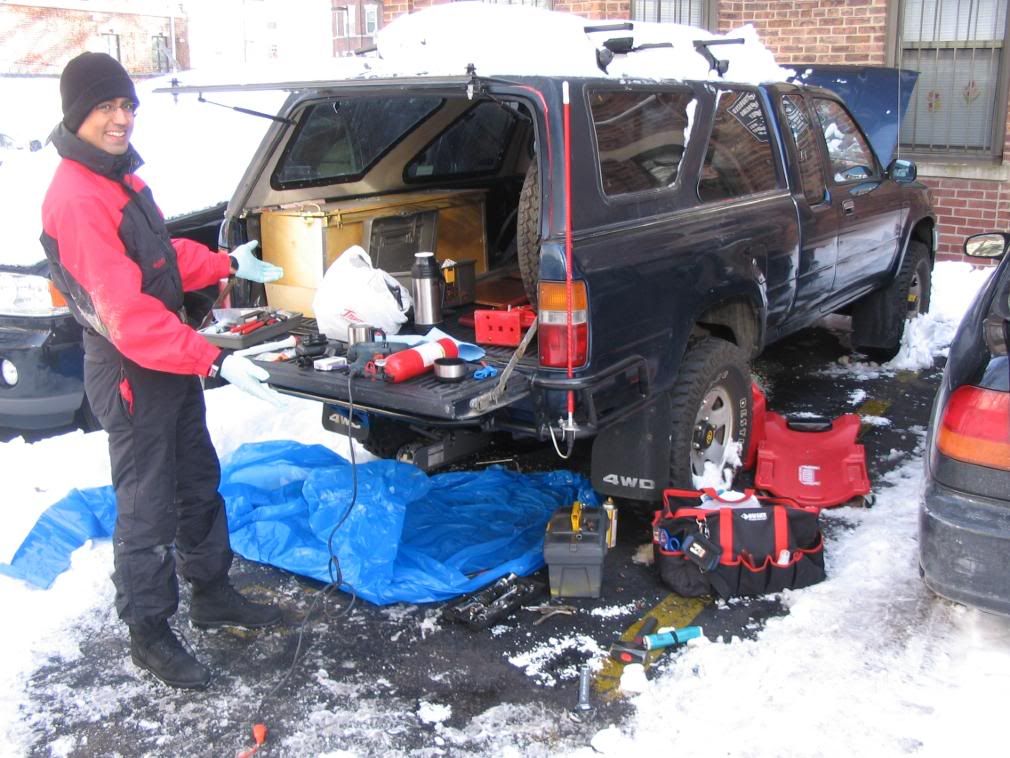
4)Keep it up with floor jack and platform: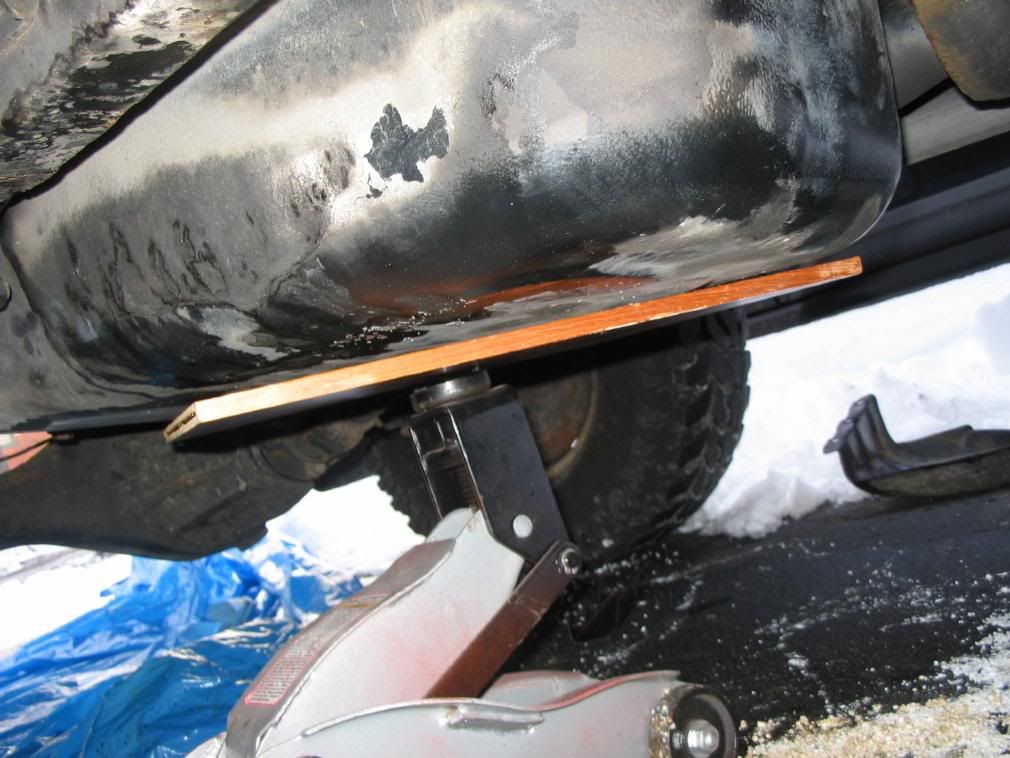
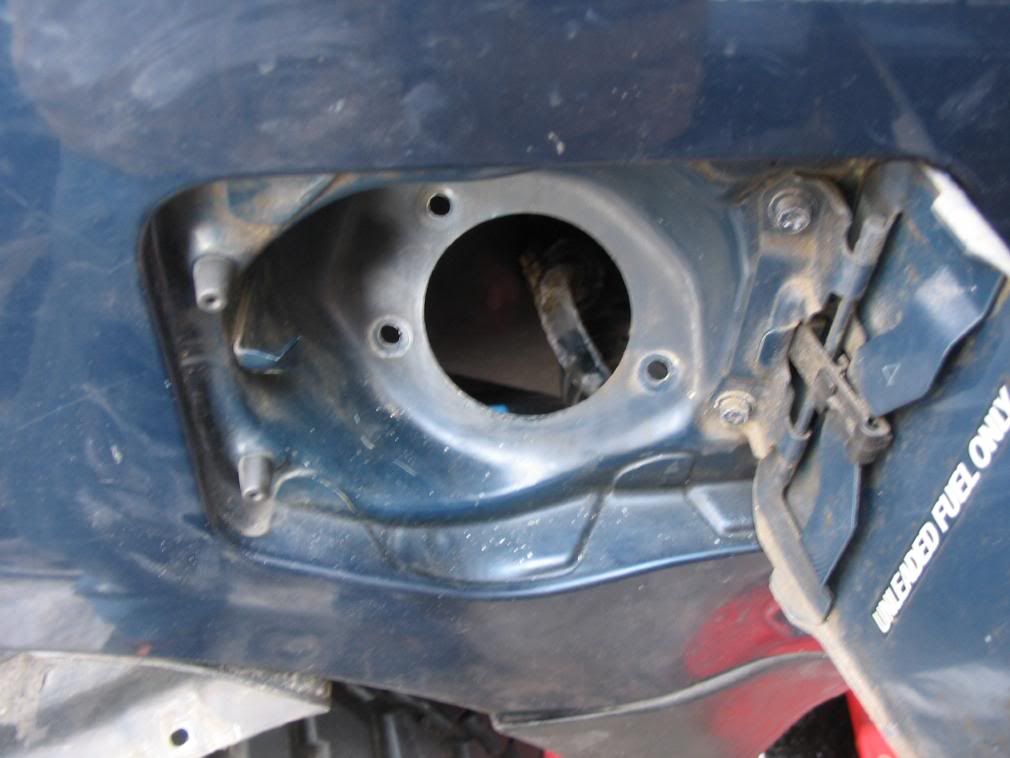
5) You need to remove forward drive shaft joint shield to drop front of tank. Hmmm maybe I should refinish?:
6) Peeling away wheel well liner helps: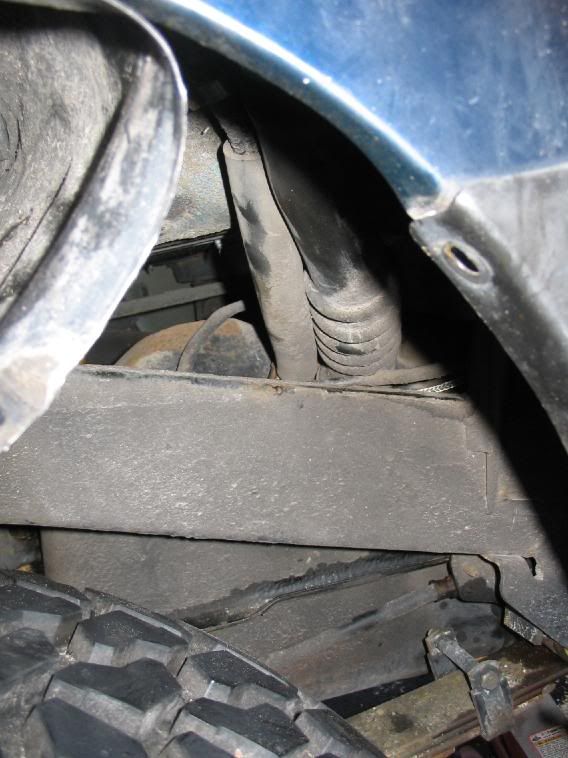
7) I think this is best way to get tank hoses free though:
8) Old wreck of bracket. Leaked from BOTH outllets, and hi-pressure one already broken off here: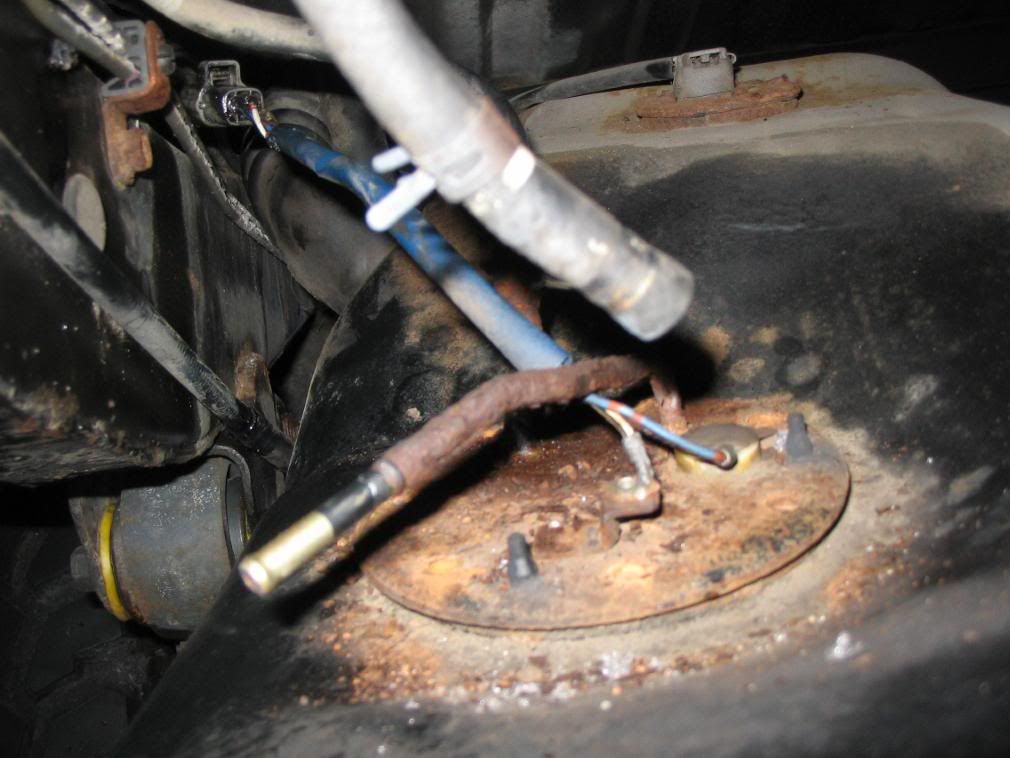
9) Reassembled with new bracket, old pump. If you don't pull off stariner (which was fine) you don't need the teeny clip thingy. Be careful that pump is firmly in place though: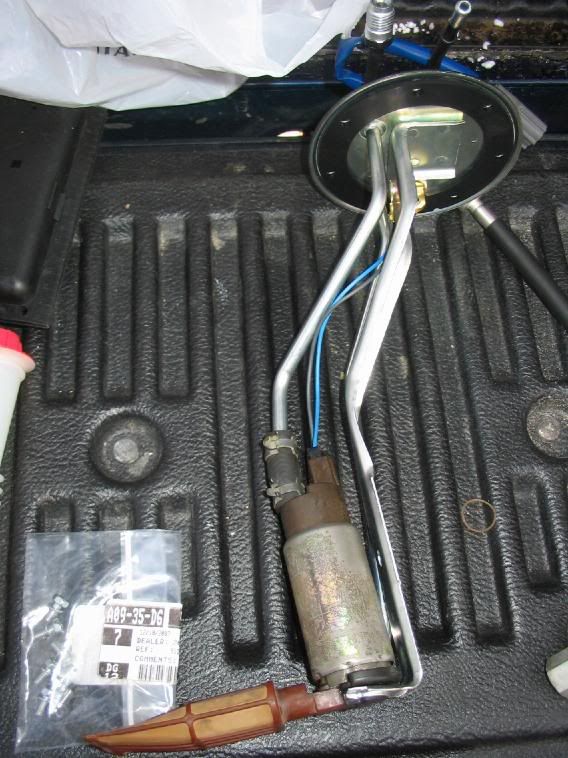
10) New one in place...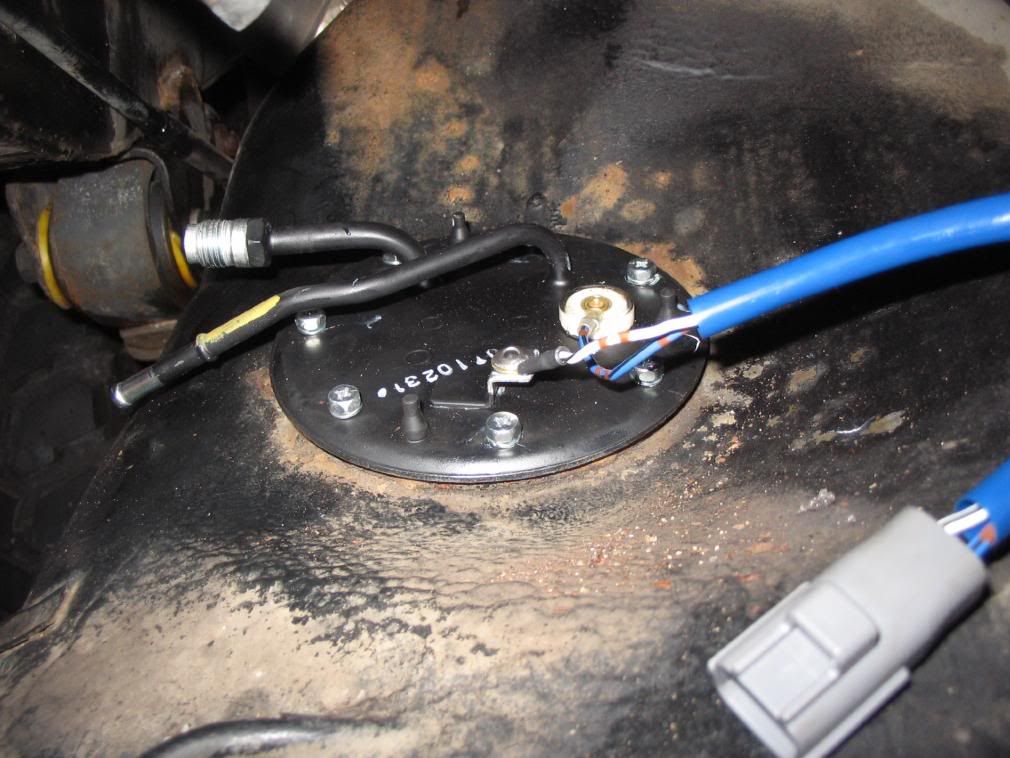
1) Parts. Note extension high pressure hose on right, didn't put on cuz couldn't get off at upstream end:
2) Rust on brackets = flog:
3)IDeal working conditions? and a reaaaaally good friend:
4)Keep it up with floor jack and platform:
5) You need to remove forward drive shaft joint shield to drop front of tank. Hmmm maybe I should refinish?:
6) Peeling away wheel well liner helps:
7) I think this is best way to get tank hoses free though:
8) Old wreck of bracket. Leaked from BOTH outllets, and hi-pressure one already broken off here:
9) Reassembled with new bracket, old pump. If you don't pull off stariner (which was fine) you don't need the teeny clip thingy. Be careful that pump is firmly in place though:
10) New one in place...
 Dec 20, 2007 | 07:26 AM
#25
Thread Starter
Registered User
Joined: Oct 2006
Posts: 380
Likes: 1
Part 2
OK, so got it about 90% done, and more importantly running. Yahoo! Just before the snow and rain restarted.
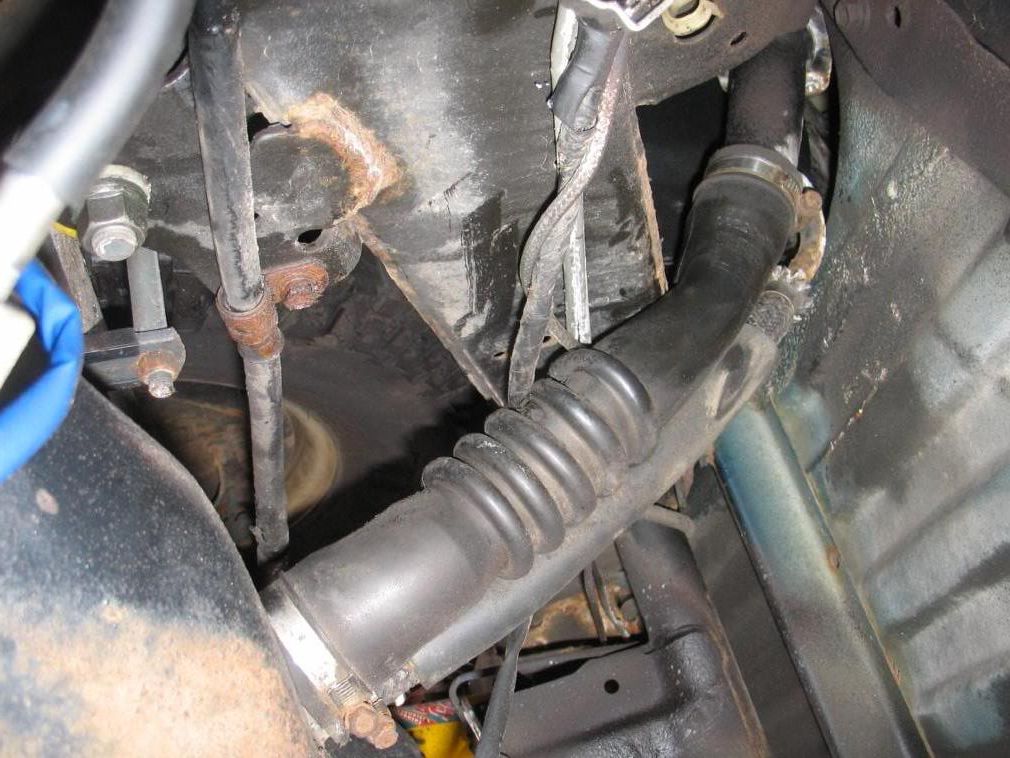
So, needed to get hard lines for before and after fuel filter, hoses for low pressure links between low pressure return hard lines (the hoses were a rip off- about $25 each, and you could just use decent fuel line hose), and the rubber covered hard line to go between the fuel pump bracket and the high pressure line running forward (this twisty bastard - in the middle of the picture below - cost $60!)
http://s260.photobucket.com/albums/i...t=IMG_0635.jpg
Much easier this go-round as we knew what we were doing, plus the gas was already out of the tank
http://s260.photobucket.com/albums/i...t=IMG_0649.jpg
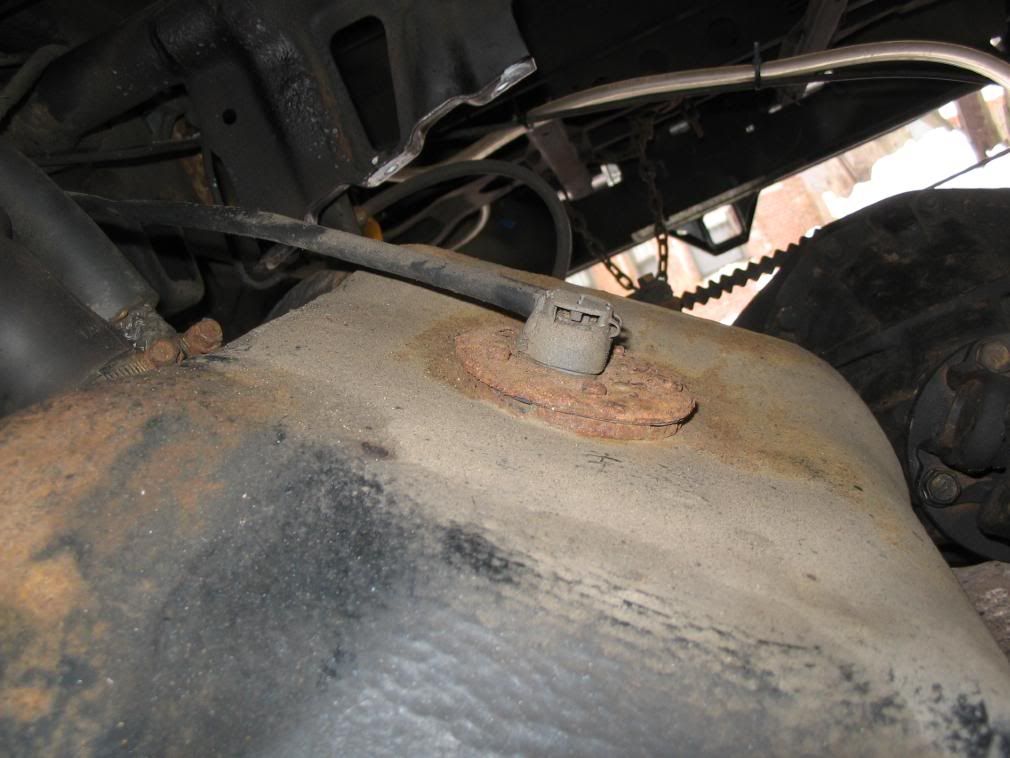
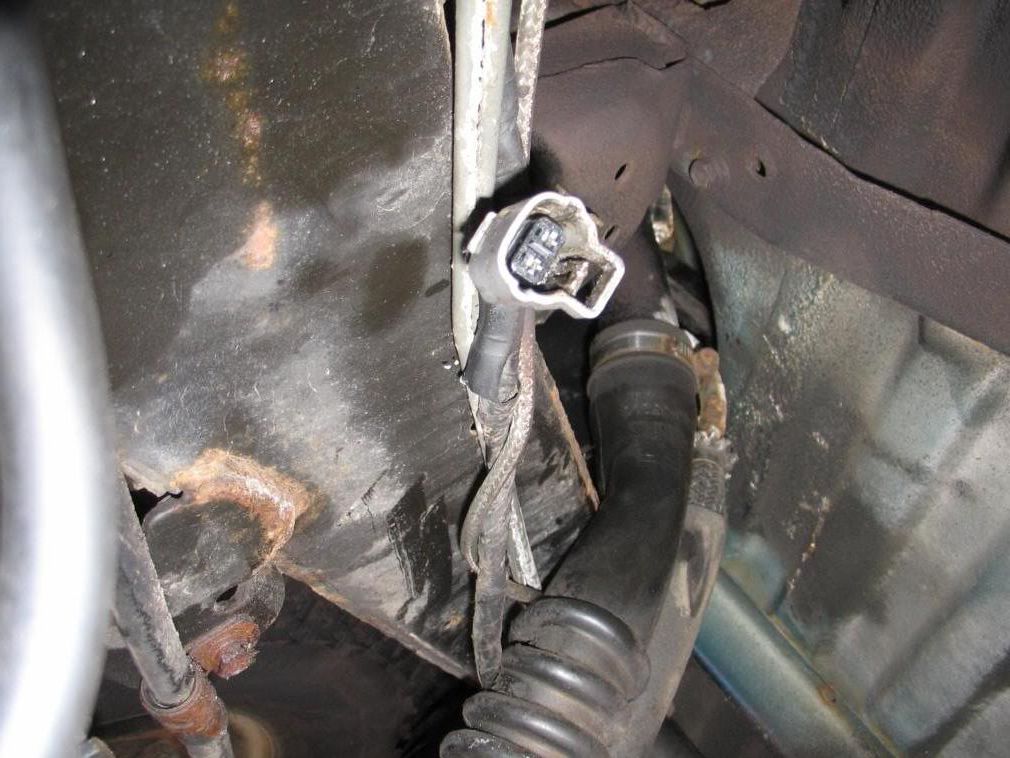
This is the fuel sensor fitting. Should have replaced, but as of now have spend about $300-400 on parts already
http://s260.photobucket.com/albums/i...t=IMG_0648.jpg
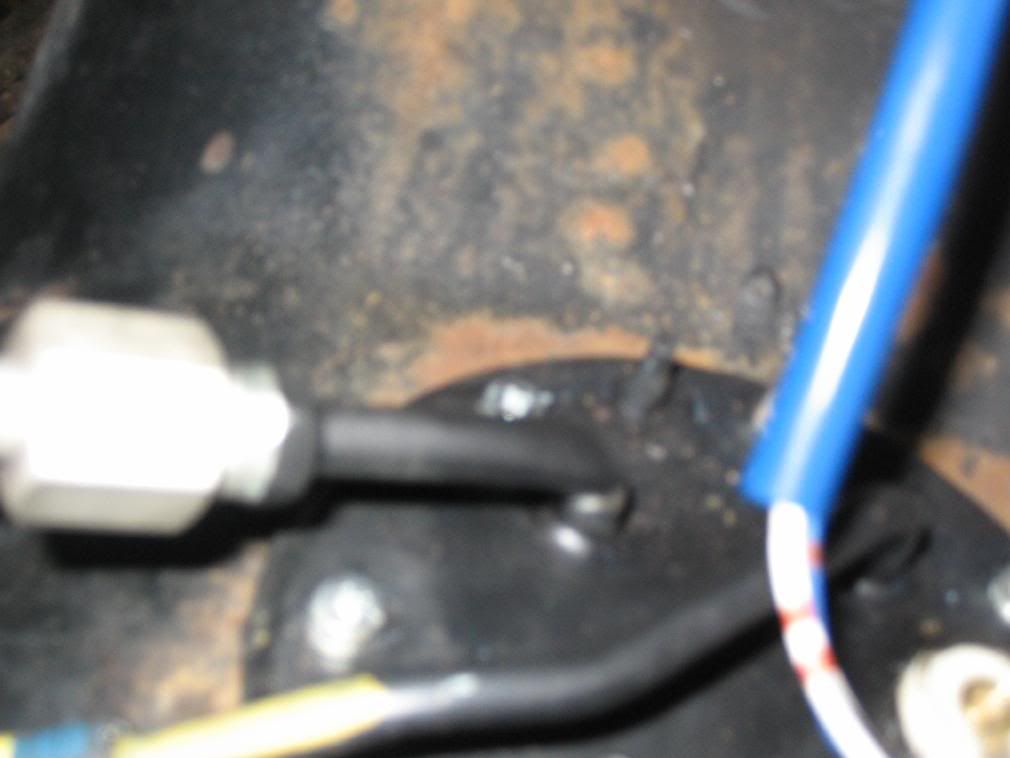
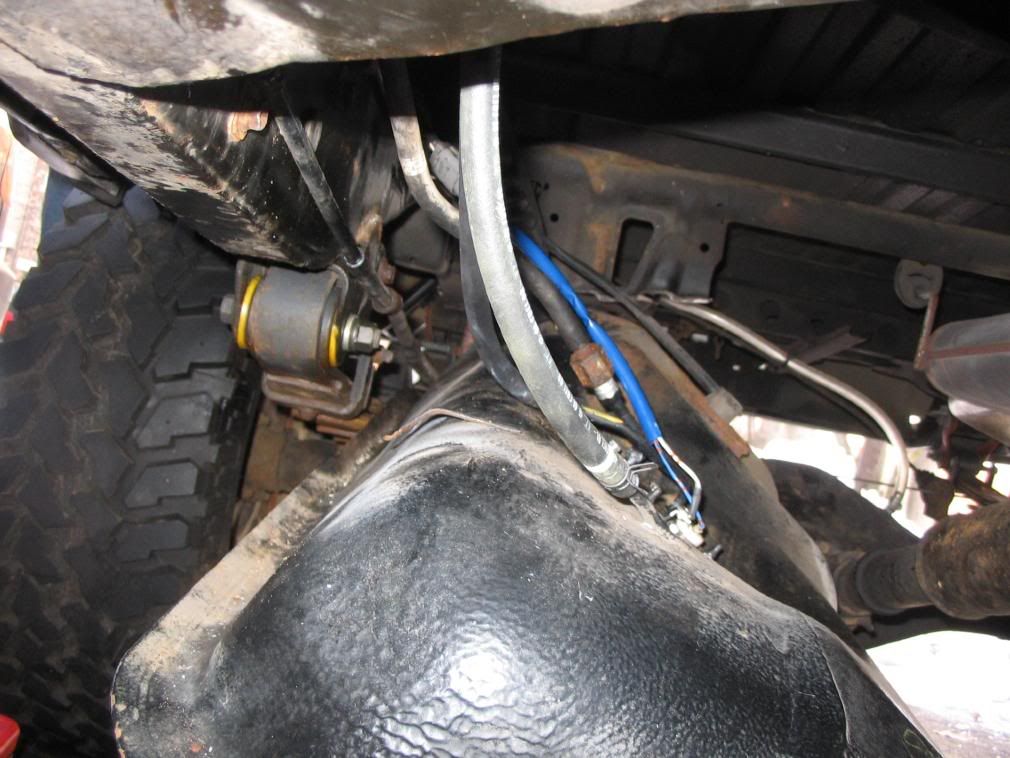
Looking down on bracket already placed. Sorry about blur. *****NOTE***** when you tighten line onto bracket (on left), the tube can very easily start to bend rotationally, so be damn careful
http://s260.photobucket.com/albums/i...t=IMG_0640.jpg
Also note it is very easy for the electrical connection to not seat right the first time...listen for subtle click, or this will happen:
http://s260.photobucket.com/albums/i...t=IMG_0646.jpg
New low pressure lines in:
http://s260.photobucket.com/albums/i...t=IMG_0638.jpg
http://s260.photobucket.com/albums/i...t=IMG_0645.jpg
But note right hand one won't hook up till tank is part way back up (ditto for electrical):
http://s260.photobucket.com/albums/i...t=IMG_0637.jpg
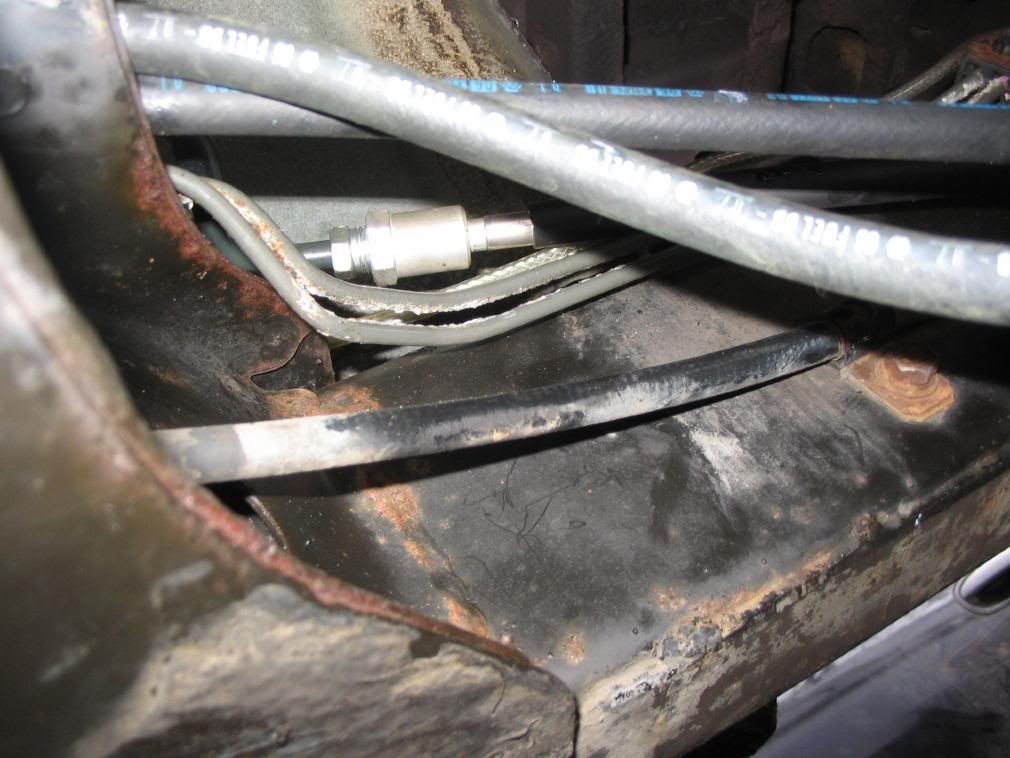
Fuel filter is a bugger, because of bolt location for shield, lots of line rust, and the idiot that designed this put the front of it above the cross-member. You need 14, 15, 19 mm wrenches here:
http://s260.photobucket.com/albums/i...t=IMG_0636.jpg
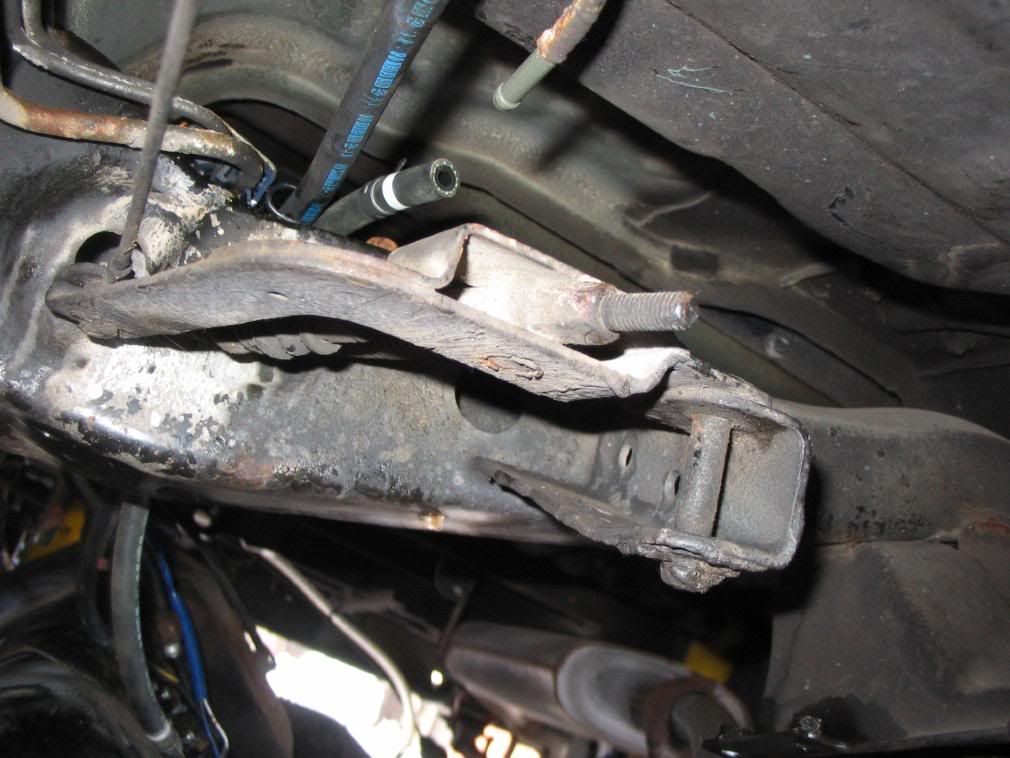
We ended up putting in the new rear hard line and new shield, but were unable to get the fuel filter off without either breaking the forward line, or dropping the crossmember (which we couldn't do because of time constraints):
http://s260.photobucket.com/albums/i...t=IMG_0642.jpg
http://s260.photobucket.com/albums/i...t=IMG_0643.jpg
But it works! So either I will visit the stealership mechanic, or do the crossmember drop later (I have been looking for an excuse for a BudBuilt Crossmember...)
So, needed to get hard lines for before and after fuel filter, hoses for low pressure links between low pressure return hard lines (the hoses were a rip off- about $25 each, and you could just use decent fuel line hose), and the rubber covered hard line to go between the fuel pump bracket and the high pressure line running forward (this twisty bastard - in the middle of the picture below - cost $60!)
http://s260.photobucket.com/albums/i...t=IMG_0635.jpg
Much easier this go-round as we knew what we were doing, plus the gas was already out of the tank
http://s260.photobucket.com/albums/i...t=IMG_0649.jpg
This is the fuel sensor fitting. Should have replaced, but as of now have spend about $300-400 on parts already
http://s260.photobucket.com/albums/i...t=IMG_0648.jpg
Looking down on bracket already placed. Sorry about blur. *****NOTE***** when you tighten line onto bracket (on left), the tube can very easily start to bend rotationally, so be damn careful
http://s260.photobucket.com/albums/i...t=IMG_0640.jpg
Also note it is very easy for the electrical connection to not seat right the first time...listen for subtle click, or this will happen:
http://s260.photobucket.com/albums/i...t=IMG_0646.jpg
New low pressure lines in:
http://s260.photobucket.com/albums/i...t=IMG_0638.jpg
http://s260.photobucket.com/albums/i...t=IMG_0645.jpg
But note right hand one won't hook up till tank is part way back up (ditto for electrical):
http://s260.photobucket.com/albums/i...t=IMG_0637.jpg
Fuel filter is a bugger, because of bolt location for shield, lots of line rust, and the idiot that designed this put the front of it above the cross-member. You need 14, 15, 19 mm wrenches here:
http://s260.photobucket.com/albums/i...t=IMG_0636.jpg
We ended up putting in the new rear hard line and new shield, but were unable to get the fuel filter off without either breaking the forward line, or dropping the crossmember (which we couldn't do because of time constraints):
http://s260.photobucket.com/albums/i...t=IMG_0642.jpg
http://s260.photobucket.com/albums/i...t=IMG_0643.jpg
But it works! So either I will visit the stealership mechanic, or do the crossmember drop later (I have been looking for an excuse for a BudBuilt Crossmember...)
Dec 20, 2007 | 07:35 AM
#26
Thread Starter
Registered User
Joined: Oct 2006
Posts: 380
Likes: 1
Oops
Part 2
OK, so got it about 90% done, and more importantly running. Yahoo! Just before the snow and rain restarted.
So, needed to get hard lines for before and after fuel filter, hoses for low pressure links between low pressure return hard lines (the hoses were a rip off- about $25 each, and you could just use decent fuel line hose), and the rubber covered hard line to go between the fuel pump bracket and the high pressure line running forward (this twisty bastard - in the middle of the picture below - cost $60!)
Much easier this go-round as we knew what we were doing, plus the gas was already out of the tank
This is the fuel sensor fitting. Should have replaced, but as of now have spend about $300-400 on parts already
Looking down on bracket already placed. Sorry about blur. *****NOTE***** when you tighten line onto bracket (on left), the tube can very easily start to bend rotationally, so be damn careful
Also note it is very easy for the electrical connection to not seat right the first time...listen for subtle click, or this will happen:
New low pressure lines in:
But note right hand one won't hook up till tank is part way back up (ditto for electrical):
Fuel filter is a bugger, because of bolt location for shield, lots of line rust, and the idiot that designed this put the front of it above the cross-member. You need 14, 15, 19 mm wrenches here:
We ended up putting in the new rear hard line and new shield, but were unable to get the fuel filter off without either breaking the forward line, or dropping the crossmember (which we couldn't do because of time constraints):
But it works! So either I will visit the stealership mechanic, or do the crossmember drop later (I have been looking for an excuse for a BudBuilt Crossmember...)
Last edited by Squiddy; Dec 20, 2007 at 07:41 AM.
Jan 5, 2008 | 11:15 AM
#28

Registered User
Joined: Jan 2008
Posts: 1
Likes: 0
My shop told me that I need to replace the fuel sending unit. Is that what you have done here? If so, how much did you pay for the unit. They quoted me $400 for the part from the 'stealership'. I have a 1989 22re 4-cylinder pickup.
Any info would be great.
WOuld you be willing to email me so that I can ask a couple of questions?
ignitethewill@hotmail.com
Thanks!
Matt
Any info would be great.
WOuld you be willing to email me so that I can ask a couple of questions?
ignitethewill@hotmail.com
Thanks!
Matt
Jan 19, 2008 | 11:24 AM
#29
Thread Starter
Registered User
Joined: Oct 2006
Posts: 380
Likes: 1
Matt - sorry, haven't checked the thread in a bit. The sending unit should be what I erroneosly listed as "sensor" in the 3rd pic from top here --- sends signal to guage. 400 bucs is a lot, and can likely get it online from far less. It's conceivable that they meant the fuel pump bracket, but doubt it. If you have a carb and not fuel injection, the pump is up at the engine. Just PM me here with any questions.
Feb 3, 2008 | 09:22 AM
#30
Thread Starter
Registered User
Joined: Oct 2006
Posts: 380
Likes: 1
I've gotten a bunch of PMs with similar questions regarding parts, etc, so I thought I would post a open reply:
Several options for the parts --
1) I ended up doing it all through my local Toyota dealership. While a bit more expensive, they knew exactly what they were doing, and I ended up doing three separate orders as things evolved. I'd recommend this route. Basically, call them with VIN number in hand (parts vary by model, etc). If you need to do it, plan on replacing basically everything ... probably worth doing the sender at the same time.
2) On line through a cheaper, but still Toyota, source. I use Mossy Toyota in San Diego -- takes a bit longer, but dirt cheap.
3) On line through wholesale vender like Drivewire or Autopartswarehouse. However they won't have all the parts, so trickier. Drivewire generally does a great job, APW seems a bit hit or miss.
I will look up the parts tonight and list them in a bit.
Nov 26, 2008 | 11:46 AM
#31
Thread Starter
Registered User
Joined: Oct 2006
Posts: 380
Likes: 1
Oy vey. Whoever suggested either golf tees or parafilm to plug the (unpressurized) fuel lines should be beaten with a pipe. Neither worked - the former leaked like crazy, the latter just gets dissolved by the gas. On to plan b, whatever that is...
Dec 12, 2008 | 05:27 AM
#32
Registered User
Joined: Jun 2008
Posts: 735
Likes: 1
From: Abington, PA
I actually have to replace the hard lines for the front and rear of the fuel filter. Would you happen to have the part #'s still for those pieces? Also how difficult was it to replace those lines specifically? Am I going to have to go through everything that you have when I know these hard lines are shot?

Thread
Thread Starter
Forum
Replies
Last Post
DiZ86
Pre 84 Trucks
12
Dec 27, 2015 09:33 PM
skoti89
General Vehicle Related Topics (Non Year Related)
4
Sep 11, 2015 07:46 AM
pyramid
86-95 Trucks & 4Runners
10
Jul 30, 2015 10:05 AM
pyramid
General Vehicle Related Topics (Non Year Related)
6
Jul 29, 2015 06:53 AM


