
2nd gen 4Runner rear quarter panel hack
 Nov 14, 2010 | 07:30 PM
#1

Thread Starter
Registered User
Joined: Oct 2010
Posts: 37
Likes: 0
From: kootenays, BC
2nd gen 4Runner rear quarter panel hack
Hey guys, I did a search but didn't come up with what I'm looking for (doesn't mean I didn't overlook it though), so I thought I'd post in here. Please move if I'm not posting in the right area.
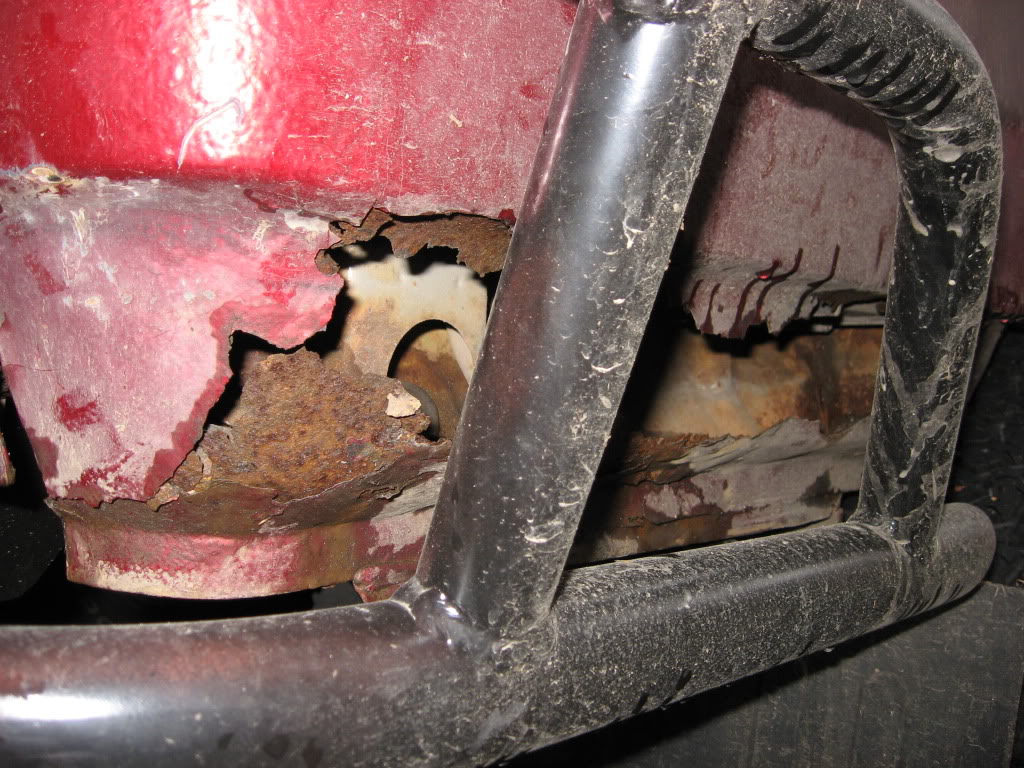
I've got a 2nd gen 4Runner with typical wheel well and quarter panel rust in some spots. The worst is under/behind the big chrome bumper end caps in the rear, there isn't much metal left back there!
I'm thinking of just removing the stock bumper skin, cutting out the rusted section behind the end caps and capping it off with 20g sheet metal to the (still solid) inner fender. I'm not too concerned with looks as I plan on using bedliner on the lower 1/3rd of the quarter panels, rockers, doors and fenders once the rust repair is all done, should cover any minor imperfections.
Has anyone done this, any problems along the way or things to look out for and of course, if anyone has any pictures please share!
Nov 15, 2010 | 06:06 PM
#2
Registered User
Joined: Jun 2006
Posts: 2,243
Likes: 5
From: Calgary, AB
I made patch panels for mine, but I don't have any pictures, sorry.
Simply put, I made a template from cardboard, cut out the sheet metal, formed it to fit, then used panel bonding adhesive (http://solutions.3m.com/wps/portal/3...glQ4QF5QHMX1bl) and some pop rivets to hold the panel in place while the adhesive set up.
Far easier than welding, but you have to have at least an inch of good, solid, clean metal to bond to.
Nov 15, 2010 | 09:15 PM
#3
Thread Starter
Registered User
Joined: Oct 2010
Posts: 37
Likes: 0
From: kootenays, BC
I made patch panels for mine, but I don't have any pictures, sorry.
Simply put, I made a template from cardboard, cut out the sheet metal, formed it to fit, then used panel bonding adhesive (http://solutions.3m.com/wps/portal/3...glQ4QF5QHMX1bl) and some pop rivets to hold the panel in place while the adhesive set up.
Far easier than welding, but you have to have at least an inch of good, solid, clean metal to bond to.
Simply put, I made a template from cardboard, cut out the sheet metal, formed it to fit, then used panel bonding adhesive (http://solutions.3m.com/wps/portal/3...glQ4QF5QHMX1bl) and some pop rivets to hold the panel in place while the adhesive set up.
Far easier than welding, but you have to have at least an inch of good, solid, clean metal to bond to.
Nov 16, 2010 | 05:26 PM
#4
Registered User
Joined: Jun 2006
Posts: 2,243
Likes: 5
From: Calgary, AB
This is the only shot I have.
It's held up really well. Make sure both surfaces are clean and have good tooth (I used a 36 grit flap wheel), that both surfaces have the panel bonding adhesive on them, and that you clamp the panels (or rivet them) tightly, but not so tightly that it all squeezes out. The stuff I used has small glass beads in it to keep you from overdoing it. But it's still possible to overclamp and crush the beads.
It's held up really well. Make sure both surfaces are clean and have good tooth (I used a 36 grit flap wheel), that both surfaces have the panel bonding adhesive on them, and that you clamp the panels (or rivet them) tightly, but not so tightly that it all squeezes out. The stuff I used has small glass beads in it to keep you from overdoing it. But it's still possible to overclamp and crush the beads.
Nov 17, 2010 | 10:37 AM
#5
Thread Starter
Registered User
Joined: Oct 2010
Posts: 37
Likes: 0
From: kootenays, BC
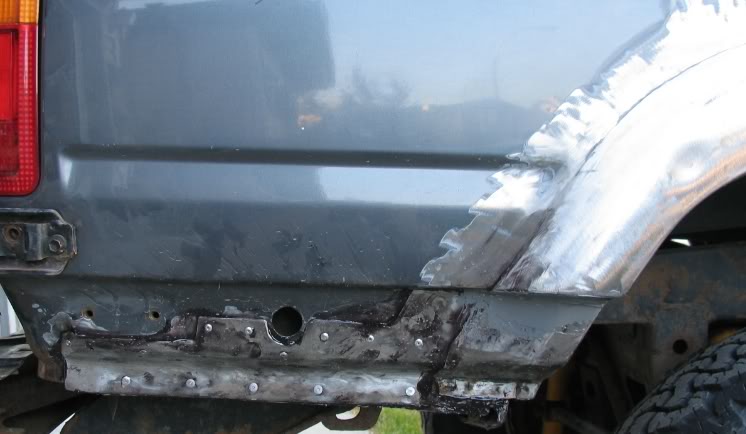
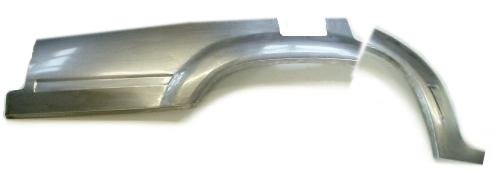
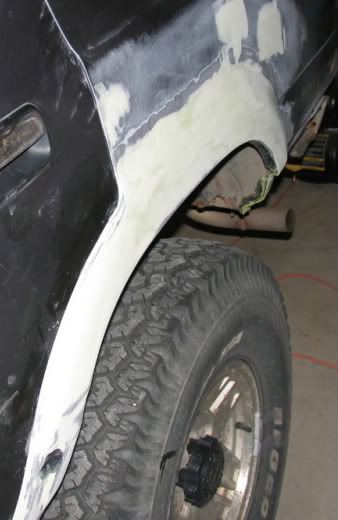
Looks good, but I think I'm going to hack that part off completely. There's enough rust under there to make any patching a temporary solution. I'm looking at having some of these welded in, which should take care of the other rust I've got and give me a good surface to re-mount the factory tire carrier:
http://www.alfaparts.net/pics/toyota/t4r/t4r5.htm
http://www.alfaparts.net/pics/toyota/t4r/t4r5.htm
Nov 17, 2010 | 10:41 AM
#6
Thread Starter
Registered User
Joined: Oct 2010
Posts: 37
Likes: 0
From: kootenays, BC
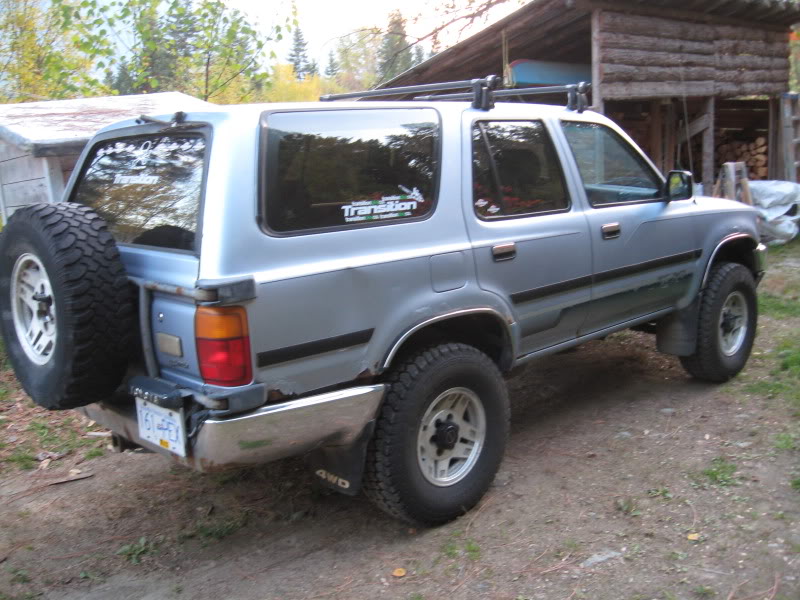
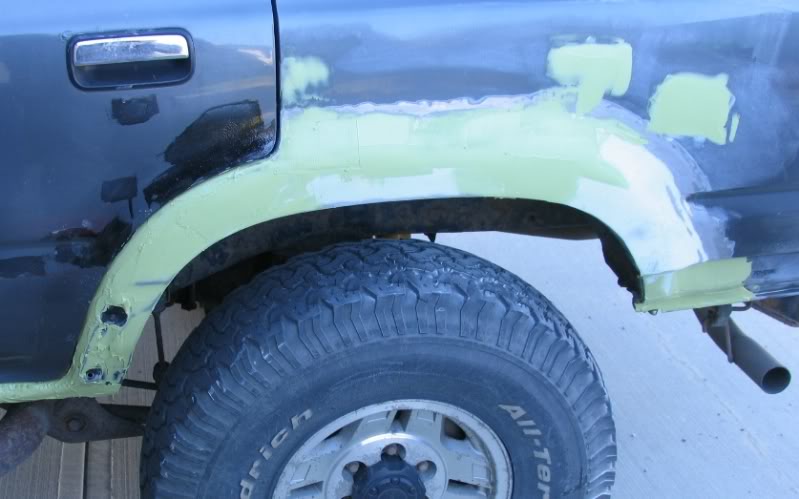
This is what I'm dealing with, typical wheelwell rust in the back quarter panels. What you can't see is that it's pretty much all swiss cheese behind the chrome bumper cap. Sorry about the photo, it came with a bunch of really ugly stickers and a roof rack I took off immediately after purchasing a few months ago:
Nov 17, 2010 | 11:29 AM
#7
Contributing Member
Joined: Aug 2005
Posts: 984
Likes: 3
From: Roanoke Va
Looks good, but I think I'm going to hack that part off completely. There's enough rust under there to make any patching a temporary solution. I'm looking at having some of these welded in, which should take care of the other rust I've got and give me a good surface to re-mount the factory tire carrier:
http://www.alfaparts.net/pics/toyota/t4r/t4r5.htm
http://www.alfaparts.net/pics/toyota/t4r/t4r5.htm
Trending Topics
Nov 17, 2010 | 04:29 PM
#8


if you can wait ? ..
We http://www.toyotafiberglass.com are building some fiberglass replacements .. (truck is in the lot now) We are very busy though and wont get to this untill the new year ..
currently we have a weld in of our own ..

much better than that other stuff
.
We http://www.toyotafiberglass.com are building some fiberglass replacements .. (truck is in the lot now) We are very busy though and wont get to this untill the new year ..
currently we have a weld in of our own ..
much better than that other stuff
.
 Nov 18, 2010 | 02:27 PM
#11

Banned
Joined: Oct 2008
Posts: 3,743
Likes: 2
From: Brier, Washington
Im not going to buy your fiberglass lol
lol
I dont mind the rust for now. I will probably end up hacking off the lower part to raise the bumper line and replace the metal i need to on the part i dont cut off.
I think AxleIke or someone show a bunch of pics in his write up. Someone correct me if im wrong.
lolI dont mind the rust for now. I will probably end up hacking off the lower part to raise the bumper line and replace the metal i need to on the part i dont cut off.
I think AxleIke or someone show a bunch of pics in his write up. Someone correct me if im wrong.
Nov 18, 2010 | 04:15 PM
#12
Thread Starter
Registered User
Joined: Oct 2010
Posts: 37
Likes: 0
From: kootenays, BC
If I'm wrong, and the arch weld-ins do replace the dog-leg section then sign me up, I'd consider a pair of those in a heartbeat...you're a hell of a lot closer than Quebec too!
Im not going to buy your fiberglass lol
I dont mind the rust for now. I will probably end up hacking off the lower part to raise the bumper line and replace the metal i need to on the part i dont cut off.
I think AxleIke or someone show a bunch of pics in his write up. Someone correct me if im wrong.
lolI dont mind the rust for now. I will probably end up hacking off the lower part to raise the bumper line and replace the metal i need to on the part i dont cut off.
I think AxleIke or someone show a bunch of pics in his write up. Someone correct me if im wrong.
Nov 18, 2010 | 07:47 PM
#15
Thread Starter
Registered User
Joined: Oct 2010
Posts: 37
Likes: 0
From: kootenays, BC
cool, seems like a good way to go. I sent corey a PM asking a few questions about the dog-leg area behind the rear doors. Did you pop-rivet the arch patches as well as use the body panel adhesive, or was the adhesive enough?
Nov 18, 2010 | 08:16 PM
#16
Registered User
Joined: Jun 2006
Posts: 2,243
Likes: 5
From: Calgary, AB
I used nothing but adhesive. The pop rivets were only on that patch panel.
With the 3M PBA, it's said that the bond will more than likely tear the metal before the adhesive gives out.
I cut the rusty area out, cleaned up about 1" of paint from the bodypanel and from the back of the patch panel, coated with the 3M and clamped them together, forming a "lap joint".
I smoothed the edges out with a flap wheel (although it would be a better idea to do that before putting the panel on...the heat of sanding can weaken the adhesive) and used Evercoat Rage Gold bodyfiller to smooth the edges.
Nov 18, 2010 | 08:46 PM
#17

Registered User
Joined: Apr 2008
Posts: 535
Likes: 2
Nice! I have more hole than body from the dog leg to the light cluster and down under the bumper. There is a 4Runner in the junk yard here with perfect panels but they want $100 for each one and $100 to cut them out.
I'd love to replace thqt whole section from below bumper up to the crease line and over to the dog leg with fibreglass.
For $75 a side!
I'd love to replace thqt whole section from below bumper up to the crease line and over to the dog leg with fibreglass.
For $75 a side!


