
22re build up
 Oct 17, 2008 | 02:44 PM
#1
Thread Starter
Registered User
Joined: Apr 2008
Posts: 301
Likes: 0
From: bend oregon
22re build up
okay so me and apalmer1 are building up a 22re this is going to be a budget build yet we want some power! we already have the intake and exhaust taken care of, but it needs to breath better so what tolerances could we get away with when we bore the intake and exhaust on the head?
next would be decking the head. how much could you actully take off? i mean there isnt much there to shave.
so far we have totally dismantaled the engine cause we didnt know what shape it was in plus its kinda nice getting familiar with something that important in our lives lol. the bores looked good and the pistons are useable. apalmer1 should be posting some pics later today, if not i will.
 (Shucks has it!)
Oct 18, 2008 | 10:38 AM
(Shucks has it!)
Oct 18, 2008 | 10:38 AM
#3
Thread Starter
Registered User
Joined: Apr 2008
Posts: 301
Likes: 0
From: bend oregon
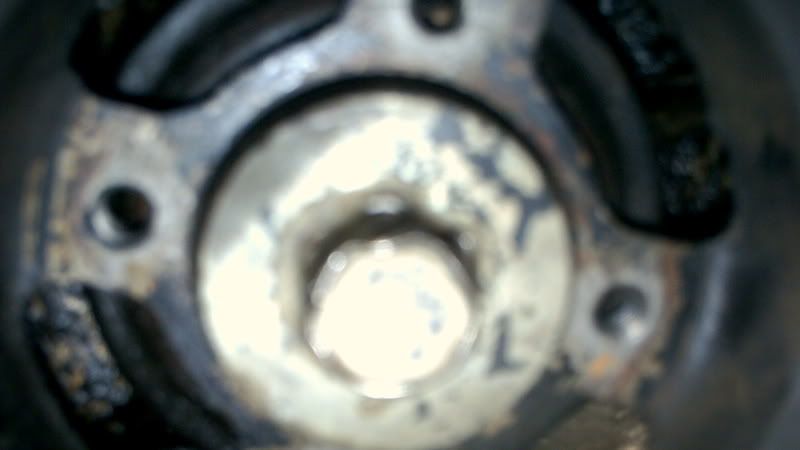
oh and to anybody else that reads this how should i go about taking out a stripped crank bolt? the head of it is stripped but the threads are fine.
 Oct 18, 2008 | 05:49 PM
#4
Registered User
Joined: Feb 2008
Posts: 2,805
Likes: 1
From: Salem, OR
 Tells you whether or not you'll need to get new bearings
Just the head? Hmm...have you tried some vice grips? Maybe grind the edges down or use a 6 point socket 17mm socket. Good luck!
Oct 18, 2008 | 05:53 PM
#5
Registered User
Joined: Oct 2007
Posts: 1,521
Likes: 0
From: Hopkins, MN
Vise grip, pound on a slightly smaller 12 point, or weld on a new bolt? Careful for heat on the weld one...maybe that is a bad idea here...may not want to pound on the crank either....sooooo....vise grip?
Trending Topics
Oct 18, 2008 | 07:13 PM
#8
Registered User
Joined: Mar 2008
Posts: 4,371
Likes: 6
From: Texas
As far as the head bolt goes you can take a nut that is a little larger, drill out the threads so its smooth and slip it over the bolt. Then weld that nut to the bolt from the top. Basically fill the hole with weld and be sure to grab some of the nut with the weld. Let it cool, tap it with a hammer a couple of times, spray some lube around the threads on the head bolt and put an open end wrench on it to take it out. I say use an open end wrench so you can see if the weld starts to break out, if it does reweld and try again. Be sure to let it cool off or it may twist.
A caveat here....... I've never done this myself but have seen it done on old Ford tractors when something like this breaks.
Luck!!!
A caveat here....... I've never done this myself but have seen it done on old Ford tractors when something like this breaks.
Luck!!!
Oct 18, 2008 | 08:28 PM
#10
Registered User
Joined: Mar 2008
Posts: 12,723
Likes: 6
From: Temecula Valley, CA
okay so me and apalmer1 are building up a 22re this is going to be a budget build yet we want some power! we already have the intake and exhaust taken care of, but it needs to breath better so what tolerances could we get away with when we bore the intake and exhaust on the head?
next would be decking the head. how much could you actully take off? i mean there isnt much there to shave.
so far we have totally dismantaled the engine cause we didnt know what shape it was in plus its kinda nice getting familiar with something that important in our lives lol. the bores looked good and the pistons are useable. apalmer1 should be posting some pics later today, if not i will.

oh and to anybody else that reads this how should i go about taking out a stripped crank bolt? the head of it is stripped but the threads are fine.
you may be able to drill the bolt and use an easy-out. or just grind the head off the bolt. or grind grooves into the head of the bolt in an x pattern... or ...
Last edited by abecedarian; Oct 18, 2008 at 08:31 PM.
Oct 18, 2008 | 08:50 PM
#11
Registered User
Joined: Oct 2008
Posts: 426
Likes: 0
From: B-TOWN, ORYGUN
from my expirences with striped bolts.. use the easy out option as a last almost hail marry attempt ( it will piss your face off real good when you break one off and have to try and re-drill through it) vise grip.. not going to work to my oppinon.. unless you have terminator sized arms... they do make sockets that have groves like an easyout in them that will grab on rounded bolts.. but i think in this case id try welding a nut to the top of the bolt, just dont go wild with the welder.. just short burst so you dont cause any warping or cracking, also put the ground as close to the bolt as you can.. possibly hold the nut on the bolt with the ground clamp. that way when a arc is struck it does not arc between main caps, crank, block, ect..
Oct 19, 2008 | 10:11 PM
#12
Thread Starter
Registered User
Joined: Apr 2008
Posts: 301
Likes: 0
From: bend oregon
by bore the intake and exhaust are you referring to the valves or porting?If you're looking to up the compression ratio, I'd rather see you do that with the pistons than milling the head. Gives you some extra head room (pun intended) if you blow a head gasket. If you do mill the head down, I wouldn't recommend more than .50mm off.so where's the pics already?
as mentioned, plastigauge is something cheap you can use to measure crank and rod bearing clearances. you cut a piece of it off, lay it on the bearing journal then torque the cap down... then remove the cap and measure the plastigauge with a scale they give you (hi-tech piece of paper you lay down next to the plastigauge) and viola! bearing clearance.
be real careful if you weld a socket or nut or other bolt to the existing bolt- you don't want to end up welding the bearing cap to the block during the process.
you may be able to drill the bolt and use an easy-out. or just grind the head off the bolt. or grind grooves into the head of the bolt in an x pattern... or ...
we basically too the best one of these 22rs
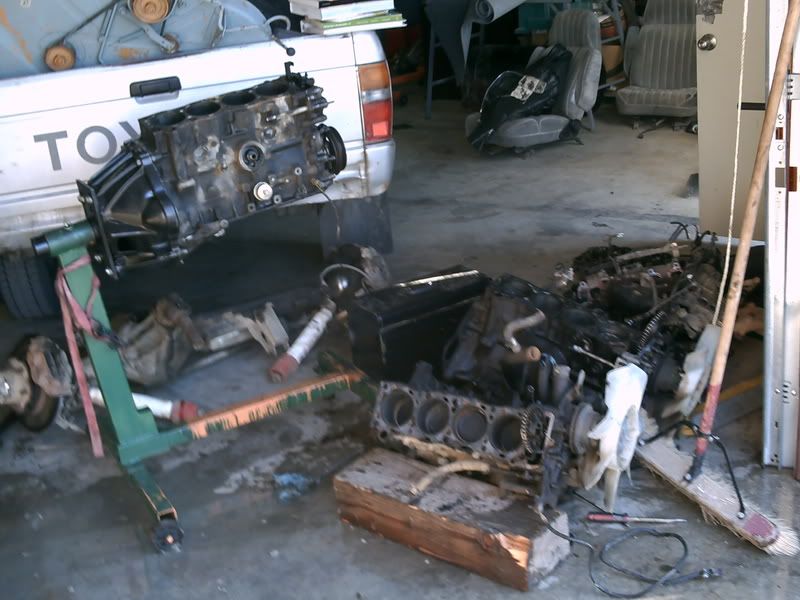
tore it down
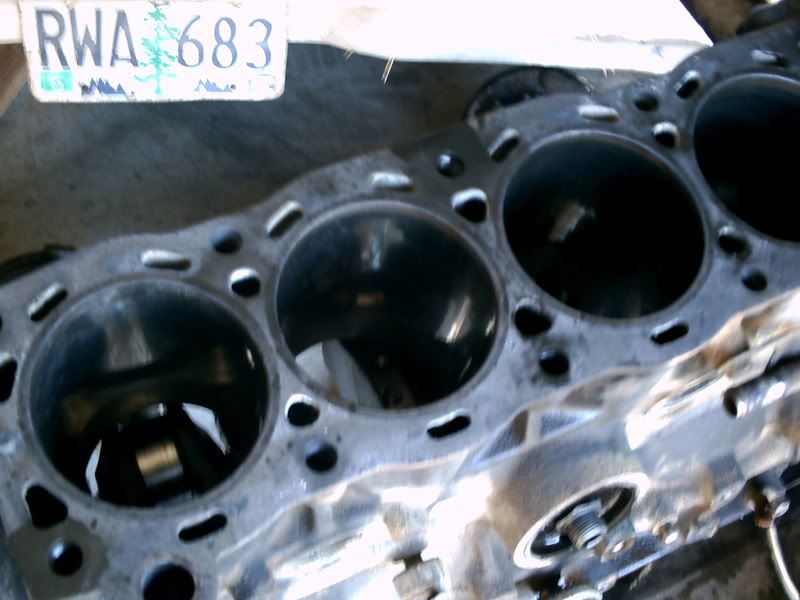
i thought the bores looked good but theres like 15 thousandths taper in them so i guess im going over on the size
the damn bolt, i think im going to weld a piece of angle iron on it and beat it with a hammer.

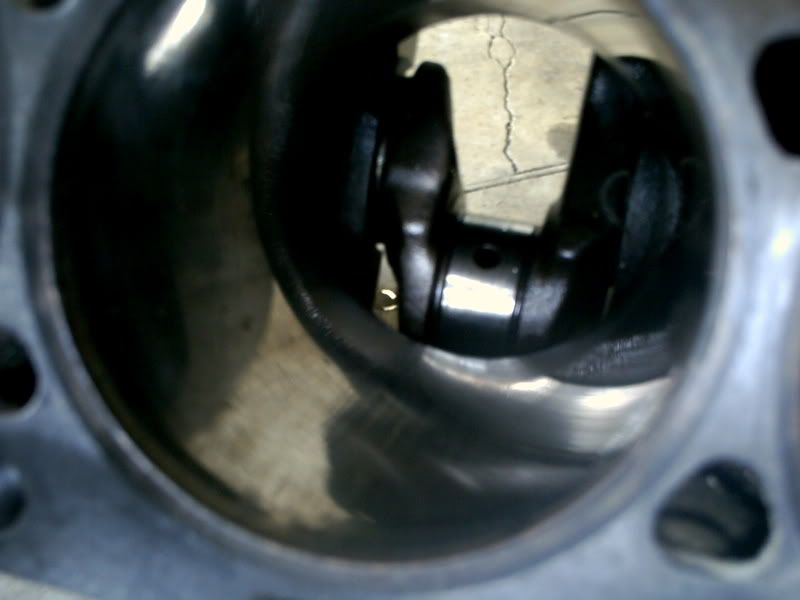
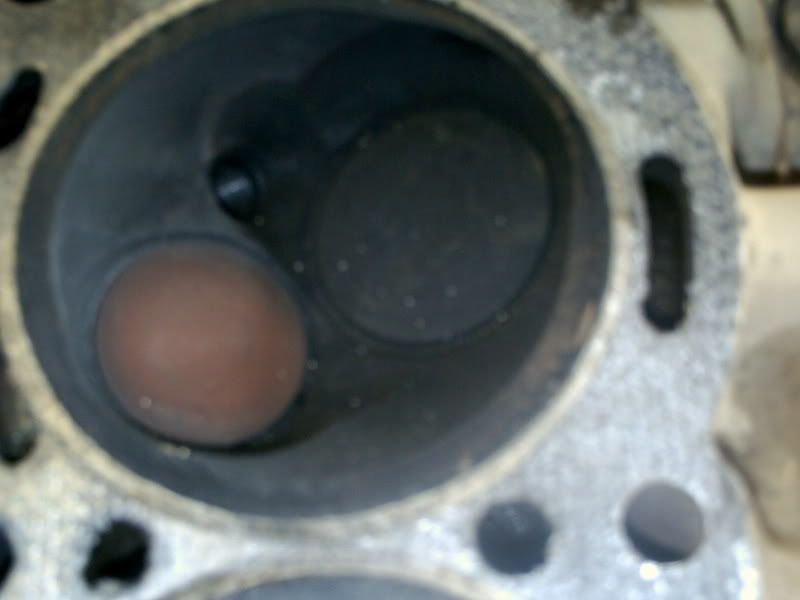
why does the exhaust valve look like this only on the #4 cyclinder?
sorry for the wait i have been busy with winterizing the shop.
 Oct 20, 2008 | 11:31 AM
#13
Thread Starter
Registered User
Joined: Apr 2008
Posts: 301
Likes: 0
From: bend oregon
http://www.engnbldr.com/head_shop.htm
does this guy do good work?
does this guy do good work?
 Oct 20, 2008 | 12:09 PM
#16
Registered User
Joined: Feb 2008
Posts: 2,805
Likes: 1
From: Salem, OR
http://www.engnbldr.com/head_shop.htm
does this guy do good work?
does this guy do good work?
Oct 20, 2008 | 02:26 PM
#19
Registered User
Joined: Mar 2008
Posts: 4,371
Likes: 6
From: Texas
Oct 20, 2008 | 04:05 PM
#20
Thread Starter
Registered User
Joined: Apr 2008
Posts: 301
Likes: 0
From: bend oregon
hahaha believe it or not i seen that one coming. as far as shattering your driveway i dunno, bloody ear drums are definatly possible


