Hey 1st Gen Pickup Crowd! **83 & Earlier ONLY** (Post your Pics Please!)

 11-10-2012, 07:55 PM
#2002
Registered User

Join Date: Oct 2012
Location: new braunfels Texas
Posts: 15
Likes: 0
Received 0 Likes
on
0 Posts
[quote=2shots1beer;51993036]@dropzone... thanks man... that carpeting job was cut and fit from a flat square piece of carpet. Started at the center where the shifter comes through then worked my way out. Brought me back to the days of high school carpeting, tinting and installing stereos in mine and friends trucks at 1:00 in the morning.
well i gotta say this def convinced me to reinstall some carpet i wasnt going to but seeing this has got me smitten and now i gotta do it. so any hints, tips tricks. im really excited about this now. but i know im missing that piece to hold the carpet up against the top of the cab under the window so ill have to make something or try and find one someone doesn want.
well i gotta say this def convinced me to reinstall some carpet i wasnt going to but seeing this has got me smitten and now i gotta do it. so any hints, tips tricks. im really excited about this now. but i know im missing that piece to hold the carpet up against the top of the cab under the window so ill have to make something or try and find one someone doesn want.
11-13-2012, 06:42 AM
#2003
Registered User
Join Date: Sep 2012
Location: San Diego
Posts: 90
Likes: 0
Received 0 Likes
on
0 Posts
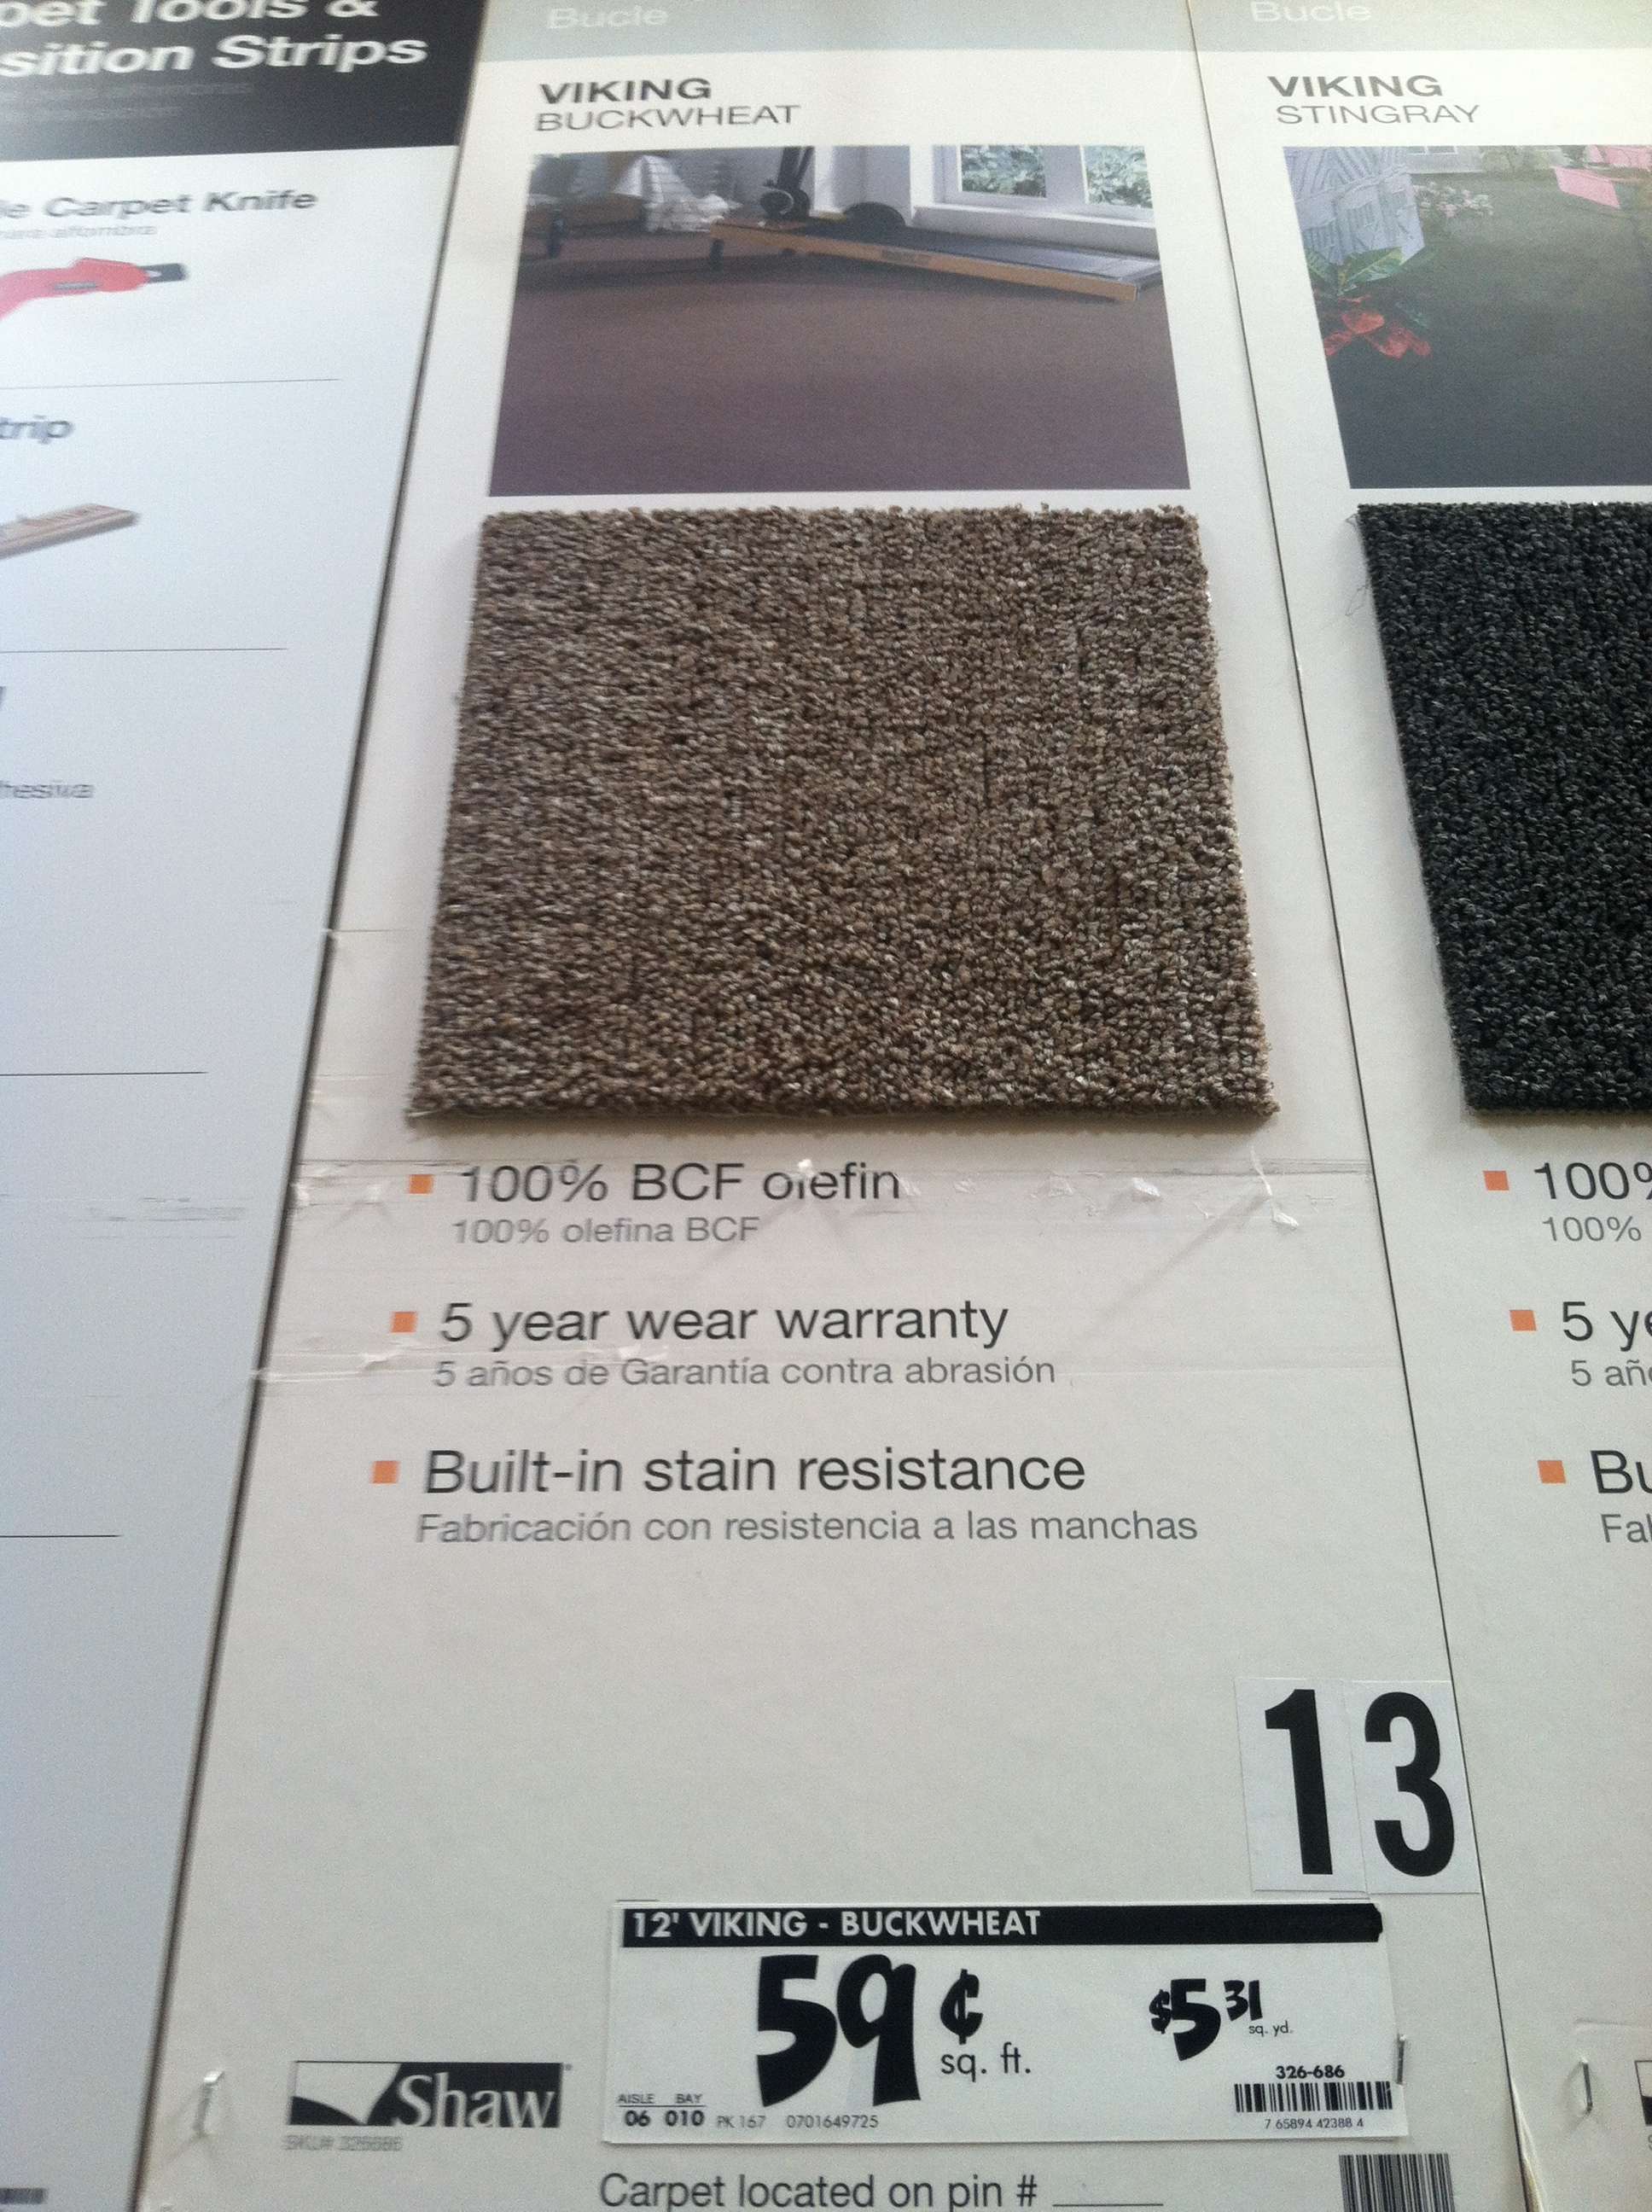
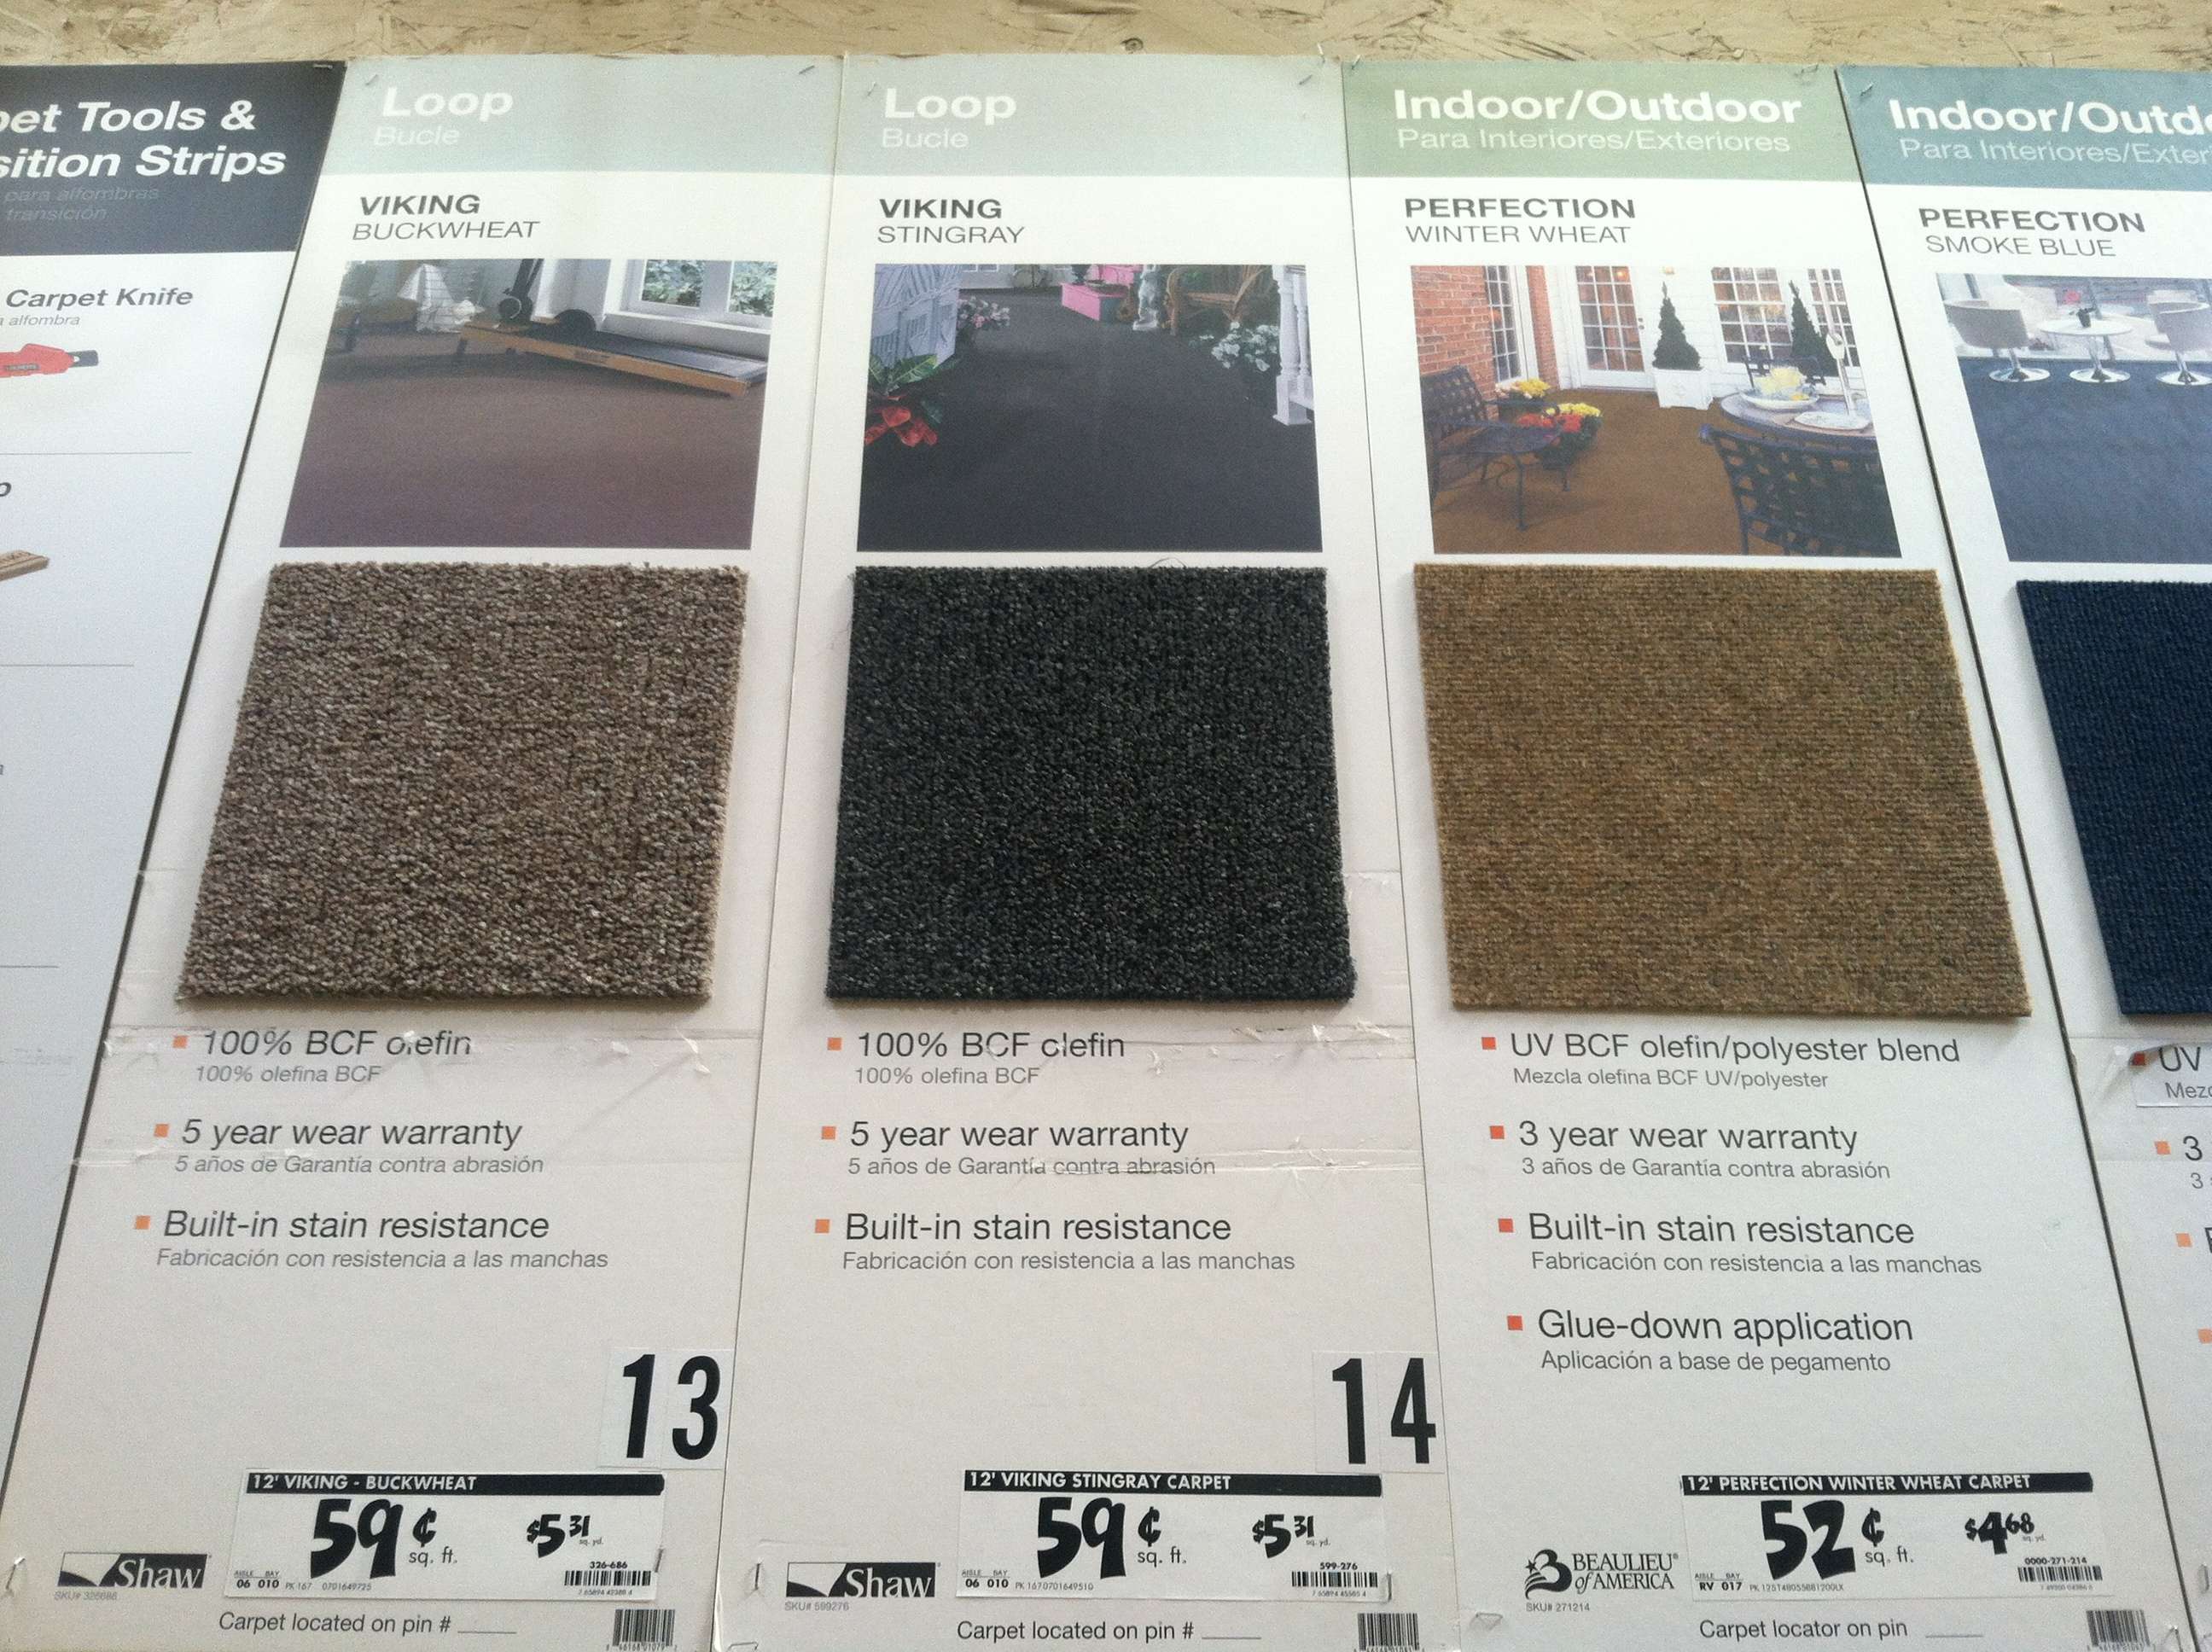
Hope I’m not too late here. The carpet I used was purchased at Home Depot at a whoppin’ 59 cents a square foot. The downfall is it only comes in 12’ widths. I needed a 6’X6’ and I ended up buying a 6’X12’ because they wouldn’t sell it to me 6’X6’. So if you know someone who wants to do the same it would be beneficial to split it, otherwise you have plenty to screw up and do it again (which I ended up doing). I particular used the first photo of Viking Buckwheat, Buckwheat being the color. These Viking carpets are designed to be used indoor/outdoor and promoted for indoor/outdoor patios, very durable. Be sure to replace the pad to keep noise and engine heat down in the cab. As for the piece you refer too holding the carpet behind the seats. In my photo that piece is actually doing nothing, it’s there to hold a storage bag on snaps which I don’t have in. The carpeting itself is being held up by good ol’ carpet adhesive also purchased at Home Depot.
As for tips, I found as I went along that the Gorilla double sided carpet tape works well for fine tune sticking (areas that the carpet adhesive didn’t take to well. Let the paste adhesive get tacky before applying pad and carpet. I started in the center where the shifter comes through and worked my way out lining things up like the seatbelts mounts, seat mounts and the edges near doors, cutting and fitting as I encountered each thing. You’ll want the piece of carpet to be larger than the entire area so you know it’ll reach the edges when you get there. I would not use your old carpet as a template because you’ll find that no matter how accurate you think you are that it won’t line up once you start applying.
Final tip. Remove the gas pedal and make an incision where the stop bolt comes through first. You want to do this before making the incision for where the gas pedal actually mounts. When making the incision for the gas pedal, this was the most difficult part of the whole process as you have to be crafty in knowing the pedal is going to need an angel to go down, which means the incision needs to be slightly behind where it actually mounts to the floor. You’ll see what I mean when you get in there!
Good luck and be sure to post a pic when you’re all done!
Sorry for the lengthily reply.
Last edited by 2shots1beer; 11-13-2012 at 06:46 AM.
11-13-2012, 08:48 AM
#2005
yes it is vulnerable down there but ill prbably mount this one as a rear facing so i have light all around me. before a new bar comes i will be doing a alternator upgrade or take it to my local guy to swap out the guts for more amperage. im not sure yet haha.
11-13-2012, 05:54 PM
#2006
Registered User
Join Date: Oct 2012
Location: new braunfels Texas
Posts: 15
Likes: 0
Received 0 Likes
on
0 Posts
[quote=2shots1beer;51998988]Hope I�m not too late here. The carpet I used was purchased at Home Depot at a whoppin� 59 cents a square foot. The downfall is it only comes in 12� widths. I needed a 6�X6� and I ended up buying a 6�X12� because they wouldn�t sell it to me 6�X6�. So if you know someone who wants to do the same it would be beneficial to split it, otherwise you have plenty to screw up and do it again (which I ended up doing). I particular used the first photo of Viking Buckwheat, Buckwheat being the color. These Viking carpets are designed to be used indoor/outdoor and promoted for indoor/outdoor patios, very durable. Be sure to replace the pad to keep noise and engine heat down in the cab. As for the piece you refer too holding the carpet behind the seats. In my photo that piece is actually doing nothing, it�s there to hold a storage bag on snaps which I don�t have in. The carpeting itself is being held up by good ol� carpet adhesive also purchased at Home Depot.
As for tips, I found as I went along that the Gorilla double sided carpet tape works well for fine tune sticking (areas that the carpet adhesive didn�t take to well. Let the paste adhesive get tacky before applying pad and carpet. I started in the center where the shifter comes through and worked my way out lining things up like the seatbelts mounts, seat mounts and the edges near doors, cutting and fitting as I encountered each thing. You�ll want the piece of carpet to be larger than the entire area so you know it�ll reach the edges when you get there. I would not use your old carpet as a template because you�ll find that no matter how accurate you think you are that it won�t line up once you start applying.
Final tip. Remove the gas pedal and make an incision where the stop bolt comes through first. You want to do this before making the incision for where the gas pedal actually mounts. When making the incision for the gas pedal, this was the most difficult part of the whole process as you have to be crafty in knowing the pedal is going to need an angel to go down, which means the incision needs to be slightly behind where it actually mounts to the floor. You�ll see what I mean when you get in there!
Good luck and be sure to post a pic when you�re all done!
Sorry for the lengthily reply.
__________________________________________________
i appreciate it and dont worry im glad you included everything thats exactly what i needed. the more knowledge i have to go off the better ill feel doing it and im really amped now you did a great job and it looks like a million bucks, hopefully mine wont turn out to bad ill definatly need the extra 6x6 that will help me i probably wont get it the first time but with all these tips i just might. ive been having a hard time posting pictures but once i do it i will for sure try and post some.
thanks again for the help i hope im not the only one you convinced to do this.
11-14-2012, 03:29 AM
#2007
Registered User
Join Date: Dec 2007
Location: Nor Cal
Posts: 101
Likes: 0
Received 0 Likes
on
0 Posts
So how did it turn out, any interior photos?
Hope I�m not too late here. The carpet I used was purchased at Home Depot at a whoppin� 59 cents a square foot. The downfall is it only comes in 12� widths. I needed a 6�X6� and I ended up buying a 6�X12� because they wouldn�t sell it to me 6�X6�. So if you know someone who wants to do the same it would be beneficial to split it, otherwise you have plenty to screw up and do it again (which I ended up doing). I particular used the first photo of Viking Buckwheat, Buckwheat being the color. These Viking carpets are designed to be used indoor/outdoor and promoted for indoor/outdoor patios, very durable. Be sure to replace the pad to keep noise and engine heat down in the cab. As for the piece you refer too holding the carpet behind the seats. In my photo that piece is actually doing nothing, it�s there to hold a storage bag on snaps which I don�t have in. The carpeting itself is being held up by good ol� carpet adhesive also purchased at Home Depot.
As for tips, I found as I went along that the Gorilla double sided carpet tape works well for fine tune sticking (areas that the carpet adhesive didn�t take to well. Let the paste adhesive get tacky before applying pad and carpet. I started in the center where the shifter comes through and worked my way out lining things up like the seatbelts mounts, seat mounts and the edges near doors, cutting and fitting as I encountered each thing. You�ll want the piece of carpet to be larger than the entire area so you know it�ll reach the edges when you get there. I would not use your old carpet as a template because you�ll find that no matter how accurate you think you are that it won�t line up once you start applying.
Final tip. Remove the gas pedal and make an incision where the stop bolt comes through first. You want to do this before making the incision for where the gas pedal actually mounts. When making the incision for the gas pedal, this was the most difficult part of the whole process as you have to be crafty in knowing the pedal is going to need an angel to go down, which means the incision needs to be slightly behind where it actually mounts to the floor. You�ll see what I mean when you get in there!
Good luck and be sure to post a pic when you�re all done!
Sorry for the lengthily reply.
11-14-2012, 06:24 AM
#2008
Registered User
Join Date: Sep 2012
Location: San Diego
Posts: 90
Likes: 0
Received 0 Likes
on
0 Posts

 11-14-2012, 05:54 PM
#2011
Registered User
Join Date: Dec 2007
Location: Nor Cal
Posts: 101
Likes: 0
Received 0 Likes
on
0 Posts
Previous page 80, scroll toward the bottom. 
Nice 2wd CottonFog, leave the white walls, looks more authentic.
11-15-2012, 08:53 AM
#2012
Registered User
Join Date: Sep 2012
Location: San Diego
Posts: 90
Likes: 0
Received 0 Likes
on
0 Posts
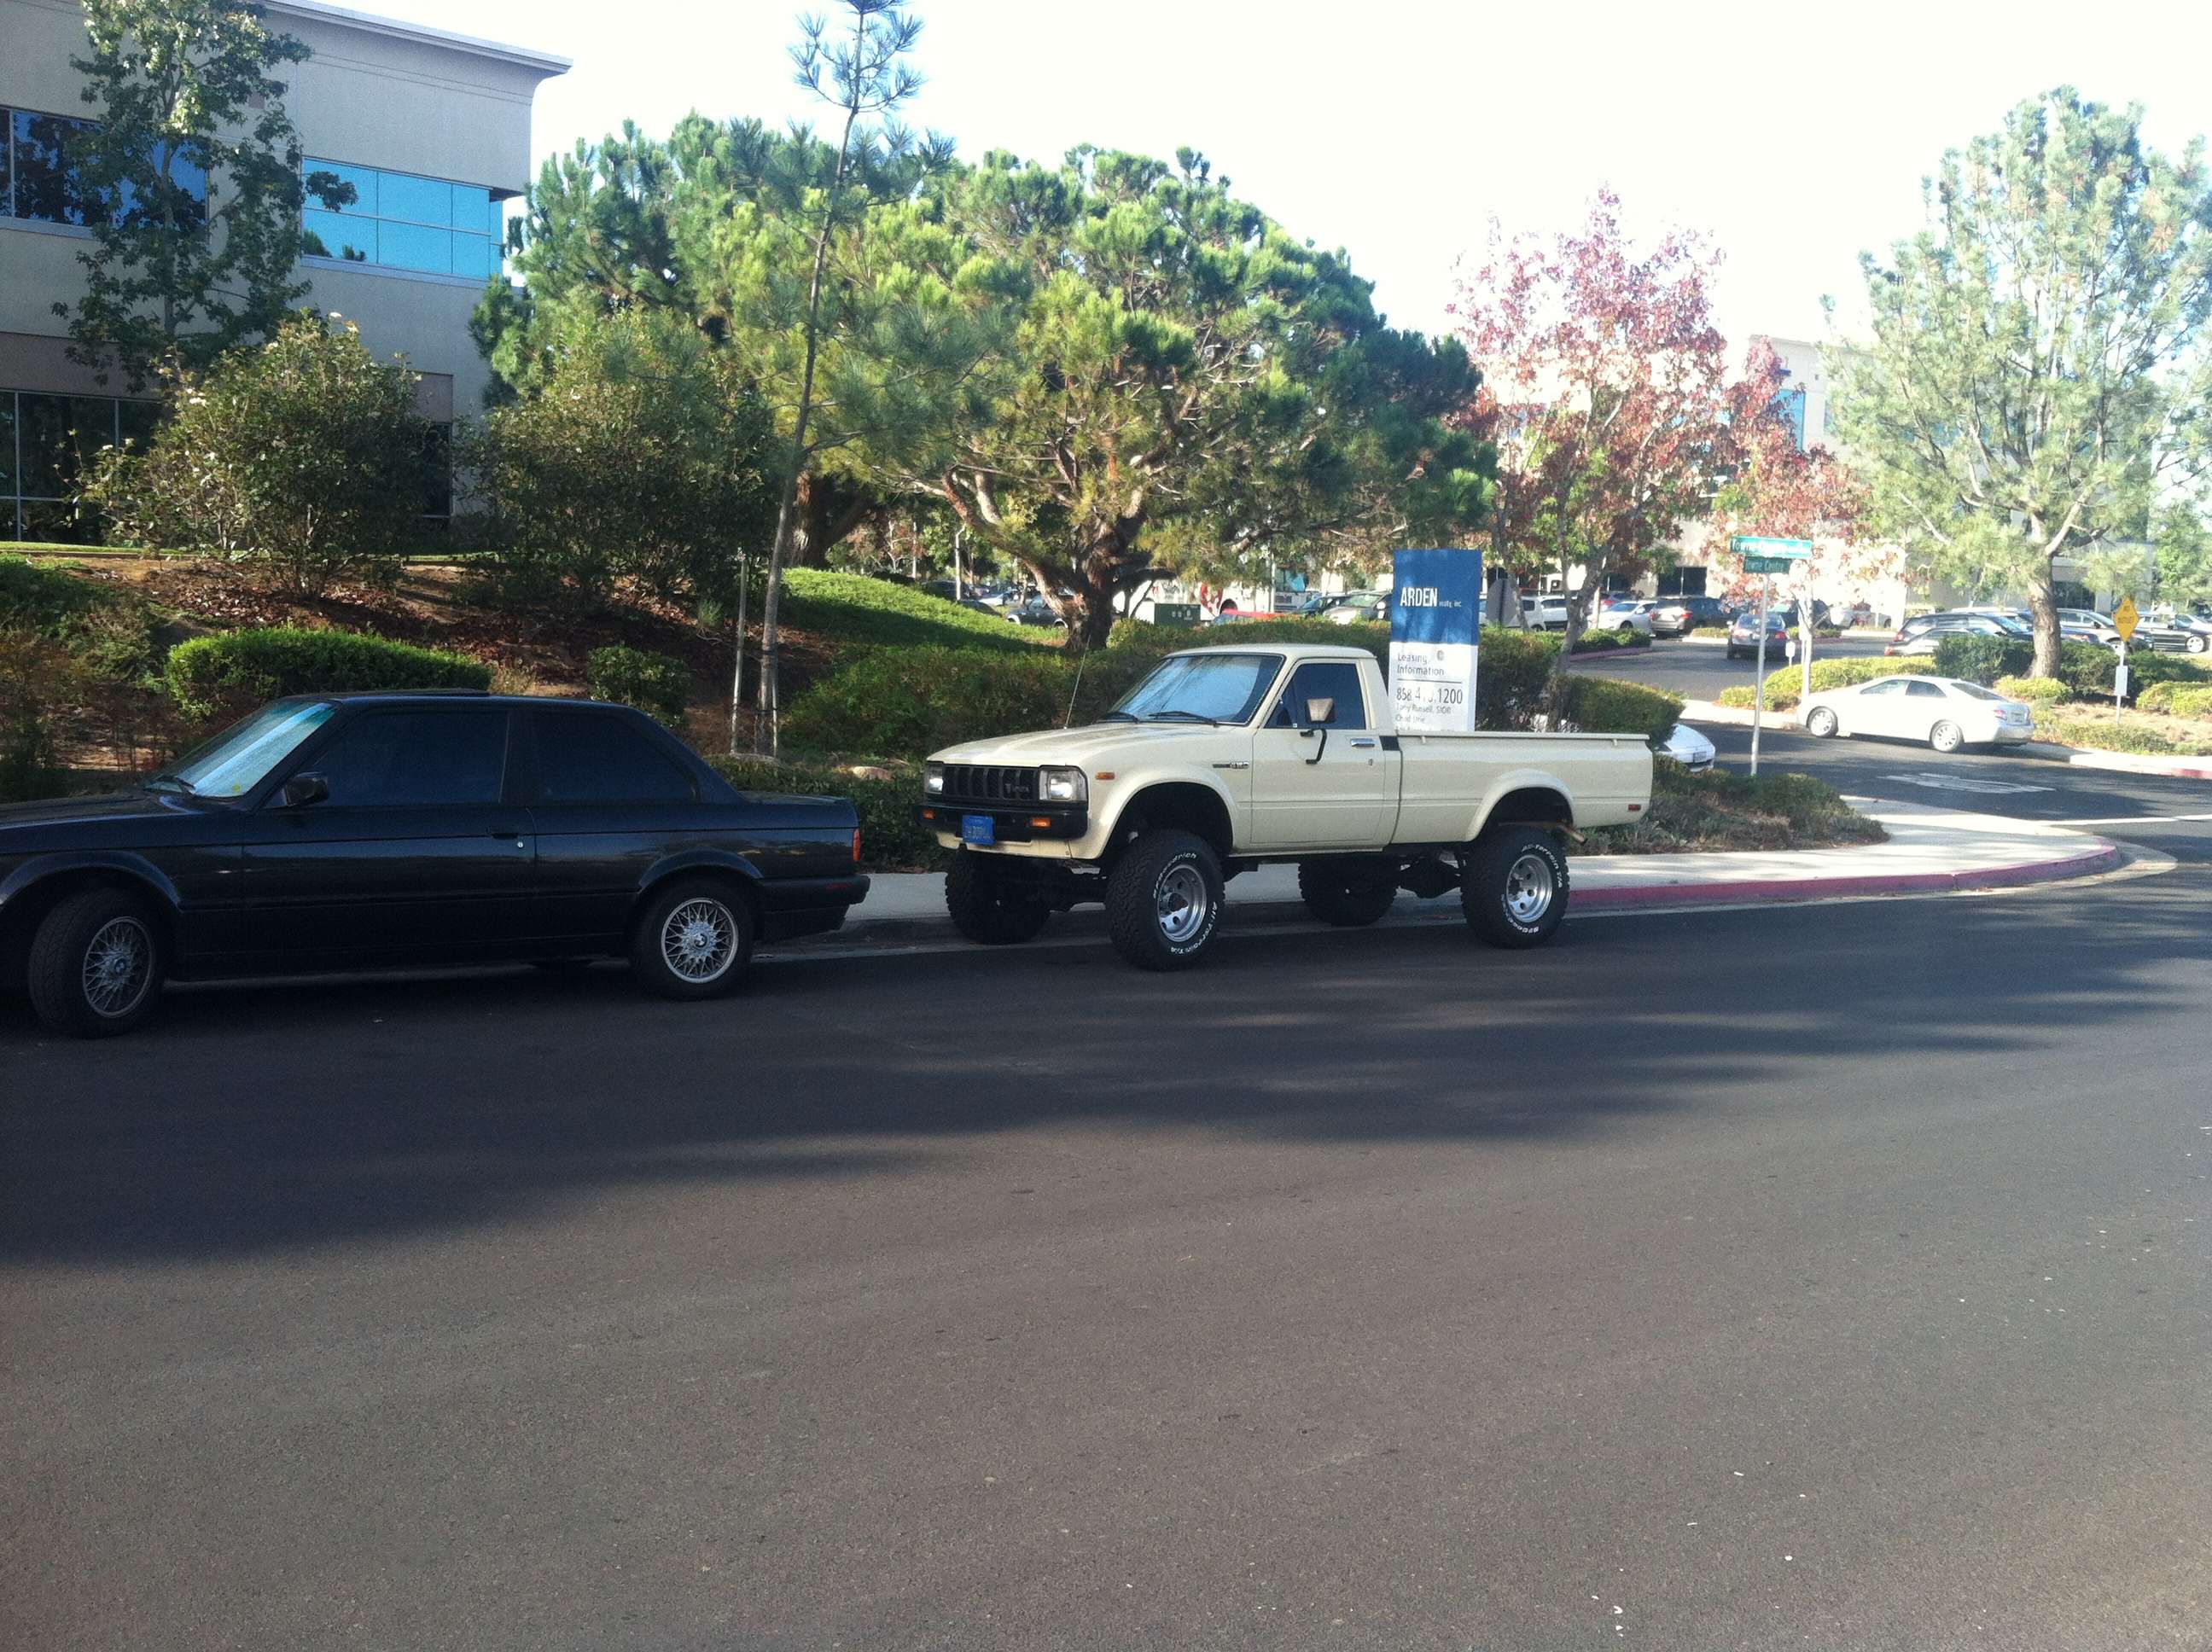
I'm with Rockalot, leave the WW. I bought my BFG's a little over a month ago. Of habit I told Discount "letters in". I've been saying that for 20 years. Then I thought about it and the next week had them flip 'em letters out. IMO it puts the whole look of the truck right back into the 80's.
...haha! I just noticed my avatar is still the letters in photo, need to update.
...haha! I just noticed my avatar is still the letters in photo, need to update.
Last edited by 2shots1beer; 11-15-2012 at 08:54 AM.
11-16-2012, 06:57 AM
#2014
Registered User
Join Date: Dec 2007
Location: Nor Cal
Posts: 101
Likes: 0
Received 0 Likes
on
0 Posts
11-16-2012, 08:21 AM
#2015
Registered User
Join Date: Sep 2012
Location: San Diego
Posts: 90
Likes: 0
Received 0 Likes
on
0 Posts
 11-16-2012, 08:24 AM
#2016
Registered User

Join Date: Mar 2010
Location: Seattle
Posts: 17
Likes: 0
Received 0 Likes
on
0 Posts
Thanks Rockalot.
That's what this one is going to be used as, daily.
I have an '84 extra cab that that has 4:88 with Detroits front and back, ome suspension. Nothing real extreme, just enough to get by.
If the economy ever comes around, I'ld like to freshen up the body and keep it relatively stock.
That's what this one is going to be used as, daily.
I have an '84 extra cab that that has 4:88 with Detroits front and back, ome suspension. Nothing real extreme, just enough to get by.
If the economy ever comes around, I'ld like to freshen up the body and keep it relatively stock.
11-16-2012, 08:42 AM
#2017
Registered User
Join Date: Mar 2010
Location: Seattle
Posts: 17
Likes: 0
Received 0 Likes
on
0 Posts
2shots
I was looking for the sand colored toy like yours. Nice interior!
I was just happy this one wasn't blue.
I like the Terra Cotta that they put out back then. Also the plain colors Toyota put on most of their rigs back then were easier to touch up or buff out. Being they didn't have all the flake in the paint.


