When you click on links to various merchants on this site and make a purchase, this can result in this site earning a commission. Affiliate programs and affiliations include, but are not limited to, the eBay Partner Network.
I change the engine oil on a regular basis around 3k miles. After a month or so the oil smells like gas and is liquidie, it still feels like oil but why does it smell like gas? Any one has any idea why that is happening?
It would help if you were to list exactly what year, make and model of vehicle you are talking about, engine model plus condition and mileage.
There are several reasons why your oil smells like gas.
1. Fuel problems. You could have an over-rich condition of the air to fuel mixture due to a carburetor being out of adjustment or a stuck open fuel injector. A carburetor could be flooding because of a bad needle and seat. In more modern vehicles with computer engine controls there could be one or more sensors malfunctioning. In all of these cases the fuel air mixture is too rich and the engine cannot burn all the fuel, so what is left unburned can literally leak past the piston rings and into the crankcase.
2. Faulty Ignition causing misfires. If this is happening, there is no spark in one or more cylinders to burn the fuel/air mixture, so the fuel again just runs down past the piston rings and into the oil.
3. Worn Piston Rings, Cylinders. If these are worn they have a much larger gap than is normal, so some of the air'fuel mix can "blow by" the rings and down into the oil pan.
4. Vehicle is only driven for short trips. If your vehicles has any of the above problems, and is only used for short trips, any gas getting into the oil will be more noticeable. This is because the oil isn't getting fully heated up, which would normally will vaporize any gas out of the oil. That's why it is recommended that for vehicles only used for short trips that the oil & filter be changed out more often.
If your oil seems thinner than normal or smells more like gas than oil you have problems that need to be fixed. Extra gas leaking past the piston rings can wash the oil off the rings & cylinder walls, causing reduced compression and extra wear. It also removes oil from places where it really needs to be, and that can damage or destroy an engine.
The truck is a 78 hilux 20R engine I dont know the millage the speedometer stopped working 3 years ago at 98,000. The carb was rebuilt a few years ago. I do not drive the truck on short trips but it does sometimes sit for 2 days or more. The oil still feels like oil but smells like gas. The piston rings are worn the truck does have a bazillion miles. The carb was rebuilt by a mechanic that did not have much experience with Toyota's and might be running rich cause of it. Are there diagrams of these carbs? It might be the float and running to rich. I will pull the spark plugs and see what I find.
Sounds like you have the same truck that I do; mine is a longbed. Good idea on pulling the plugs & checking them. I'll be interested to hear what you find. Some results of that can point to specific conditions of these carbs**. The good news here is that your oil still feels like oil and doesn't feel thinned out by the gas in it. That means whatever gas is getting into the oil isn't excessive.
** See last item below.
Also forgot to ask, but is your ignition timing set correctly? If timing is off it could cause an incomplete burn of the fuel. Timing Spec on the 20R should be 8 degrees before top dead center (BTDC). Questions on this let me know.
As far as the carb rebuild goes, there are several things that could be causing a rich condition. If he didn't set the float height correctly that could be causing the carb to "flood" a bit. Only fix for that is to open the carb up again & set the float height. In the meantime you can check the fuel level in the float bowl by looking at the Sight Glass on the front of the carb (see diagram below). Clean it off with some WD-40 or similar if it's hard to see. A good flashlight helps to see the fuel level. Sometimes I even have to rock the truck a bit to see it.
If float bowl fuel level is correct, it should be somewhere between the two tabs. You might want to crank or run the engine for several seconds to make sure the fuel pump has filled the bowl as much as it's going to before checking the level. If the fuel level is OK, the float height should be OK.
If fuel level in the float bowl is above the upper tab on the Sight Glass, either the float level is set wrong, or you may have a malfunctioning needle valve. The needle valve is what the float hits when it rises to shut off gas flow into the bowl when it's full.
Other than that the Idle Mixture could be set wrong (too rich). You could check this out in the meantime.
The Idle Mixture Screw is on the passenger side of the carb near the base, in the center (diagram below). Take a flat-blade screwdriver that fits the screwhead correctly, and turn the screw in to the right until it is lightly seated. You do NOT want to crank down on this screw, because you WILL mess up the screw, & the carb will be impossible to tune after that.
The screw is Brass and you can gouge the metal if you run it in too tight. Just run it in until you feel some resistance & stop. Only use your fingers for pressure on the screwdriver handle. IMPORTANT - Count the number of "turns" it takes until the screw seats. This will tell you how many turns "out" it was set to. Then back the screw out (left) until you are 1 & 1/2 to 1 & 3/4 turns "out". That is the stock setting for the Idle Mixture.
Carb Diagram:
Toyota 20R Carburetor Diagram
If the Idle Mixture was too rich (too many turns out) and you reset it as described above, you may notice that your idle speed is faster than before. Use the Idle Adjusting Speed Screw to adjust idle speed. It is directly to the left of the Idle Mixture Screw (see diagram, do not confuse it with the Fast Idle Screw, which is further left & down, look at your carb, you'll see it). Turning the screw left reduces idle speed, to the right increases idle speed.
One more thing. Look at the diagram & locate the AAP Diaphragm. There may or may not be a vacuum line going to this item. If you have a vacuum line or a vacuum cap on it, pull it off that item & see if you have any liquid gasoline coming out of that vacuum port. If you do have gas coming out of that port, the AAP Diaphragm is ruptured (broken).
Explanation:
Normally, the AAP (Auxiliary Acceleration Pump) Diaphragm works when the engine is cold (not up to full operating temperature), and gives a little shot of extra gas when you press the pedal. Once the engine is up to temp, a thermal valve closes and cuts vacuum to the AAP, and it no longer operates. When that diaphragm ruptures, gas can flow through the vacuum line and can dump into cylinder #1, causing that cylinder to be "rich". That's why a good look at the spark plugs is a great idea. If the #1 plug is black & showing a rich condition, but the other 3 plugs look normal (light tan to light brown color*), this shows that the diaphragm is ruptured.
The carb does not need the AAP to be working for the carb to function OK. If the diaphragm is leaking the diaphragm should be replaced, or at least cap off the vacuum port to it as a (very) short-term fix. Getting the diaphragm on it's own is either a hassle or very expensive, but you can get one in a full carb kit for $20 to $30 on the web.
Reference: Standard Motor Products 739C https://www.rockauto.com/en/catalog/...epair+kit,5964
Once again thank you for the detailed explanation, it helps so much. I pulled the plugs and 3 of them looked like this, black and dry. Cylinder #3 there was a lot of deposit on it also black but I had to scrape off the deposit with my finger nail. It just chipped off like dry carbon. I replaced the wires and plugs a year ago. I got medium quality wires but these seem not to work well, this time i'm going for the expensive kind, the wire sit next to the headers so I'm sure they get HOT.
Im sure the timing is not set correct. It runs really rich and high idle. I took it to a mechanic to rebuilt the carb, install an MSD box, and a new distributor. I wanted to get rid of the igniter and make it run better. The mechanic said he knew what he was doing, but ended up burning my igniter, not installing the MSD box and sent the carb out to be rebuilt. Have been chasing down problems and high running idle ever since. Its got good pick up at the start and has no more go at 55mph. This truck used to be zippy and I can travel at 78mph with out a problem.
I need help understanding how to set the timing, I don't know what 8 degrees means. When I bought the truck the distributor was turned counter clock wise all the way, and it ran with a high idle. I did have top speed in it in 5th gear. Now I don't really have much go in 5th, 3rd is amazing. Do you recommend setting the carb first or the timing?
I think you attached the wrong picture. From that link I am seeing a Volt Meter instead of spark plugs.
Below is going to be yet more detail so be ready.
Yep, black spark plugs show the engine is running rich (too much fuel or fuel not being totally burned). Considering that 3 of the plugs looked like that, it would indicate a generalized rich condition, which actually isn't bad news. I would be interested to hear what type or brand of wires you are using. Usually any 7mm wire set from any major brand has enough quality for a daily driver.
Good quality spark plug wires do not necessarily have to be expensive. Even a direct replacement set of OEM Toyota/Denso wires are only $20 + shipping from Rock Auto (DENSO 6714012): https://www.rockauto.com/en/catalog/...+wire+set,7224
You can also find wire looms at most parts store to help keep the wires off the exhaust manifold or header, like this: https://www.autozone.com/ignition/pe...-4216/399874_0
Some questions before going any further. Any or all of this info will help me to understand exactly what you are working with and may help guide you to some other solutions.
Spark Plug Wire brand, type, part number. If you no longer have the box for them, just look at the wires, info should be printed on the wire jacket itself.
Do you still have your stock Toyota Igniter and was it still working when it was removed? These factory units are fairly durable and work well. You say the mechanic burned it; is it no longer functional? If so, what are you using for an igniter now? Please be specific.
What MSD ignition box do you have? Part number or model number? Where did you buy it? There are some counterfeit (fake) MSD boxes on the market that look like the real thing but perform terribly.
What ignition coil are you using? What brand and part number?
What distributor are you using? Is it stock Toyota or non-stock? Is it electronic or points type? What brand and part number?
A brief explanation about engine timing -
For the most part, all we will be dealing with is the timing of the #1 cylinder. If the timing is set correctly for that cylinder, all the other cylinders will also be "in time" because of how the engine is mechanically constructed.
The crankshaft rotates 720 degrees, or 2 complete rotations of the crankshaft, for every complete cycle of air/fuel intake, compression, power stroke and exhaust stroke, and then repeats. All 4 of these are related to the piston moving up & down in the cylinder. So each process takes 180 degrees of crank rotation.
What we are focused on is just the compression stroke and where in that cycle the piston is in the cylinder. The "8 degrees before top dead center (BTDC)" refers to degrees of rotation of the crankshaft on that compression stroke. Top Dead Center means when the piston is at the very top of it's travel in the cylinder on the compression stroke.
The timing of the ignition spark is critical. The spark "lights off" the air/fuel mixture, causing it to expand & push the piston down in the cylinder. This is your power stroke. Usually, you want the spark to happen just before the piston reaches Top Dead Center, so you can use the full "push" of the air/fuel mixture burning.
If the timing is not correct you do not get the full power possible. If timing is too "advanced" or early, the "push" is happening when the piston is still rising in the cylinder, and you get "ping". If the timing is too "retarded" (yes that is a proper term) or too late, the "push" is happening after the piston is already on the way down, and you have less power.
This can also cause incomplete burning of the air/fuel mix, or what can look like an overly rich condition (bells should be going off here).
The burn speed of the air/fuel mix is always the same, but engine speed is not. The piston moves in the cylinder faster with higher engine speeds so you need a way to "advance" the spark timing to make up for this, & still get the full "push" of the air/fuel expansion on the piston. Your distributor is what does this for you, via a mechanical system within it.
To maintain that full "push", the spark has to happen sooner.
So basically, at idle speed (850 RPM). the engine needs the spark to happen 8 degrees before top dead center. Once that timing is set and if your distributor and ignition systems are working correctly, you get full power regardless of engine speed.
I DO recommend setting the timing first.
You say when you bought the truck the distributor was turned counter clockwise all the way. Normally, when you adjust engine timing, turning the distributor counter clockwise retards the timing.
I suspect that the distributor was not installed correctly, and that it is "a tooth off" towards the advanced side. That could be why someone tried to adjust the distributor all the way to the retard side, to make up for it & try to get something resembling correct timing. If this is so, that needs to be corrected first.
Explanation of "a tooth off". Your distributor is driven by a gear at the bottom of it's shaft, that meshes with a gear on your camshaft. If the distributor was installed wrong, those gears can be "a tooth off" and the timing will be messed up. Sounds a lot like you are describing and that "mechanic" may have messed up on the install.
Here is a VERY good video about proper installation of the distributor and what everything should look like when it's done right:
Don't be intimidated by this. If you follow the instructions and use some care, you can easily do this.
Important: Note what he says about the engine being on the Compression Stroke. Since your engine still runs but not well, if you roll the engine around so the pulley timing mark is on the "8" on the indicator tab, the engine itself will be in the correctly timed position.
By the way, it's easier to roll the engine over physically if the spark plugs are out.
Then pull your distributor cap & compare your rotor position with what you see in the video.
I suspect that what you are going to see is that the rotor is pointing to a position past where it should be (more to the right as seen in the video). If so, the distributor was installed wrong. Take out the hold-down bolt & remove the distributor as shown in the video, & reinstall as shown.
The rotor should be pointing just slightly left of straight up & down (as shown) before you push the distributor into the head, and should rotate to point at the #1 position, just as you see in the video. This is exactly the same for 20Rs & 22Rs.
If you do this right, you should notice that the slot on the distributor that the hold-down bolt goes into will be centered over the bolt hole.
Also make sure you read his notes in the video description. On the 20R the pulley timing mark should be set to 8 before you re-install the distributor. This will allow the engine to be "in time" or very near to it. Once you get the hold-down bolt tightened back up you can start the engine & see if it's running any better.
After that if it's running better, then you can get a timing light & check or adjust the timing to get it spot on, if needed. Then you can move on to any other problems you may have.
If it's not running any better after re-installing the distributor correctly, then you can suspect you have either ignition problems or fuel problems, or both. I will still try to help you with those if needed. I'm hoping it's just the distributor not being right. Fingers crossed.
Some questions before going any further. Any or all of this info will help me to understand exactly what you are working with and may help guide you to some other solutions.
Spark Plug Wire brand, type, part number. If you no longer have the box for them, just look at the wires, info should be printed on the wire jacket itself.
Do you still have your stock Toyota Igniter and was it still working when it was removed? These factory units are fairly durable and work well. You say the mechanic burned it; is it no longer functional? If so, what are you using for an igniter now? Please be specific.
What MSD ignition box do you have? Part number or model number? Where did you buy it? There are some counterfeit (fake) MSD boxes on the market that look like the real thing but perform terribly.
What ignition coil are you using? What brand and part number?
What distributor are you using? Is it stock Toyota or non-stock? Is it electronic or points type? What brand and part number?
Sorry for not giving a better explanation of the mess that happen from the previous mechanic. My intentions was to replace the distributor the old one was burned and glued together with an up grated version, and install a MSD box to by pass the igniter for better gas millage and smoother running engine. The mechanic said he was comfortable with installing these parts. But ended up burning the old igniter with the MSD box cause he hooked it up to the igniter, and could not get the timing correct. I went back to him a day later with the truck not running. He disconnected the MSD box and bought me a new igniter. And that is what i'm running now. The MSD box is not connected just mounted in the engine bay, the igniter works and distributor are working. There are is no part number written on the distributor, but I purchased it from this web site. Scroll down and you will see a ignition section. I purchased, the MSD box, distributor, and ballast at the same time 3 years ago. The coils are the hi temp ACDELCO I purchased last year when I replaced the spark plugs. I would like to get the MSD box to work and get away from the igniter all together. But first I need to set the timing correct. I will post more updates soon.
That's OK, that's why I ask the questions. The info & pics help.
I'm not too sure about the line "But ended up burning the old igniter with the MSD box cause he hooked it up to the igniter" for a very simple reason. There is no reason on earth (for a street driven vehicle) to have one igniter hooked up to another one. The MSD box should have replaced the stock igniter, NOT been wired up to it. You only need one. If that actually is the case, this guy had no idea what he was doing or how things are supposed to work, and if he works in a shop & has ASE Mechanics certification, his certificate should be revoked IMO.
Now just to be clear here, let's get all of our parts terms straight. I'm a little worried that the terms we are using are being confused and I want us to "be on the same page".
Ignition Coil, or Coil - The round canister type item under the Igniter. The Ignition Coil makes the electrical energy for the spark plugs. It is basically an electrical transformer, turning 12 volts into 15,000 volts or more.
Igniter (or Ignitor, as Toyota likes to spell it) - This is the metal box that sits on top of your ignition coil. This part is what triggers the ignition coil, using a signal from the distributor. In the rest of "vehicle mechanics world" the Igniter is usually called a "Ignition Control Module" or "ICM".
Pickup Coil - This is a small coil inside your distributor, that generates a signal and sends it to the Igniter.
How it works (basic version) - There is a metal ring on the distributor shaft, inside the distributor. When one of the teeth pass over the Pickup Coil, the Pickup Coil creates a voltage that is sent to the Igniter. The Igniter uses this signal to operates some switching transistors, and then send that signal to the Ignition Coil, which turns the Ignition Coil on and off via the Negative Terminal on the Ignition Coil. When the Ignition Coil is on, it builds up electrical energy. When the Ignition Coil is turned off, the electrical energy rushes out of the coil, through the wire that connects it to the Distributor. The Distributor then sends that energy to the spark plugs. Which spark plug depends on which terminal the Rotor is pointing to. That's another reason Timing is so important.
So now I'll take your items in order. I've has a close look at your pic of the MSD box, and it's difficult to tell from that one picture if it's genuine MSD or a knock-off. There are some things to look for if you have any doubts about it. Here's a good article with pictures that show how you can tell the difference: https://bangshift.com/general-news/s...ion-vs-a-fake/
The article refers to the 6AL box, but it's the same for the 6A. Starting around 2013 a LOT of counterfeit 6A & 6AL boxes were out there so it's worth checking. Besides, there is no sense using it if it's not going to work well. If it is genuine and still operational that would be a plus.
If it were me, I think I'd ask my local parts store that does free parts testing if they can test a MSD 6A or not, and if they can, take it out of the truck & have them test it to be sure it's a working unit. If it turns out good & you want to try to use it, there are wiring diagrams for it on the web.
If it turns out the MSD box is bad, there are other solutions & I can advise you on those, if needed.
Other Info & trivia - MSD stands for "Multi-Spark Discharge". That system was basically created for racing vehicles, sending multiple Ignition Coil "charges" to the spark plugs for a supposedly" more complete burn of the fuel, to get the most power out of it. For a street vehicle IMO it isn't needed and an extra expense. As long as the "regular" ignition system is working and the engine is in time and in tune, a typical stock "single spark" system is more than adequate.
If the pic of your current Igniter is the one the "mechanic" bought, he kinda screwed up again. I checked the part number on that unit and it's actually for a 1980 to 1982 Tercel 1.4 Liter engine. The good news is that it doesn't matter that much, as the 1.4 & the 20R are both inline 4 cylinders that basically work the same way, so I am not surprised that it is working. It should work with the 20R OK. It does show the carelessness on his part though.
It looks like you have the correct type of distributor, but if you bought it from that website, you paid too much for it, sorry to say. Looks like their current price on that is $184.28. Rock Auto has the exact same distributor for $100.79 plus shipping. Ouch. But at least you have the right one. Also good, it appears the distributor is very close to being installed in the correct position, even though it may be in "a tooth off", so that should be an easy fix. I can tell it's close to correct because the vacuum advance is facing downwards the way it should be.
Ballast? Ballast Resistor maybe? Can you clarify? I know it shows one in the schematic schematic diagram but the electronic ignition system doesn't need one, and really shouldn't have one in the Ignition Coil circuit. So why is it in the diagram? Because Toyota didn't take it out of the diagram like they should have. The 1975 to 1978 pickup wiring is the same for all three years, however, 1978 was the 1st year for the electronic ignition, replacing the old "breaker points system". The breaker points systems used an Ignition Coil that was designed to work best between 7 to 9 volts, so the ballast resistor was put in place to cut down the battery voltage of 12 volts or more to that level, extending the life of the Ignition Coil. The more modern Ignition Coils designed to work with the electronic ignition systems, and are designed to use the full 12 volts, giving you more spark power than with breaker points. So adding in the old ballast resistor is actually cutting down on what power your Ignition Coil can supply. That means weak spark and maybe even incomplete fuel burning. I recommend that the ballast resistor, if you are running one, by removed/bypassed. Specific questions on this let me know.
You said "The coils are the hi temp ACDELCO" but from your pic I think you meant spark plug wires. The AC Delco wire set is good quality, but looks to be the most expensive wire set you can buy for this engine. Any good name brand wire set will work fine and cost less; just a note for the future. You don't really need high performance racing type parts to make this engine run well & pull hard.
Only other thought I have at the moment concerns the Ignition Coil. You might want to do a resistance test on it to see what kind of condition it is in. A weak or failing coil could also cause a rich condition, if it's not putting out enough spark energy to completely burn the fuel.
To correctly test the coil it has to be completely disconnected from the system. Make sure your Ohm Meter is set to the correct range(s) for each test (see specs below). You will be checking resistance of the coil's Primary and Secondary circuits.
Primary is the + & - terminals. Secondary is the center post terminal and either the + or - terminal, it doesn't matter which one of those you use.
Your coil specs should be: Primary - 1.3 to 1.7 Ohms (don't forget to subtract for test lead wire resistance!), Secondary - 6500 to 10,500 Ohms.
Coil is tested cold (cold engine). If either reading is near, at or above the higher numbers for each, the coil should be replaced.
On the Secondary reading if it's about 10% or less than the upper limit (10.500 Ohms minus 10%, 9450 Ohms or above) I'd replace the coil anyway. Again, like resistors, coils will rise in resistance when they get hot, and that can cause running issues. Weak coils especially can rise above the limits. Extra resistance can cut down your spark energy.
Take your time with your work, I'll be around when you have any updates.
I had some time this weekend to look at the timing. Started with pulling out the spark plugs and they all look like this, I wrote what cylinder they come from. The engine was a little hot when I took the wires off prob why they come apart but #3 was also corroded on the clip cable side. Rotated the engine on the the #8 mark, removed the rotter cap and it looks in the right position. So i moved on to the ignition ballast. Tested it as you posted I removed the battery + side, removed the connections to the ignition ballast and hoked up the Ohm reader. First I did the primaries then the secondary held the connectors there till the ohm stop dropping. Got new plugs and wire could not find a ballast or a new distributor cap at the auto parts store, cleaned off the inside of the rotor cap with some sand paper as all of the contact points were corroded. It runs a little better but not perfect. Also found out that no auto parts sores rent out timing light this is a new thing since I rented from them before.
OK, some good work & detail here, and again the pics help a lot. Taking it in order as usual:
The electrodes on the plugs look OK, and the coloration isn't bad, except for #3. Given what you said about the clip on the #3 spark plug wire & looking at the plug, I'd say that plug was not firing all the time. So you probably had an intermittent miss on #3 at best. The corrosion at the clip acts like an insulator.
Good move on the new plugs & wires. Did you check the gap of the plugs before you installed them? I never trust the "factor gap setting" & prefer to check them myself. It should be 0.031" gap. If you didn't check this but they are reasonably close it's not a huge deal, but I just like to be precise.
Your rotor is not in the right position but don't panic, it's fine, I will explain. Even though you put the timing mark at 8, that doesn't mean the #1 piston is at Top Dead Center on the compression stroke. If it was, the Rotor would be pointing 180 degrees opposite of what is shown in your picture, at the "10 O'clock" position instead of the "4 O'clock" position.
What your engine is set to in the pics is the #1 piston at Top Dead Center of the exhaust stroke.
Each piston has to go up & down twice to do a full cycle of intake, compression, power and exhaust. The mark on the crankshaft pulley will "hit" the pointer timing mark twice during those 4 strokes, once at full compression (when the spark happens) and again when the pistons travels fully upwards to push out the burned exhaust gasses.
That means the crankshaft makes two full rotations for each complete cycle. That's why the "8" mark can be on the pointer, but the rotor can be in the "wrong" position.
Again, this is perfectly normal and nothing to worry about, I just wanted to explain why you are seeing what you are seeing.
Good news that I did spot, is that your distributor appears to be installed in the correct position, with the vacuum advance pointing at the ground.
I am not sure what you mean by "ballast" but from what you wrote I assume you mean the Ignition Coil(?) It sounds like you tested the coil correctly, but where are the numbers/results? Those results will tell us if the coil is OK or not.
I've mentioned this before but some of the older Toyota 20R's had an Ignition Coil with a Ballast Resistor; maybe that's where you are getting the term from? In any case, you do NOT need a Ballast resistor for the electronic ignition setup, and you should NOT have one hooked up.
If you had corrosion on the contacts inside the Distributor Cap and on the Rotor, you most likely need new ones. Just order them from Rock Auto, they have everything you need & the prices are good. Just get good brands like SMP or Bosch.
They also have the Ignition Coil if you want to replace yours. I still recommend the SMP UC12 or the NGK 49030. It doesn't pay in the long run to cheap out on the Ignition Coil. https://www.rockauto.com/en/catalog/...77108,ignition
The parts stores probably don't want to loan or rent out timing lights because they can get easily damaged from rough handling, so they don't want the headache.
Harbor Freight has a decent timing light for $30: https://www.harborfreight.com/timing...nce-40963.html
If you are going to do your own tune-ups in the future it's well worth getting. Also, they often have flyers near the front of the store that have 20% off coupons in them, so that would get you down to about $24 for the timing light. Good deal.
OK, some good work & detail here, and again the pics help a lot. Taking it in order as usual:
Your rotor is not in the right position but don't panic, it's fine, I will explain. Even though you put the timing mark at 8, that doesn't mean the #1 piston is at Top Dead Center on the compression stroke. If it was, the Rotor would be pointing 180 degrees opposite of what is shown in your picture, at the "10 O'clock" position instead of the "4 O'clock" position.
What your engine is set to in the pics is the #1 piston at Top Dead Center of the exhaust stroke.
Each piston has to go up & down twice to do a full cycle of intake, compression, power and exhaust. The mark on the crankshaft pulley will "hit" the pointer timing mark twice during those 4 strokes, once at full compression (when the spark happens) and again when the pistons travels fully upwards to push out the burned exhaust gasses.
That means the crankshaft makes two full rotations for each complete cycle. That's why the "8" mark can be on the pointer, but the rotor can be in the "wrong" position.
Again, this is perfectly normal and nothing to worry about, I just wanted to explain why you are seeing what you are seeing.
Good news that I did spot, is that your distributor appears to be installed in the correct position, with the vacuum advance pointing at the ground.
That would explain the farting and stuttering actions that it does when I turn off the engine. In order to fix this is I should pull the rotor out and and rotate it 180 degrees?
Originally Posted by 13Swords
I am not sure what you mean by "ballast" but from what you wrote I assume you mean the Ignition Coil(?) It sounds like you tested the coil correctly, but where are the numbers/results? Those results will tell us if the coil is OK or not.
I've mentioned this before but some of the older Toyota 20R's had an Ignition Coil with a Ballast Resistor; maybe that's where you are getting the term from? In any case, you do NOT need a Ballast resistor for the electronic ignition setup, and you should NOT have one hooked up.
If you had corrosion on the contacts inside the Distributor Cap and on the Rotor, you most likely need new ones. Just order them from Rock Auto, they have everything you need & the prices are good. Just get good brands like SMP or Bosch.
They also have the Ignition Coil if you want to replace yours. I still recommend the SMP UC12 or the NGK 49030. It doesn't pay in the long run to cheap out on the Ignition Coil. https://www.rockauto.com/en/catalog/...77108,ignition
Ignition coil is what im talking about. Sorry for the wrong terminology. I was thinking of going with this one.
Originally Posted by 13Swords
The parts stores probably don't want to loan or rent out timing lights because they can get easily damaged from rough handling, so they don't want the headache.
Harbor Freight has a decent timing light for $30: https://www.harborfreight.com/timing...nce-40963.html If you are going to do your own tune-ups in the future it's well worth getting. Also, they often have flyers near the front of the store that have 20% off coupons in them, so that would get you down to about $24 for the timing light. Good deal.
It just seems like a one time use tool. Its a good deal, can't think when I would use it again. Cars don't really go out of timing to tun it again.
Sounds like you guys probably got this handled, but thought I would add that when I found gas in my oil it ended up being a bad fuel pump diaphragm. Of course it was a mechanical fuel pump mounted on the front of the cylinder head. Good luck!
I guess I didn't do a good job of explaining how the engine works in regards to the distributor and crank position. I thought I explained it pretty simply but I guess not. The main point here is, the "8" mark on the crank pulley will be at the timing pointer twice, once on the "Fire" point, and again on the exhaust stroke.
Both times the piston will be at or near the very top of it's travel in the cylinder. Your pictures show the engine is set at the exhaust stroke for cylinder #1. The Rotor should be pointing exactly where it is to fire a different cylinder at the same moment in time. It all looks correct.
No, you do not need to fix anything. You can't pull the rotor out & rotate it 180 degrees anyway, as the Rotor has a key slot on it that fits on the distributor shaft in only one location on the shaft. I did say that this was perfectly normal and that the distributor appears to be installed in the correct position.
If the distributor was installed "180 degrees out" you probably wouldn't even be able to start the engine at all, and even if it did start, it would run horribly.
If the engine is trying to "run on" whenever you shut off the key, you have a different issue. Causes? Timing not set correctly, bad fuel shut-off solenoid, missing or damaged o-ring in fuel shut-off solenoid, carb out of adjustment.
I wouldn't worry with any of those things until I got a full, new ignition system in it and made sure it was all working correctly (properly firing).
The NGK coil is a good choice & is good quality. It will work with the GM Module just fine. And don't pay any attention to the wording on the coil itself about an "external resistor, you don't need one with the GM Module. You'd only need one if you were still using a "points" system.
Ask yourself this. If cars don't really go out of timing, why are there timing lights made to check the timing?
Timing lights are not a one time use tool. You should use one every time you do a tune up (spark plugs, wires, cap, rotor) to verify that the engine timing is set correctly and exactly.
Yes, engines can and do go out of timing, due to worn parts like timing chains, worn distributor shafts and a few others.
A timing light can be a valuable diagnostic tool. You can use one to verify that each wire & plug are getting current from the coil while the engine is running. You can move the clamp to each wire in turn, pull the trigger on the timing light & see the flash.
Any "skipping" in the flash pattern would tell you that you have a misfire, and exactly on the wire you are hooked up to. That makes it easier to find a bad wire or plug.
It can also tell you if you have a misfire from the coil in the same way. This can tell you if the ignition coil, module or distributor pickup coil has a problem.
The timing light can also be used to diagnose a slack or loose timing chain. Chains wear and/or stretch over time and a loose chain can throw of engine timing. Chain tensioners can also fail making the chain slack.
Use the light to check the timing marks as normal, and with the engine running at a steady idle speed, if you see the mark jump around back & forth, that tells you the chain is not tight. If the chain is good the mark on the crank pulley will be stable and in the same spot on every flash of the light.
I guess I didn't do a good job of explaining how the engine works in regards to the distributor and crank position. I thought I explained it pretty simply but I guess not. The main point here is, the "8" mark on the crank pulley will be at the timing pointer twice, once on the "Fire" point, and again on the exhaust stroke.
Both times the piston will be at or near the very top of it's travel in the cylinder. Your pictures show the engine is set at the exhaust stroke for cylinder #1. The Rotor should be pointing exactly where it is to fire a different cylinder at the same moment in time. It all looks correct.
No, you do not need to fix anything. You can't pull the rotor out & rotate it 180 degrees anyway, as the Rotor has a key slot on it that fits on the distributor shaft in only one location on the shaft. I did say that this was perfectly normal and that the distributor appears to be installed in the correct position.
If the distributor was installed "180 degrees out" you probably wouldn't even be able to start the engine at all, and even if it did start, it would run horribly.
If the engine is trying to "run on" whenever you shut off the key, you have a different issue. Causes? Timing not set correctly, bad fuel shut-off solenoid, missing or damaged o-ring in fuel shut-off solenoid, carb out of adjustment.
I wouldn't worry with any of those things until I got a full, new ignition system in it and made sure it was all working correctly (properly firing).
I missed the part where the engine goes around twice. Your explanations are always crystal clear.
Originally Posted by 13Swords
The NGK coil is a good choice & is good quality. It will work with the GM Module just fine. And don't pay any attention to the wording on the coil itself about an "external resistor, you don't need one with the GM Module. You'd only need one if you were still using a "points" system.
I do not have the GM module I still have the old igniter. I will look at your video on you tube I want to upgrade, the igniter I have on there now might not be working great.
Originally Posted by 13Swords
Ask yourself this. If cars don't really go out of timing, why are there timing lights made to check the timing?
Timing lights are not a one time use tool. You should use one every time you do a tune up (spark plugs, wires, cap, rotor) to verify that the engine timing is set correctly and exactly.
Yes, engines can and do go out of timing, due to worn parts like timing chains, worn distributor shafts and a few others.
A timing light can be a valuable diagnostic tool. You can use one to verify that each wire & plug are getting current from the coil while the engine is running. You can move the clamp to each wire in turn, pull the trigger on the timing light & see the flash.
Any "skipping" in the flash pattern would tell you that you have a misfire, and exactly on the wire you are hooked up to. That makes it easier to find a bad wire or plug.
It can also tell you if you have a misfire from the coil in the same way. This can tell you if the ignition coil, module or distributor pickup coil has a problem.
The timing light can also be used to diagnose a slack or loose timing chain. Chains wear and/or stretch over time and a loose chain can throw of engine timing. Chain tensioners can also fail making the chain slack.
Use the light to check the timing marks as normal, and with the engine running at a steady idle speed, if you see the mark jump around back & forth, that tells you the chain is not tight. If the chain is good the mark on the crank pulley will be stable and in the same spot on every flash of the light.
The NGK Ignition Coil is still a good choice to use with the stock Ignitor. Quality counts. Still way curious about what meter results you got on the Ignition Coil.
Ignition issues solved. I got new: ignition coil, rotor cap, plugs, wires, and I installed the MSD box. So far so good. I got rpm now, I can travel on the freeway without being a slow old truck. MSD box works real well, if I have any issues with it I can just return it and have it fixed. I left the old igniter in place just in case something happens I can always plug it back in and limp home. I need to find out where I can purchase a male connector that goes to the rotor, right now the wires are plunged in good but I would like to reroute them and get that connection permanent.
Very good work. Nice to know the MSD box is a worker. Good idea on leaving the old igniter in place as a backup. As far as I know there aren't any sources on that pickup coil connector, but how you have it now should be fine, as long as the connectors are tight.
I'd still like to know the resistance test results on your old ignition coil, because I suspect it was the 1 major item that was causing your problems.
I did the primaries then the secondary held the connectors there till the ohm stop dropping.
I posted it here in my previous post. I should of included the leads in the pic. With this set up I had no rpms, the truck would feel like its running out of steam. Would need to switch gears to be able to go faster. 1st gear was supper short. On the freeway I would max out at 55- 60mph or something around that.
Originally Posted by 13Swords
Very good work. Nice to know the MSD box is a worker. Good idea on leaving the old igniter in place as a backup. As far as I know there aren't any sources on that pickup coil connector, but how you have it now should be fine, as long as the connectors are tight.
I'd still like to know the resistance test results on your old ignition coil, because I suspect it was the 1 major item that was causing your problems.
I want to re route the wires, right now they are being strung from the wheel well across the rotor cap. I want to run them across the top of the engine on the exhaust side, and the engine rattles so I want something more stable.
Yep, your ignition coil was the problem, those numbers are WAY off. The spec is 1.3 to 1.7 Primary & 6500 to 10,500 Secondary. Your primary is about 25% over the max, and your secondary is more than DOUBLE the max. All that extra resistance keeps electricity from flowing properly and it only gets worse as the coil heats up from use & heat exposure.
It's a wonder that coil would run the engine at all.
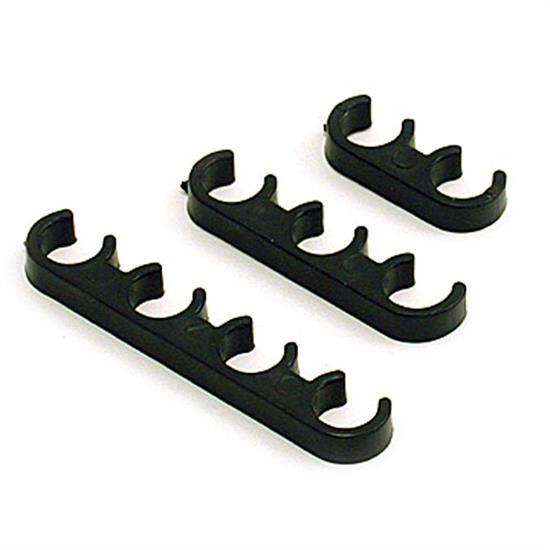
If you mean the spark plug wires, you can either get some simple wire looms like these:
(available in most parts stores for cheap) to tidy up the wires, or you can spend more money on something like this:http://www.northernautoparts.com/part/mg-6018
The engine "rattles"? Does ti move side to side more than 1/2"? You might want to have a look at your motor mounts & look for torn rubber blocks in them.

 Mar 3, 2020 | 12:55 AM


 The info & pics help.