Start of an exo cage for 3rd gen...PICS
 02-21-2010, 10:15 PM
#1
Registered User
Thread Starter
Join Date: Aug 2008
Location: Arizona
Posts: 488
Likes: 0
Received 0 Likes
on
0 Posts
Start of an exo cage for 3rd gen...PICS
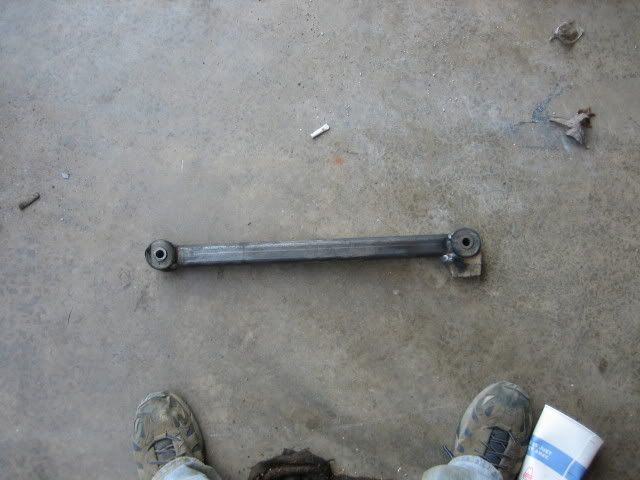
I went out with guys from TTORA today. had a good time, scratched some paint, scratched some glass, bent some wheels, and bent a lower link in the rear, but it was all fun stuff. But I stilll lower gears, and lower center of gravity. I have the sliders and part of the front bumper done. Pics of the rest of the exo cage and rear tire carrier will be up soon.


running 7 psi w/o bead locks

tipping point


running 7 psi w/o bead locks
tipping point


Trending Topics
02-22-2010, 06:47 AM
#10
Registered User
Thread Starter
Join Date: Aug 2008
Location: Arizona
Posts: 488
Likes: 0
Received 0 Likes
on
0 Posts
02-22-2010, 06:51 AM
#11
Registered User
Thread Starter
Join Date: Aug 2008
Location: Arizona
Posts: 488
Likes: 0
Received 0 Likes
on
0 Posts
02-22-2010, 07:31 AM
#12
Contributing Member
x2 on tire on roof (although, I would argue its closer to 100 lbs than 75).
Also, looks like they were spotting you on the SFA line, not the IFS line.
I've been really happy with the protection my miniexo has provided
Also, looks like they were spotting you on the SFA line, not the IFS line.
I've been really happy with the protection my miniexo has provided
02-22-2010, 08:26 AM
#13
Registered User
Thread Starter
Join Date: Aug 2008
Location: Arizona
Posts: 488
Likes: 0
Received 0 Likes
on
0 Posts

There was my truck and a tacoma that was IFS, and we all kinda took the same line through that section, so not sure what you getting at. But I'd like to know.
And yeah I cant wait to get mine finished, I need to protect all the damn glass on my rig. I scratched glass twice yesterday, and it would have made for an expensive fix if any would have busted out.
 02-22-2010, 09:57 AM
#14
Contributing Member
Obviously, it may have been different in person, but I would say the IFS line was more to the left, smeared in, or climbing that wall to keep the truck more level, and the side away from the wall.
02-22-2010, 10:14 AM
#15
Registered User
Thread Starter
Join Date: Aug 2008
Location: Arizona
Posts: 488
Likes: 0
Received 0 Likes
on
0 Posts
I hear ya. That just could not be done, the wall slated downwards so you really could not do what you were talking about. It was raining the whole day to so you kinda wanted to try and stay off the rocks and on the dirt, keep from sliding in a line you didnt want to be in.
02-22-2010, 05:12 PM
#17
Registered User
Thread Starter
Join Date: Aug 2008
Location: Arizona
Posts: 488
Likes: 0
Received 0 Likes
on
0 Posts
Well I am def. going different on the rear tire carrier. I am doing another "stinger" in the rear that the spare tire will bolt into. It will have bushings from DIY4X.com and have a latch on both sides, allowing it to swing down....It willl be a PIA to get into my rear hatch everytime havin to swing the tire up and down, even though I plan on putting it on a spring to take some load off (similar to a toy haulers rear gate, but more simple)
Keep in my mind its not my DD, so really I am just trying to get my weight off the top and proctect the back of my rig.
02-22-2010, 07:52 PM
#18
Contributing Member
Interesting idea on a swing down with a spring.
Yeah I hated my CBI swing down so much I sold it. Just too much work to get into the back.
The lower links are a good idea as well. I was planning on cutting up some square 1/4" stock.....just like the extremely expensive Toytech ones, but for 1/16th of the cost! Not too sure how much better they will do against bending, but probably a lot better than stock small diameter rods.
02-22-2010, 08:47 PM
#19
Registered User
Thread Starter
Join Date: Aug 2008
Location: Arizona
Posts: 488
Likes: 0
Received 0 Likes
on
0 Posts
Interesting idea on a swing down with a spring.
Yeah I hated my CBI swing down so much I sold it. Just too much work to get into the back.
The lower links are a good idea as well. I was planning on cutting up some square 1/4" stock.....just like the extremely expensive Toytech ones, but for 1/16th of the cost! Not too sure how much better they will do against bending, but probably a lot better than stock small diameter rods.
Yeah I hated my CBI swing down so much I sold it. Just too much work to get into the back.
The lower links are a good idea as well. I was planning on cutting up some square 1/4" stock.....just like the extremely expensive Toytech ones, but for 1/16th of the cost! Not too sure how much better they will do against bending, but probably a lot better than stock small diameter rods.
Speaking of the Toytec lower links, have you heard anything good or bad about them? Knows someone who has them and uses them?
02-22-2010, 09:35 PM
#20
Contributing Member
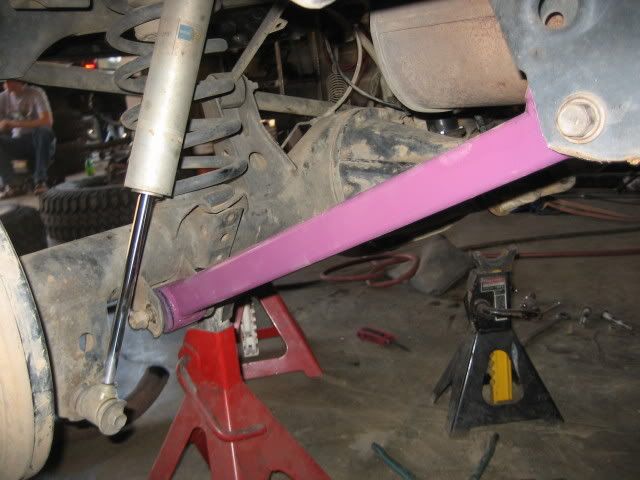
The Toytec ones are basically stock arms with some angle welded to them. They work just like stock, but stronger.
If you want to get into making links, it's not that hard to just redo the whole thing with a bushing on the axle end, and a johnny joint on the frame end. Will eliminate a lot of bind and free up some travel. While you're at it, make them a bit longer to get your wheelbase back after the lift. Rebuild the uppers while you're at it, as you will see they're not very strong.
IMHO, there's HUGE bang-for-the-buck in remaking the links using the factory mounting locations.
My lowers are 2"x0.25" wall, and the uppers are 1.75"x.120" wall
Last edited by tc; 02-22-2010 at 09:37 PM.


