Redeth's Overland Trailer Build
 05-20-2017, 08:16 AM
#121
Registered User
Thread Starter
The trailer is looking good Richard, looks like you're getting pretty close to finishing it. It must be nice to see the light at the end of the tunnel! I need to get spray gun like that, but I need to invest in a small compressor first, lol. I did get a electric metal cutting shears from harbor freight like the ones you posted a pic of awhile back, they work great, wish I had bought those years ago!
And yes that paint gun is great. It says it's recommended to be used with a 6 or 8 gallon compressor but it works fine with my 3 gallon. I just run out of air more often so my compressor is going 70-80% of the time. Glad you liked those shears. THEY MADE CUTTING SHEET METAL SUCH A BREEZE and way less of a mess!
__________________________________________________ __________________________________________________ __________________________________________________ ________
Batteries are super expensive but I think they're worth it when your away from home for more than a weekend. Especially when there are little ones around that need to be entertained by something other than sticks and dirt after 5 days camping. I paid $400 for a camper years ago and spent $3,000 on 3 batteries, solar panels, charge controller, and an updated panel. Wife daughter and I could boondock for 11 days without running the generator. Then we had more kids and it got too small.
Kids distracted me and I never finished what I was getting at lol. You're best bet is to look at how much physical battery space and amp hours your going to want eventually and plan/build for that. Then when your ready to upgrade your not trying to cut things apart, upgrade to larger wire ground point hardware and fuses everywhere in the system. If you want to run the freezer fridge combo, flat screen tv, compact AC or fan for hot evenings and anything else you could think your going to possibly cram in there, set the system up so you can upgrade to it later really easy. I spent allot of extra time and money going back and upgrading and modifying to increase battery storage capacity twice.
How did you calculate your amp hour usage? I considered buying a Honda EU2000 generator for this build but i think it may be overkill and i dont want to buy it if i can get away with he proper battery storage. Plus if i can charge up the battery by just turning on the truck until my battery is full on the trailer i would much rather do that. But i agree the proper battery for the job is definitely good. What are the dimensions of that battery you told me about before?
 05-20-2017, 08:39 AM
#122
Registered User
Thread Starter
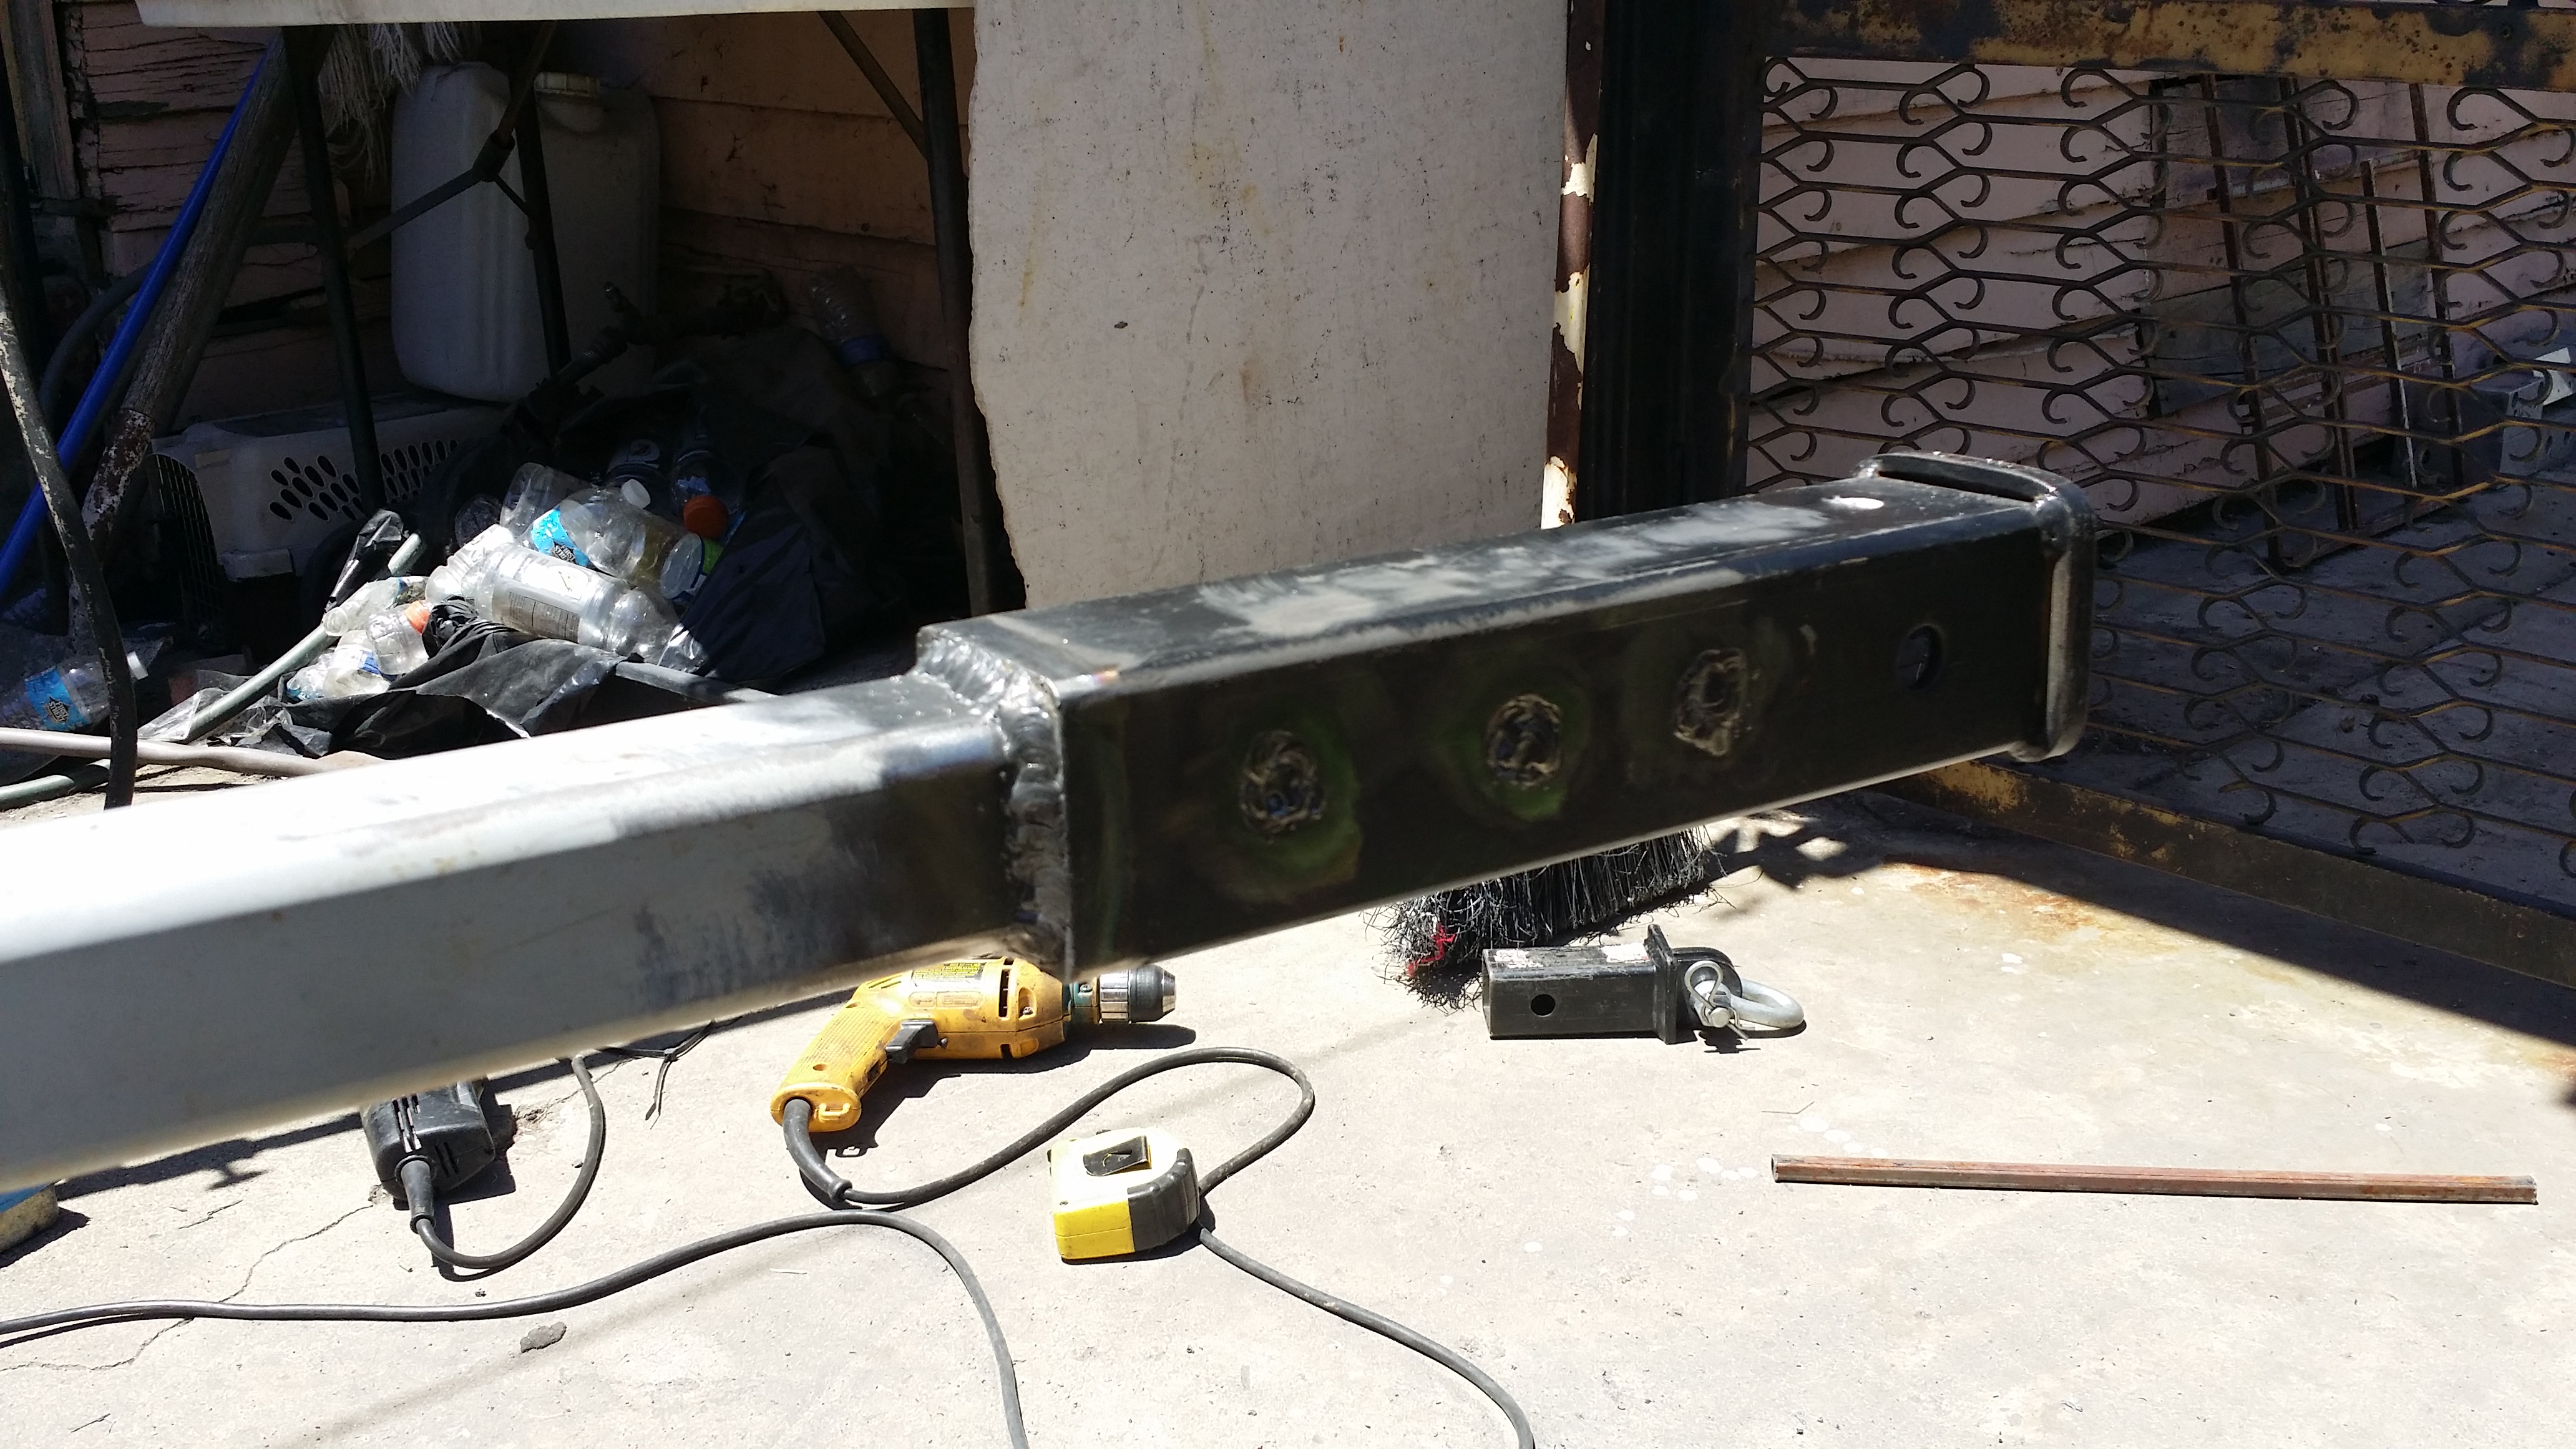
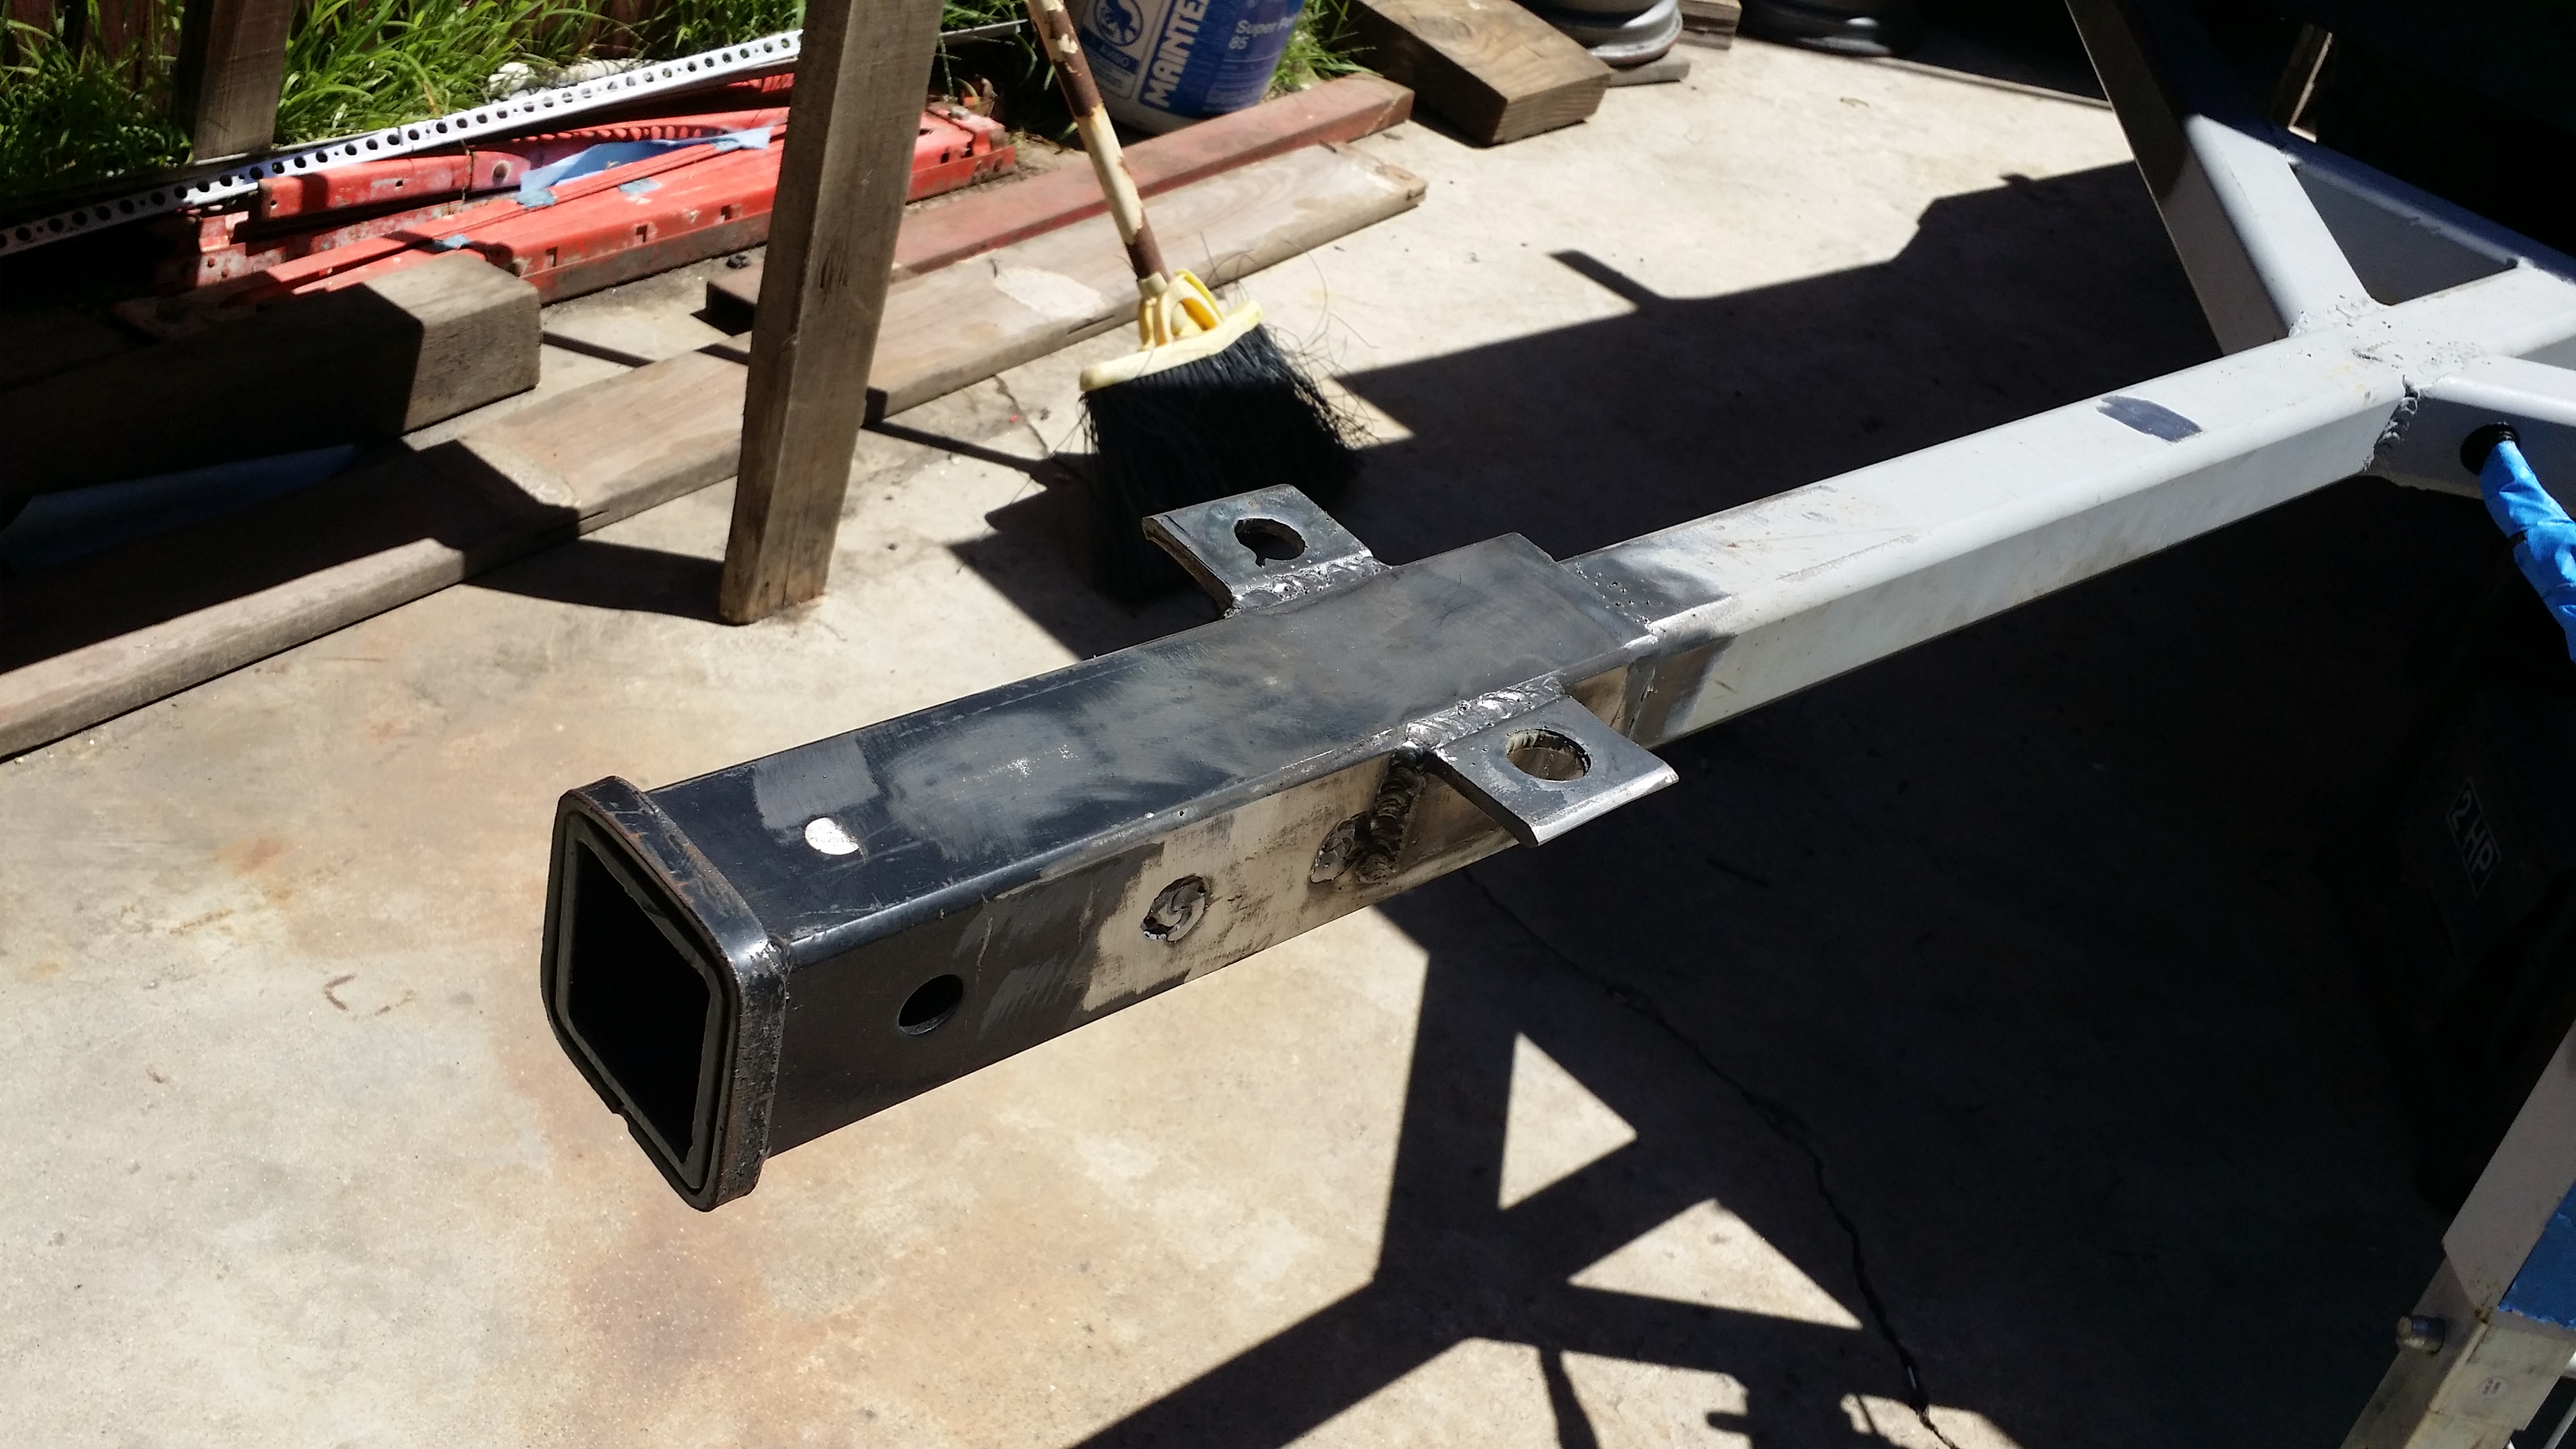
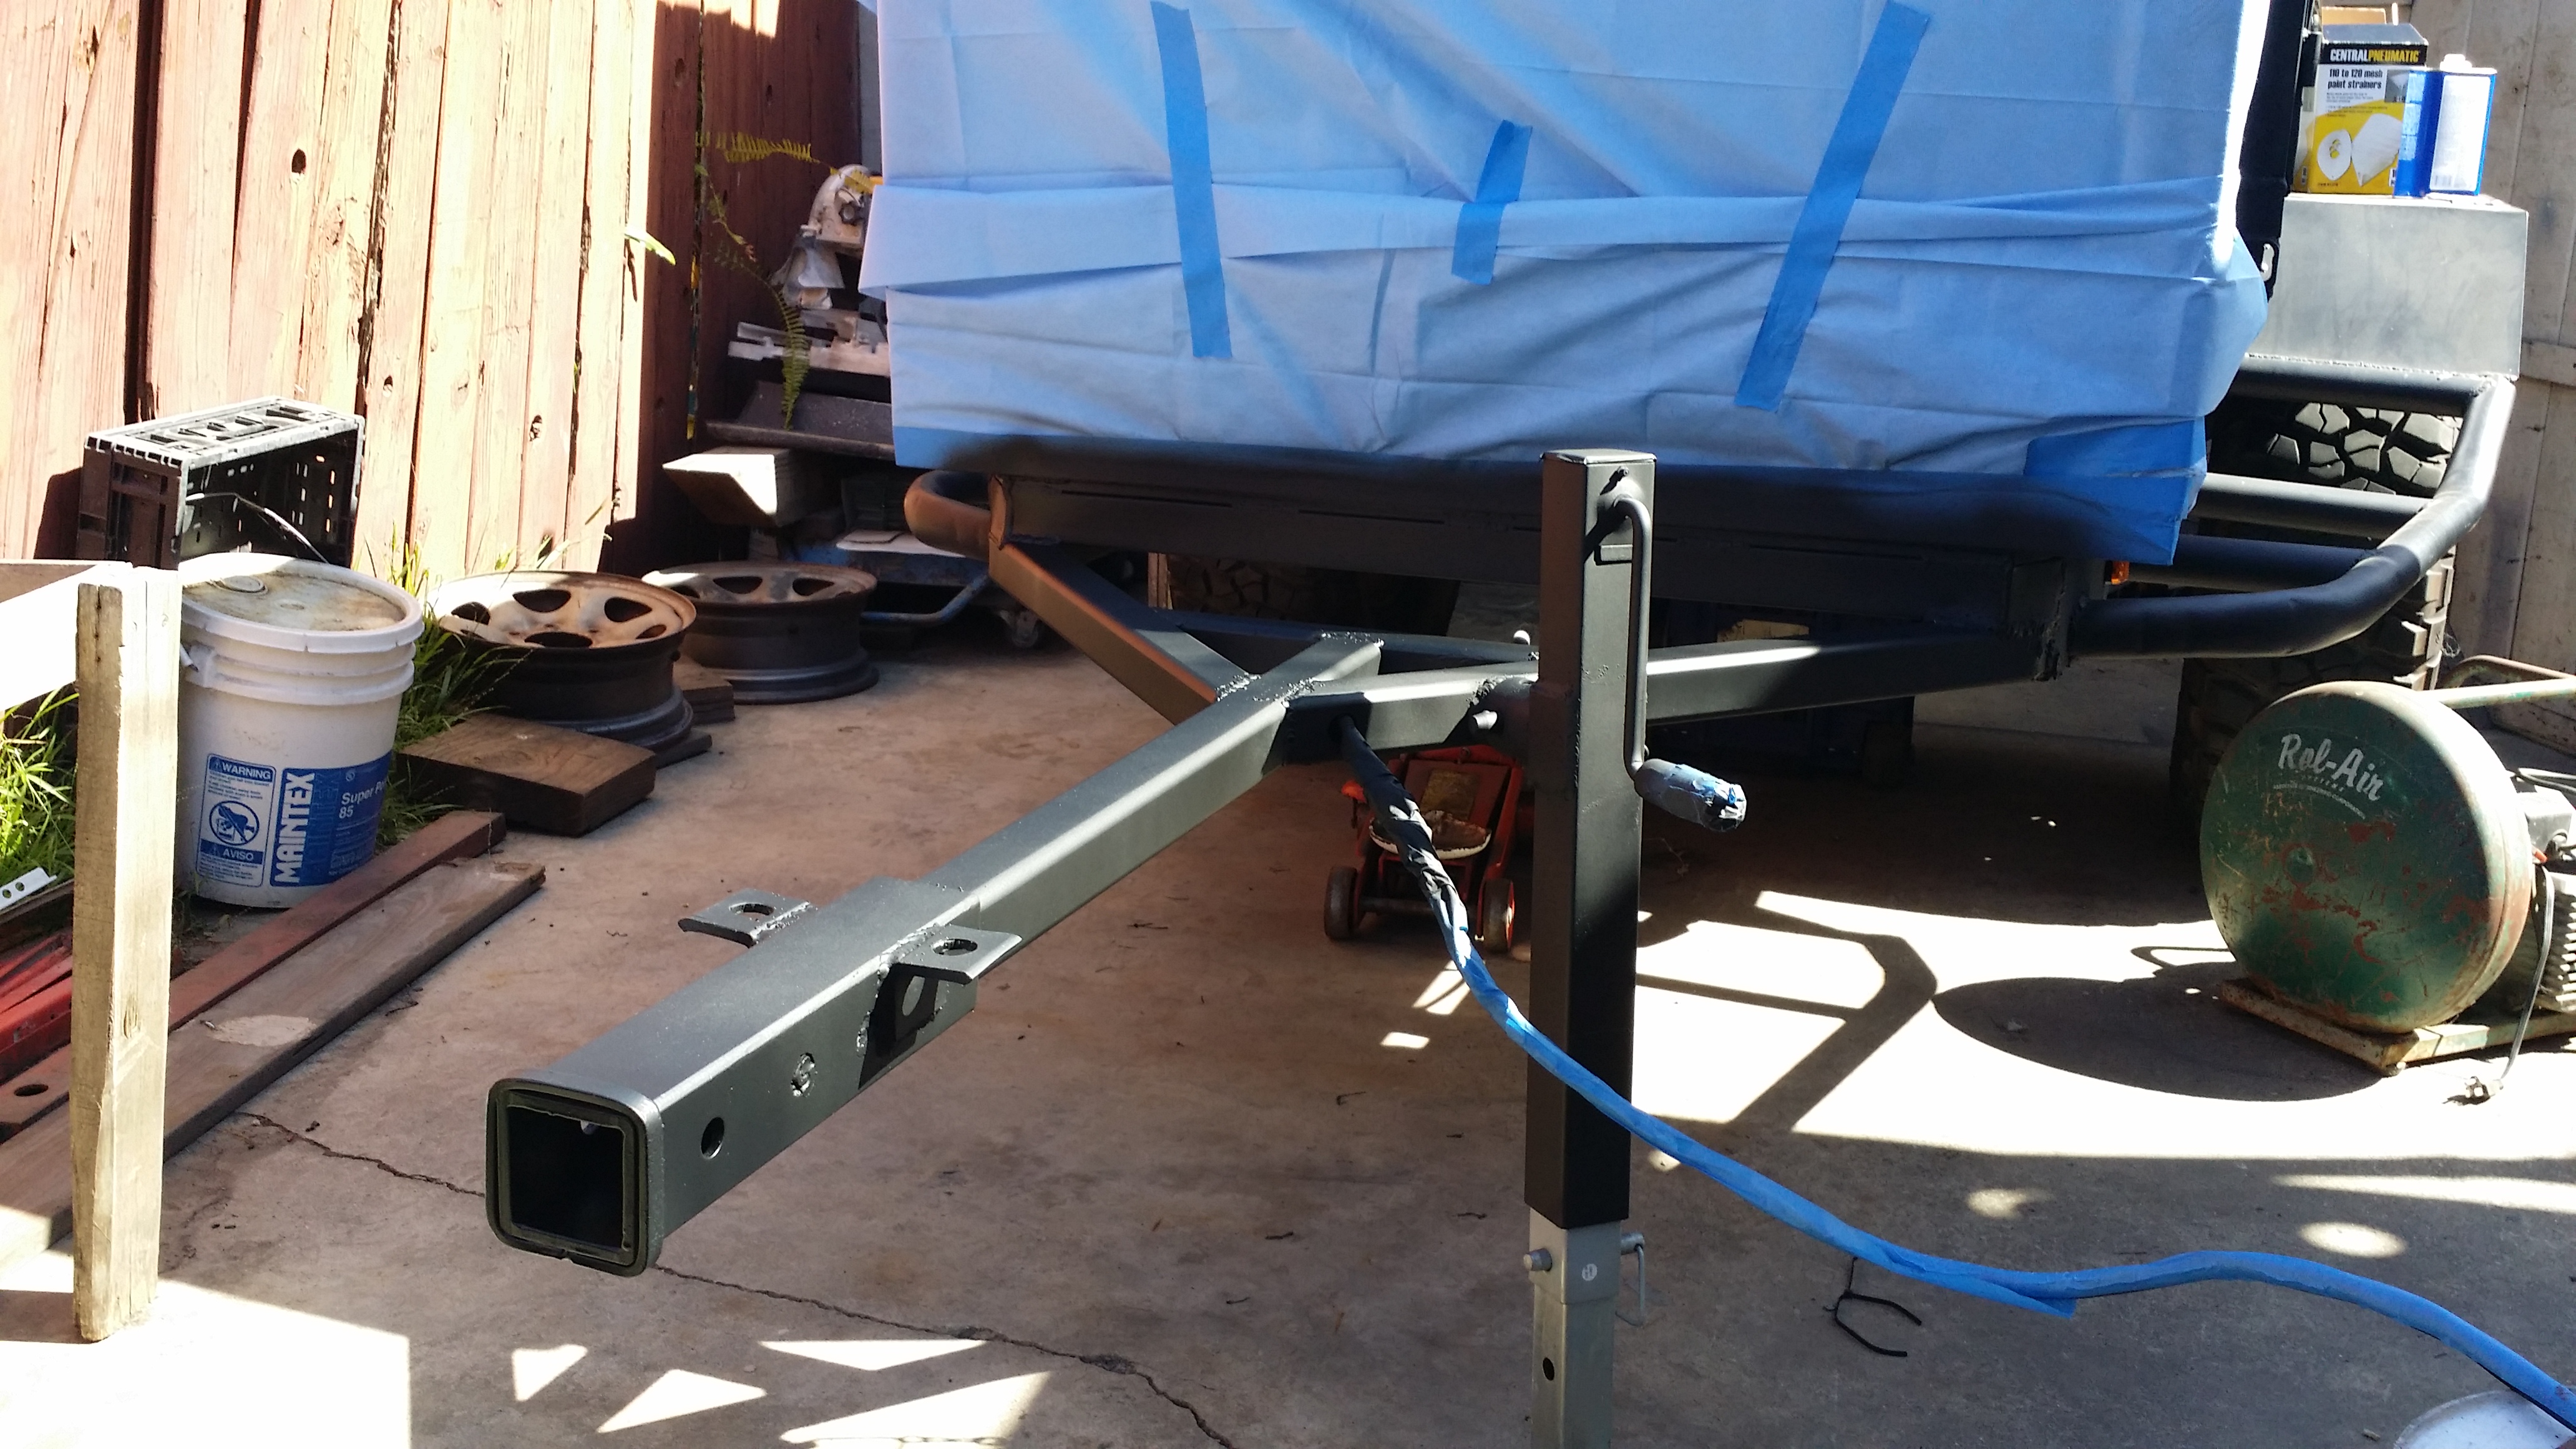
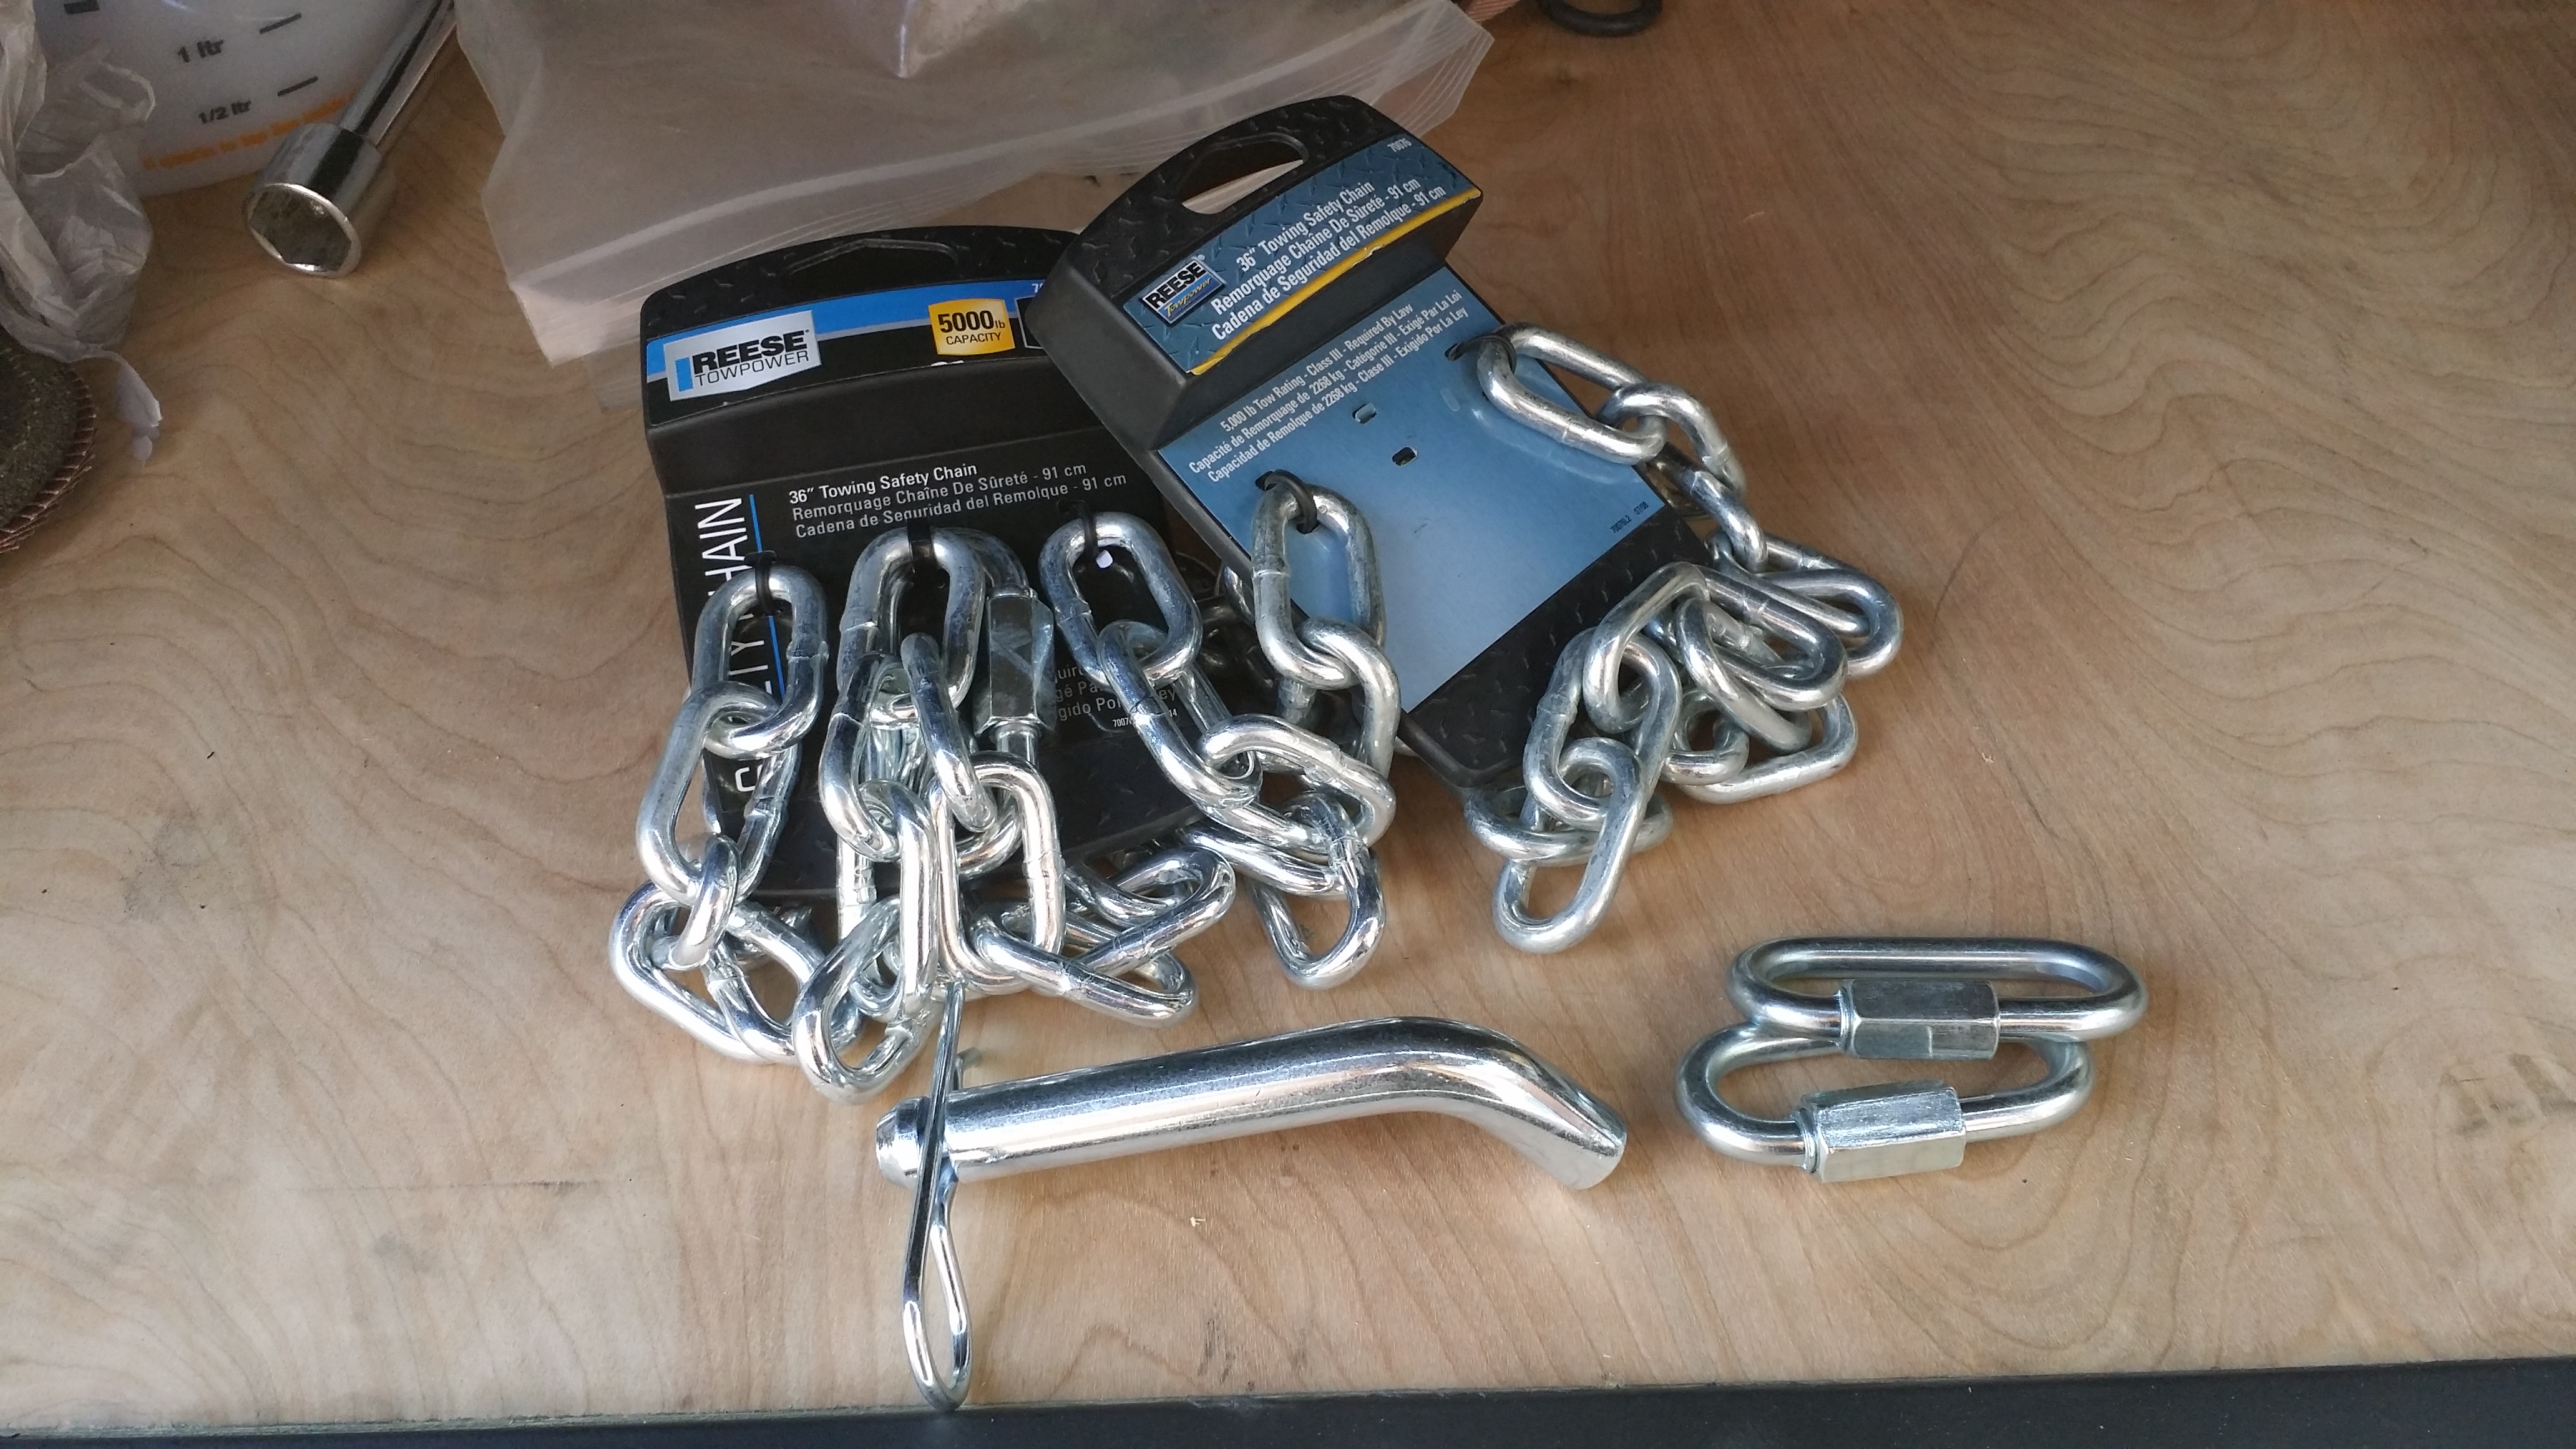
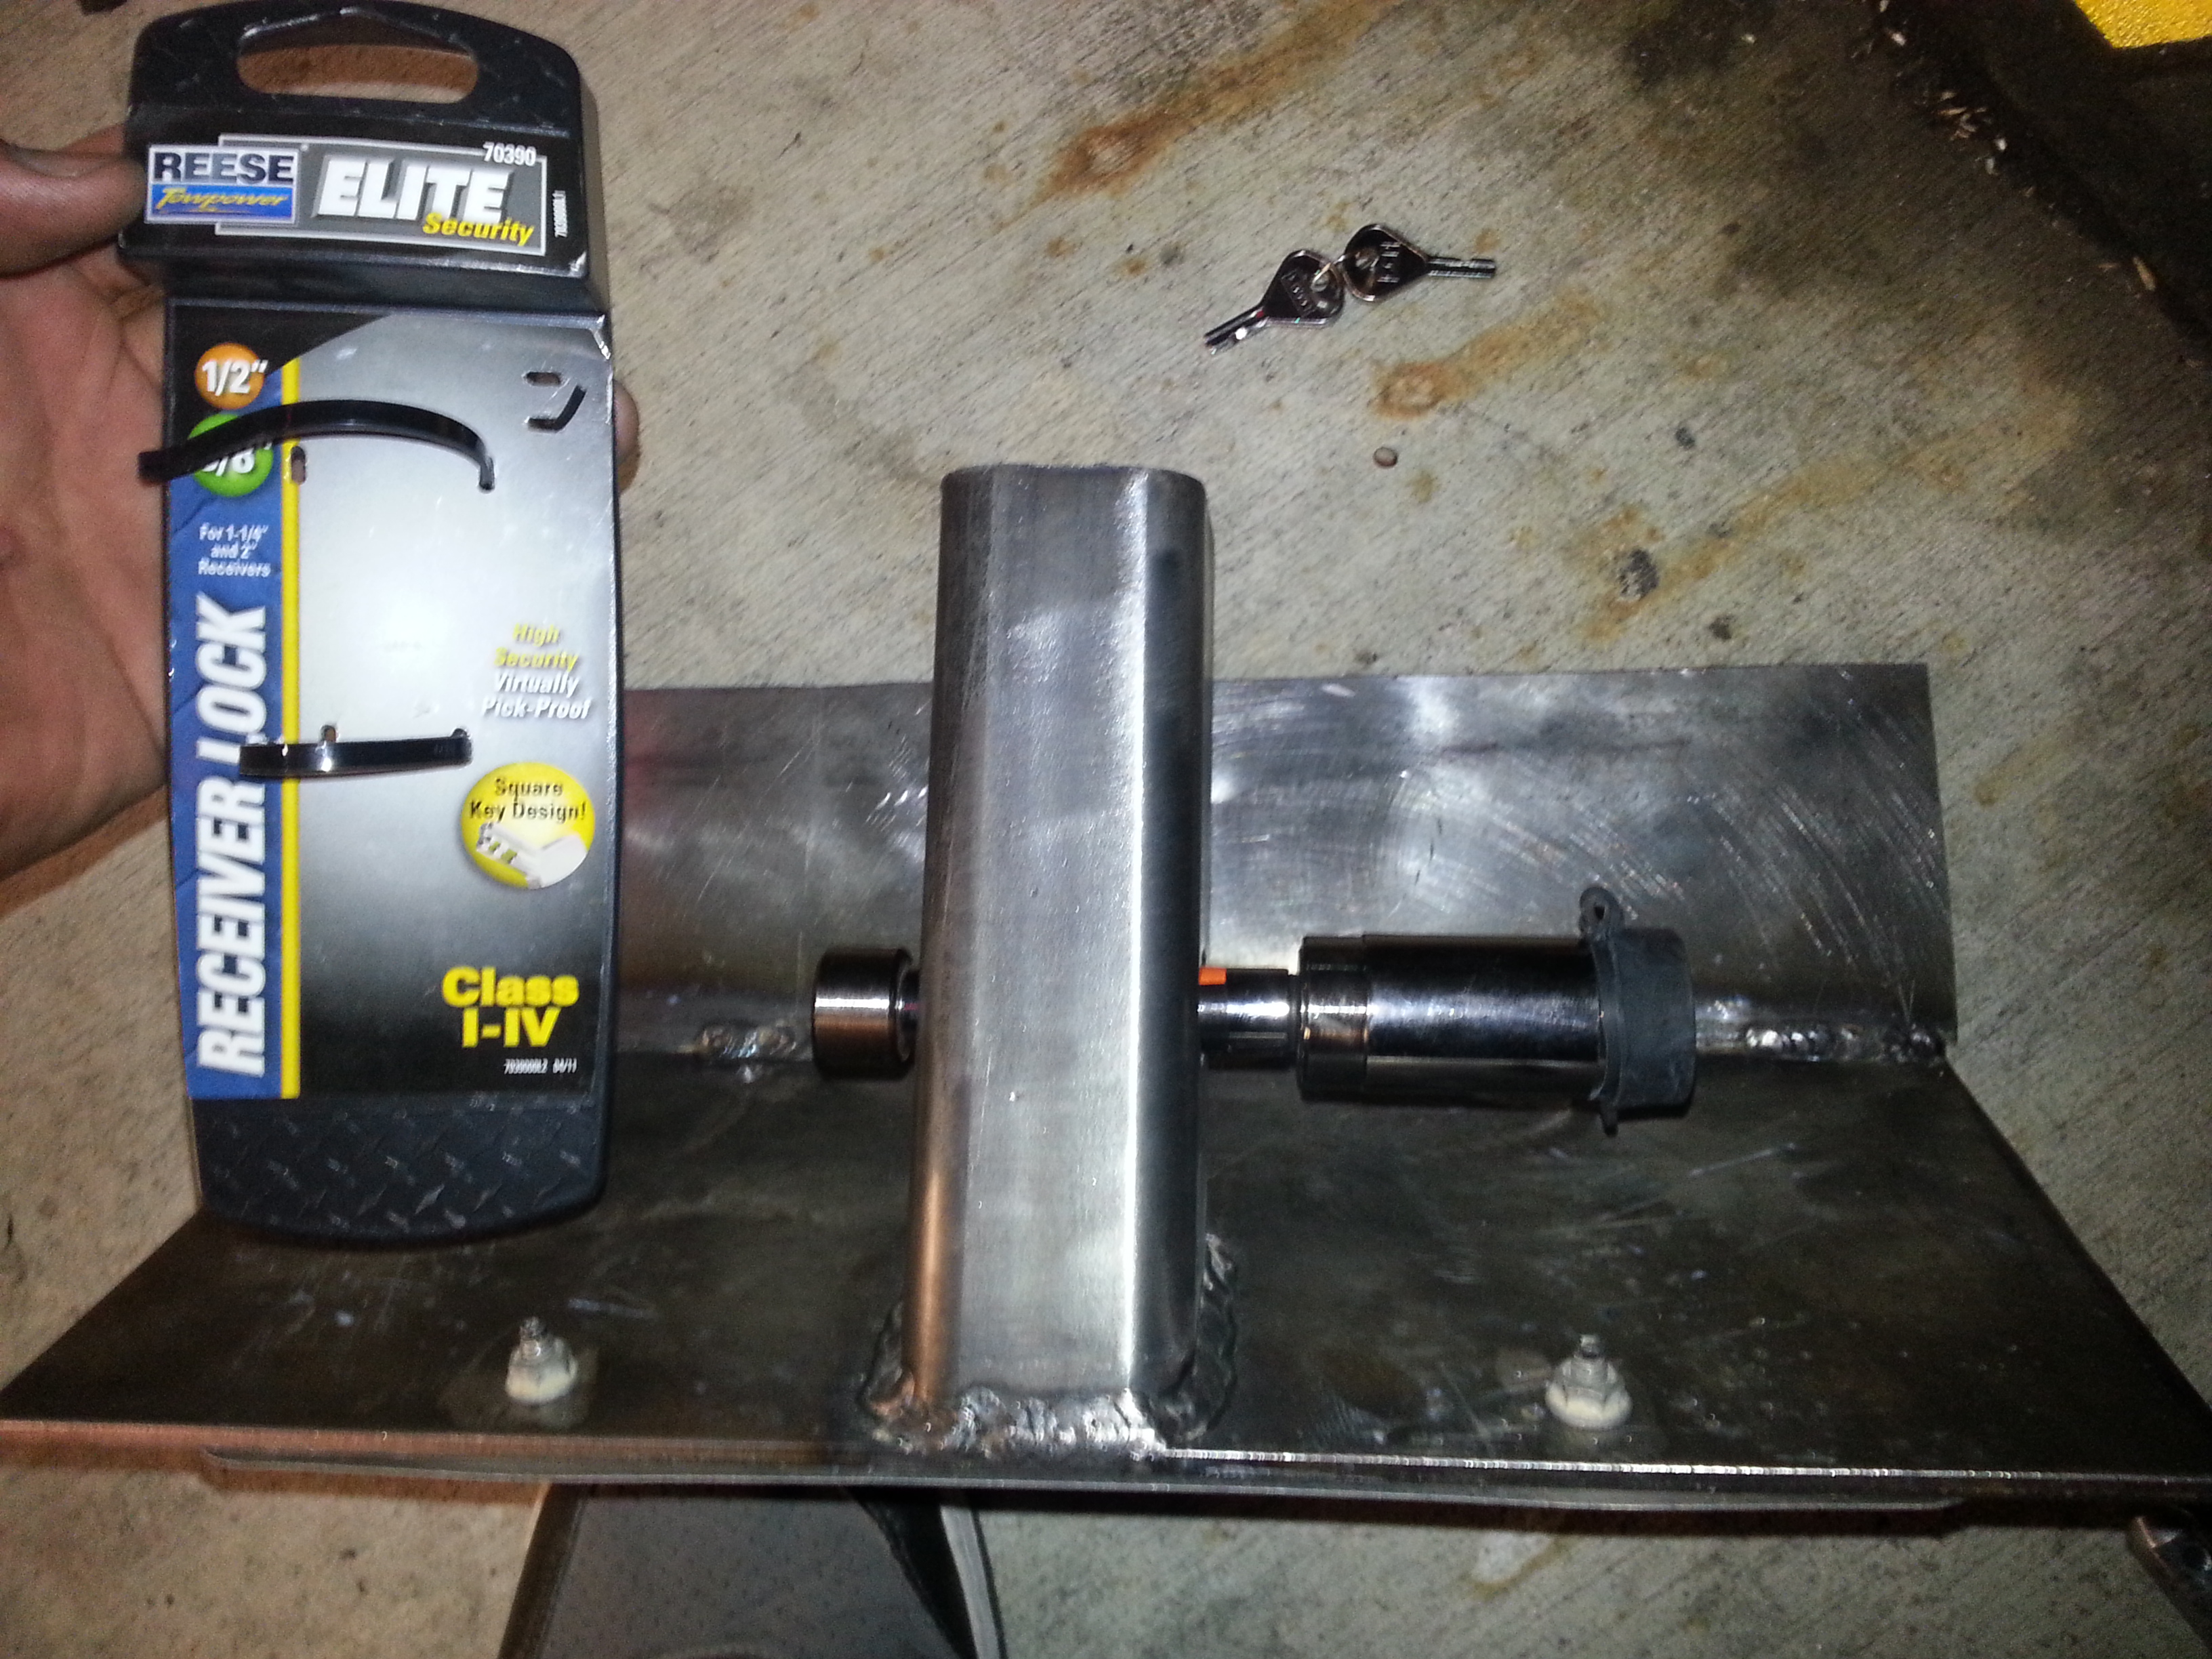
Went to the DMV and got 2 one day permits to take it in to get checked out. So far DMV charges have only been $40. After that I went home and welded on the tow hitch receiver and hoops for the trailer safely chains. I will be using D-Rings on those chains. Also primed and painted up everything. Painting is such a breeze when you have a paint gun! I only have this weekend to prep the trailer to look its best because come monday at 8:20am i have to take he trailer to the DMV to get inspected and complete the paper work to finally make it legal.
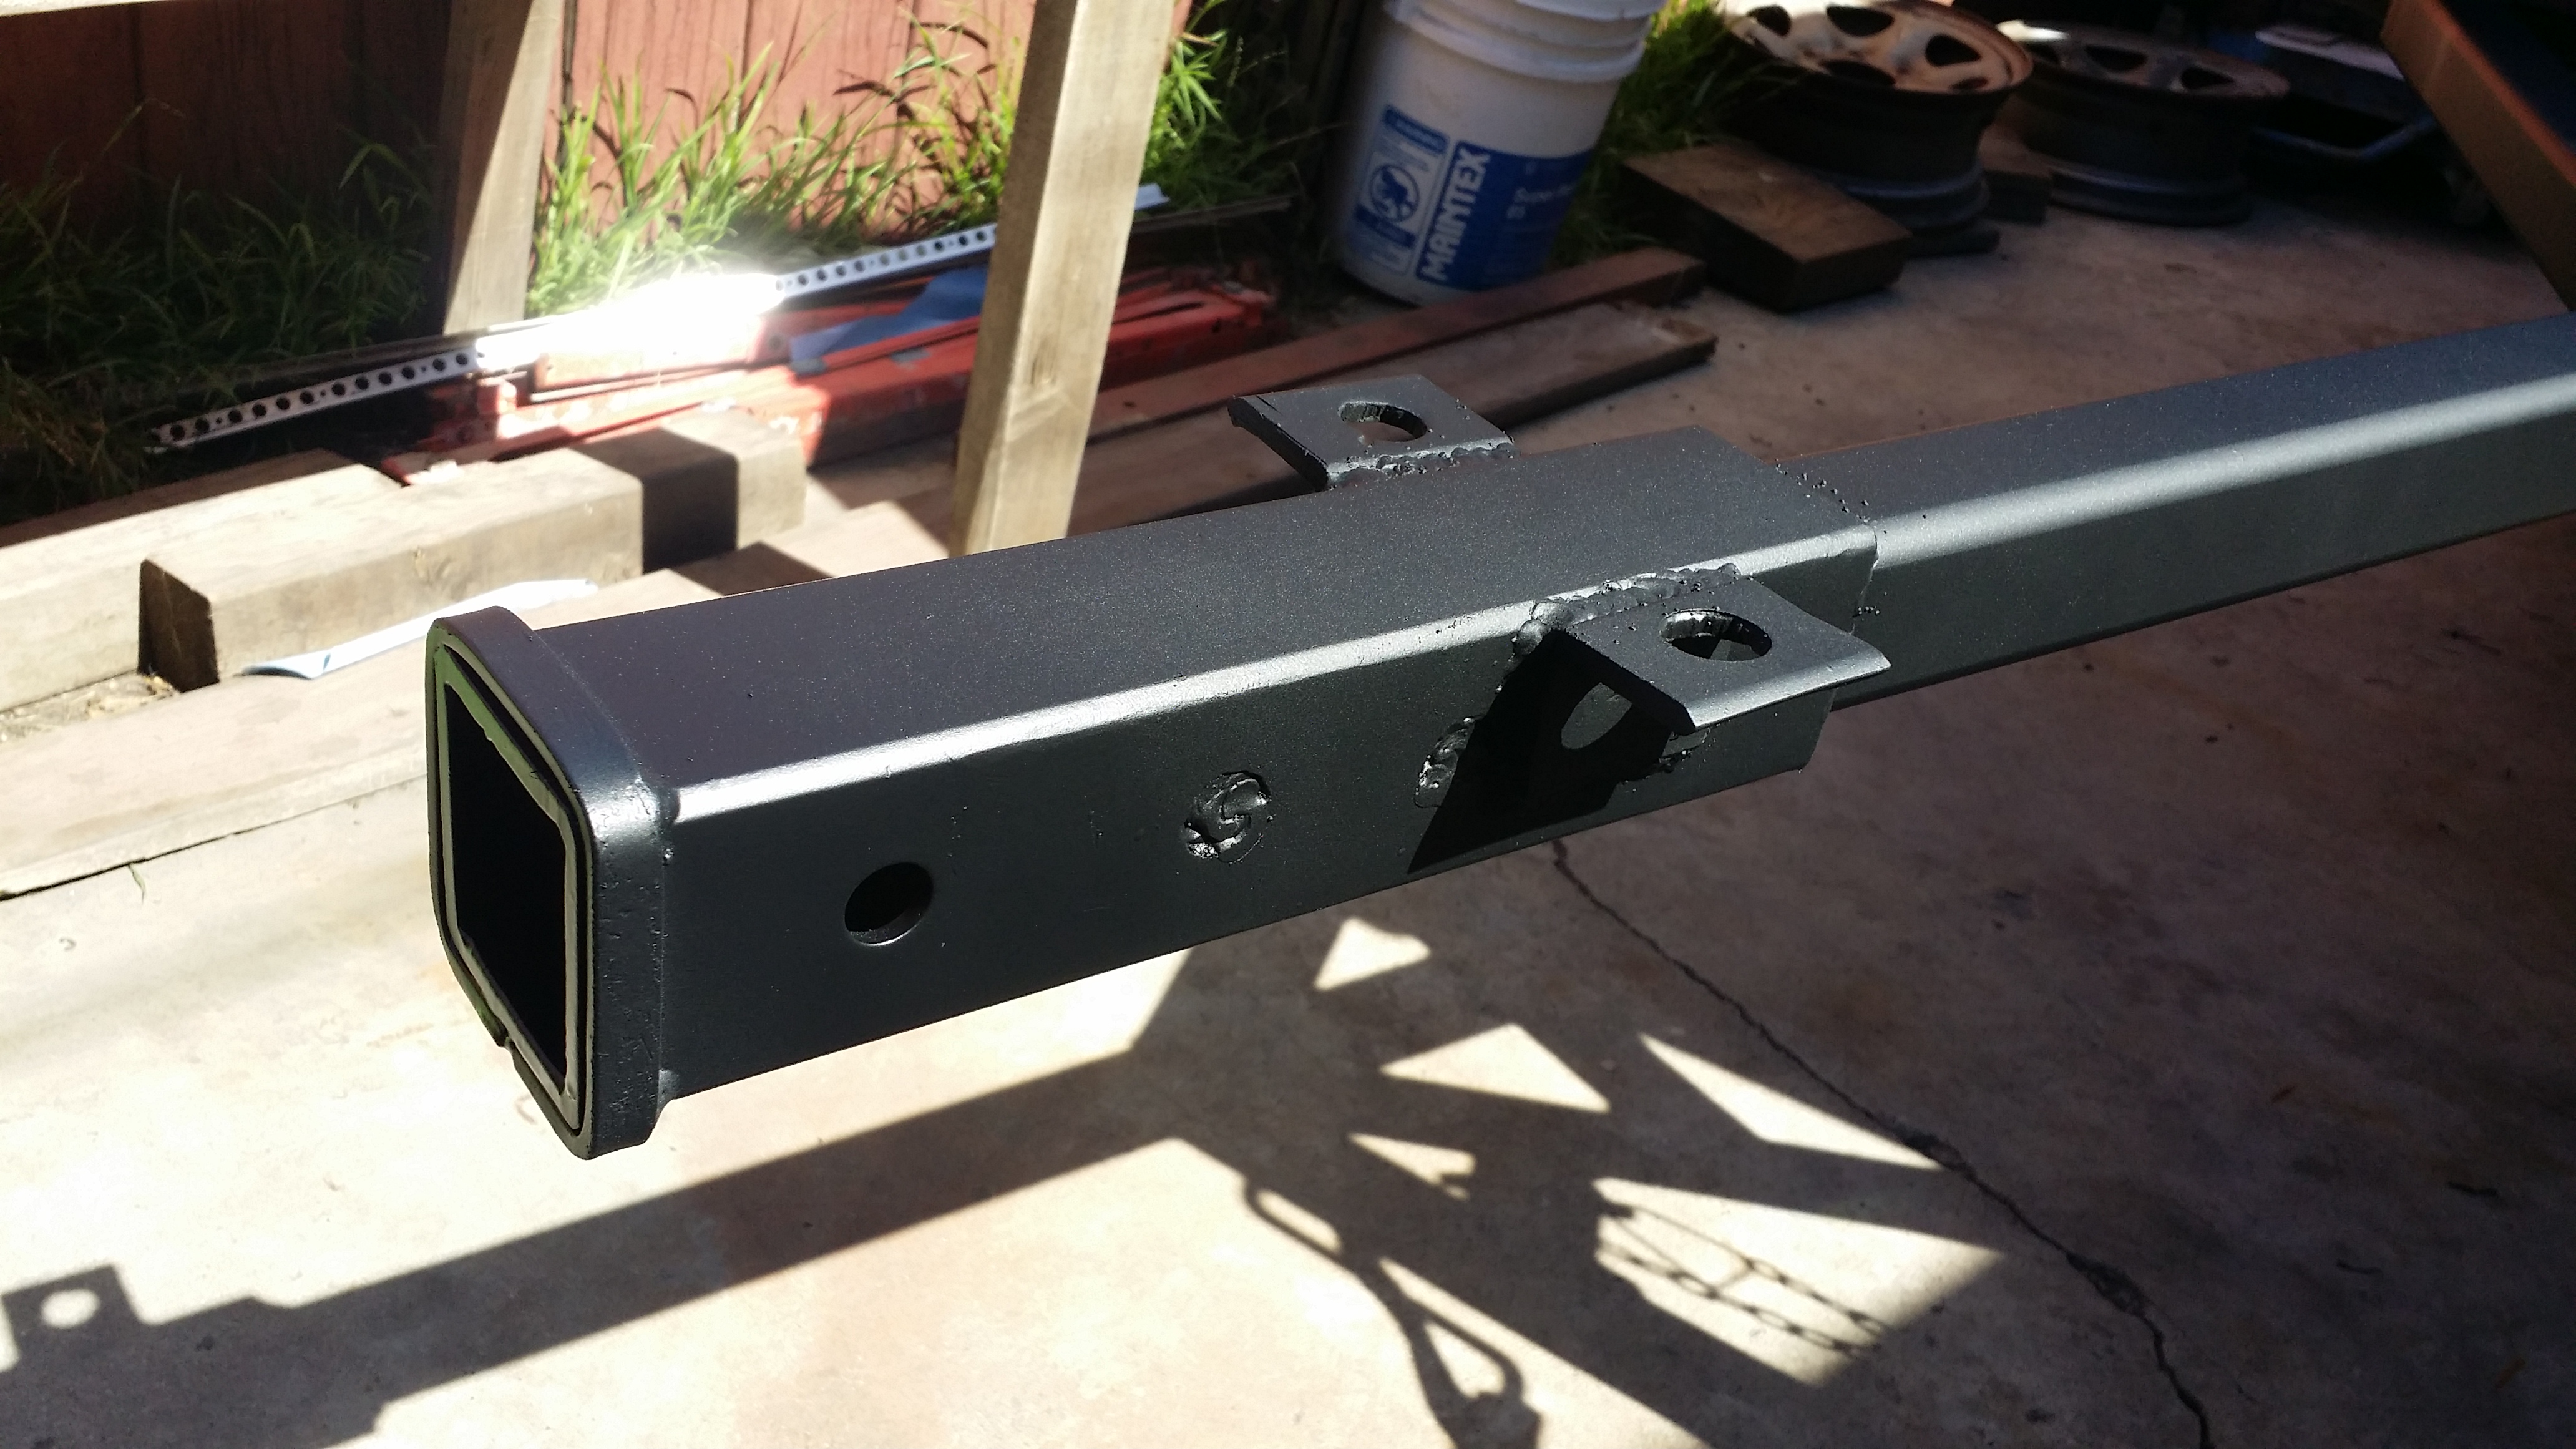
This is an 18" receiver that i bought toward the beginning of my build from harbor freight.
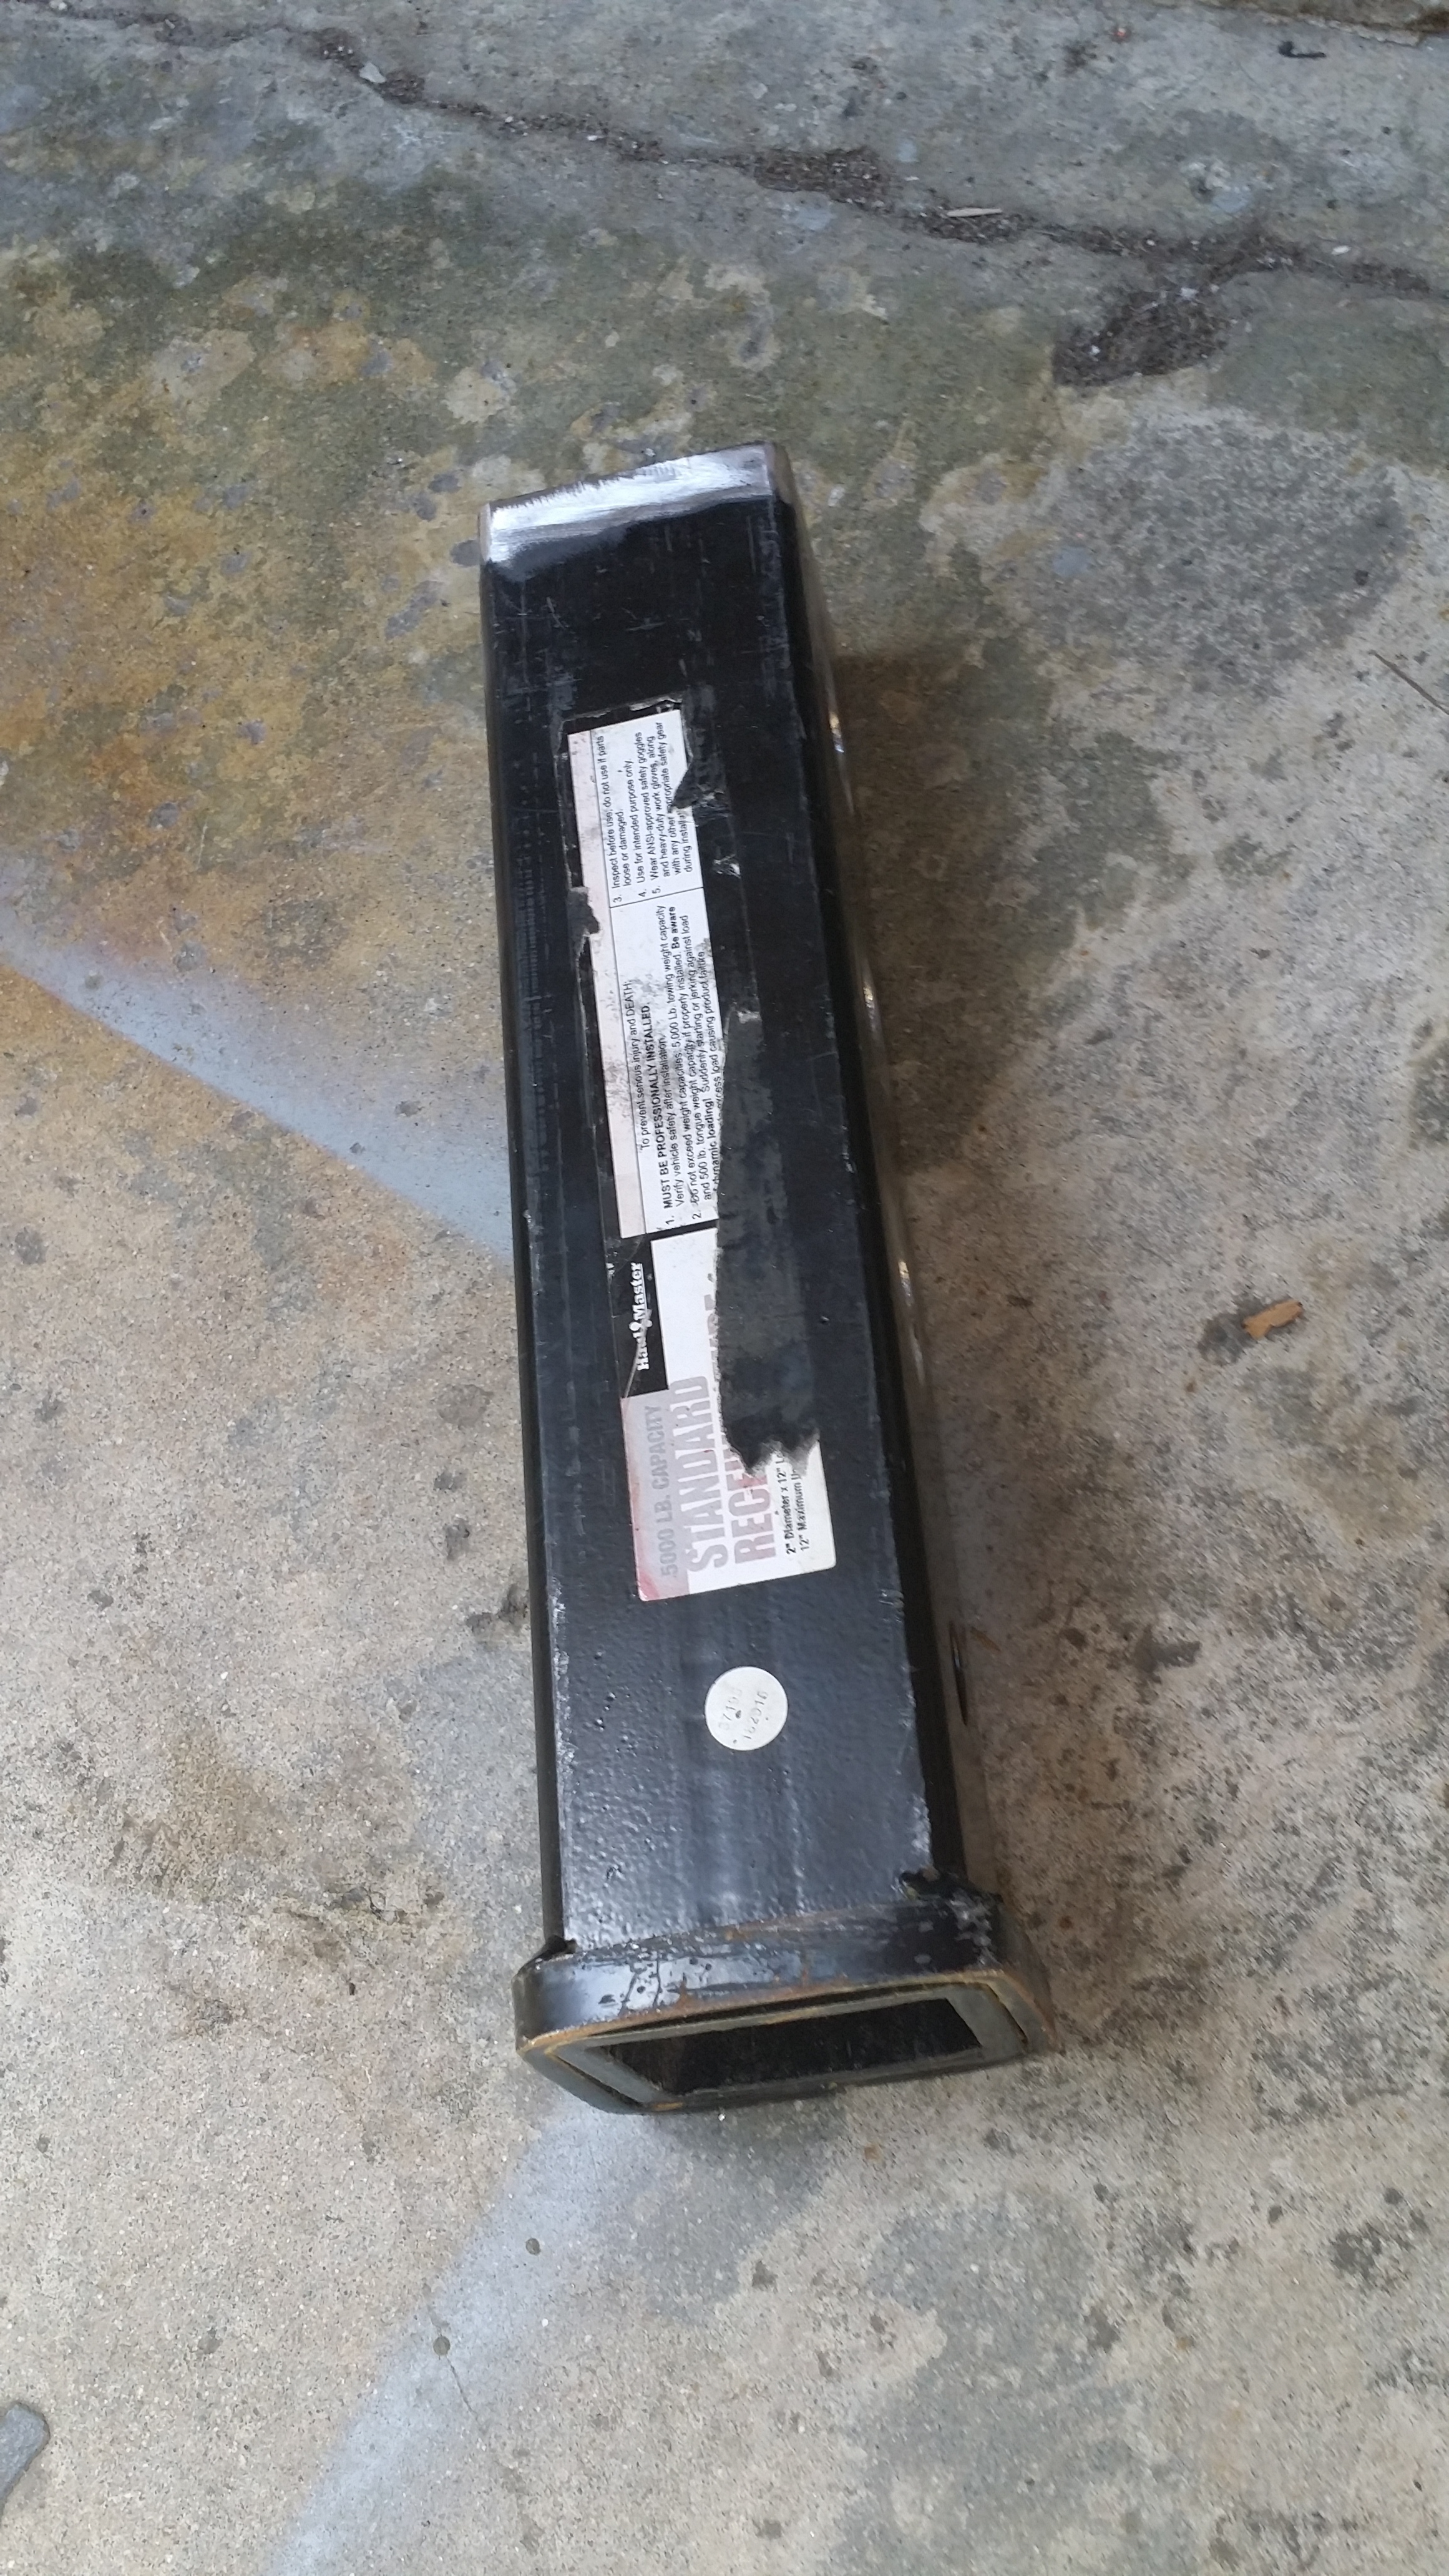
In order for his receiver to really be secure i did drilled 6 holes; 3 on each side, this way i can weld on the shaft of the receiver too not just at the end of it. I think it is much more secure like this. Especially if i ever plan to do some crazy trails with this thing.
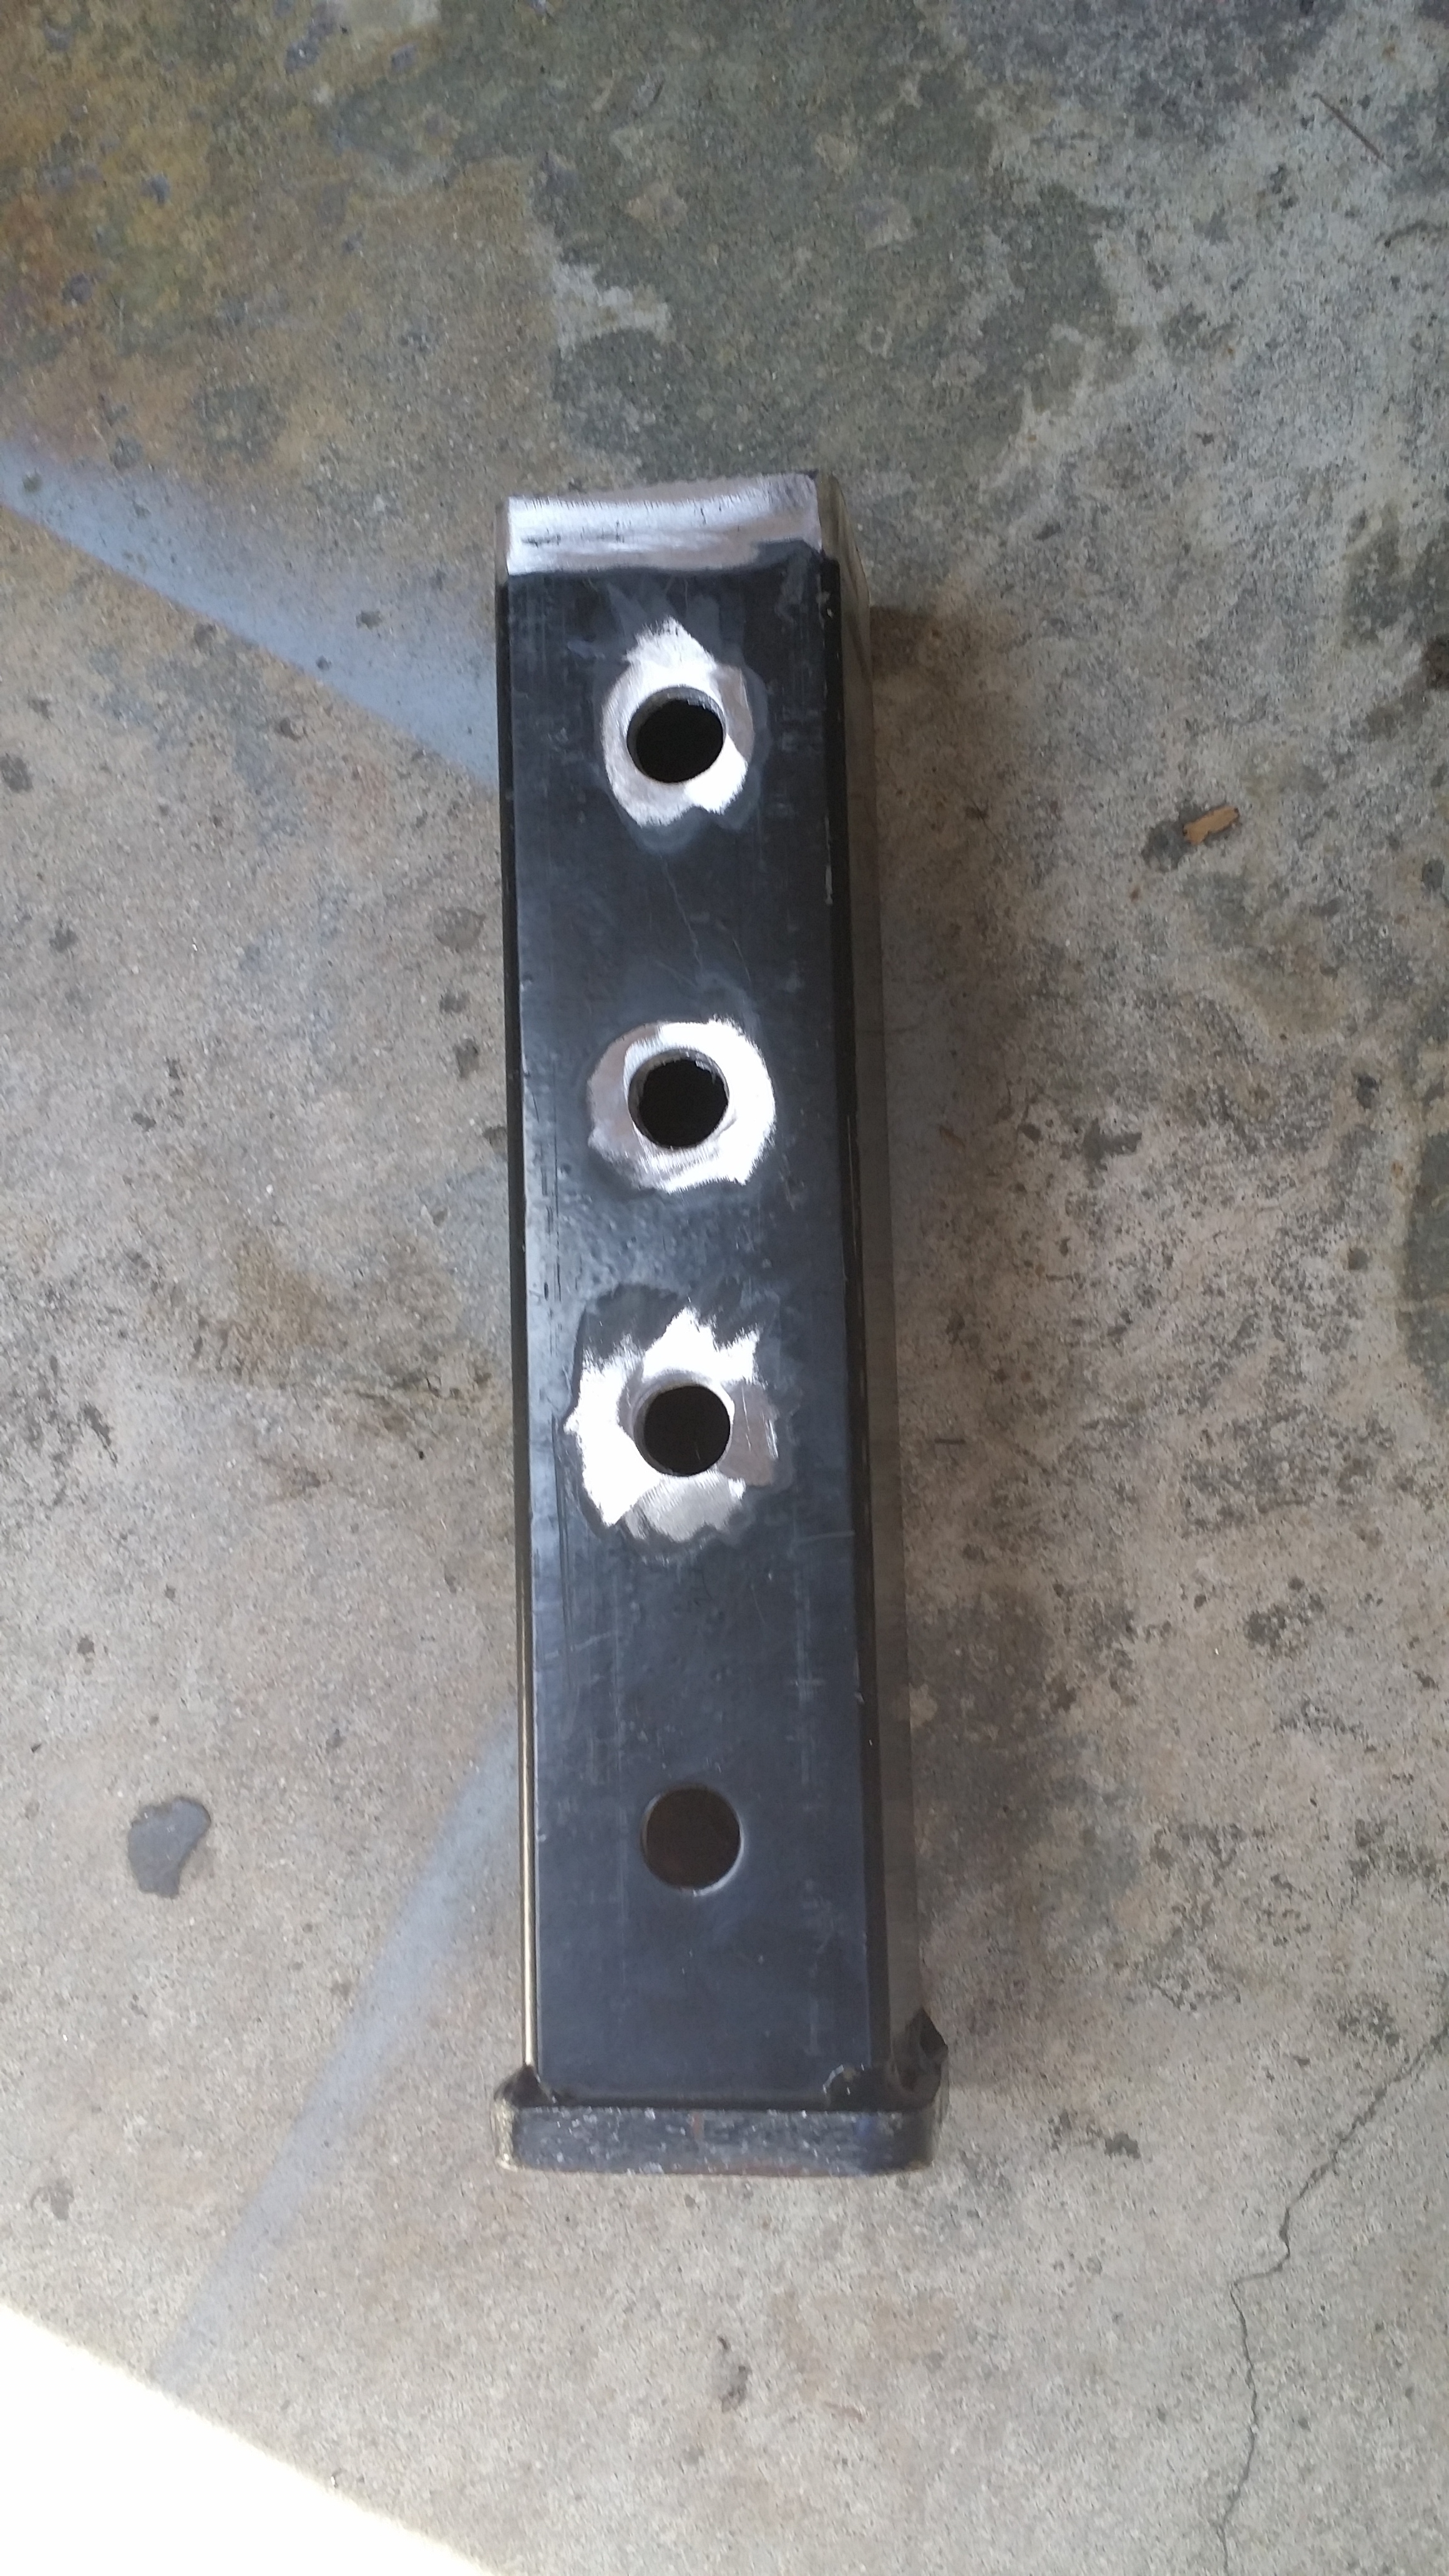
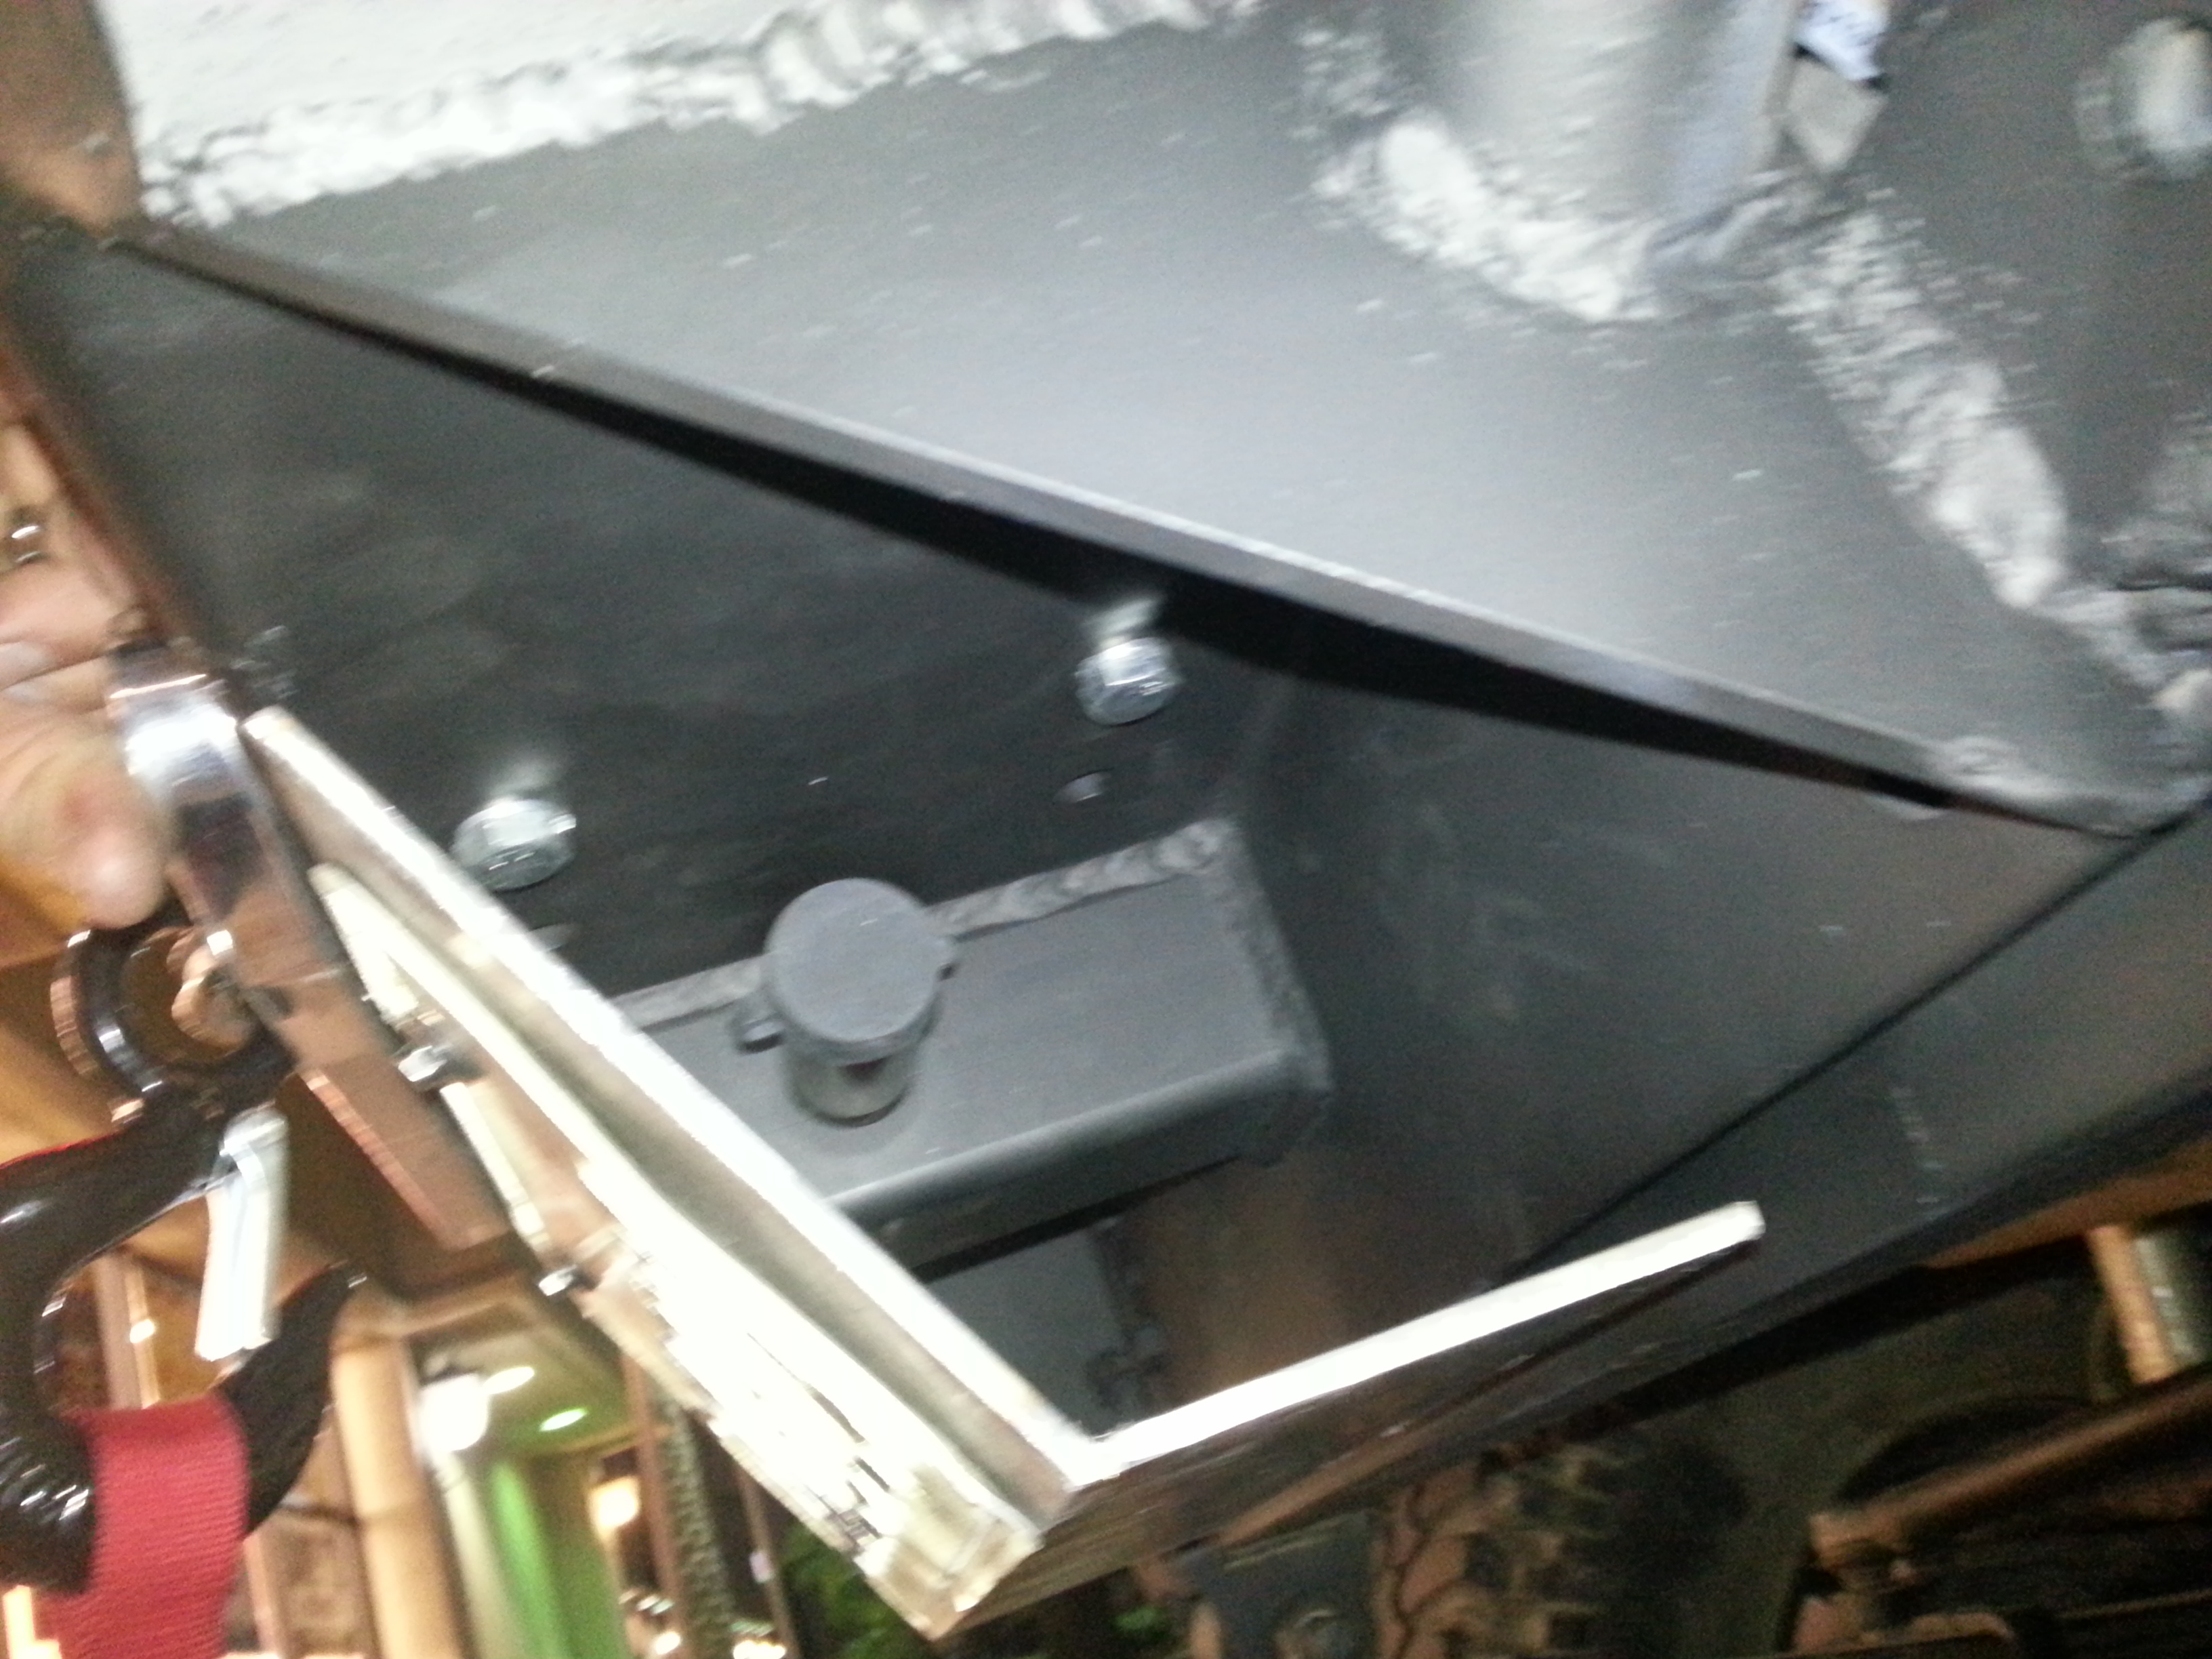
Here you can see what i meant
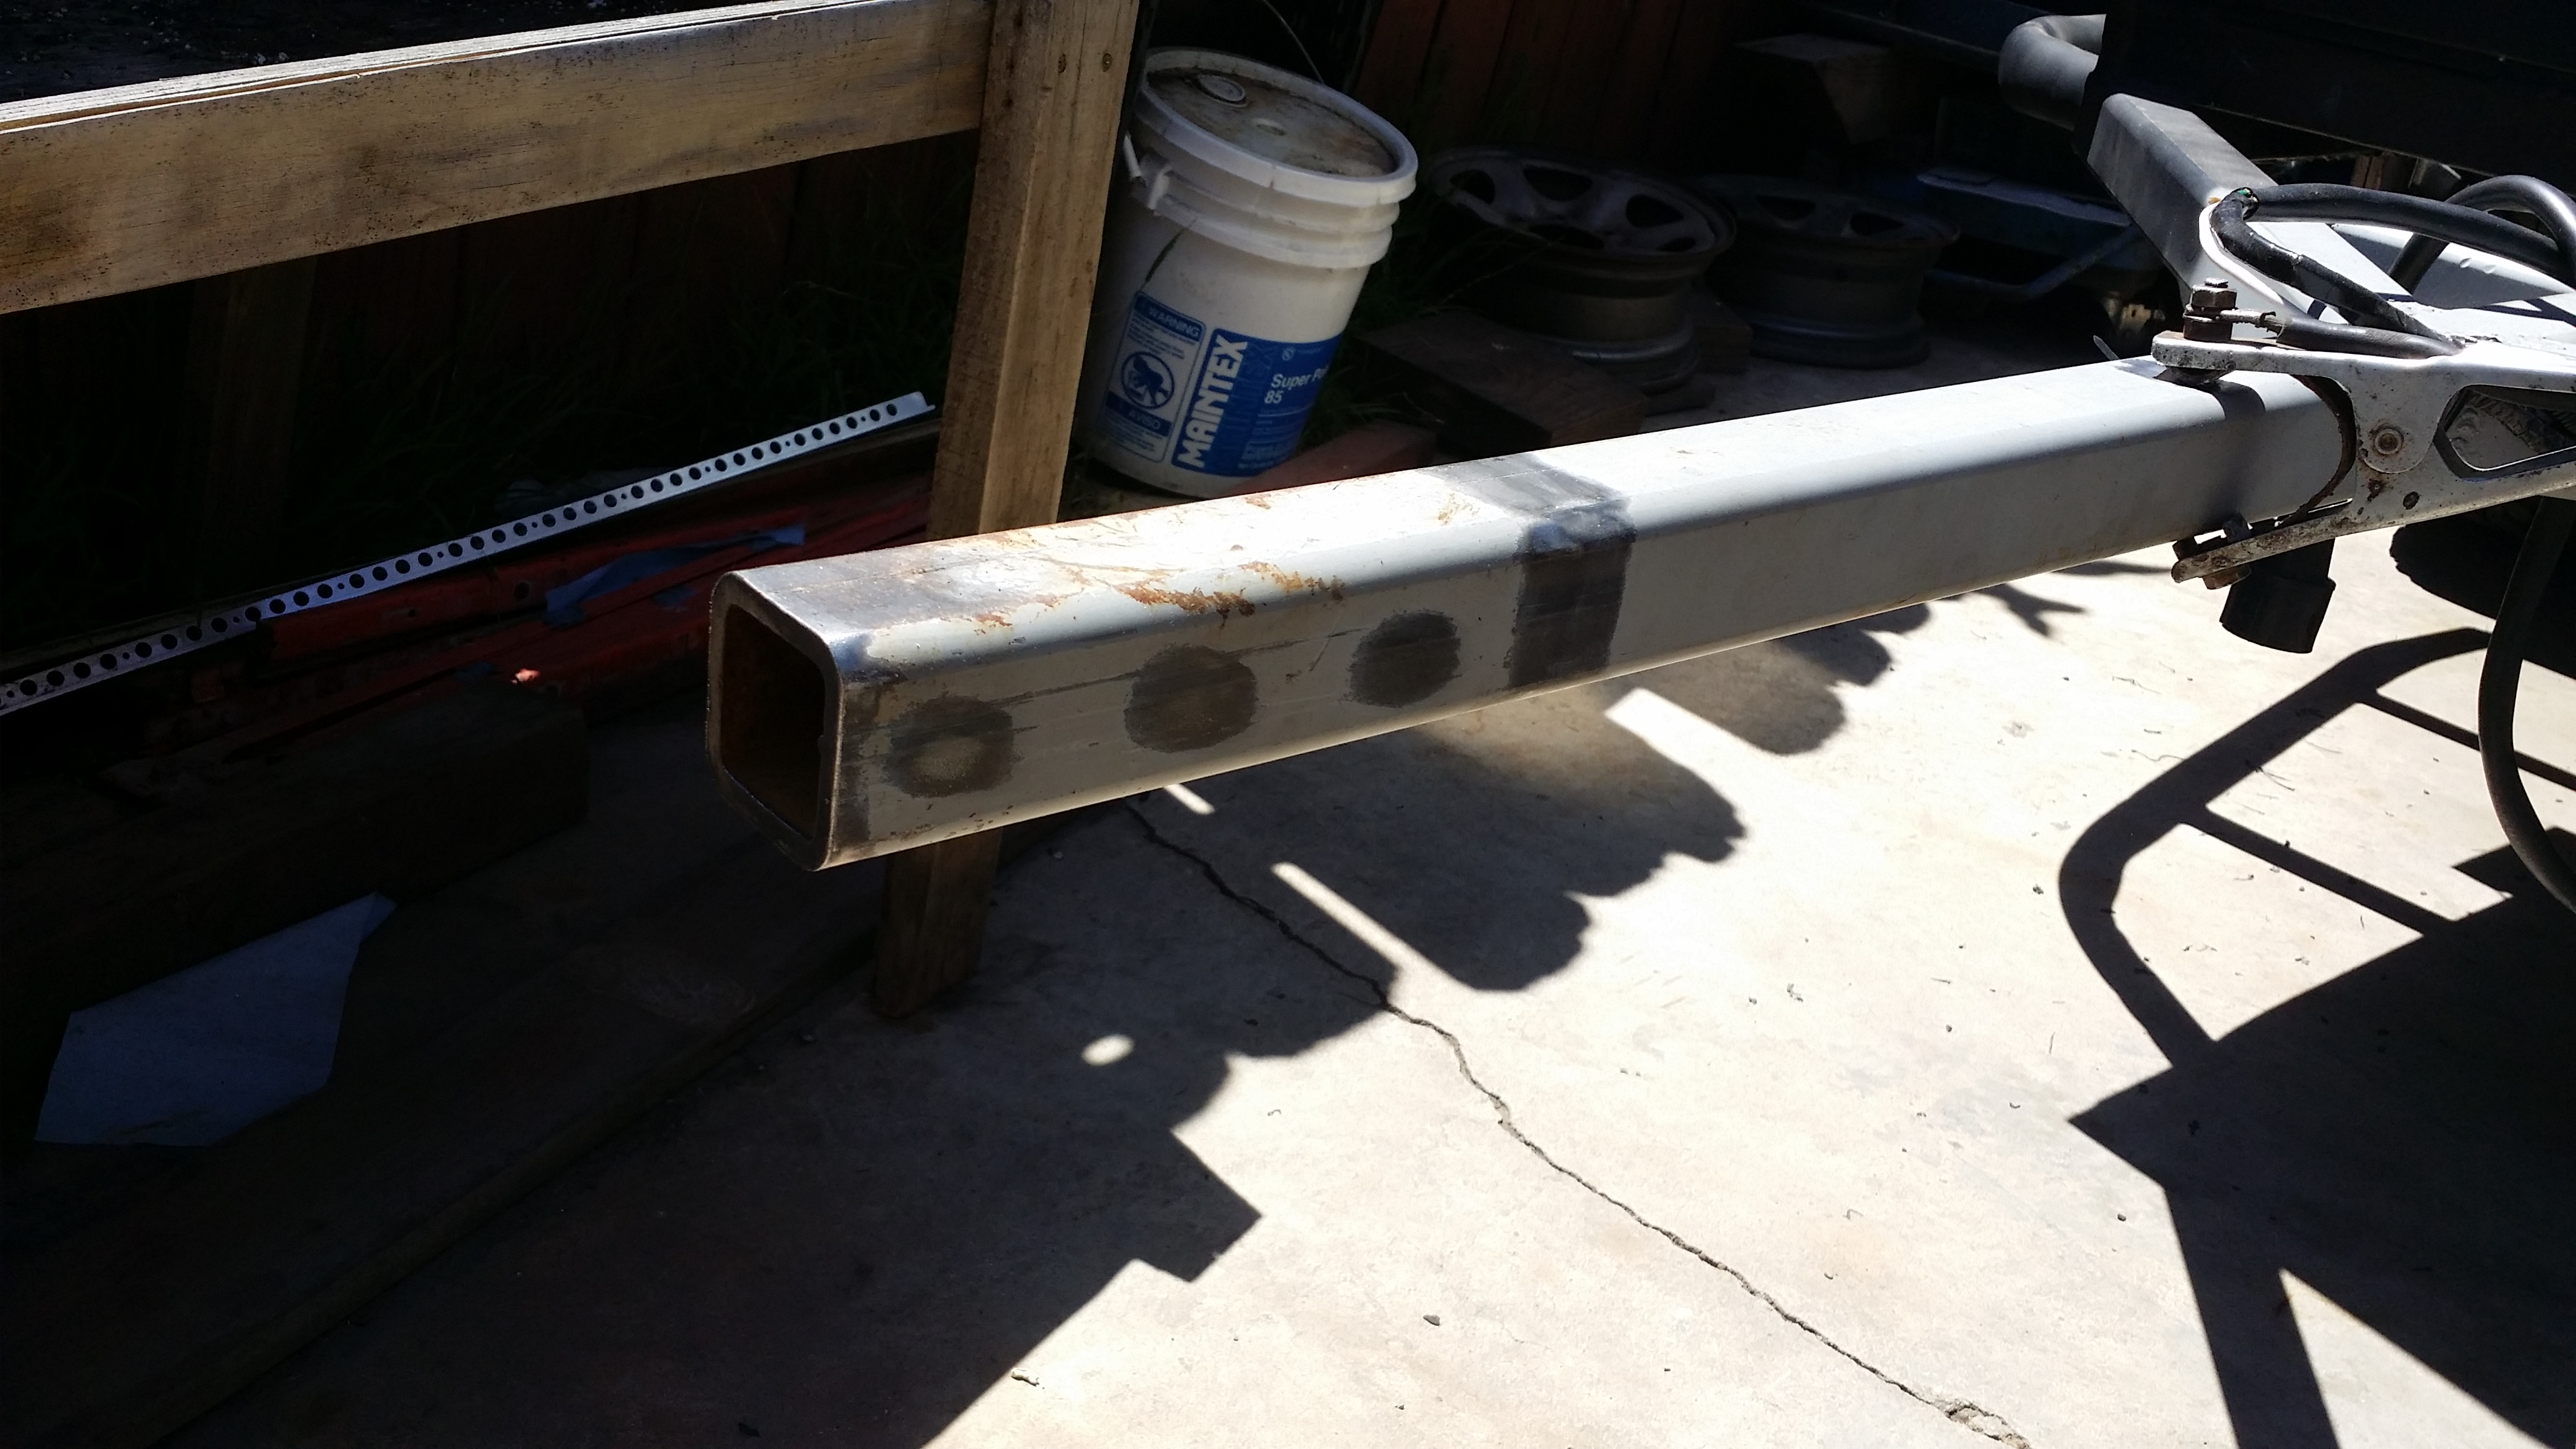
I feel like it is much more secure like this.
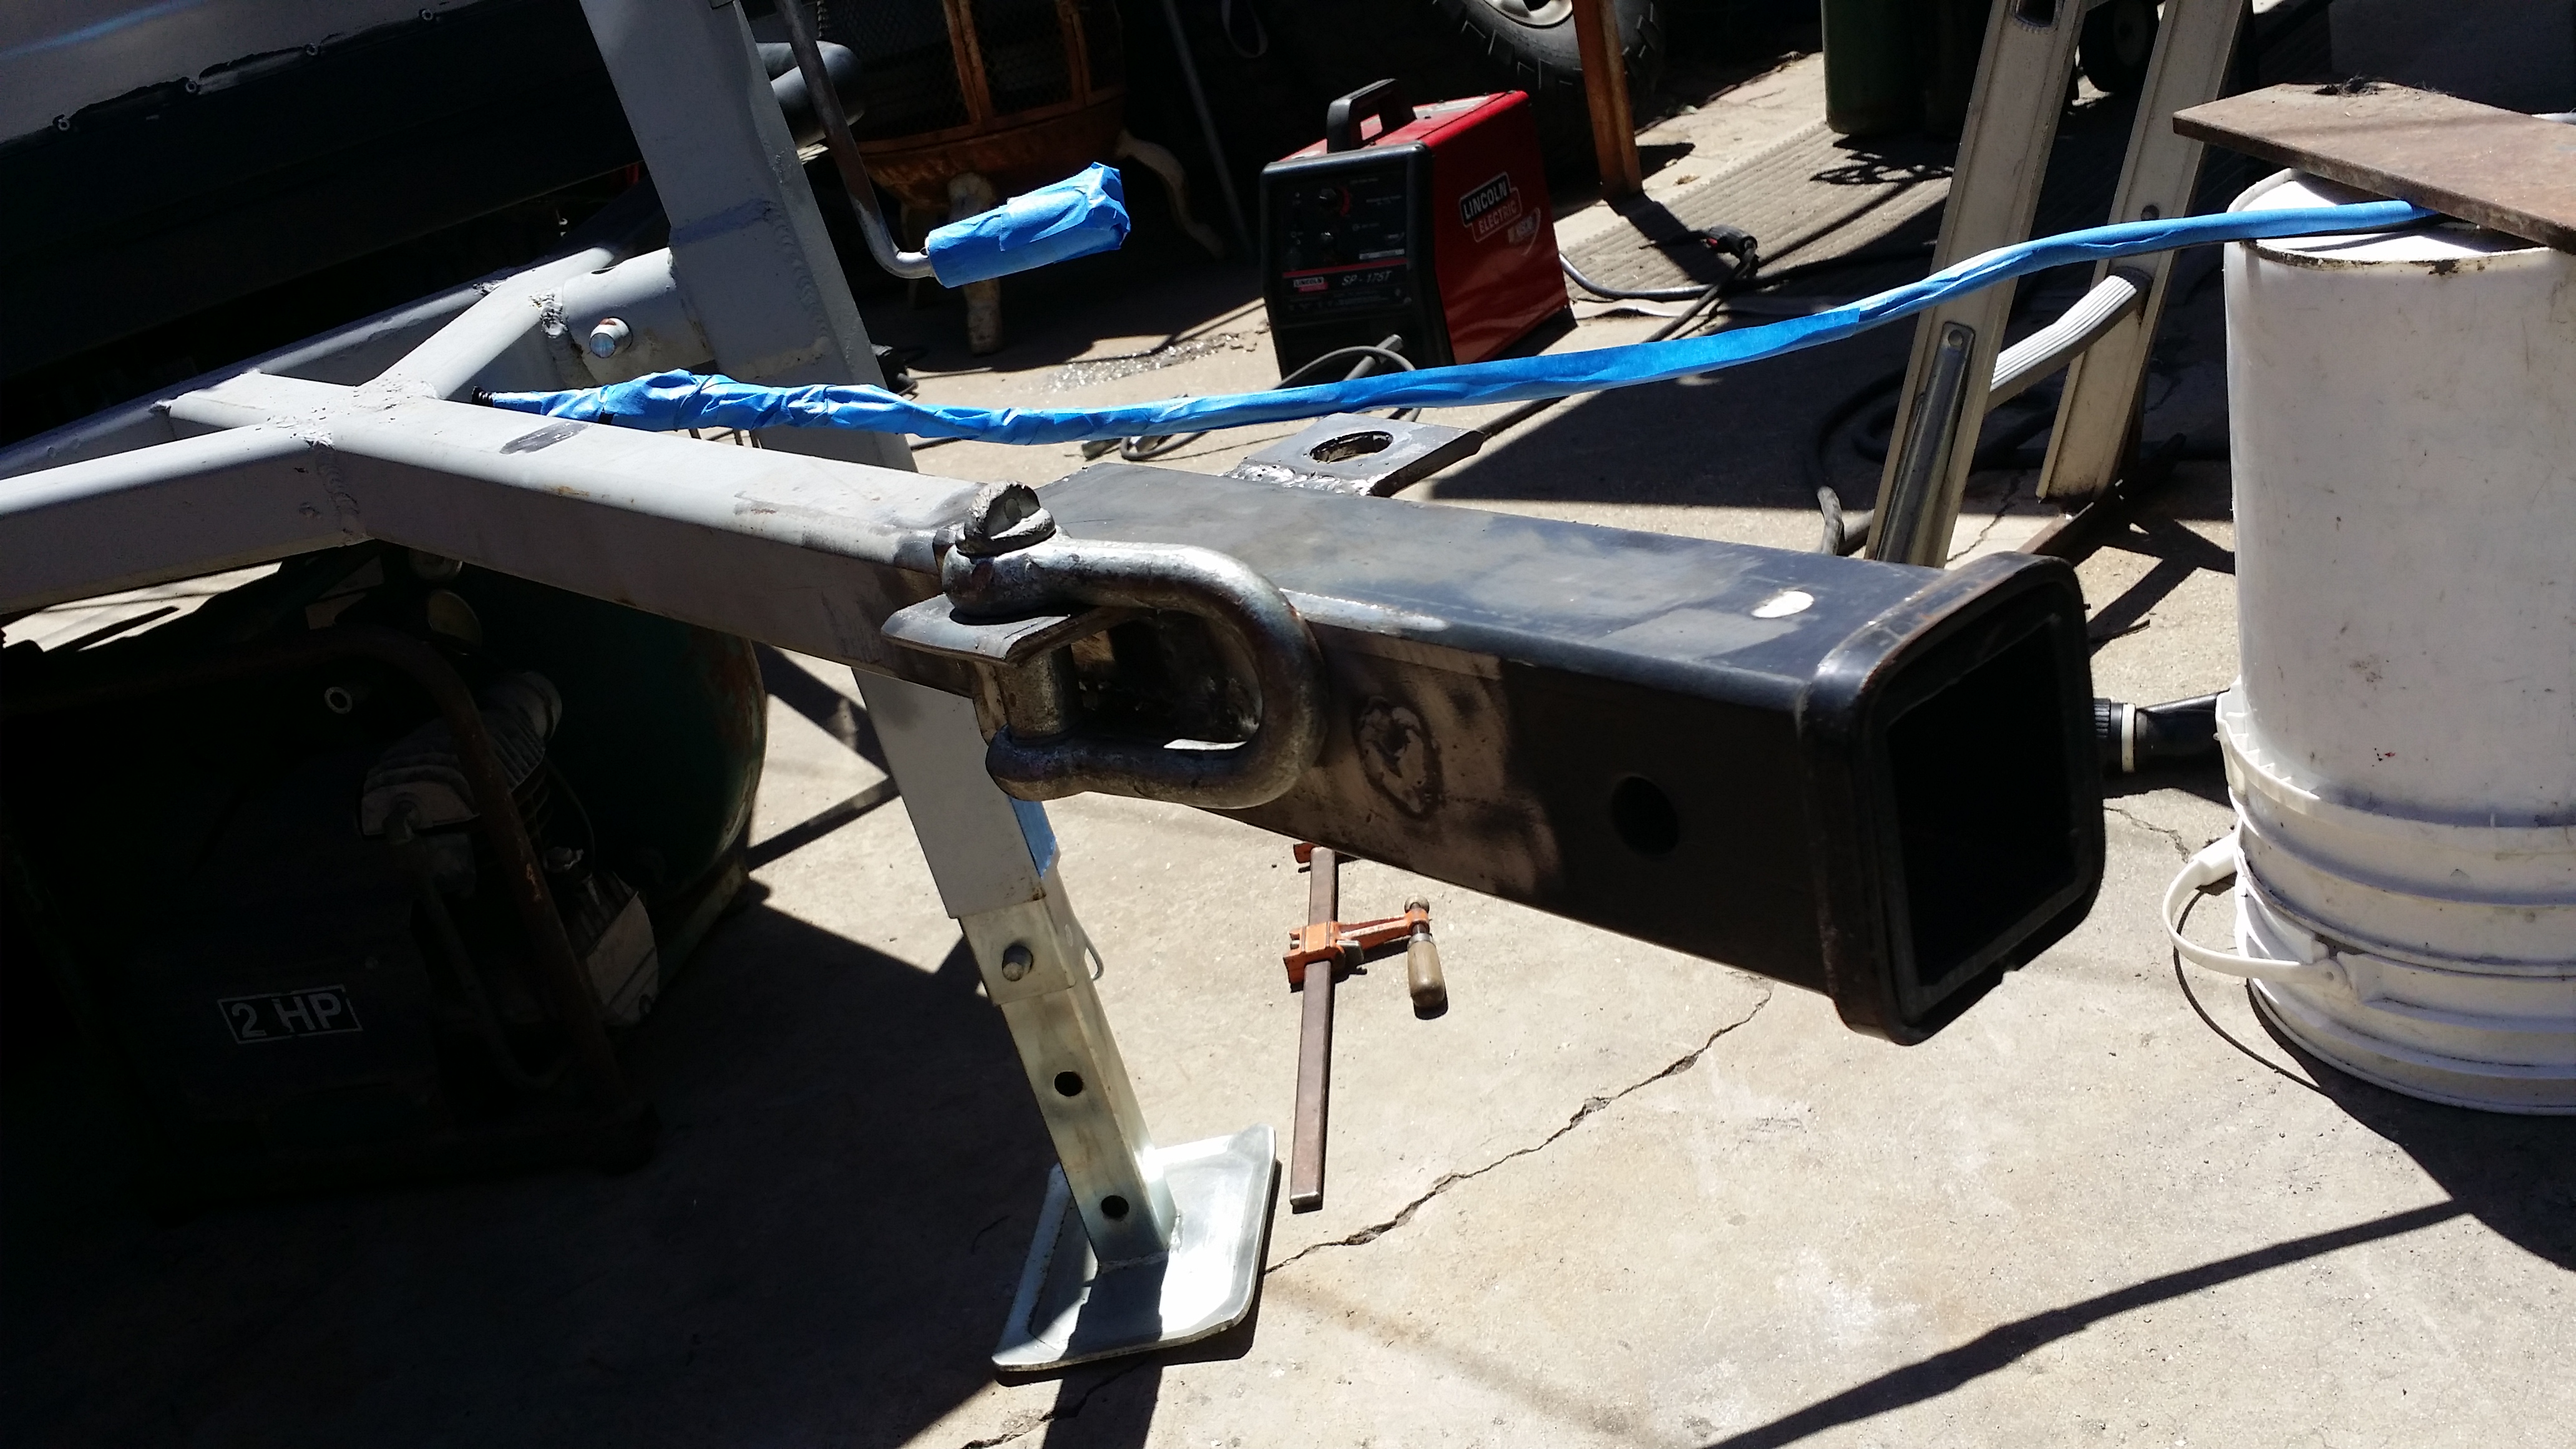
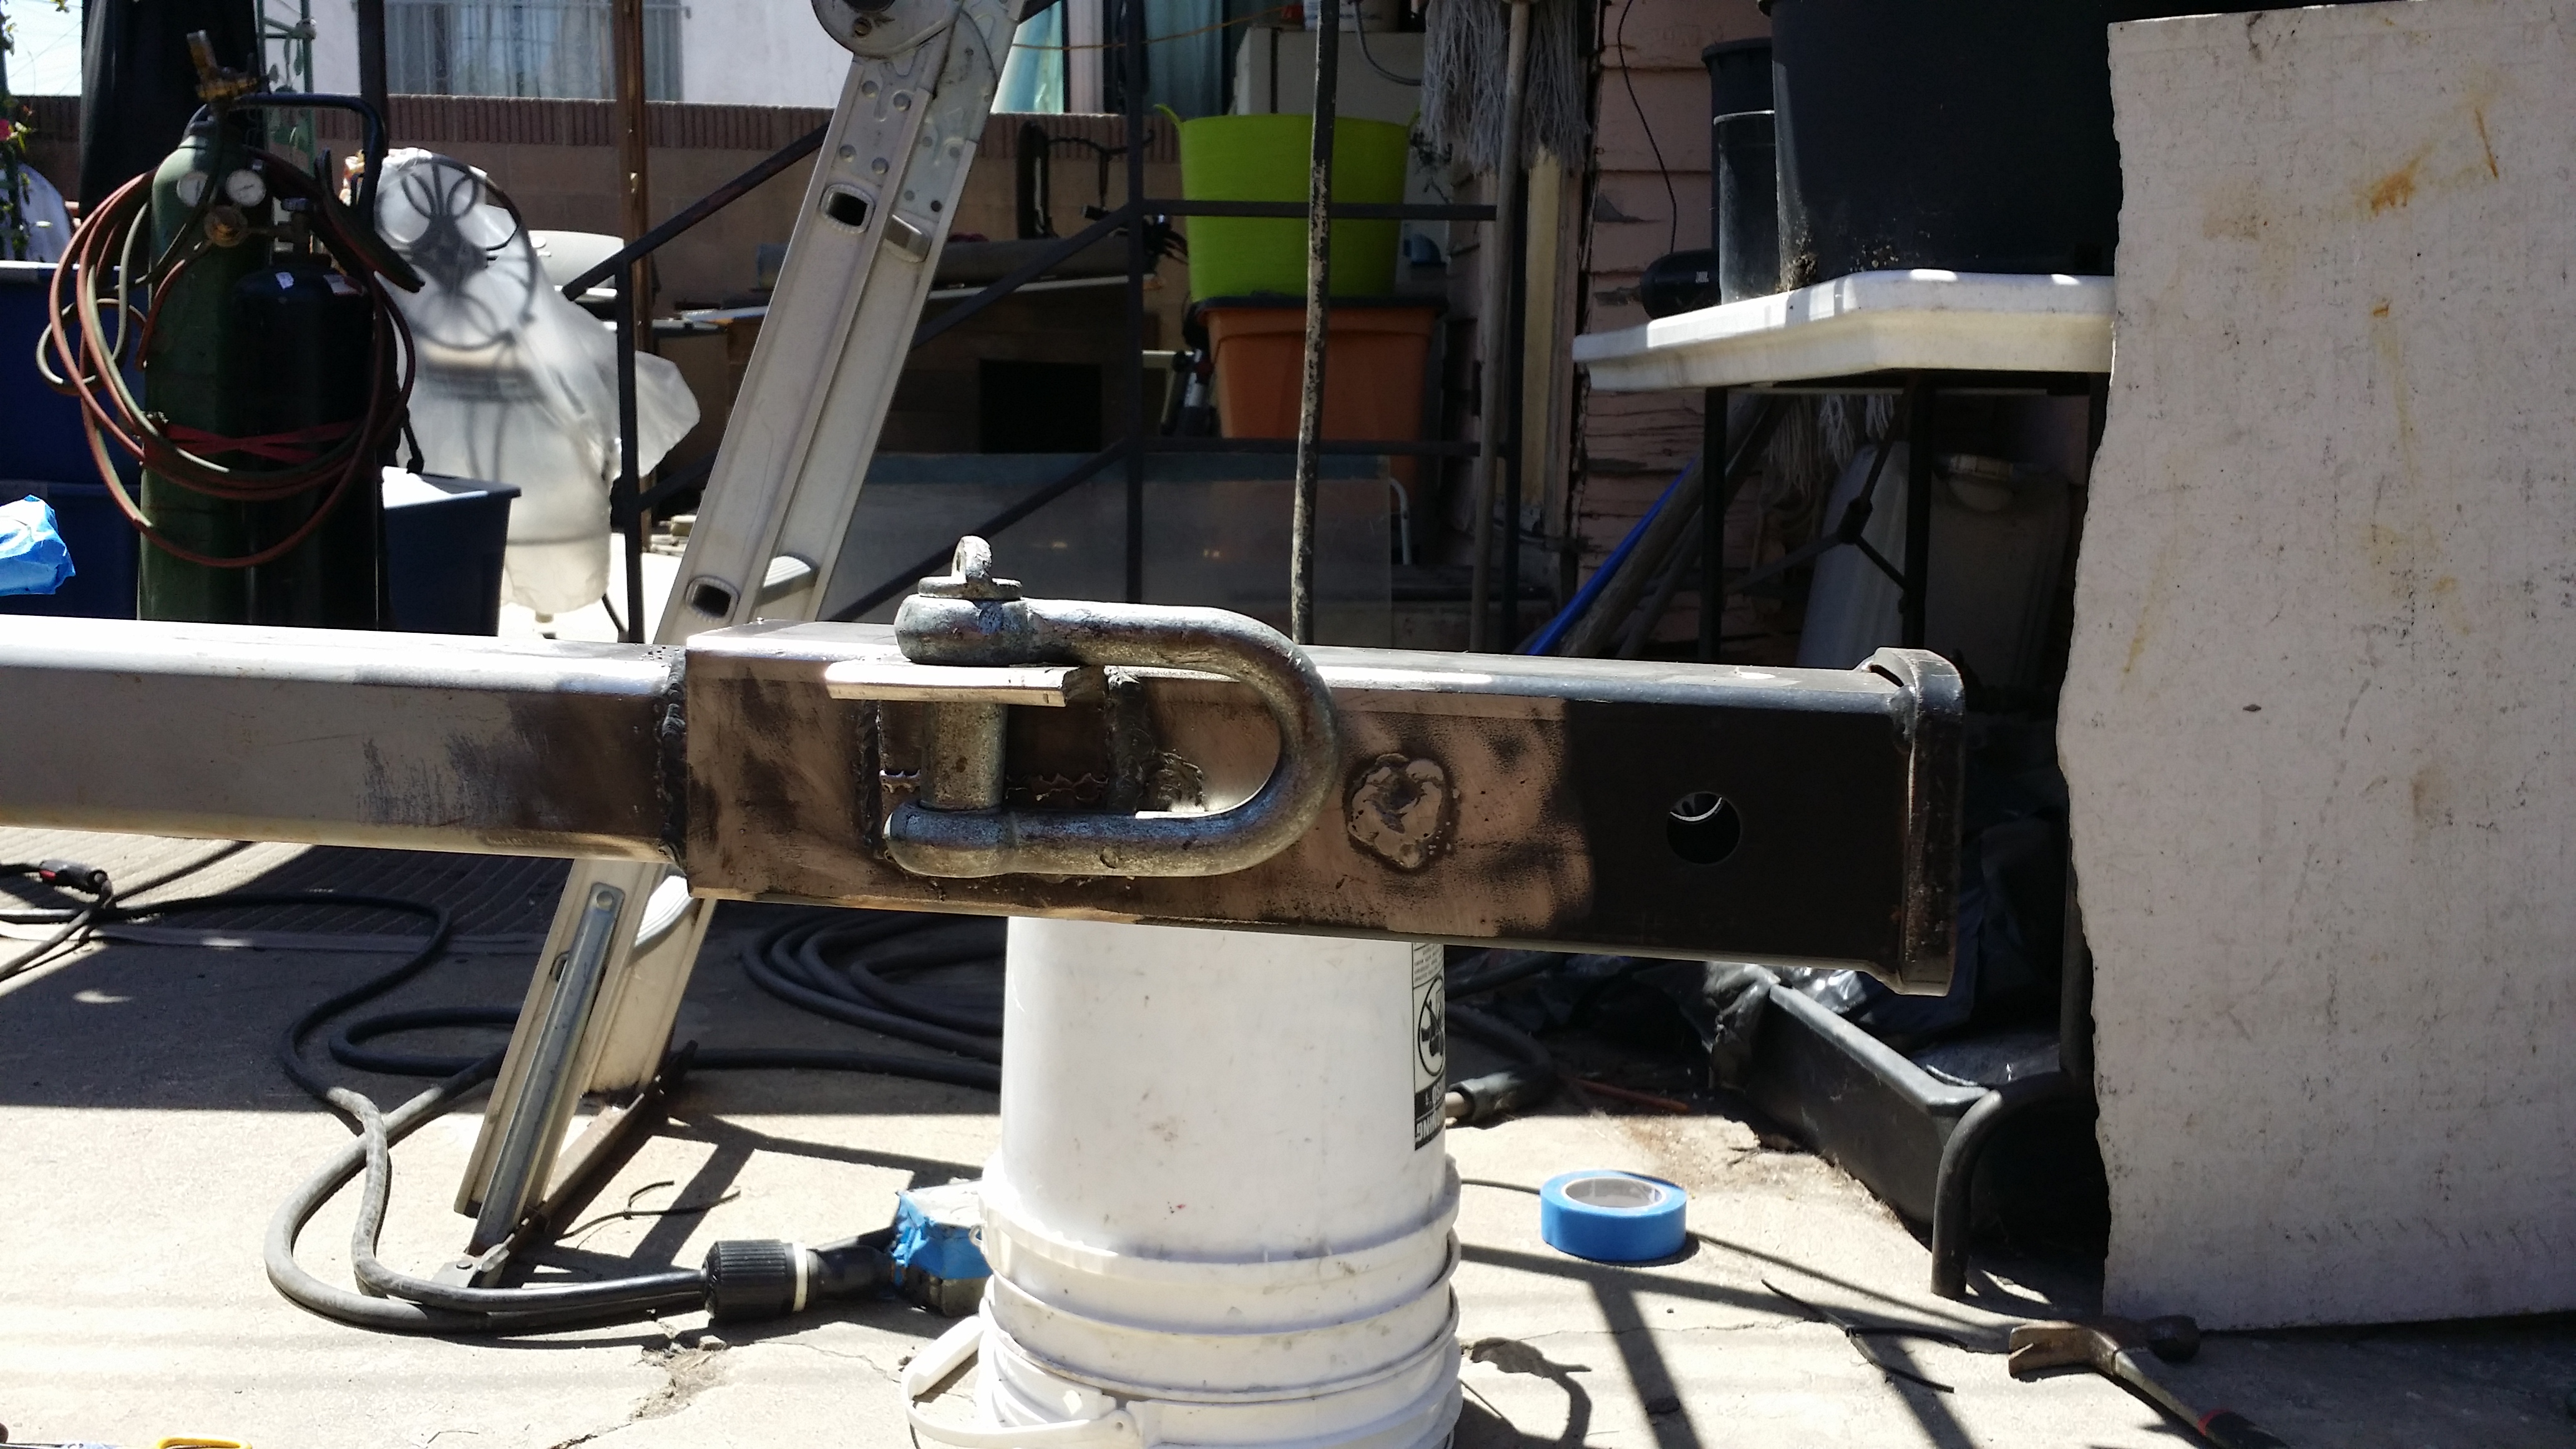
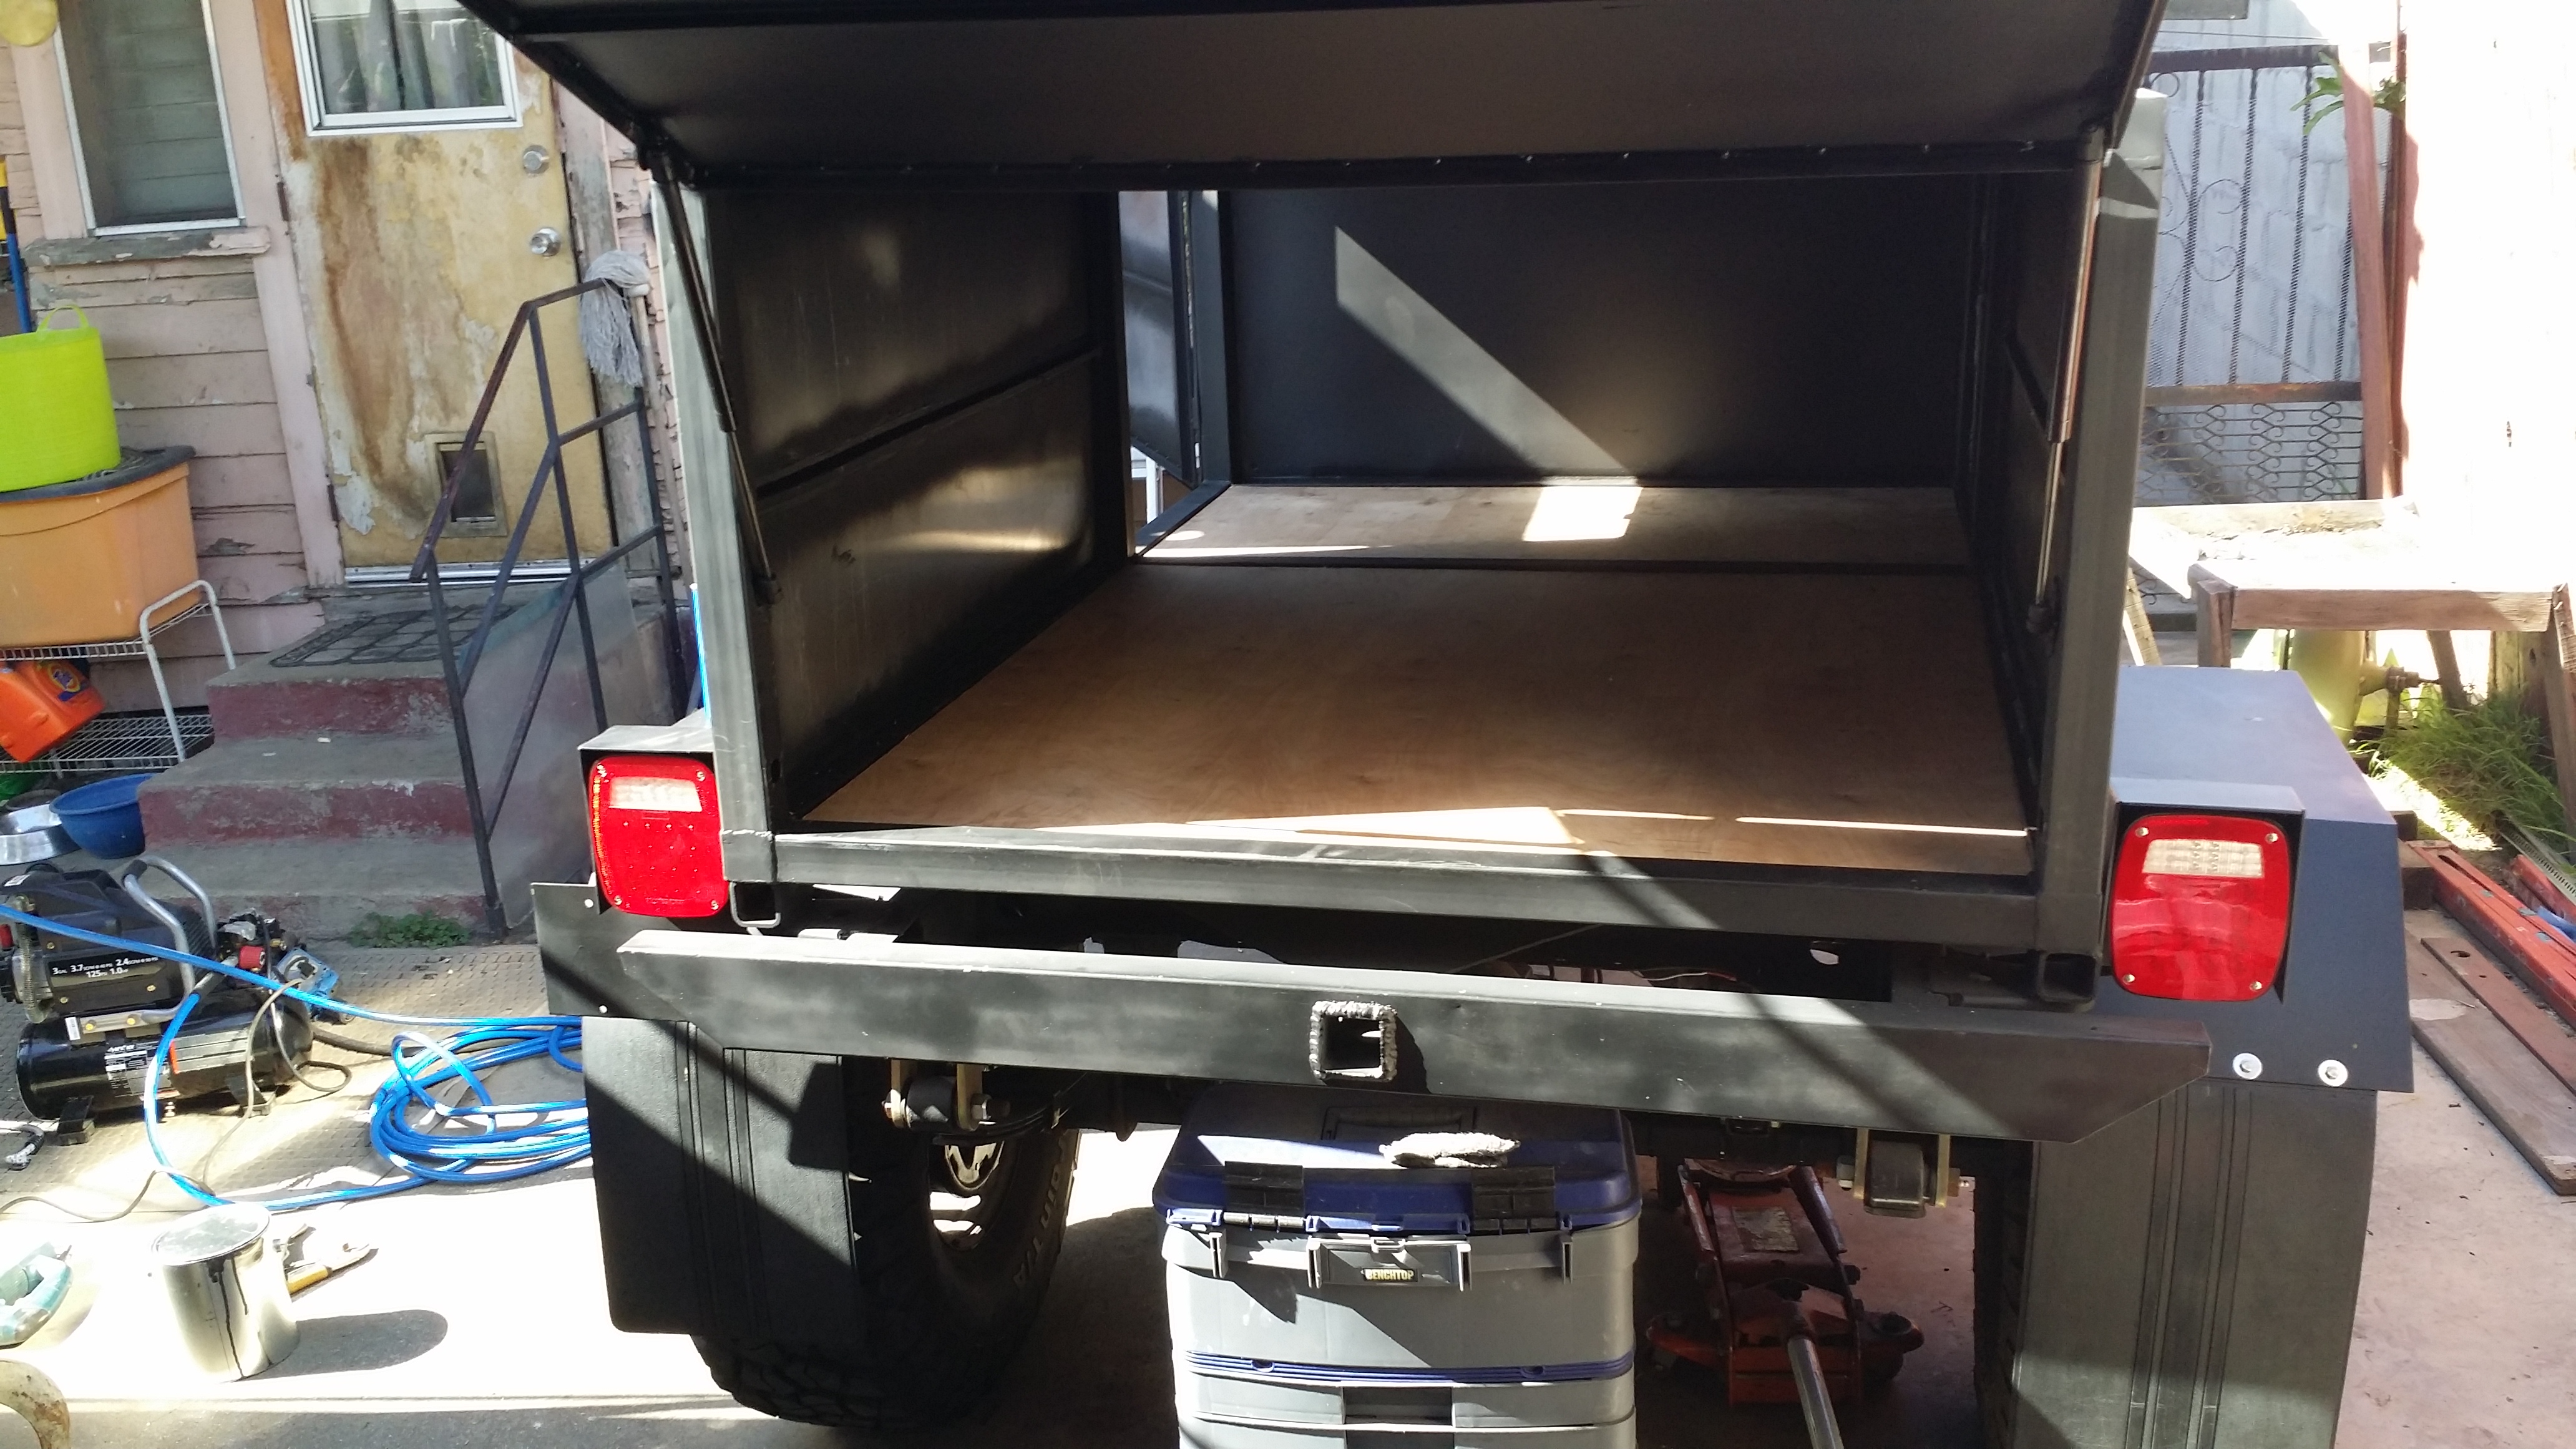
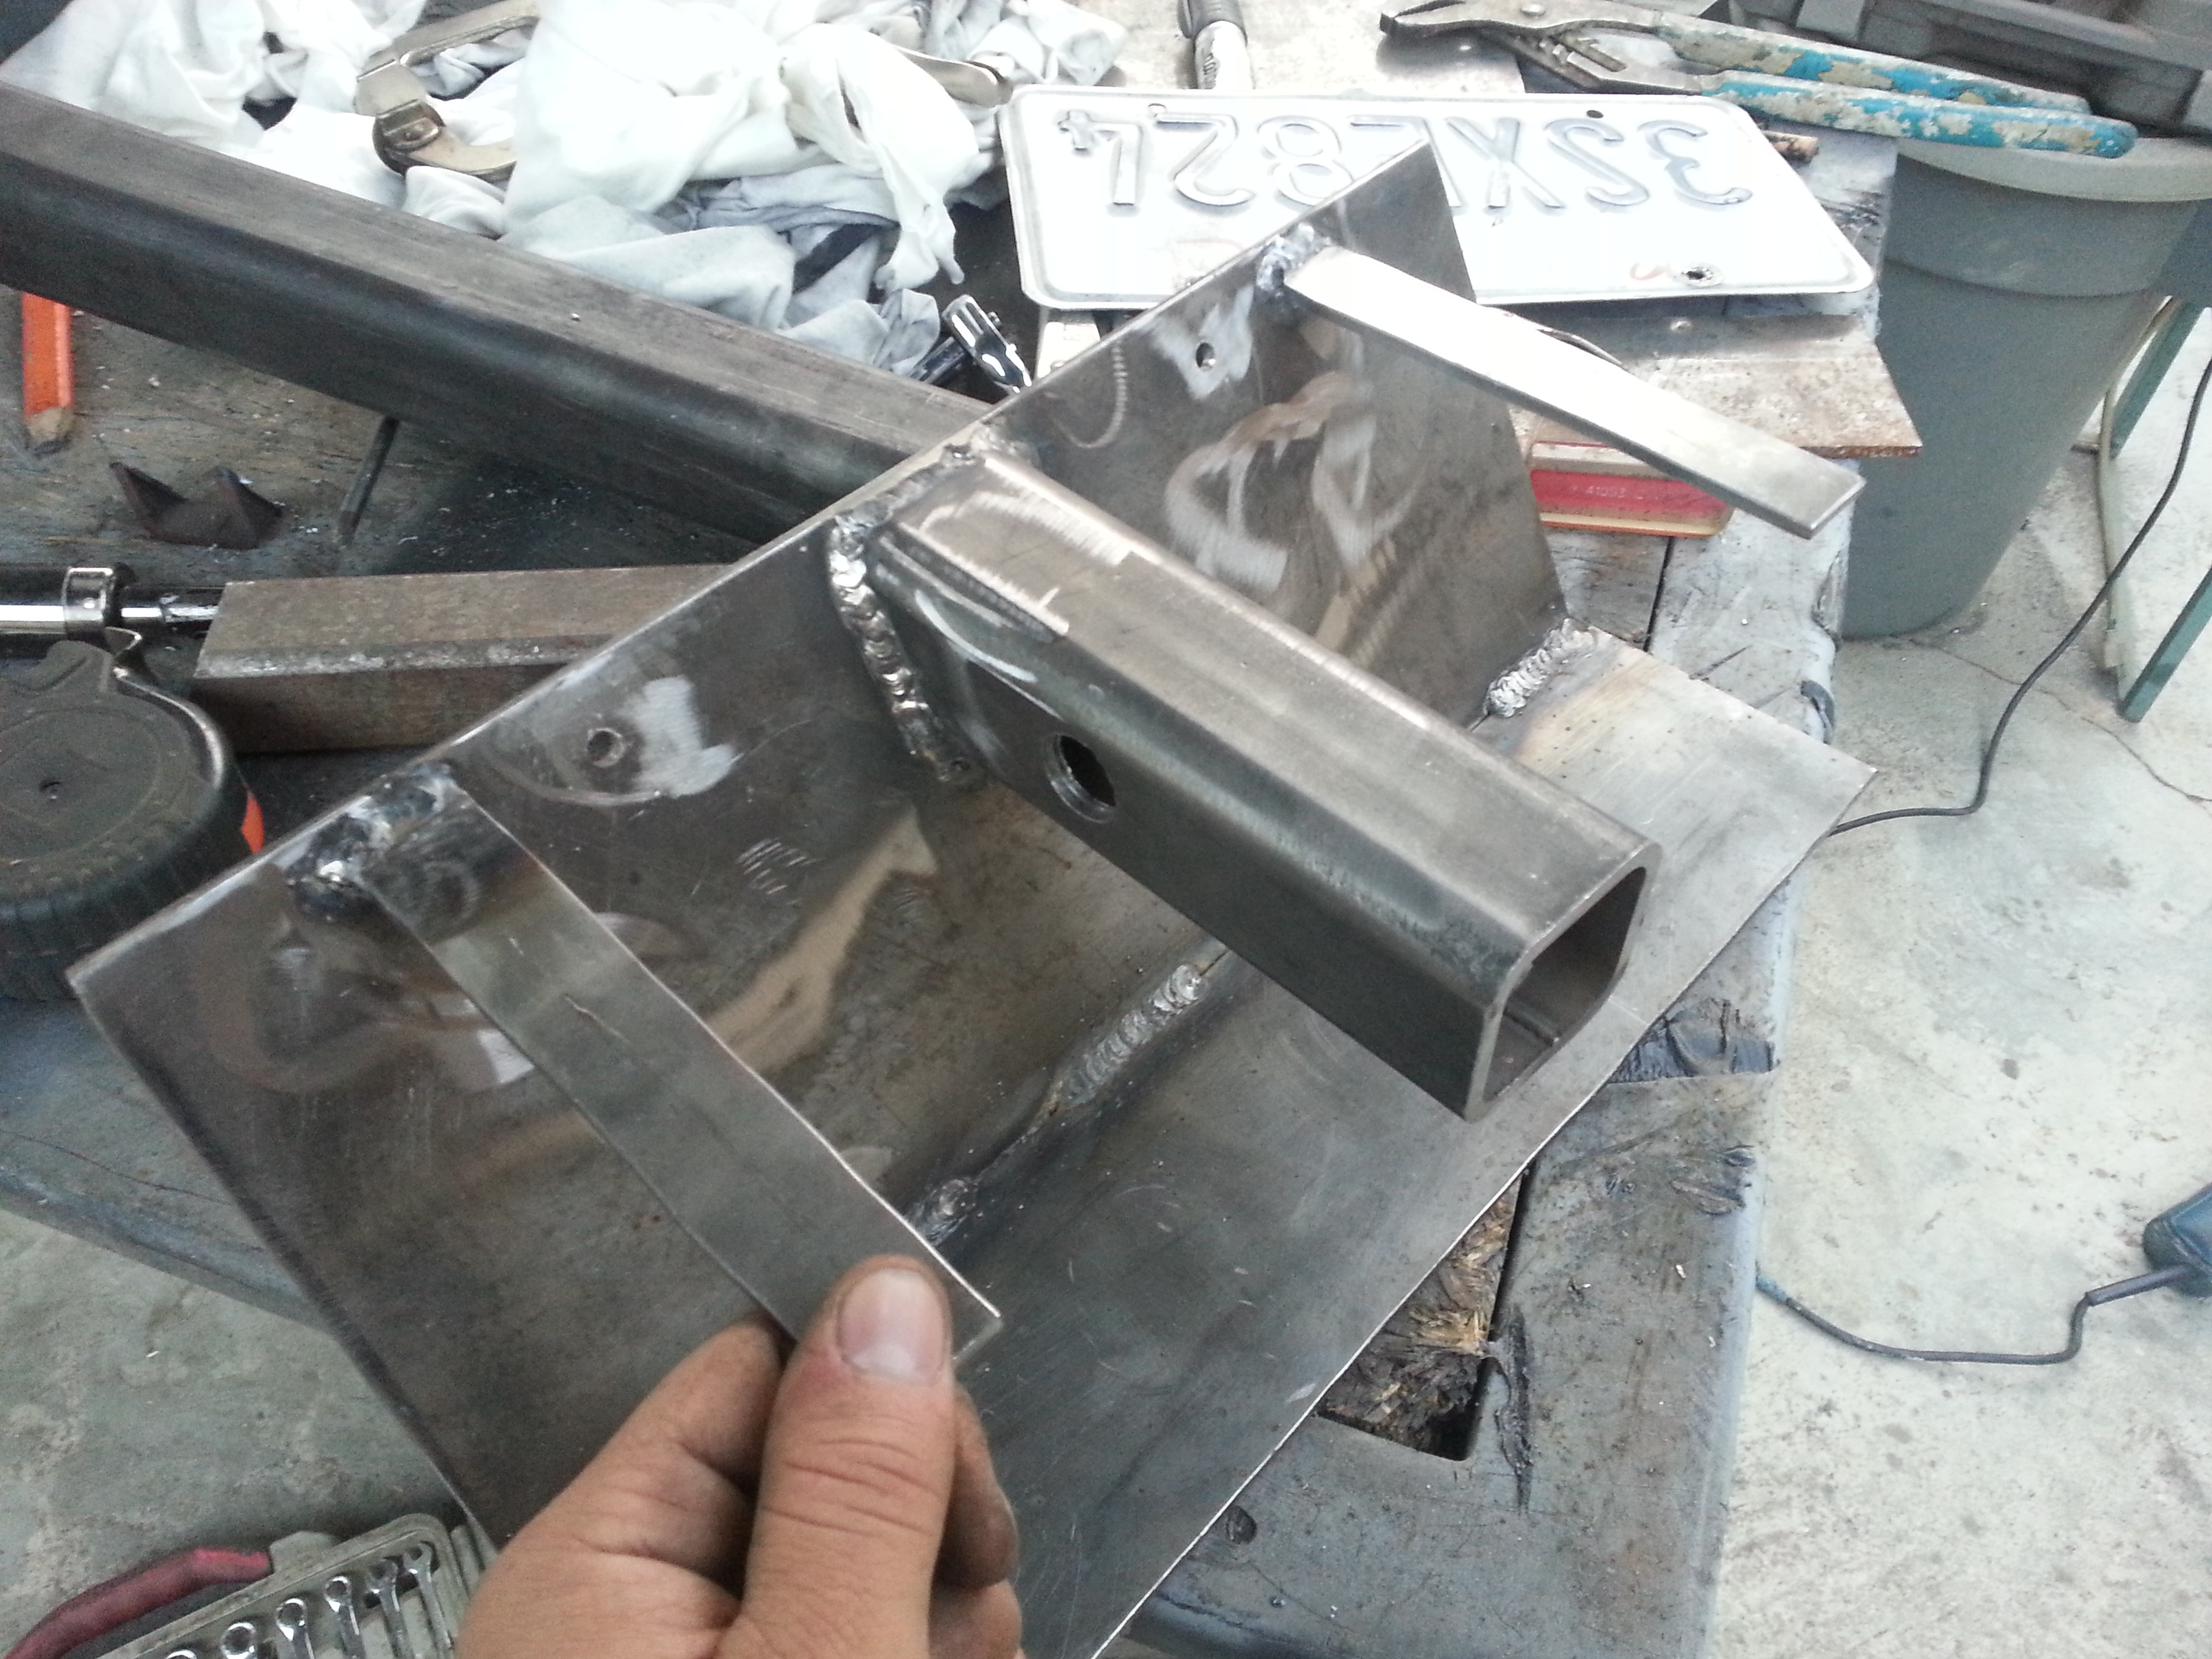
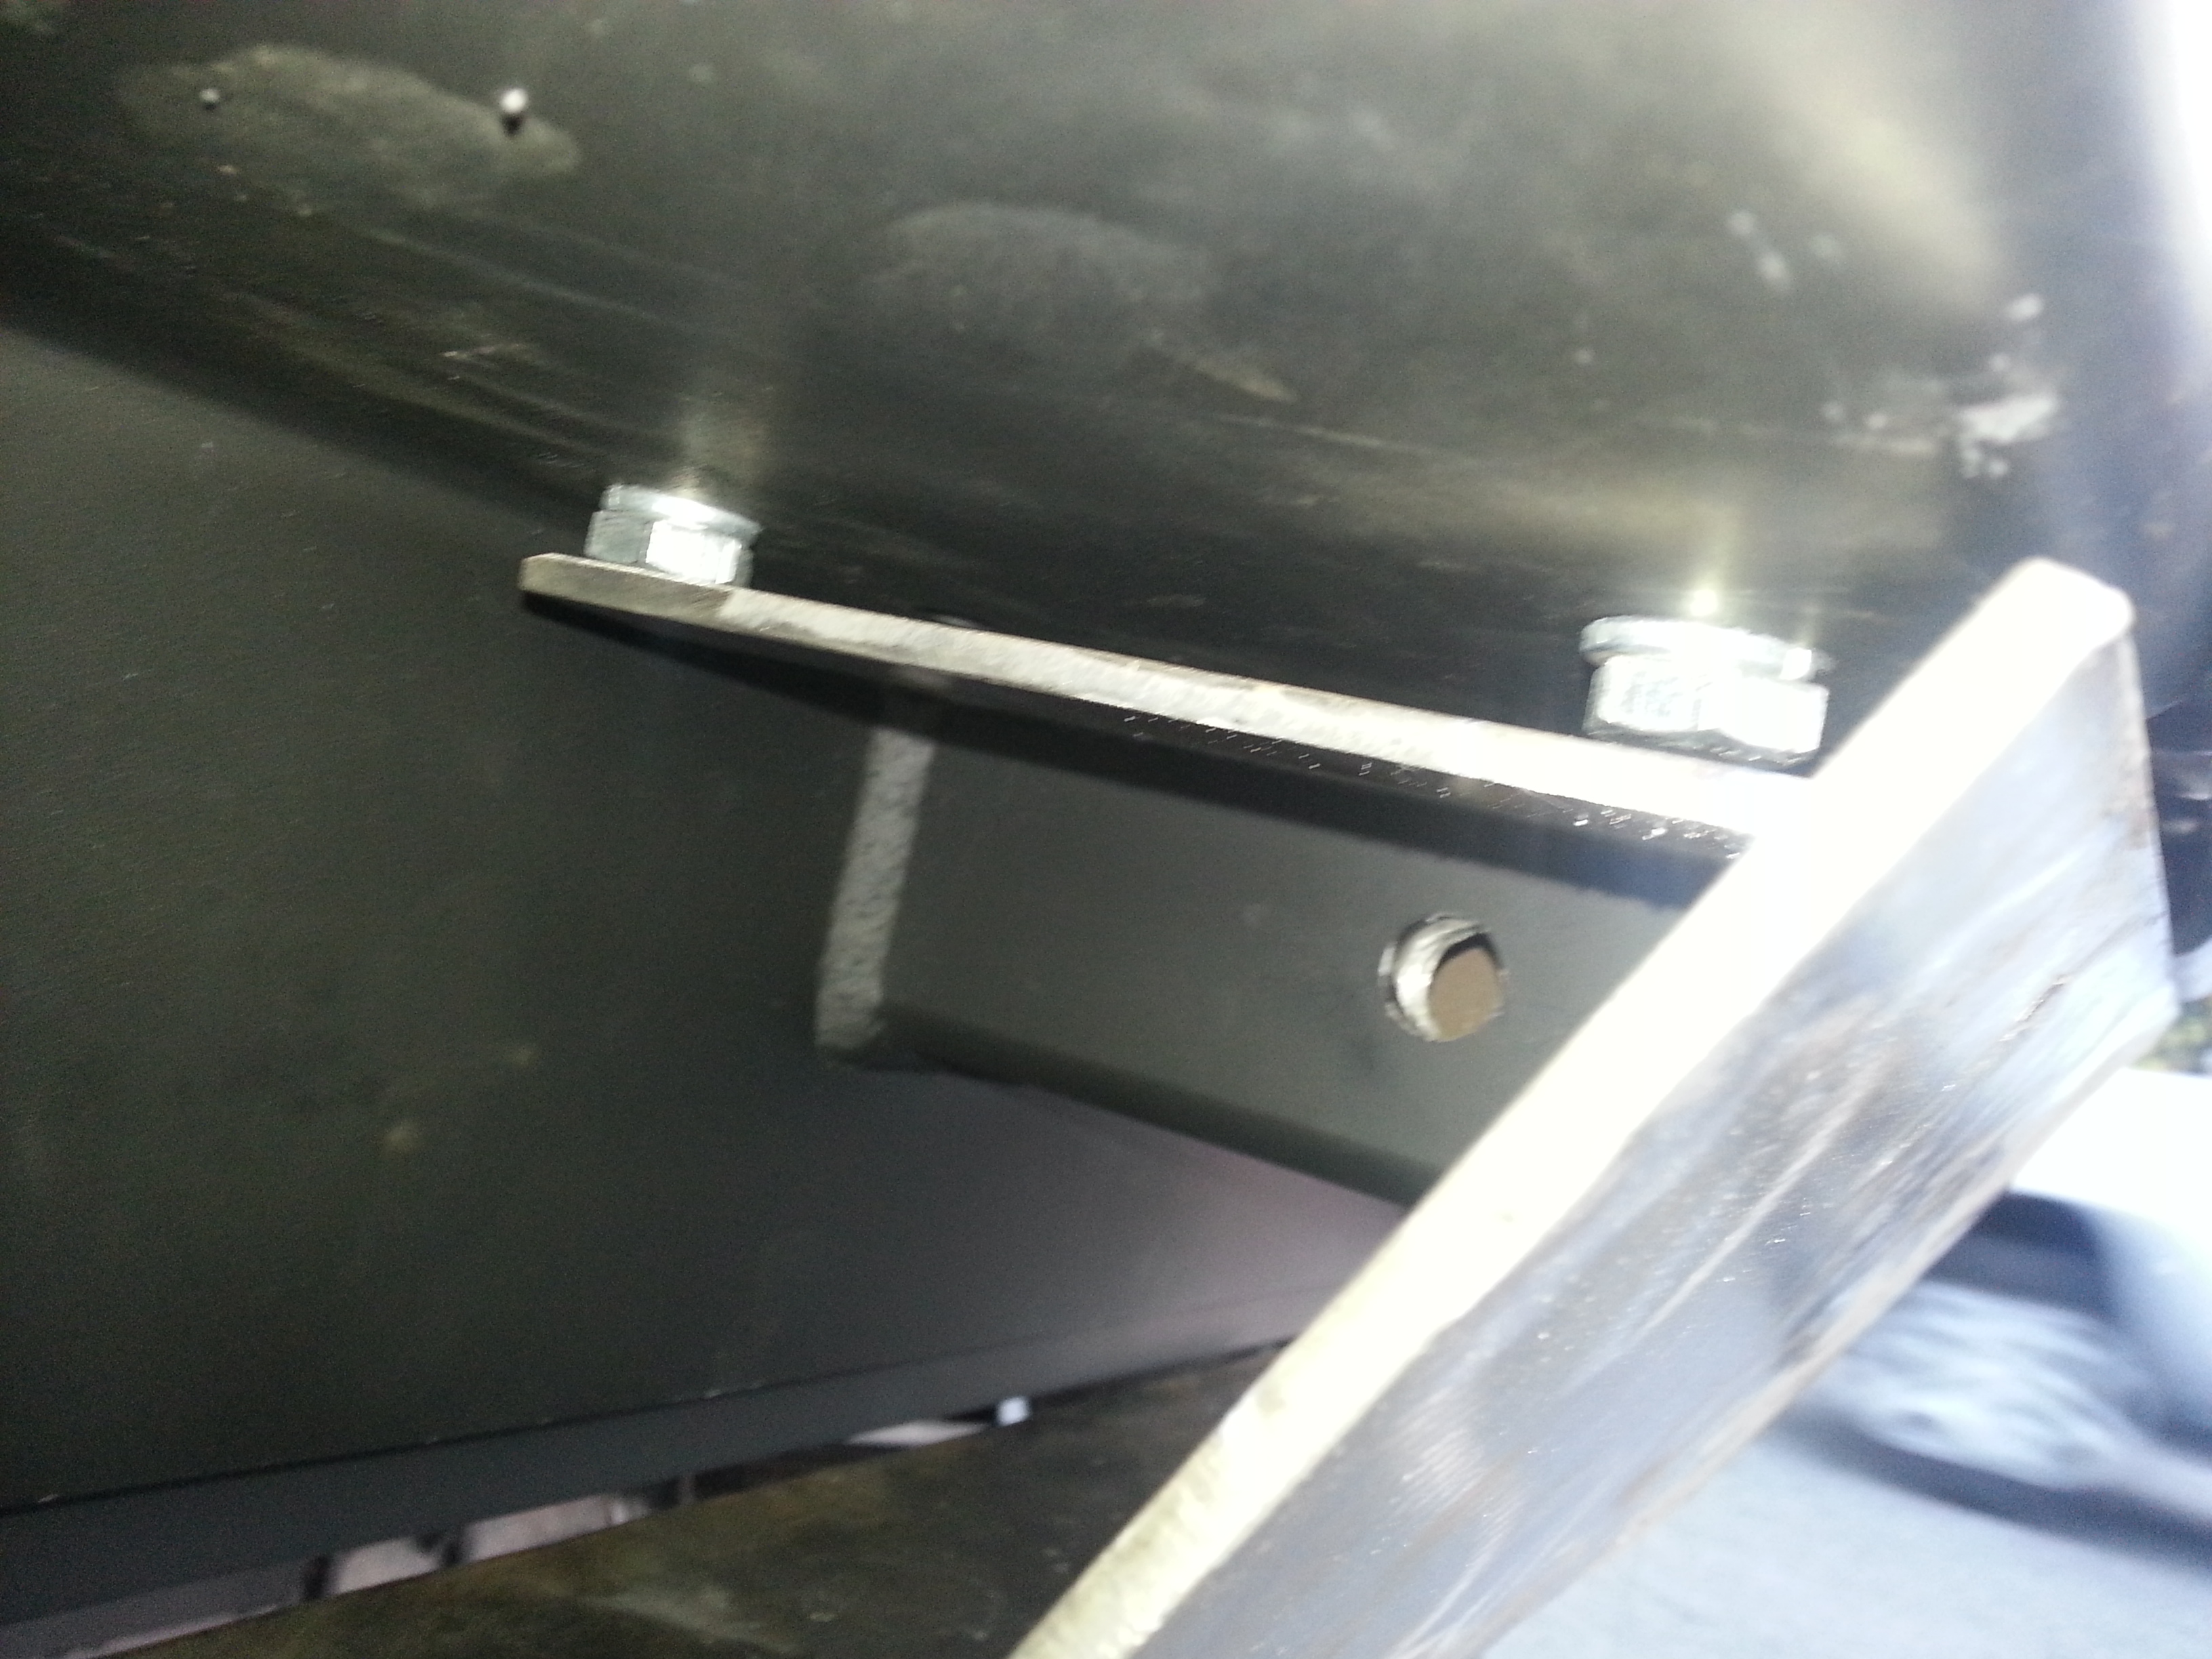
Then i made some Hoops to use with the safety towing chains. These are made of some spare some 1/4" thick 2"x2" square tube that i had left over from when i created my trailer axle and trailer tongue.

I Made the holes big enough to be able to fit the D-Ring bolt. I plan to use 1 one each side
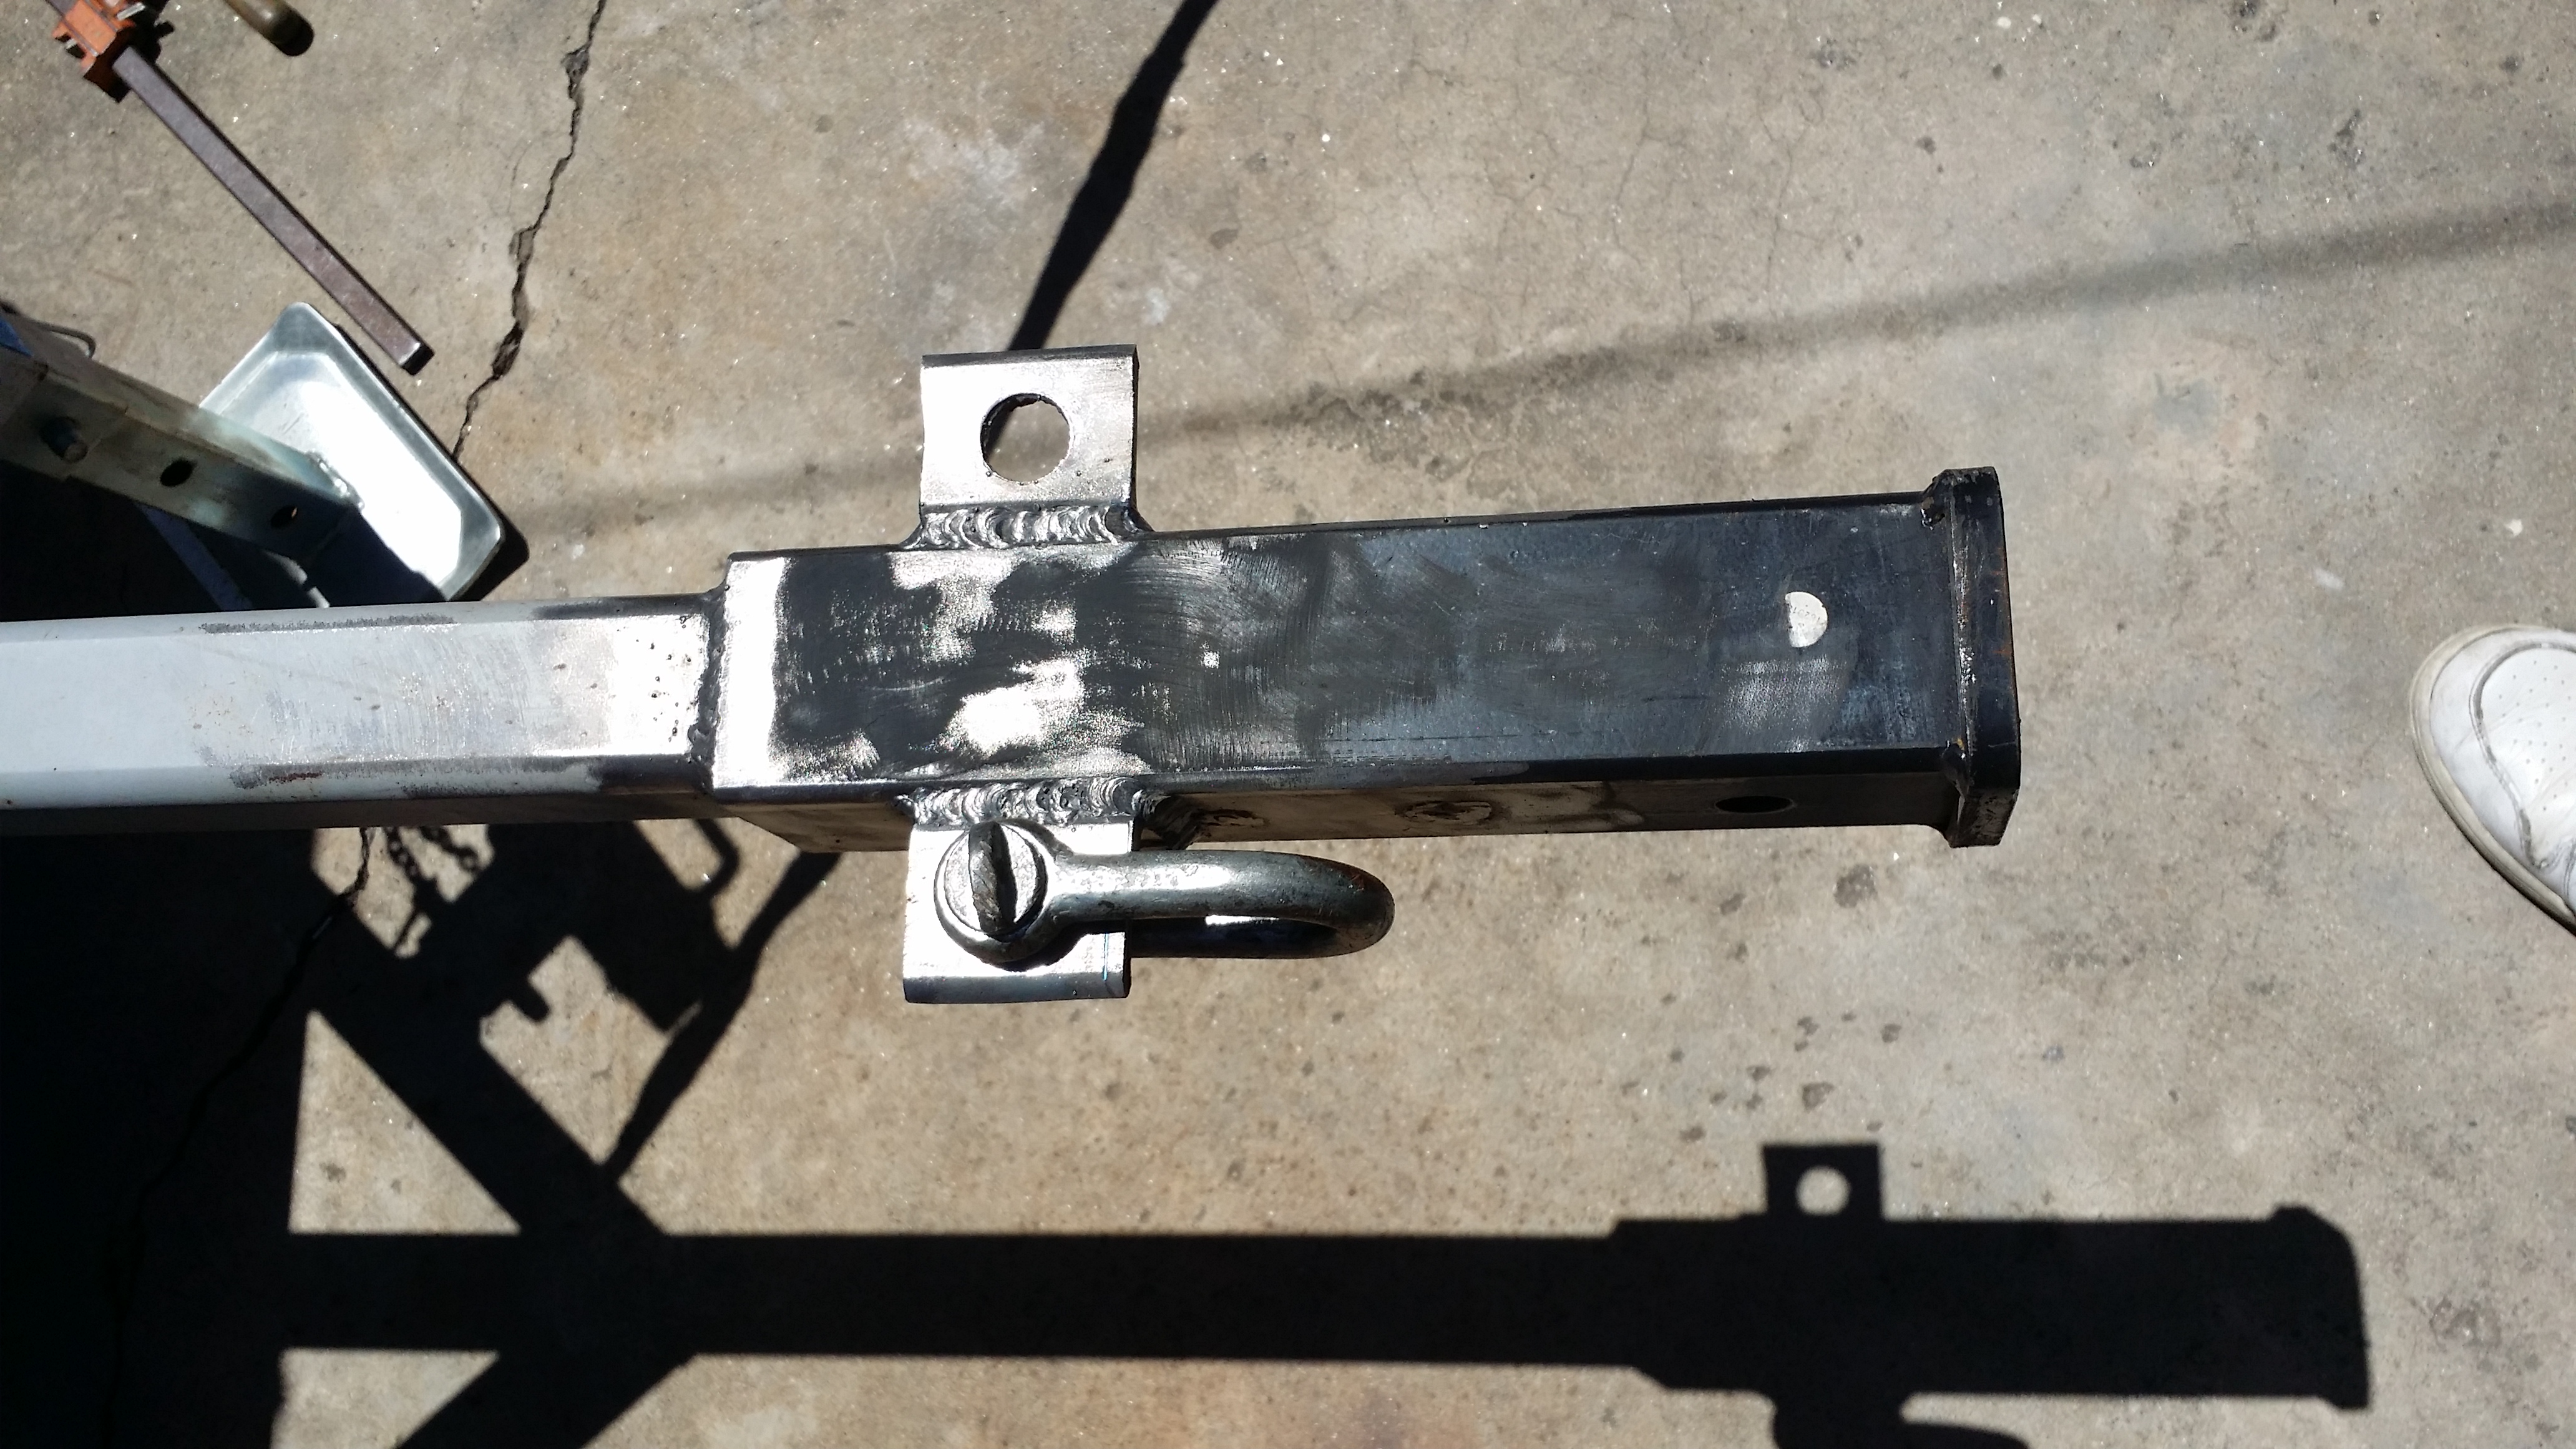
Give myself a pat on the back. It turned out looking great. I really love how fast i can paint with that paint gun. Its so freeking convenient. I just hate the clean up process though. So i can definitely see myself not using it for touch ups. But i will definitely use it for painting large surfaces or redoing my trucks bumpers and sliders. Still it's great to have
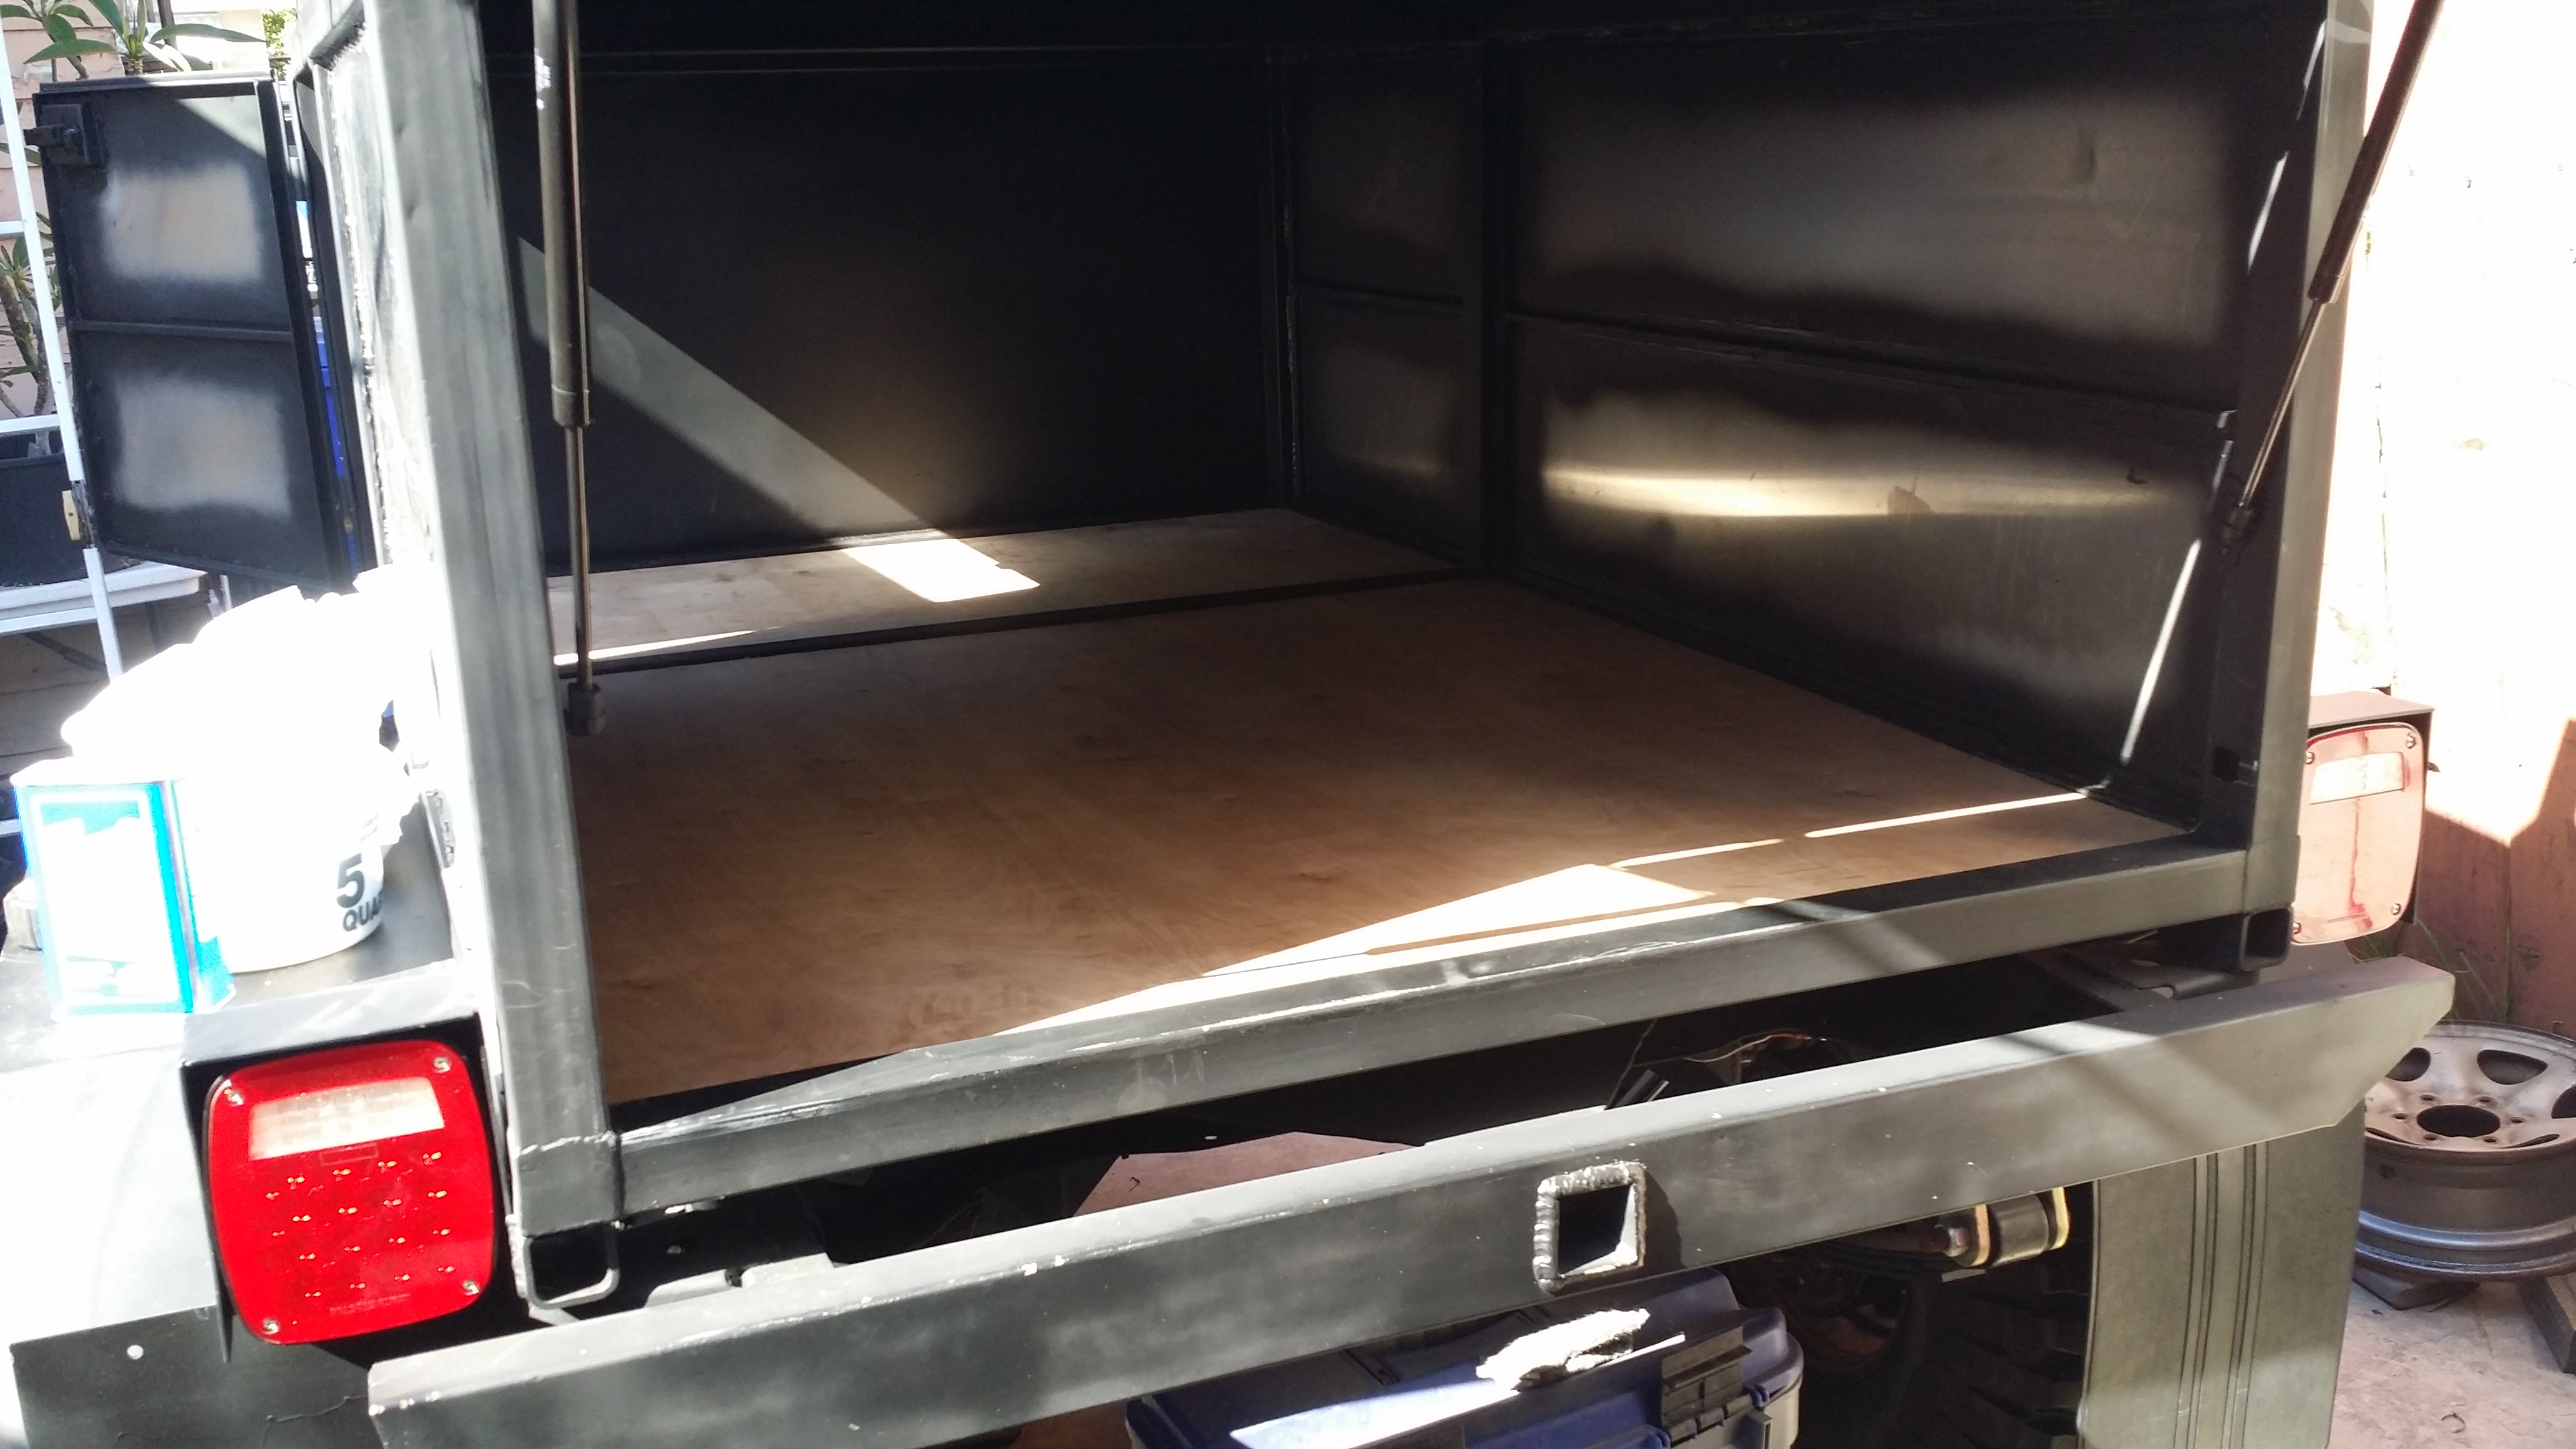
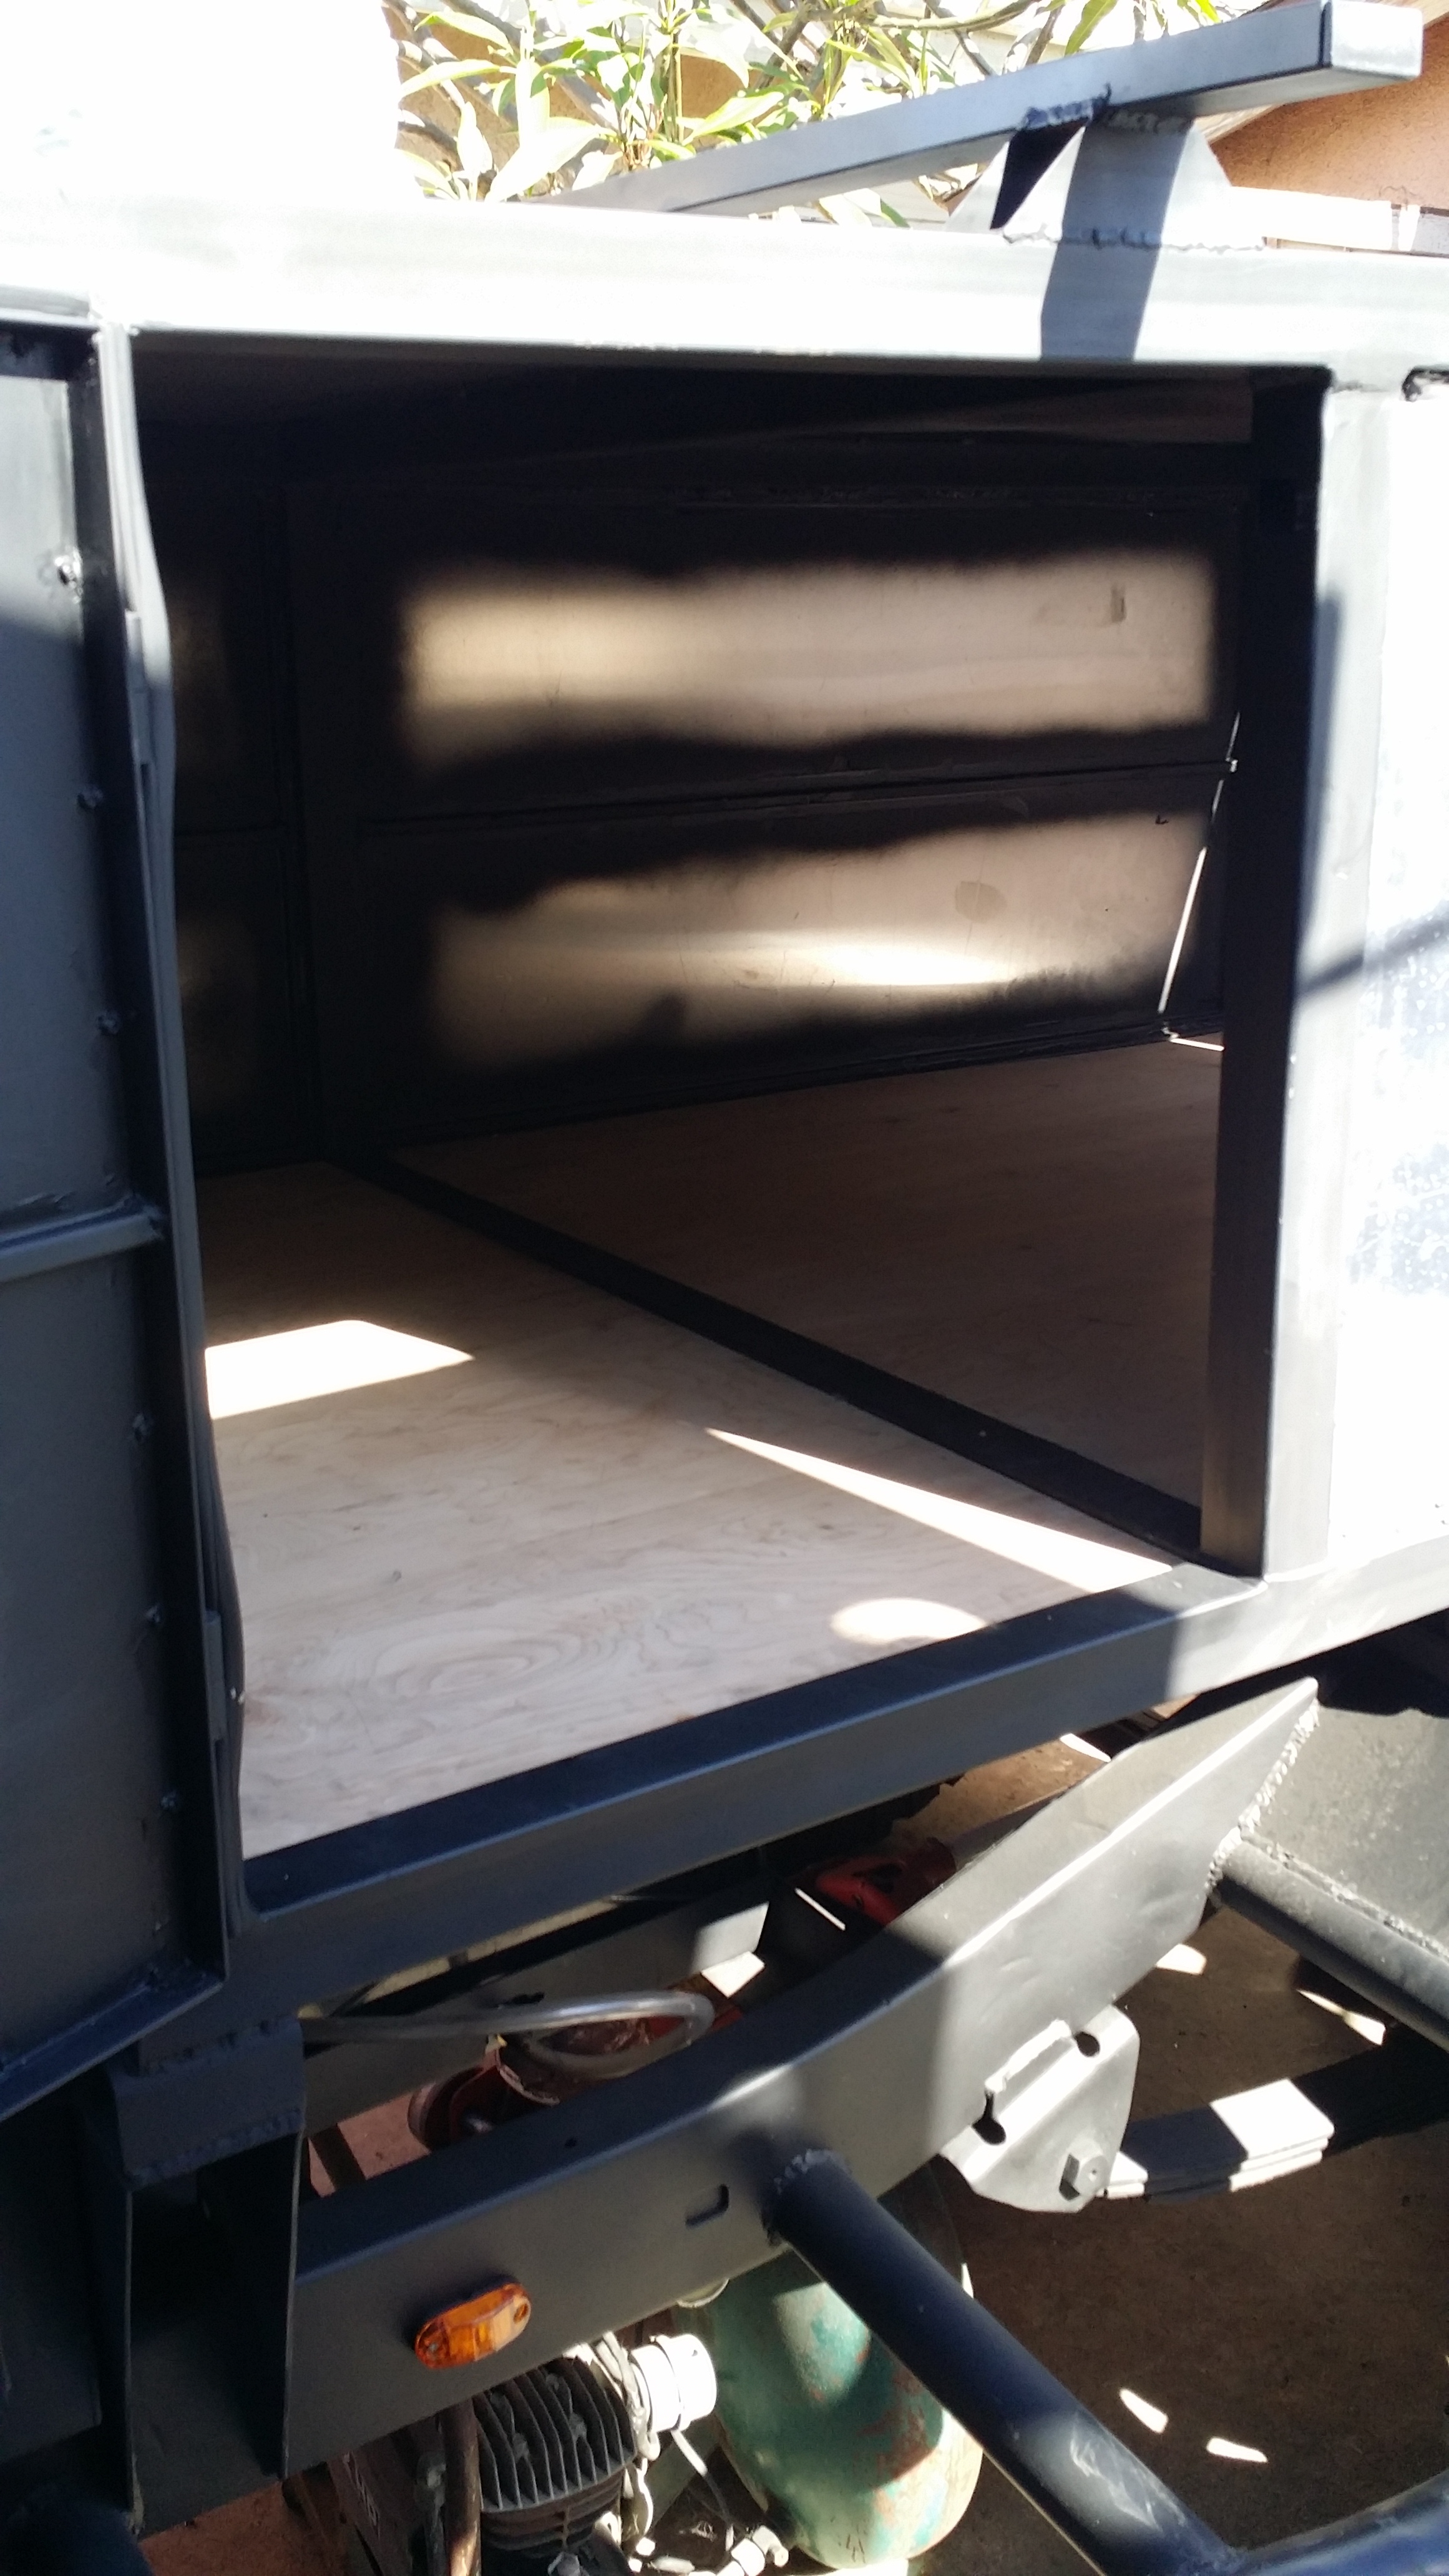
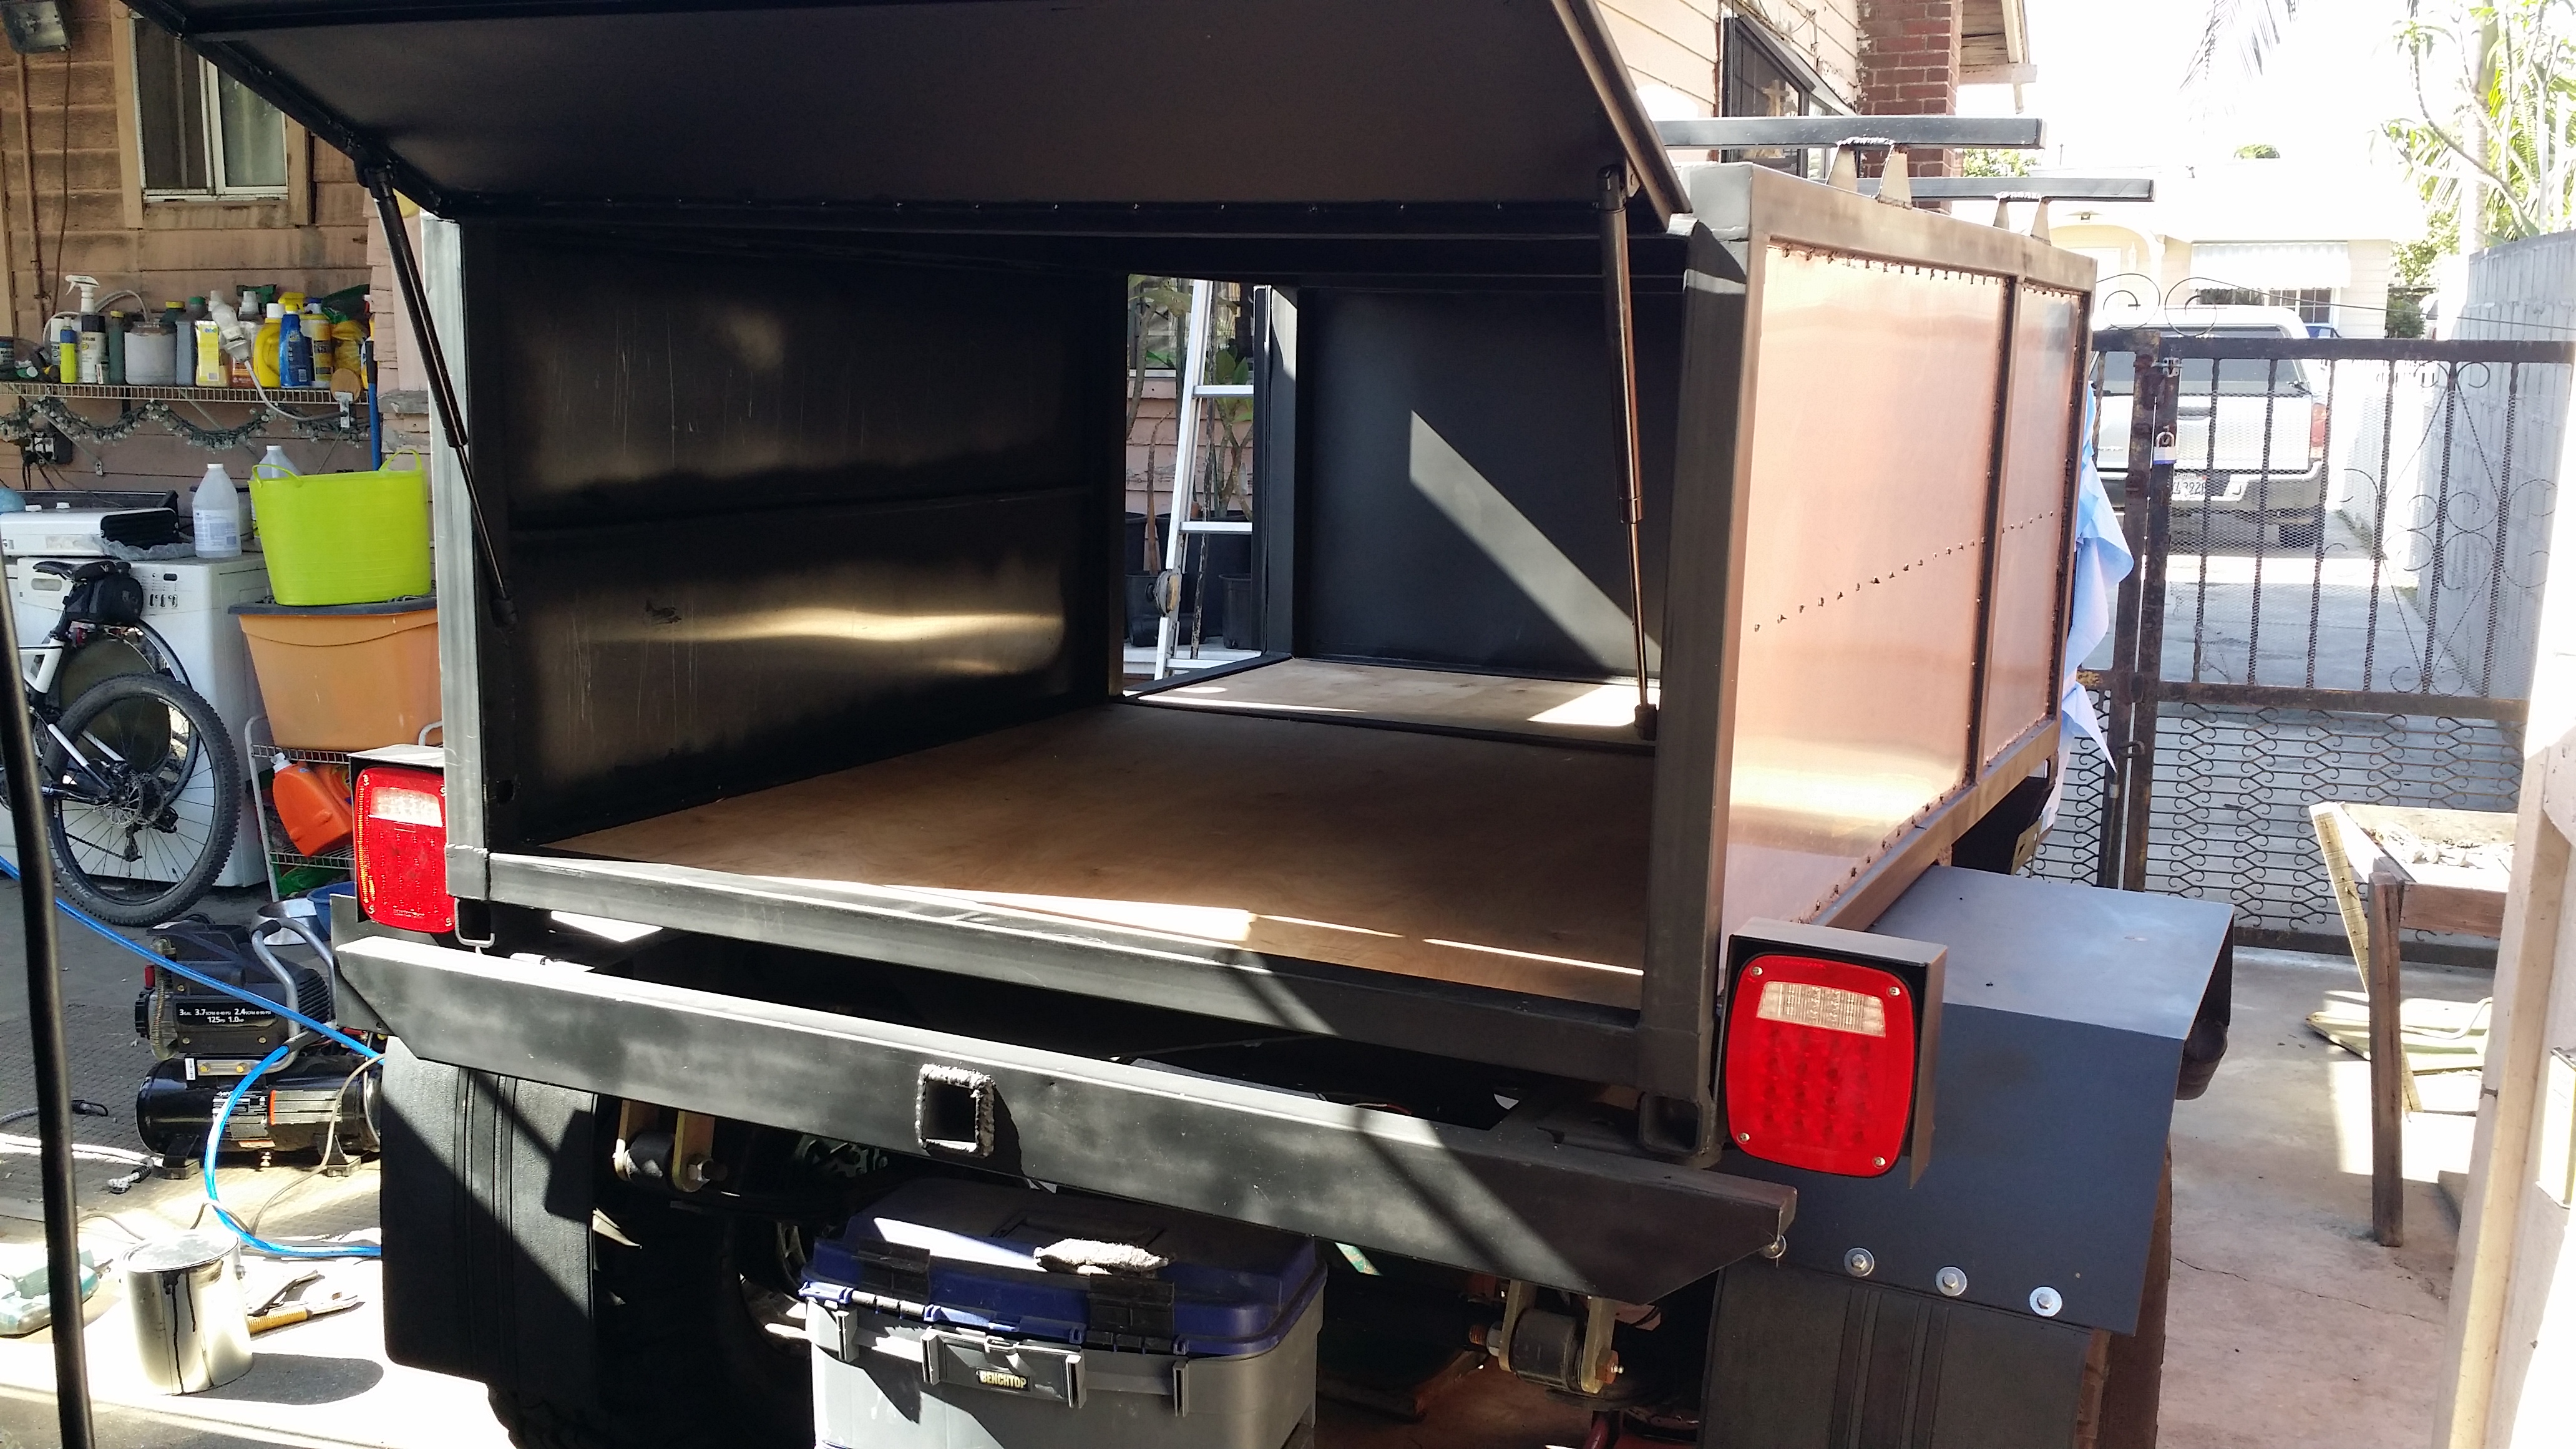
I figured since i have the DMV appointment on Monday i may as well put in the birch-wood floor to make it look cleaner. I don't know what exactly the inspector plans to look at but at least the trailer will look great!
That is all i have to share for now. Hopefully today i can get the High security locks installed onto the doors of the trailer. Then give both my truck and trailer a nice car wash to have both looking immaculate for Monday's inspection.
Wish me luck!
This is an 18" receiver that i bought toward the beginning of my build from harbor freight.

In order for his receiver to really be secure i did drilled 6 holes; 3 on each side, this way i can weld on the shaft of the receiver too not just at the end of it. I think it is much more secure like this. Especially if i ever plan to do some crazy trails with this thing.

Here you can see what i meant

I feel like it is much more secure like this.

Then i made some Hoops to use with the safety towing chains. These are made of some spare some 1/4" thick 2"x2" square tube that i had left over from when i created my trailer axle and trailer tongue.


I Made the holes big enough to be able to fit the D-Ring bolt. I plan to use 1 one each side


Give myself a pat on the back. It turned out looking great. I really love how fast i can paint with that paint gun. Its so freeking convenient. I just hate the clean up process though. So i can definitely see myself not using it for touch ups. But i will definitely use it for painting large surfaces or redoing my trucks bumpers and sliders. Still it's great to have


I figured since i have the DMV appointment on Monday i may as well put in the birch-wood floor to make it look cleaner. I don't know what exactly the inspector plans to look at but at least the trailer will look great!


That is all i have to share for now. Hopefully today i can get the High security locks installed onto the doors of the trailer. Then give both my truck and trailer a nice car wash to have both looking immaculate for Monday's inspection.
Wish me luck!
05-20-2017, 08:45 AM
#123
Registered User
Thread Starter
I Ordered a Max-Coupler and it should arrive today in the afternoon so i'll make sure to post some pix of that when i get it. I just need to buy some towing chains and I'm set. I followed the DMV requirements as best I could. So I hope they don't have anything negative to say about my trailer. The only bad thing i can imagine hem saying about it is maybe the 3" lift or maybe the 35" tires. But i've seen trailers this big in California before so i'm hoping all is good.
05-22-2017, 01:37 PM
#124
Registered User
Join Date: Aug 2014
Location: Knoxville, TN
Posts: 48
Likes: 0
Received 0 Likes
on
0 Posts
Years ago when I built my first system it was a mess. Then I tried upgrading things using my existing wiring and almost burnt the camper down. Friend of mine that builds systems for off the grid cabins laughed at me then helped me design a system. Now a days there are allot of websites out there that have the information and calculators you need. key things I learned. 1 little kid can burn 3 times the power you plan to use, no idea how they do it but they will. Only use the vehicle to charge the system while it's driving, uses way to much fule and you'll burn up the alternator before you break the habit. Spend the money on wire. High quality 00 is expensive but it's way cheaper, safer and more efficient to use it anywhere there is a dirrect connection to a battery. Batteries will change over the years, don't worry about them too much. It's way better to sink money in to things like hardware and controllers. A well thought out 12,000 peak watt system designed to run 1000 amp hours of battery bank (a cabin) will run off a car battery. You try going the opposite way you'll burn it to the ground. Take the time researching information that isn't posted on a site selling the stuff to you and you'll be ok.
05-22-2017, 08:08 PM
#125
Registered User
Thread Starter
Years ago when I built my first system it was a mess. Then I tried upgrading things using my existing wiring and almost burnt the camper down. Friend of mine that builds systems for off the grid cabins laughed at me then helped me design a system. Now a days there are allot of websites out there that have the information and calculators you need. key things I learned. 1 little kid can burn 3 times the power you plan to use, no idea how they do it but they will. Only use the vehicle to charge the system while it's driving, uses way to much fule and you'll burn up the alternator before you break the habit. Spend the money on wire. High quality 00 is expensive but it's way cheaper, safer and more efficient to use it anywhere there is a dirrect connection to a battery. Batteries will change over the years, don't worry about them too much. It's way better to sink money in to things like hardware and controllers. A well thought out 12,000 peak watt system designed to run 1000 amp hours of battery bank (a cabin) will run off a car battery. You try going the opposite way you'll burn it to the ground. Take the time researching information that isn't posted on a site selling the stuff to you and you'll be ok.
05-22-2017, 08:46 PM
#126
Registered User
Thread Starter
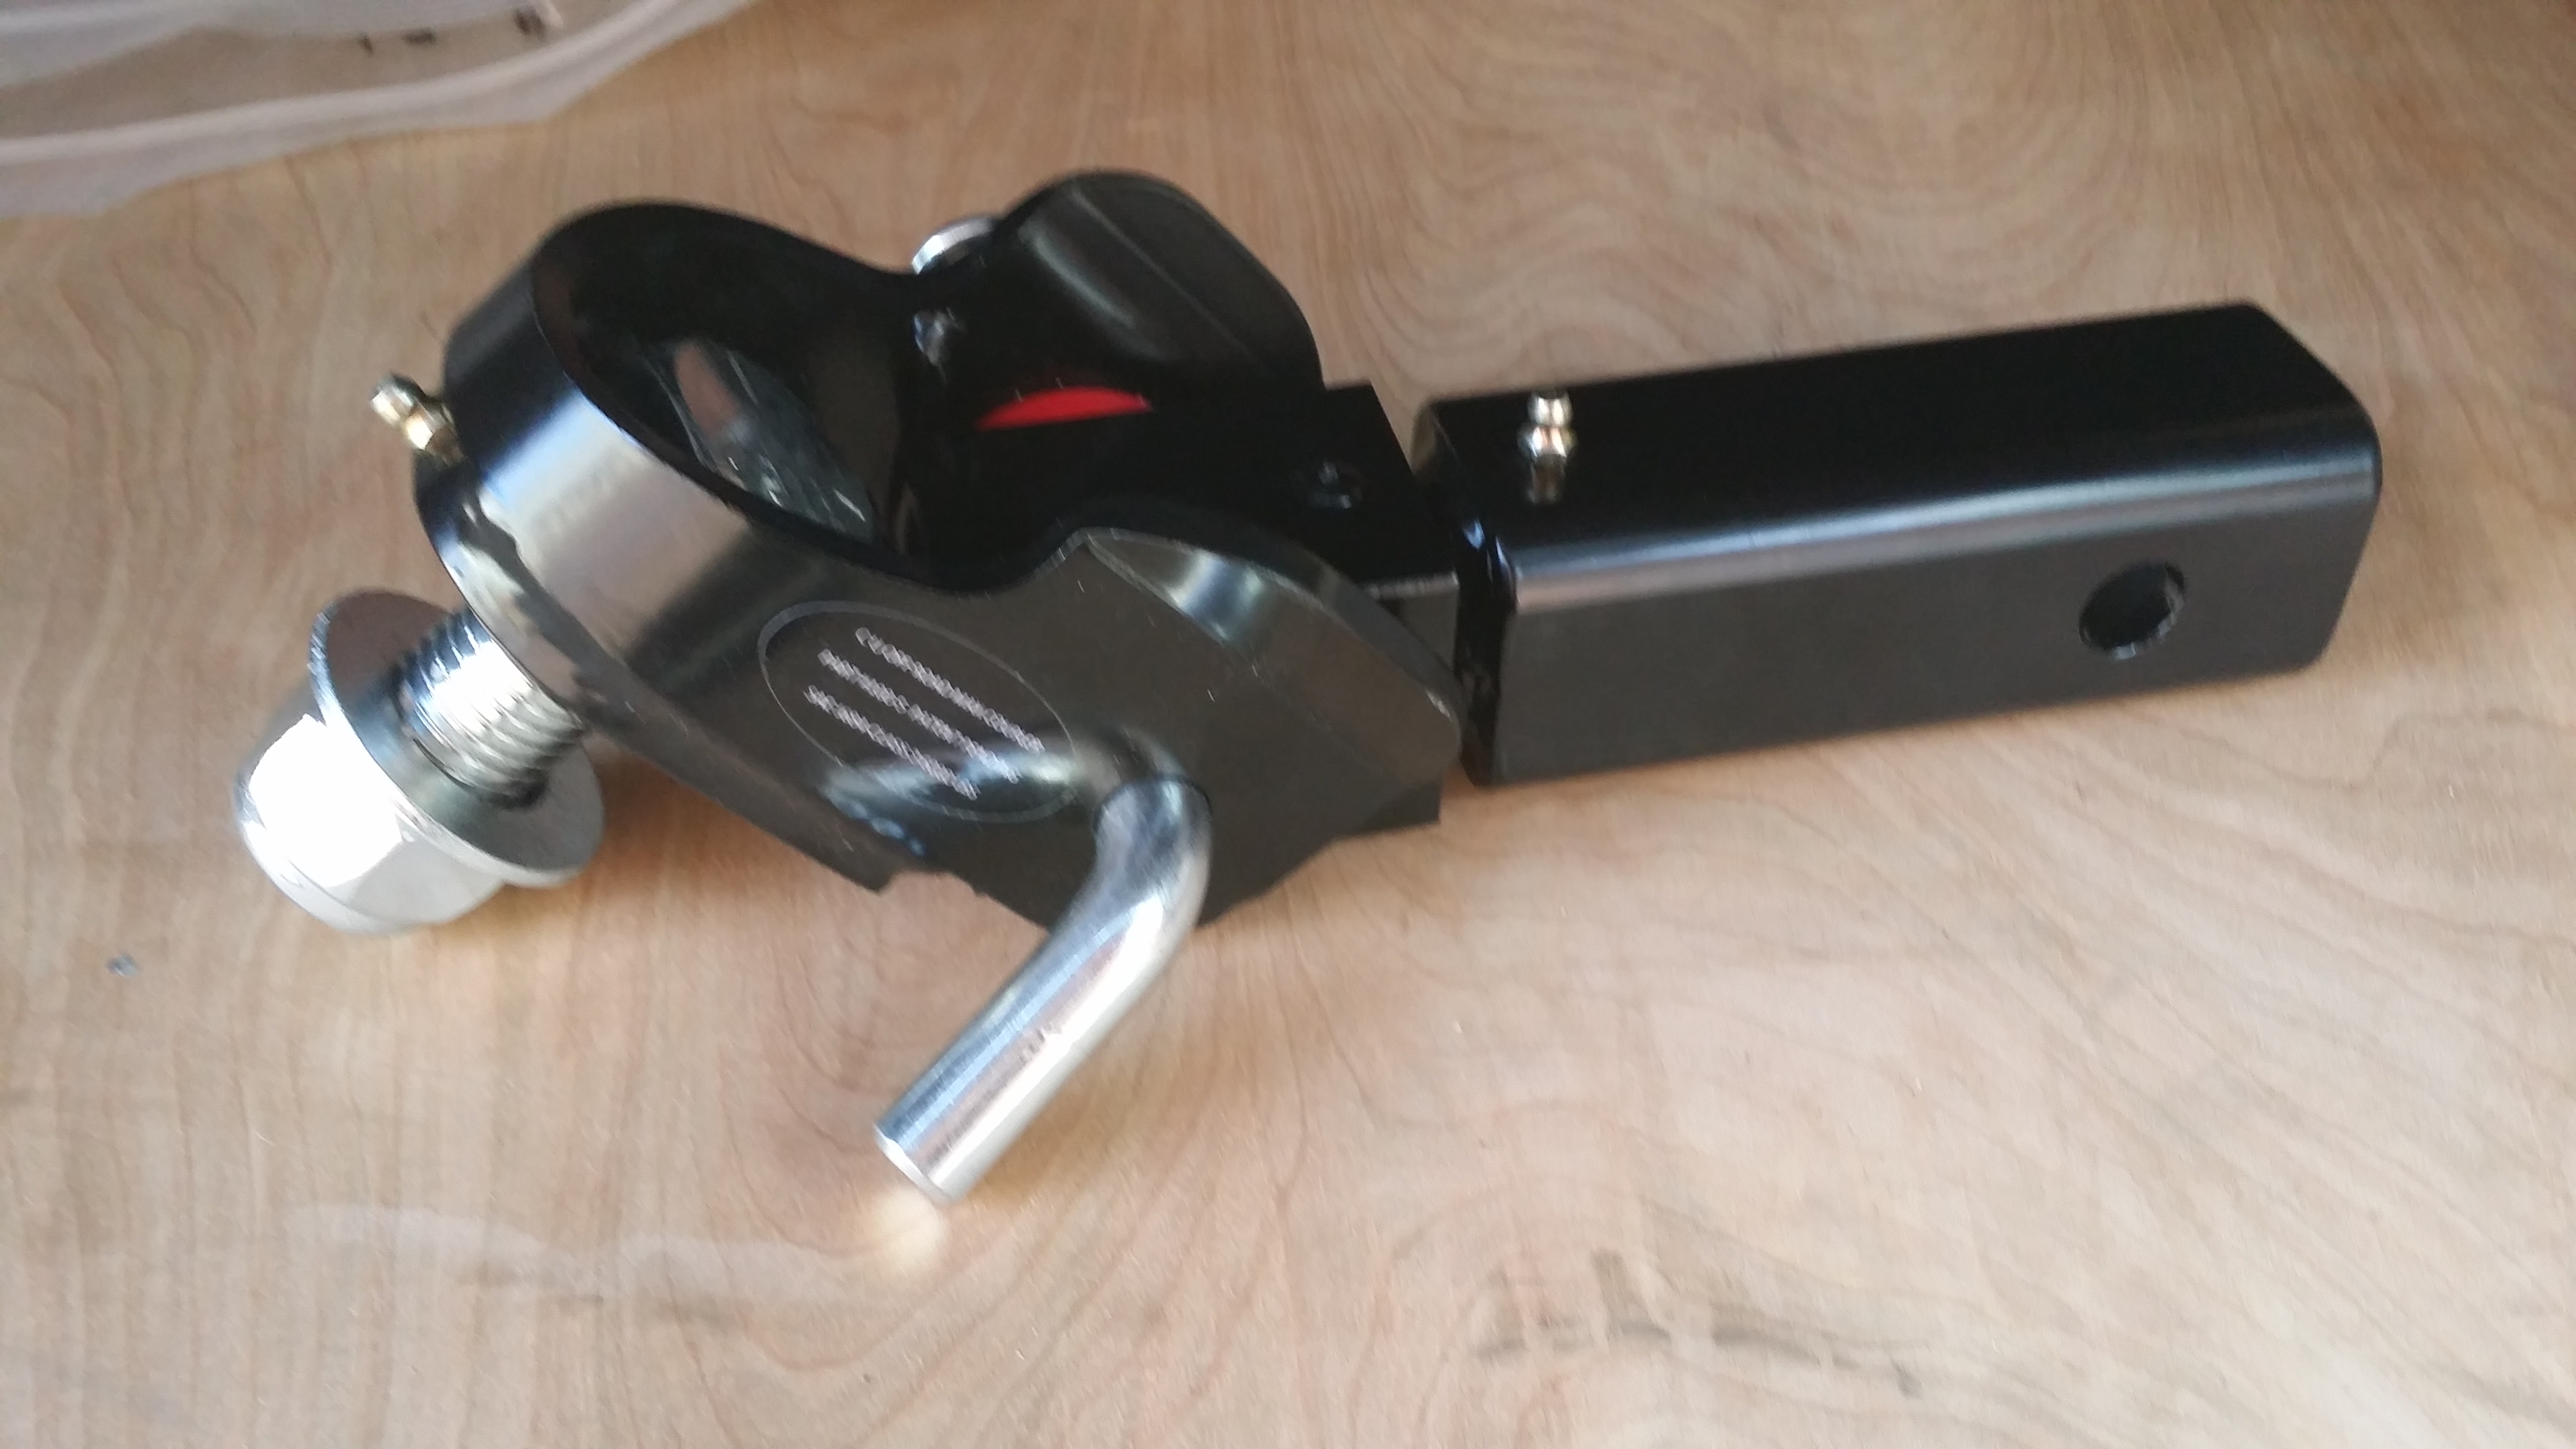
My Max- Coupler came in on Saturday morning I bought it off of Knight offroad for about 225 and free shipping. Saved me about 25-35 bucks by getting it through them.
http://shop.knightoffroadtrailers.co...OUPLER_c12.htm
Once that came in i figured i would get the rest of the items needed for the DMV inspection and of course safety. I went to Autozone and bought all this stuff.
Boom she was ready.
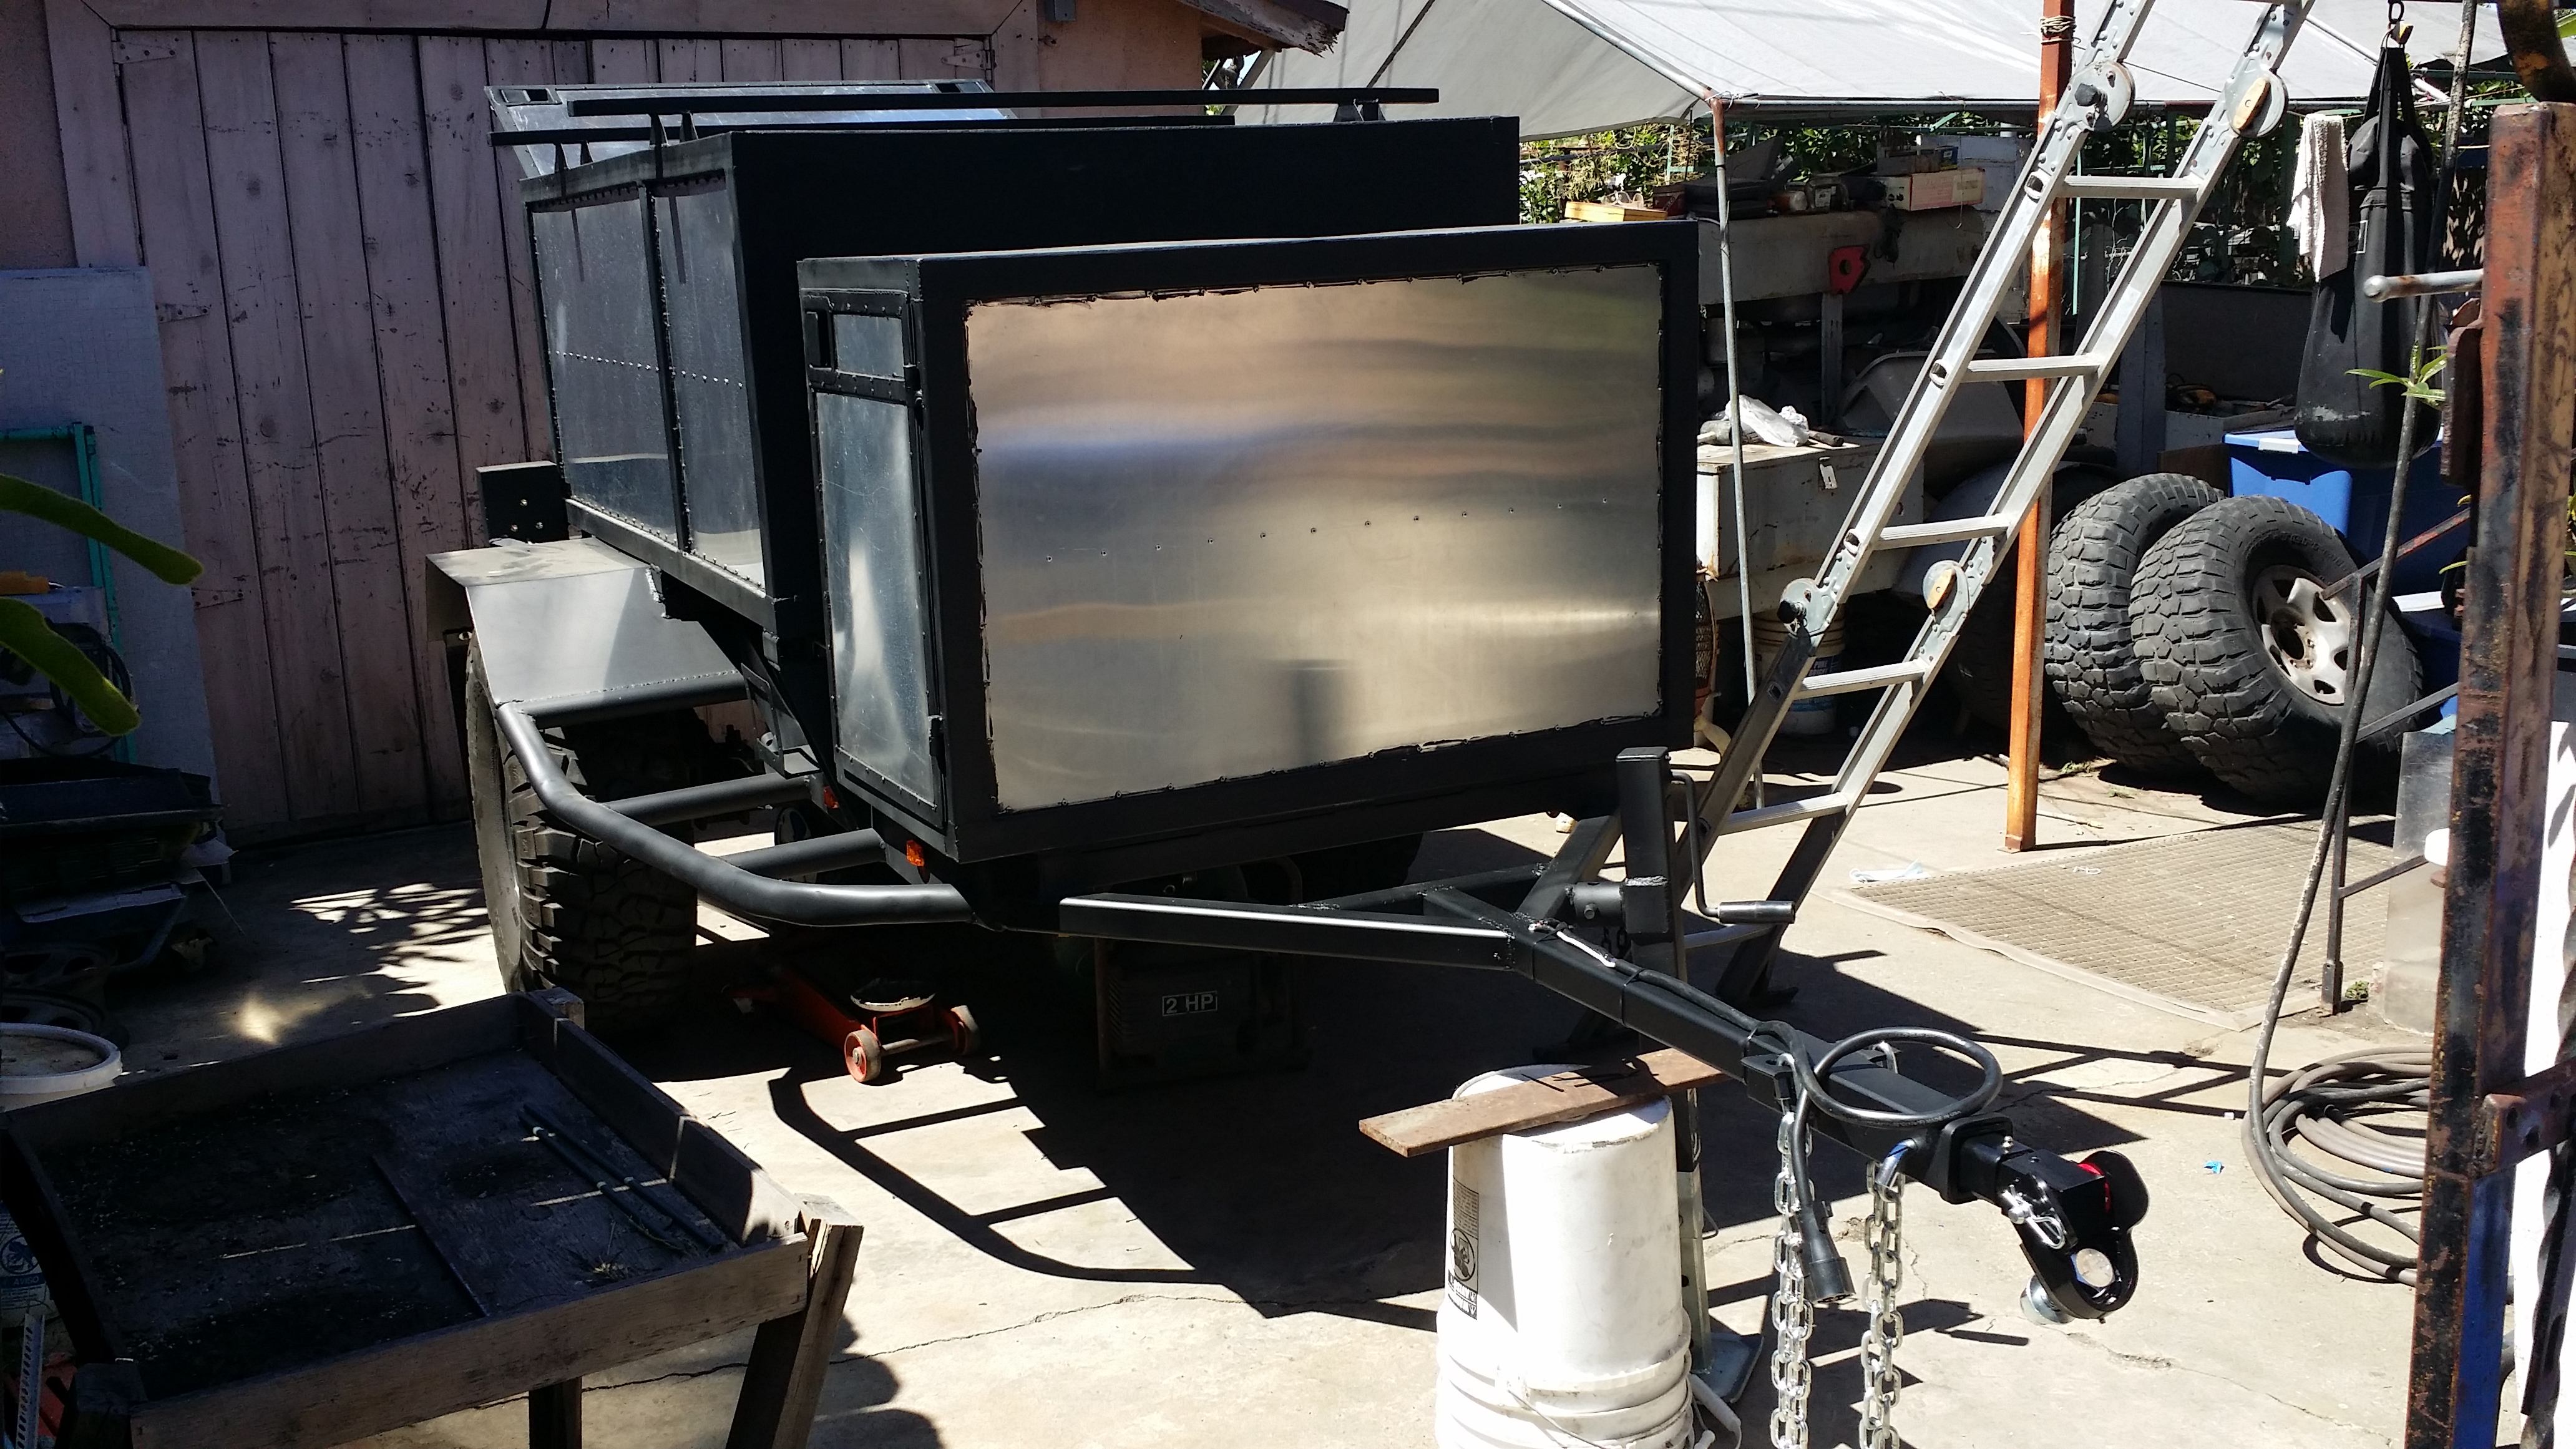
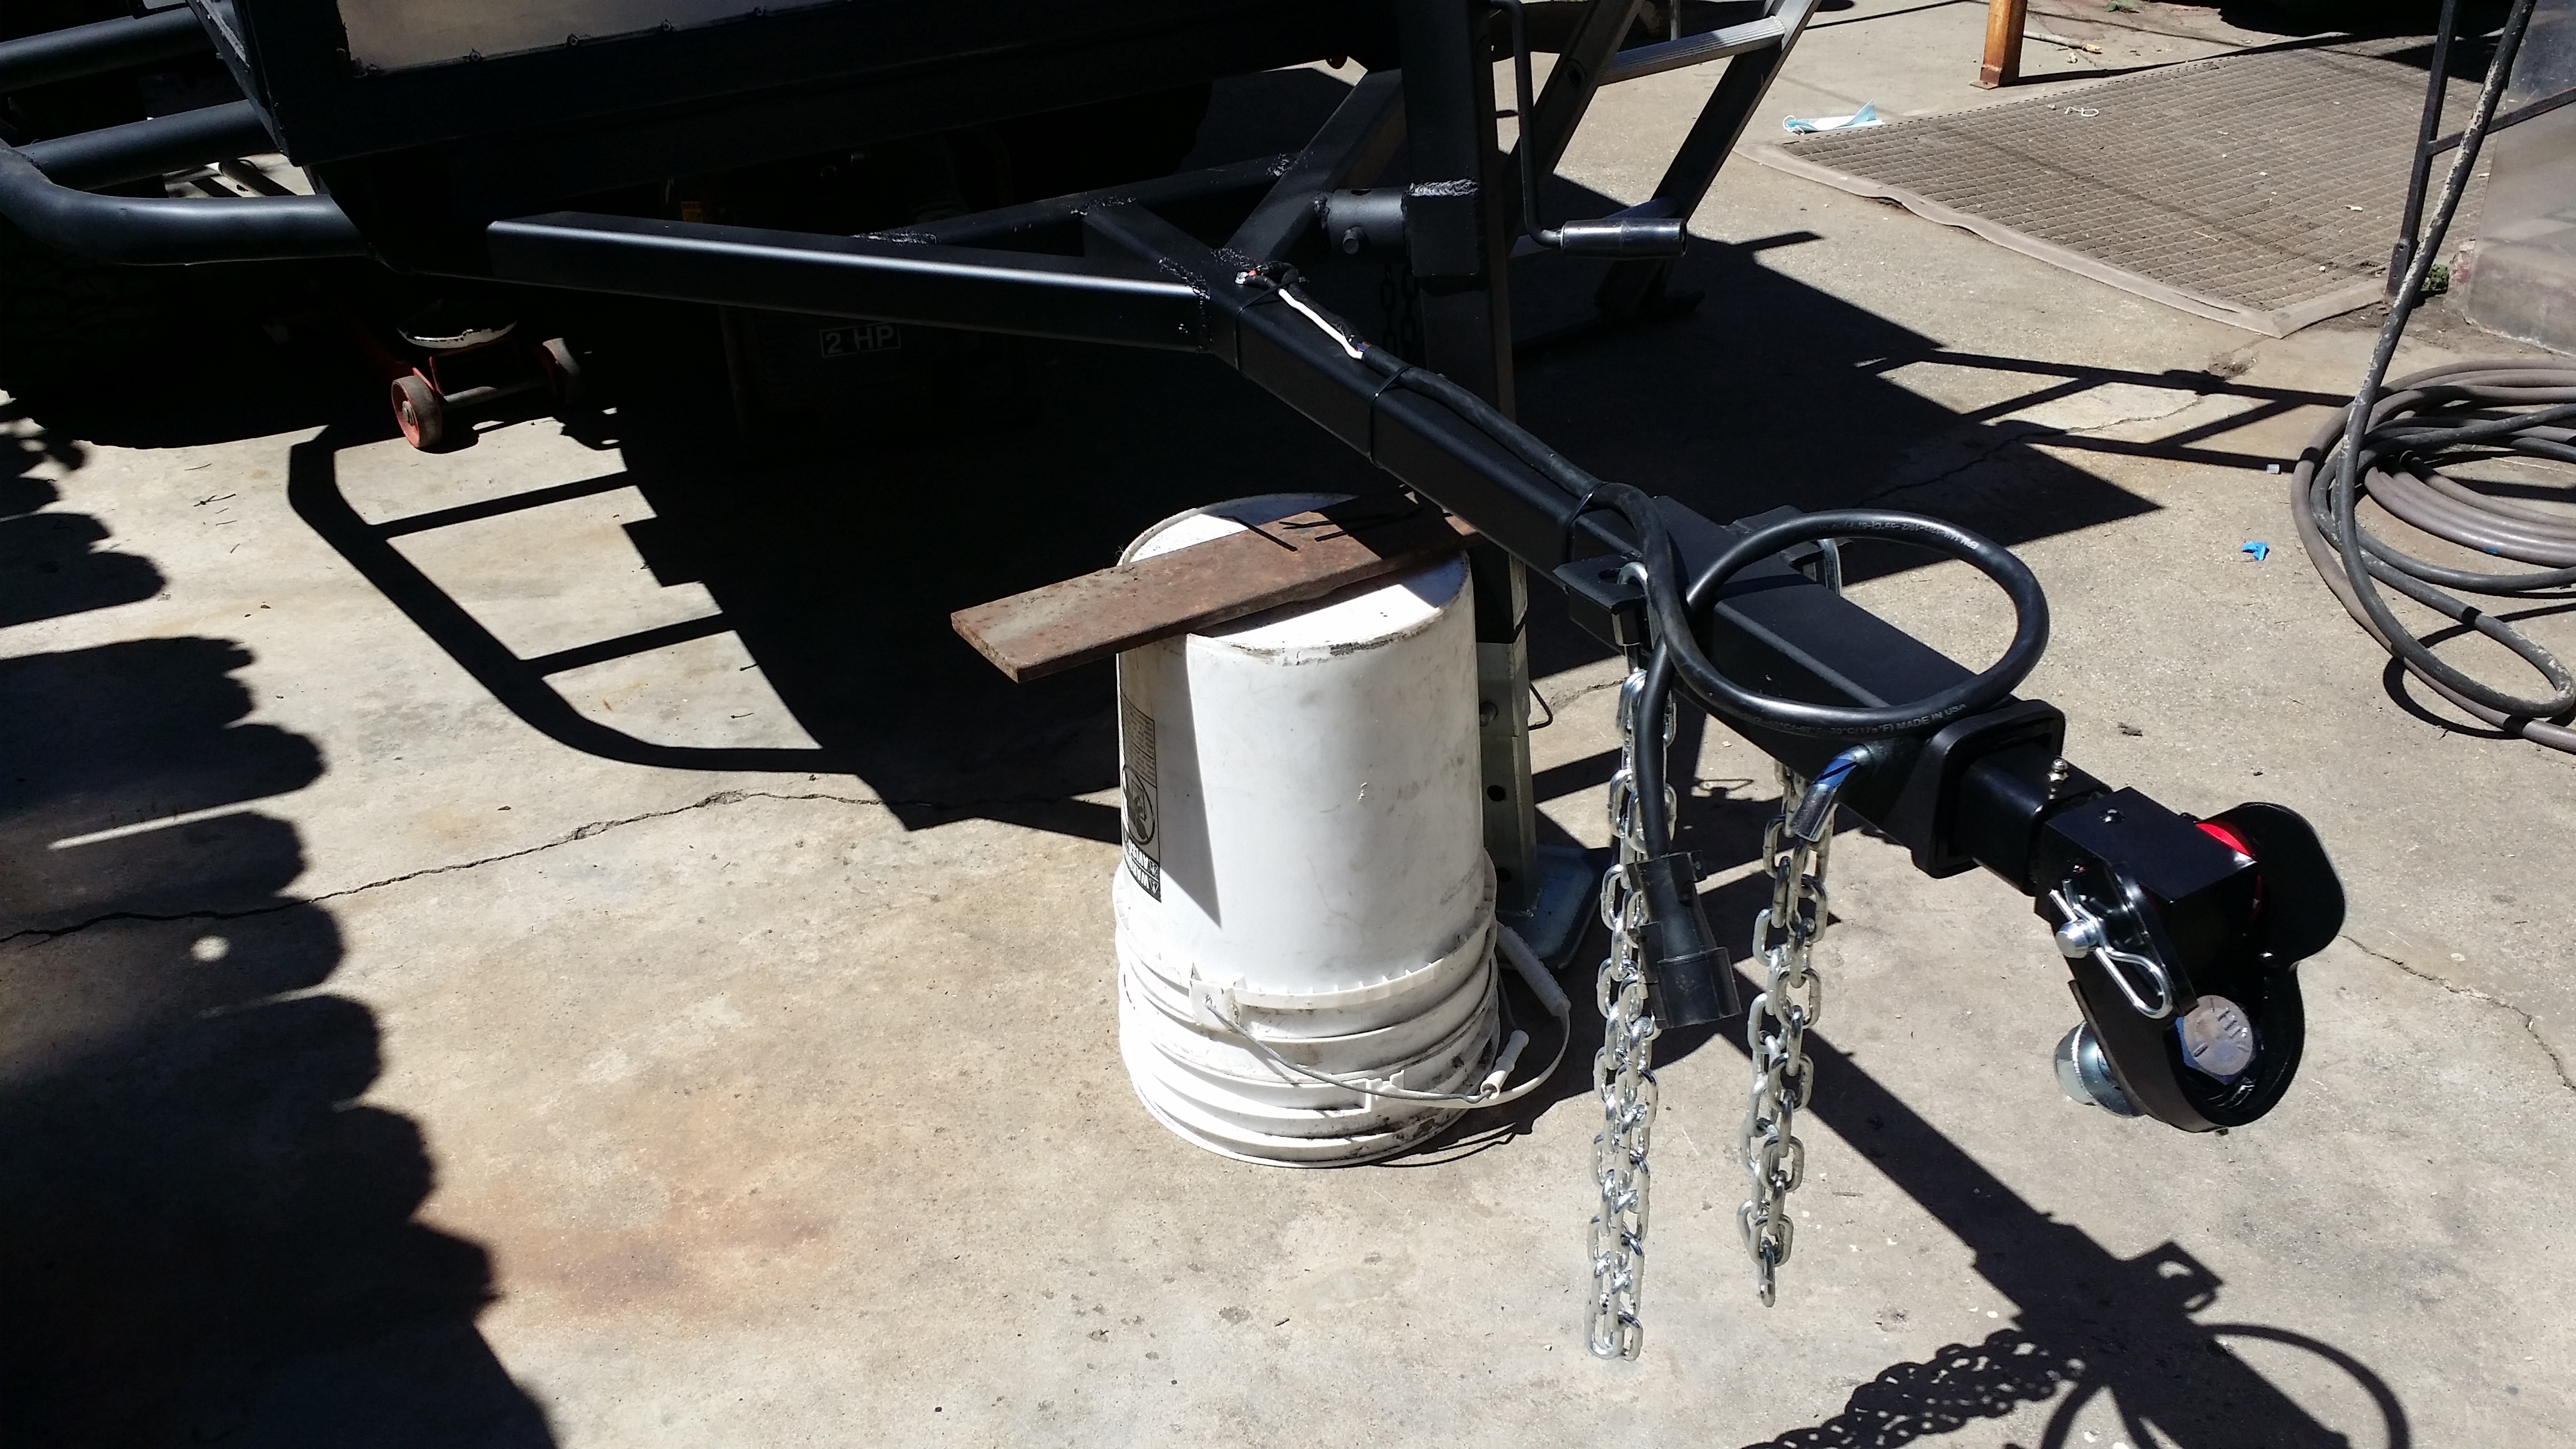
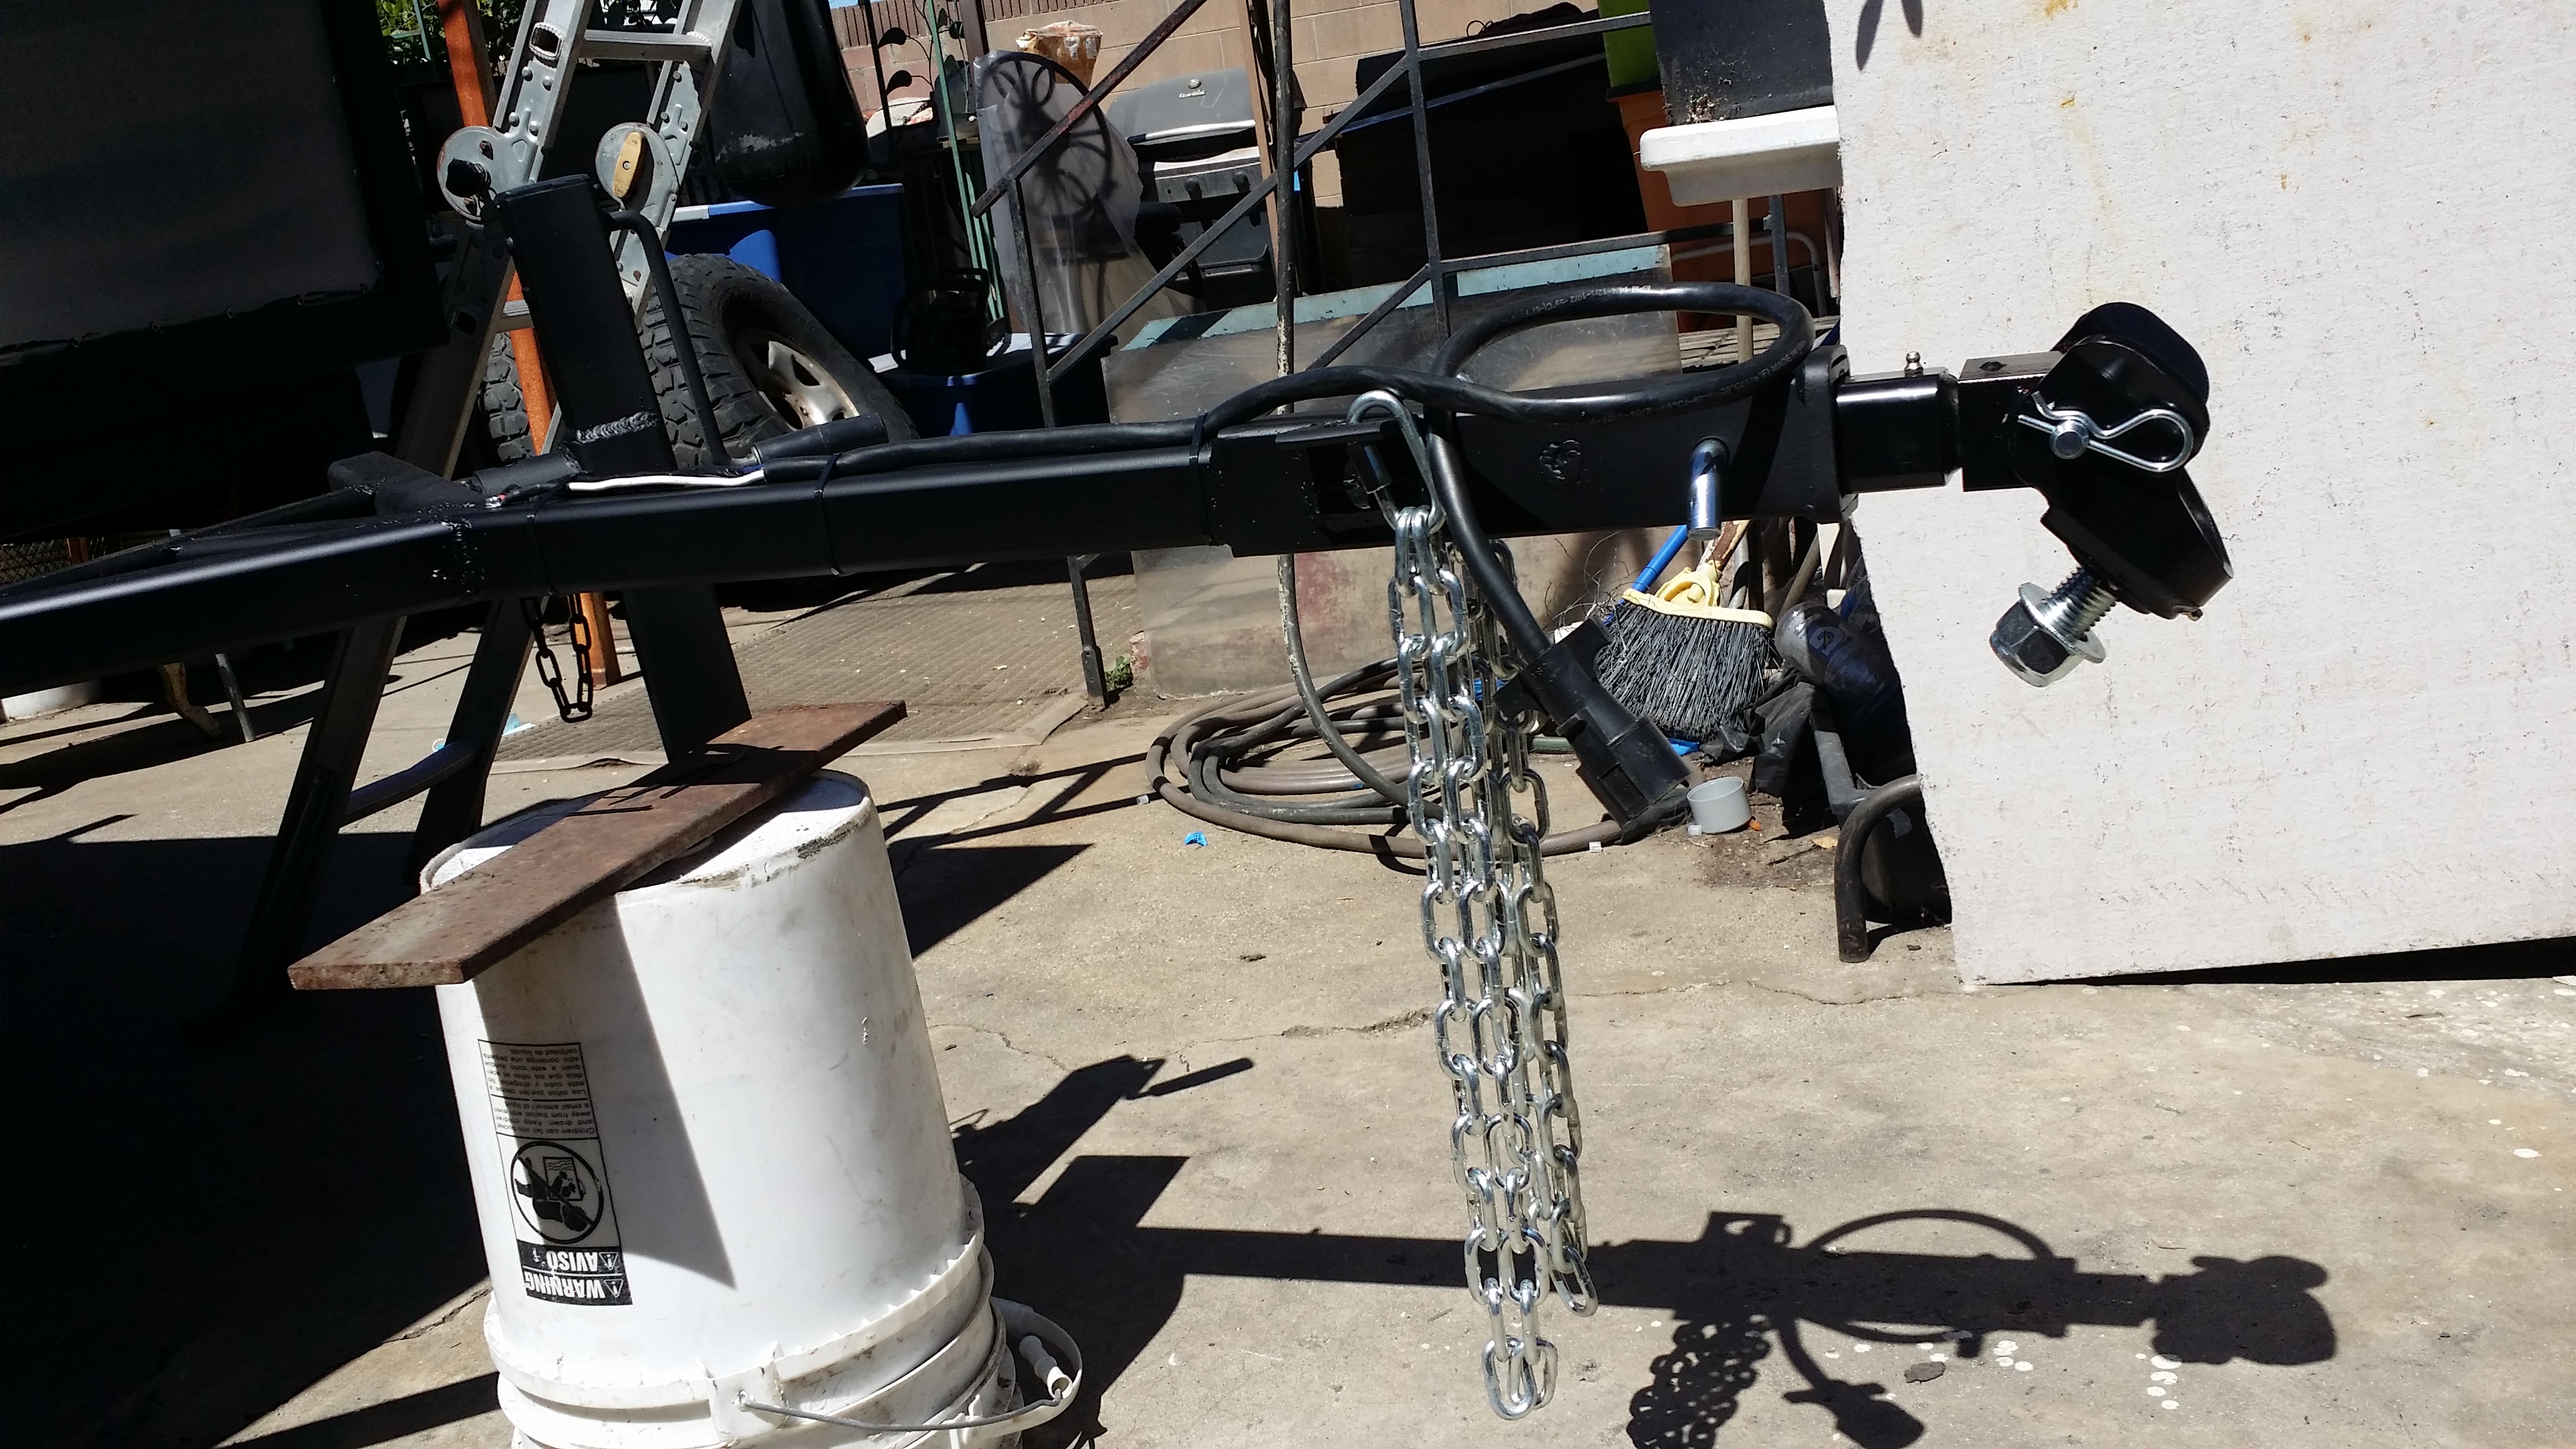
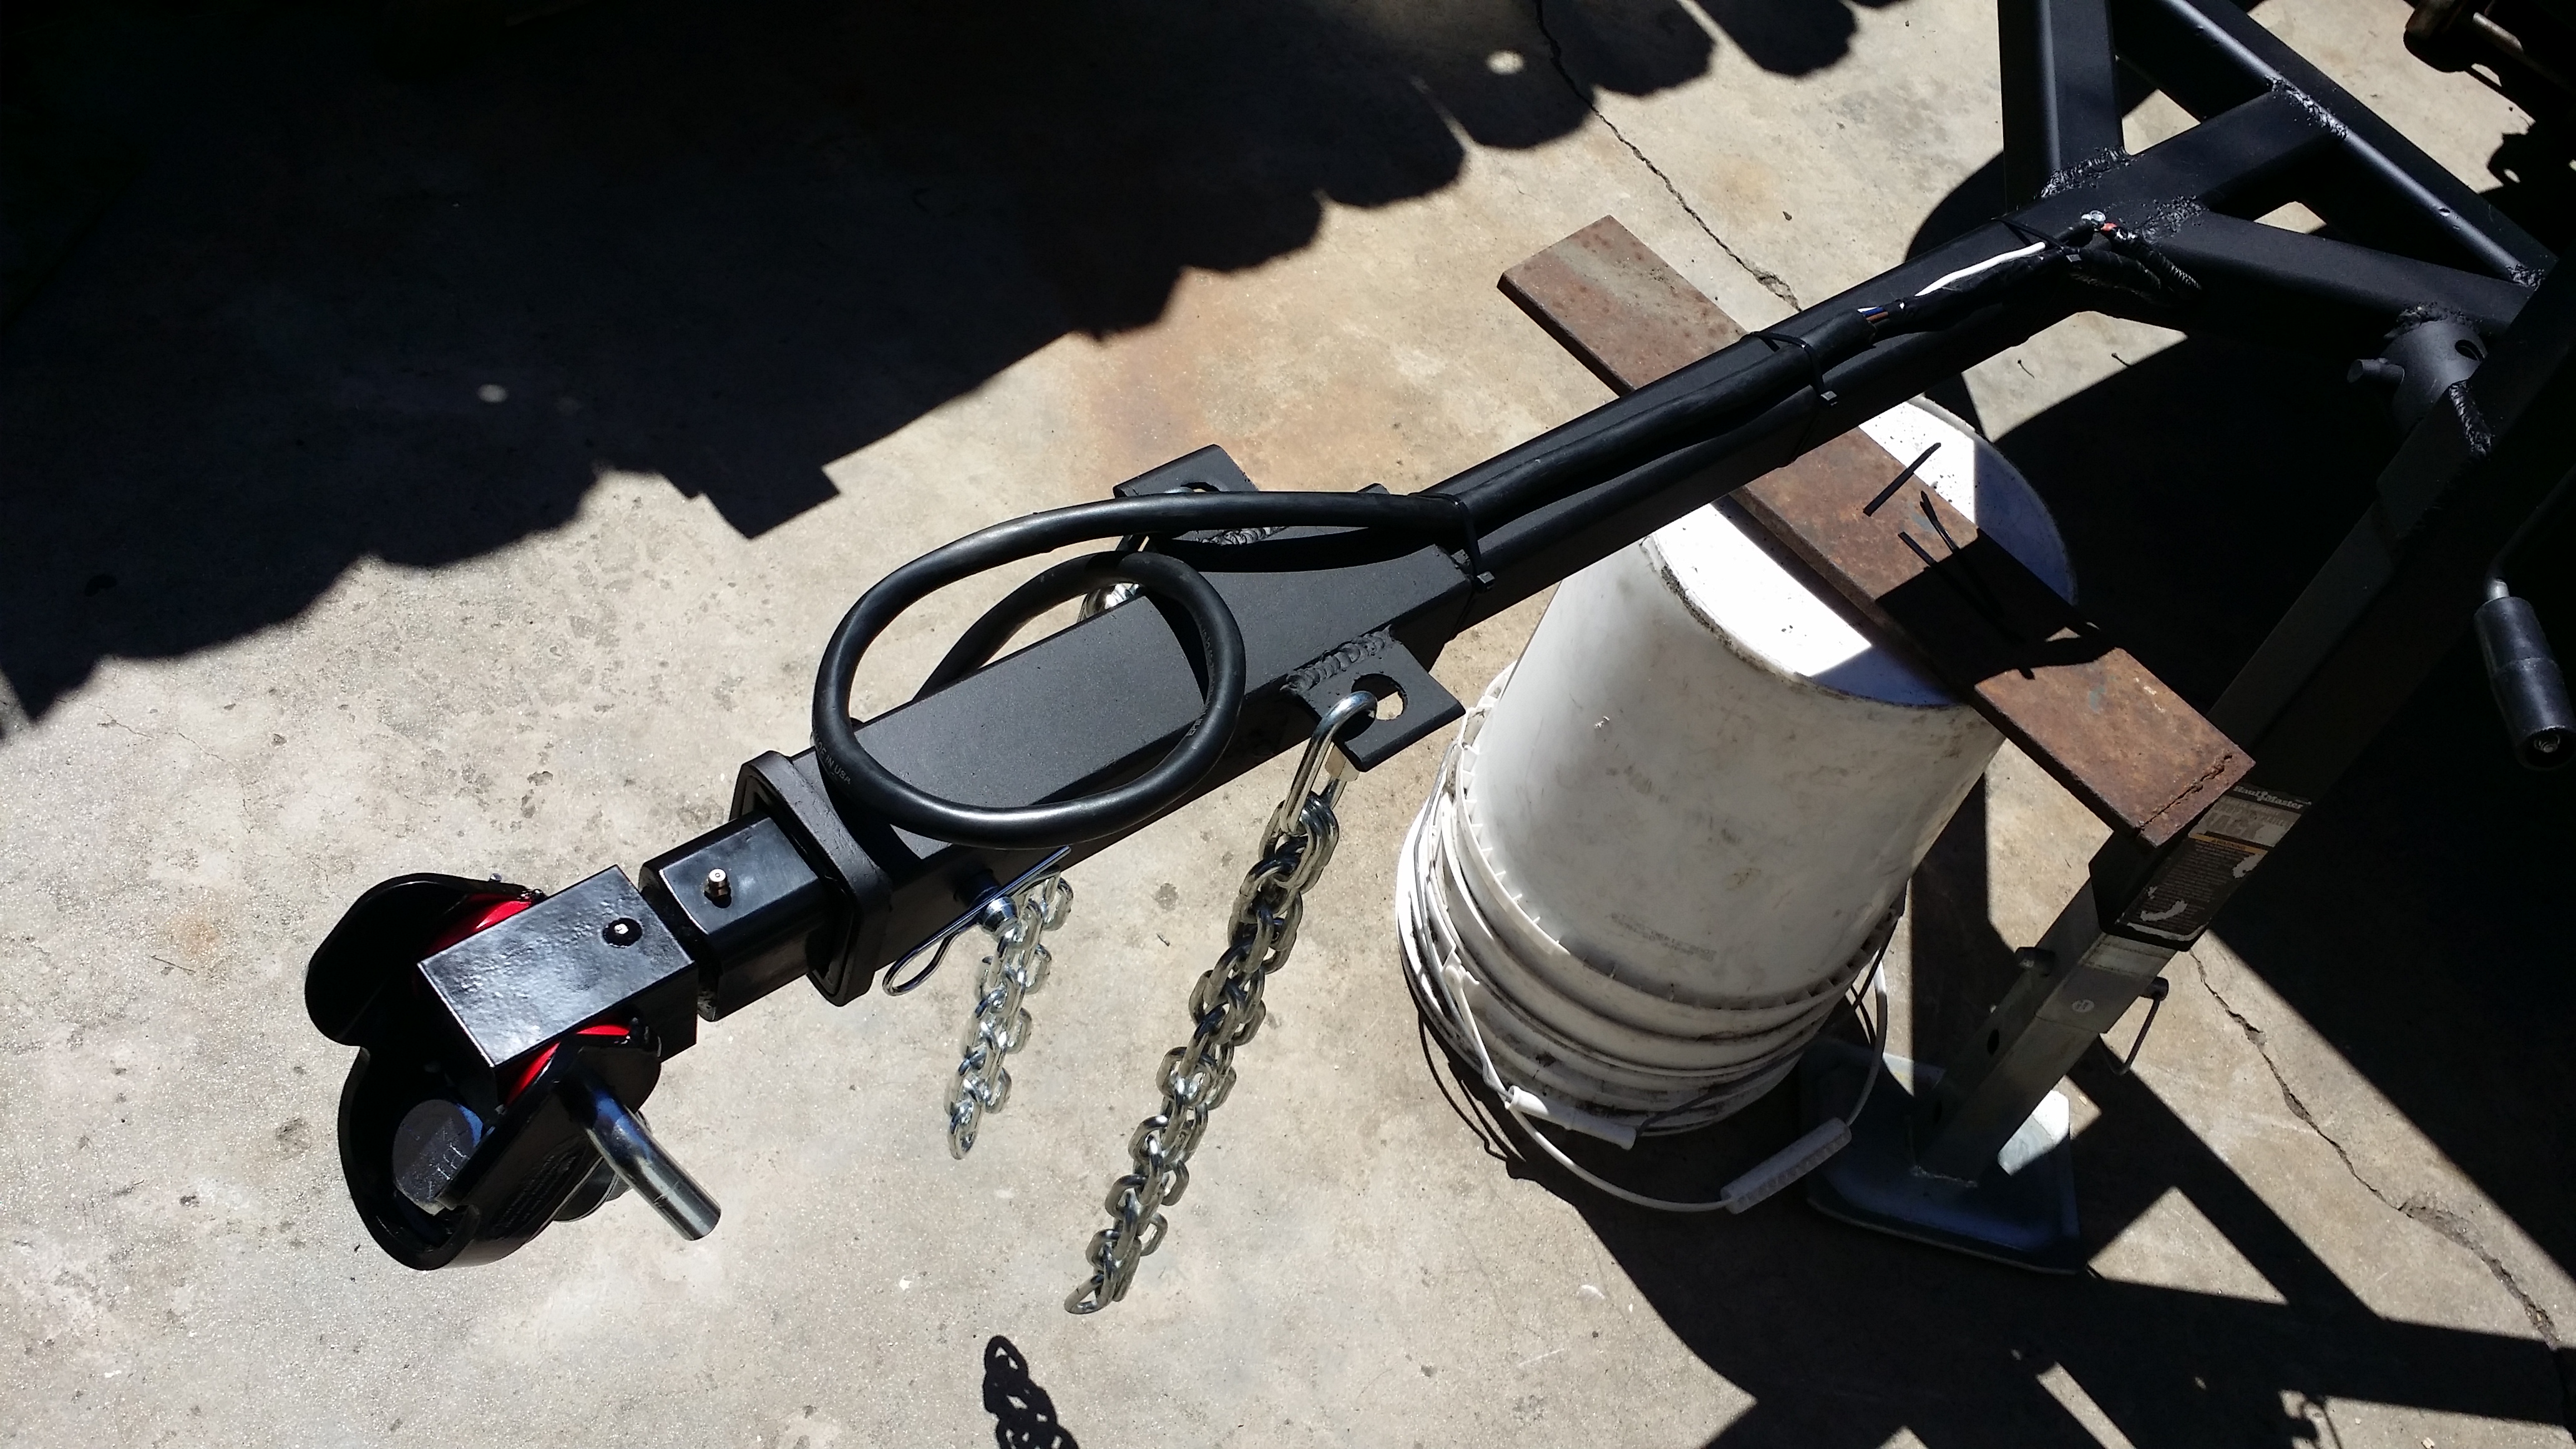
I greased all the zerk fittings on the max coupler and on my leaf springs to make sure it was all lubed up!
Then spent the rest of the night installing my high security locks. Finally i then finished up the night by taking it out for a test drive around the block a few times o get a feel of how it would feel owing the trailer on inspection day plus i wanted to make sure the trailer was stable since i had never driven the trailer before this point.
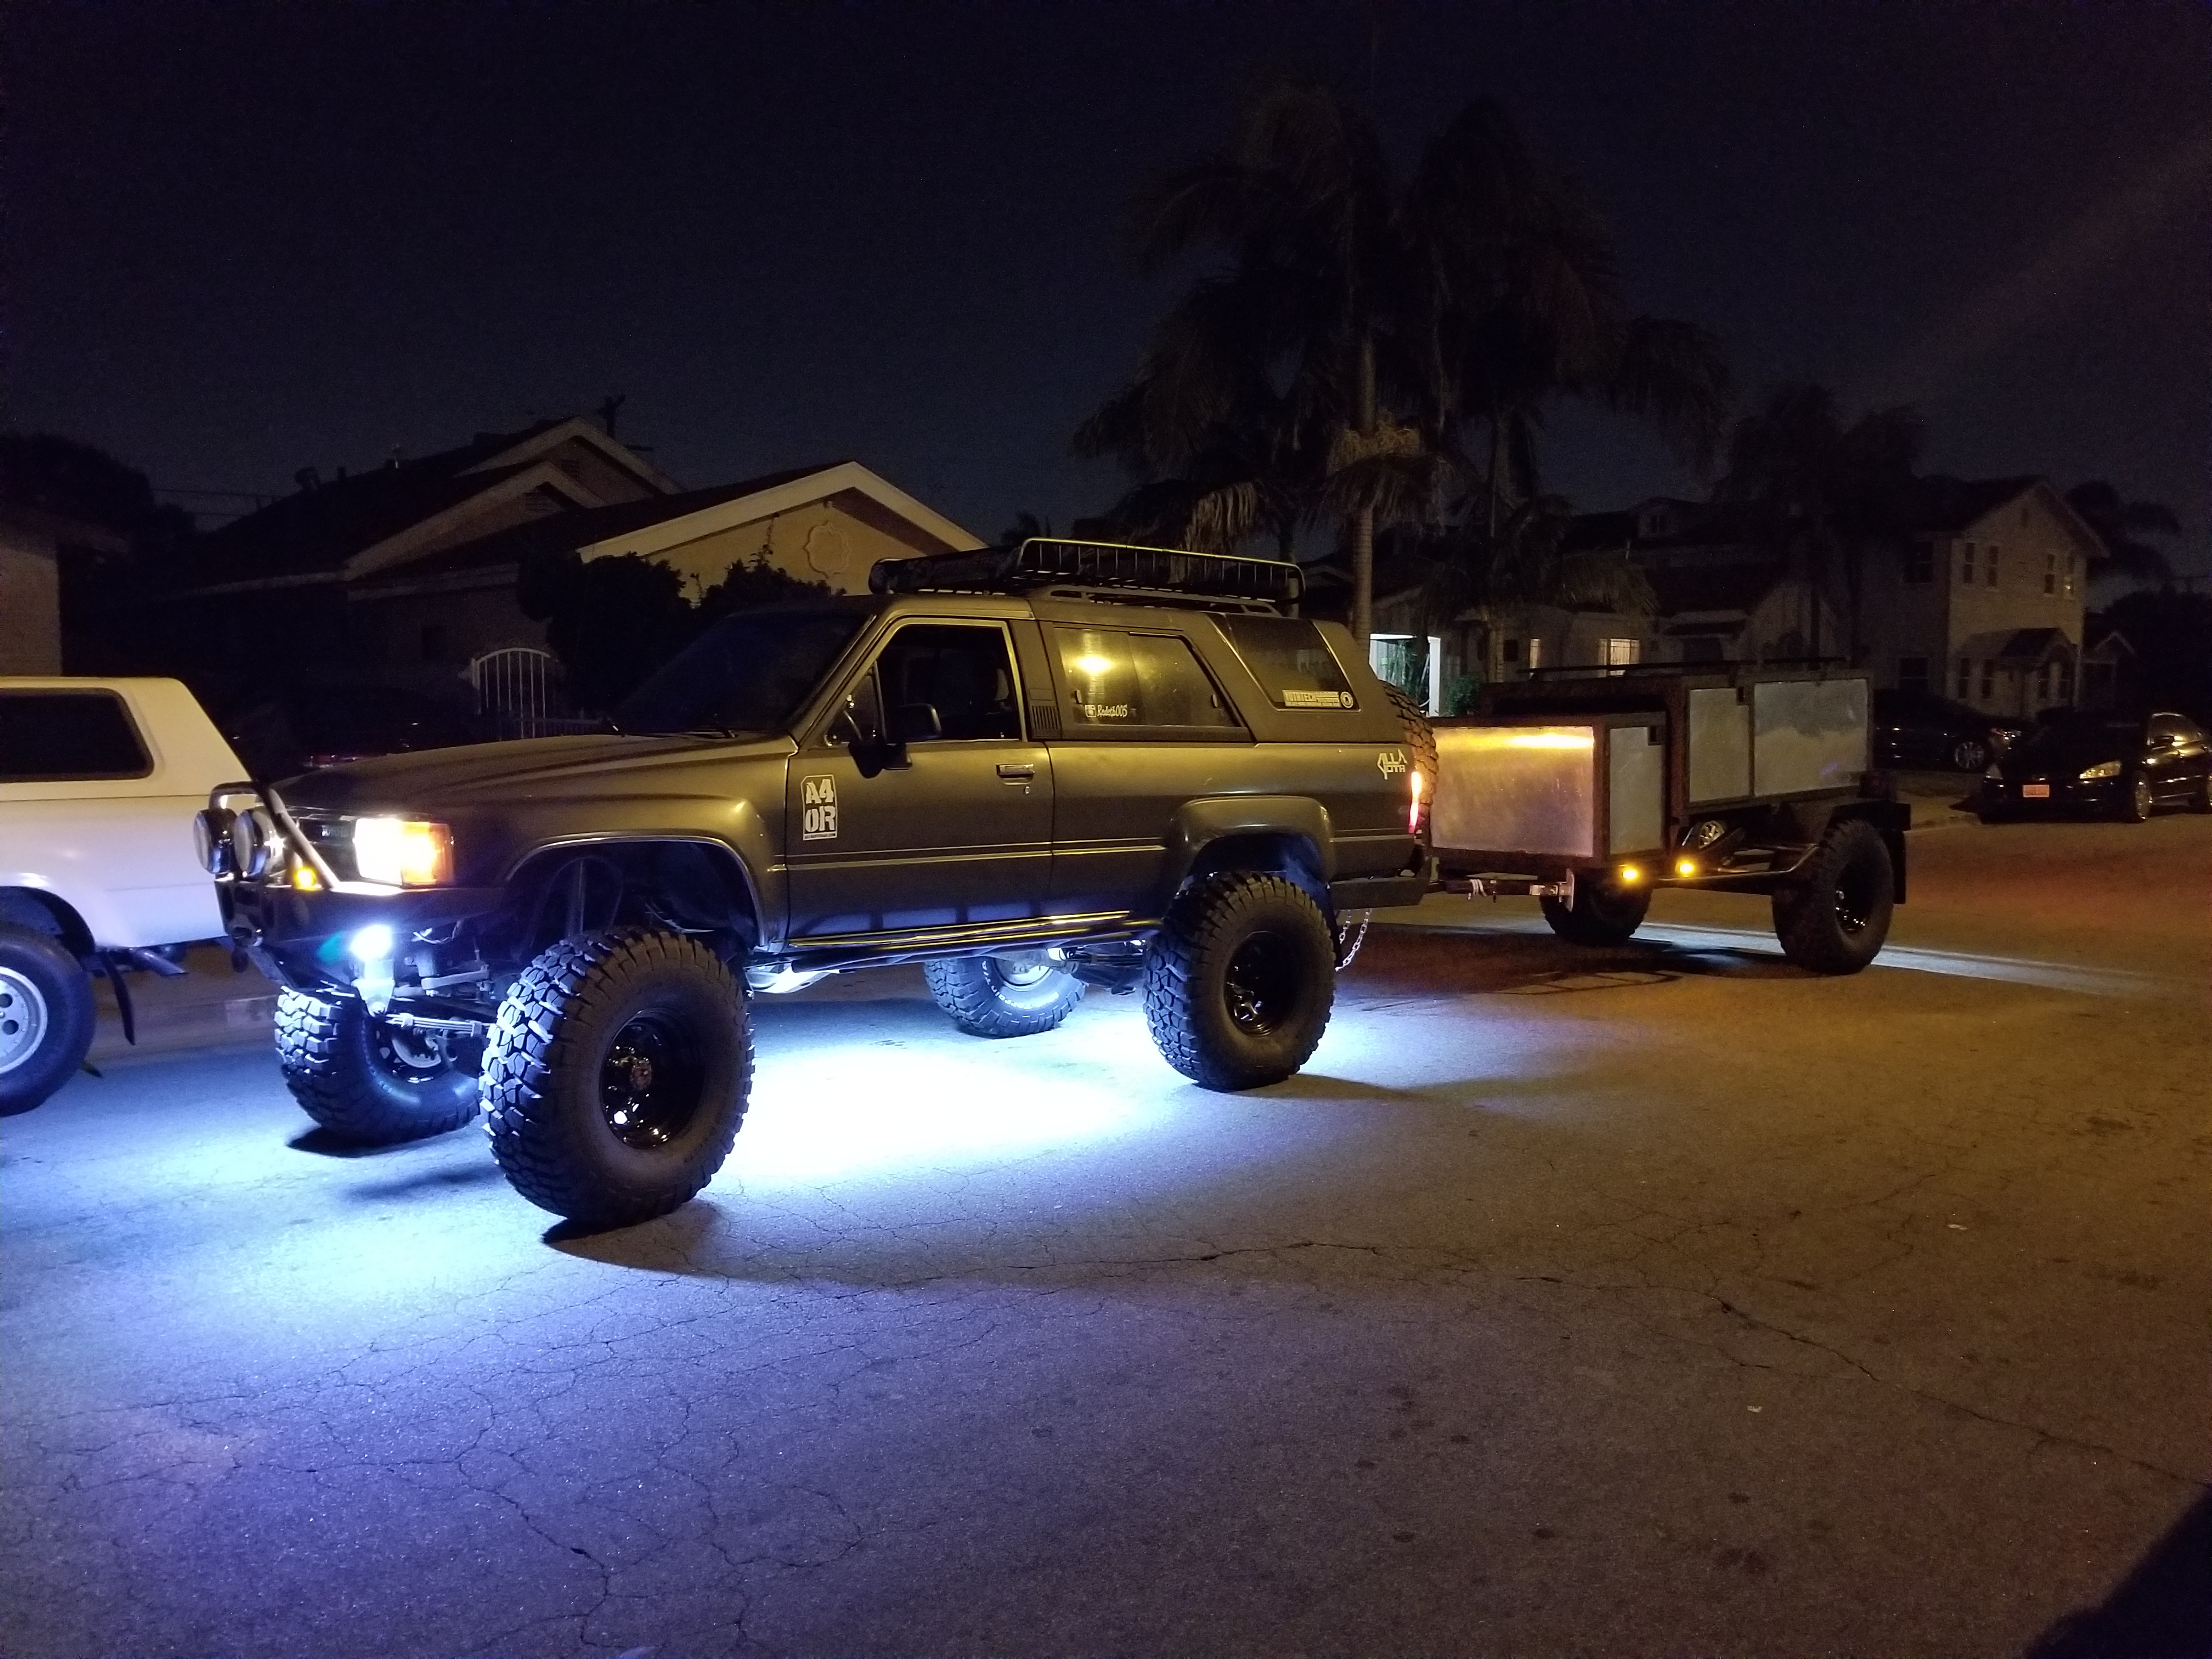
Here's a quick video i made of a walk around of the trailer while parked on the street.
http://shop.knightoffroadtrailers.co...OUPLER_c12.htm

Once that came in i figured i would get the rest of the items needed for the DMV inspection and of course safety. I went to Autozone and bought all this stuff.

Boom she was ready.


I greased all the zerk fittings on the max coupler and on my leaf springs to make sure it was all lubed up!
Then spent the rest of the night installing my high security locks. Finally i then finished up the night by taking it out for a test drive around the block a few times o get a feel of how it would feel owing the trailer on inspection day plus i wanted to make sure the trailer was stable since i had never driven the trailer before this point.

Here's a quick video i made of a walk around of the trailer while parked on the street.
05-22-2017, 08:57 PM
#127
Registered User
Thread Starter
Went to the DMV this morning. I'll have to say the trailer drove really great and i love the Tekonsha Prodigy p3 brake controller. The different levels of boost were so convenient.
I lost so much sleep thinking if this trailer would pass. I was so nervous hat i only got 2 hours of sleep! i was just nervous hey would ding me for the lift, tires or not having reflective tape on the back side. Luckily for me the guy i got to do the inspection was an awesome down to earth dude.
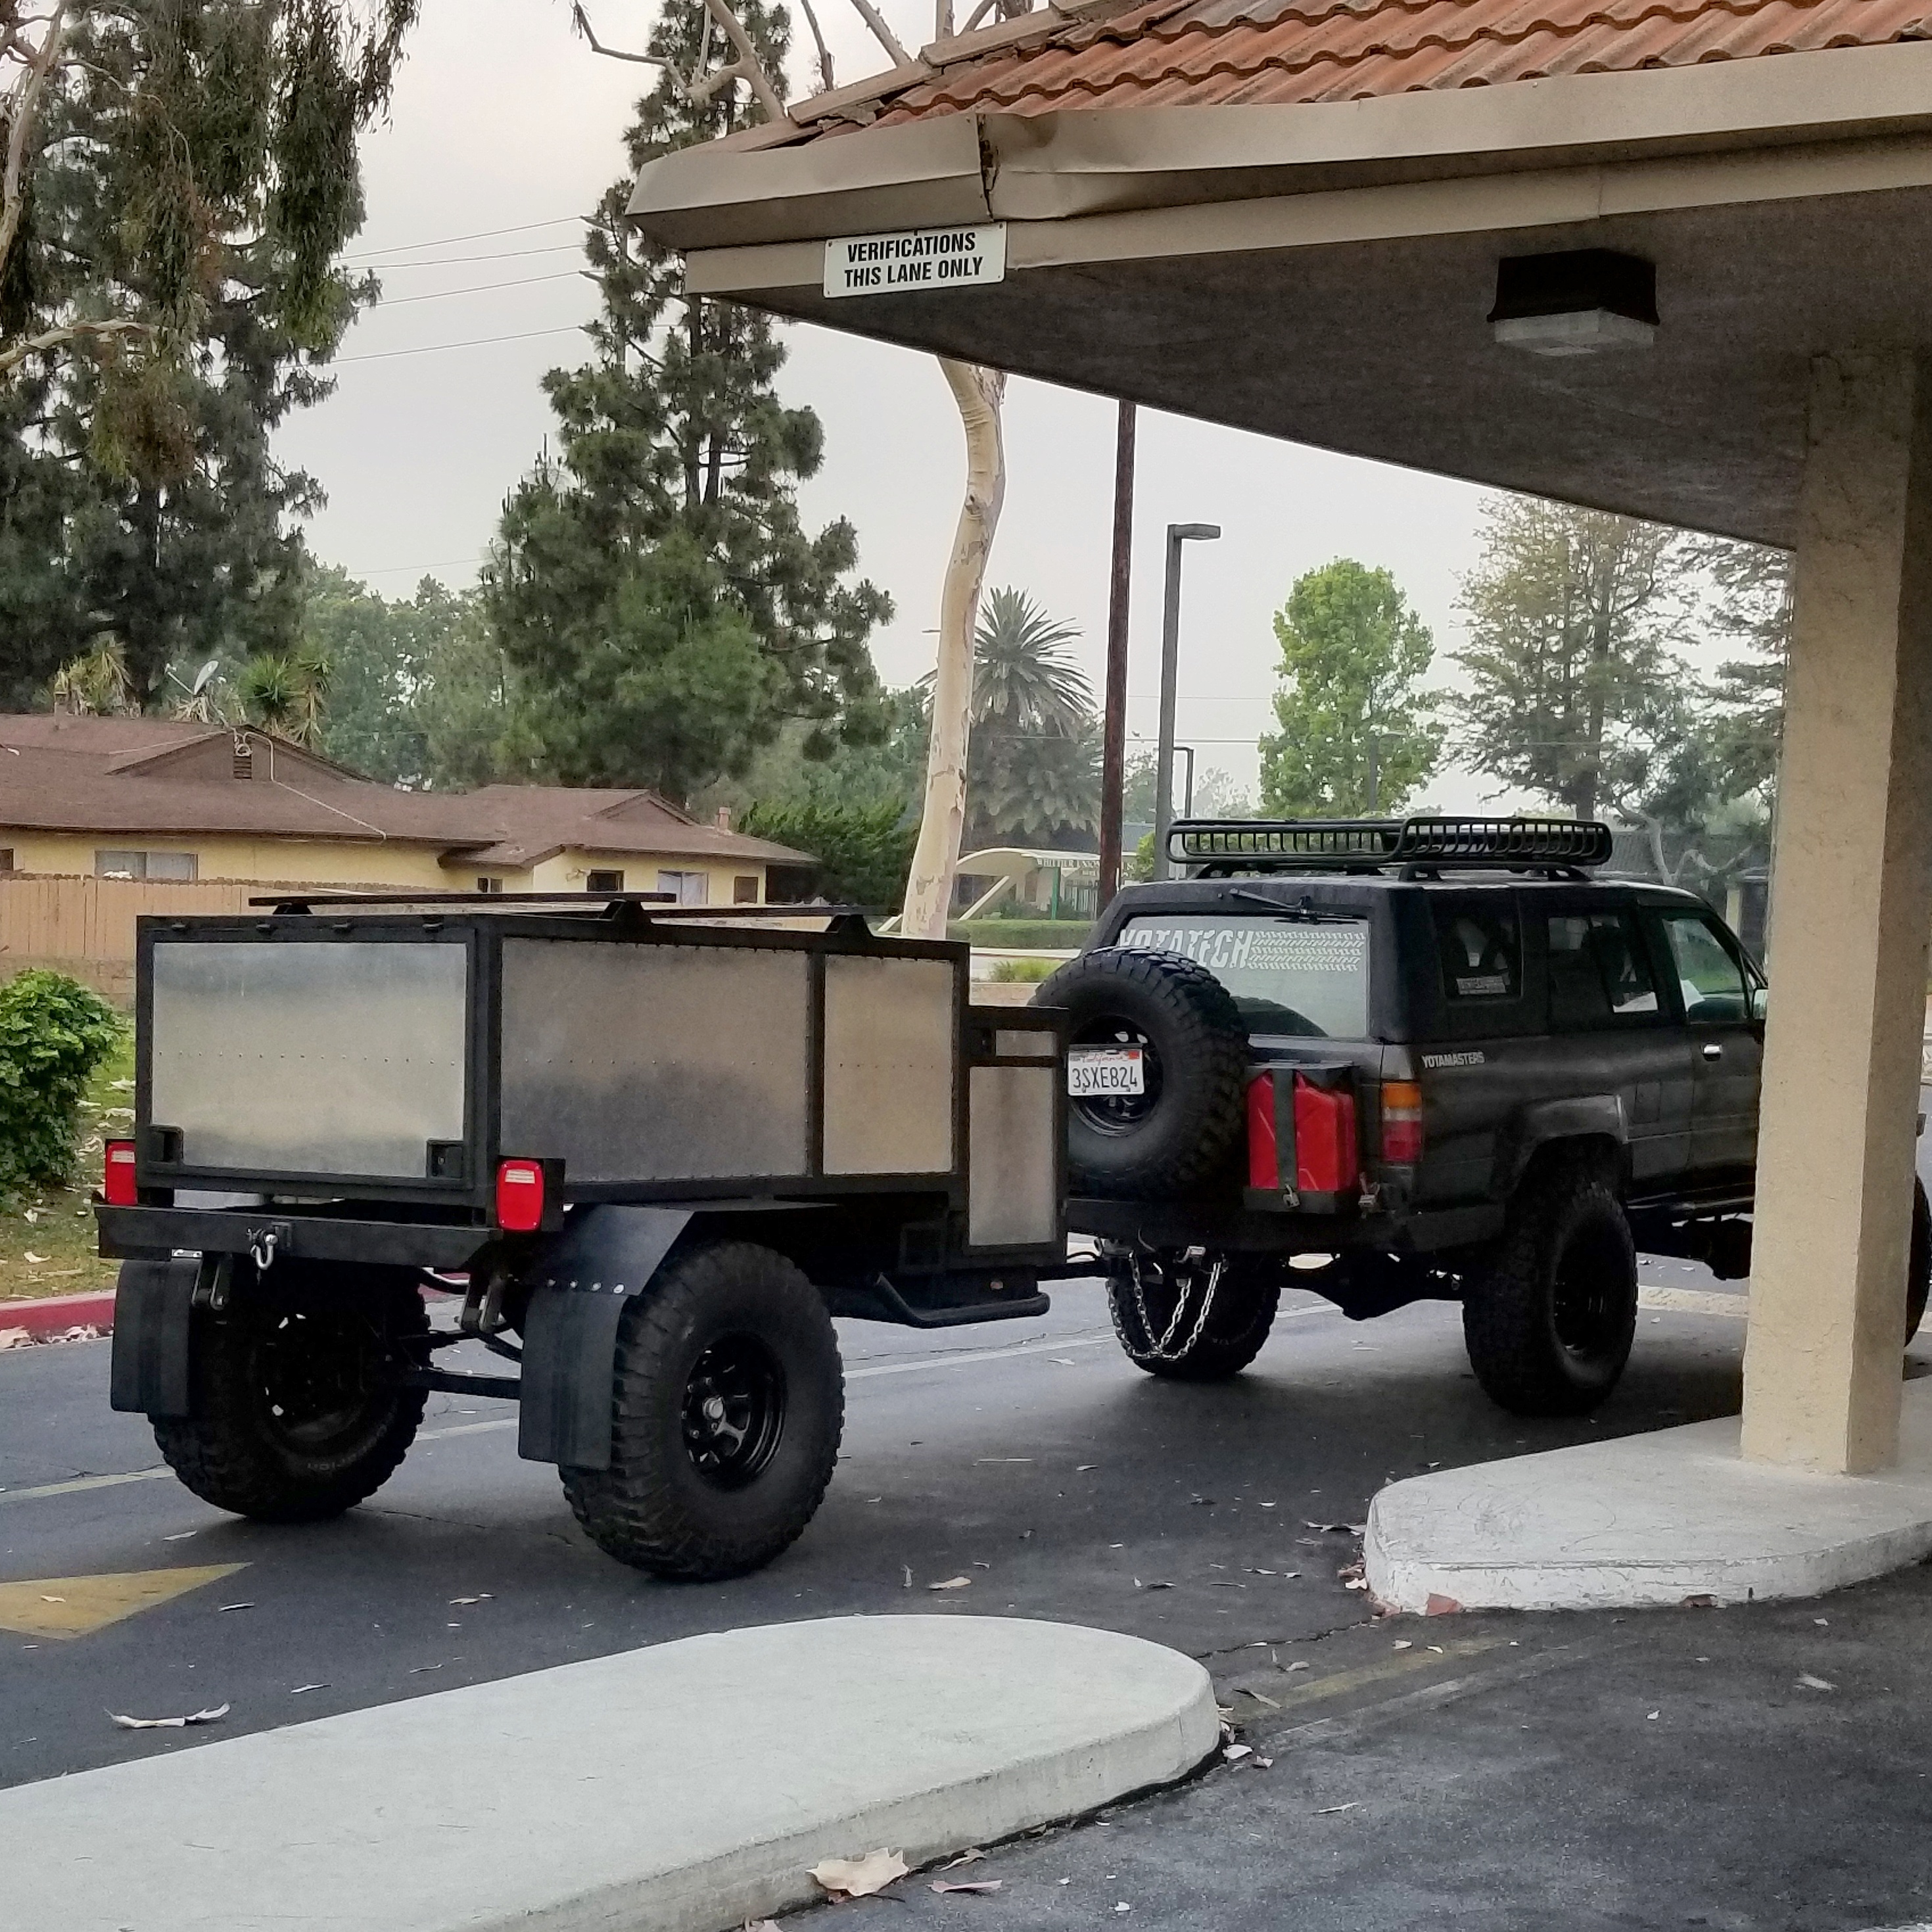
Needless to say i passed inspection. He was also pretty impressed with how well built it was. We didn't chat too much because he had other appointments to tend to but i was super quick and it made me so happy.
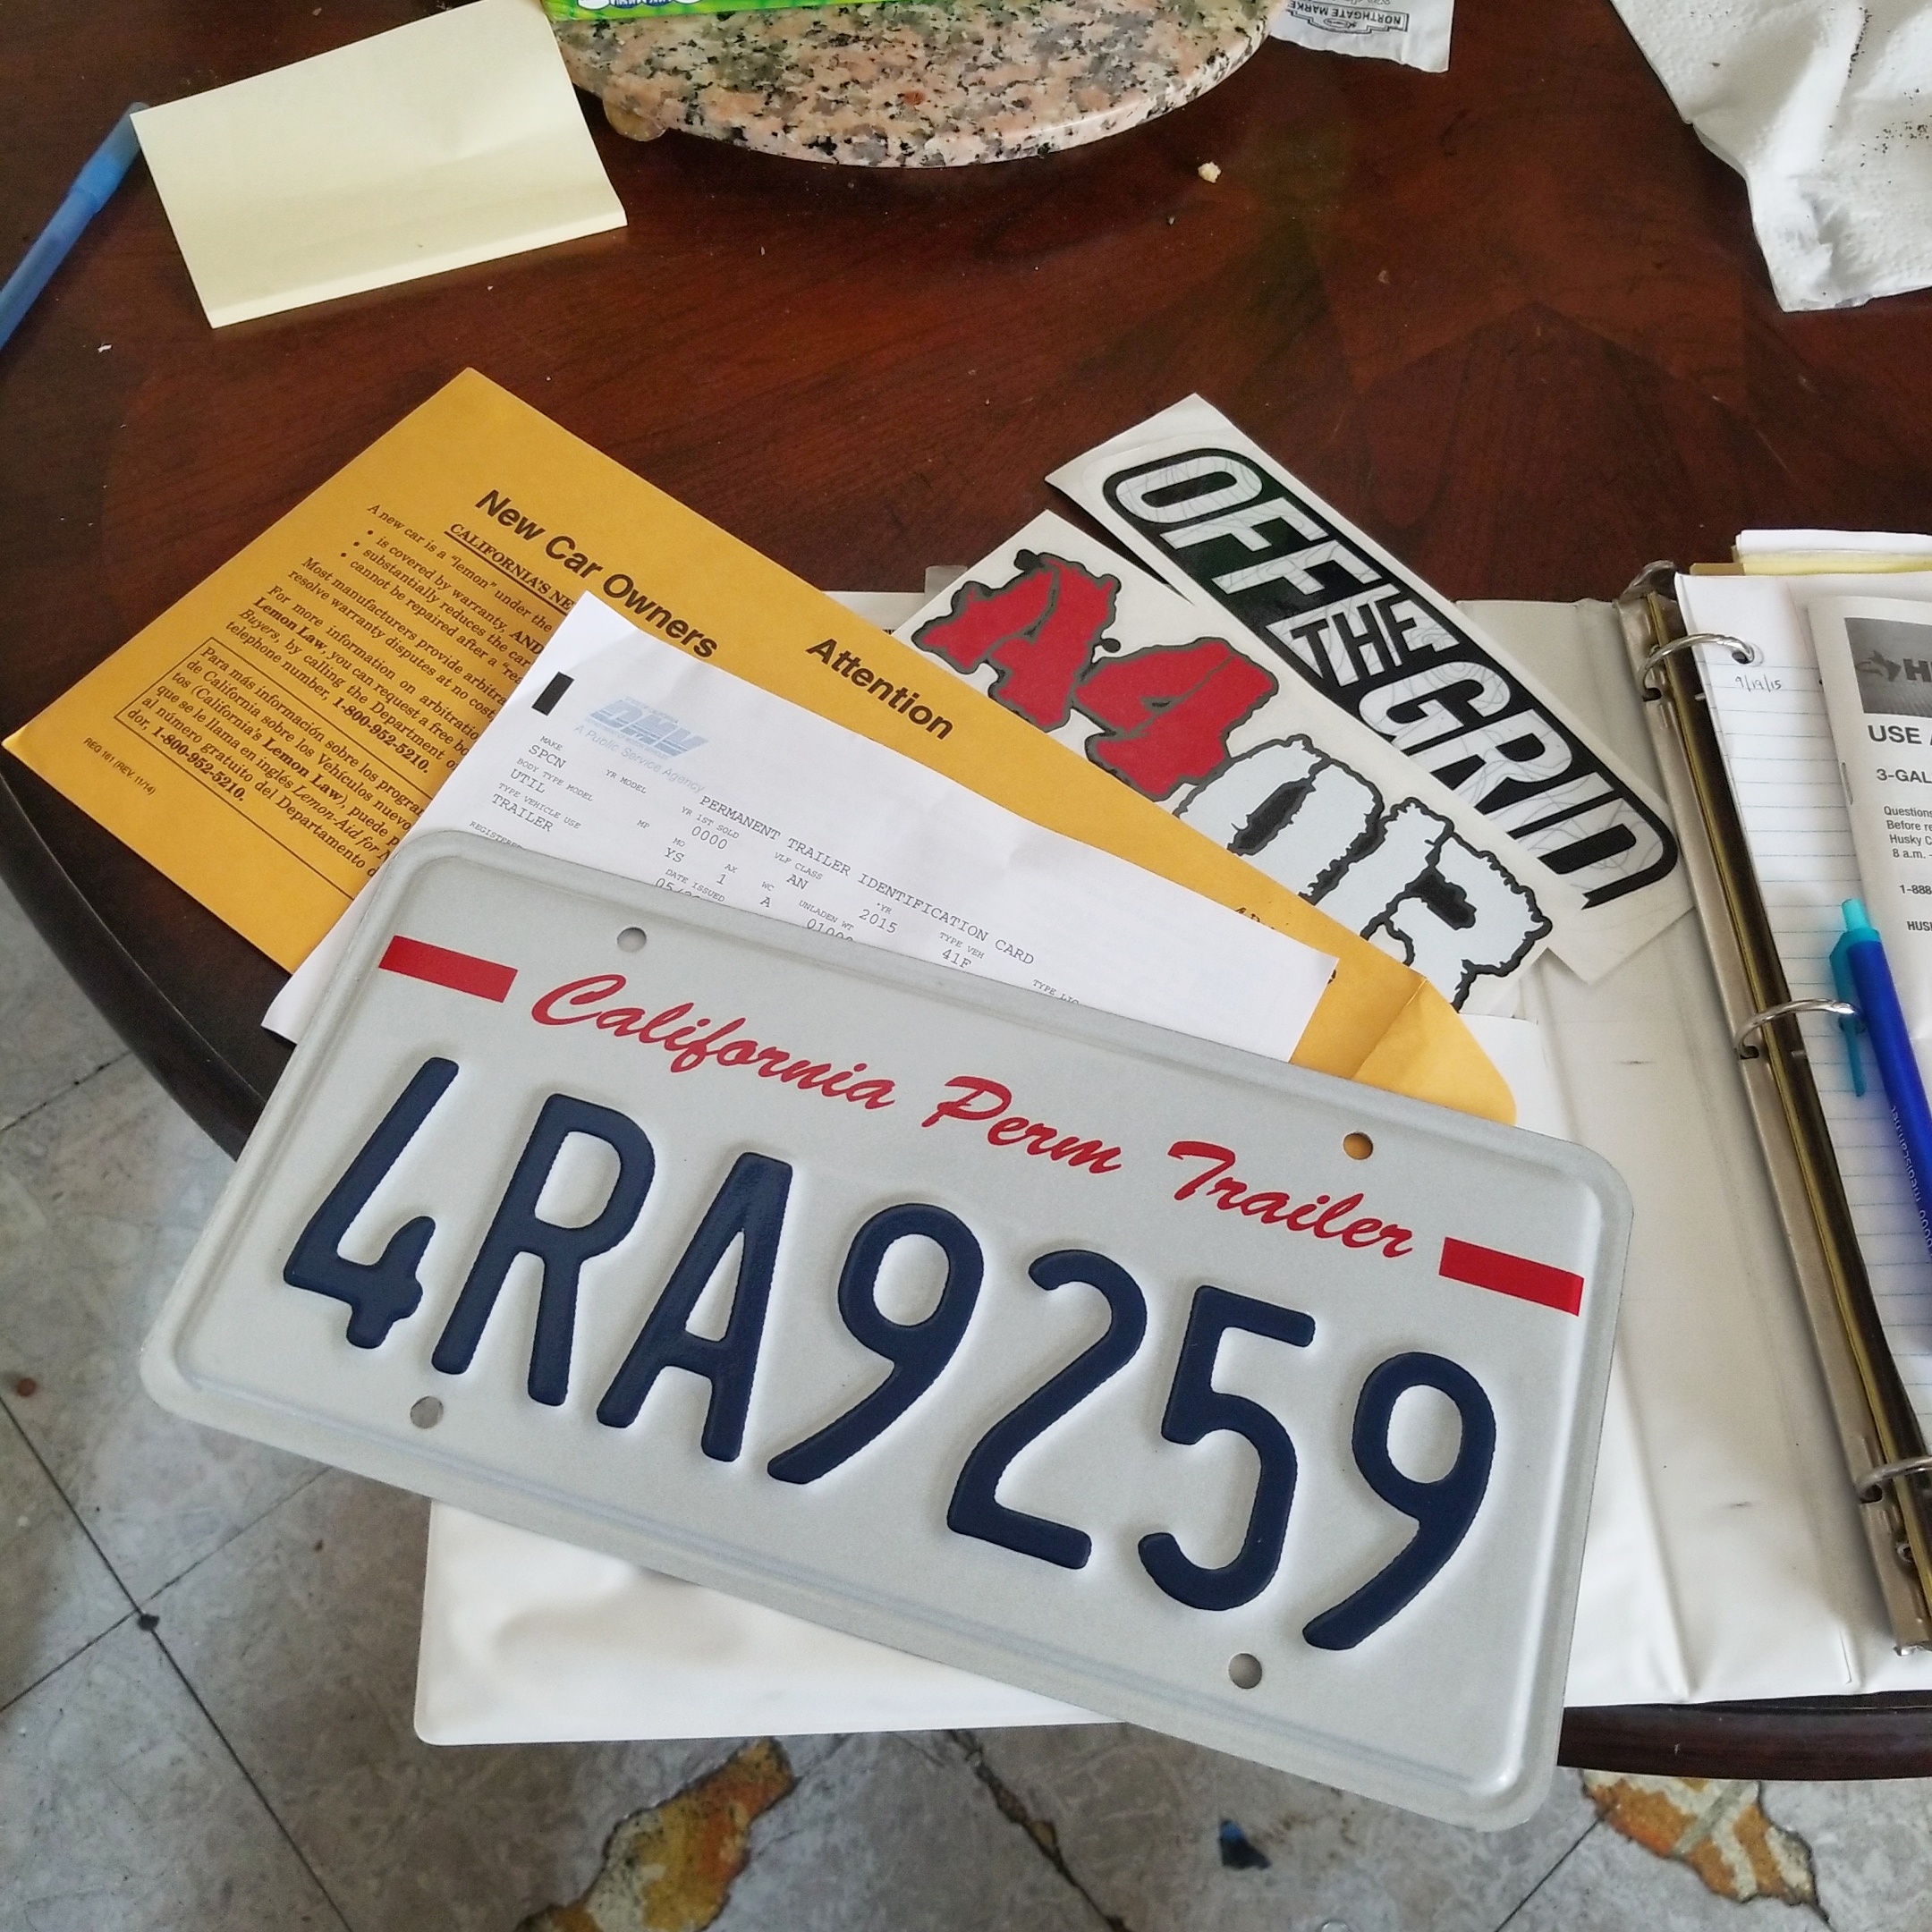
I'm so thrilled that is all over with. They gave me a new VIN and told me registration would be every 5 years because it is a "Light Weight Utility Trailer" In the end I ended up paying $40 for all the paperwork and new license plate plus VIN tag. I can't wait to start adding all the cool gadgets.
I lost so much sleep thinking if this trailer would pass. I was so nervous hat i only got 2 hours of sleep! i was just nervous hey would ding me for the lift, tires or not having reflective tape on the back side. Luckily for me the guy i got to do the inspection was an awesome down to earth dude.

Needless to say i passed inspection. He was also pretty impressed with how well built it was. We didn't chat too much because he had other appointments to tend to but i was super quick and it made me so happy.
I'm so thrilled that is all over with. They gave me a new VIN and told me registration would be every 5 years because it is a "Light Weight Utility Trailer" In the end I ended up paying $40 for all the paperwork and new license plate plus VIN tag. I can't wait to start adding all the cool gadgets.
 05-23-2017, 10:42 PM
#128
Registered User
Thread Starter
There's not much i can do on a week night but I did mount my 15 gallon water tank and water fill.
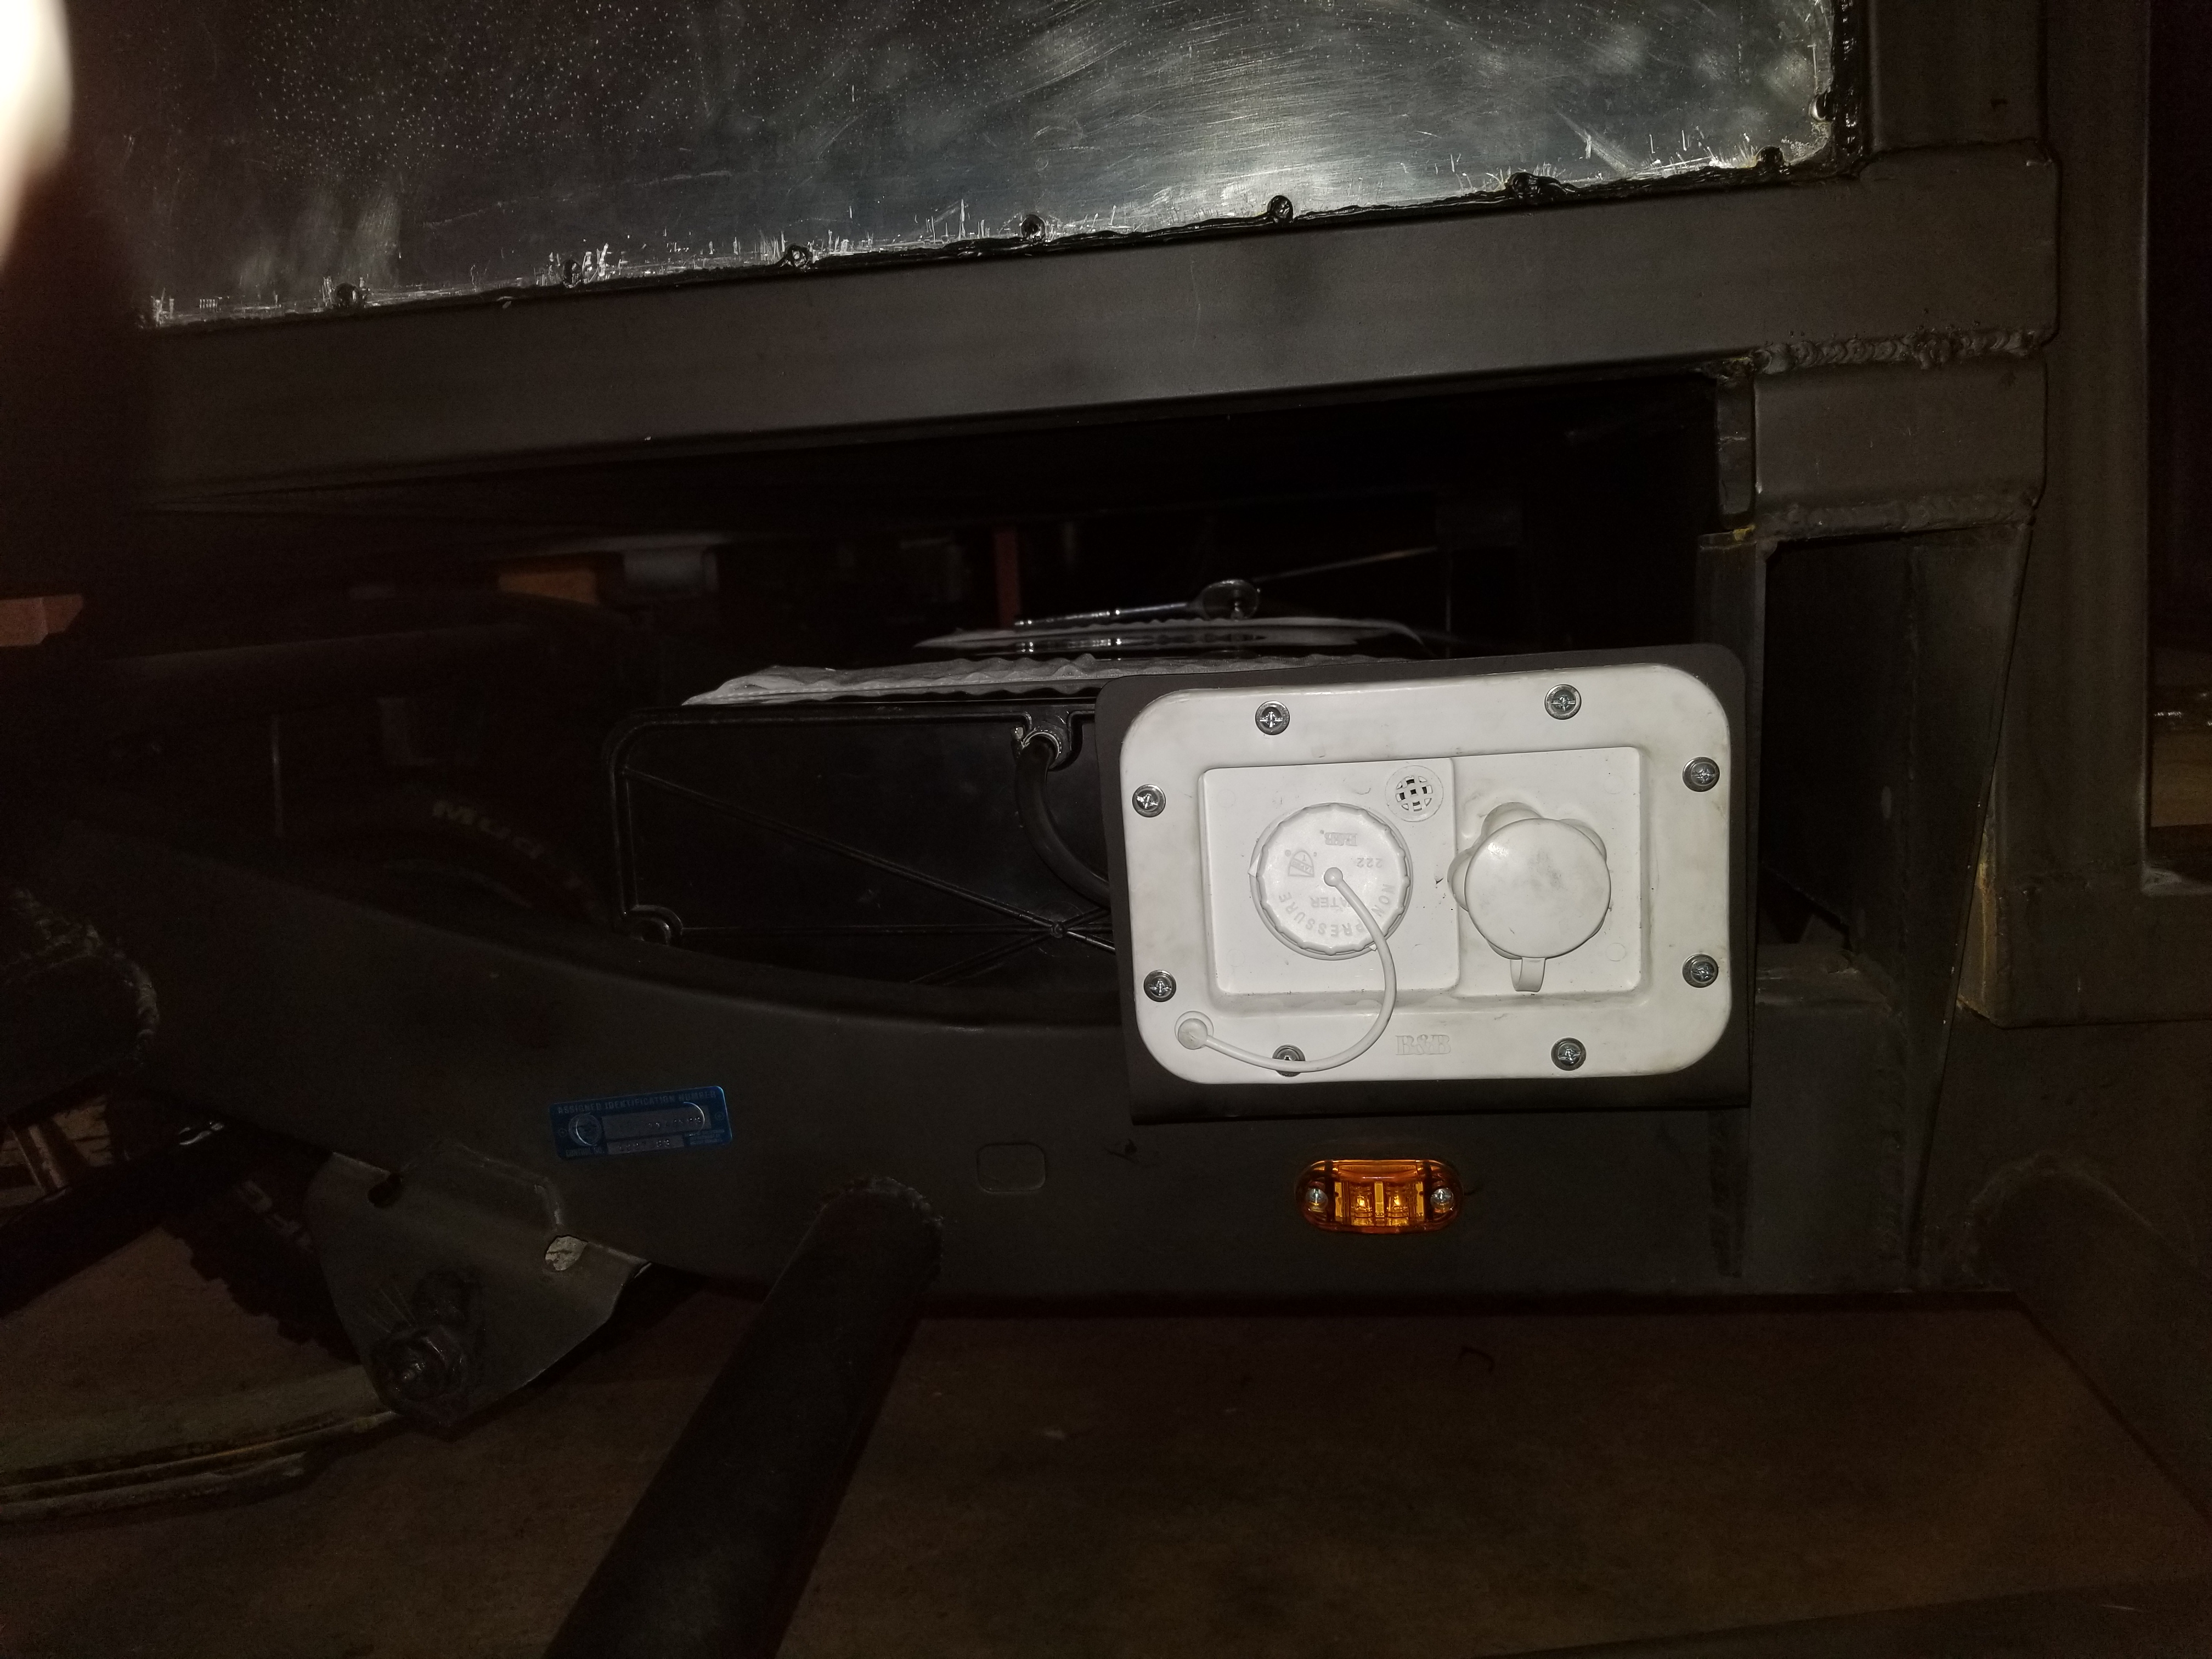

I used two extremely heavy duty grade velcro straps to hold the tank in place. I don't care about sun wear & tear or the quality degrading because i have an unlimited supply of them at my hospital. We use these straps to secure our patient's to the operating tables once they are out. It's a about 3" or 3.5" thick. And if they can hold a 300-500lb patient in place I'm sure it will do well in holding the water tank in place with all the bumps on the road; Especially since i used 2 of them lol
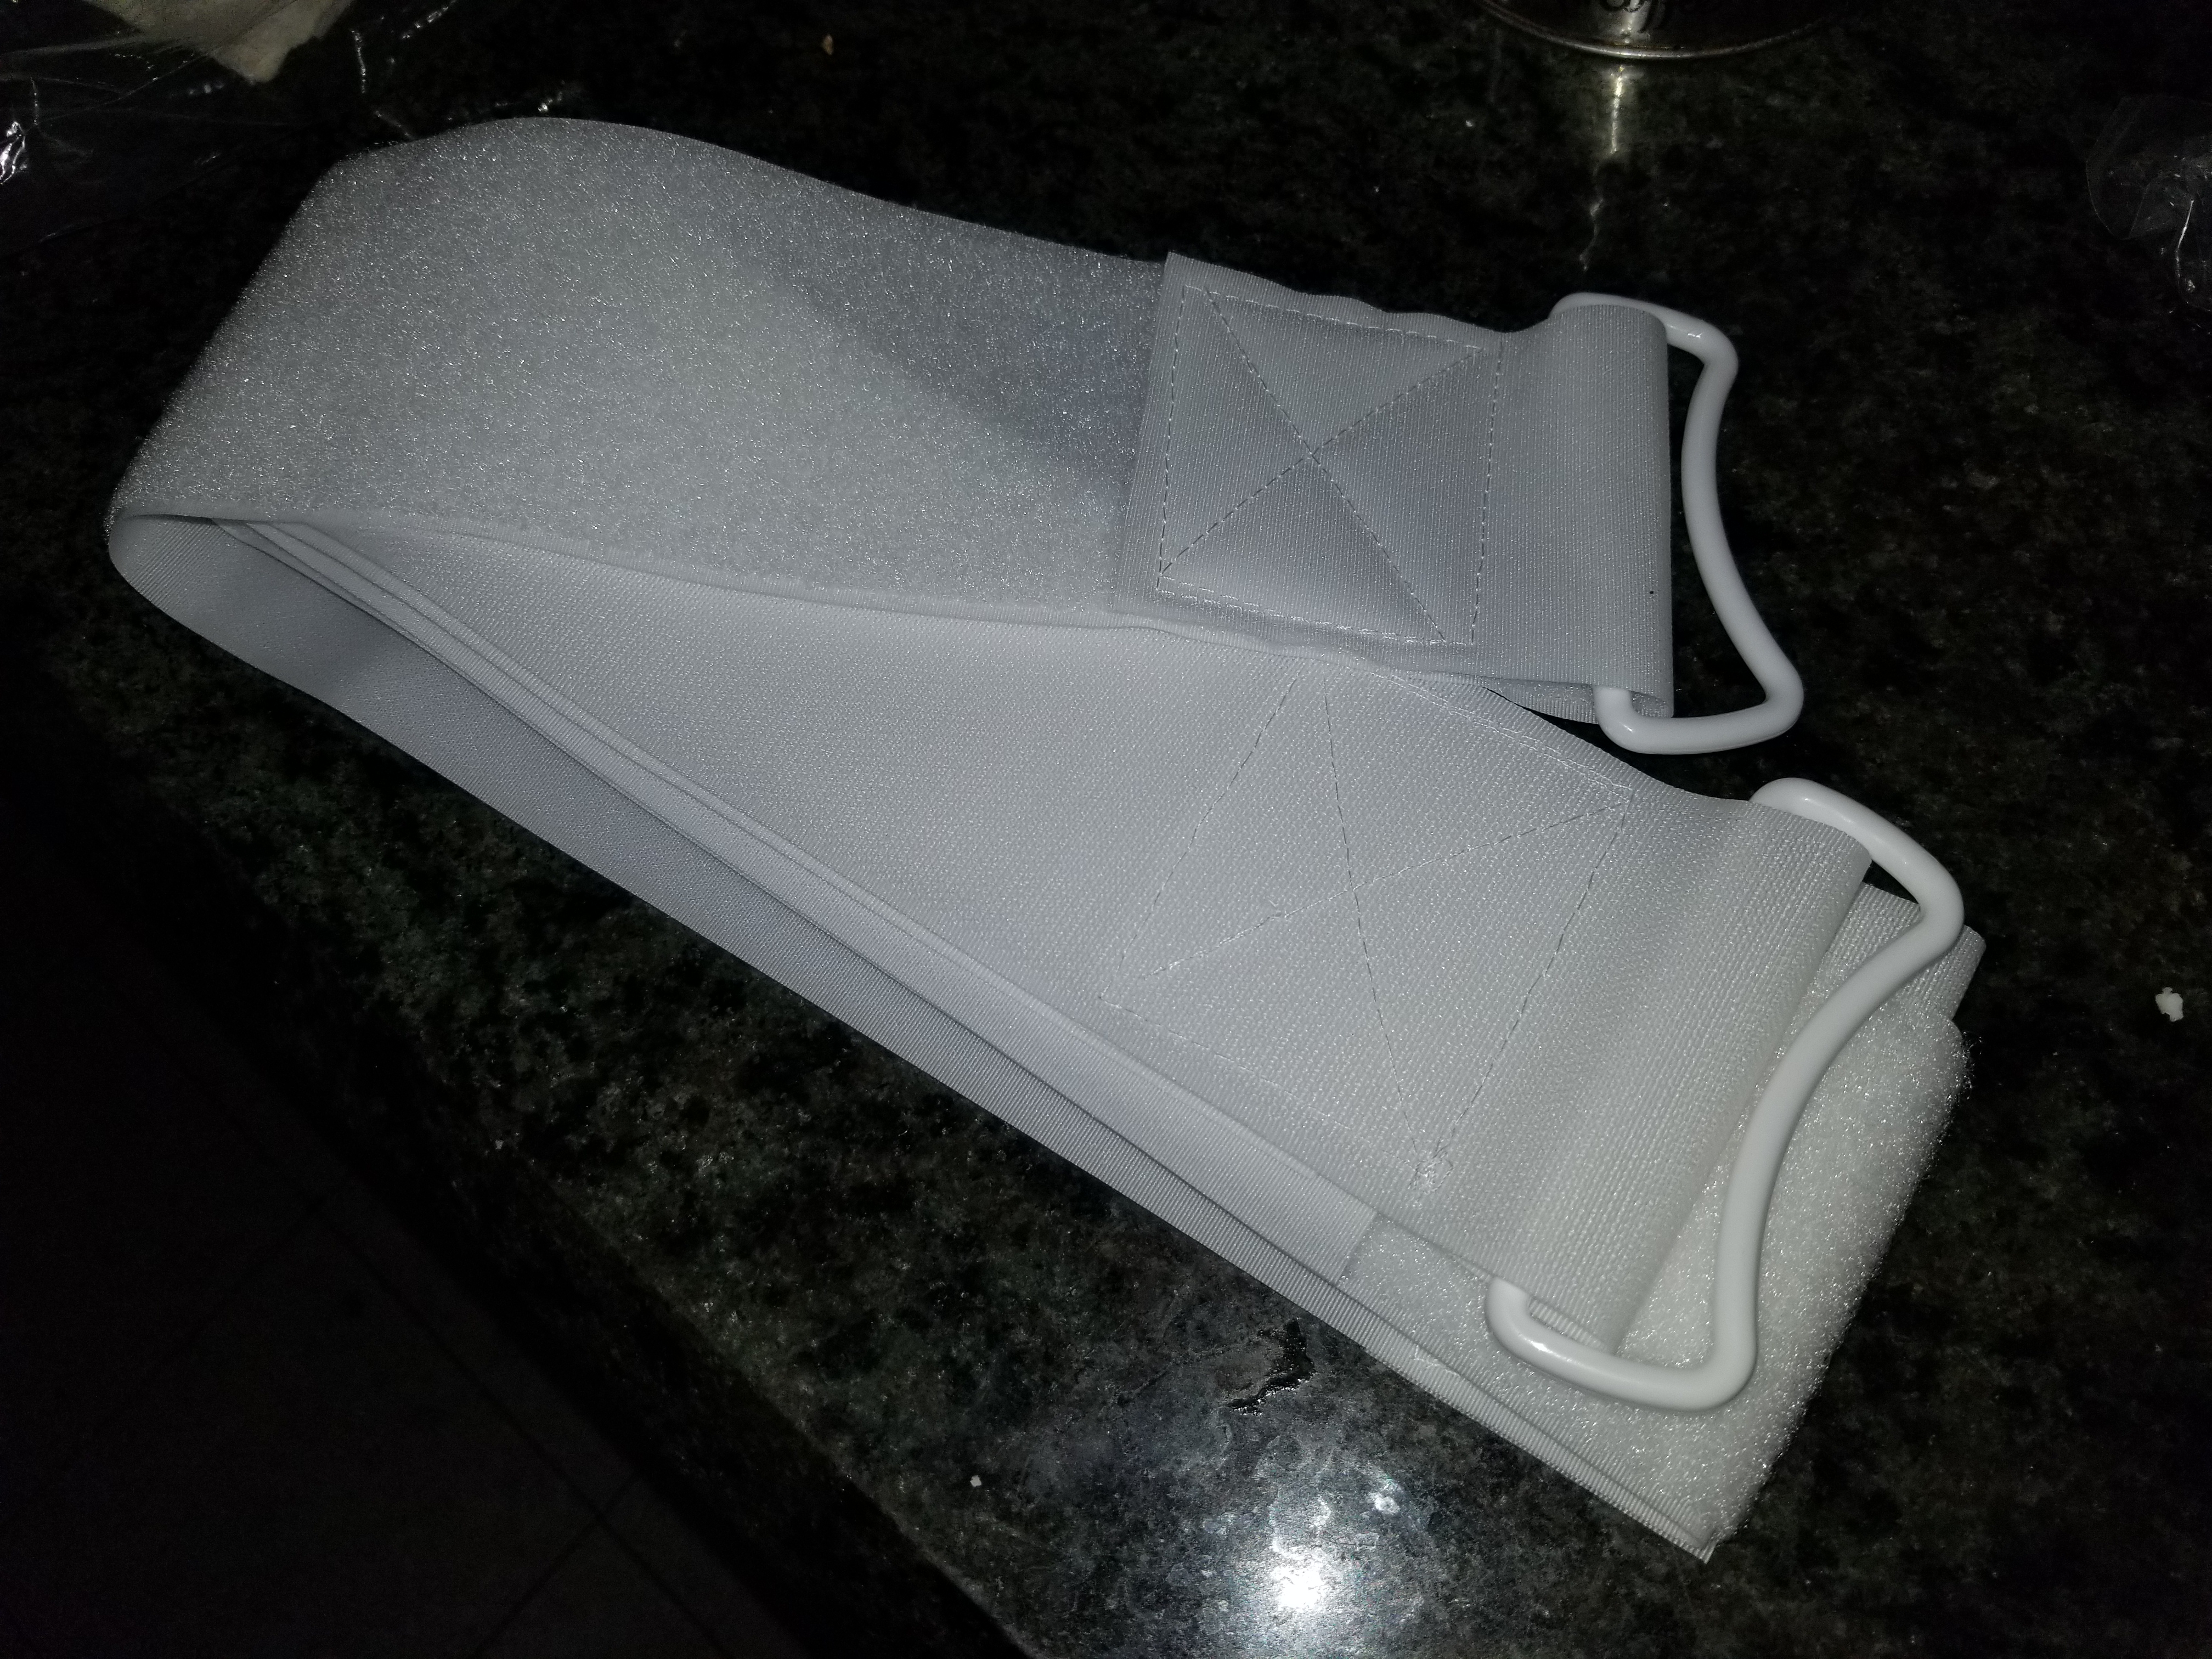
The on-board heated shower is gonna be great nice when i permanently install the rest of the shower components.
05-24-2017, 01:16 AM
#129
Congratulations on passing the dmv inspection Richard, that's got to be a relief to have that out of the way! Just not knowing exactly what the inspector might ding you on has got to be nerve racking, lol, don't blame you for not getting any sleep the night before! The trailer looks great, I like the max coupler, I would like to get one of those eventually too. So do you have a camping trip planned out yet to take the trailer out for its maiden voyage?
Last edited by rustED; 05-24-2017 at 01:19 AM.
05-24-2017, 06:55 AM
#130
Registered User
Thread Starter
Congratulations on passing the dmv inspection Richard, that's got to be a relief to have that out of the way! Just not knowing exactly what the inspector might ding you on has got to be nerve racking, lol, don't blame you for not getting any sleep the night before! The trailer looks great, I like the max coupler, I would like to get one of those eventually too. So do you have a camping trip planned out yet to take the trailer out for its maiden voyage?
I'm thinking the over all trailer will be done by winter time. With out the roof top tent. I'm thinking I may get the tent during tax season. We will see. At least finishing it up during tax season will mean I can test out my tent heater during the cold winter lol
05-27-2017, 02:47 PM
#131
Registered User
Thread Starter
I just bit the bullet and invested into the most expensive piece to my trailer build. Although expensive it is definitely going to be worth it and I know my family is going to enjoy camping with this thing for sure. The quality of the summit series line is unmatched. And the extra options you get included in the summit series is well worth every penny of this investment. I can't wait to use it. Average price for this gem is $2995 but for this weekend only it's $2k plus S&H. It's even a better deal then the 20% off that they give during black friday and I couldn't just let a deal like that pass me by. So by our hazing it this weekend I saved just under $1k. Get your deal this weekend! Thanks for the great customer service guys. And the great Memorial Day weekend sale price.
These were the pricings exclusively for this weekend at CVT and the current quantity available for sale:
(2) Mt. Bachelor SF Pioneer EG $760 (SOLD)
(5) Mt. Bachelor SF Summit BG $1400
(3) Mt. Bachelor SF Summit Tan $1400
(2) Mt. Bachelor EV Summit BG $1500
(2) Mt. Bachelor EV Summit Tan $1500
(1) Mt. Shasta SF Pioneer Tan $975 (SOLD)
(5) Mt. Shasta EV Summit BG $1800
(1) Mt. Shasta EV Summit Tan $1800
(4) Mt. Hood SF SKY Pioneer EG $1250 (3 Left)
(2) Mt. Hood SF Pioneer Tan $1050
(6) Mt. Hood SF Pioneer EG $1050
(4) Mt. Rainier SF Pioneer EG $1100 (3 Left)
(1) Mt. Rainier SF Summit BG $1800
(13) Mt. Rainier EV Summit BG $2000 (10 Left)
(4) Mt. Denali SF Pioneer Tan $1600
(1) Mt. Denali SF Summit Tan $2000 (SOLD)
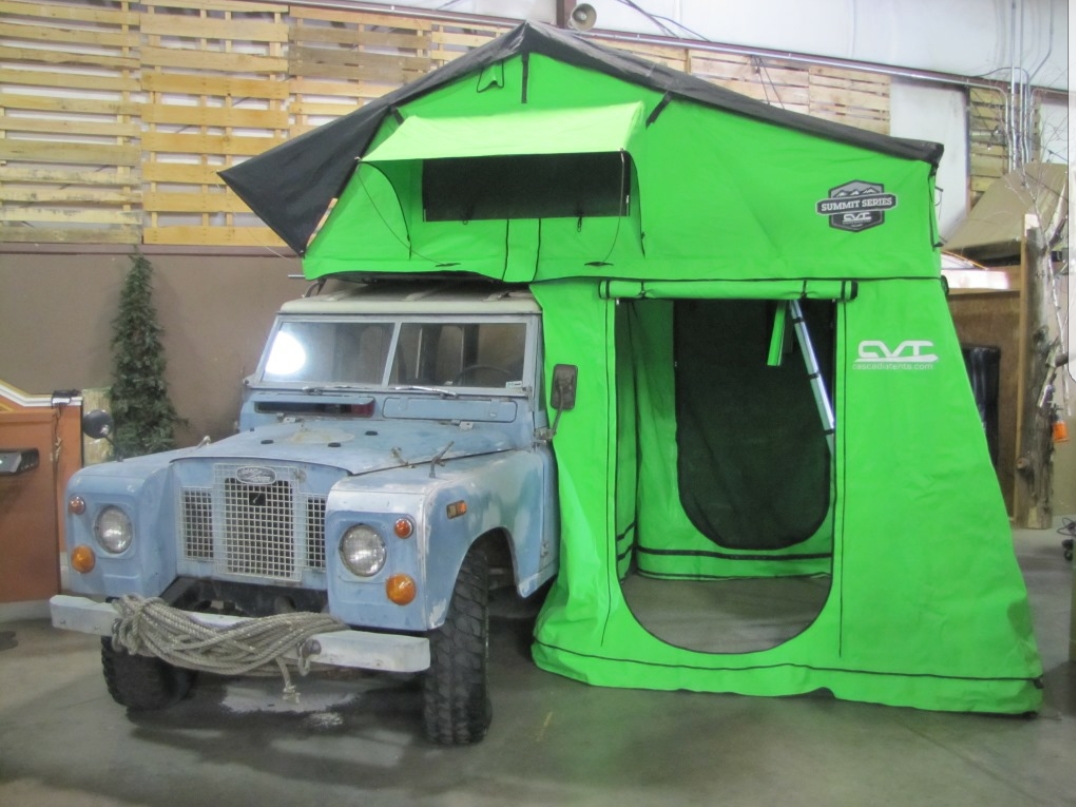
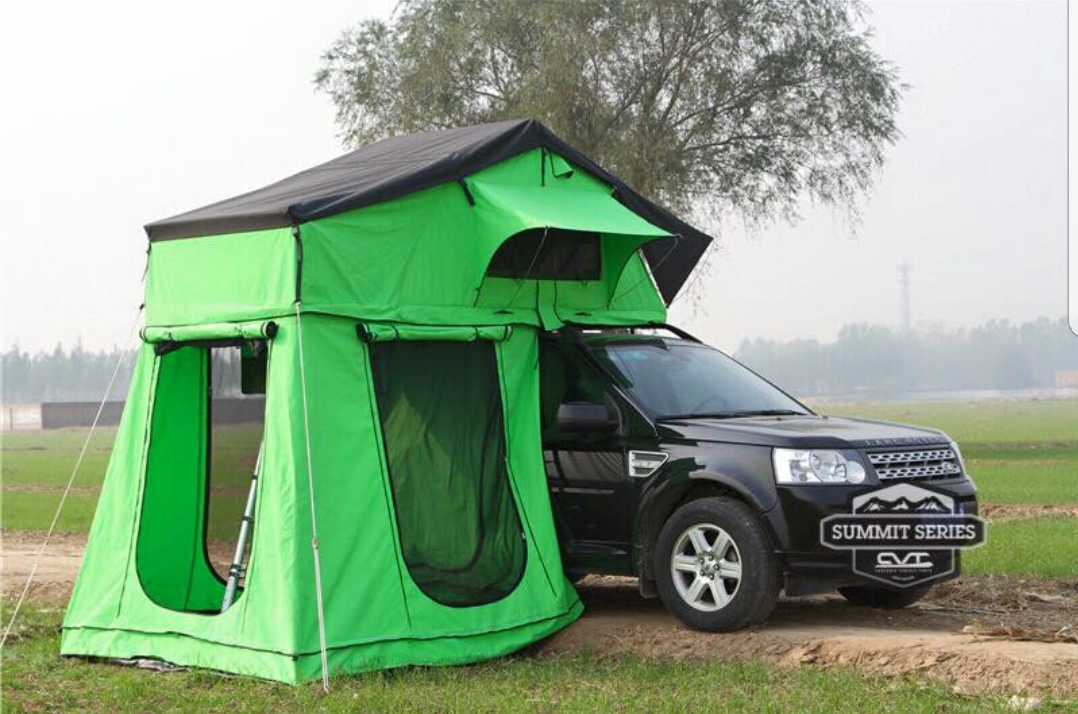

This is the color i originally wanted to get. But with a deal this good i just couldn't pass up my chance. I don't care if it's bright green. At least finding my home base campground will be easy for me and others meeting up after we arrive to camp sites.
If you are curious to learn more about this tent here is the link:
https://cascadiatents.com/shop/mt-ra...summit-series/
but basically here is a copy/paste off their website description:
The Mt. Rainier Extended Vestibule Summit is a 3+ person tent that gives you extra room inside your annex room as well as additional privacy.
The Summit Model has an upgraded floor made with a diamond plate honeycomb aluminum.
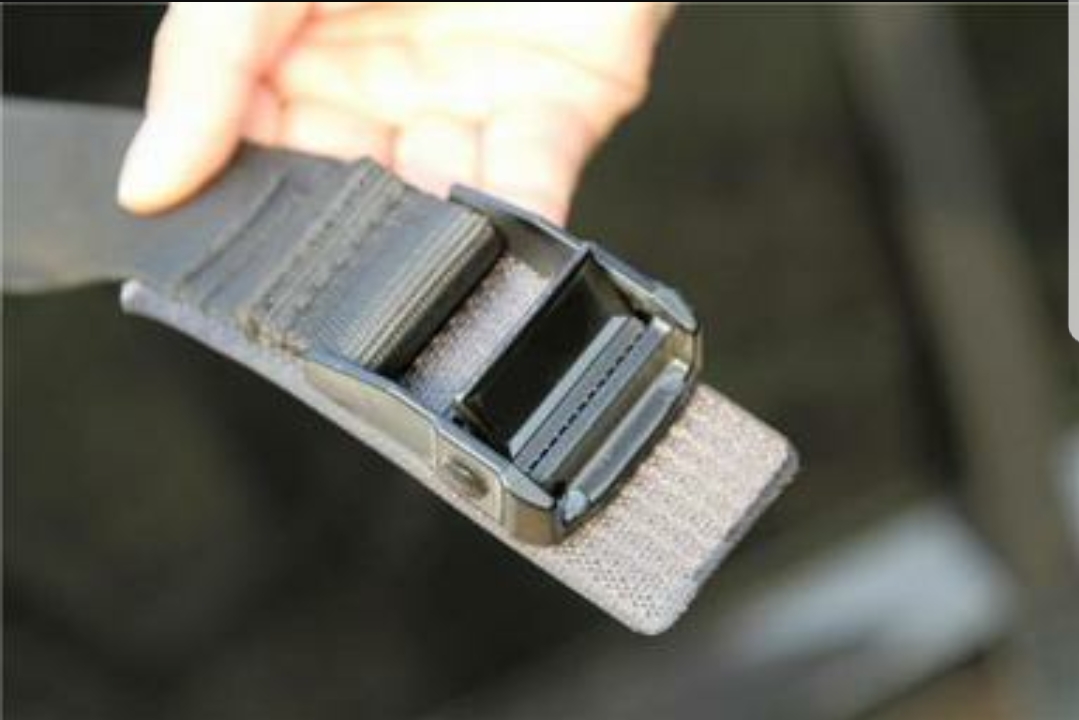
The Fabric is a 380g compared to 280g on our standard Pioneer Series Tent. Straps on the cover are a cinch buckle versus Velcro on the Pioneer Series.
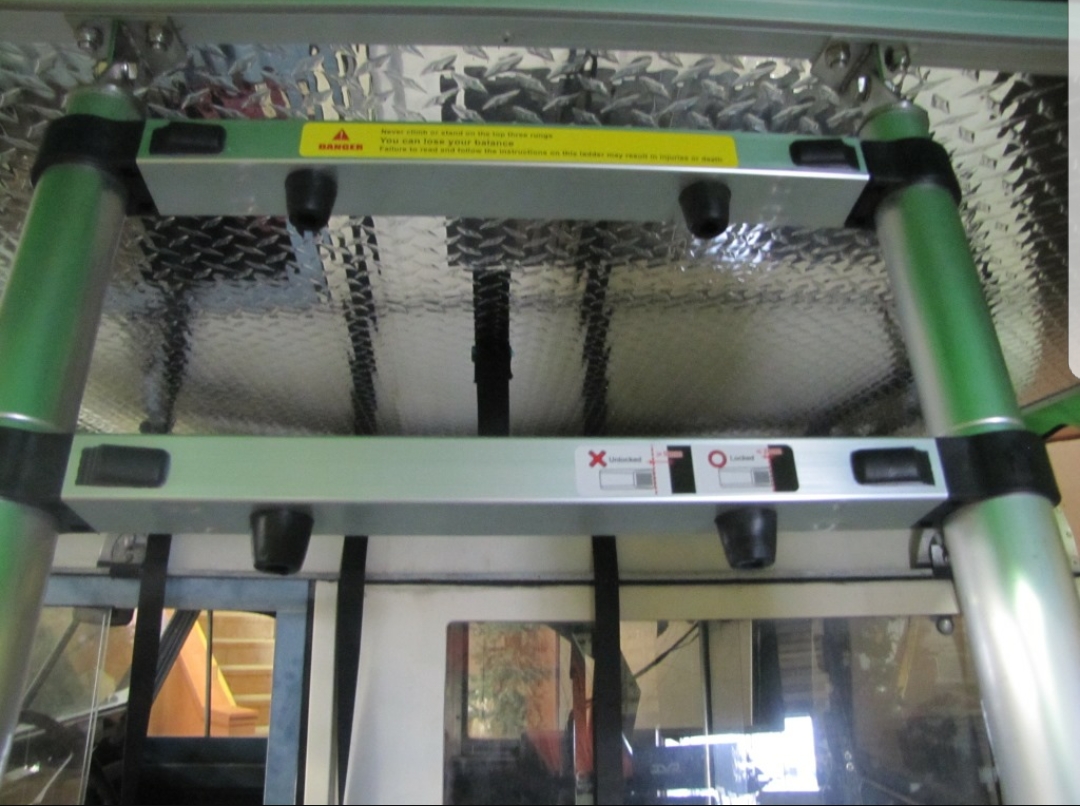
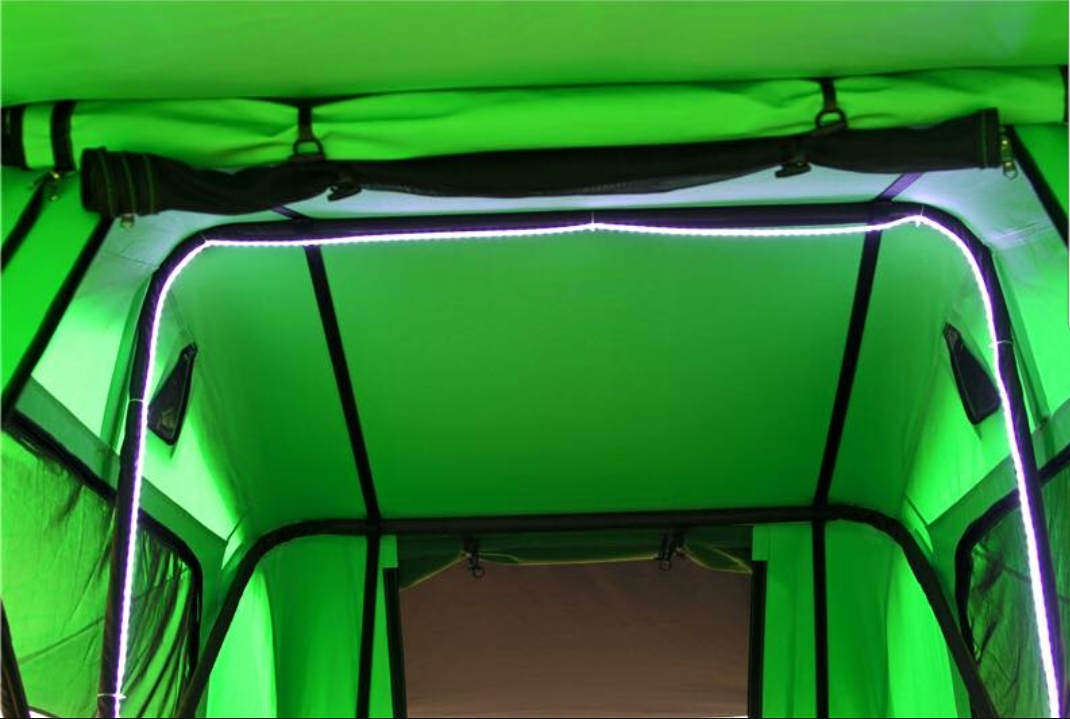
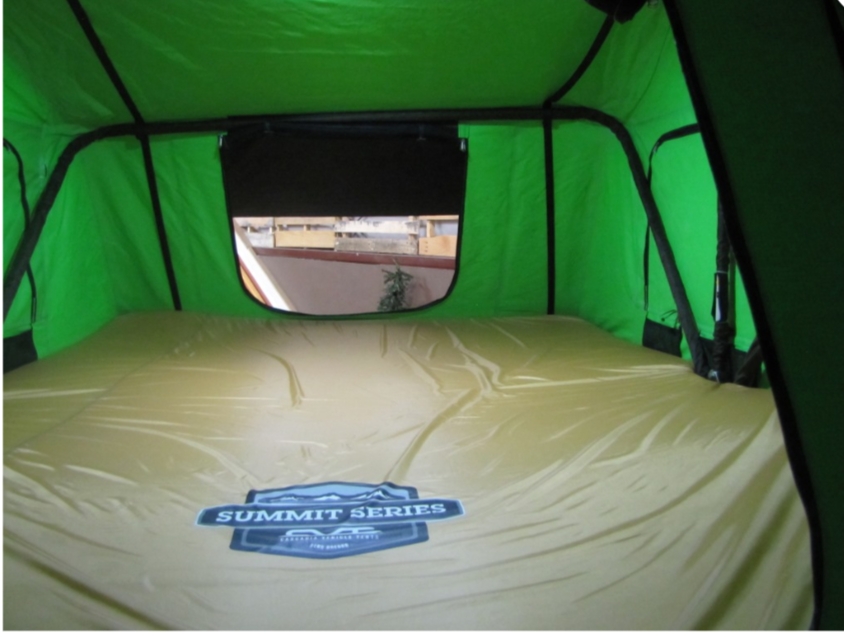
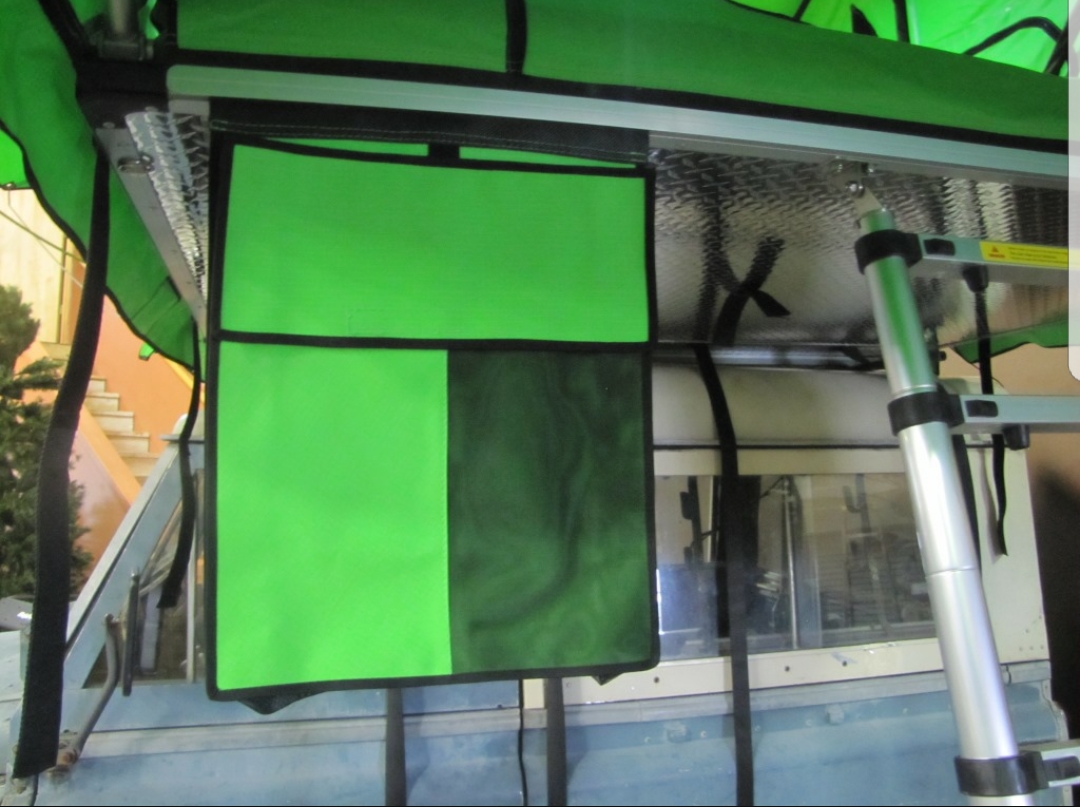
The mattress comes with a Waterproof mattress cover instead of cotton. The interior poles are material wrapped and the center pole has built in LED Lighting with on, off and dimmer switch as well as 2 USB ports. Telescoping ladder, the ladder has a release on the face of the steps and bumper stops between each step. All the plastic fitting have been upgraded to alloy (on hinges), D-rings are bigger and Velcro is thicker. The rain fly is heavier with quick release buckles. The Summit Model tent also includes two shoe racks (one on each side of the ladder), X One Piece anti condensation mat, two Spreader Poles to help keep the overhang taut, Annex walls, removable 6″ annex extension, and a removable PVC floor.
Specs:
- Sleeps: 3+
- Size (Open): 72″ wide x 132″ long x 50″ high
- Size (Closed): 72″ wide x 48″ long x 15.5″ tall
- Size (Sleeping): 72″ wide x 96″ long
- Travel Cover: 1000D PVC, Heavy duty PVC
- Mattress: 2.5″ thick high-density foam with waterproof cover
- Covered Overhang: 36″
- Rain Fly: 600D Polyester Oxford with taped seams and PU coated
- Fabric: 380g poly/cotton rip-stop canvas, Breathable, Mold resistant, UV protection, Waterproof PU coating
- Ladder: Telescoping ladder
- Base: Diamond plate honeycomb aluminum floor
- Internal Frame: 1″ aluminum, Material wrapped
- Floor: Removable PVC floor
- Light: Included, LED
- Anti-Condensation Mat: 72″ Anti-Condensation Mat
- Compatible Rack System(s): Baja, Diamond Racks, Front Runner, Garvin, Gobi, Thule, Voyager
- Additional Features: Two shoe rack/holders, Two USB ports
- Other: Annex Room included
These were the pricings exclusively for this weekend at CVT and the current quantity available for sale:
(2) Mt. Bachelor SF Pioneer EG $760 (SOLD)
(5) Mt. Bachelor SF Summit BG $1400
(3) Mt. Bachelor SF Summit Tan $1400
(2) Mt. Bachelor EV Summit BG $1500
(2) Mt. Bachelor EV Summit Tan $1500
(1) Mt. Shasta SF Pioneer Tan $975 (SOLD)
(5) Mt. Shasta EV Summit BG $1800
(1) Mt. Shasta EV Summit Tan $1800
(4) Mt. Hood SF SKY Pioneer EG $1250 (3 Left)
(2) Mt. Hood SF Pioneer Tan $1050
(6) Mt. Hood SF Pioneer EG $1050
(4) Mt. Rainier SF Pioneer EG $1100 (3 Left)
(1) Mt. Rainier SF Summit BG $1800
(13) Mt. Rainier EV Summit BG $2000 (10 Left)
(4) Mt. Denali SF Pioneer Tan $1600
(1) Mt. Denali SF Summit Tan $2000 (SOLD)


This is the color i originally wanted to get. But with a deal this good i just couldn't pass up my chance. I don't care if it's bright green. At least finding my home base campground will be easy for me and others meeting up after we arrive to camp sites.

If you are curious to learn more about this tent here is the link:
https://cascadiatents.com/shop/mt-ra...summit-series/
but basically here is a copy/paste off their website description:
The Mt. Rainier Extended Vestibule Summit is a 3+ person tent that gives you extra room inside your annex room as well as additional privacy.
The Summit Model has an upgraded floor made with a diamond plate honeycomb aluminum.
The Fabric is a 380g compared to 280g on our standard Pioneer Series Tent. Straps on the cover are a cinch buckle versus Velcro on the Pioneer Series.
The mattress comes with a Waterproof mattress cover instead of cotton. The interior poles are material wrapped and the center pole has built in LED Lighting with on, off and dimmer switch as well as 2 USB ports. Telescoping ladder, the ladder has a release on the face of the steps and bumper stops between each step. All the plastic fitting have been upgraded to alloy (on hinges), D-rings are bigger and Velcro is thicker. The rain fly is heavier with quick release buckles. The Summit Model tent also includes two shoe racks (one on each side of the ladder), X One Piece anti condensation mat, two Spreader Poles to help keep the overhang taut, Annex walls, removable 6″ annex extension, and a removable PVC floor.
Specs:
- Sleeps: 3+
- Size (Open): 72″ wide x 132″ long x 50″ high
- Size (Closed): 72″ wide x 48″ long x 15.5″ tall
- Size (Sleeping): 72″ wide x 96″ long
- Travel Cover: 1000D PVC, Heavy duty PVC
- Mattress: 2.5″ thick high-density foam with waterproof cover
- Covered Overhang: 36″
- Rain Fly: 600D Polyester Oxford with taped seams and PU coated
- Fabric: 380g poly/cotton rip-stop canvas, Breathable, Mold resistant, UV protection, Waterproof PU coating
- Ladder: Telescoping ladder
- Base: Diamond plate honeycomb aluminum floor
- Internal Frame: 1″ aluminum, Material wrapped
- Floor: Removable PVC floor
- Light: Included, LED
- Anti-Condensation Mat: 72″ Anti-Condensation Mat
- Compatible Rack System(s): Baja, Diamond Racks, Front Runner, Garvin, Gobi, Thule, Voyager
- Additional Features: Two shoe rack/holders, Two USB ports
- Other: Annex Room included
05-30-2017, 08:49 PM
#132
Registered User
Thread Starter
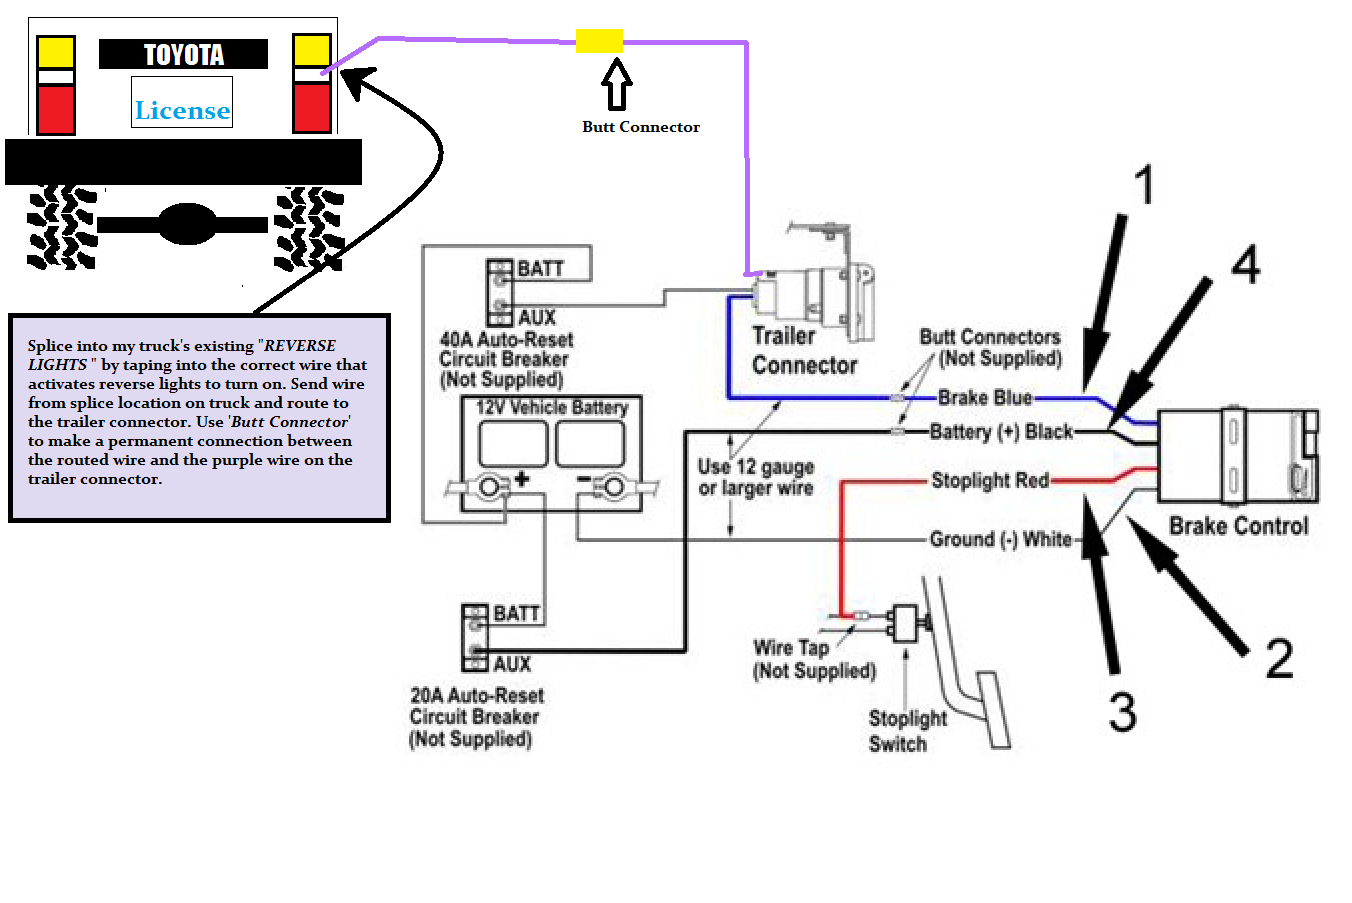
I Thought i would share this really quick. It is basically the wire diagram that i made when i asked the "E-Trailer.com" guys my questions to confirm i had all the wiring correct for my Tekonsha Prodigy p3 Brake controller. They told me i was good to proceed based off this diagram.
I wasn't planning to share it. But i know many people are going to have issues wiring their vehicles and so i thought i would help another person out since i had to figure out how to do it on my own.
I hope this helps somebody looking to go from a 4 pole to 7 pole connector tow wire harness.
I wasn't planning to share it. But i know many people are going to have issues wiring their vehicles and so i thought i would help another person out since i had to figure out how to do it on my own.
I hope this helps somebody looking to go from a 4 pole to 7 pole connector tow wire harness.
 06-01-2017, 10:46 PM
#133
Registered User
Thread Starter
So i asked for the wrong day off. CVT ships with old dominion freight lines. And online it said my package would arrive today. But with this company you need to make an appointment for them to drop it off at your residence. Since i was a bit late with making the appointment i wouldn't be getting my package till Friday or Saturday but i had already asked for the day off from work to receive my package. So unfortunately i had to pick it up myself. But its cool at least my day didn't go to waste.
Here i had just loaded up the 278lb box. Me and one of their workers pushed it off the fork lift onto the truck's roof rack. Getting it off was kinda hard but at least i had help once i got home.
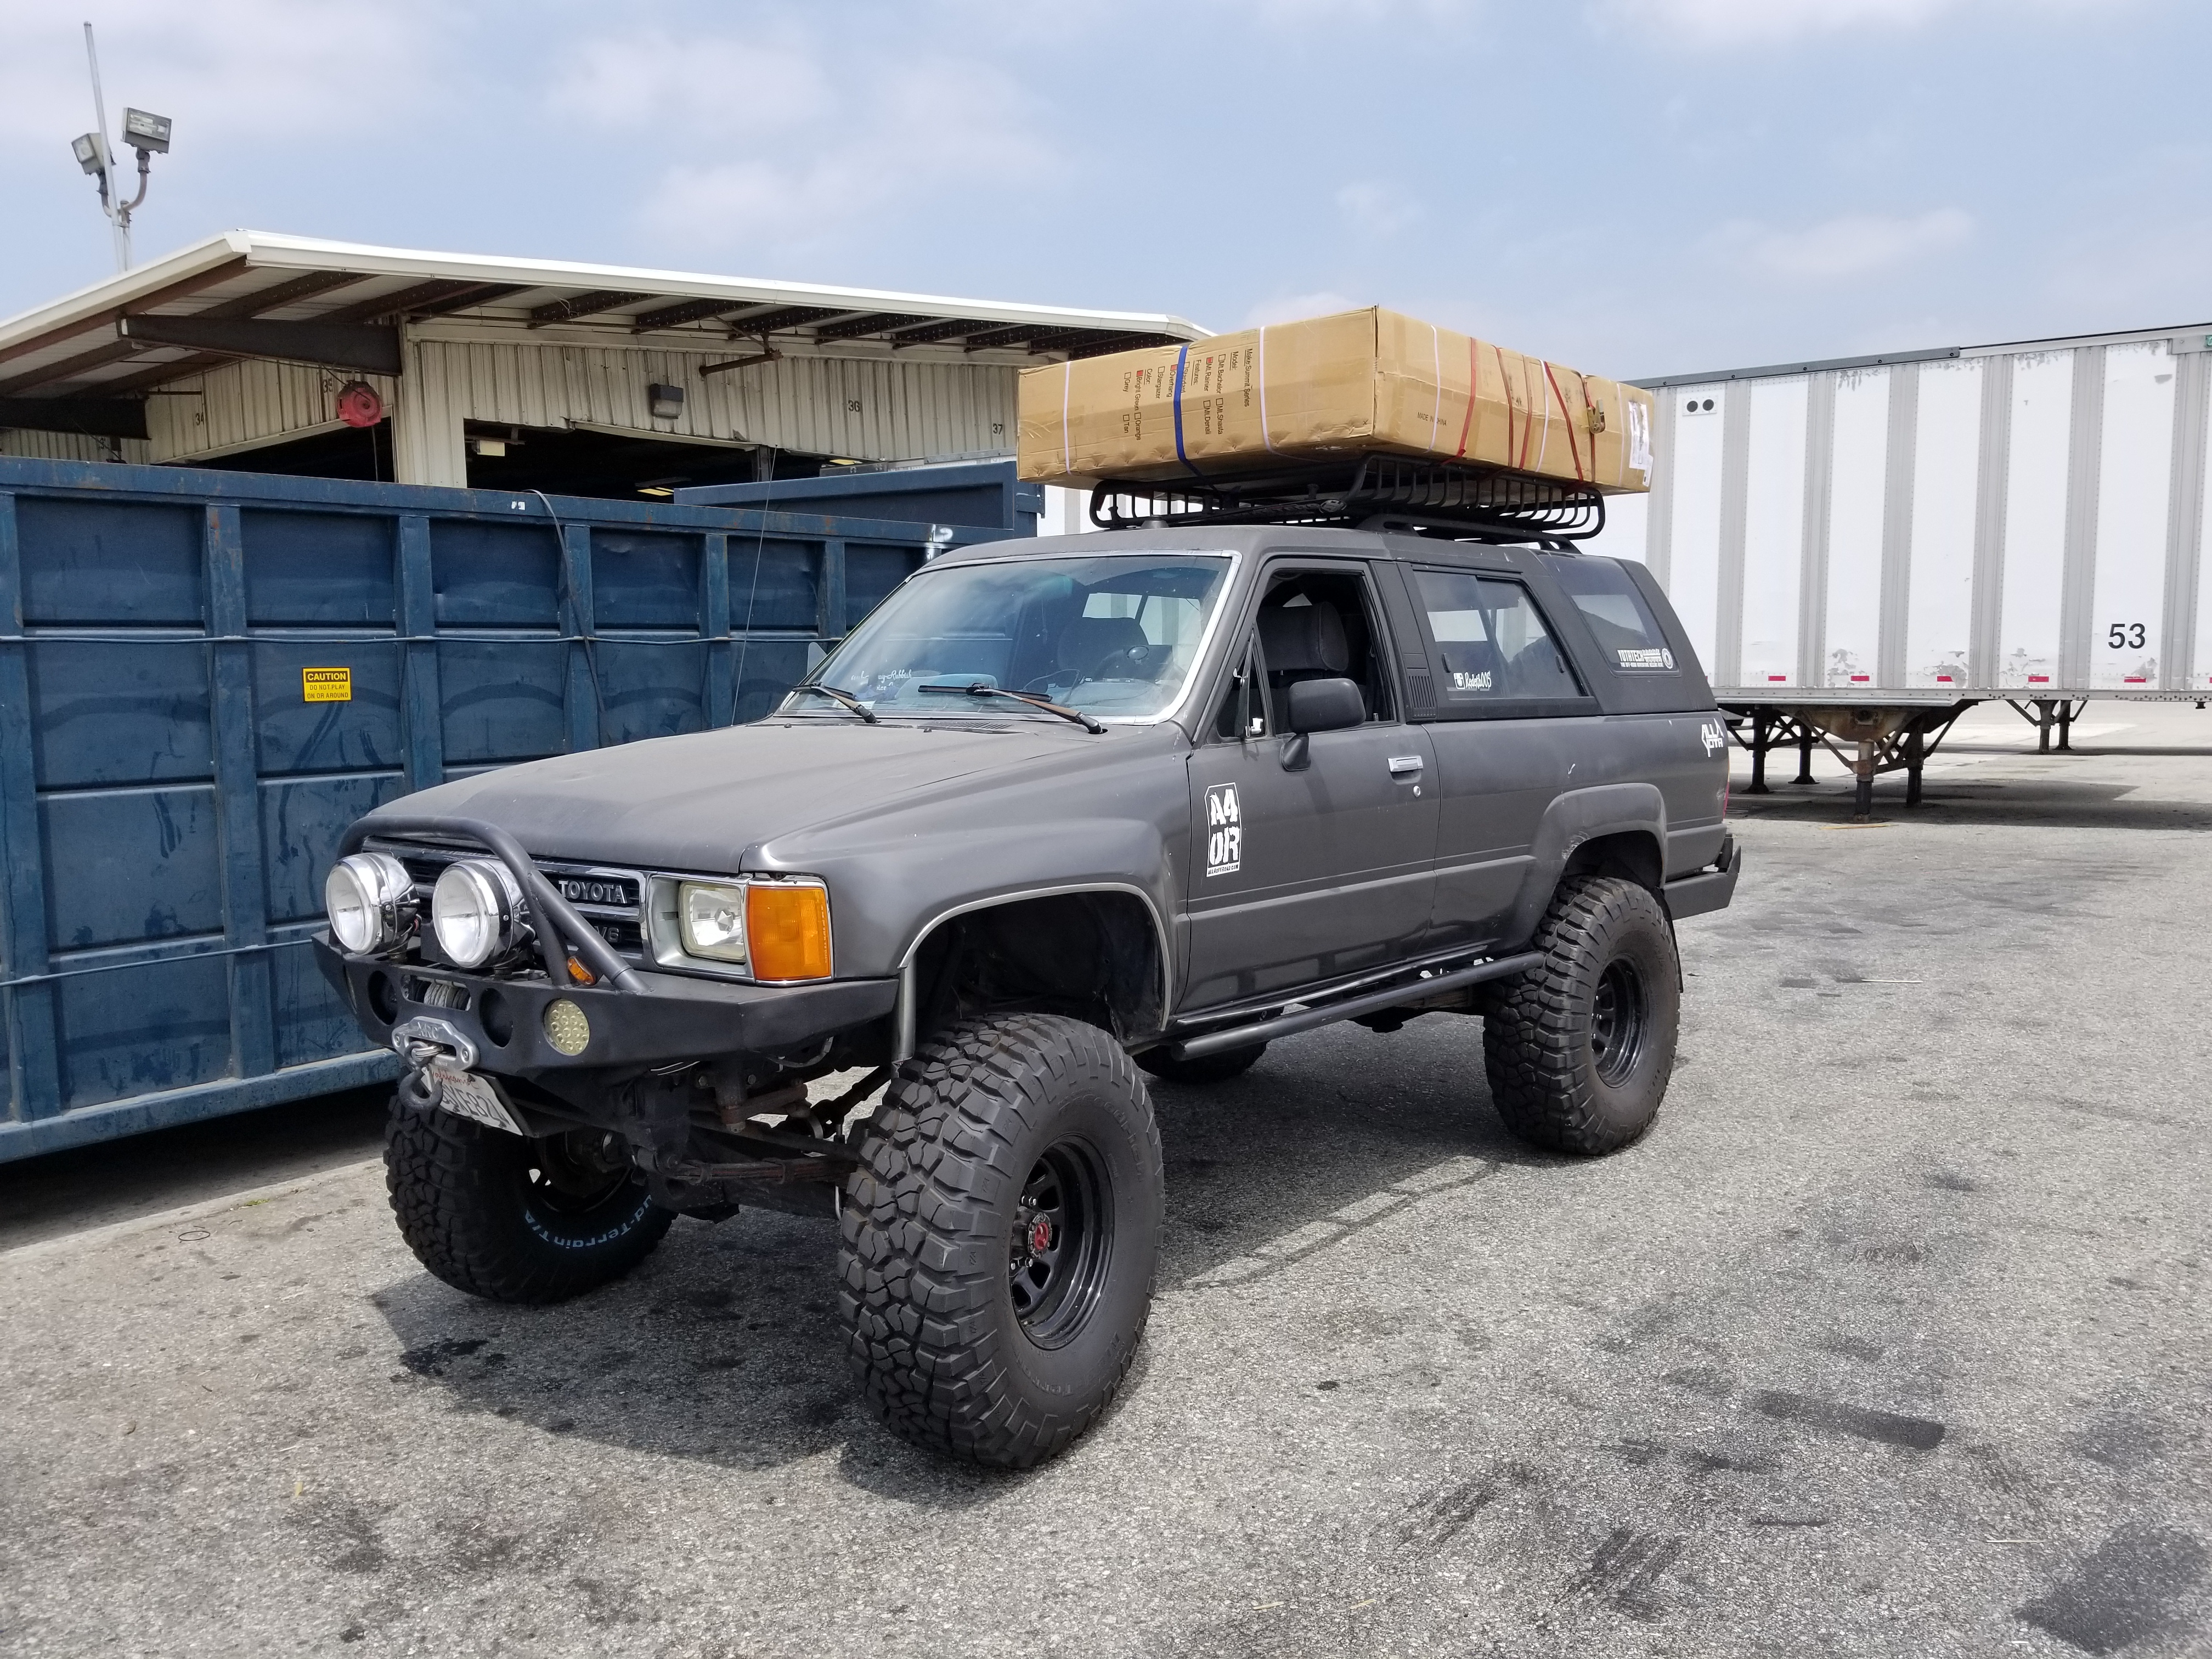
Putting the tent together is pretty straight forward. The package comes with an instruction book so it wasn't so hard.
This was right before i began to mount the tent onto the trailer.
--------------------------------------------------------------------------------------------------------------------------------------------------
Unfortunately i don't have any more pictures so this is just gonna have to be a little teaser for the mean time until i get around to taking more pix this weekend.
I will however give you my honest opinion about this awesome tent.
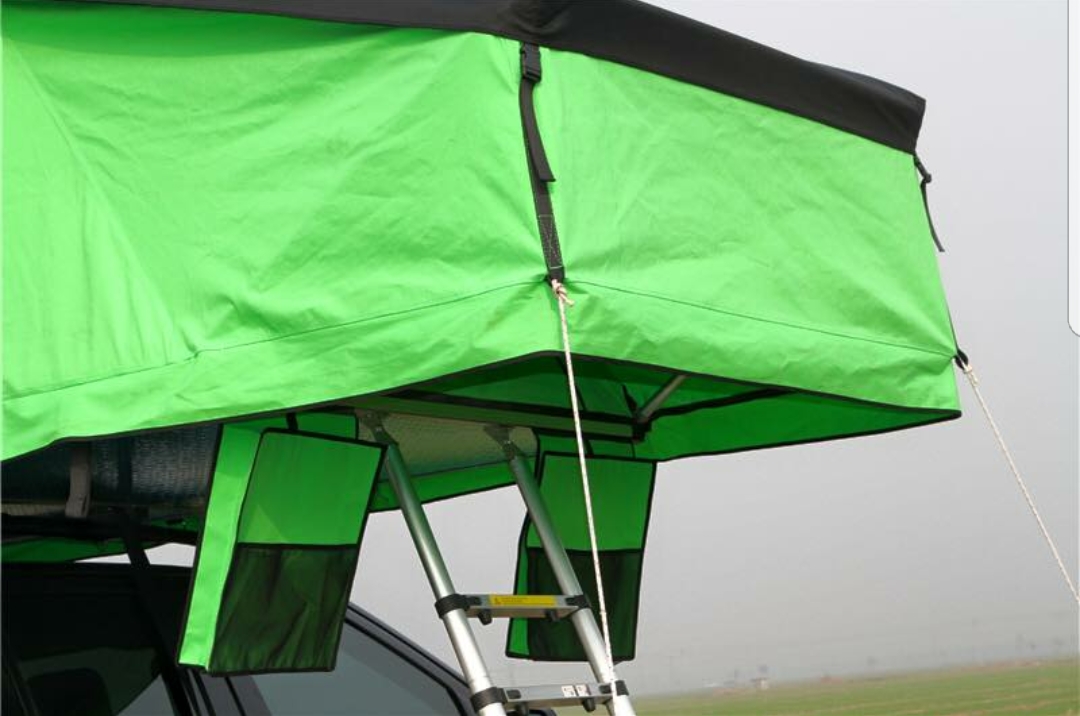
I love how thick the canvas material is. Yes the over all tent is heavy as hell but the quality of the material they used is very nice and so long as i don't accidentally get anything caught on the trailer while it is closed I'm sure it will be just fine. Not only is the canvas super thick but the black waterproof cover is extra chunky. You can definitely feel the quality in this one.
I love that they give you an anti condensation matt for under the mattress. It also includes 2 USB charging ports and an internal LED light.
Of course there has to be some minor flaw yes? In my opinion i thought the mounting hardware should have been stainless. I believe they provide zinc coated bolts and nuts but my biggest disappointment were in the plates that slide within the rails which hold the bolts in place; They are made of aluminum! Yes the instructions say do not over tighten but when i only have the nut on about 1/4" of he way in and i still have almost 1 more inch to go on the bolt length i don't think the mounting hardware should snap!!! My bolt seized. and snapped the tip of the bolt off. In addition, the aluminum plate was stripped so the new bolt that i eventually bought from home depot continued to turn and turn when trying to tighten because there was nothing to hold traction on the bolt when tightening the nut. Luckily hat entire piece is removable and i just tightened the replacement bolt and nut as much as i needed so it was snug on my trailer's crossbars then i tightened the rest of the way on the opposite side which the bolt and aluminum piece were in still good working order. So pretty much i put all the tension on the good bolt. I Highly suggest greasing the bolts they provide in the kit. It will ensure that the lock washers go in smoothly. CVT should definitely upgrade those plates to STEEL! because when a steel bolt is vs an aluminum bracket the bolt will always win.
Aside from this minor hickup in the installation I am very pleased with the entire tent quality. If i didnt have this slight set back i would have been able to take a ton of pictures with the tent set up and opened up with annex. Now i gotta keep you guys waiting till saturday lol
Here i had just loaded up the 278lb box. Me and one of their workers pushed it off the fork lift onto the truck's roof rack. Getting it off was kinda hard but at least i had help once i got home.

Putting the tent together is pretty straight forward. The package comes with an instruction book so it wasn't so hard.
This was right before i began to mount the tent onto the trailer.

--------------------------------------------------------------------------------------------------------------------------------------------------
Unfortunately i don't have any more pictures so this is just gonna have to be a little teaser for the mean time until i get around to taking more pix this weekend.
I will however give you my honest opinion about this awesome tent.
I love how thick the canvas material is. Yes the over all tent is heavy as hell but the quality of the material they used is very nice and so long as i don't accidentally get anything caught on the trailer while it is closed I'm sure it will be just fine. Not only is the canvas super thick but the black waterproof cover is extra chunky. You can definitely feel the quality in this one.
I love that they give you an anti condensation matt for under the mattress. It also includes 2 USB charging ports and an internal LED light.
Of course there has to be some minor flaw yes? In my opinion i thought the mounting hardware should have been stainless. I believe they provide zinc coated bolts and nuts but my biggest disappointment were in the plates that slide within the rails which hold the bolts in place; They are made of aluminum! Yes the instructions say do not over tighten but when i only have the nut on about 1/4" of he way in and i still have almost 1 more inch to go on the bolt length i don't think the mounting hardware should snap!!! My bolt seized. and snapped the tip of the bolt off. In addition, the aluminum plate was stripped so the new bolt that i eventually bought from home depot continued to turn and turn when trying to tighten because there was nothing to hold traction on the bolt when tightening the nut. Luckily hat entire piece is removable and i just tightened the replacement bolt and nut as much as i needed so it was snug on my trailer's crossbars then i tightened the rest of the way on the opposite side which the bolt and aluminum piece were in still good working order. So pretty much i put all the tension on the good bolt. I Highly suggest greasing the bolts they provide in the kit. It will ensure that the lock washers go in smoothly. CVT should definitely upgrade those plates to STEEL! because when a steel bolt is vs an aluminum bracket the bolt will always win.
Aside from this minor hickup in the installation I am very pleased with the entire tent quality. If i didnt have this slight set back i would have been able to take a ton of pictures with the tent set up and opened up with annex. Now i gotta keep you guys waiting till saturday lol
06-02-2017, 09:11 PM
#134
Registered User
Thread Starter
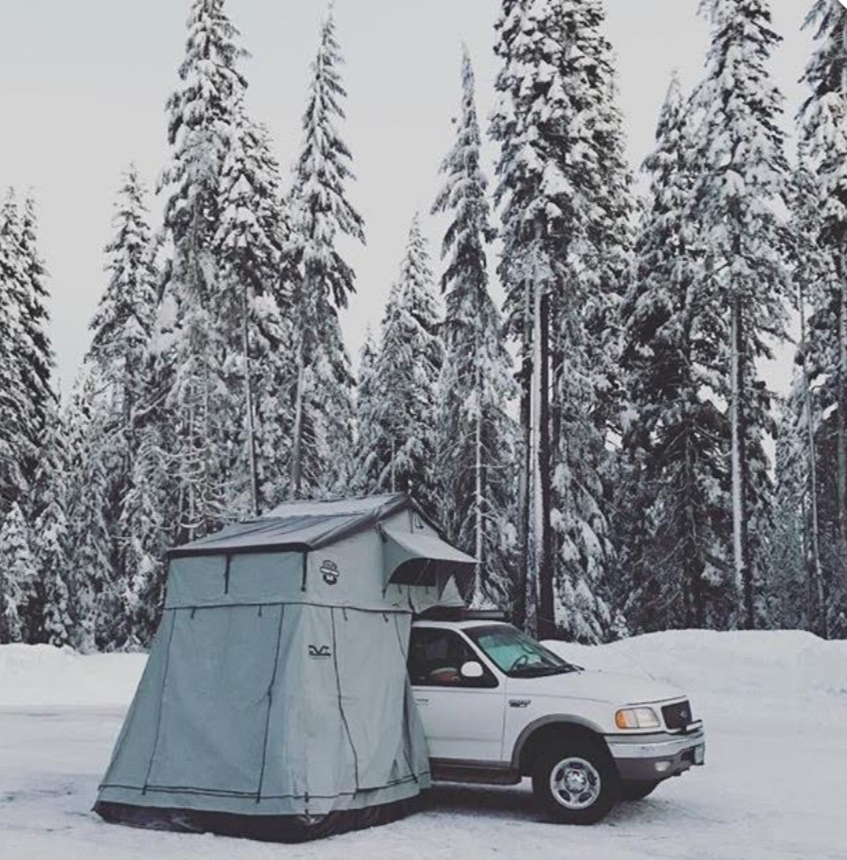
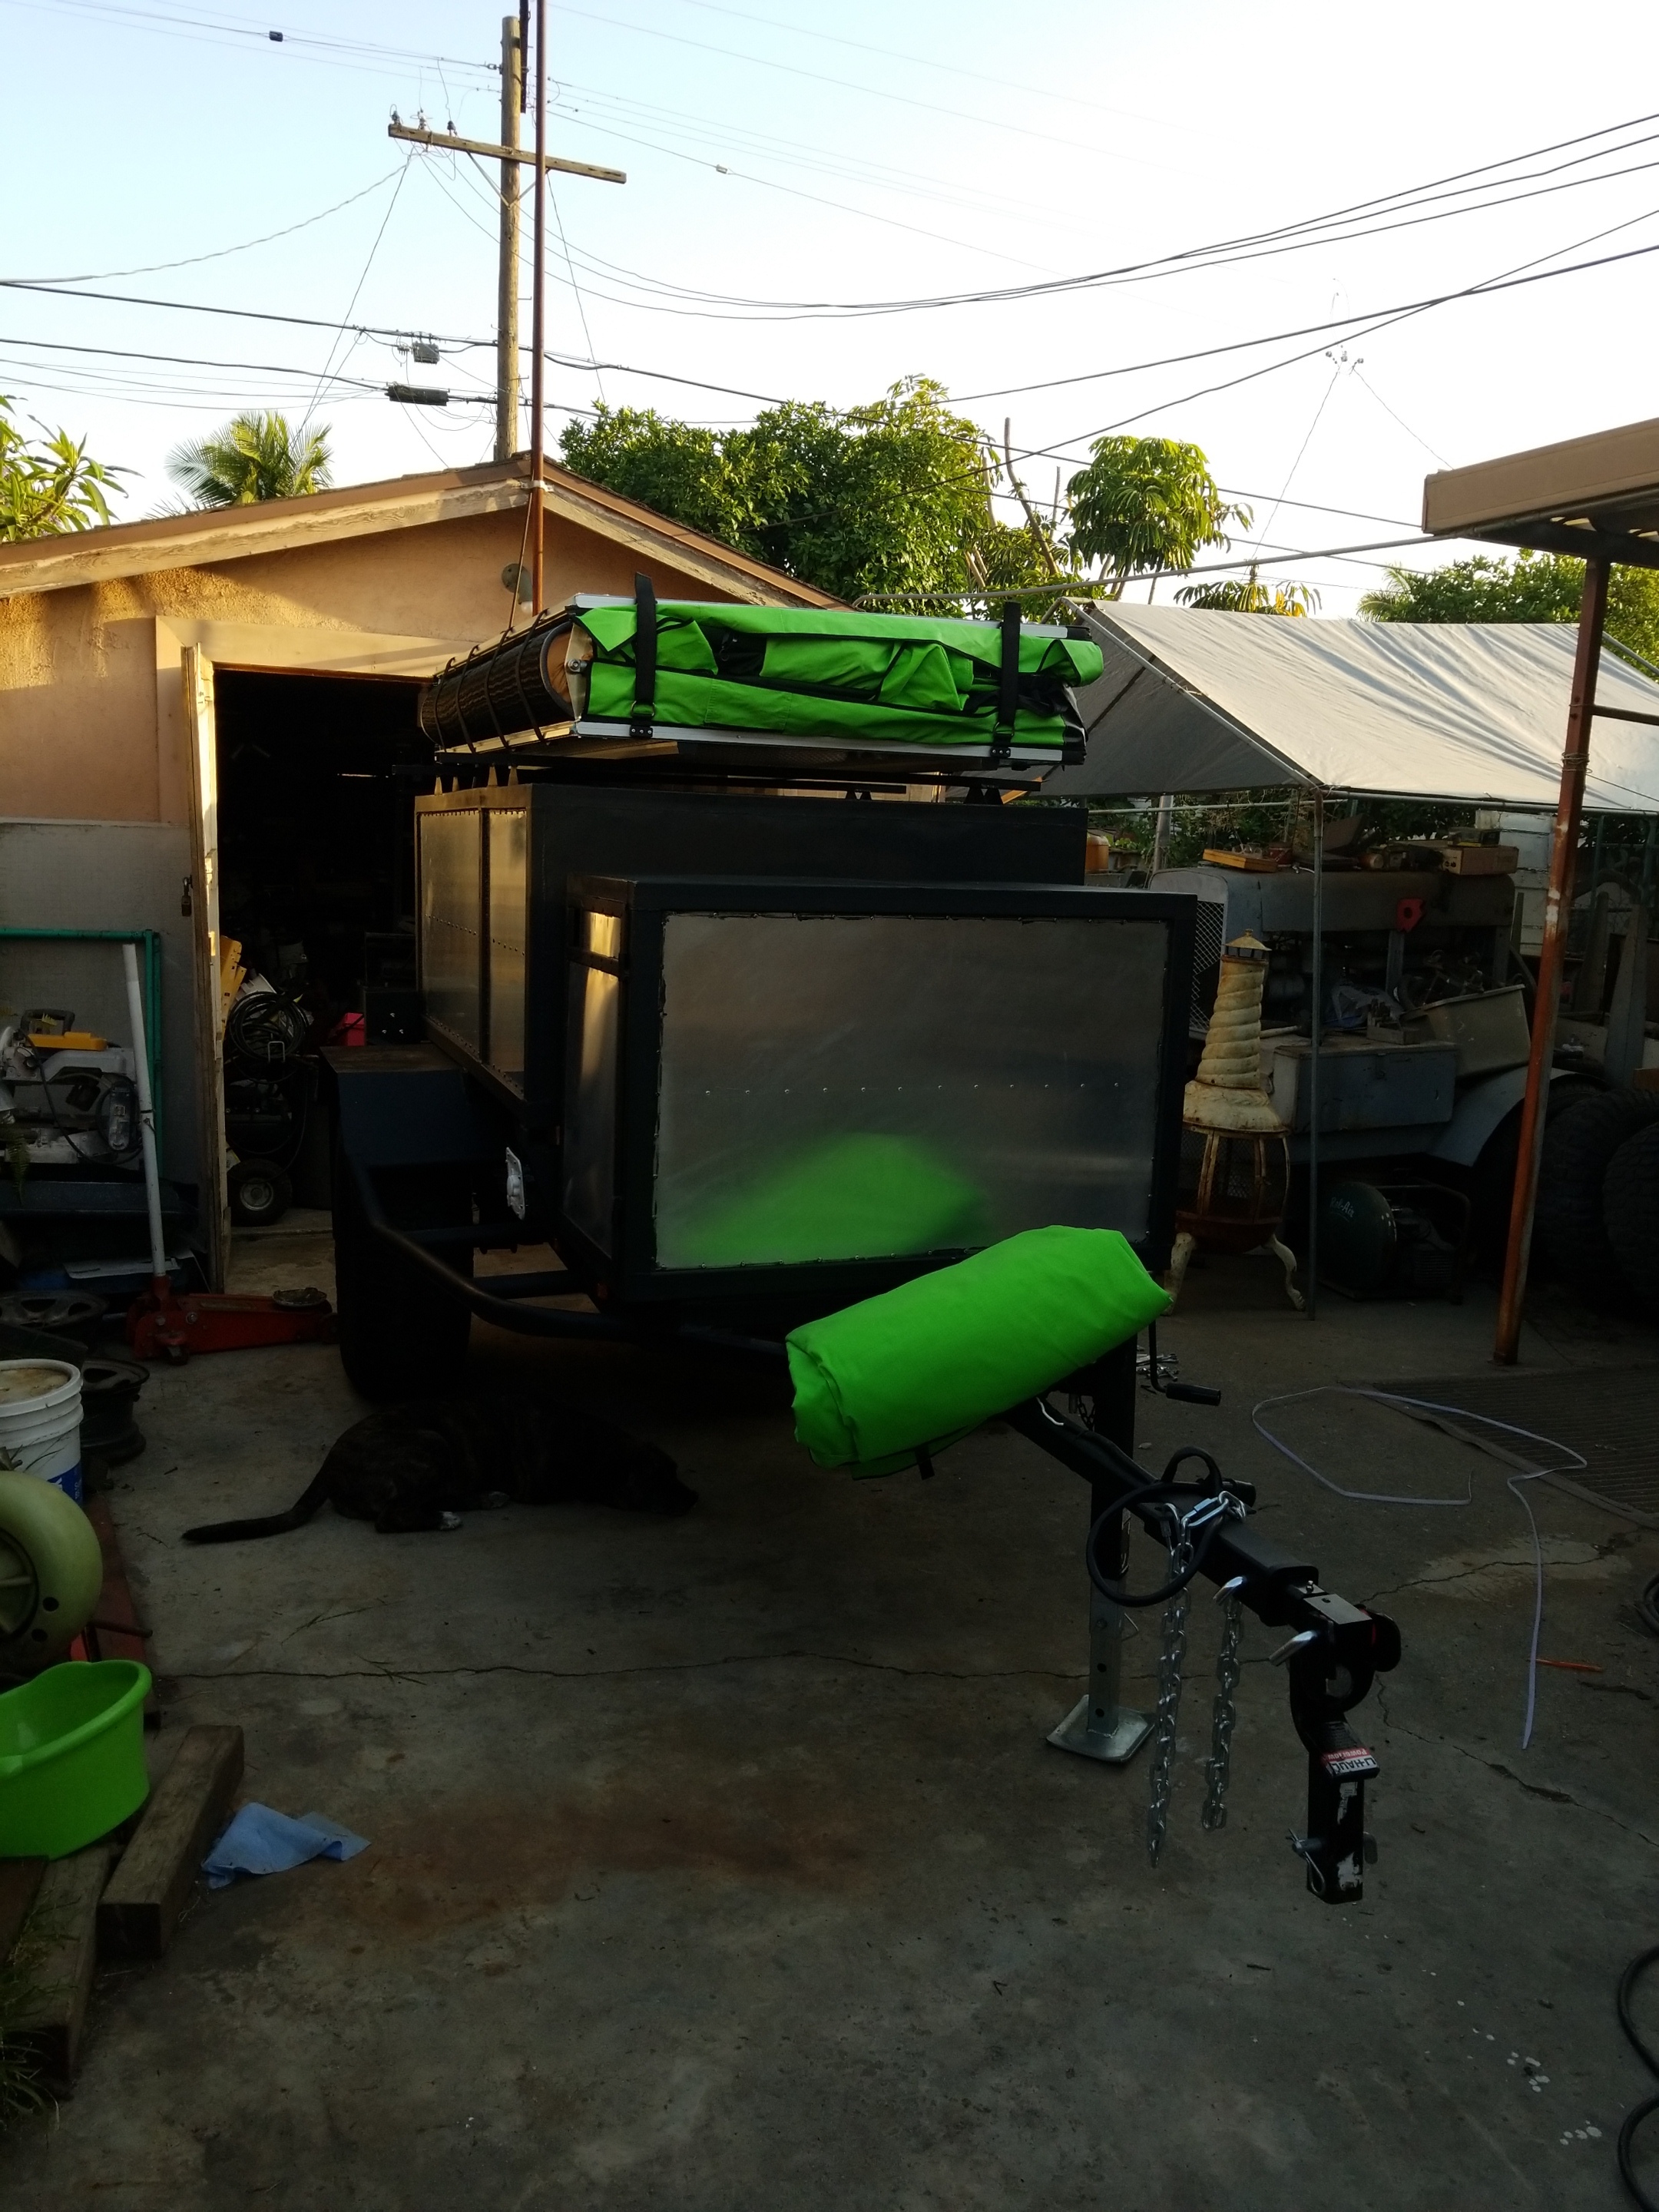
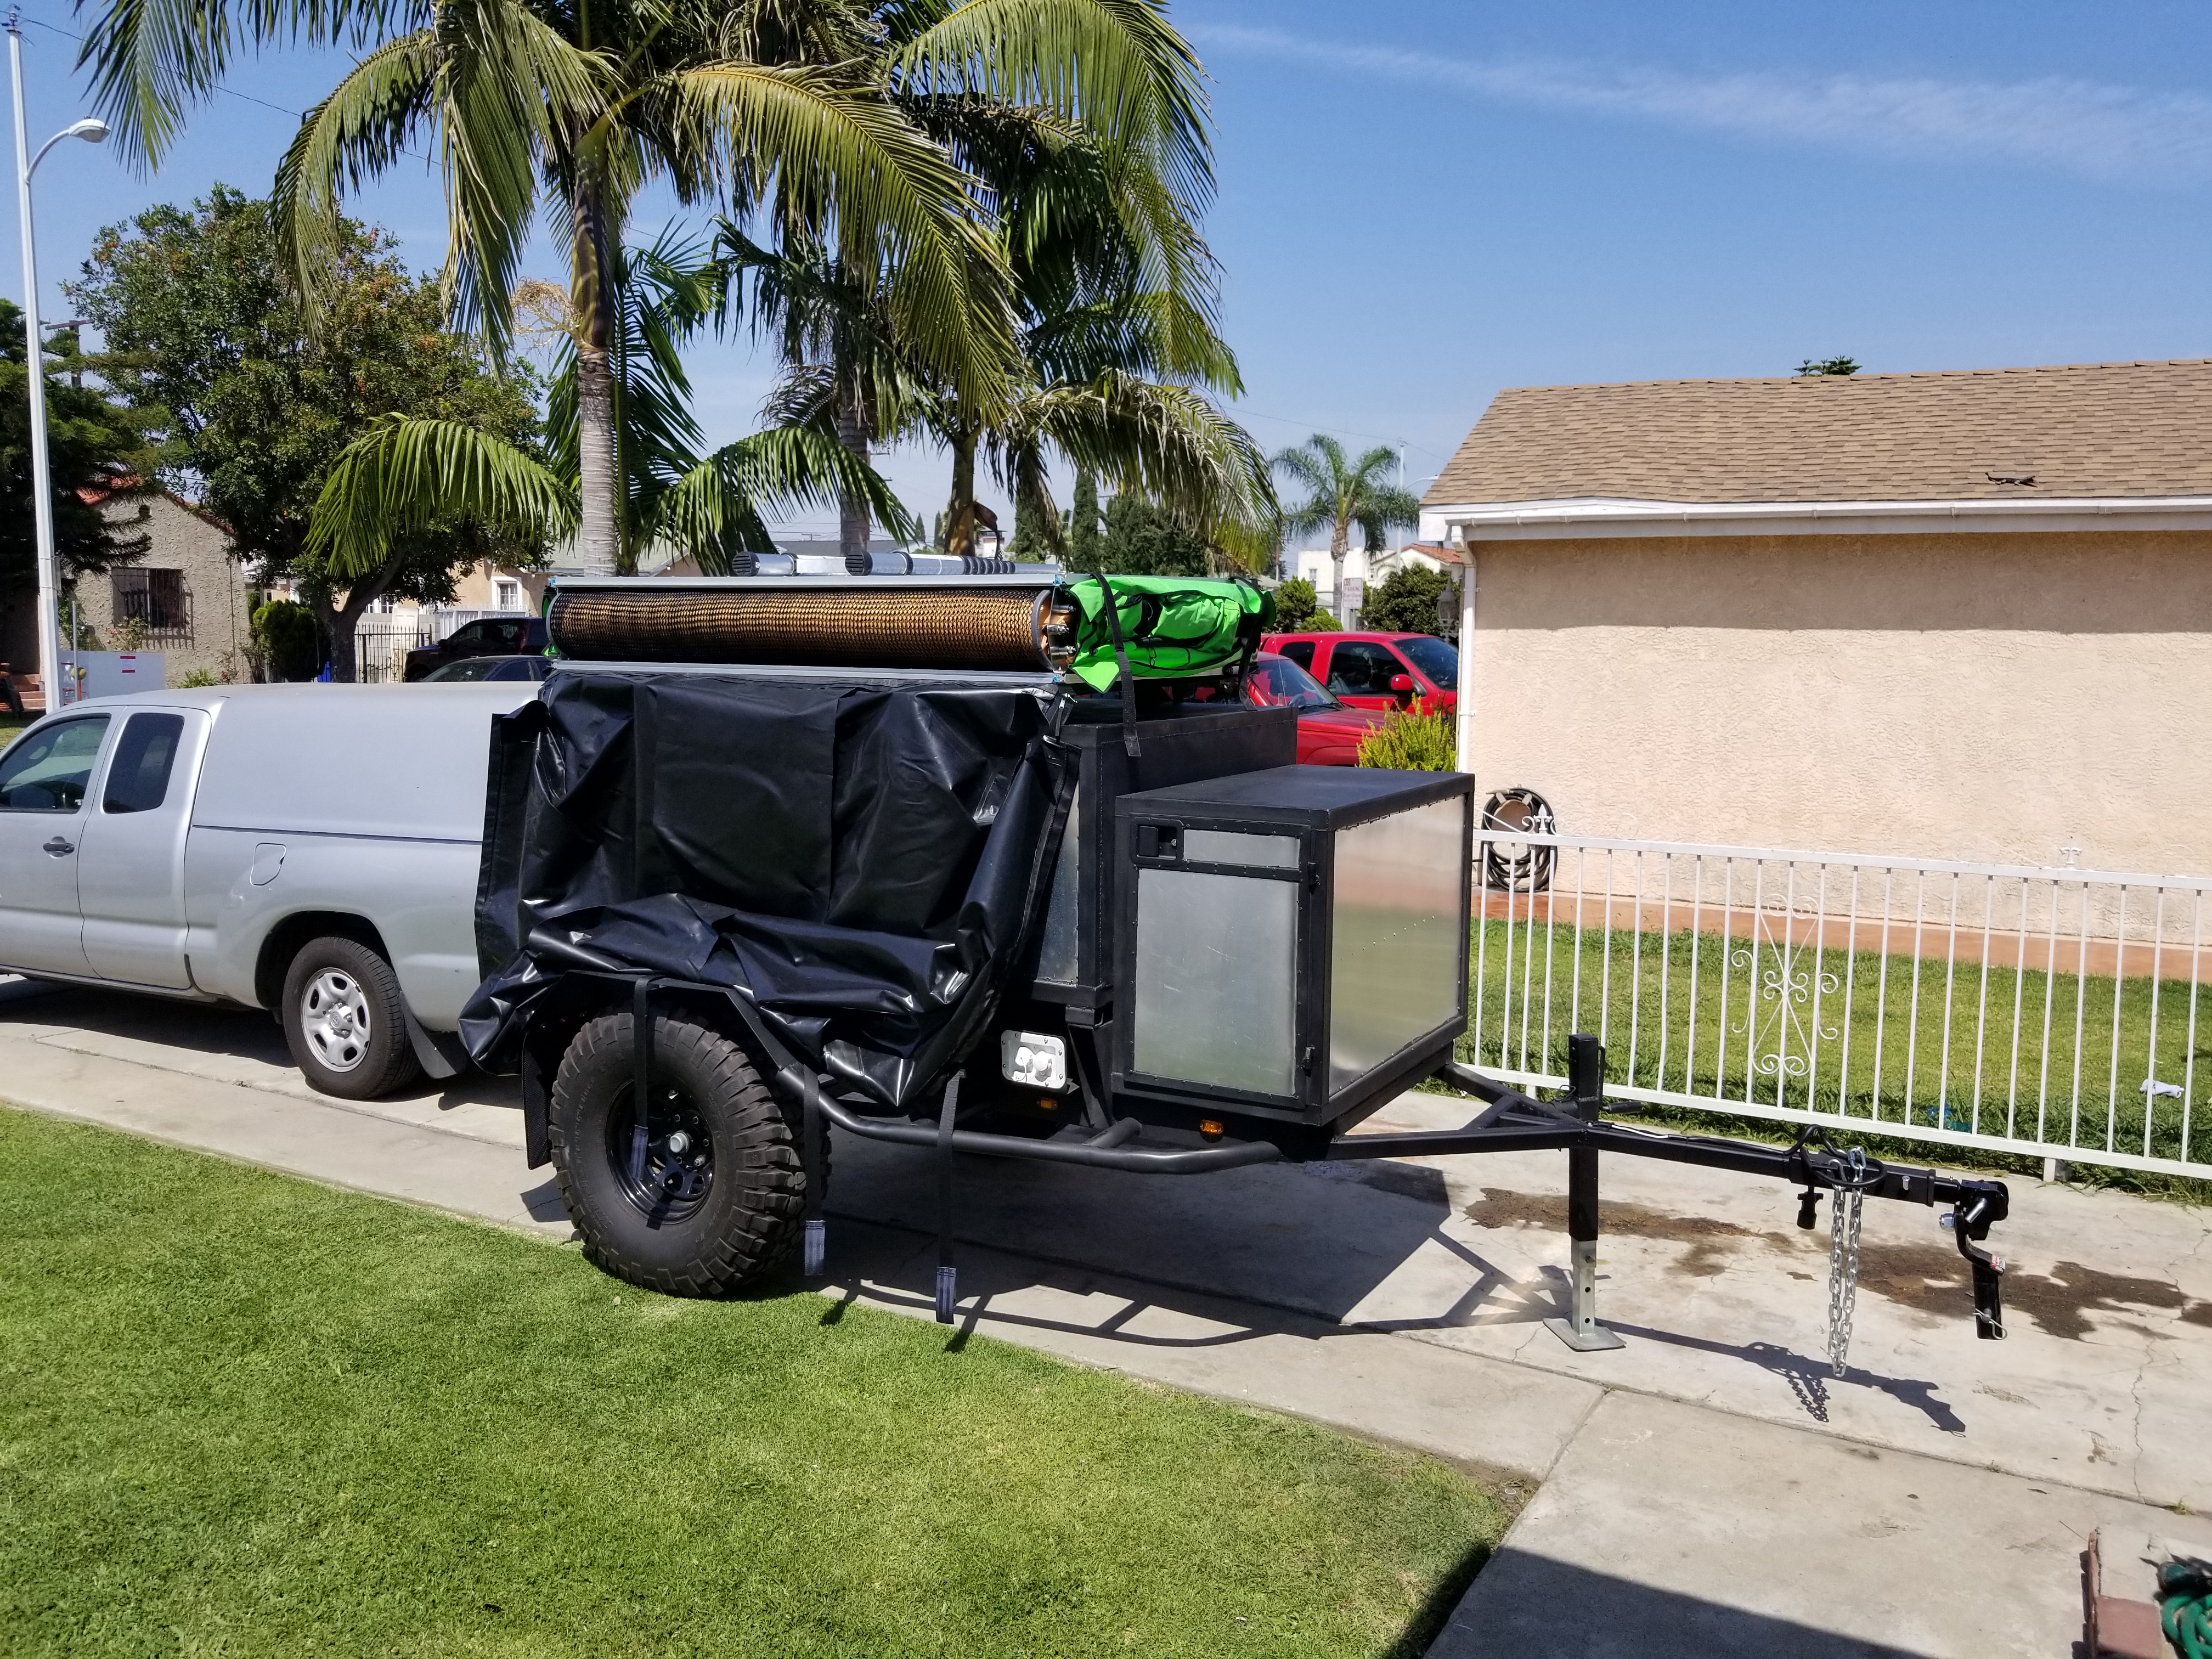
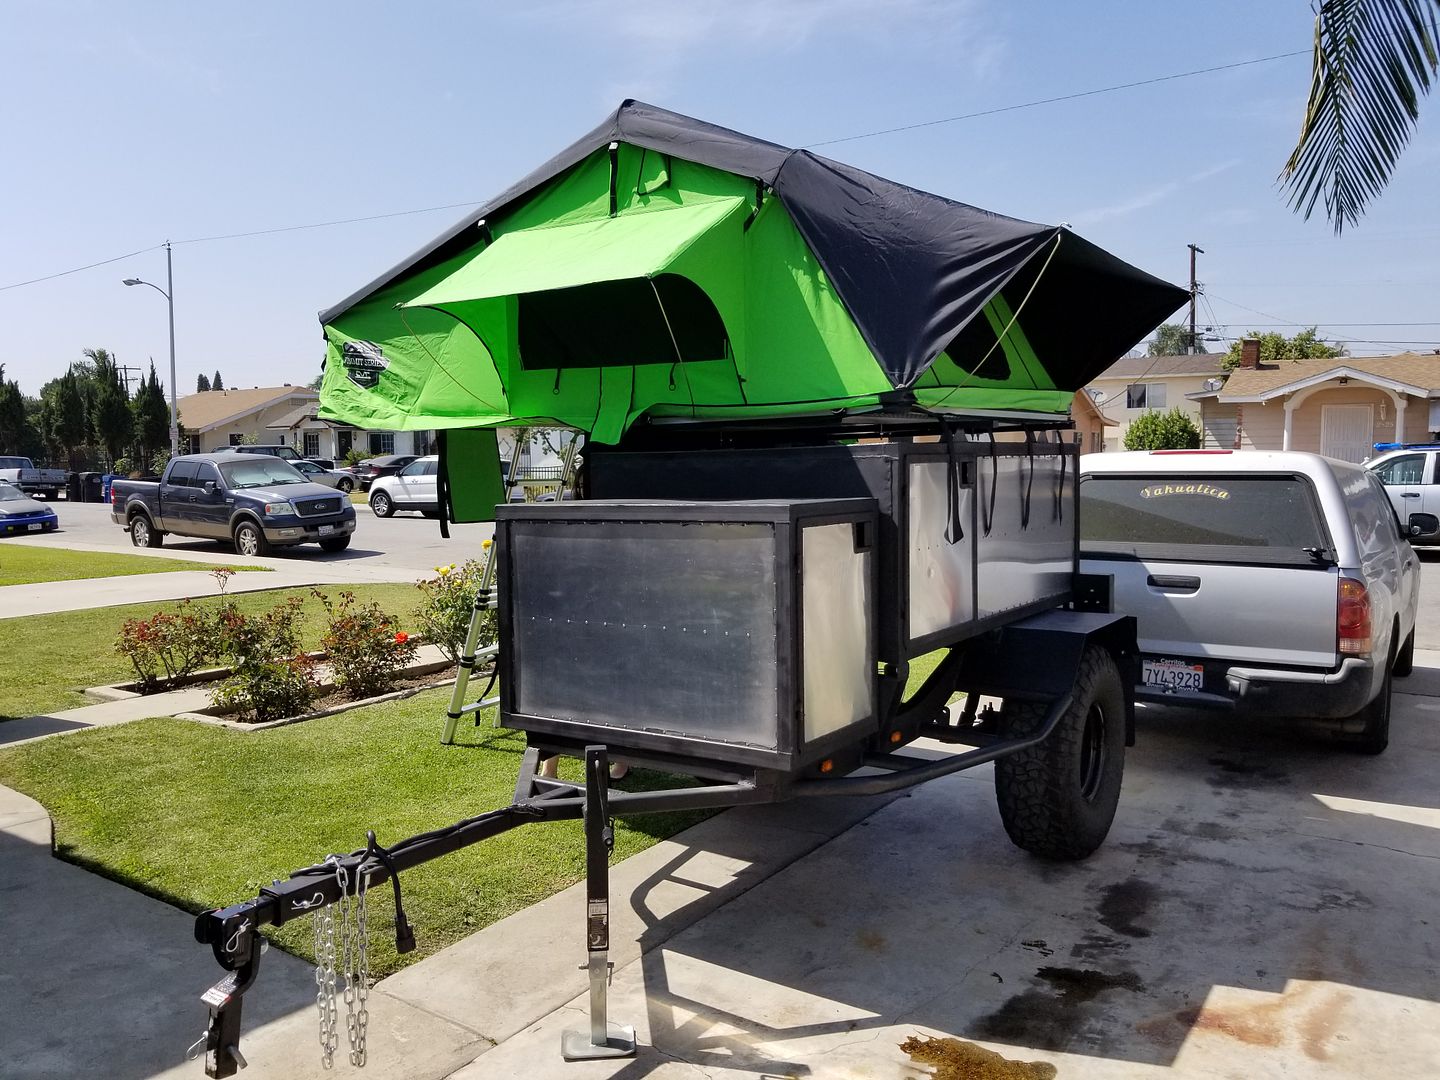
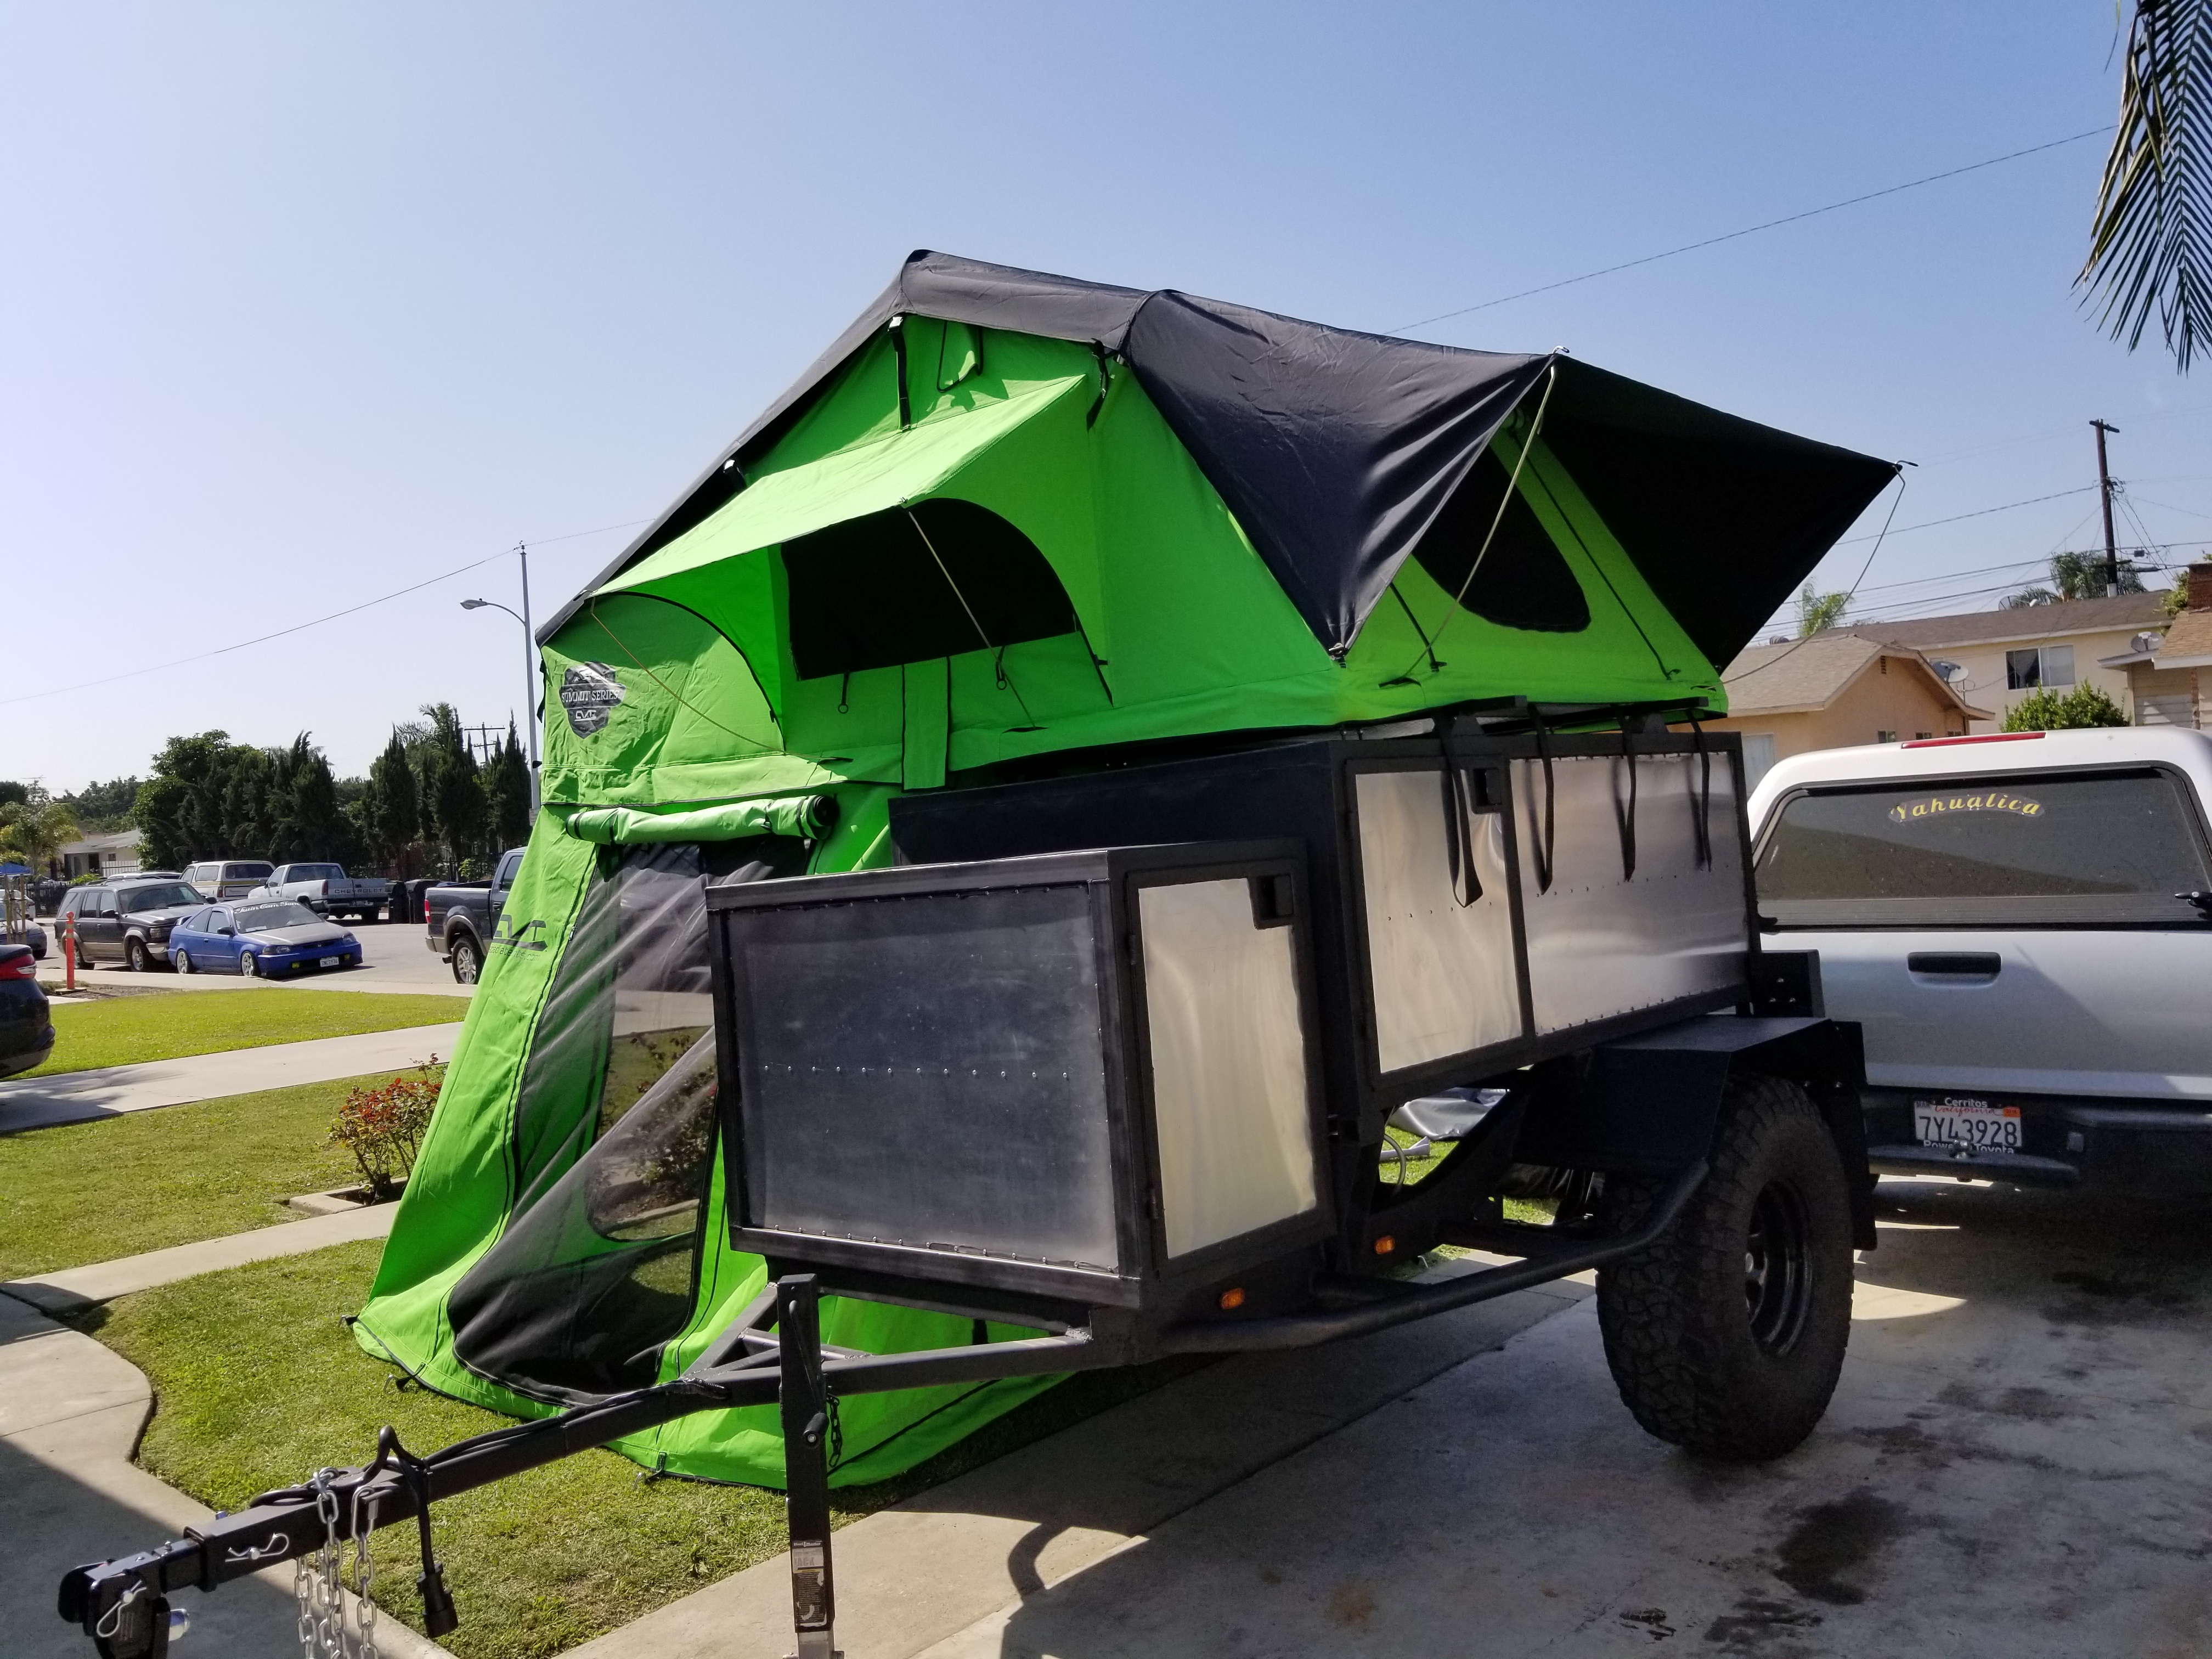
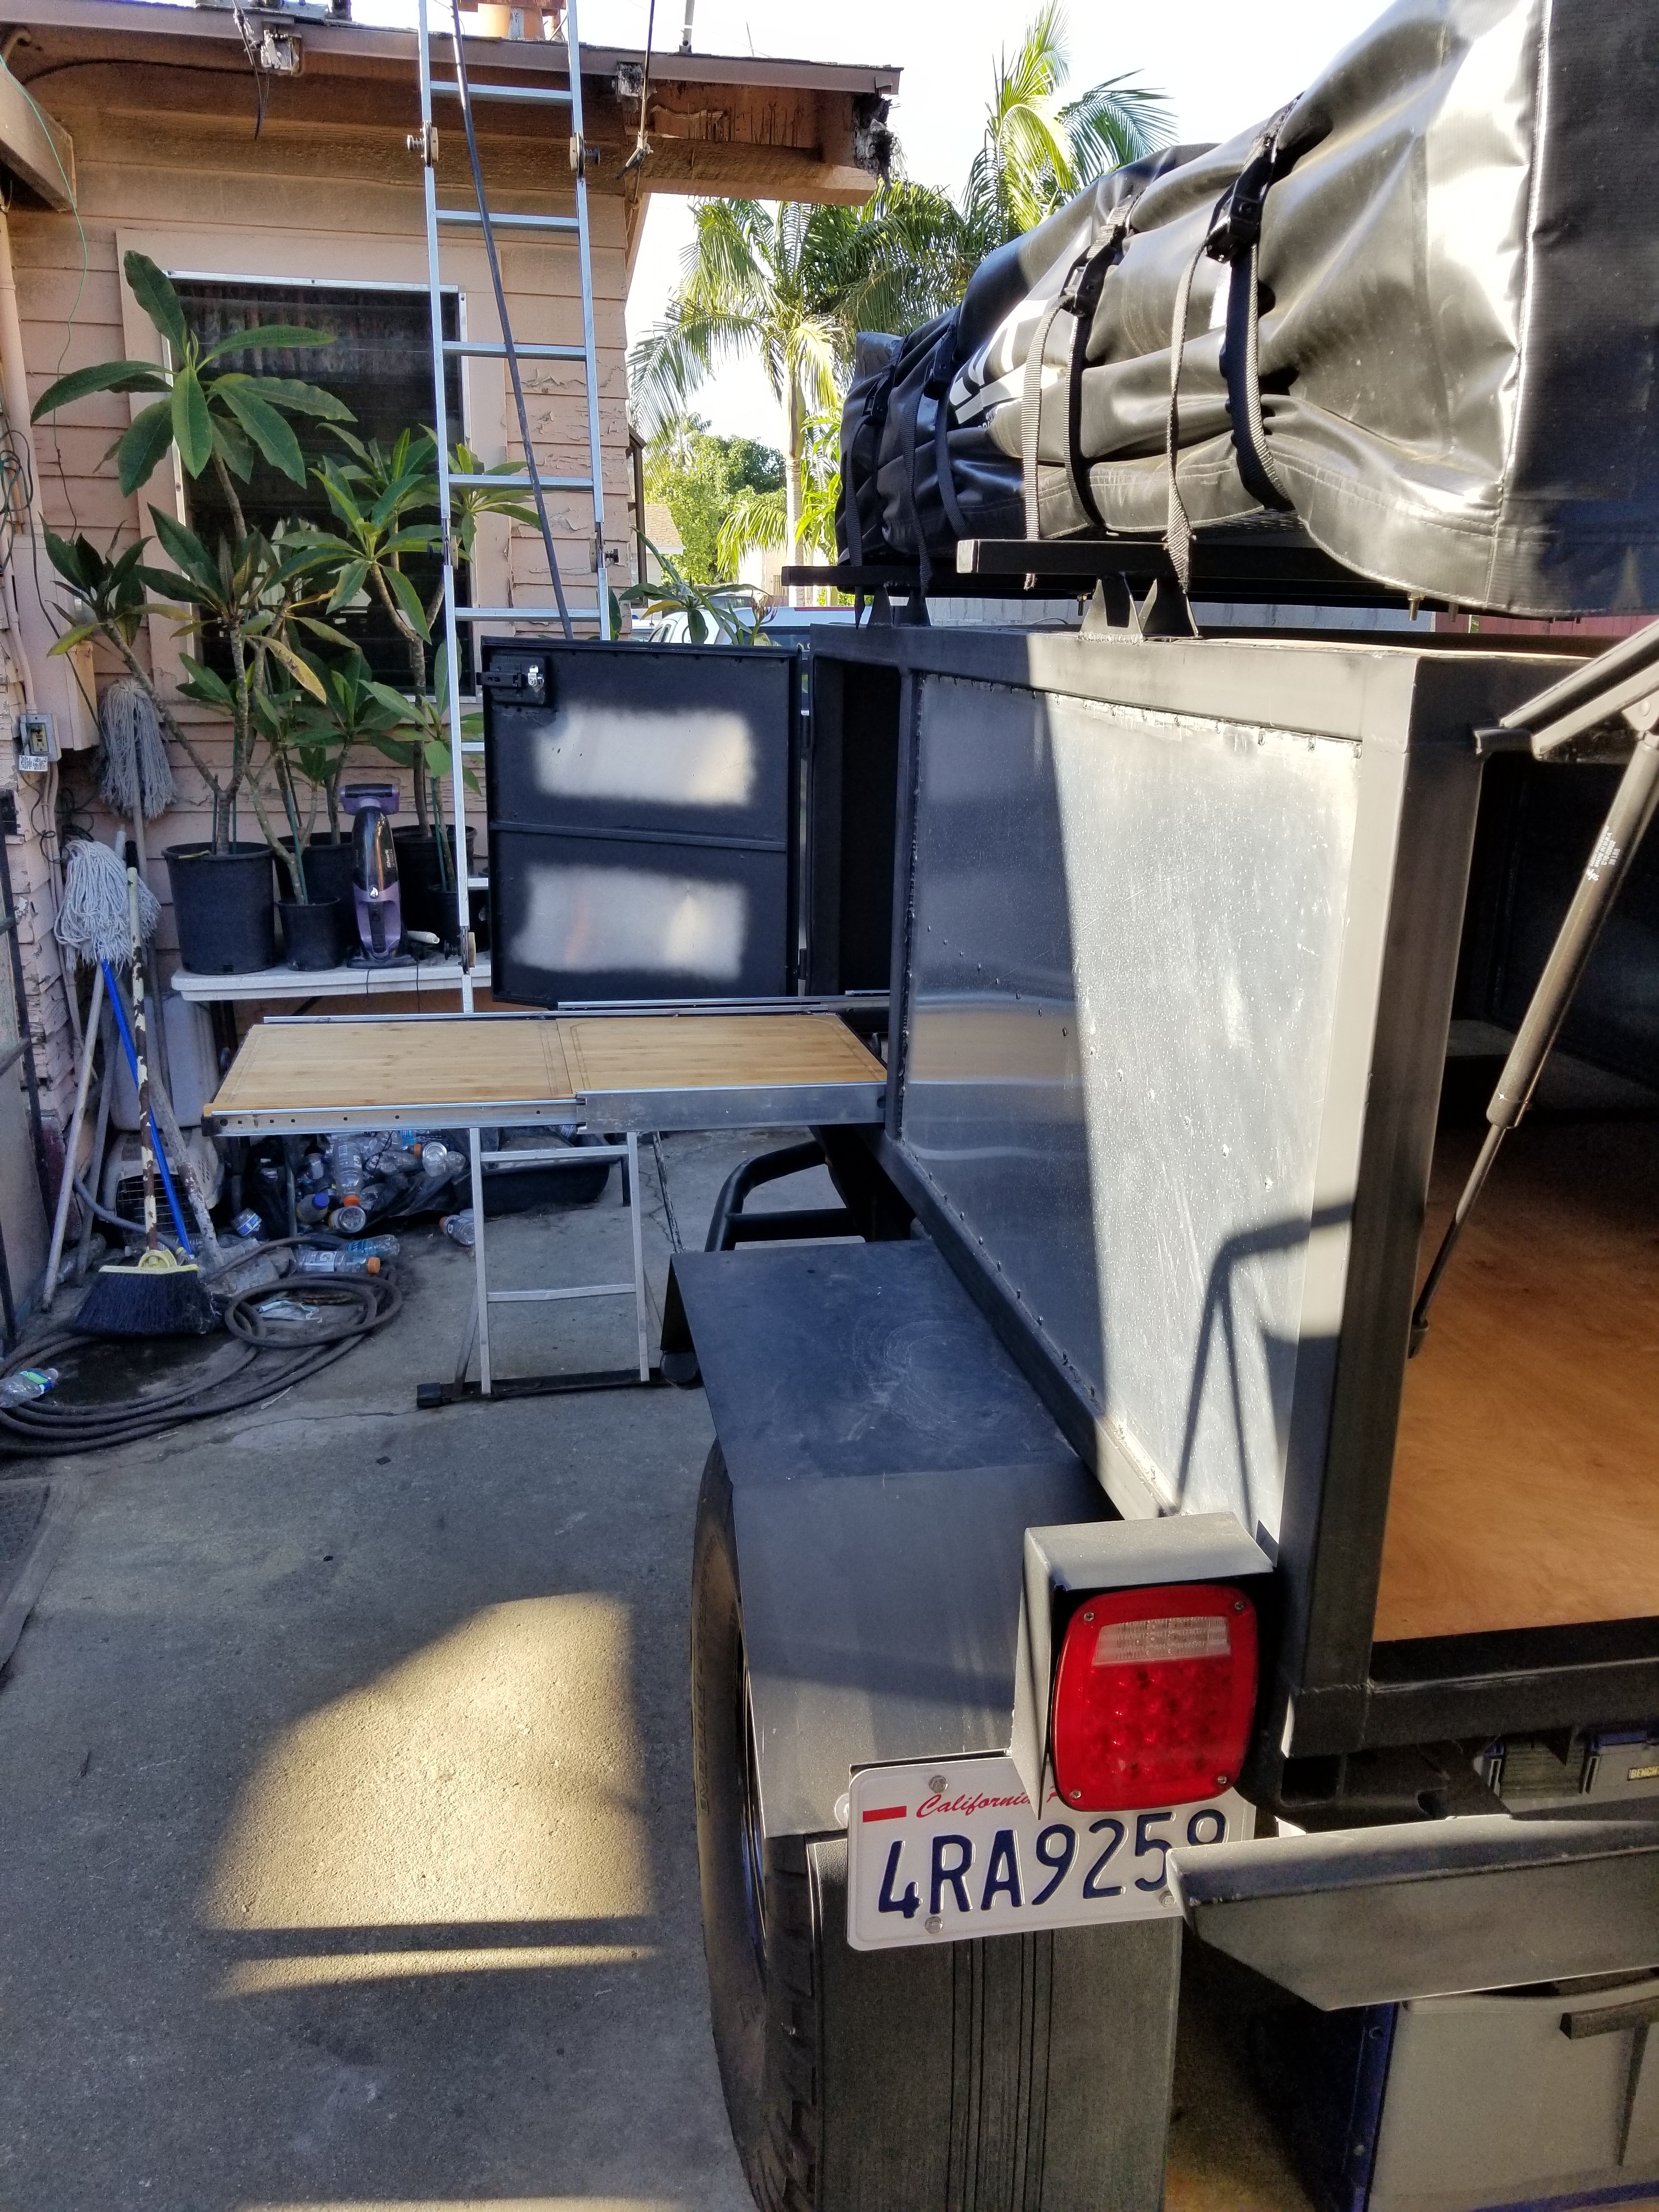
Here's a nice picture of it to give you guys something to look forward to lol (or just another teaser)
At least this will give you all some perspective of how it looks all packed up. I took this one this morning. I'll have more pix tomorrow.
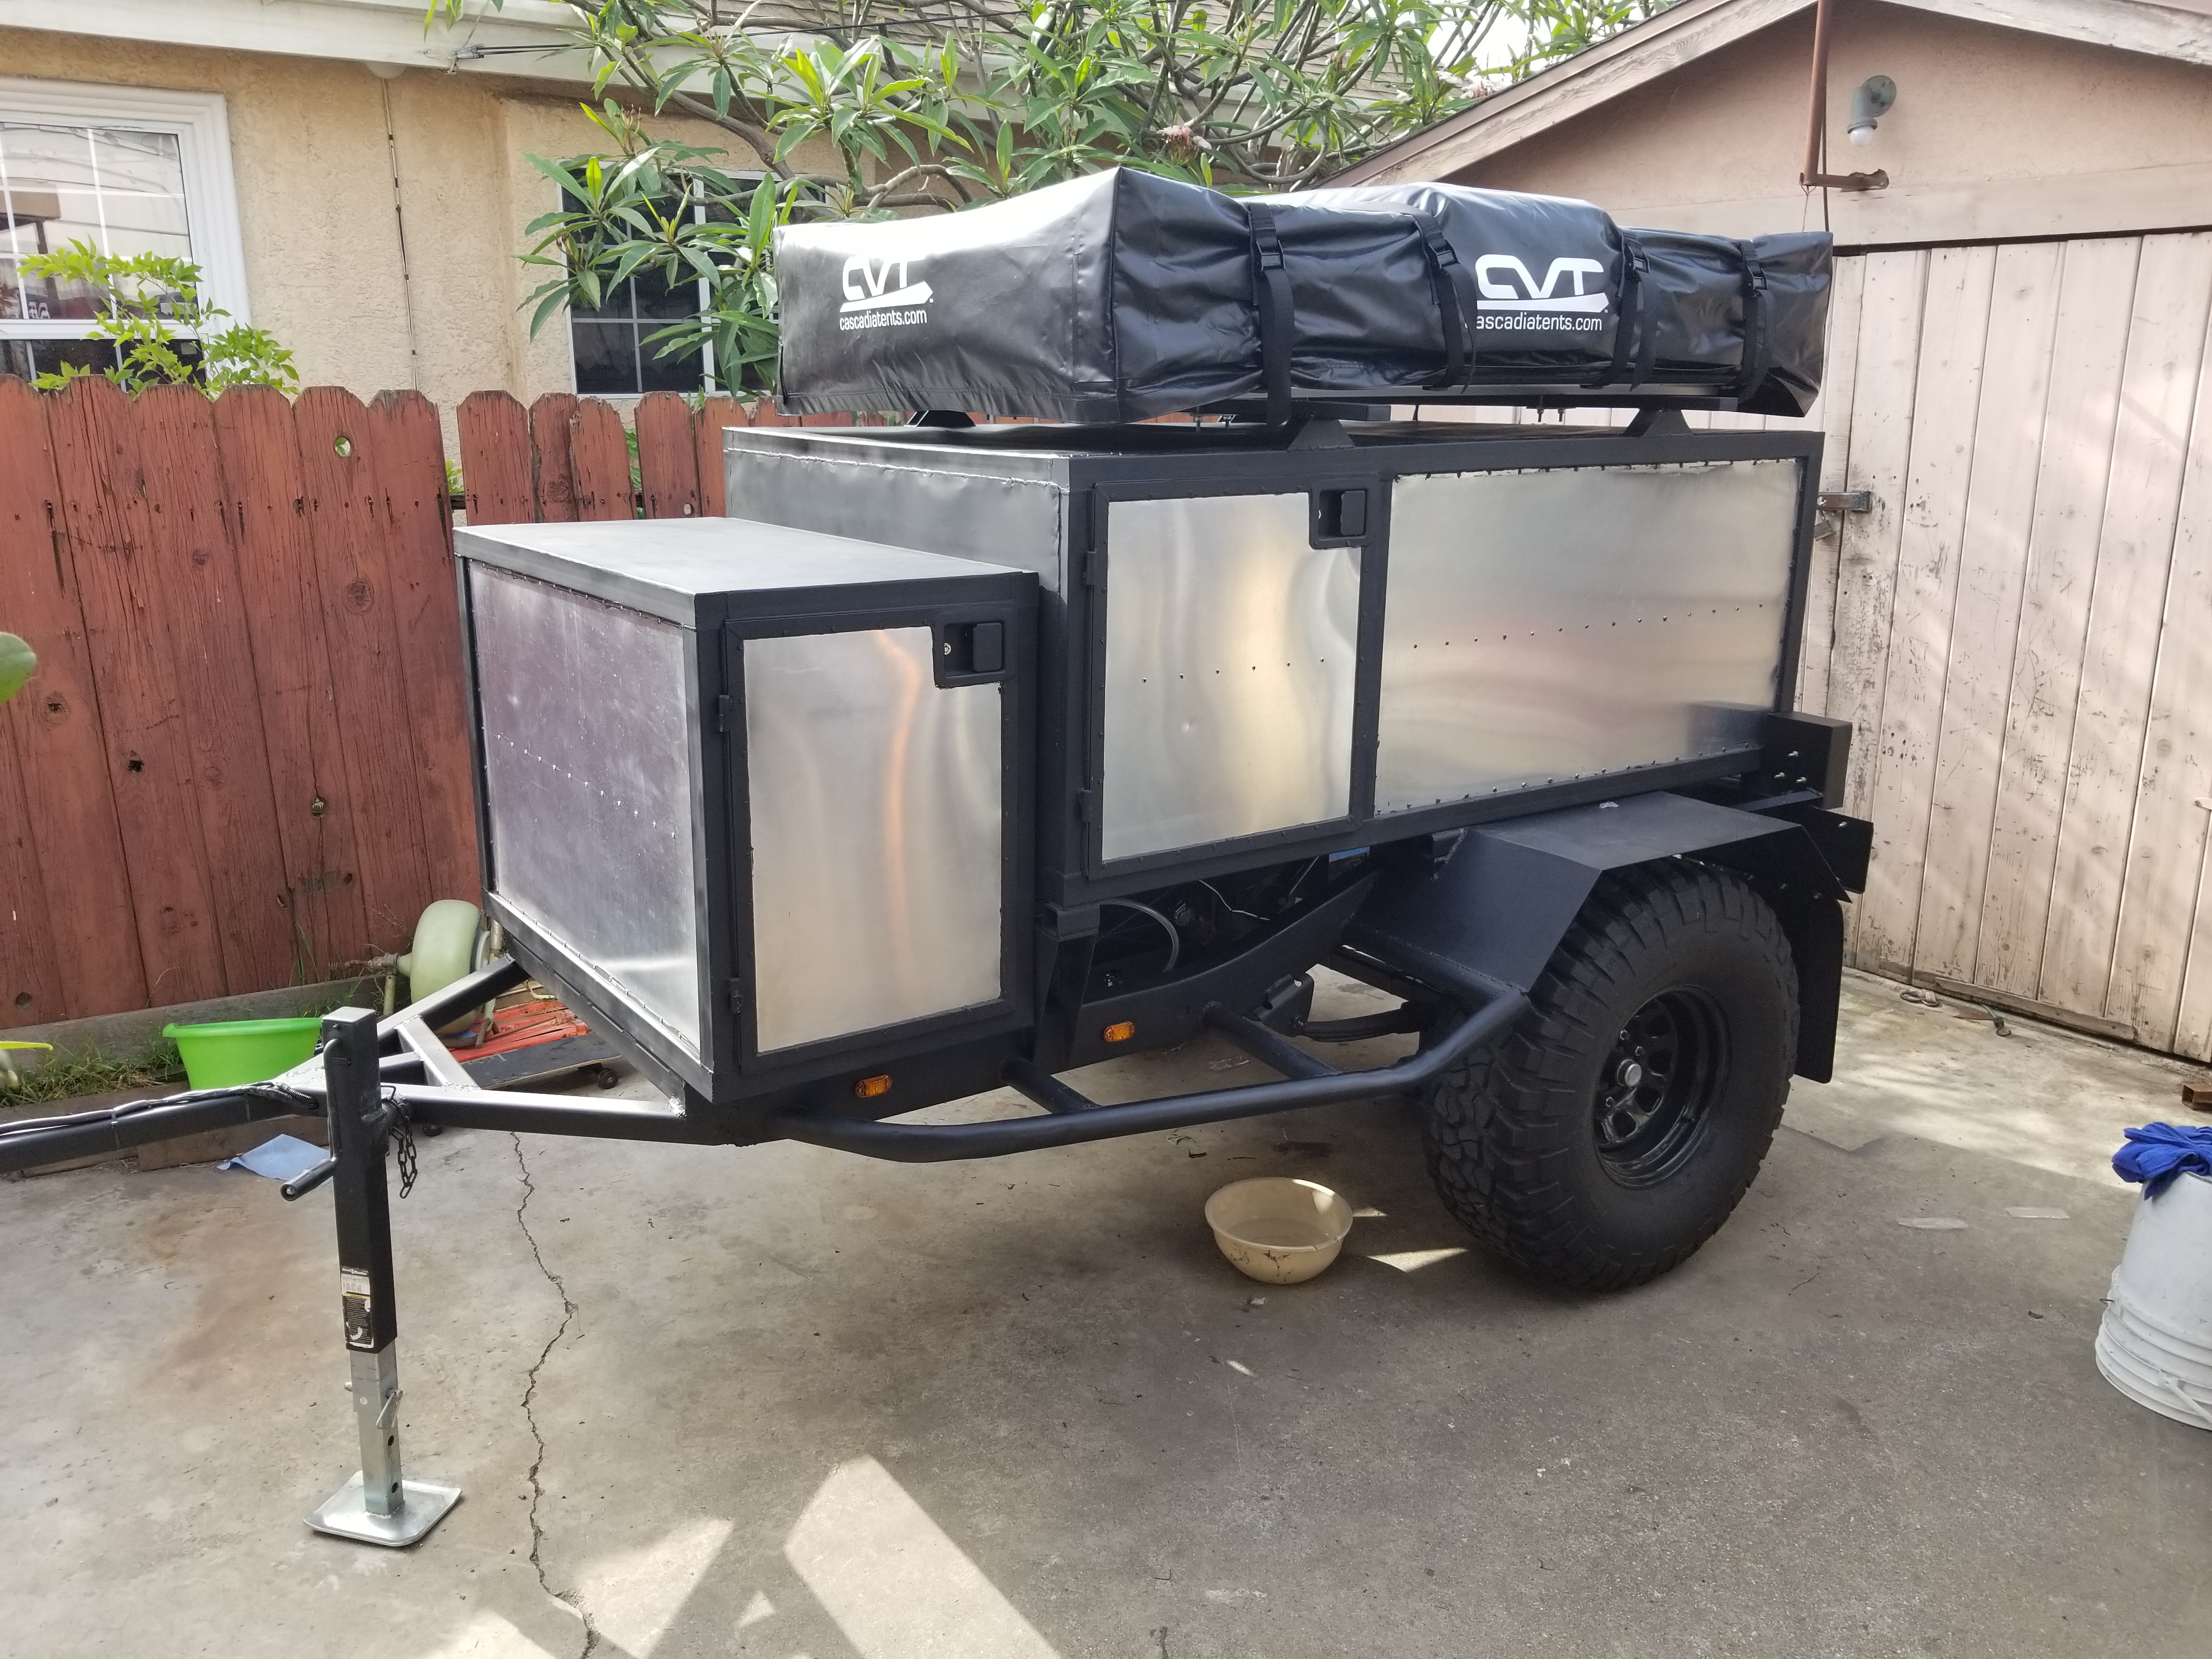
At least this will give you all some perspective of how it looks all packed up. I took this one this morning. I'll have more pix tomorrow.
 06-03-2017, 10:49 PM
#135
Registered User
Thread Starter
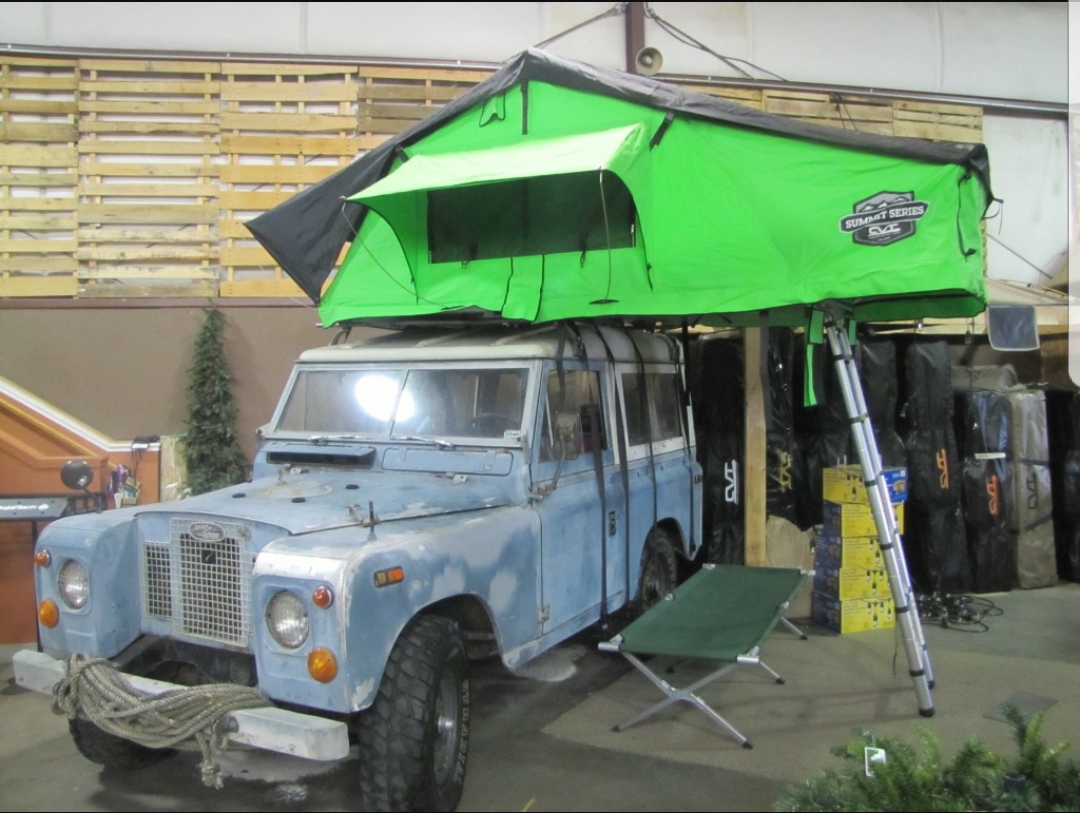
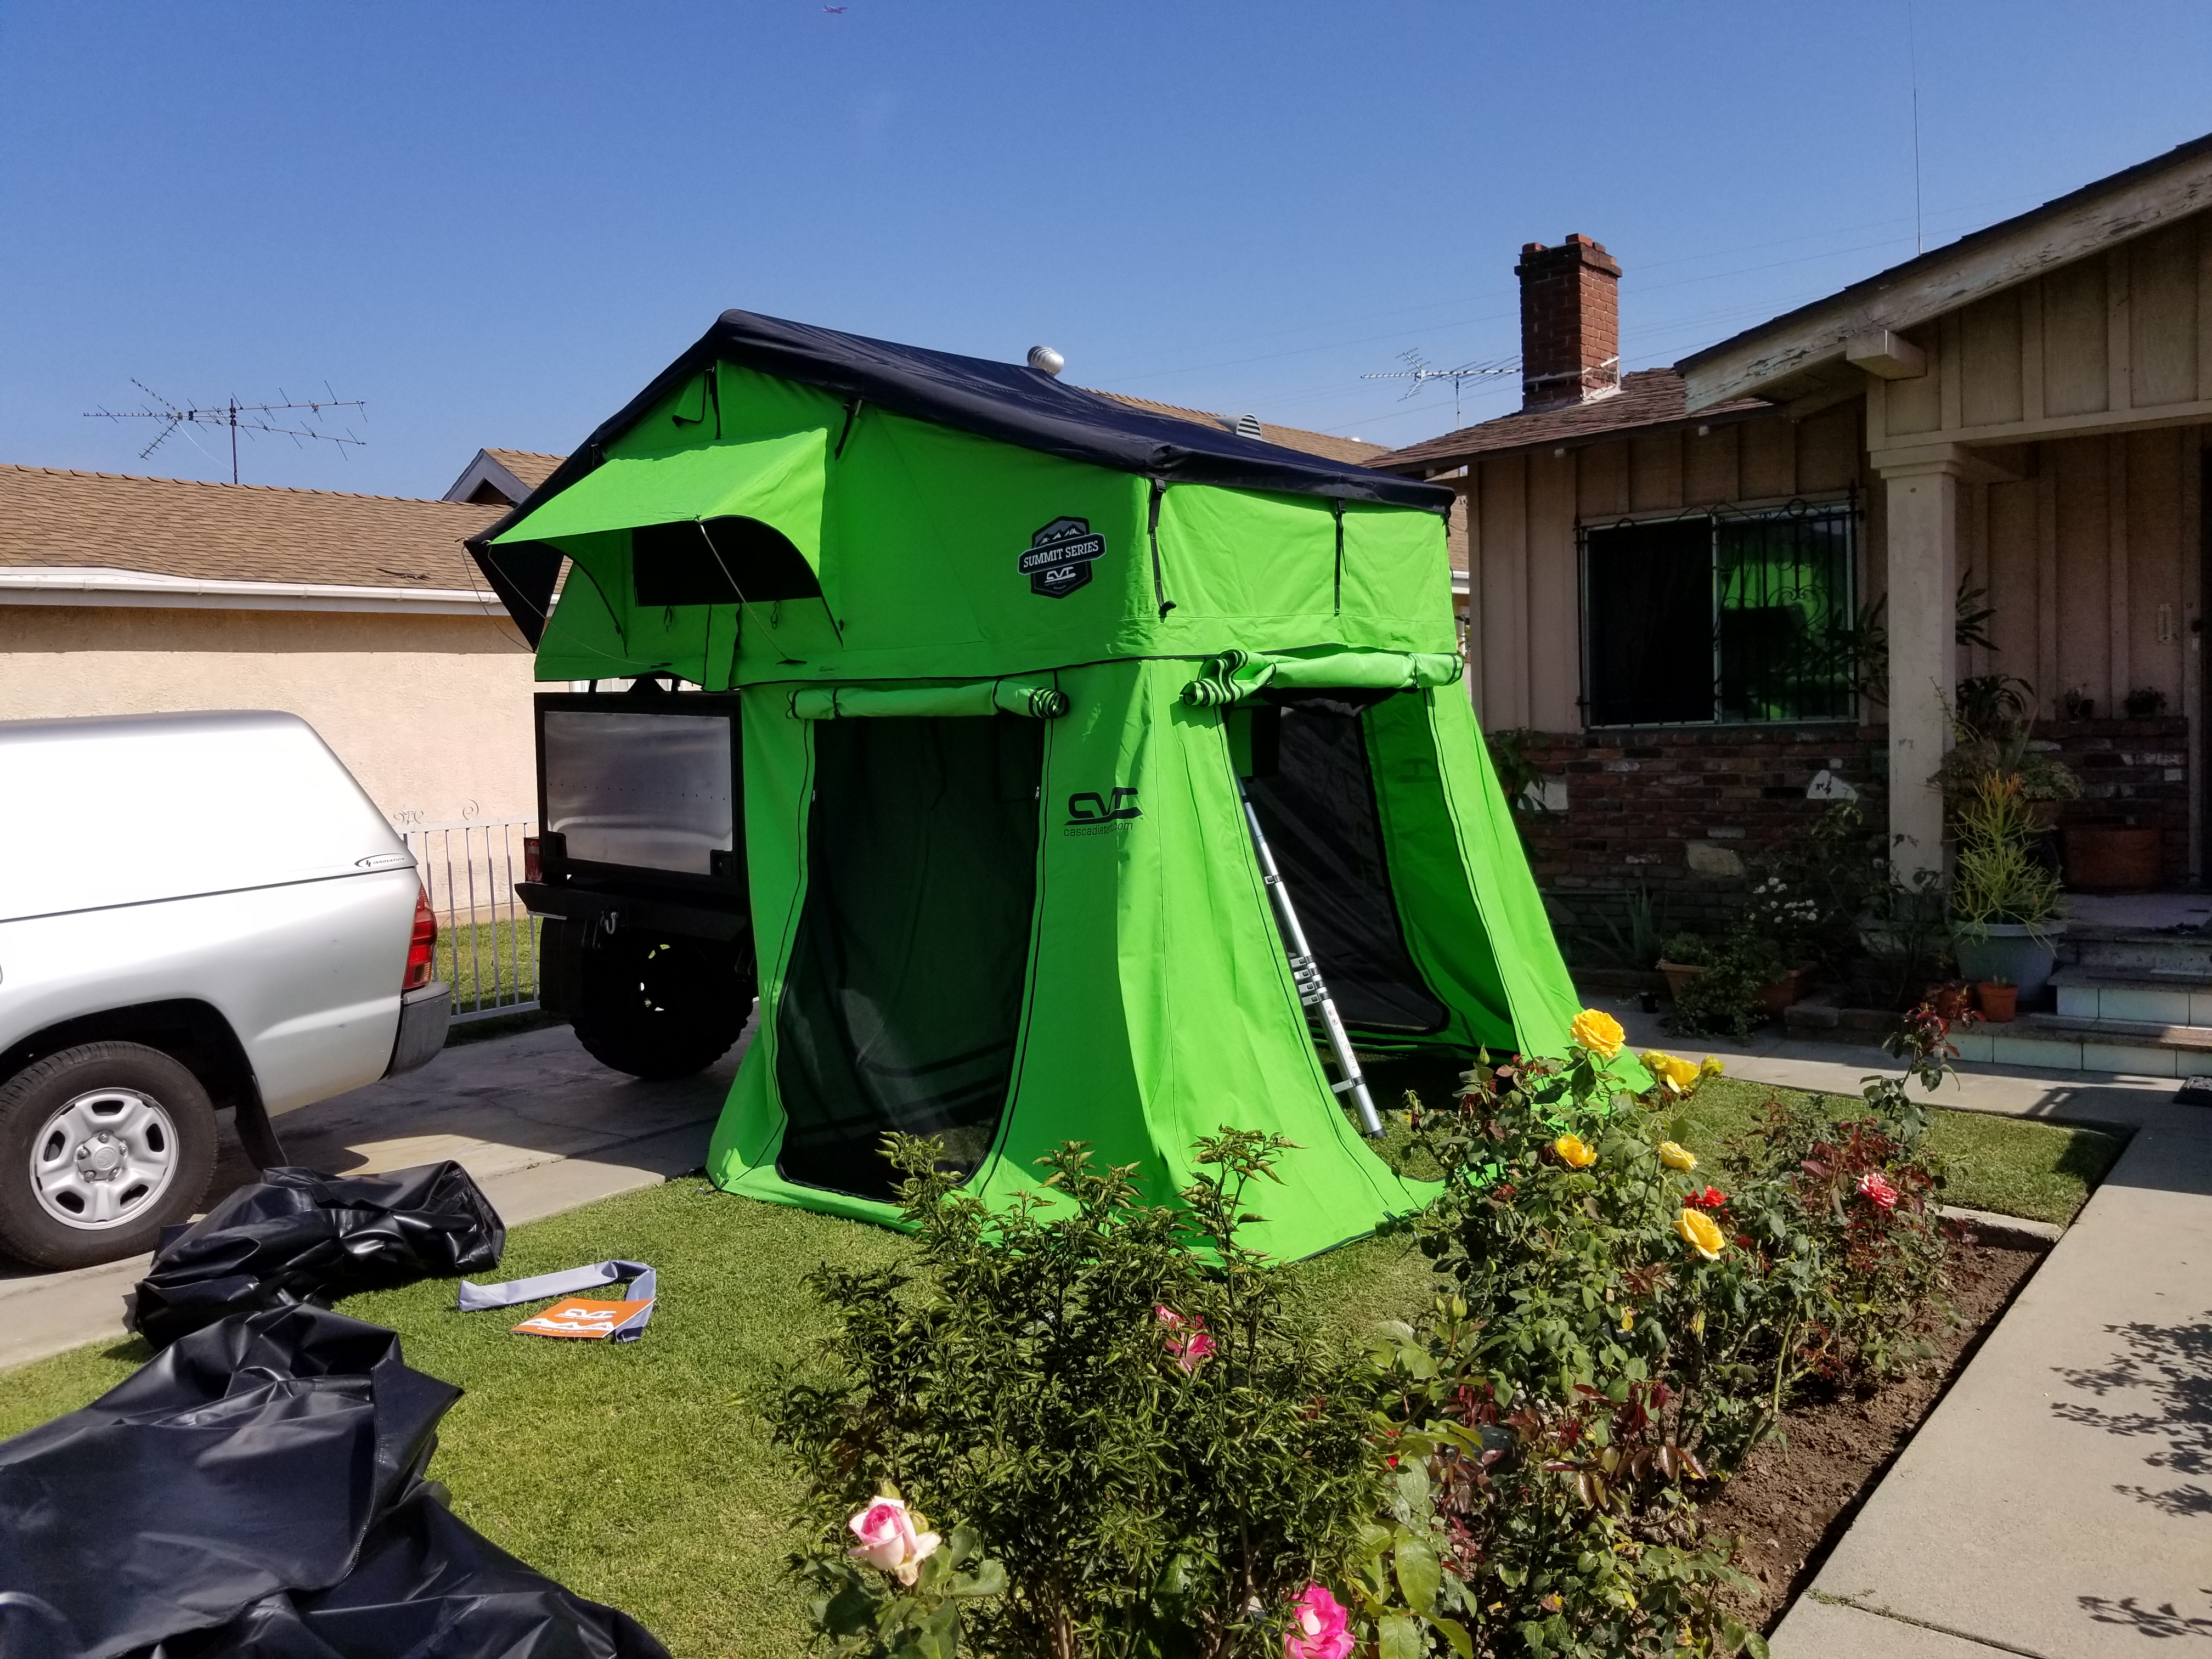
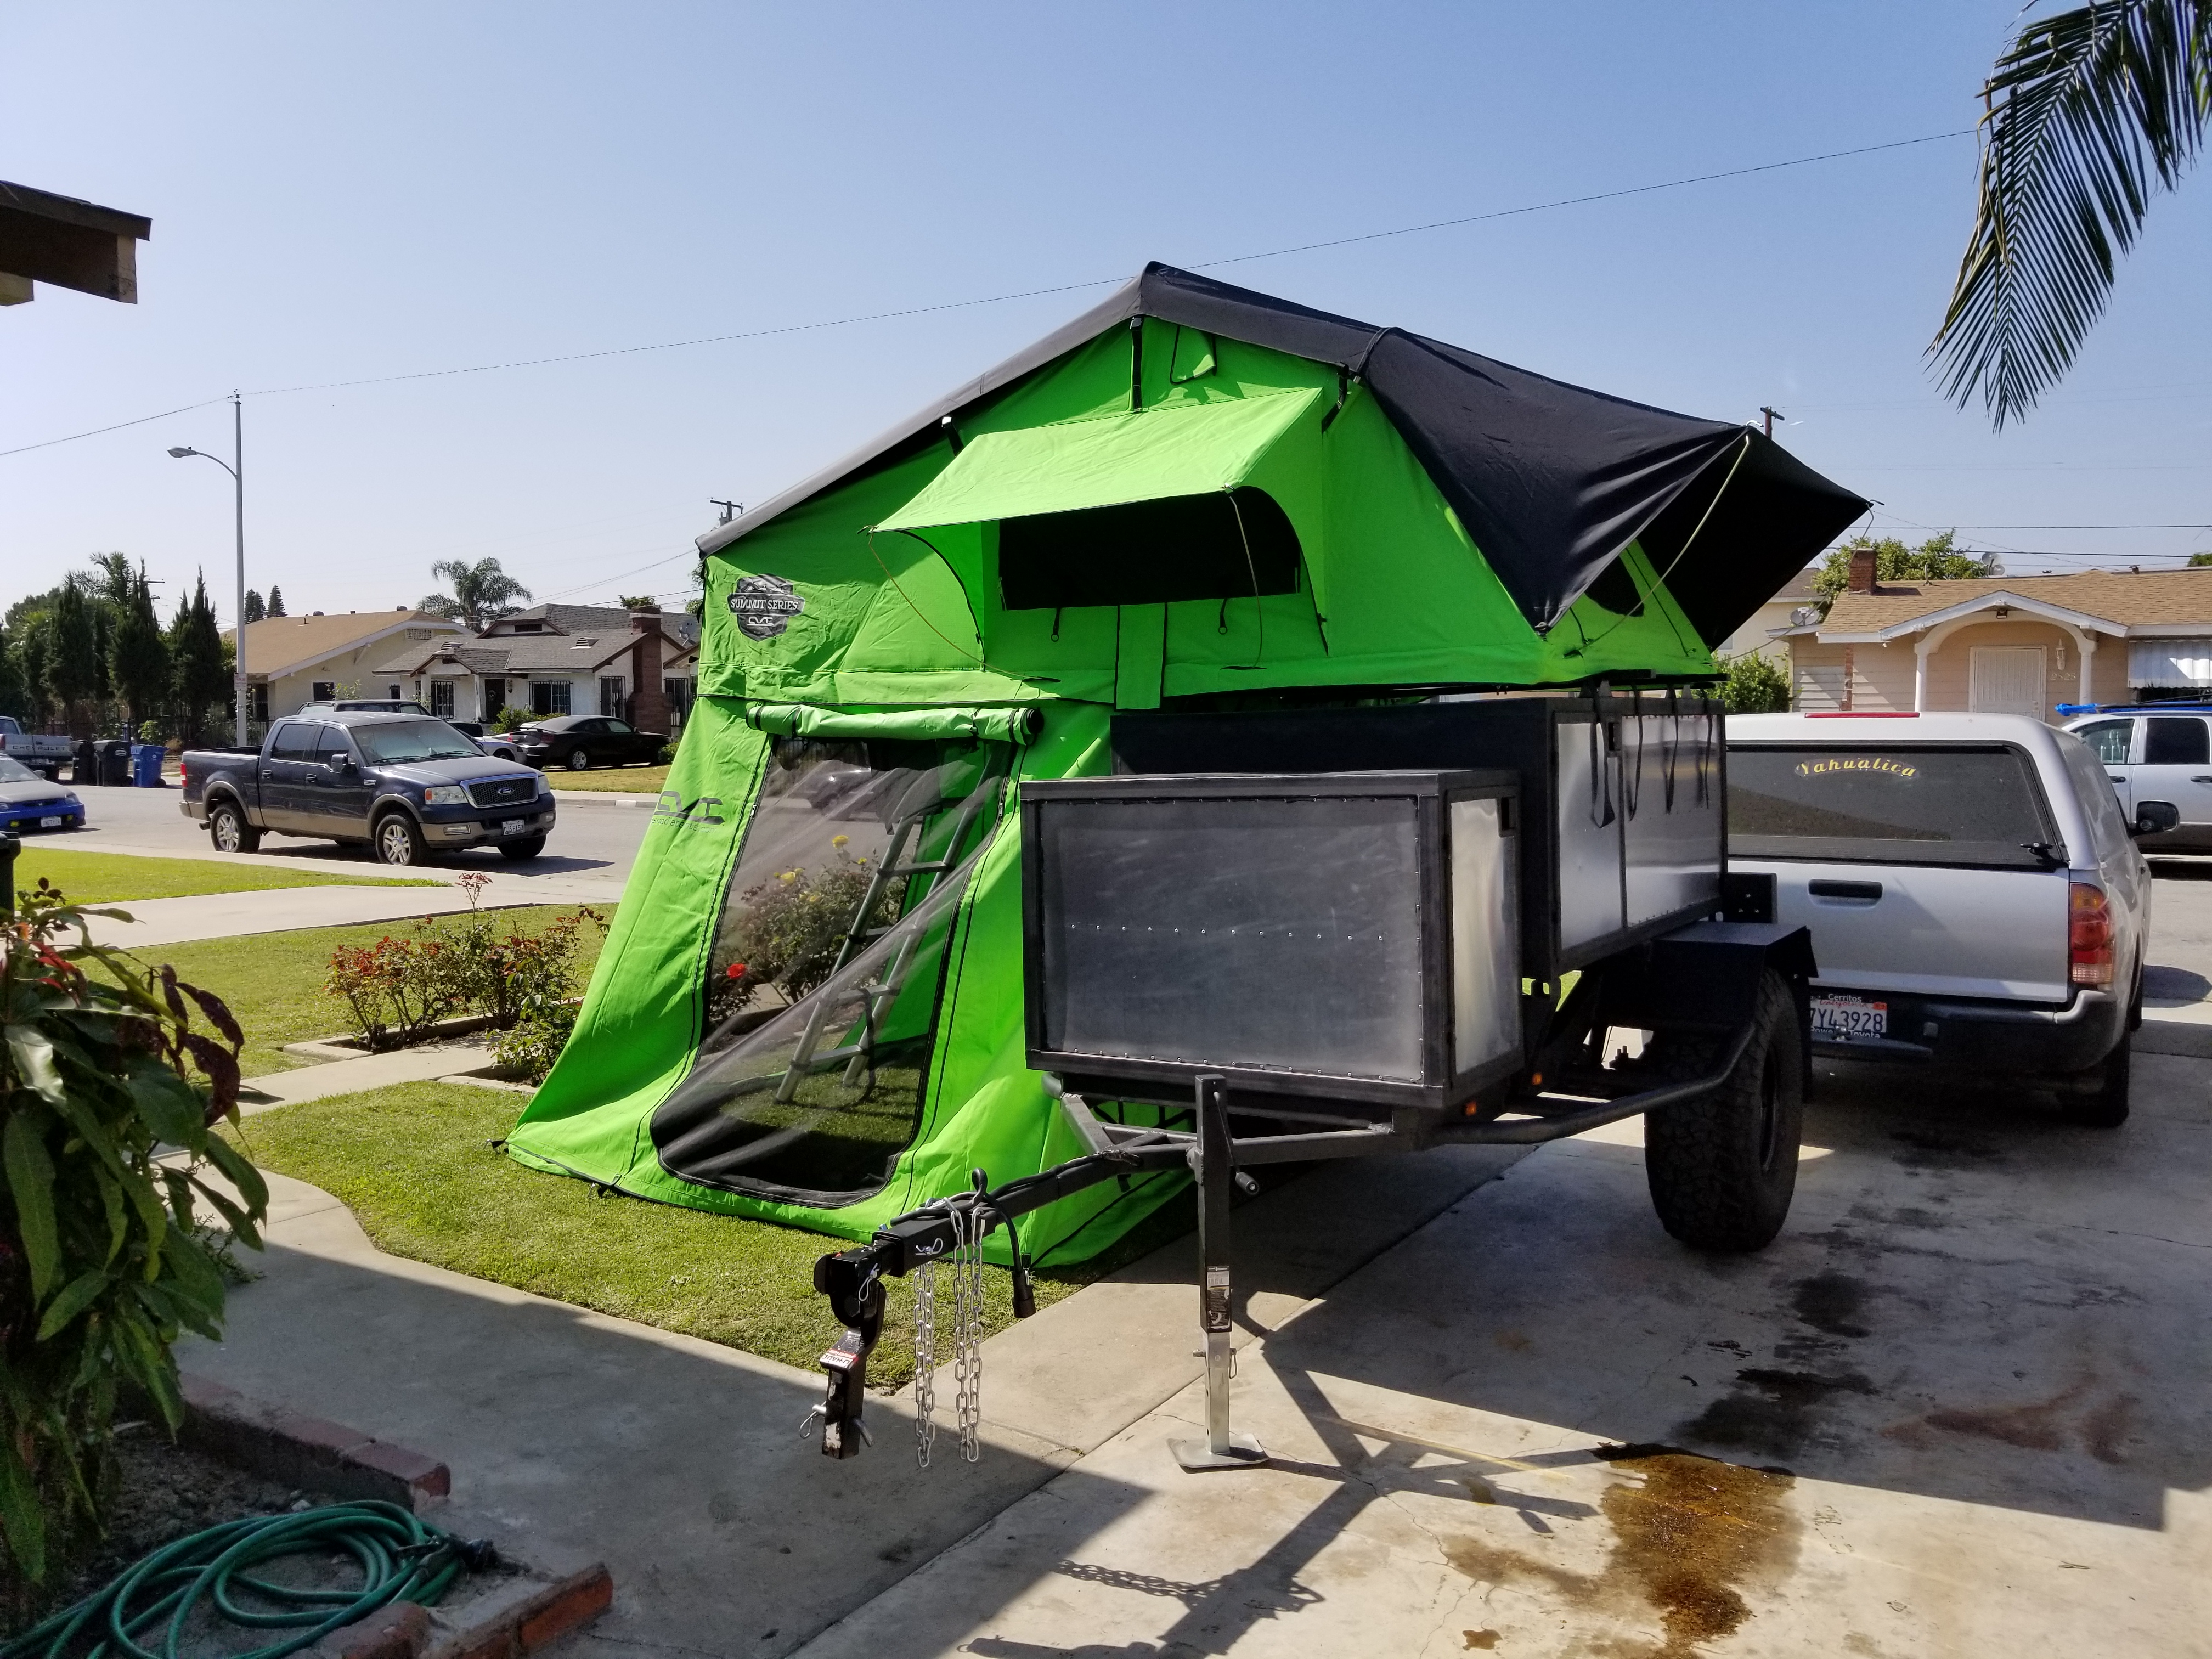
As promised here are the pix!
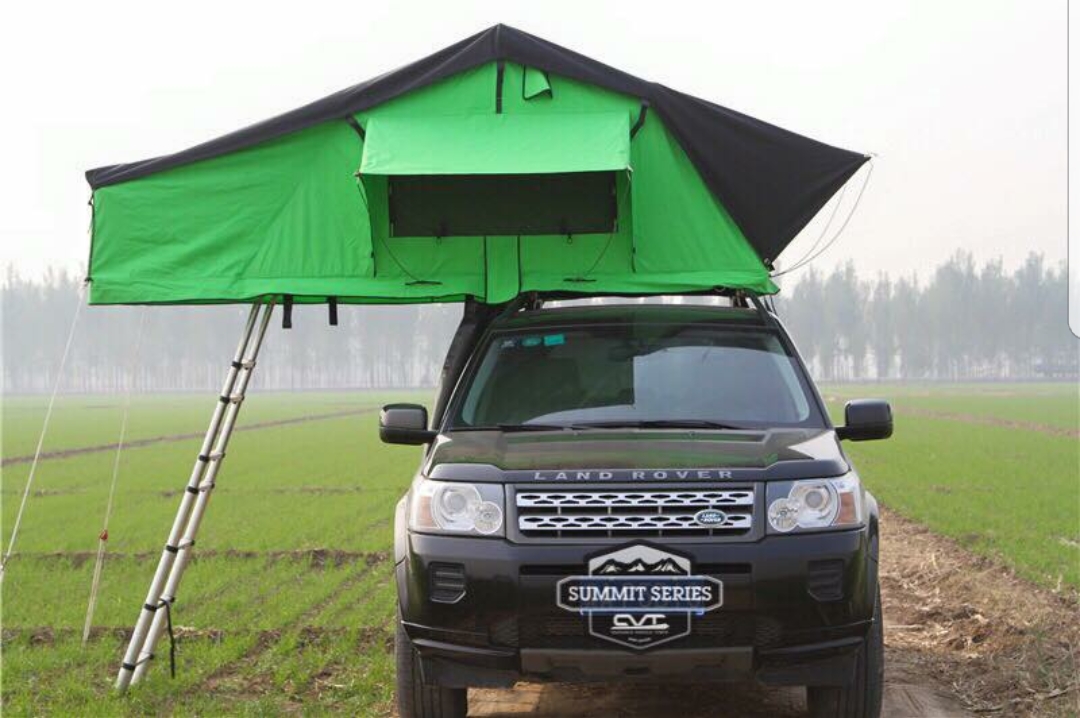
There she is in all her glory! I can't wait to try her out on a camping trip. This CVT roof top tent extremely easy to set up. It takes approximately 5 minutes to set up without the annex. And approximately 10 more minutes or so to do the annex (only because I'm not used to setting it up yet). The annex floor has enough space to fit at least a full size may be even a queen sized blow up bed.
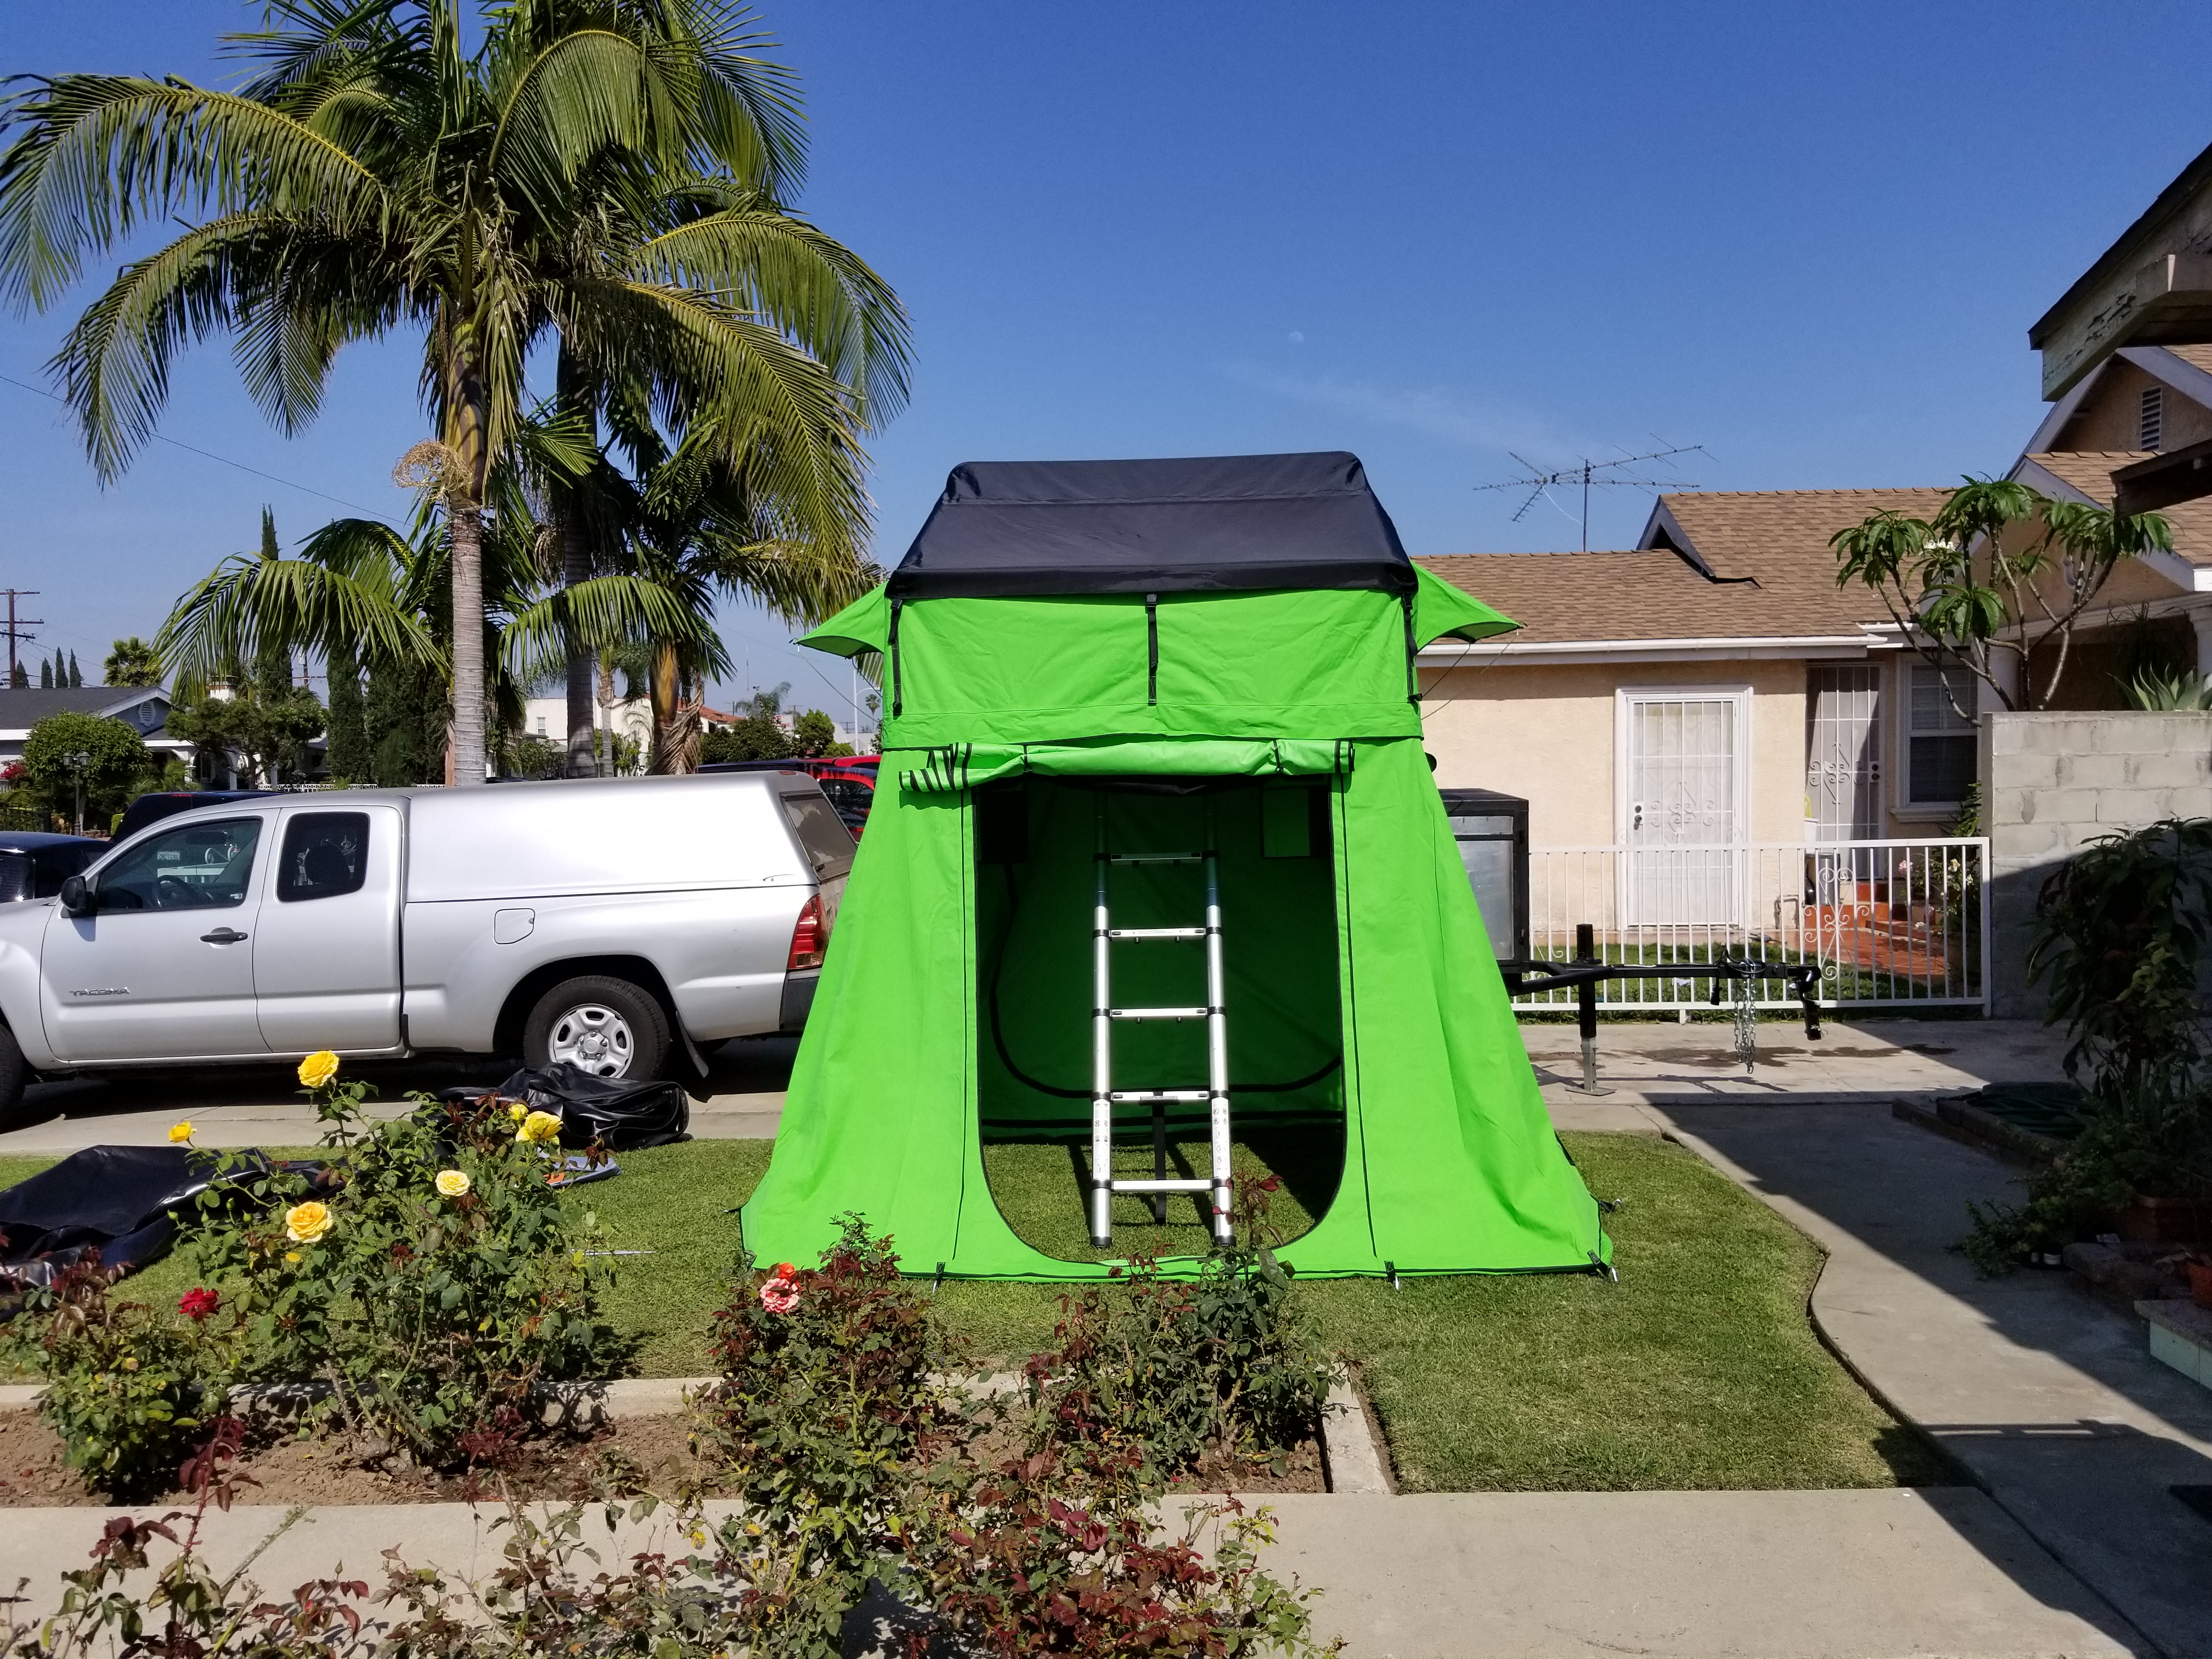
This is the set up without the annex.

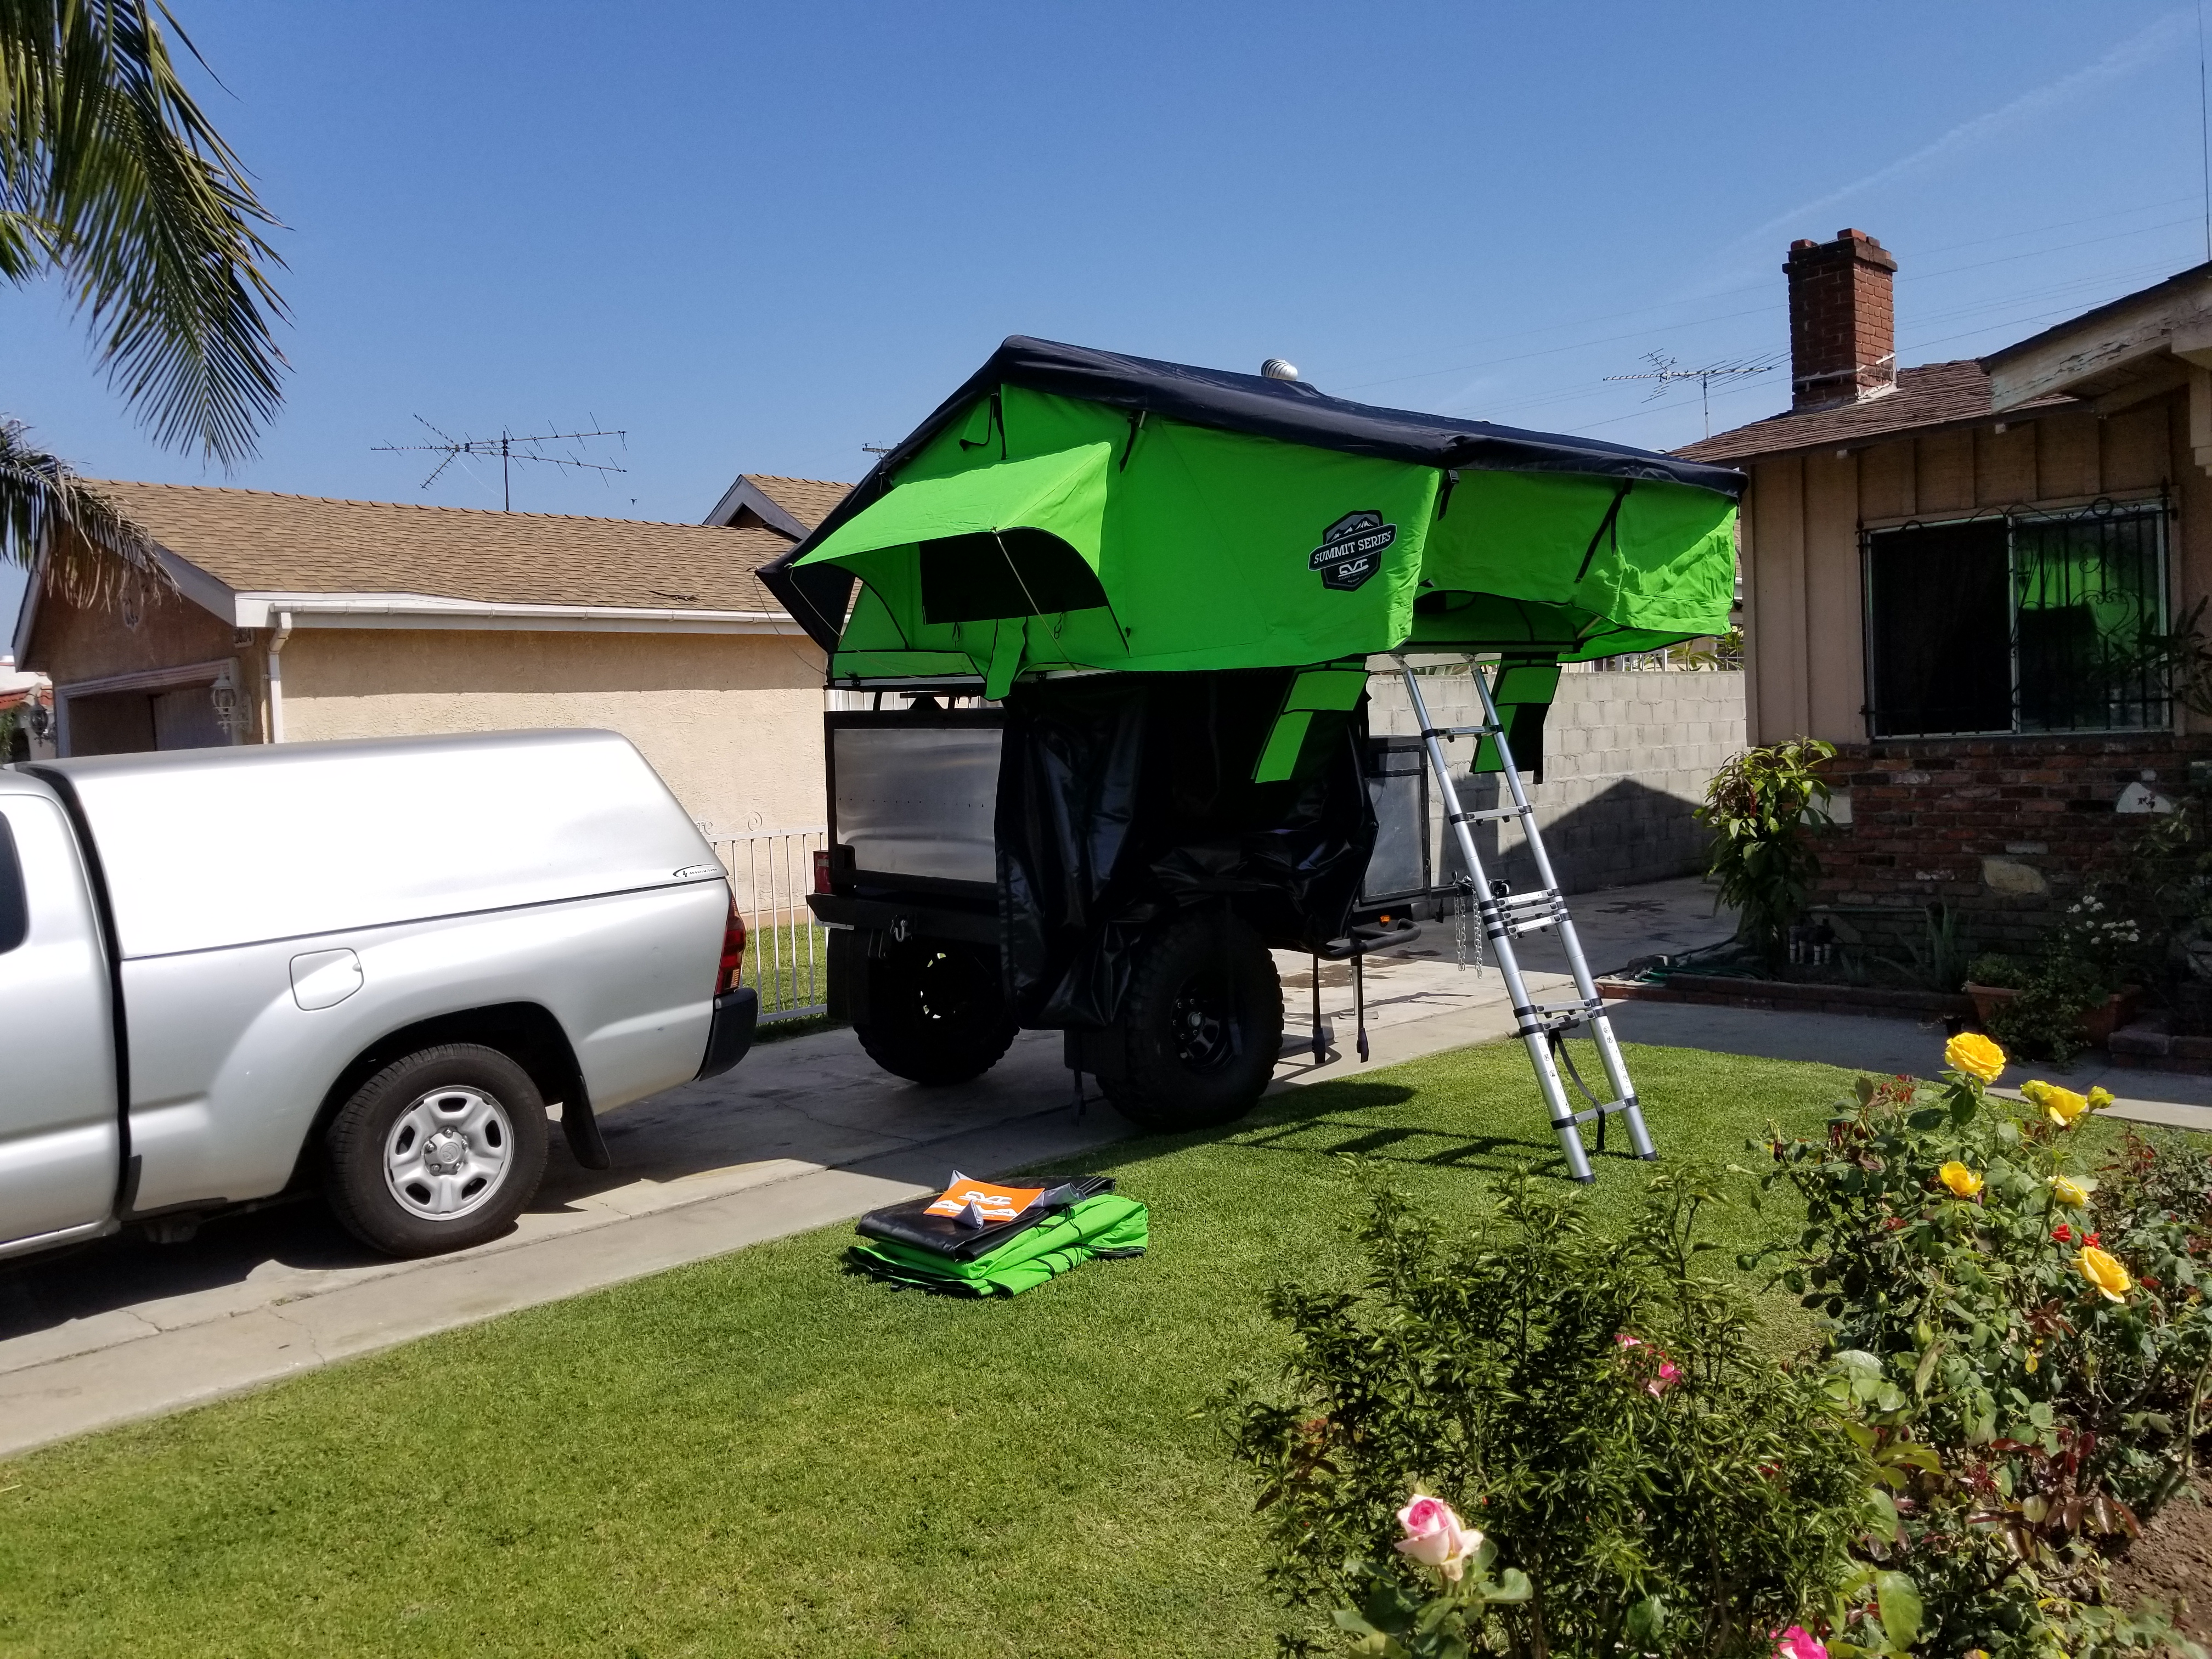
Don't worry about that telescoping ladder, i just hadnt figured out how to properly adjust it in these pix. It looks crooked in the pix. After i had figured it out i adjusted the unused steps and moved them all to the top.
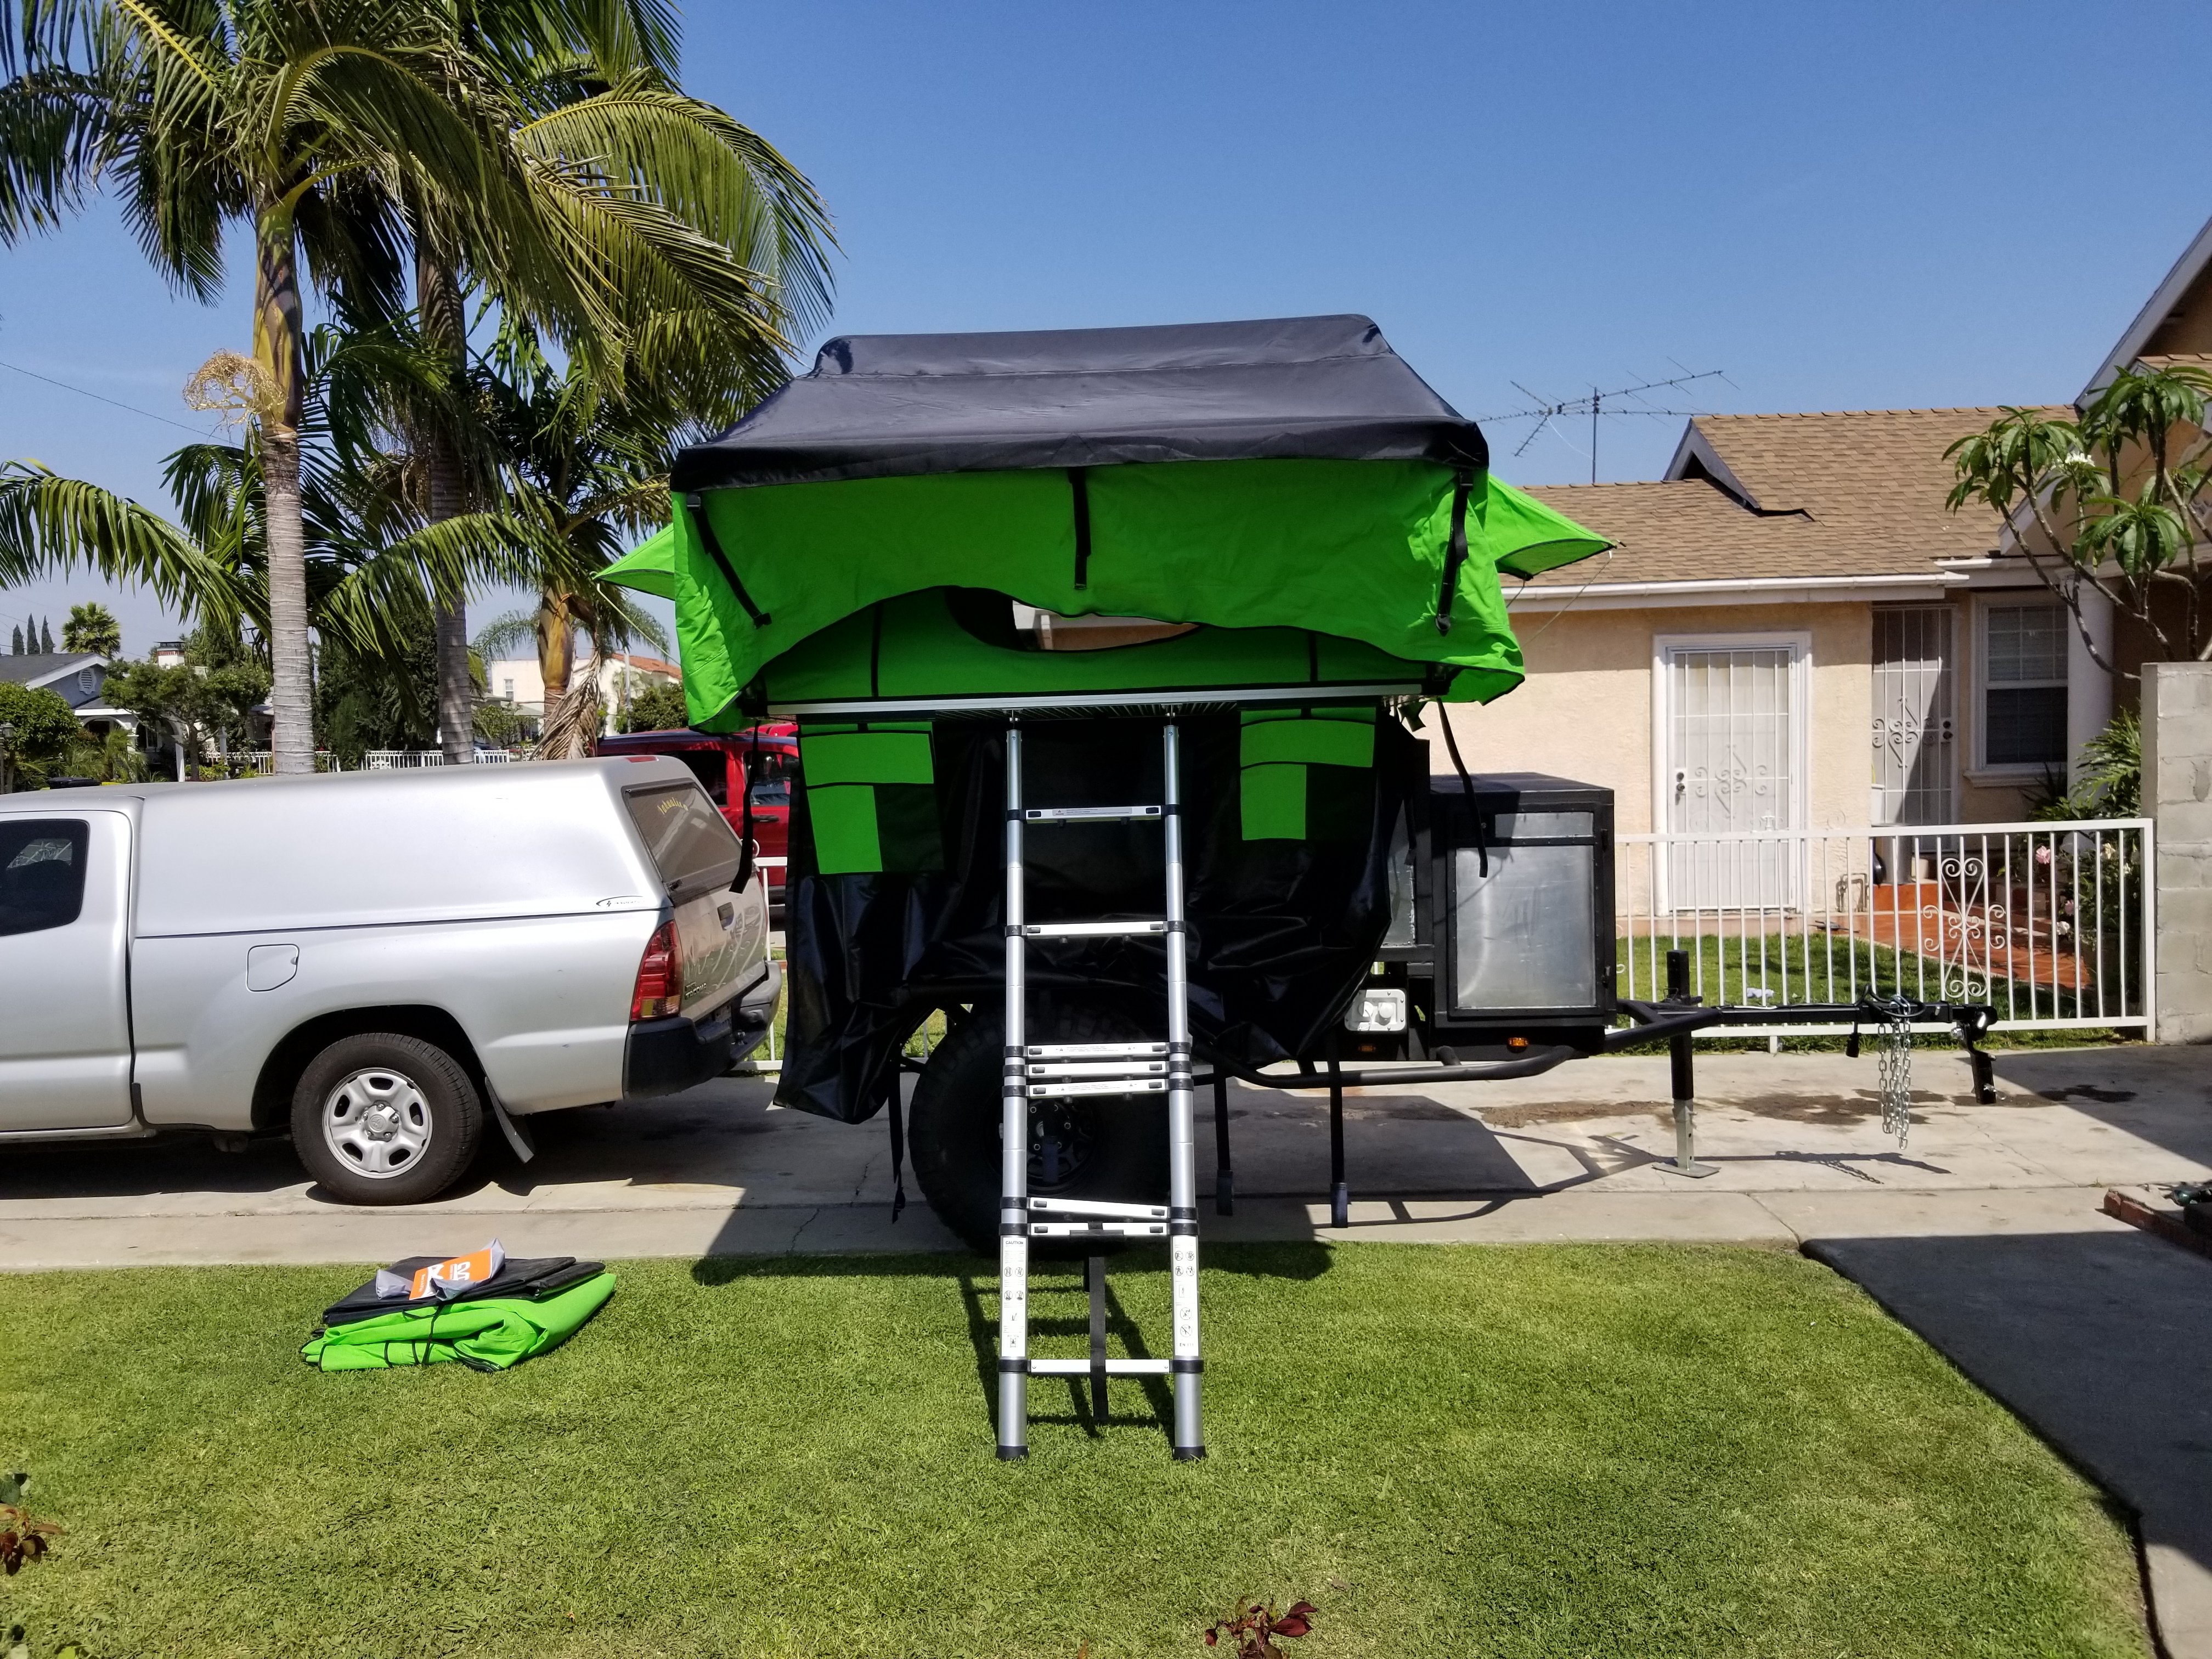
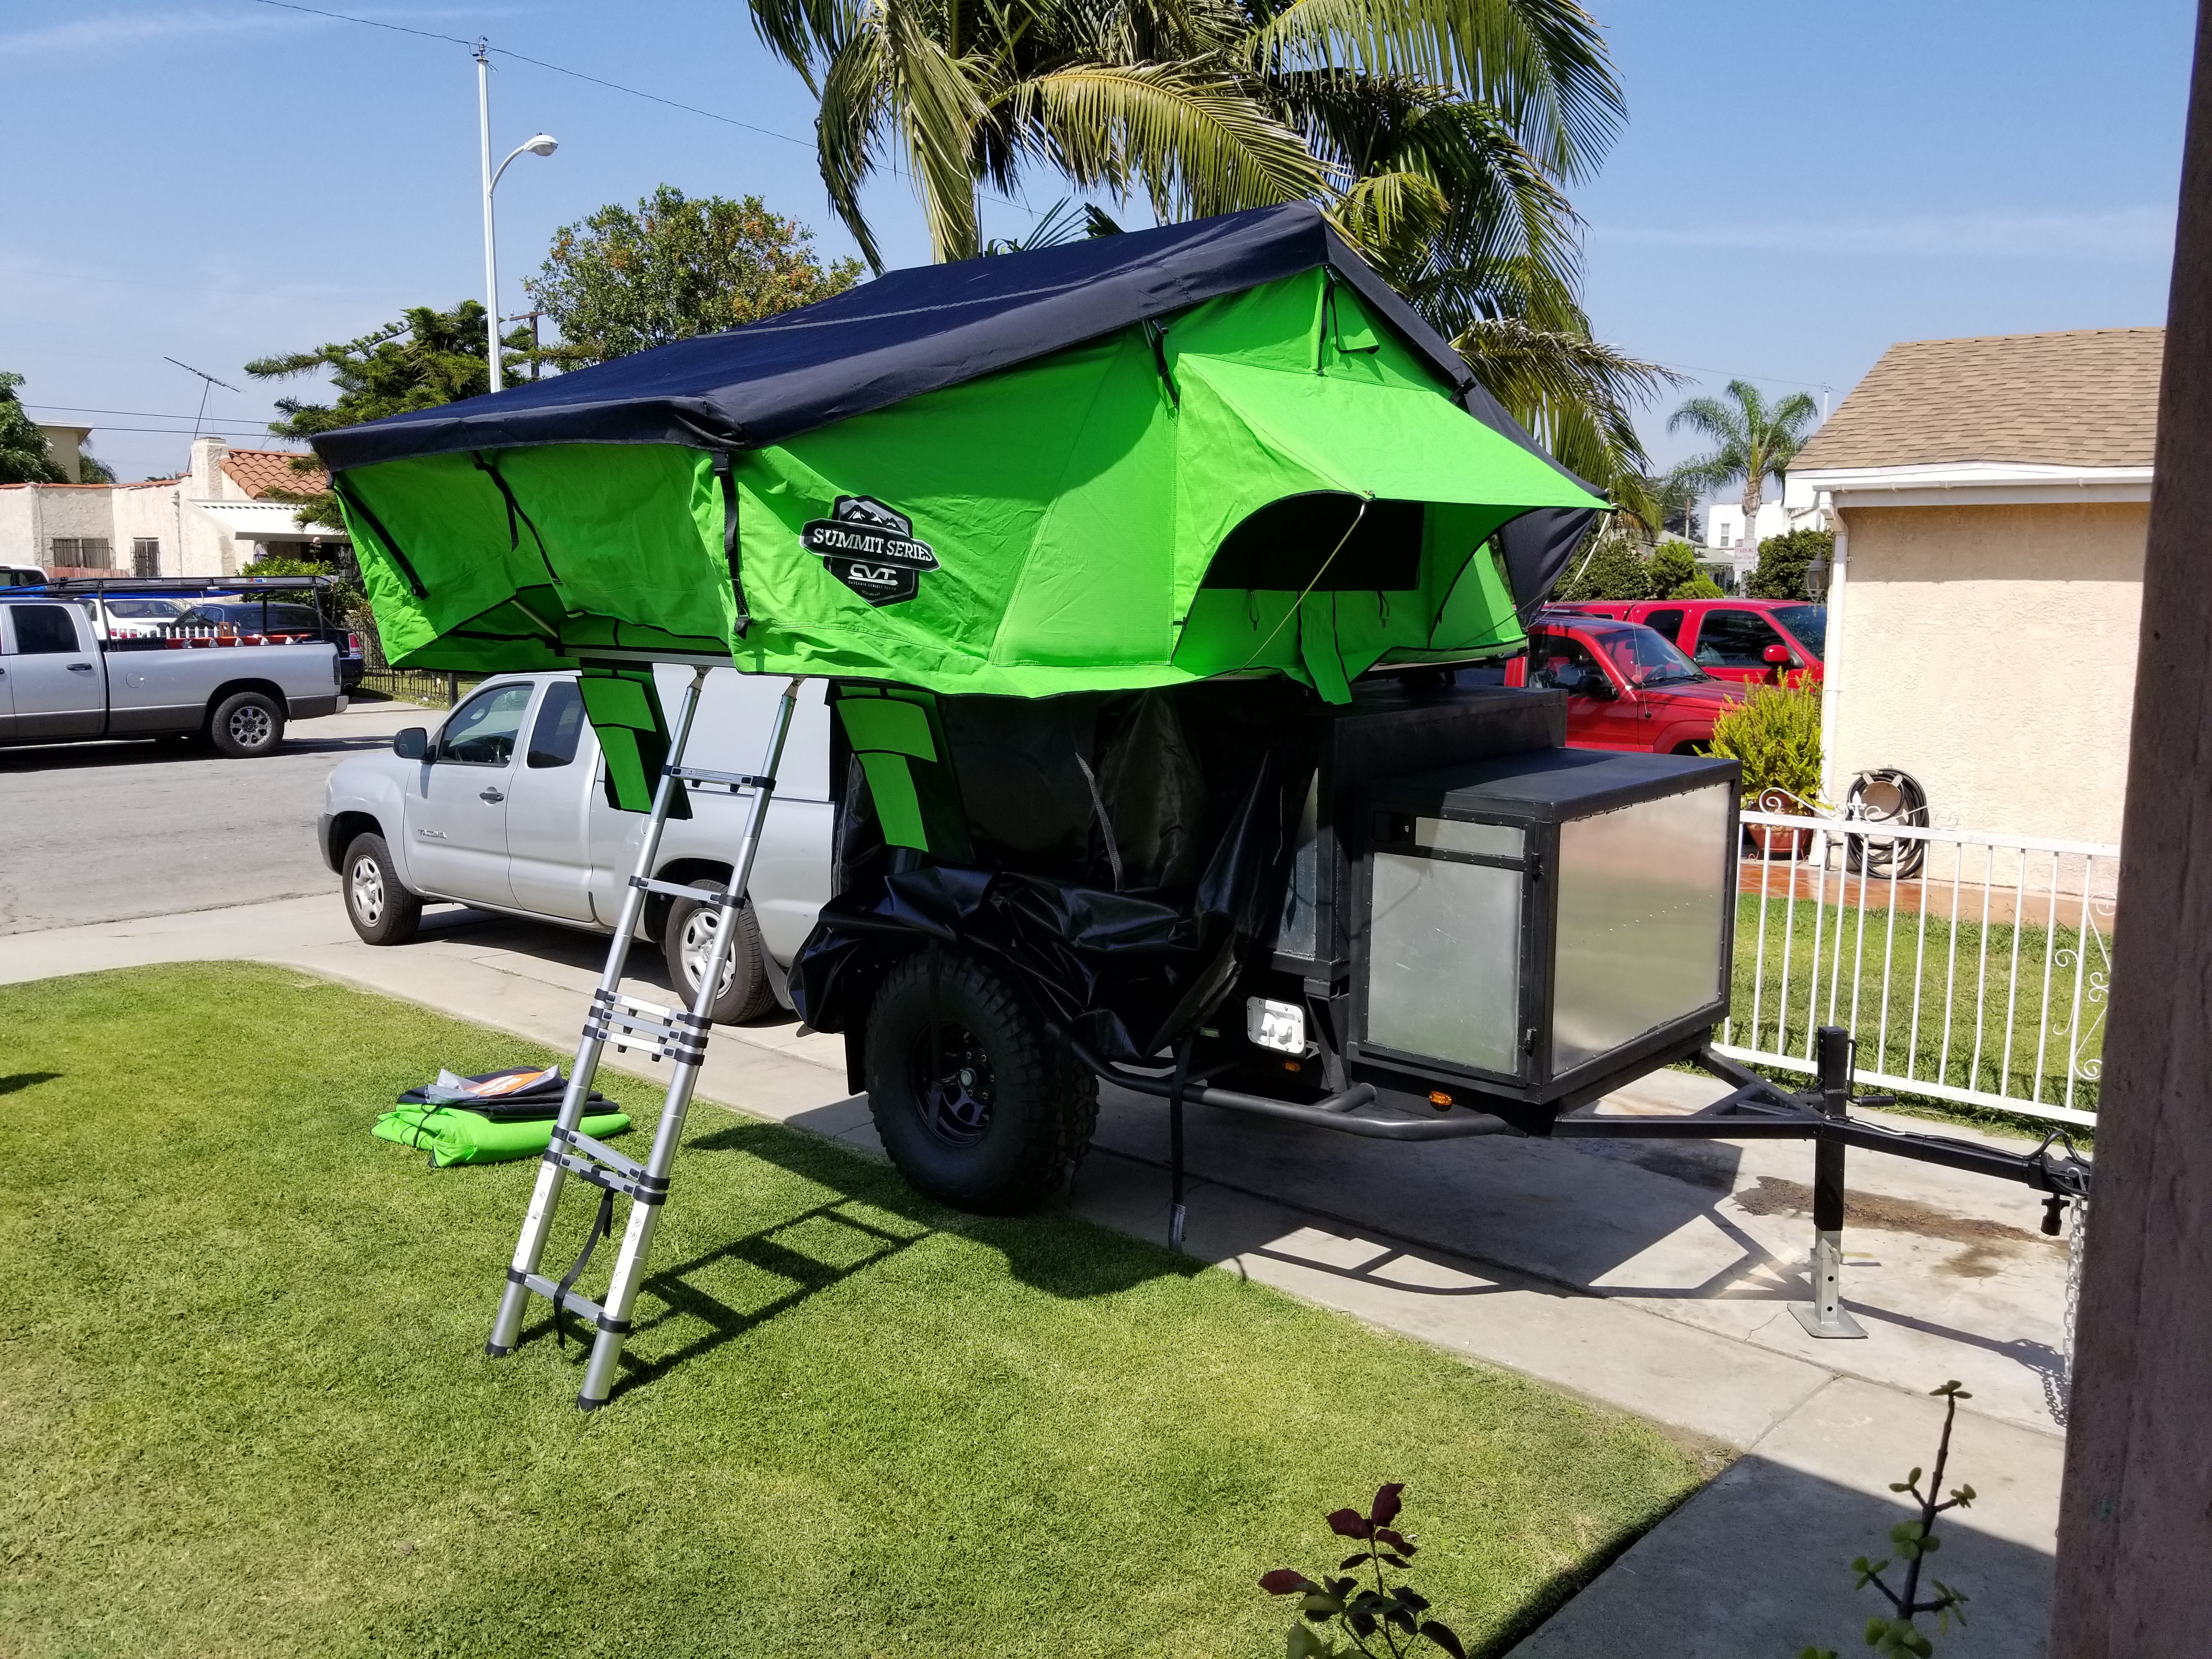
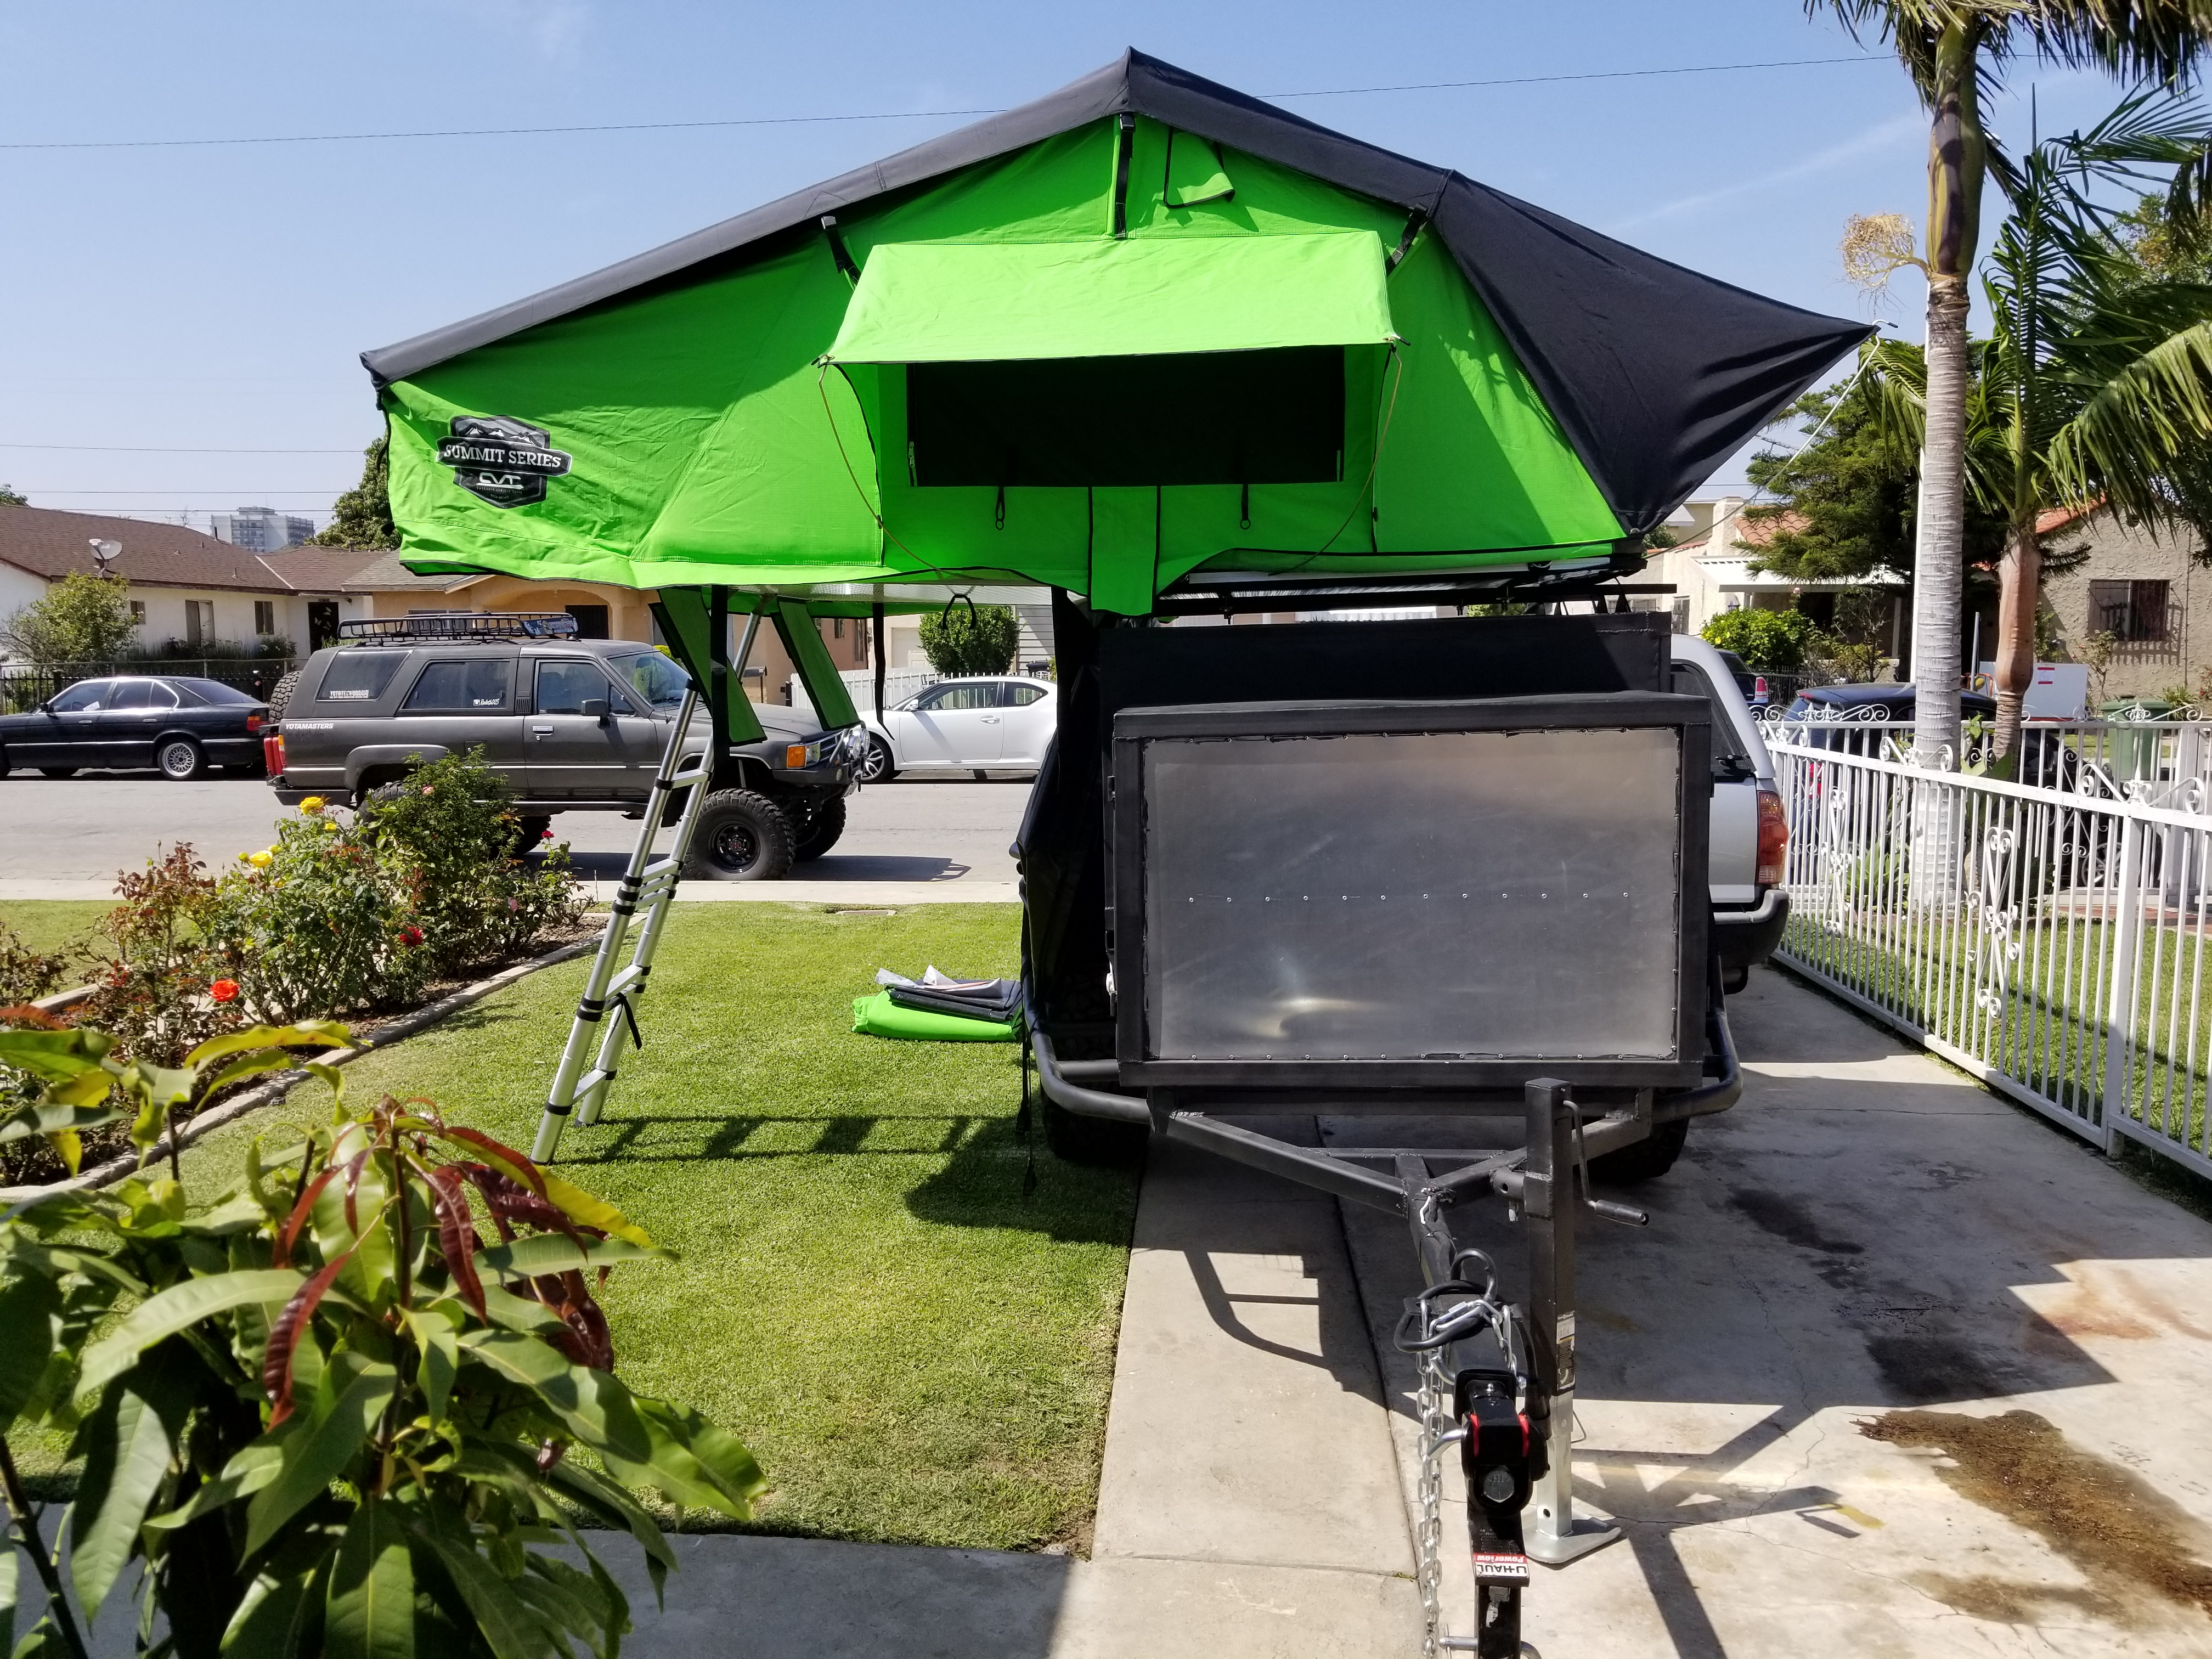
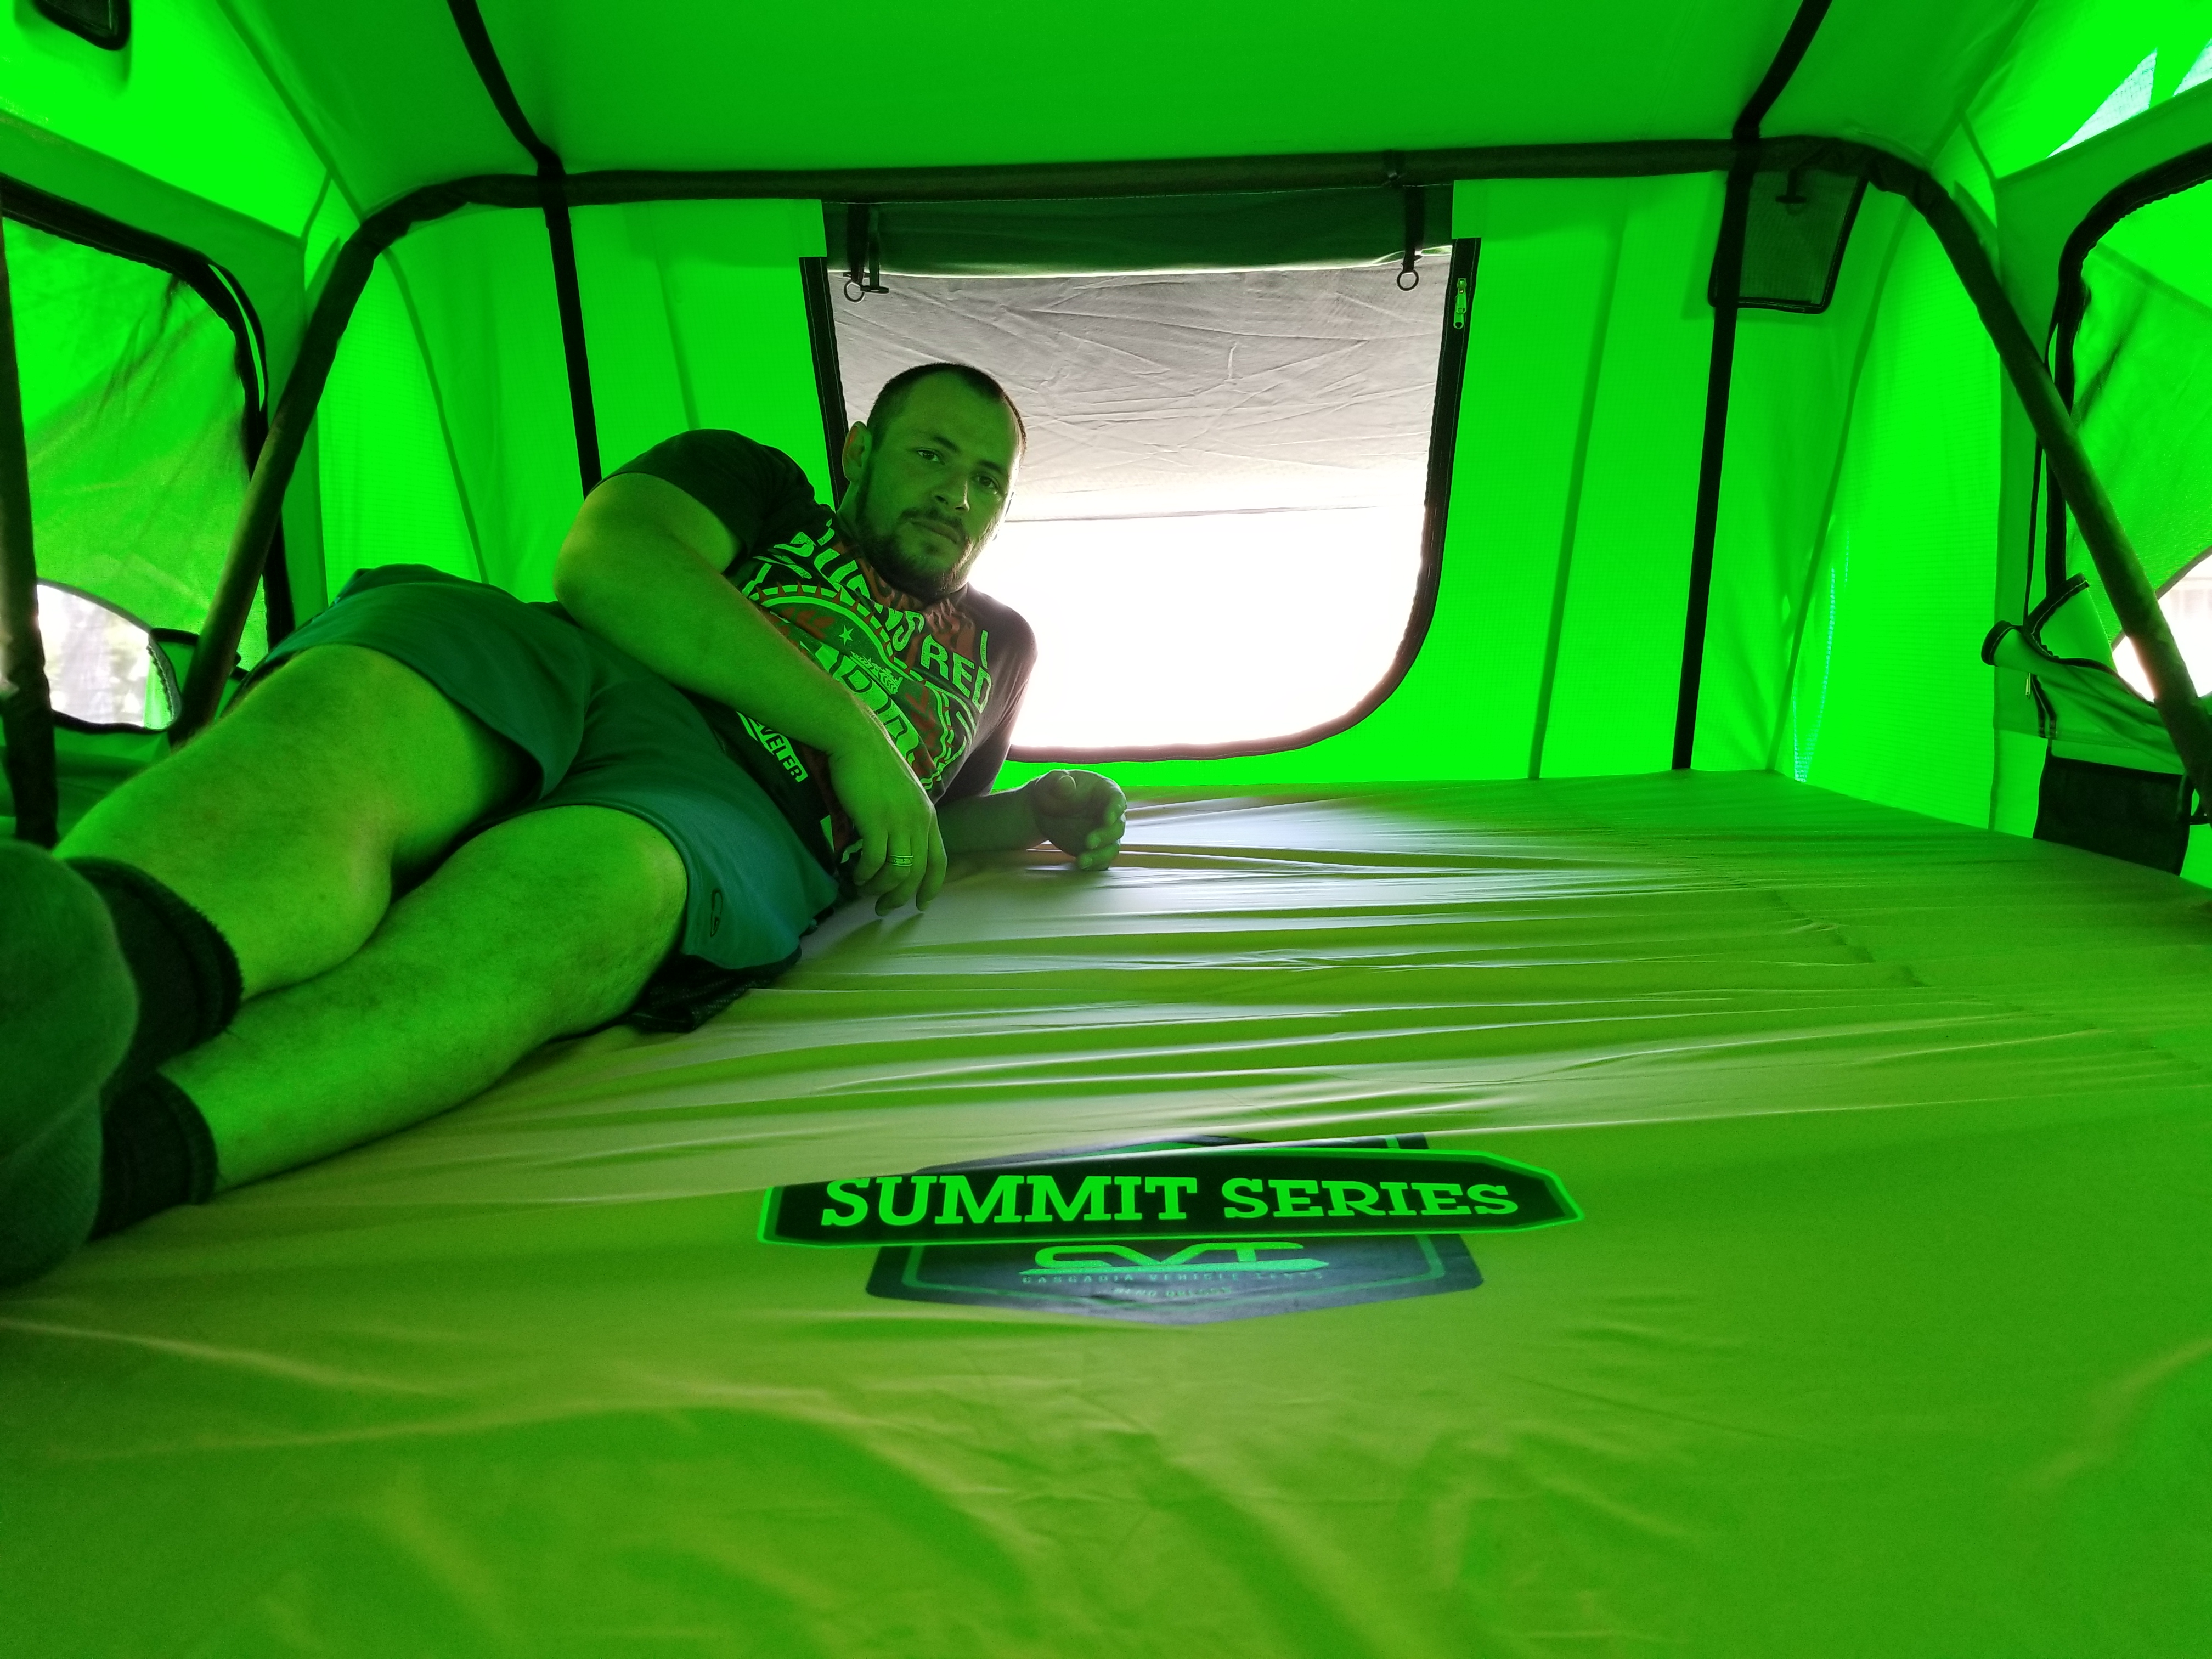
It's huge. And as you can see on the inside picture you can see how much space is still inside. I am 5'8" 260lbs. And there's enough space to fit 3 of me up there. There will definitely be plenty of space for my girl and I and with her son Isaac.
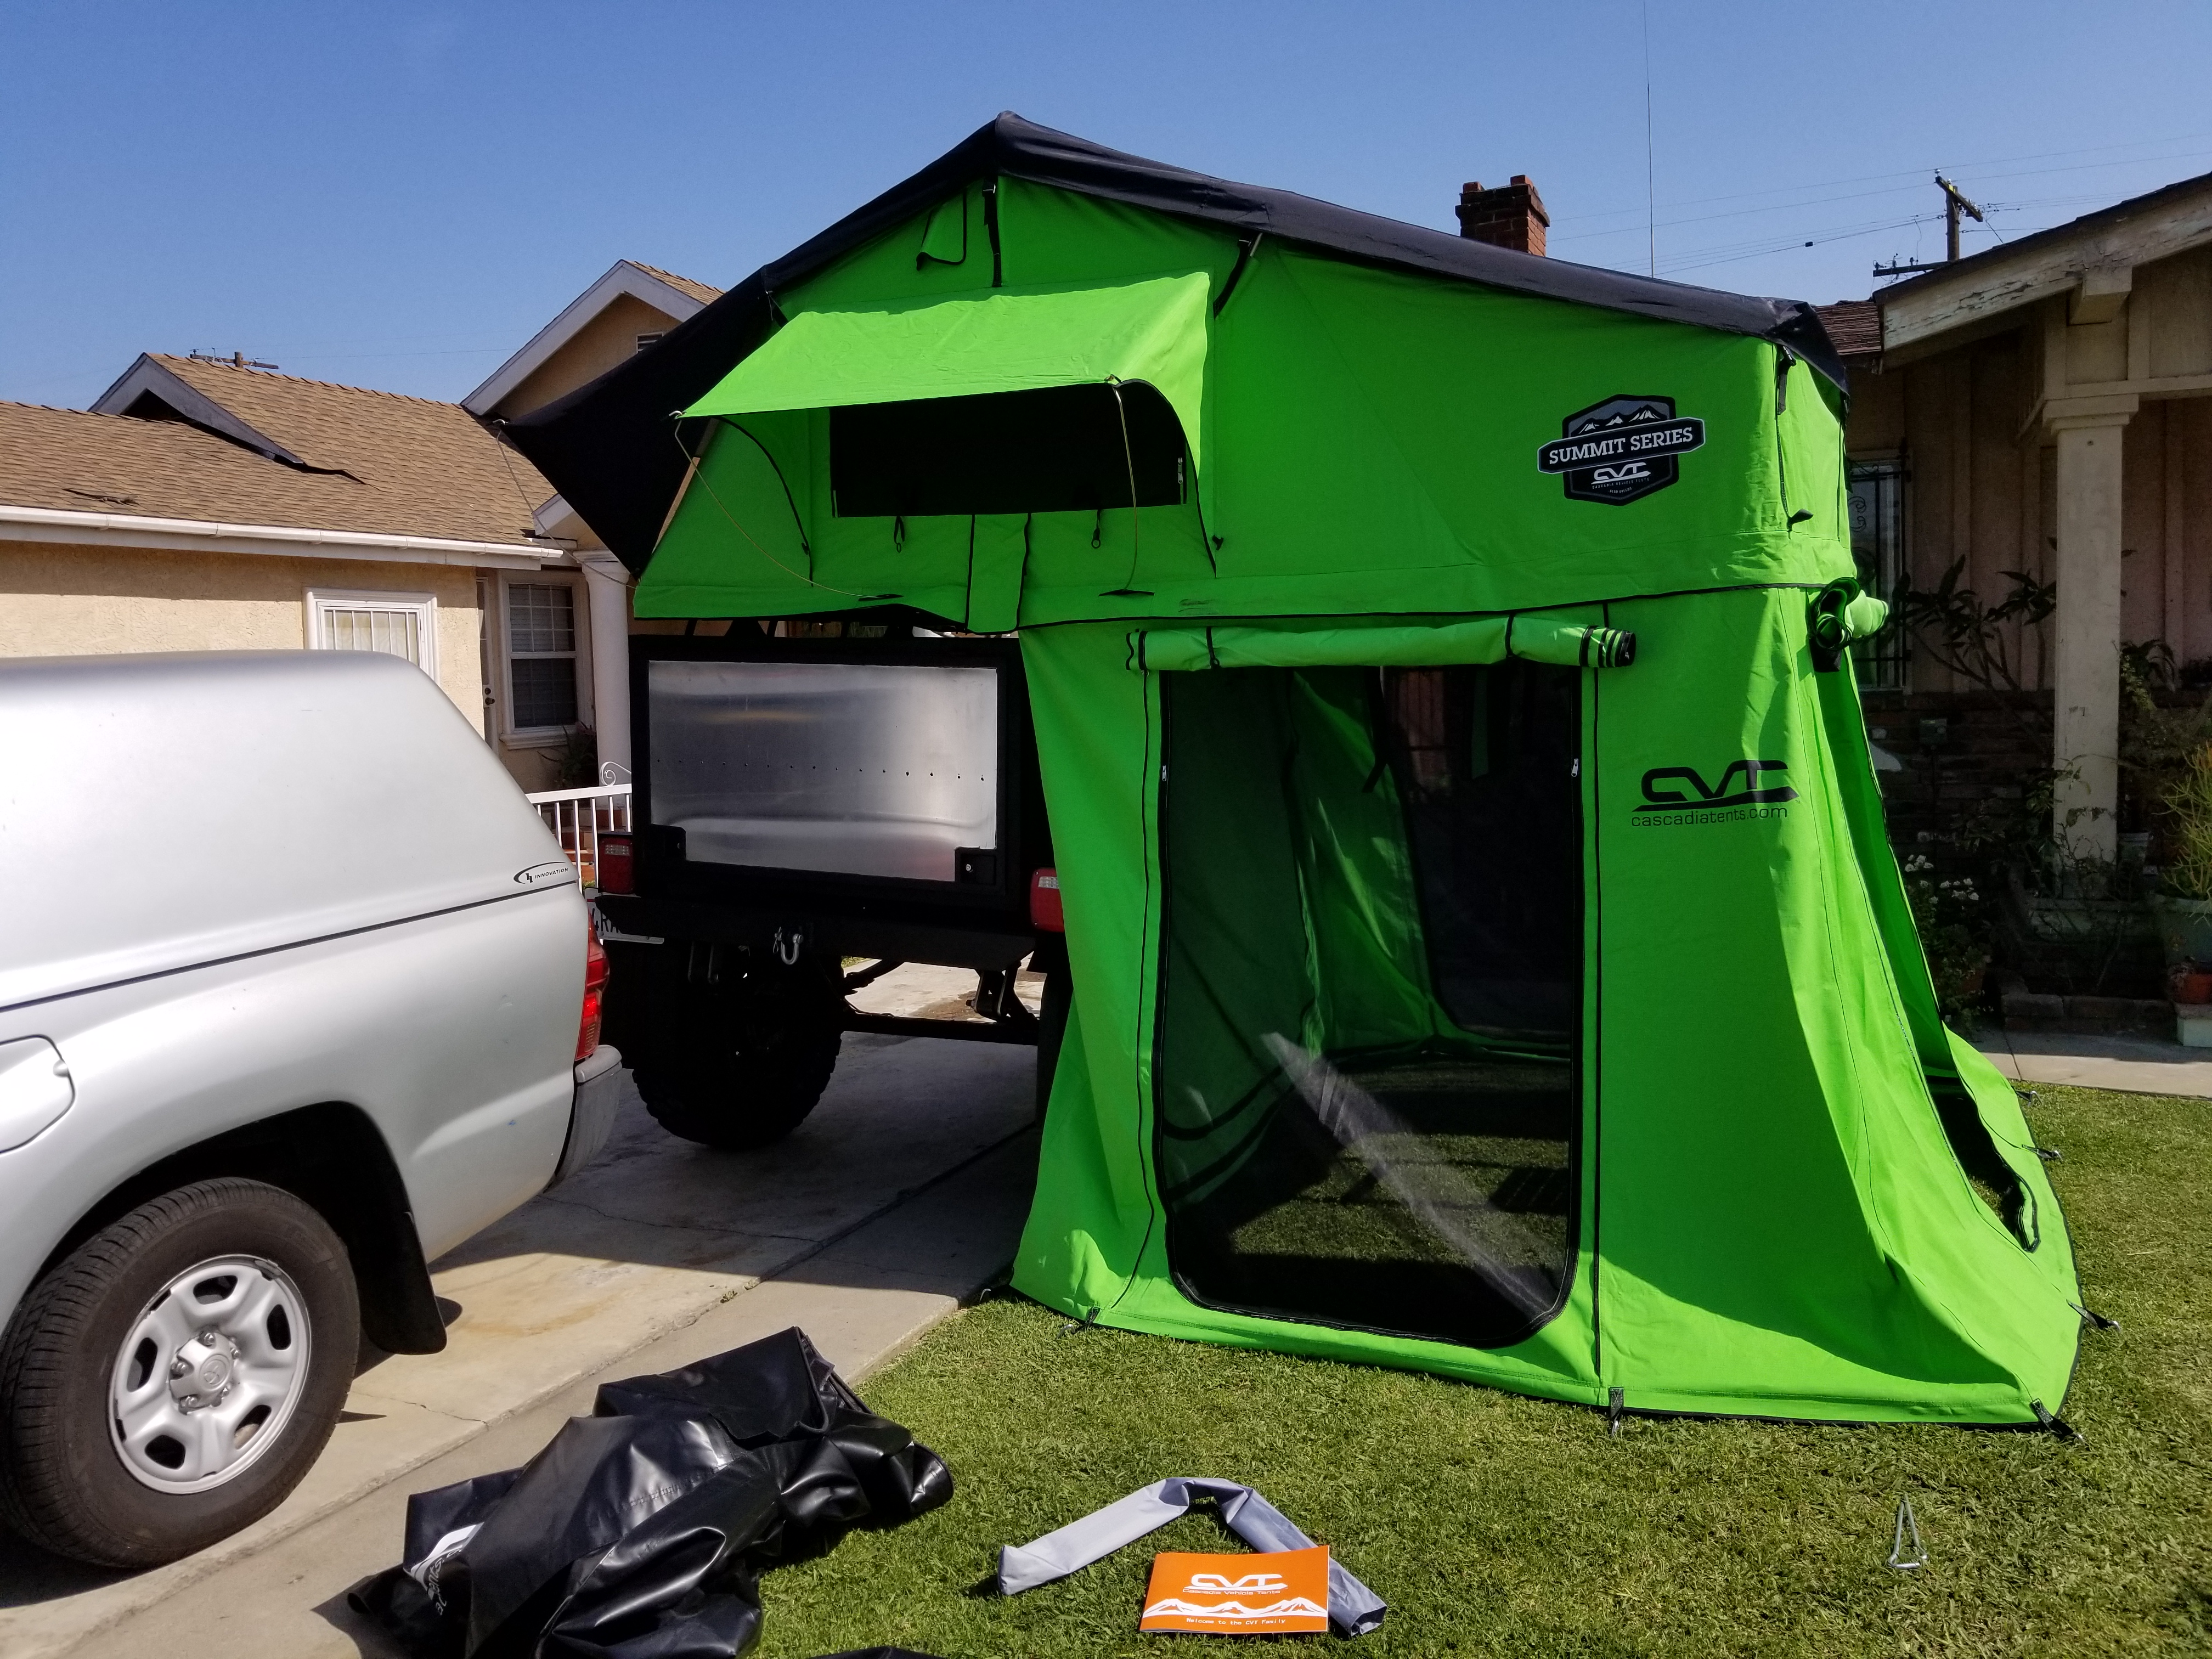
I later learned while trying to set up the annex that getting it ready would be a hell of a lot easier if i had put the annex floor in front of the side of the trailer (where the tent opens up to). Another thing is setting up the annex would be 100% easier to remove the CVT tent cover completely because the annex slides into the same channel across the side of the fold that holds the cover on. and trying to get it inside is much harder to do once it is popped open and already set up. So next time i would definitely place the annex floor. Route the annex through the channel on the side of the tent. Then open up the tent and place the ladder on the center of the annex then pull up the annex and zip it up followed by the rest of the set up. Also considering it may be windy on some days the annex stakes would be handy to place right after it is zipped to the actual roof top tent.
Here you can see where i had already fixed the ladder issue. Now it looks good!
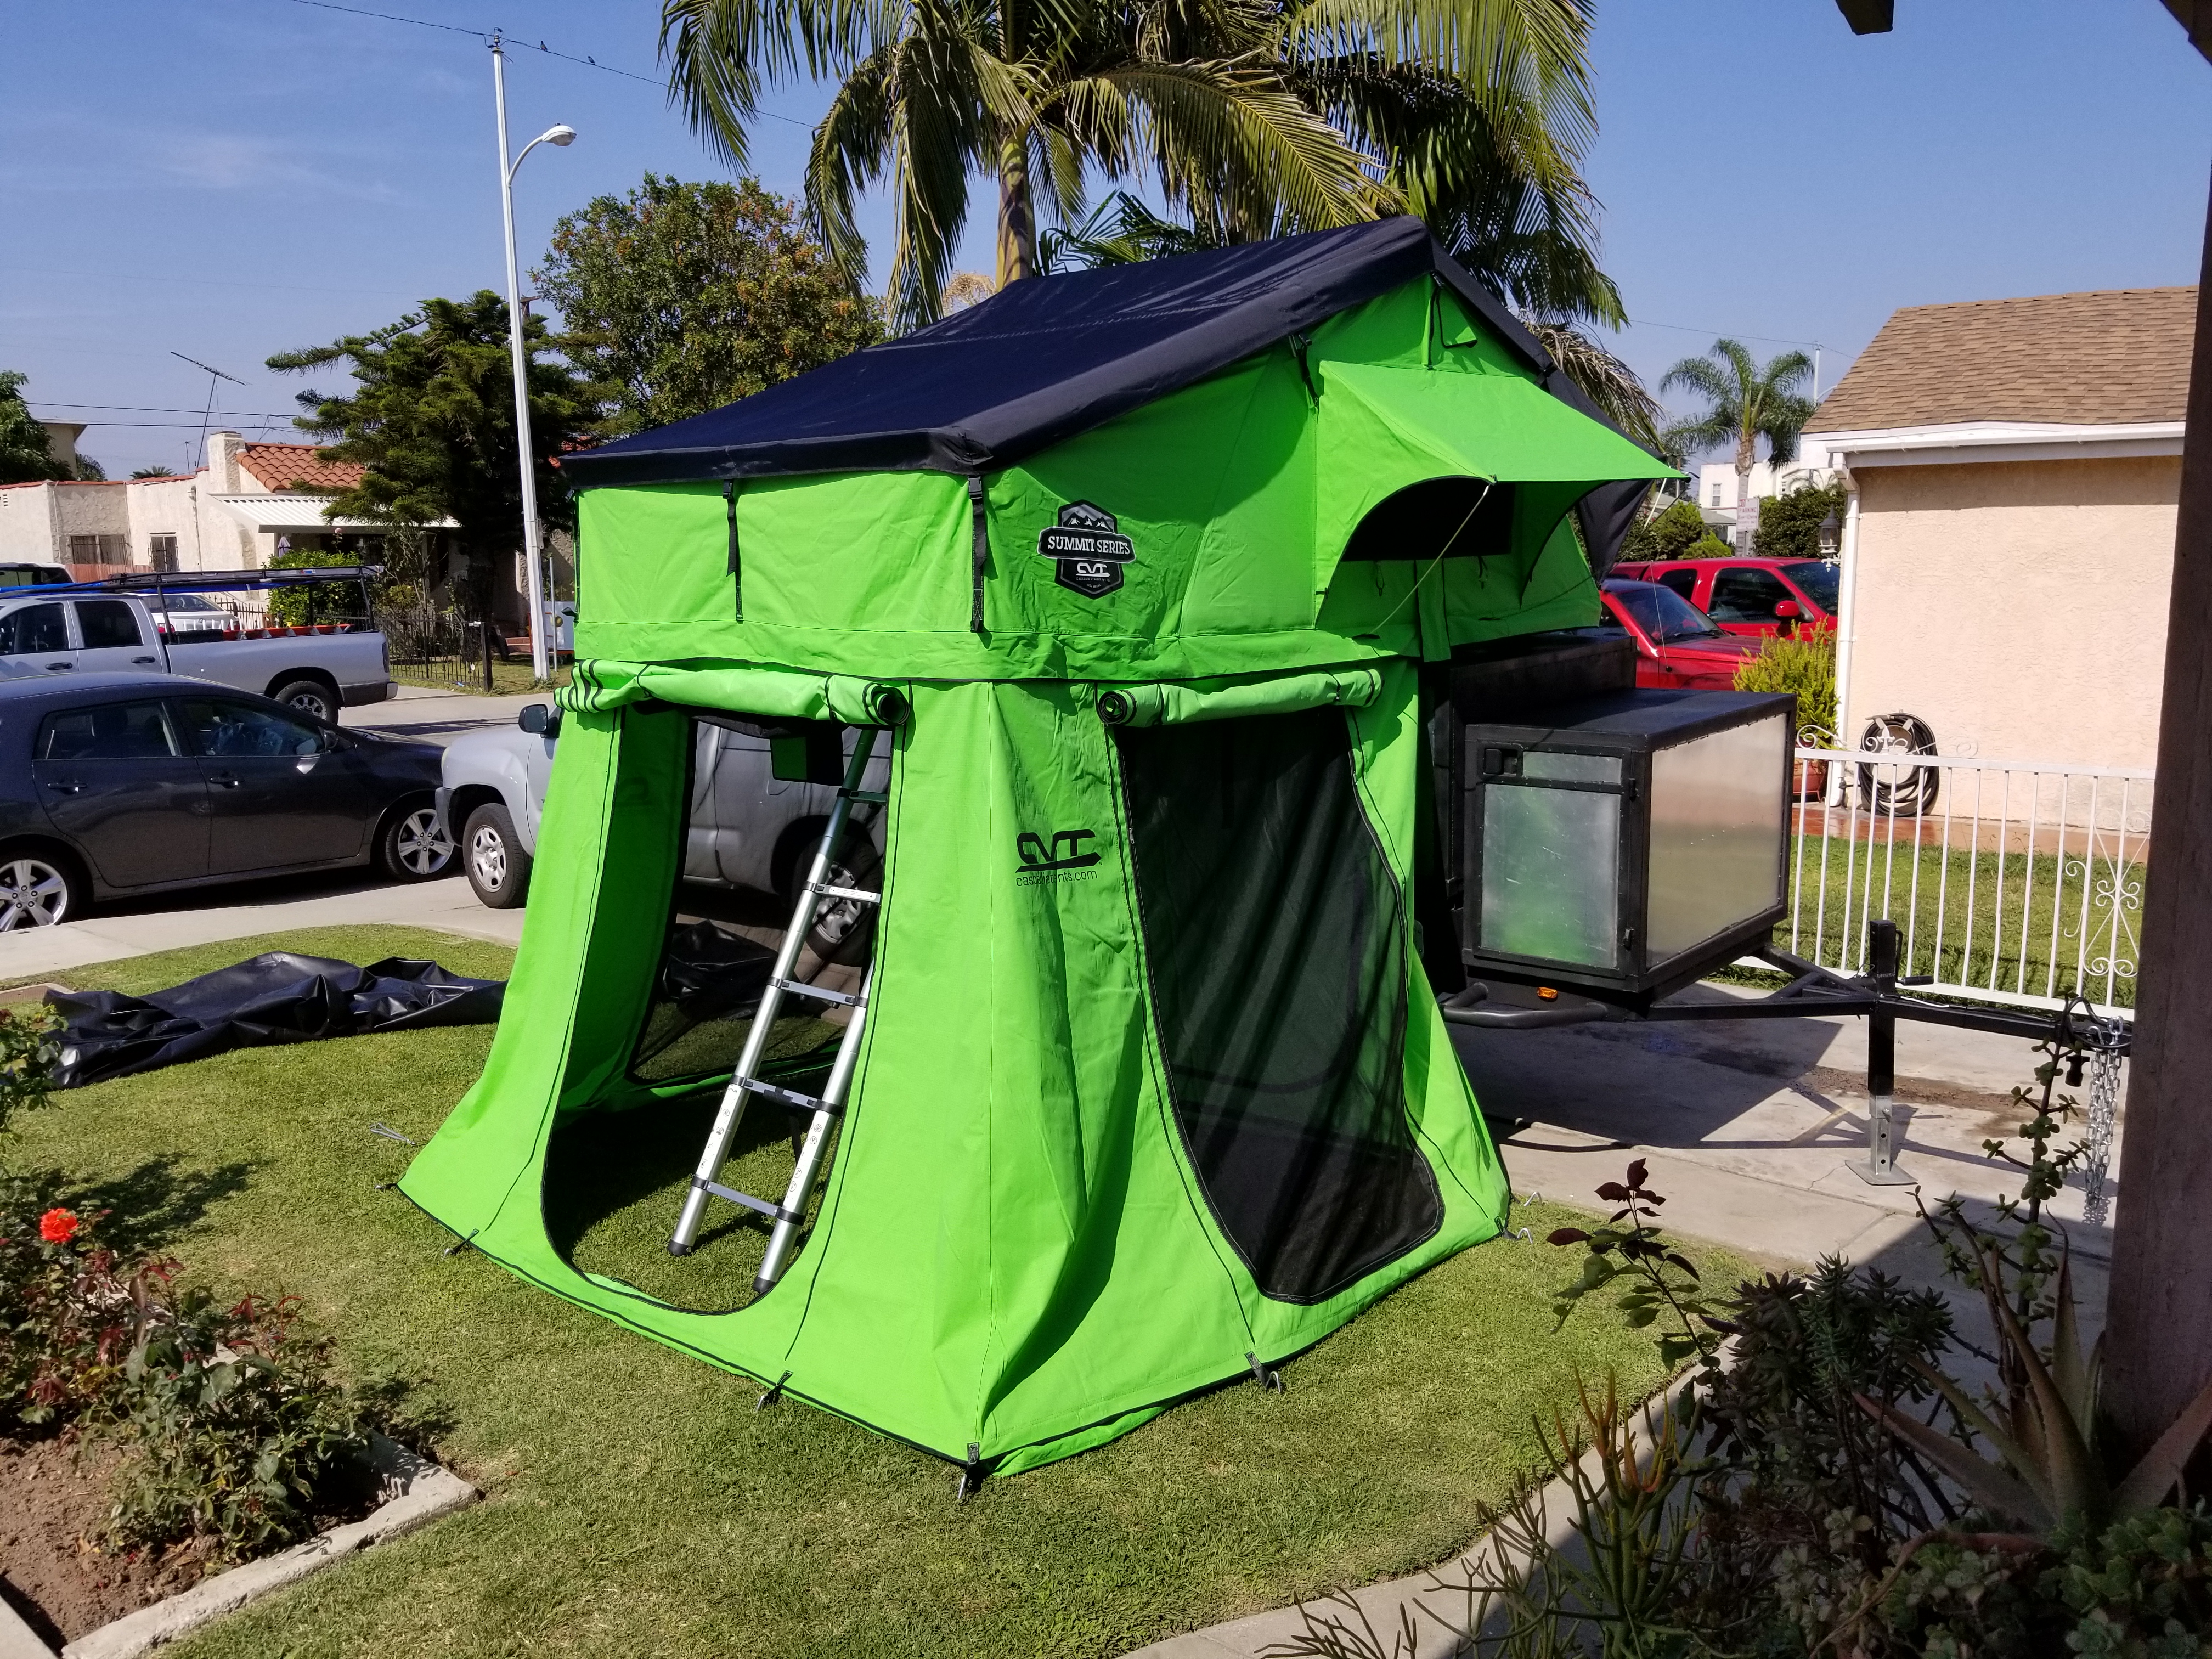
The trailer looks tiny with this tent/annex set up lol
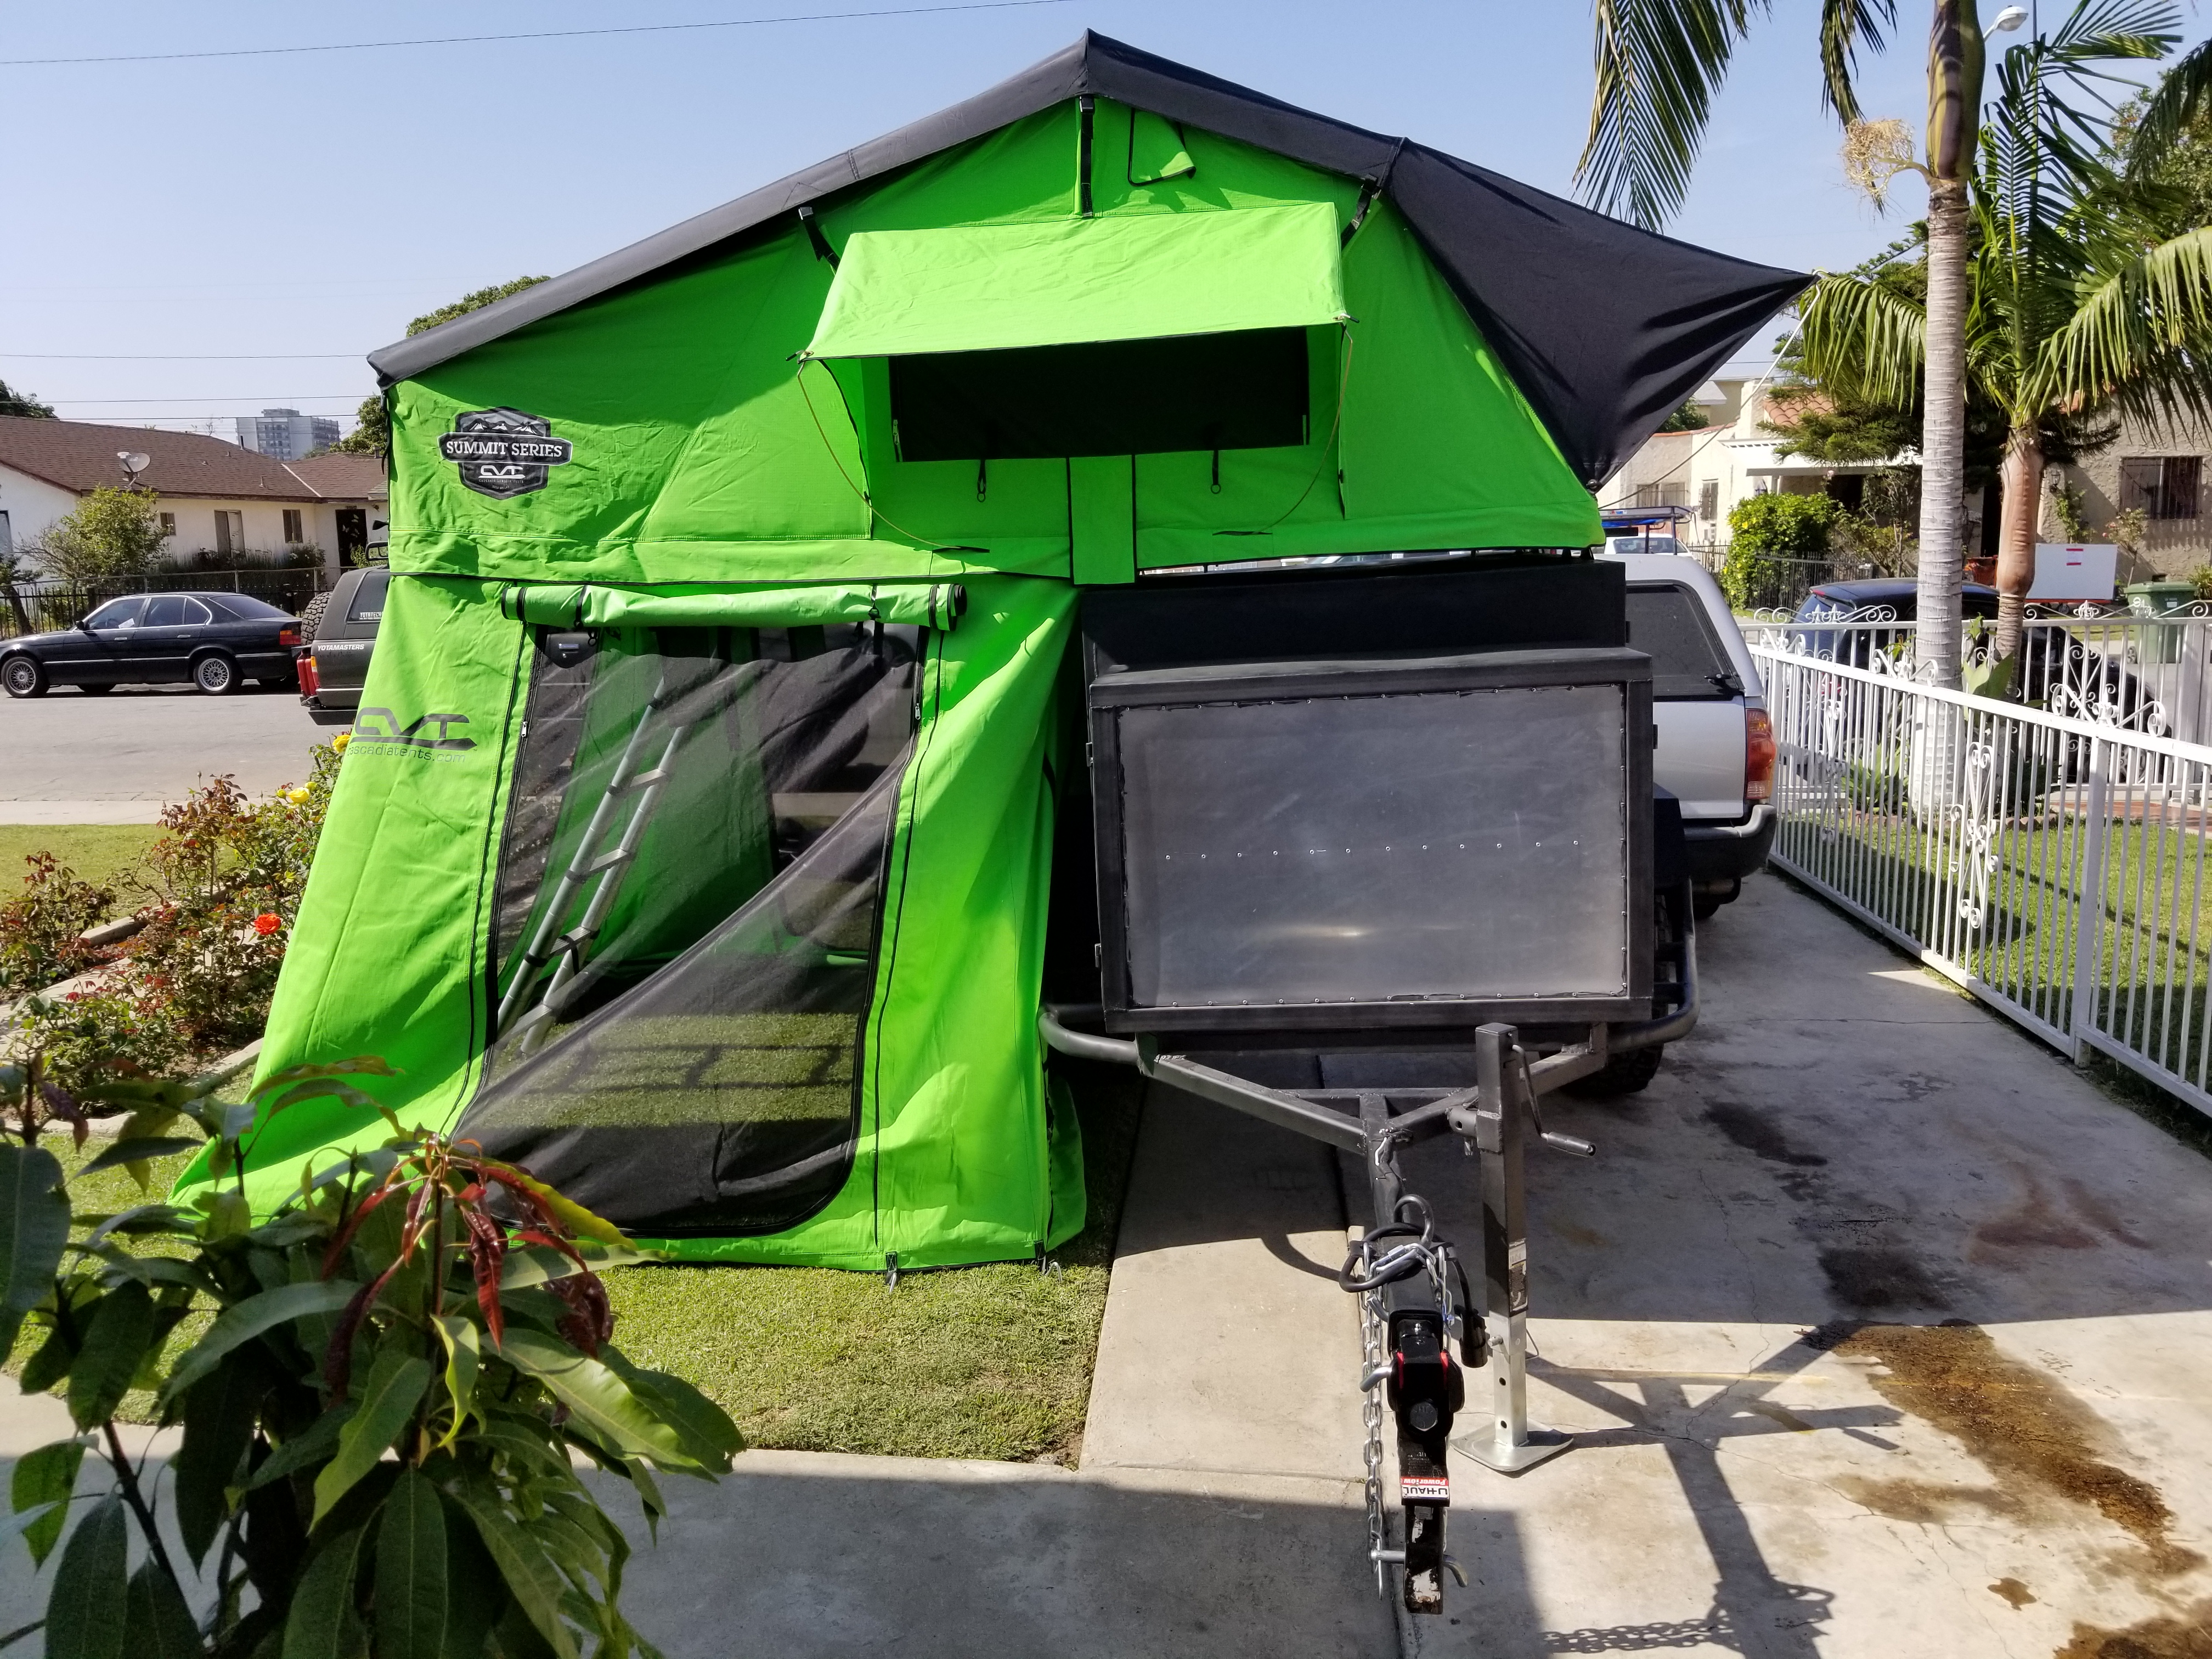
Today was a pretty hot day. It reached almost 90 degrees. So when when my girl, Veronica, and i were setting up the tent we quickly learned that the aluminum metal floors and telescoping ladder get extremely hot; EVEN WITH THE TENT COVER! Opening up the tent at first was pretty hard because it burned to the first touch so i cant imagine how the heck we are gonna set up camp in desert areas lol At first with the crazy heat wave that we had i realized it was pretty hot inside that tent. BUT with all the windows open the inside of the tent we saw a huge temperature drop within the first minute. Especially since the tent sit's up high we got a really nice breeze. I had all the doors(minus screens) open and it wasn't too bad. I'm sure if we added a couple 12v fans in there it would be even better!
Also like i said earlier, I am 5'8" and i was able to stand under the annex just fine. The bottom floor barely touched my head so i approve. The height i built this thing at was perfect. Going with a 3" lift on the trailer was an excellent choice.

There she is in all her glory! I can't wait to try her out on a camping trip. This CVT roof top tent extremely easy to set up. It takes approximately 5 minutes to set up without the annex. And approximately 10 more minutes or so to do the annex (only because I'm not used to setting it up yet). The annex floor has enough space to fit at least a full size may be even a queen sized blow up bed.
This is the set up without the annex.


Don't worry about that telescoping ladder, i just hadnt figured out how to properly adjust it in these pix. It looks crooked in the pix. After i had figured it out i adjusted the unused steps and moved them all to the top.


It's huge. And as you can see on the inside picture you can see how much space is still inside. I am 5'8" 260lbs. And there's enough space to fit 3 of me up there. There will definitely be plenty of space for my girl and I and with her son Isaac.

I later learned while trying to set up the annex that getting it ready would be a hell of a lot easier if i had put the annex floor in front of the side of the trailer (where the tent opens up to). Another thing is setting up the annex would be 100% easier to remove the CVT tent cover completely because the annex slides into the same channel across the side of the fold that holds the cover on. and trying to get it inside is much harder to do once it is popped open and already set up. So next time i would definitely place the annex floor. Route the annex through the channel on the side of the tent. Then open up the tent and place the ladder on the center of the annex then pull up the annex and zip it up followed by the rest of the set up. Also considering it may be windy on some days the annex stakes would be handy to place right after it is zipped to the actual roof top tent.


Here you can see where i had already fixed the ladder issue. Now it looks good!


The trailer looks tiny with this tent/annex set up lol


Today was a pretty hot day. It reached almost 90 degrees. So when when my girl, Veronica, and i were setting up the tent we quickly learned that the aluminum metal floors and telescoping ladder get extremely hot; EVEN WITH THE TENT COVER! Opening up the tent at first was pretty hard because it burned to the first touch so i cant imagine how the heck we are gonna set up camp in desert areas lol At first with the crazy heat wave that we had i realized it was pretty hot inside that tent. BUT with all the windows open the inside of the tent we saw a huge temperature drop within the first minute. Especially since the tent sit's up high we got a really nice breeze. I had all the doors(minus screens) open and it wasn't too bad. I'm sure if we added a couple 12v fans in there it would be even better!
Also like i said earlier, I am 5'8" and i was able to stand under the annex just fine. The bottom floor barely touched my head so i approve. The height i built this thing at was perfect. Going with a 3" lift on the trailer was an excellent choice.
 06-04-2017, 10:12 AM
#136
Registered User
Thread Starter
Just gonna leave these links here for a while. This is gonna be some of the items i need to buy for the propane gas, wiring, and heater duct stuff that will be needed to pass from the inside of the front compartment to the outside.
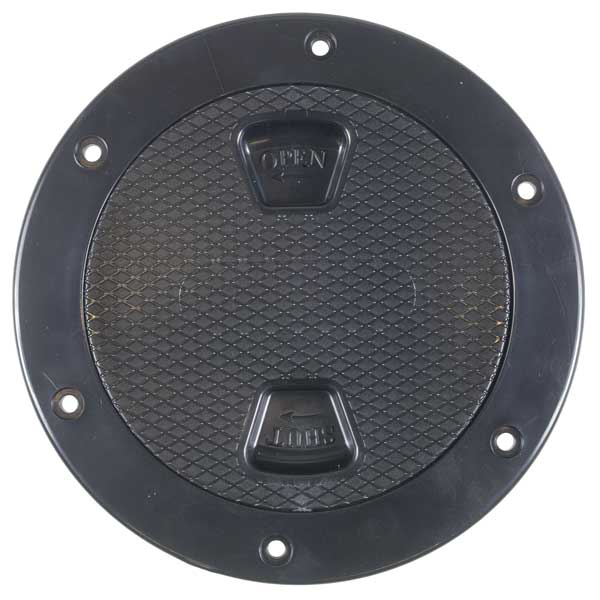
Hatch:
This is what i plan to use to route the Propex heater ducting from the inside of that front compartment and allow it to pass through the wall to the outside where i can route it into the tent. then when its time to pack up i just remove the ducting and close up this port.
https://www.westmarine.com/buy/west-...gGABoCFHDw_wcB
I still need to find the waterproof (tight seal) wire grommets that allow the electrical wires to pass in and out of the trailer with no water leaks too. I had in mind something like this:
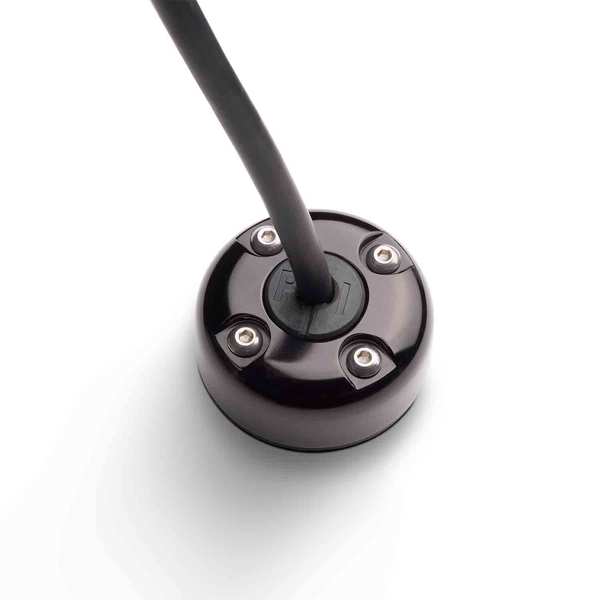
https://www.westmarine.com/buy/pyi--..._X7xoCQ5fw_wcB
https://www.westmarine.com/buy/pyi--..._X7xoCQ5fw_wcB
Next i am going to have to find a safe way to pass the propane line into that front compartment to feed my Propex heater. This one has to be waterproof but still be able to pass through the solid aluminum wall. I need to research this one a bit more. I'm open to any ideas or suggestions if you all have any.
Hatch:
This is what i plan to use to route the Propex heater ducting from the inside of that front compartment and allow it to pass through the wall to the outside where i can route it into the tent. then when its time to pack up i just remove the ducting and close up this port.

https://www.westmarine.com/buy/west-...gGABoCFHDw_wcB
I still need to find the waterproof (tight seal) wire grommets that allow the electrical wires to pass in and out of the trailer with no water leaks too. I had in mind something like this:

https://www.westmarine.com/buy/pyi--..._X7xoCQ5fw_wcB
https://www.westmarine.com/buy/pyi--..._X7xoCQ5fw_wcB
Next i am going to have to find a safe way to pass the propane line into that front compartment to feed my Propex heater. This one has to be waterproof but still be able to pass through the solid aluminum wall. I need to research this one a bit more. I'm open to any ideas or suggestions if you all have any.
Last edited by Redeth005; 06-04-2017 at 01:14 PM.
06-04-2017, 11:00 AM
#137
Registered User
Thread Starter
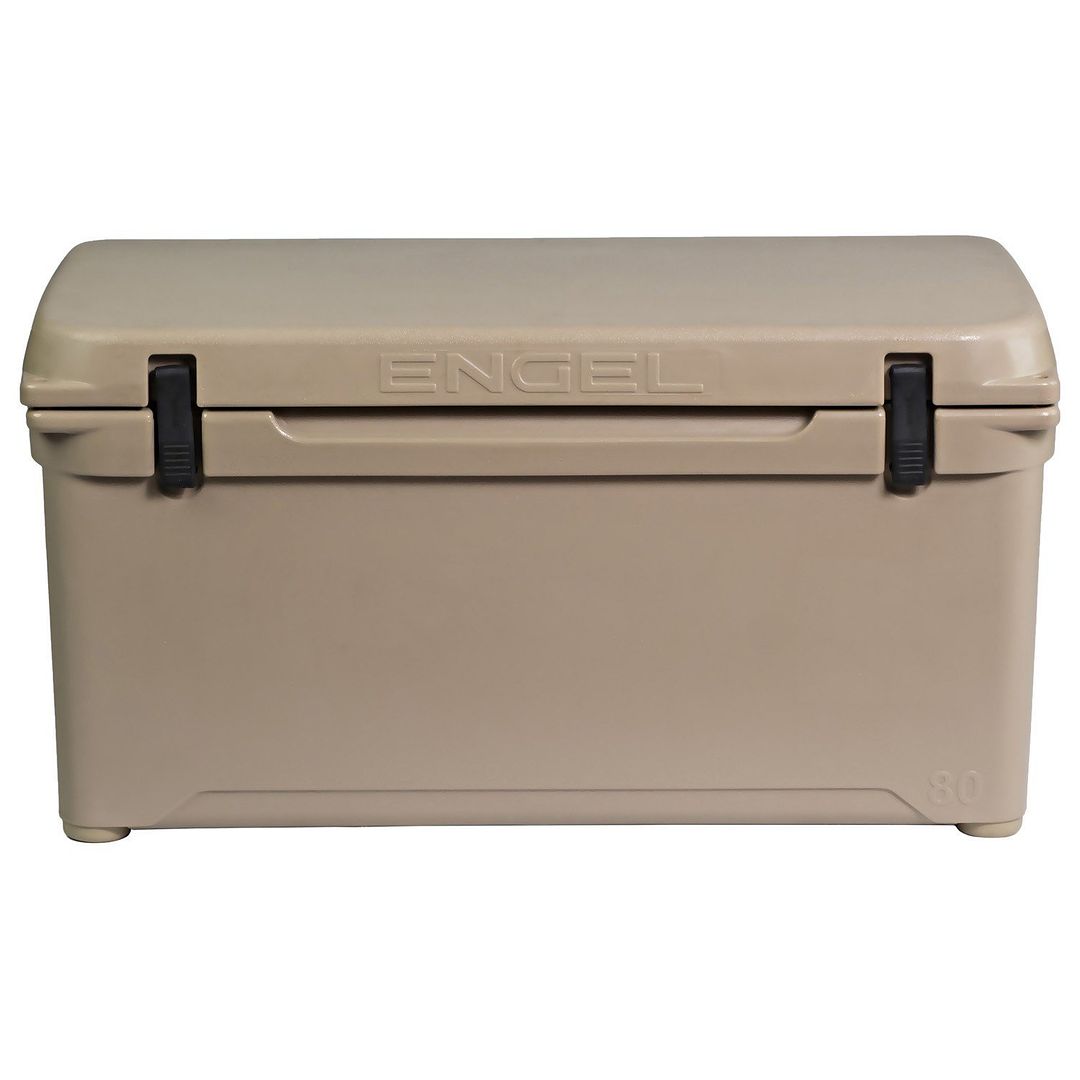
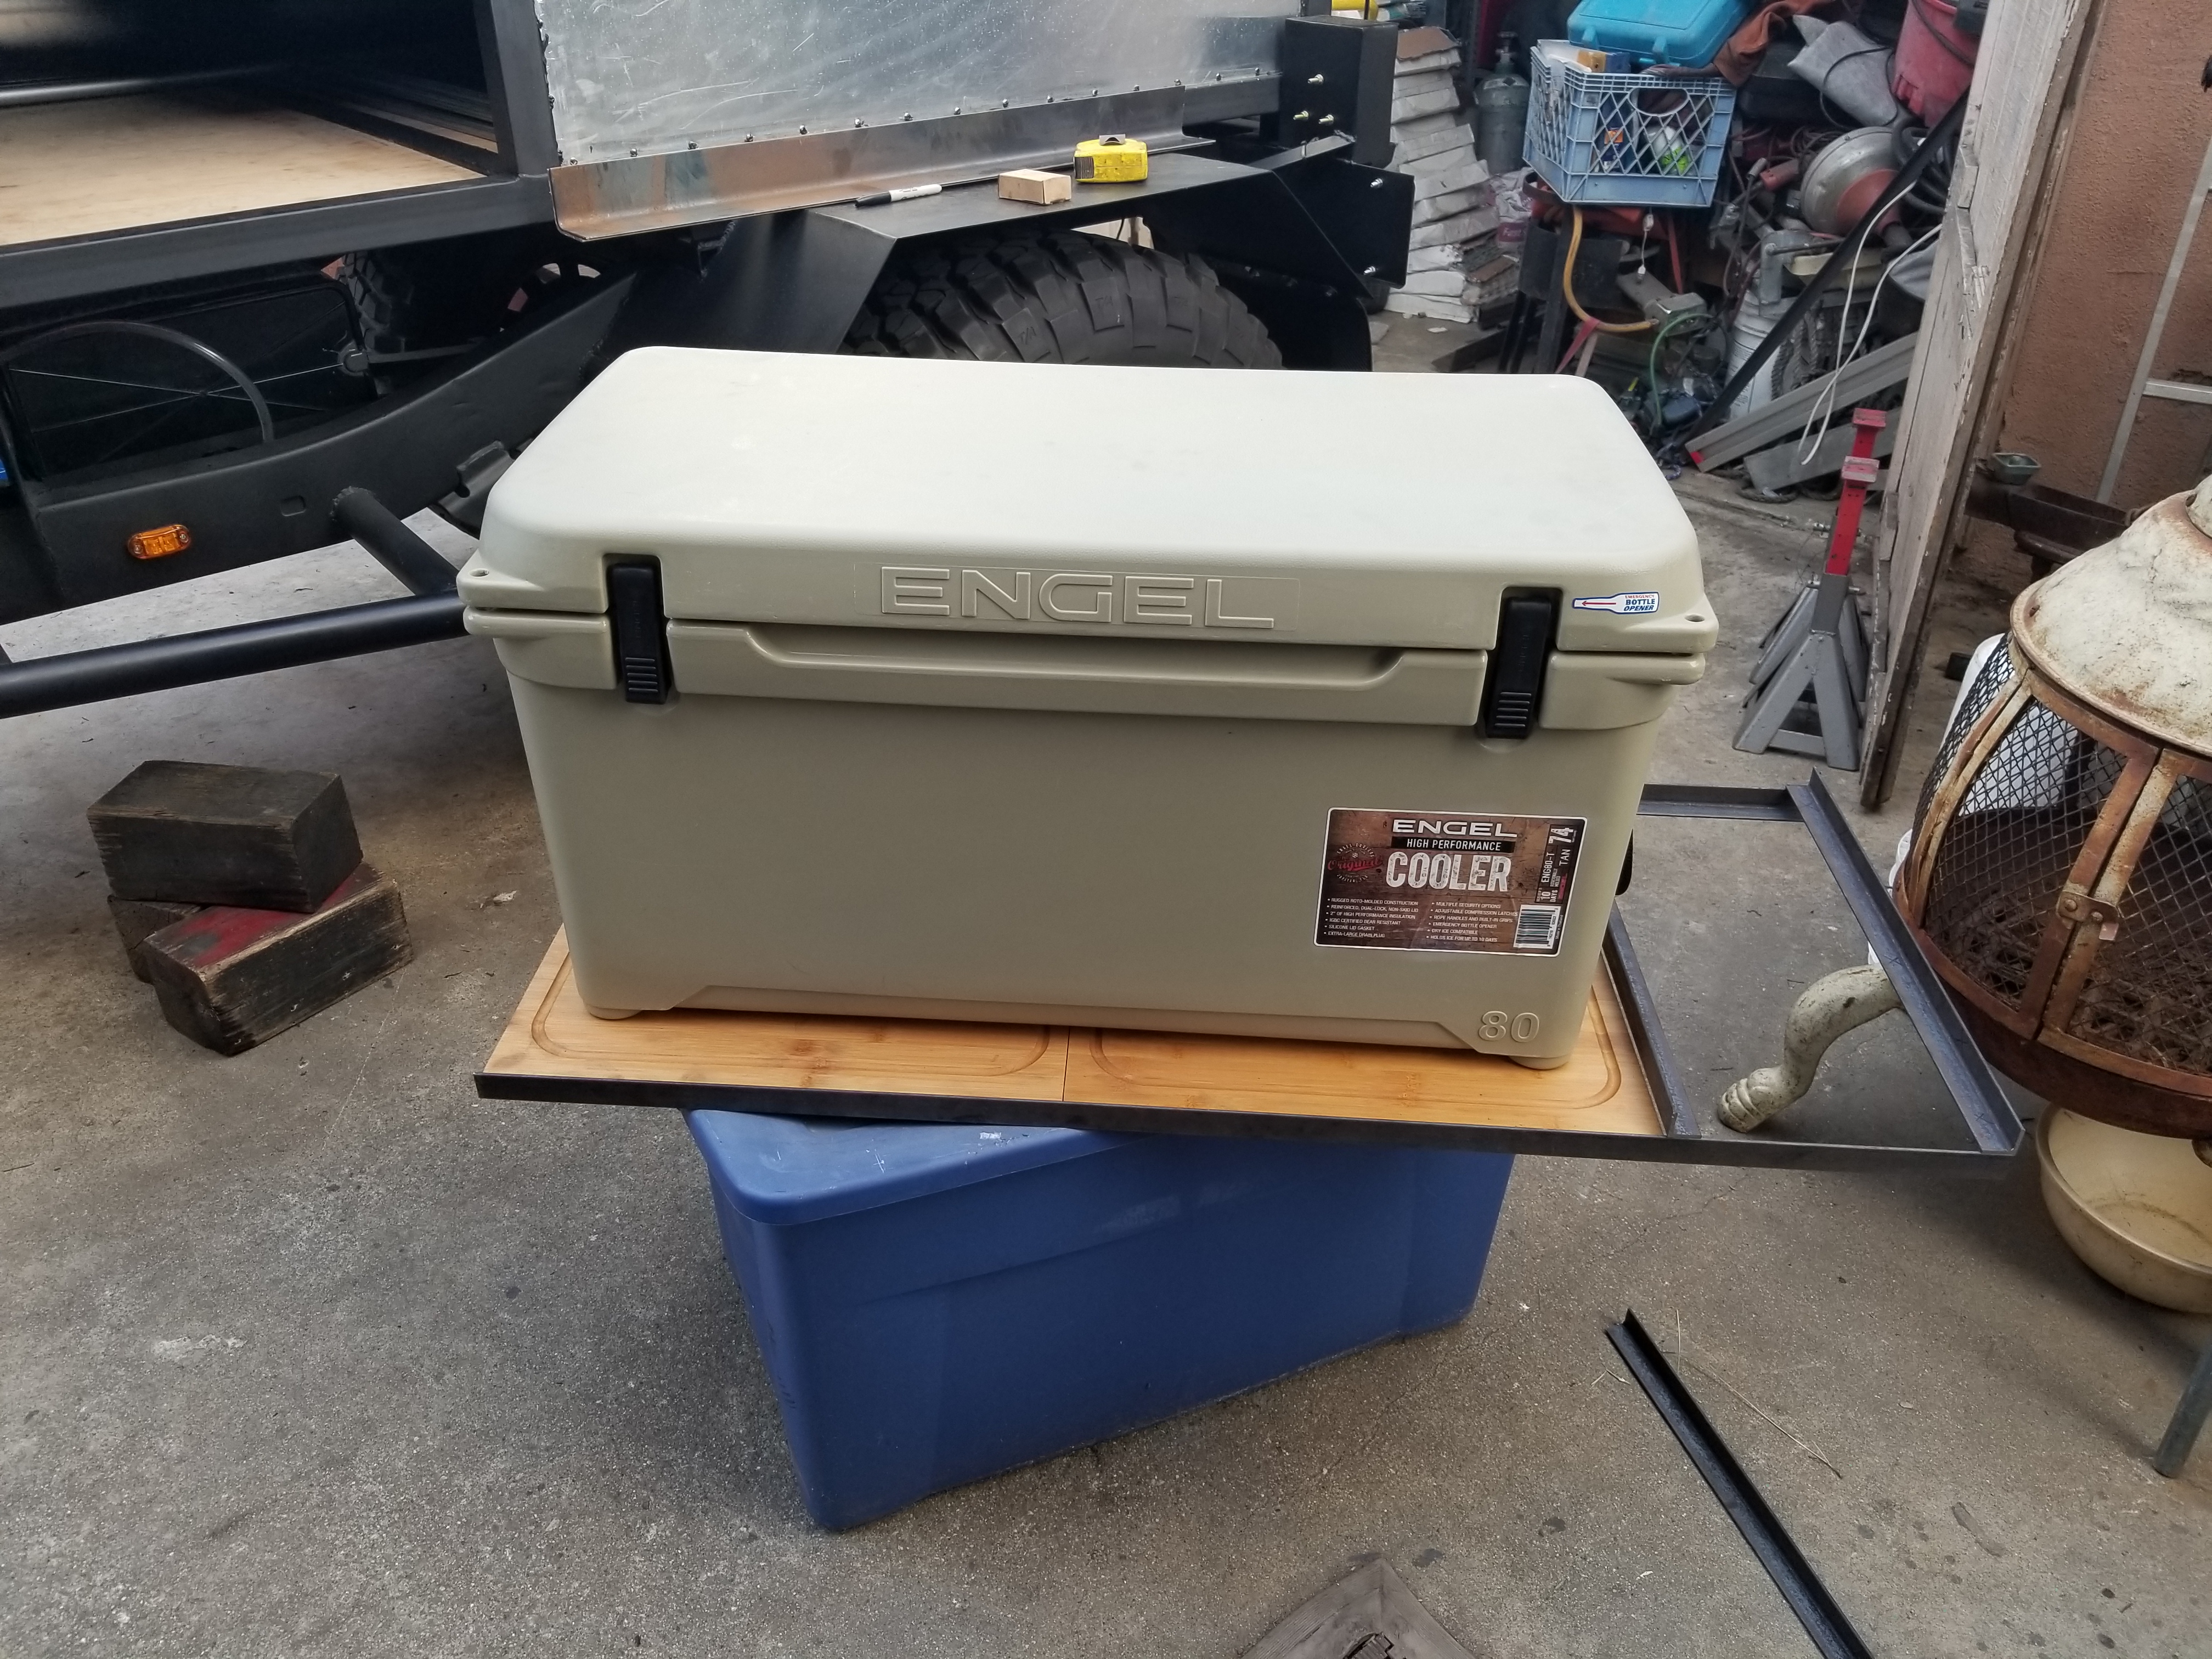
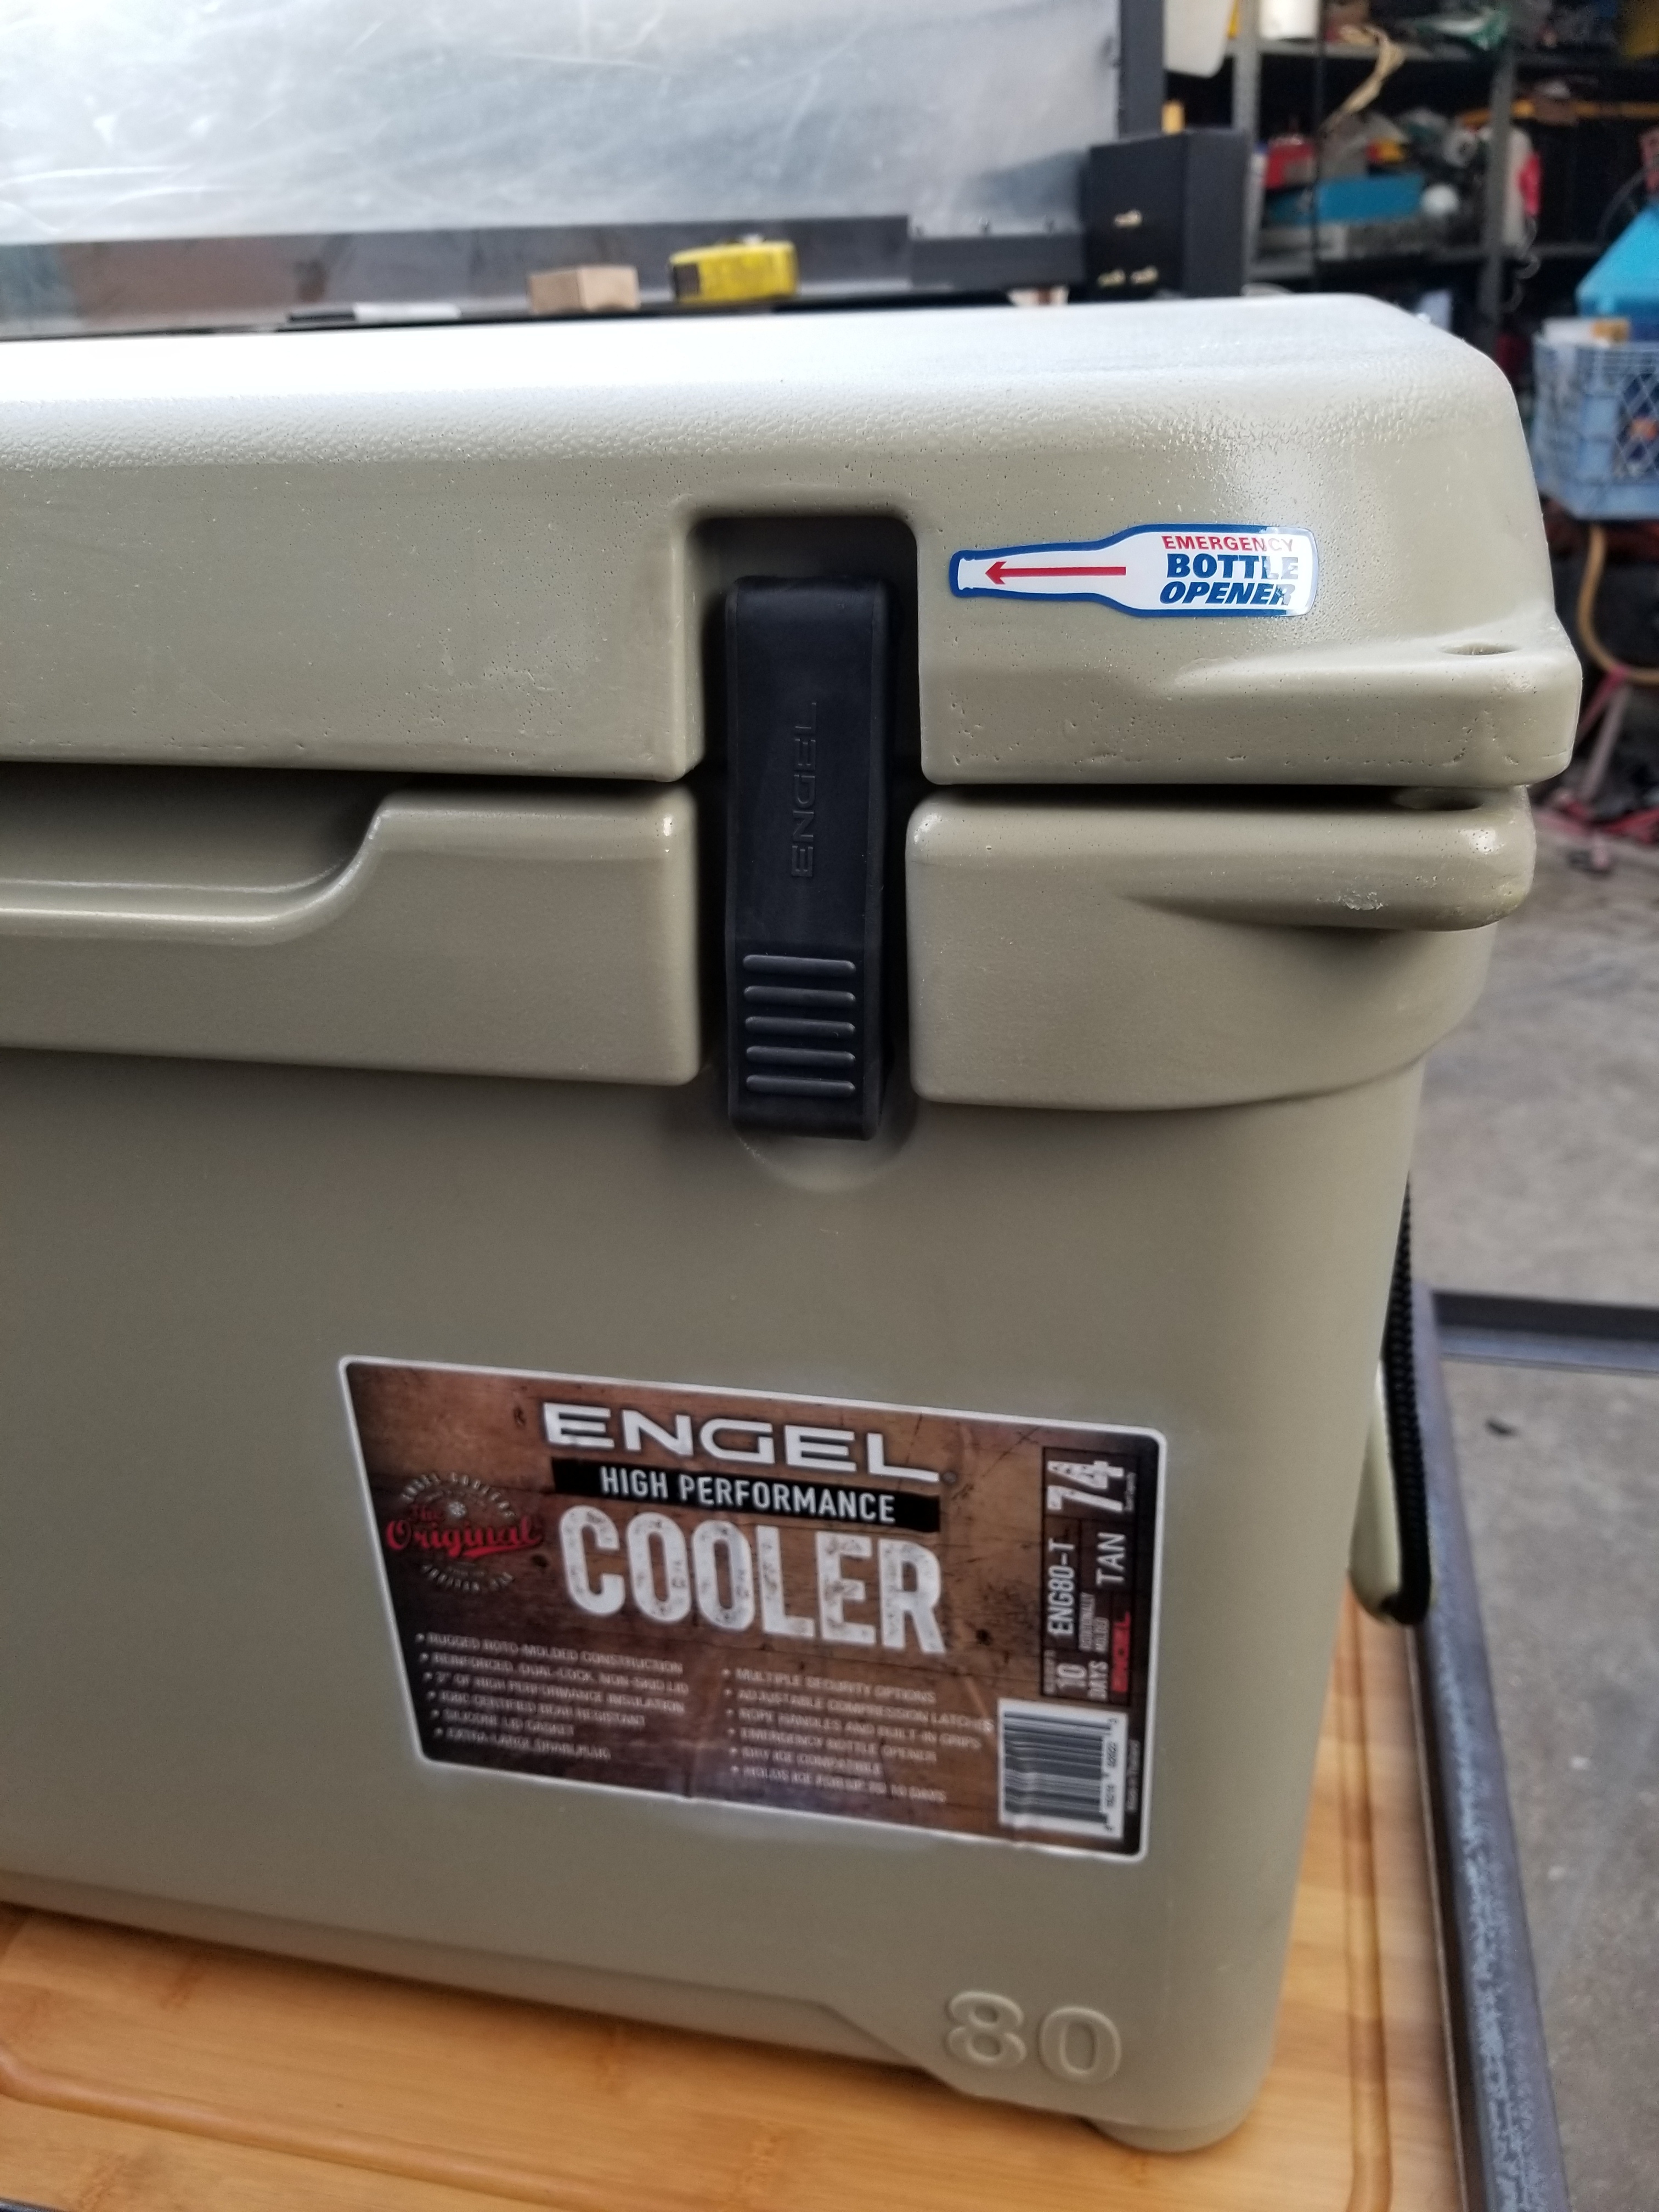
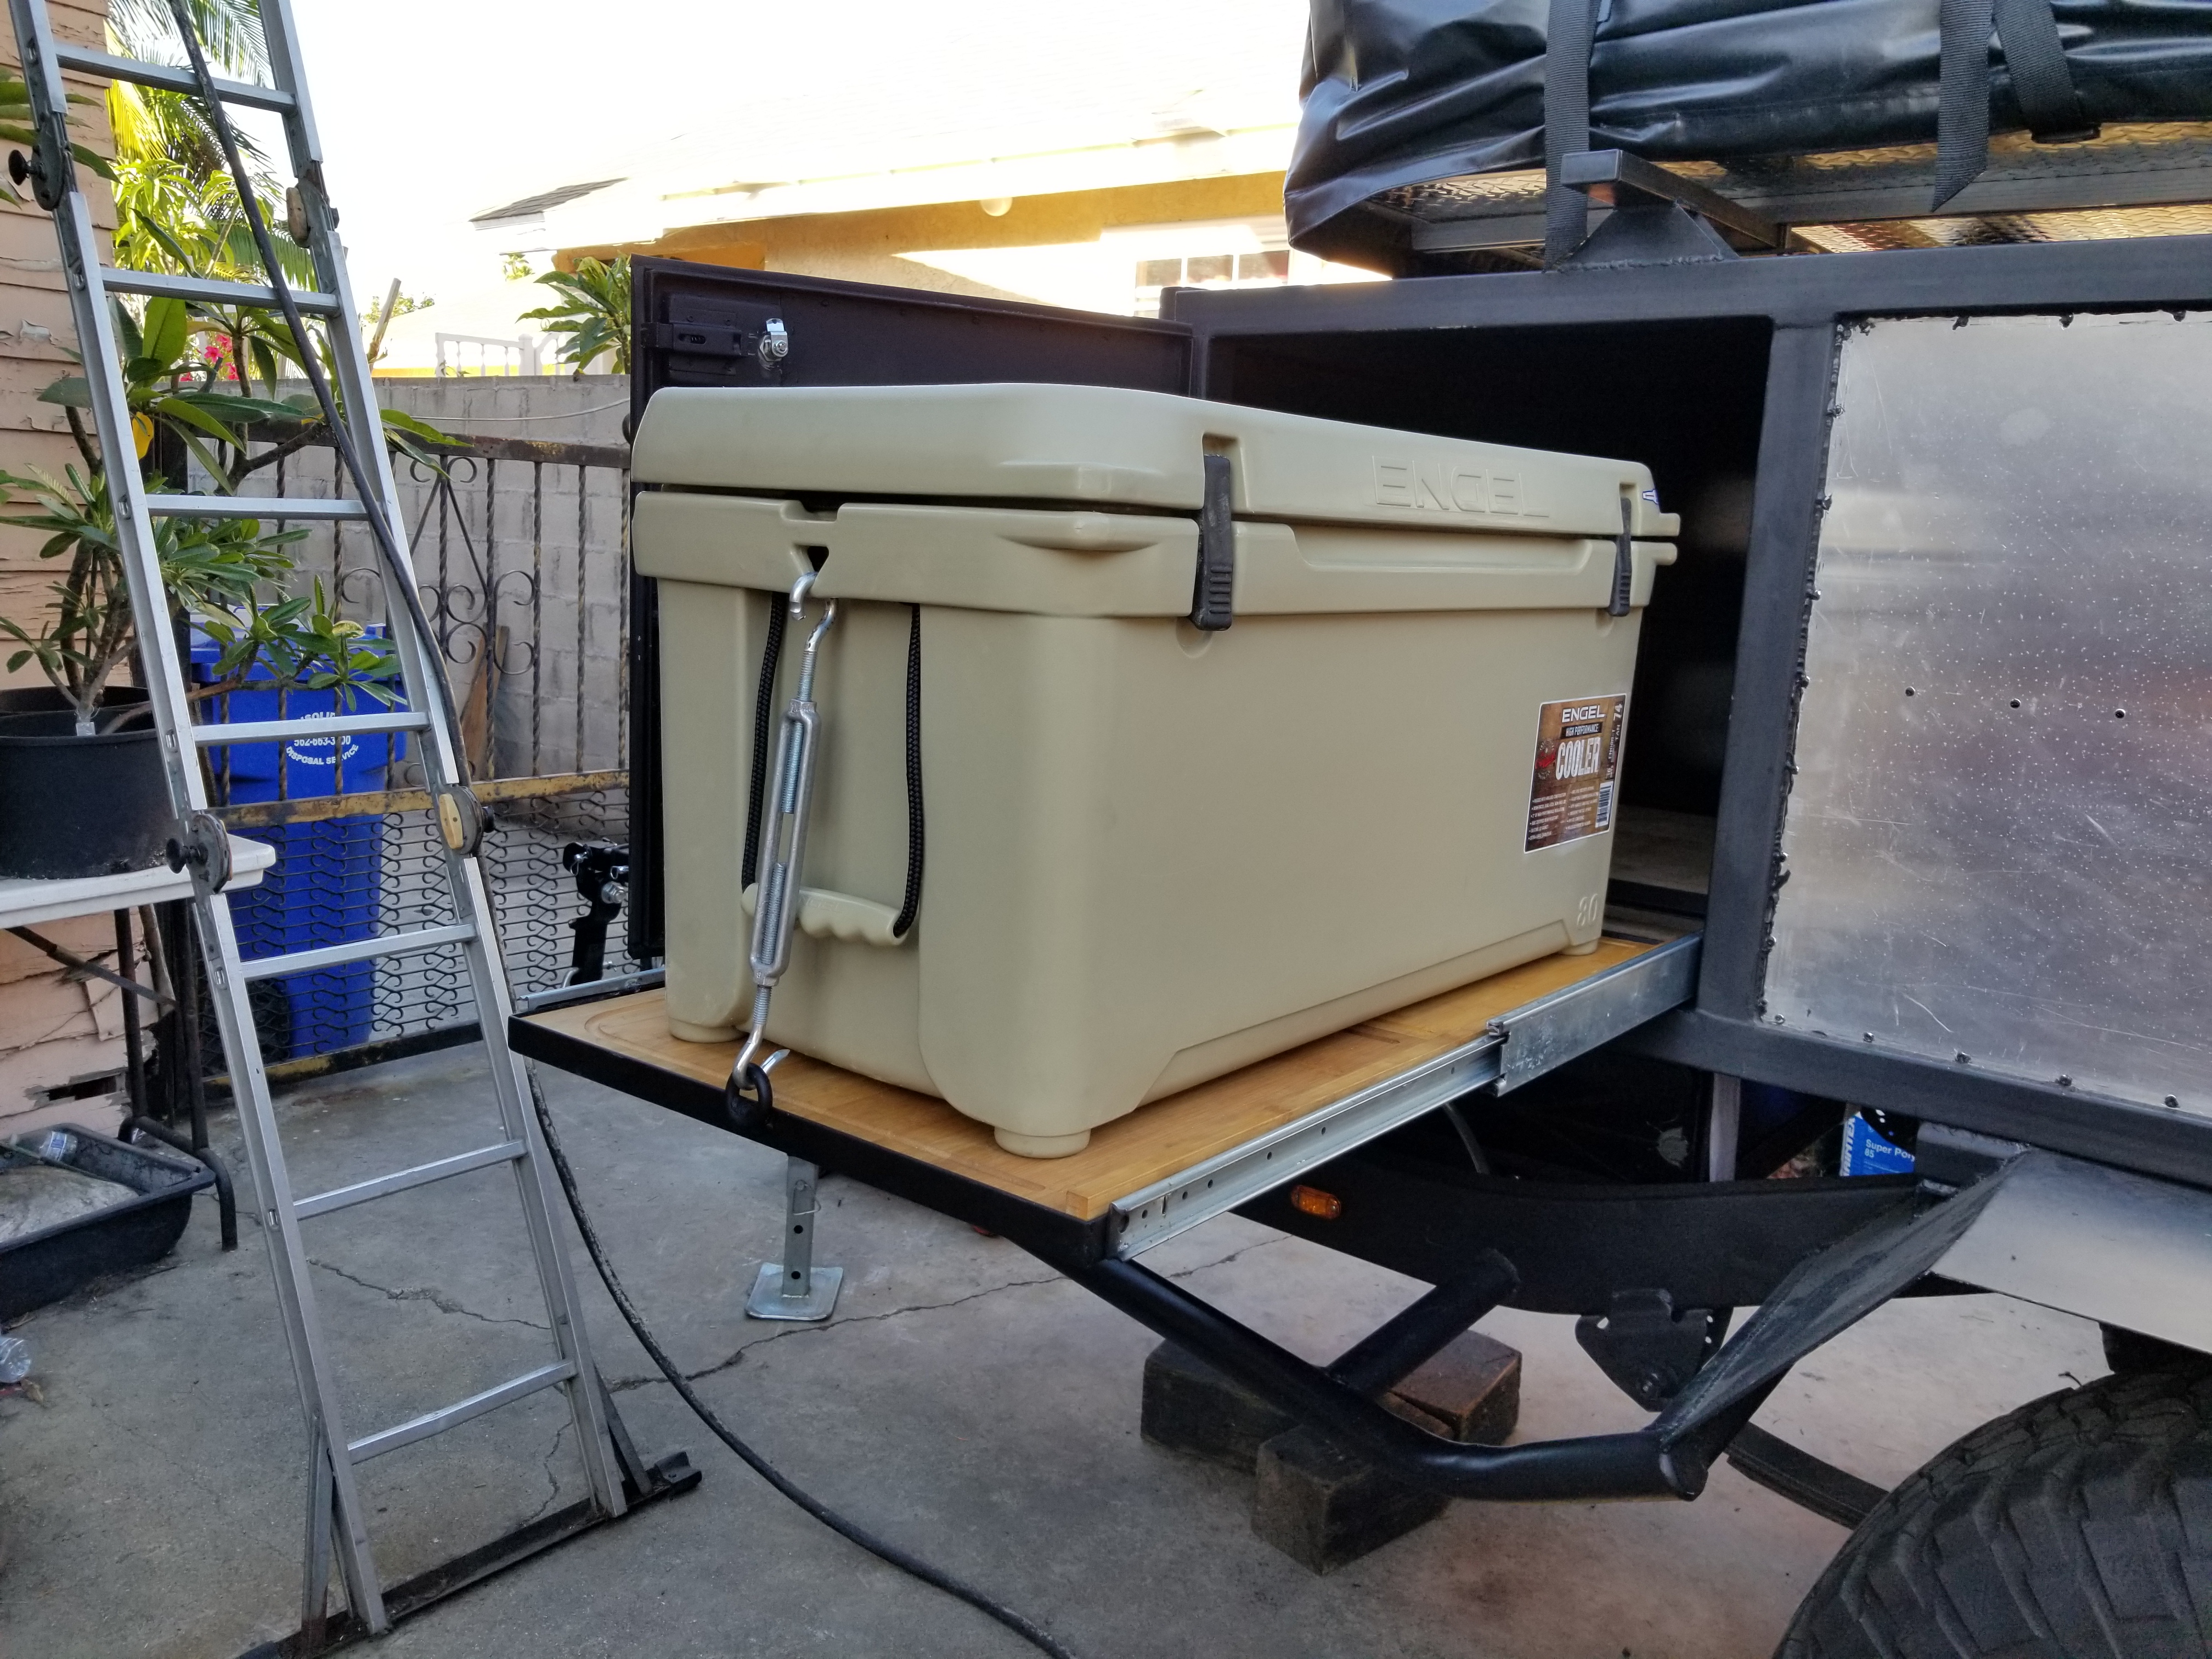
My amazing girlfriend was kind enough to offer to buy us the high performance cooler that i wanted.
Since we have 1 kid and eventually will have 1 more on the way, plus we plan on going camping with larger groups of friends/family we decided to go with the Engel 80 Roto-molded Cooler. We watched countless of youtube comparison videos online and made up our minds that tne ENGEL coolers were the best coolers on the market and the one for us. So Here is the link to what we bought:
https://www.engelcoolers.com/engel-eng80-cooler.html
It is an 80 quart cooler so we have more than enough space inside for a long weekend (or week) worth of food. I chose this large size because ice always takes up space on coolers and usually takes up valuable space where we can be sticking drinks and food. So at least with 80 quarts we can add a decent amount of ice to keep stuff inside cold and not have to compromise bringing more food, drinks and snacks.
Here it is:
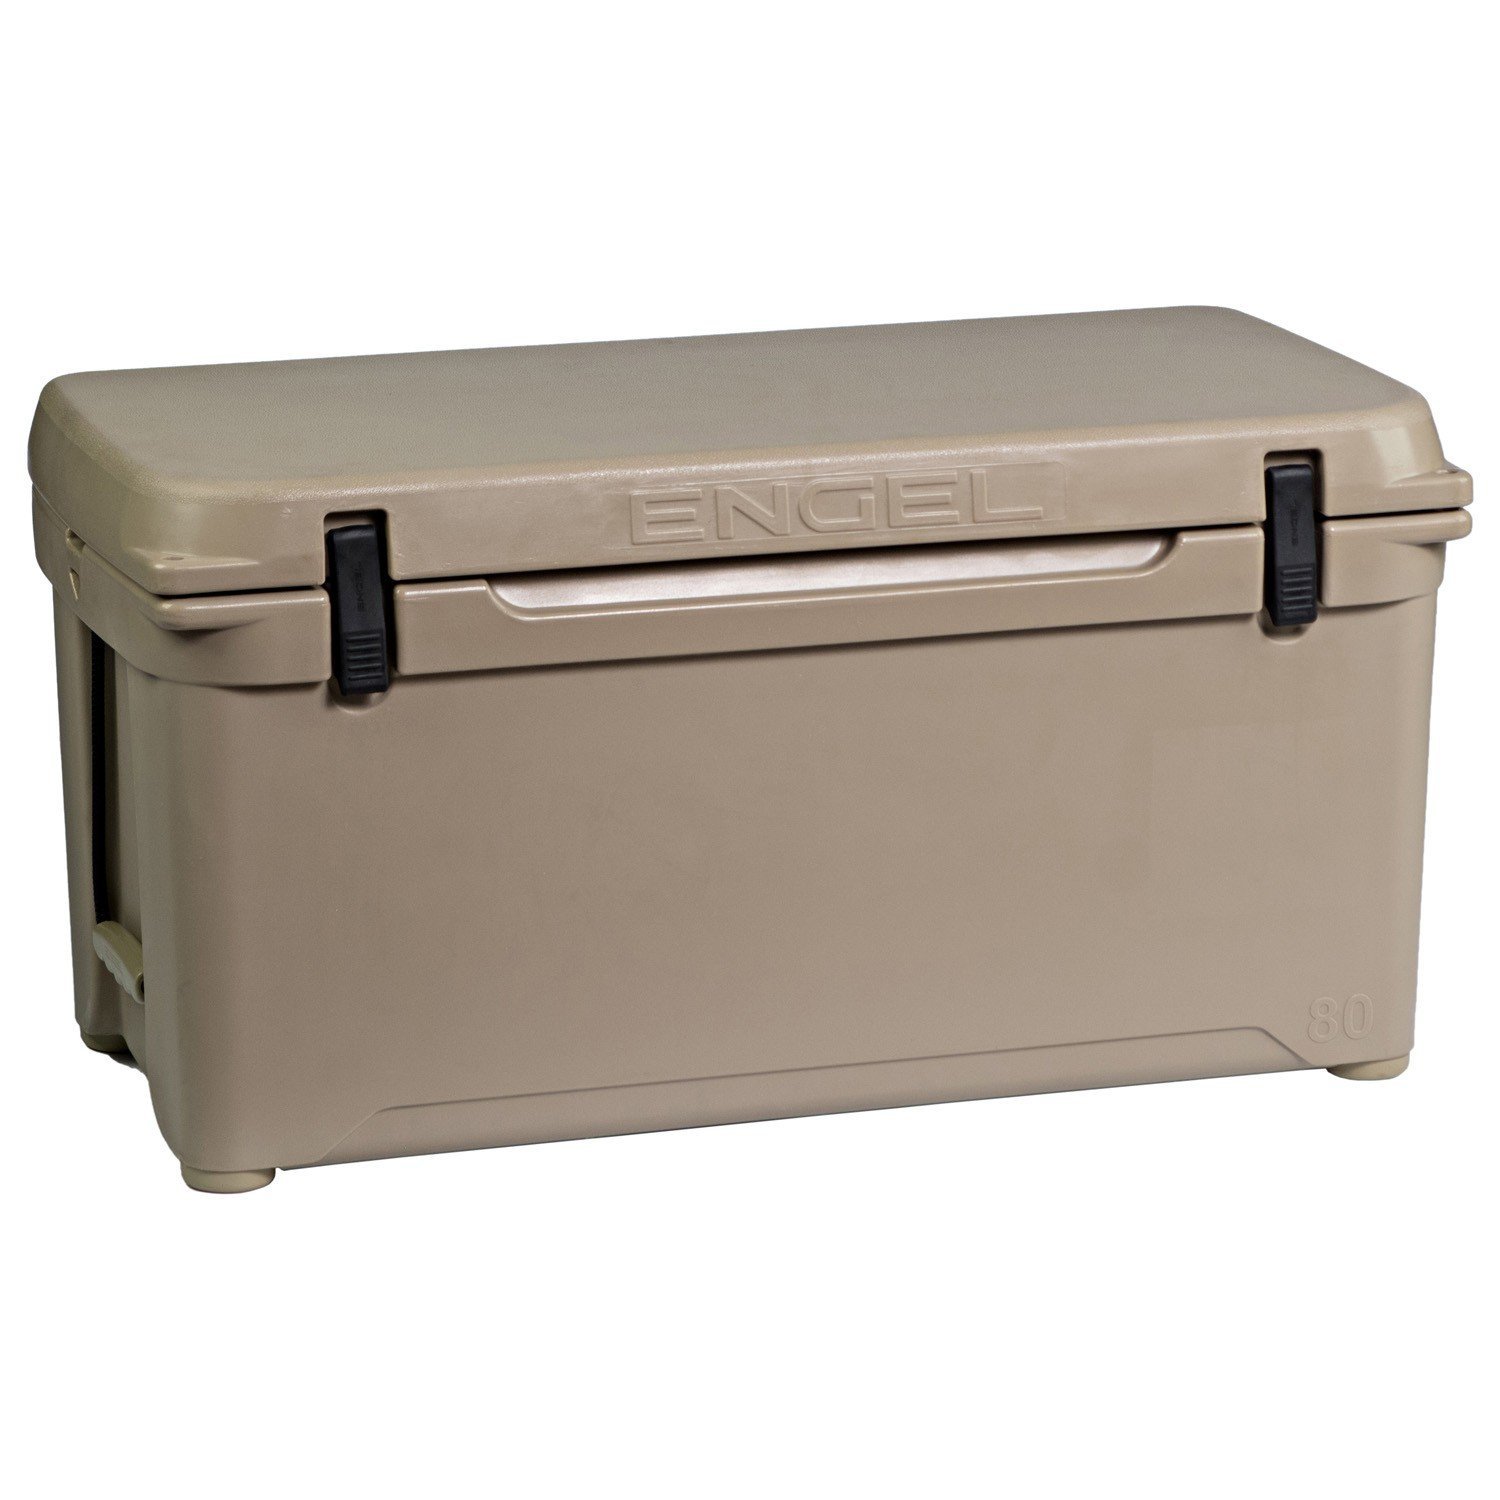
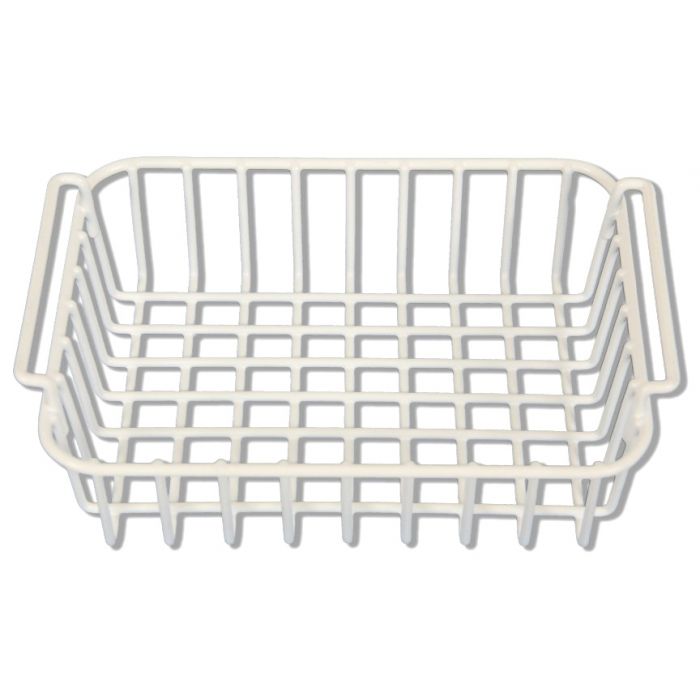
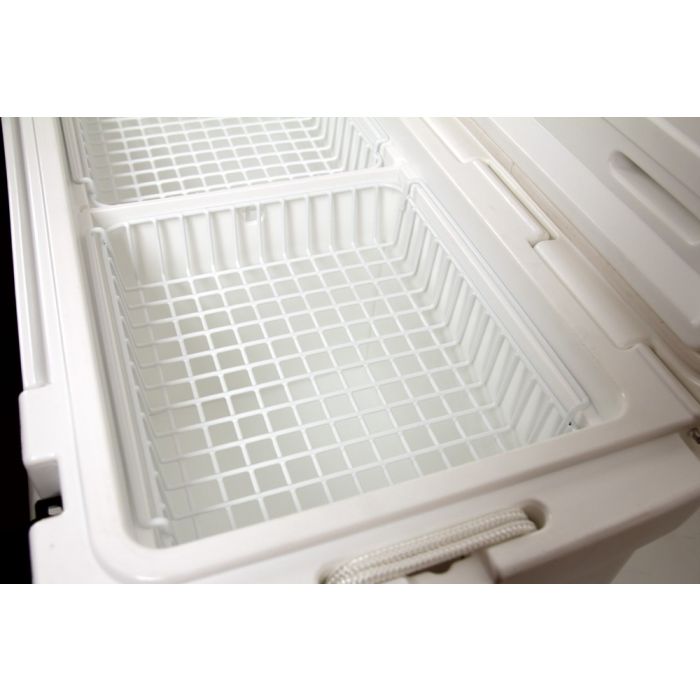
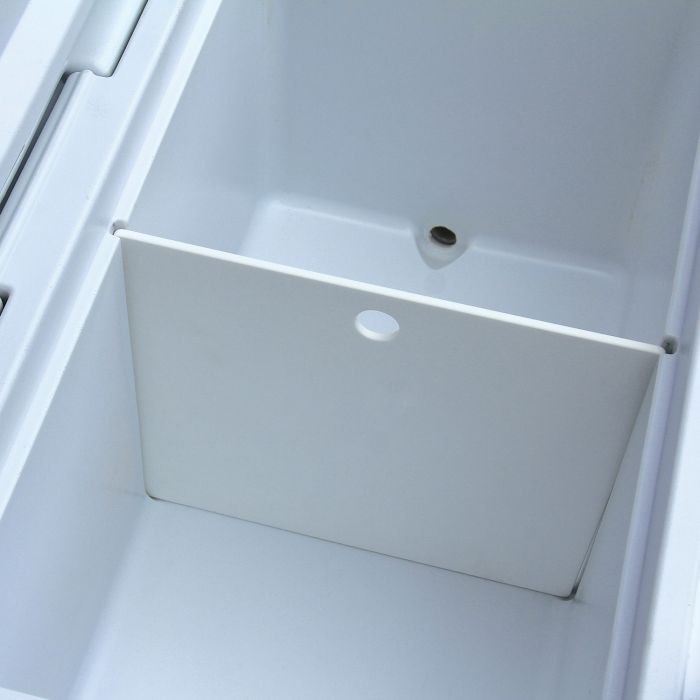
We also decided it would be wise to buy a center divider and a hanging basket for the cooler to keep the more wanted separate and easy to reach rather than having to dig around in the cooler. this will have save time grabbing things and help keep the cooler closed longer to maintain the cold temperature from so much opening and closing.
All in all we spent $330.97 for all 3 items with free shipping
Since we have 1 kid and eventually will have 1 more on the way, plus we plan on going camping with larger groups of friends/family we decided to go with the Engel 80 Roto-molded Cooler. We watched countless of youtube comparison videos online and made up our minds that tne ENGEL coolers were the best coolers on the market and the one for us. So Here is the link to what we bought:
https://www.engelcoolers.com/engel-eng80-cooler.html
It is an 80 quart cooler so we have more than enough space inside for a long weekend (or week) worth of food. I chose this large size because ice always takes up space on coolers and usually takes up valuable space where we can be sticking drinks and food. So at least with 80 quarts we can add a decent amount of ice to keep stuff inside cold and not have to compromise bringing more food, drinks and snacks.
Here it is:


We also decided it would be wise to buy a center divider and a hanging basket for the cooler to keep the more wanted separate and easy to reach rather than having to dig around in the cooler. this will have save time grabbing things and help keep the cooler closed longer to maintain the cold temperature from so much opening and closing.


All in all we spent $330.97 for all 3 items with free shipping
06-11-2017, 08:37 PM
#138
Registered User
Thread Starter
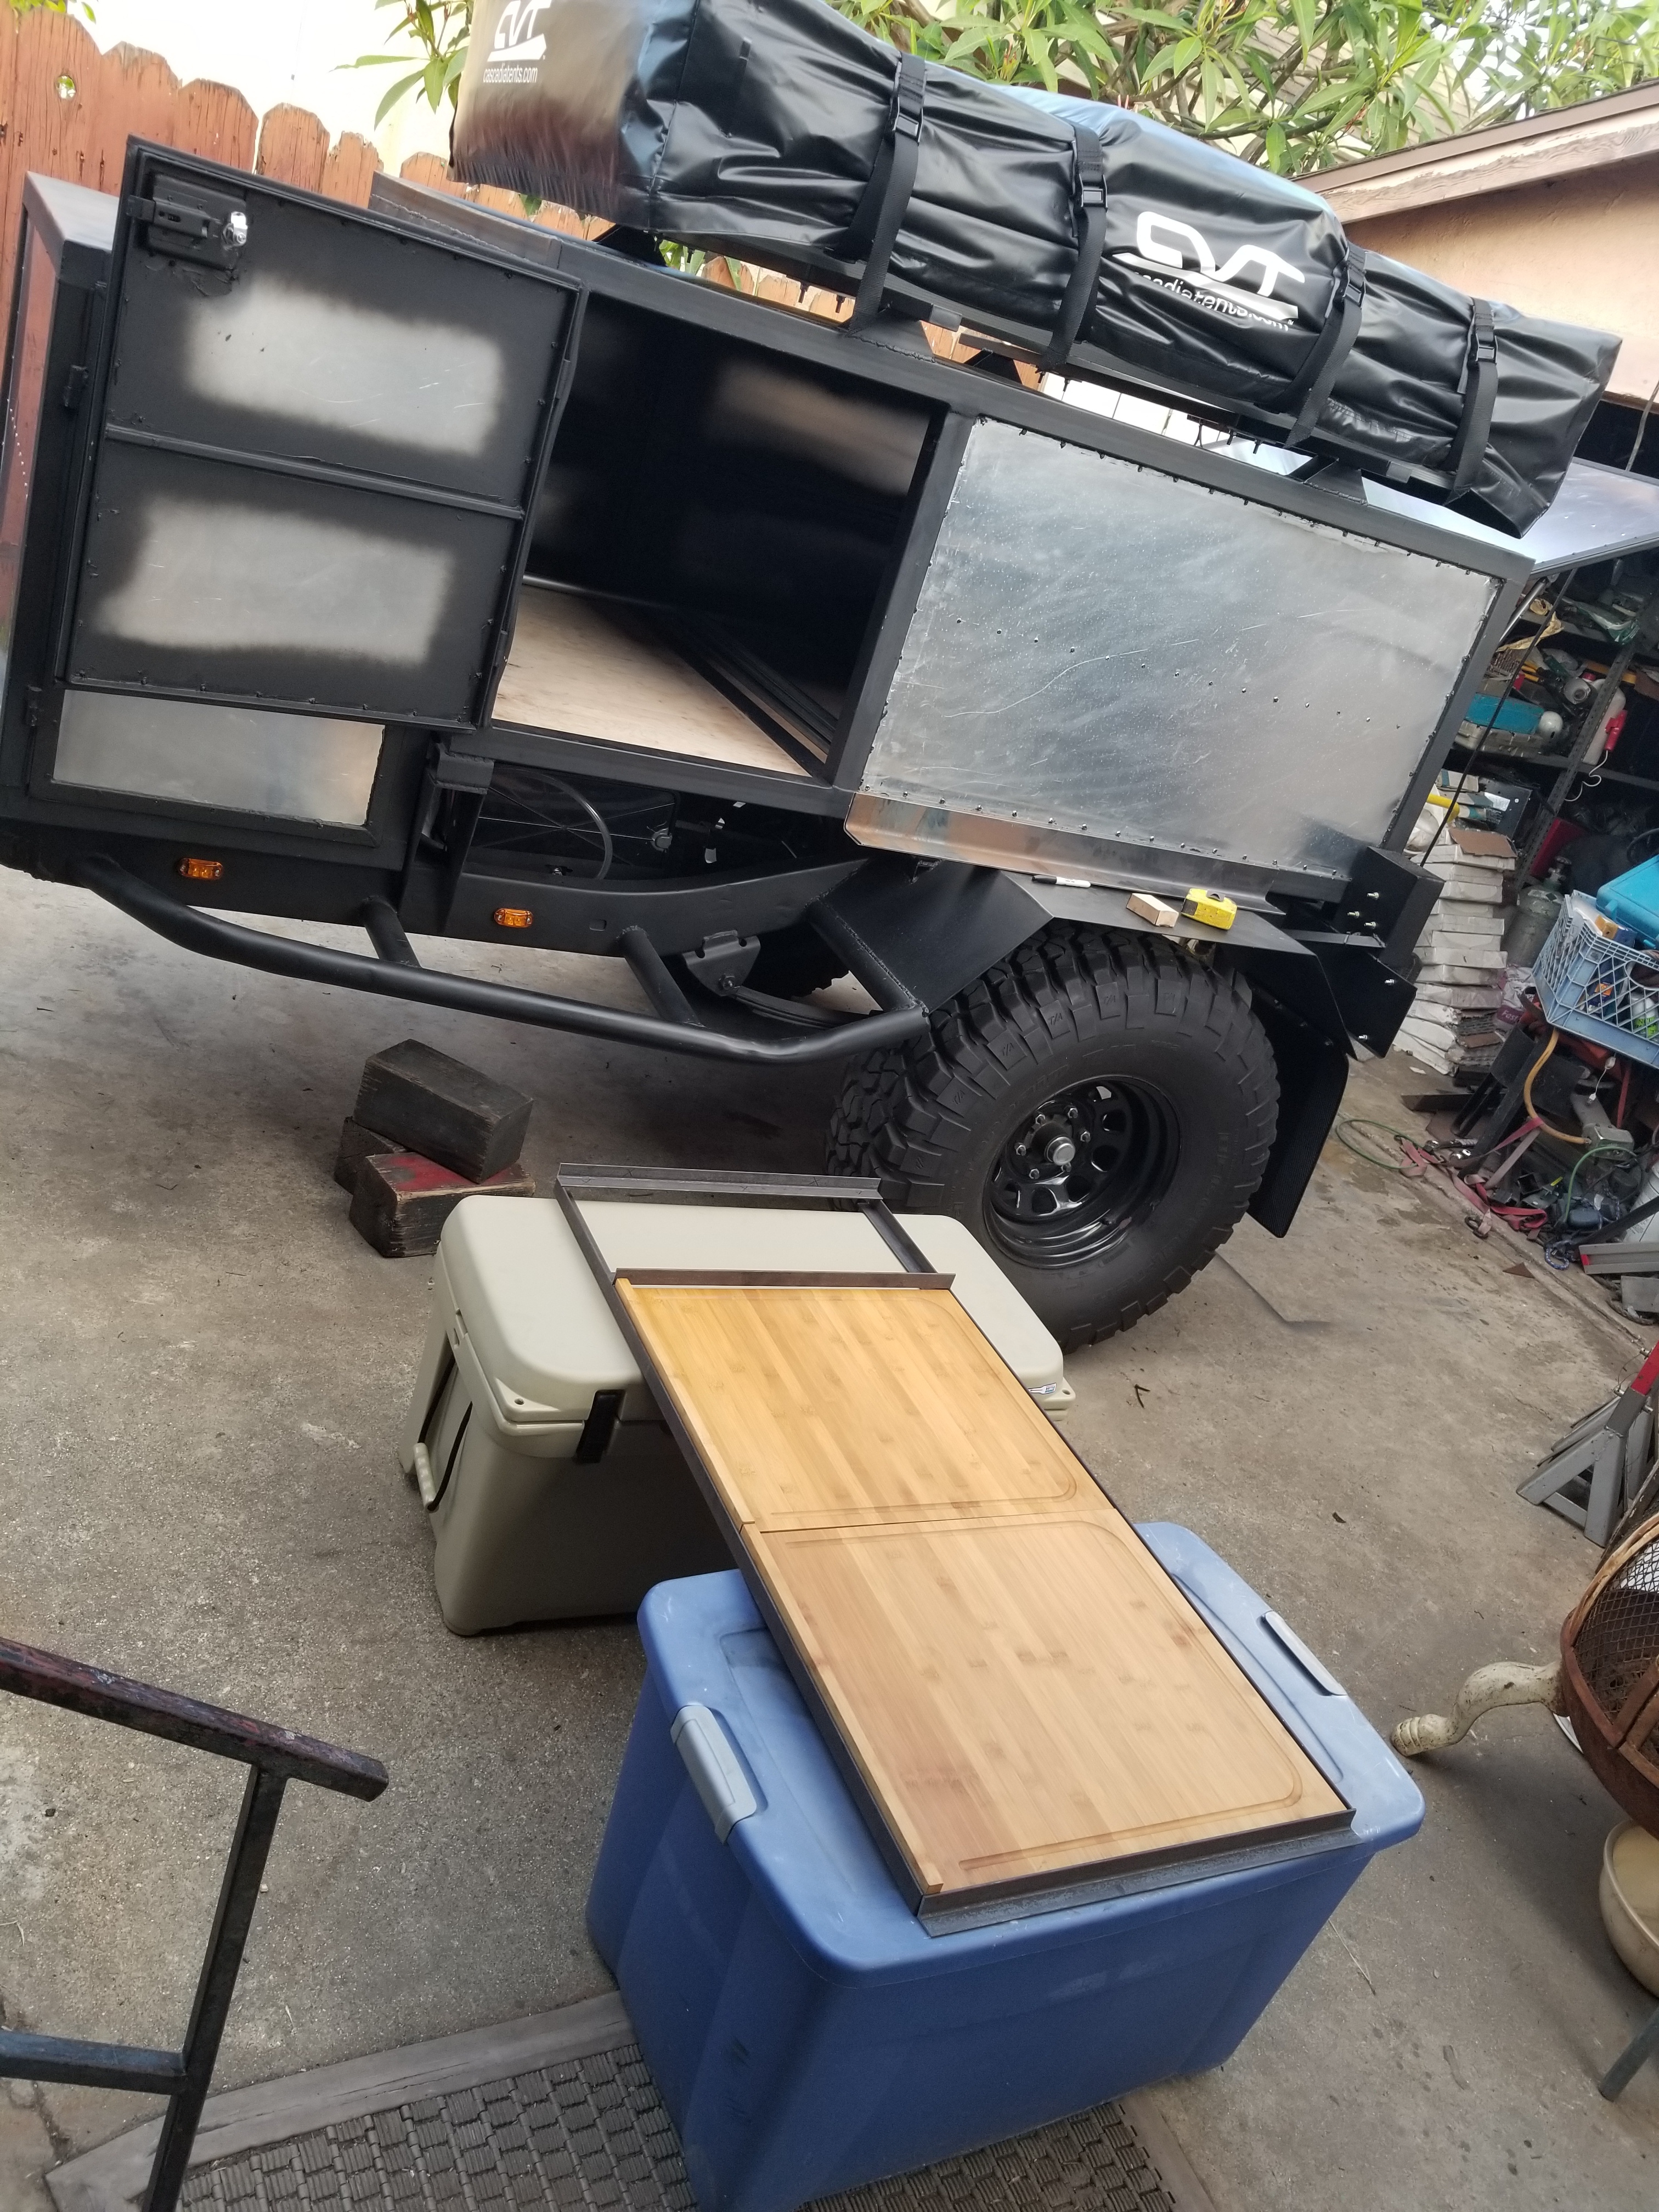
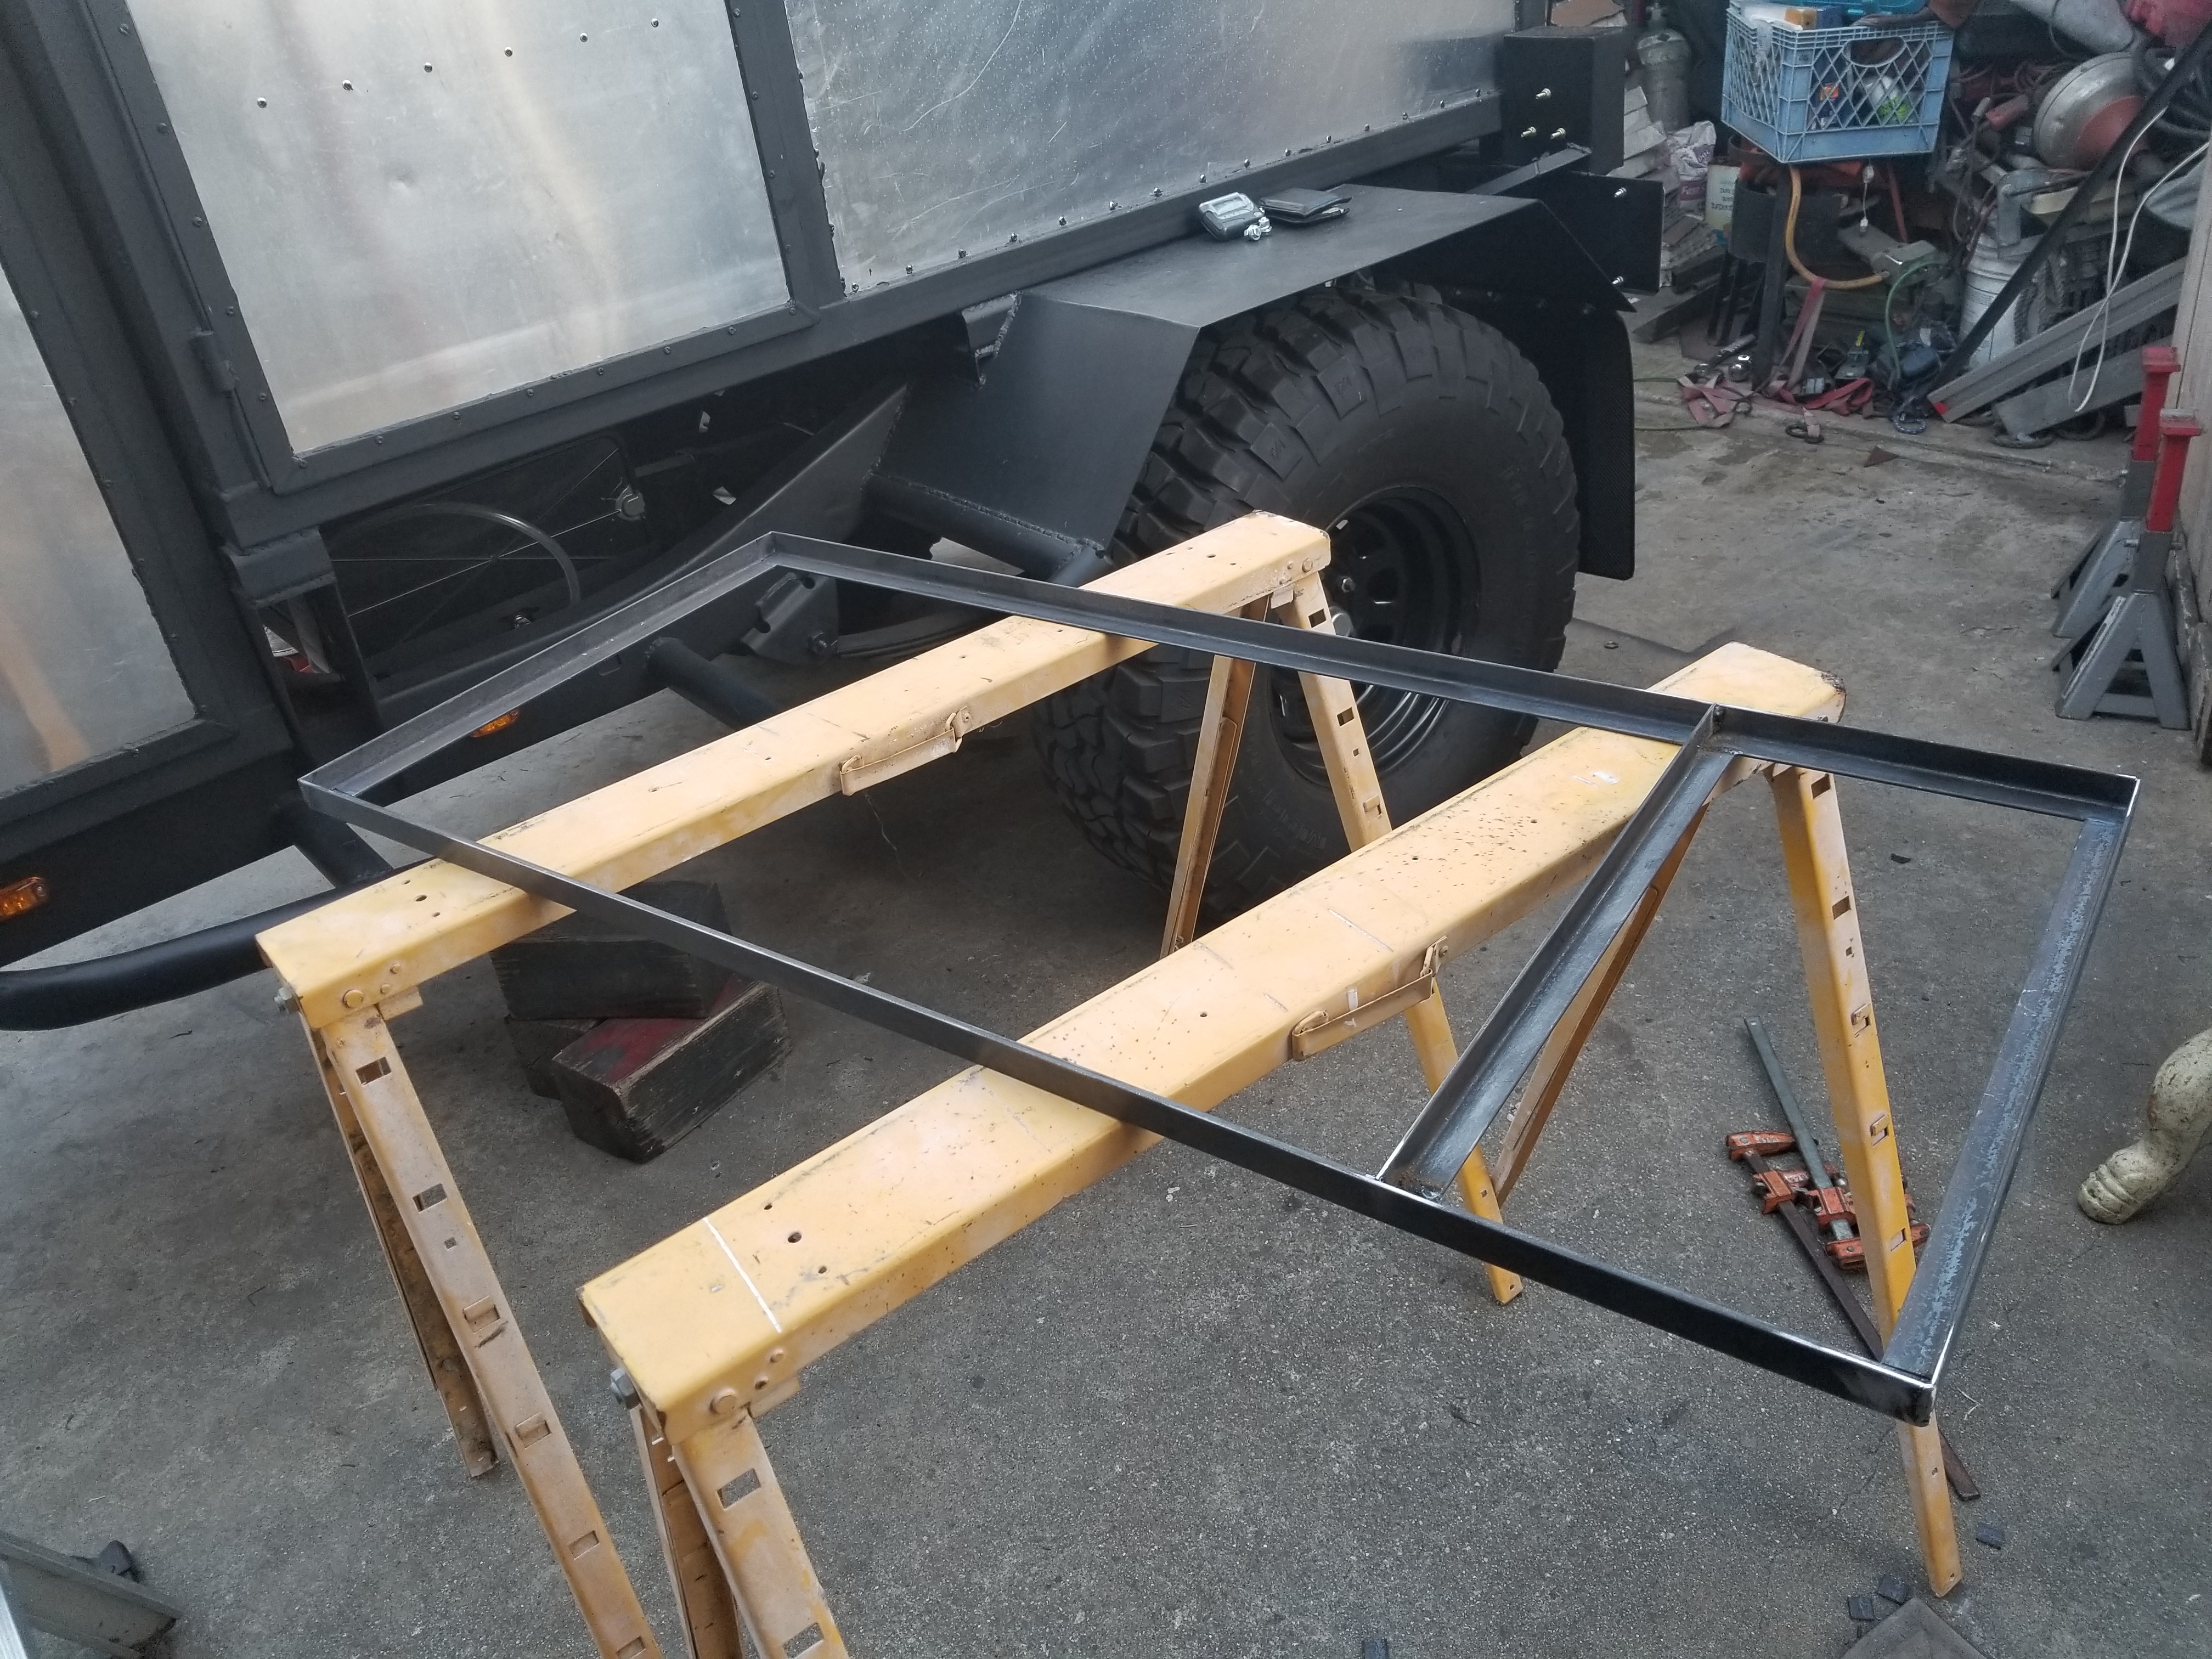
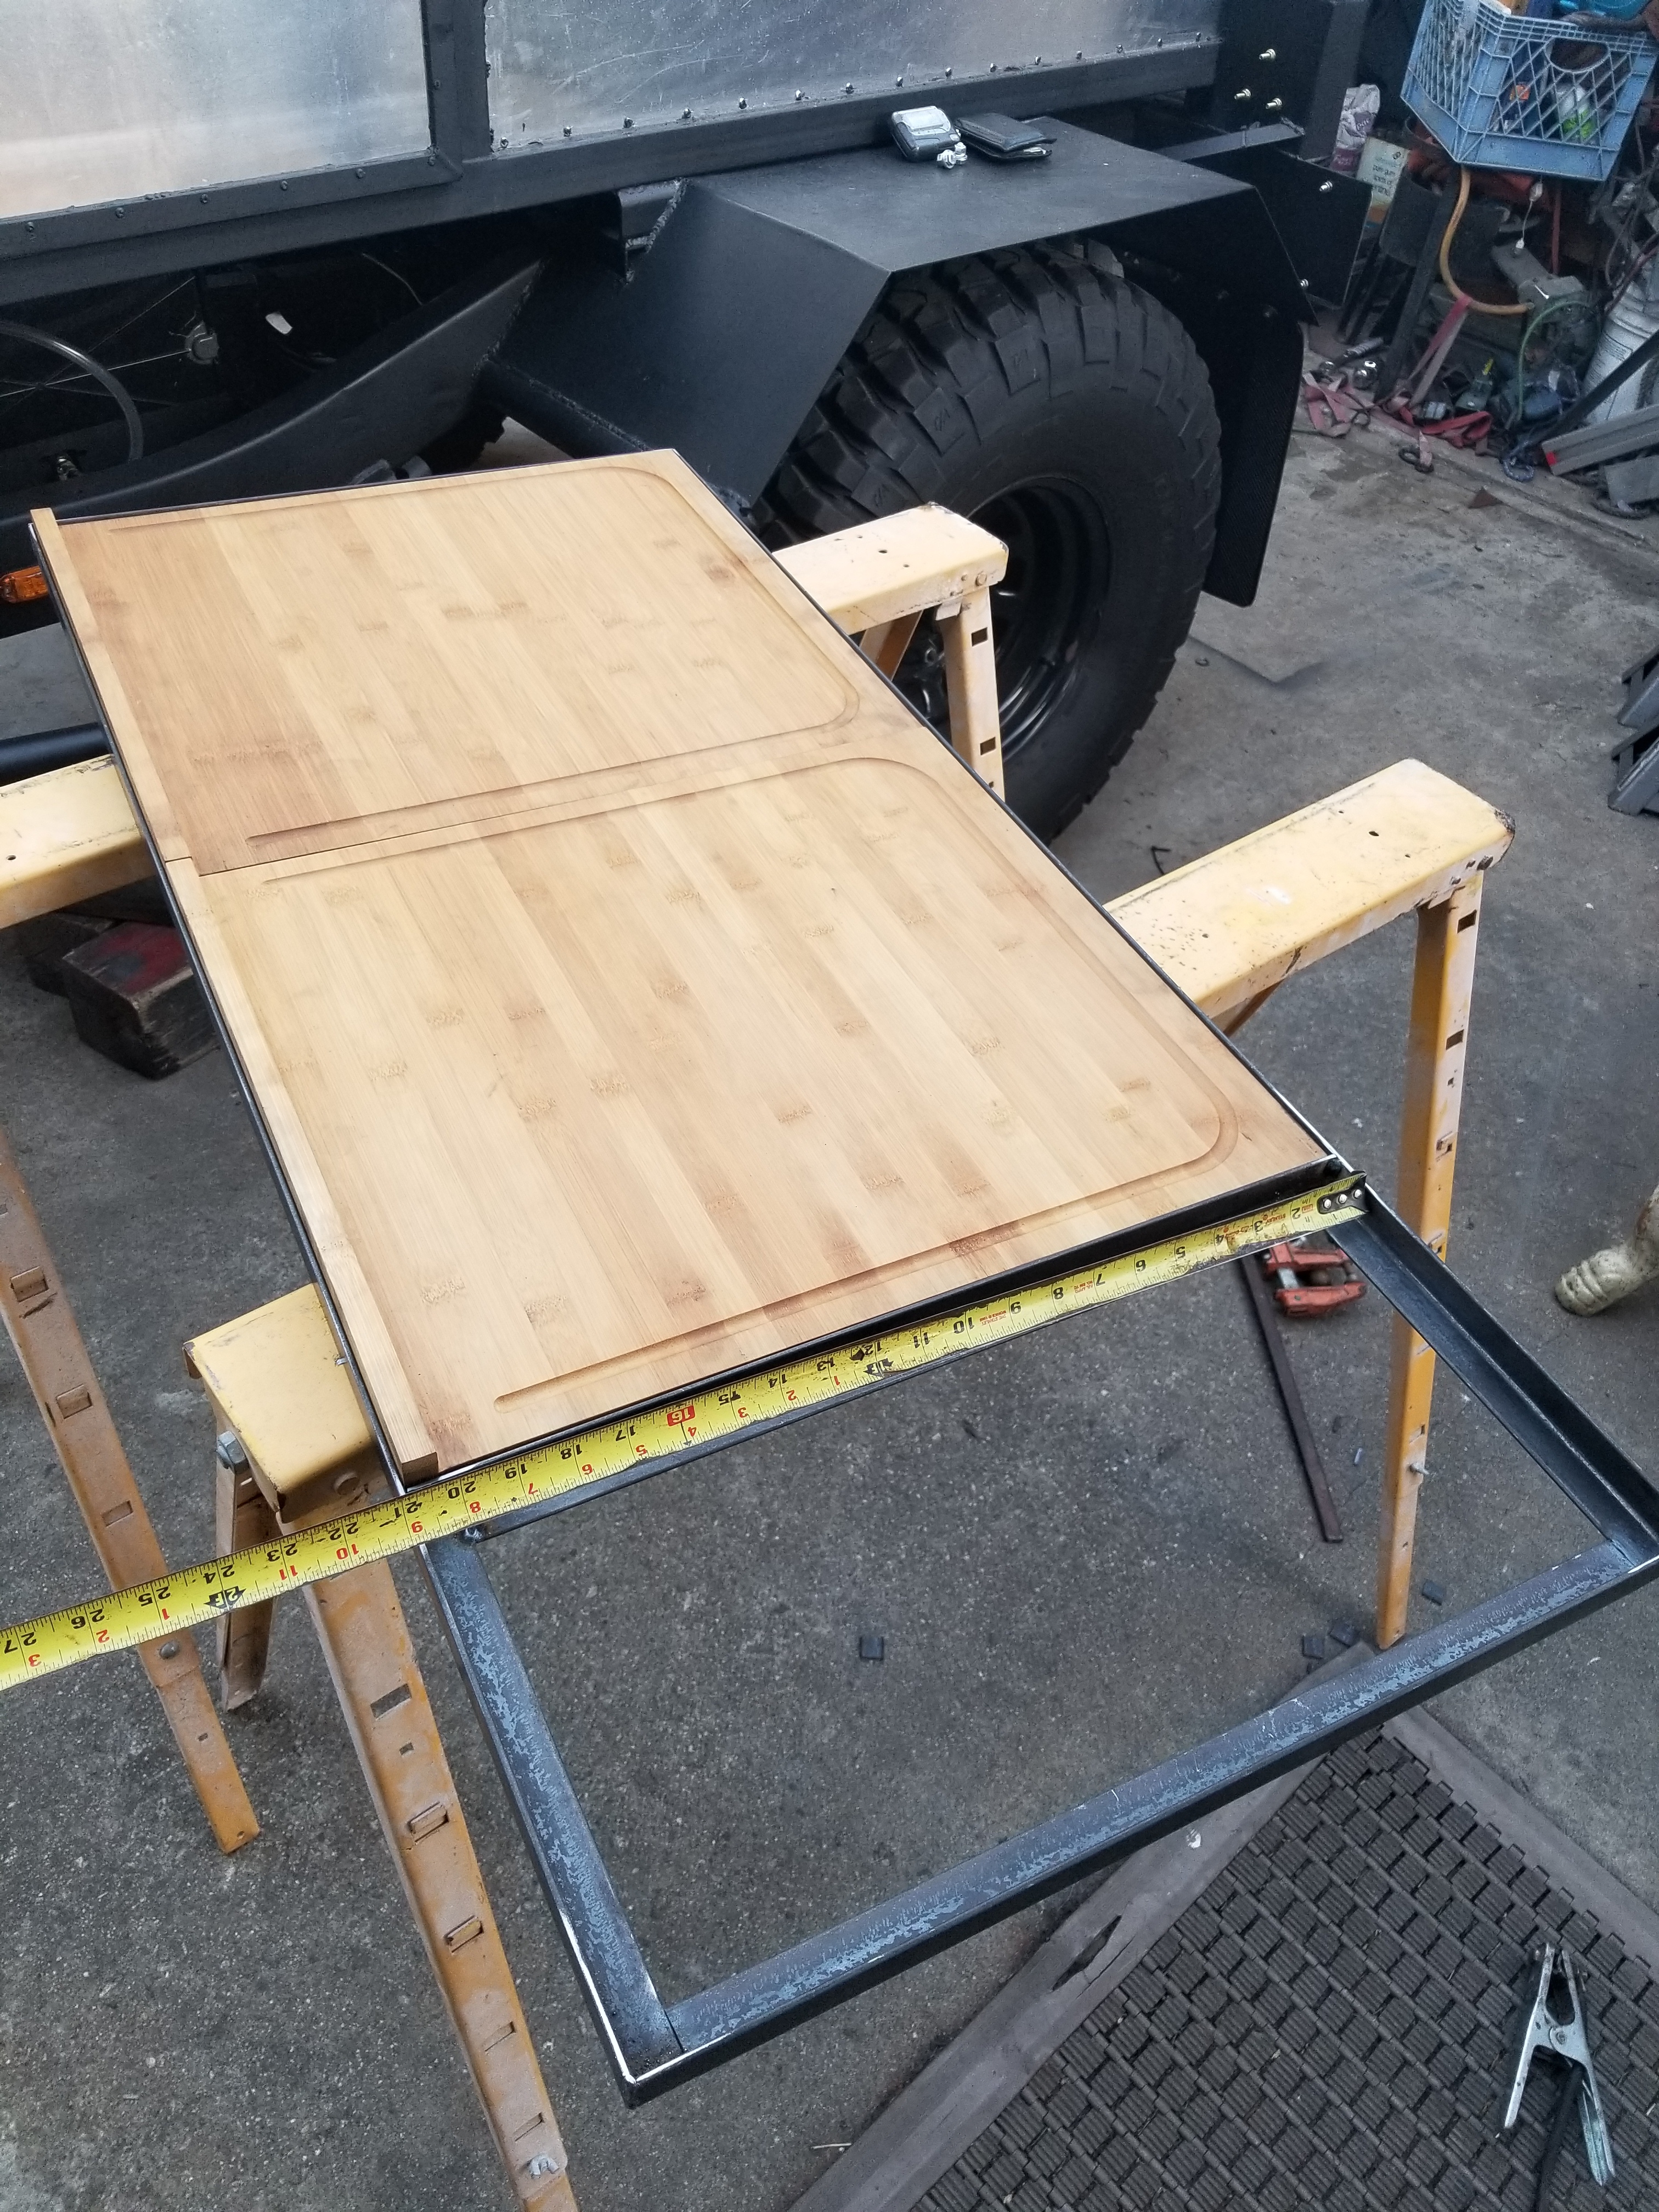
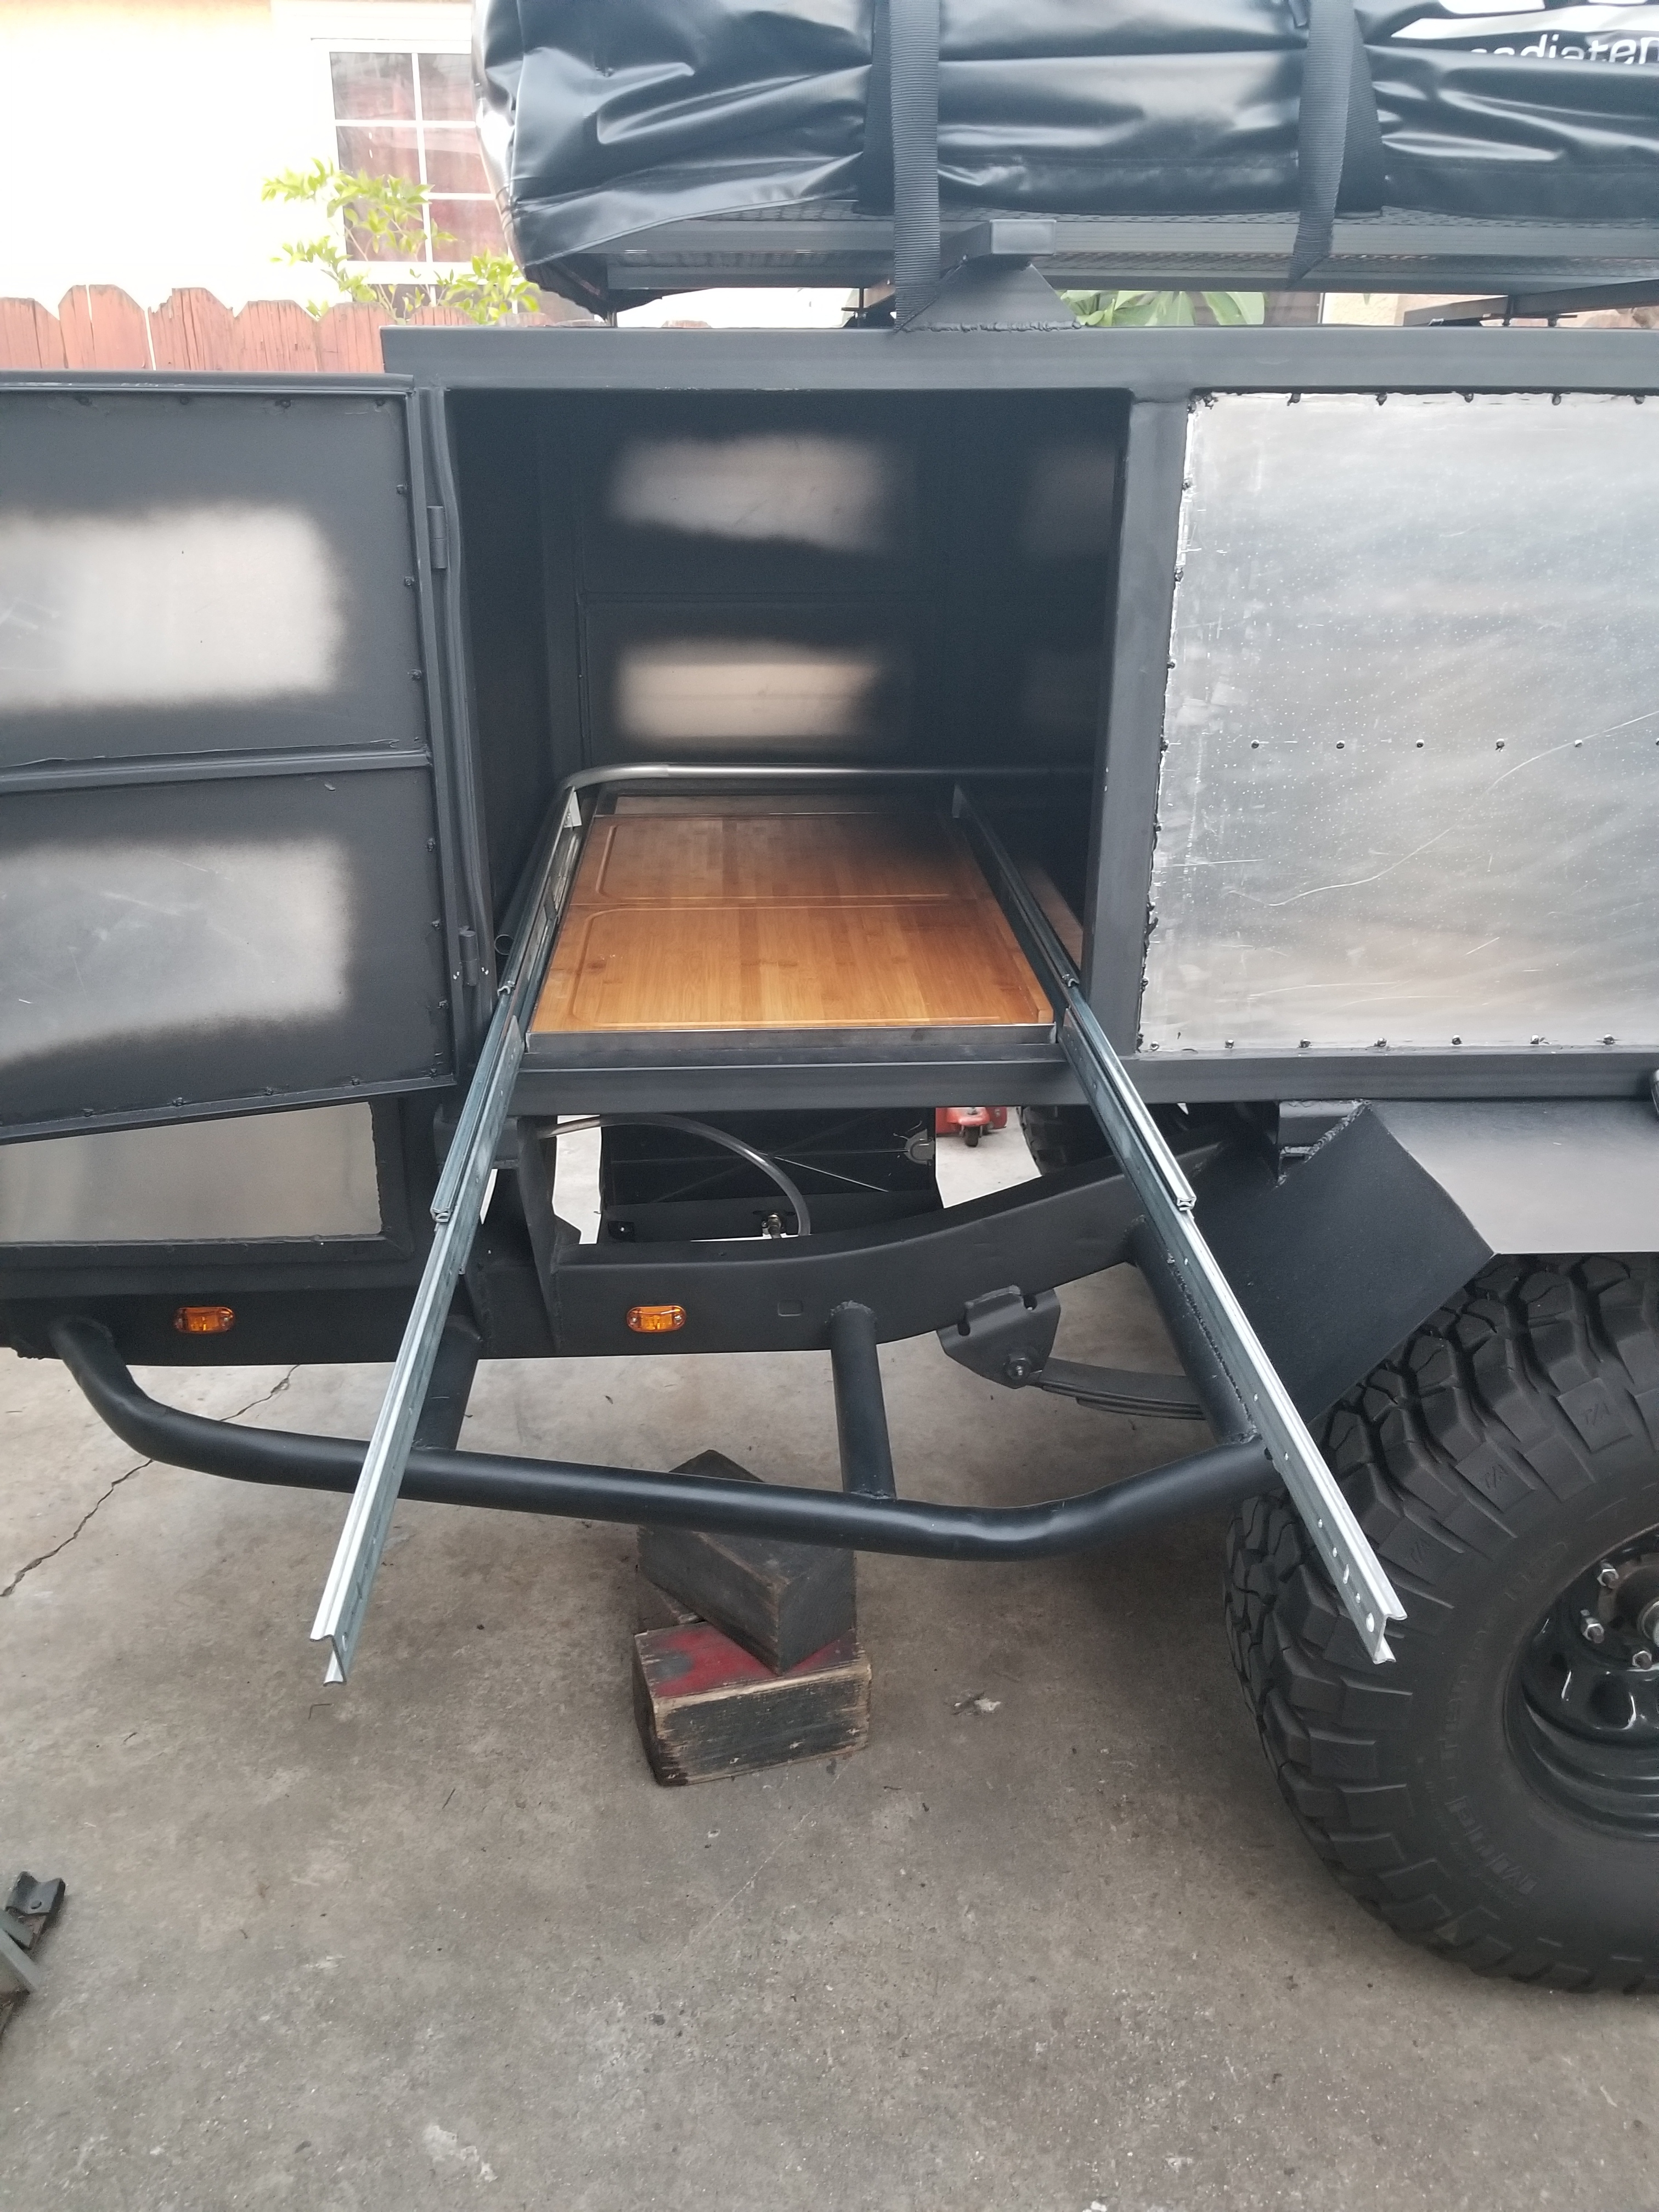
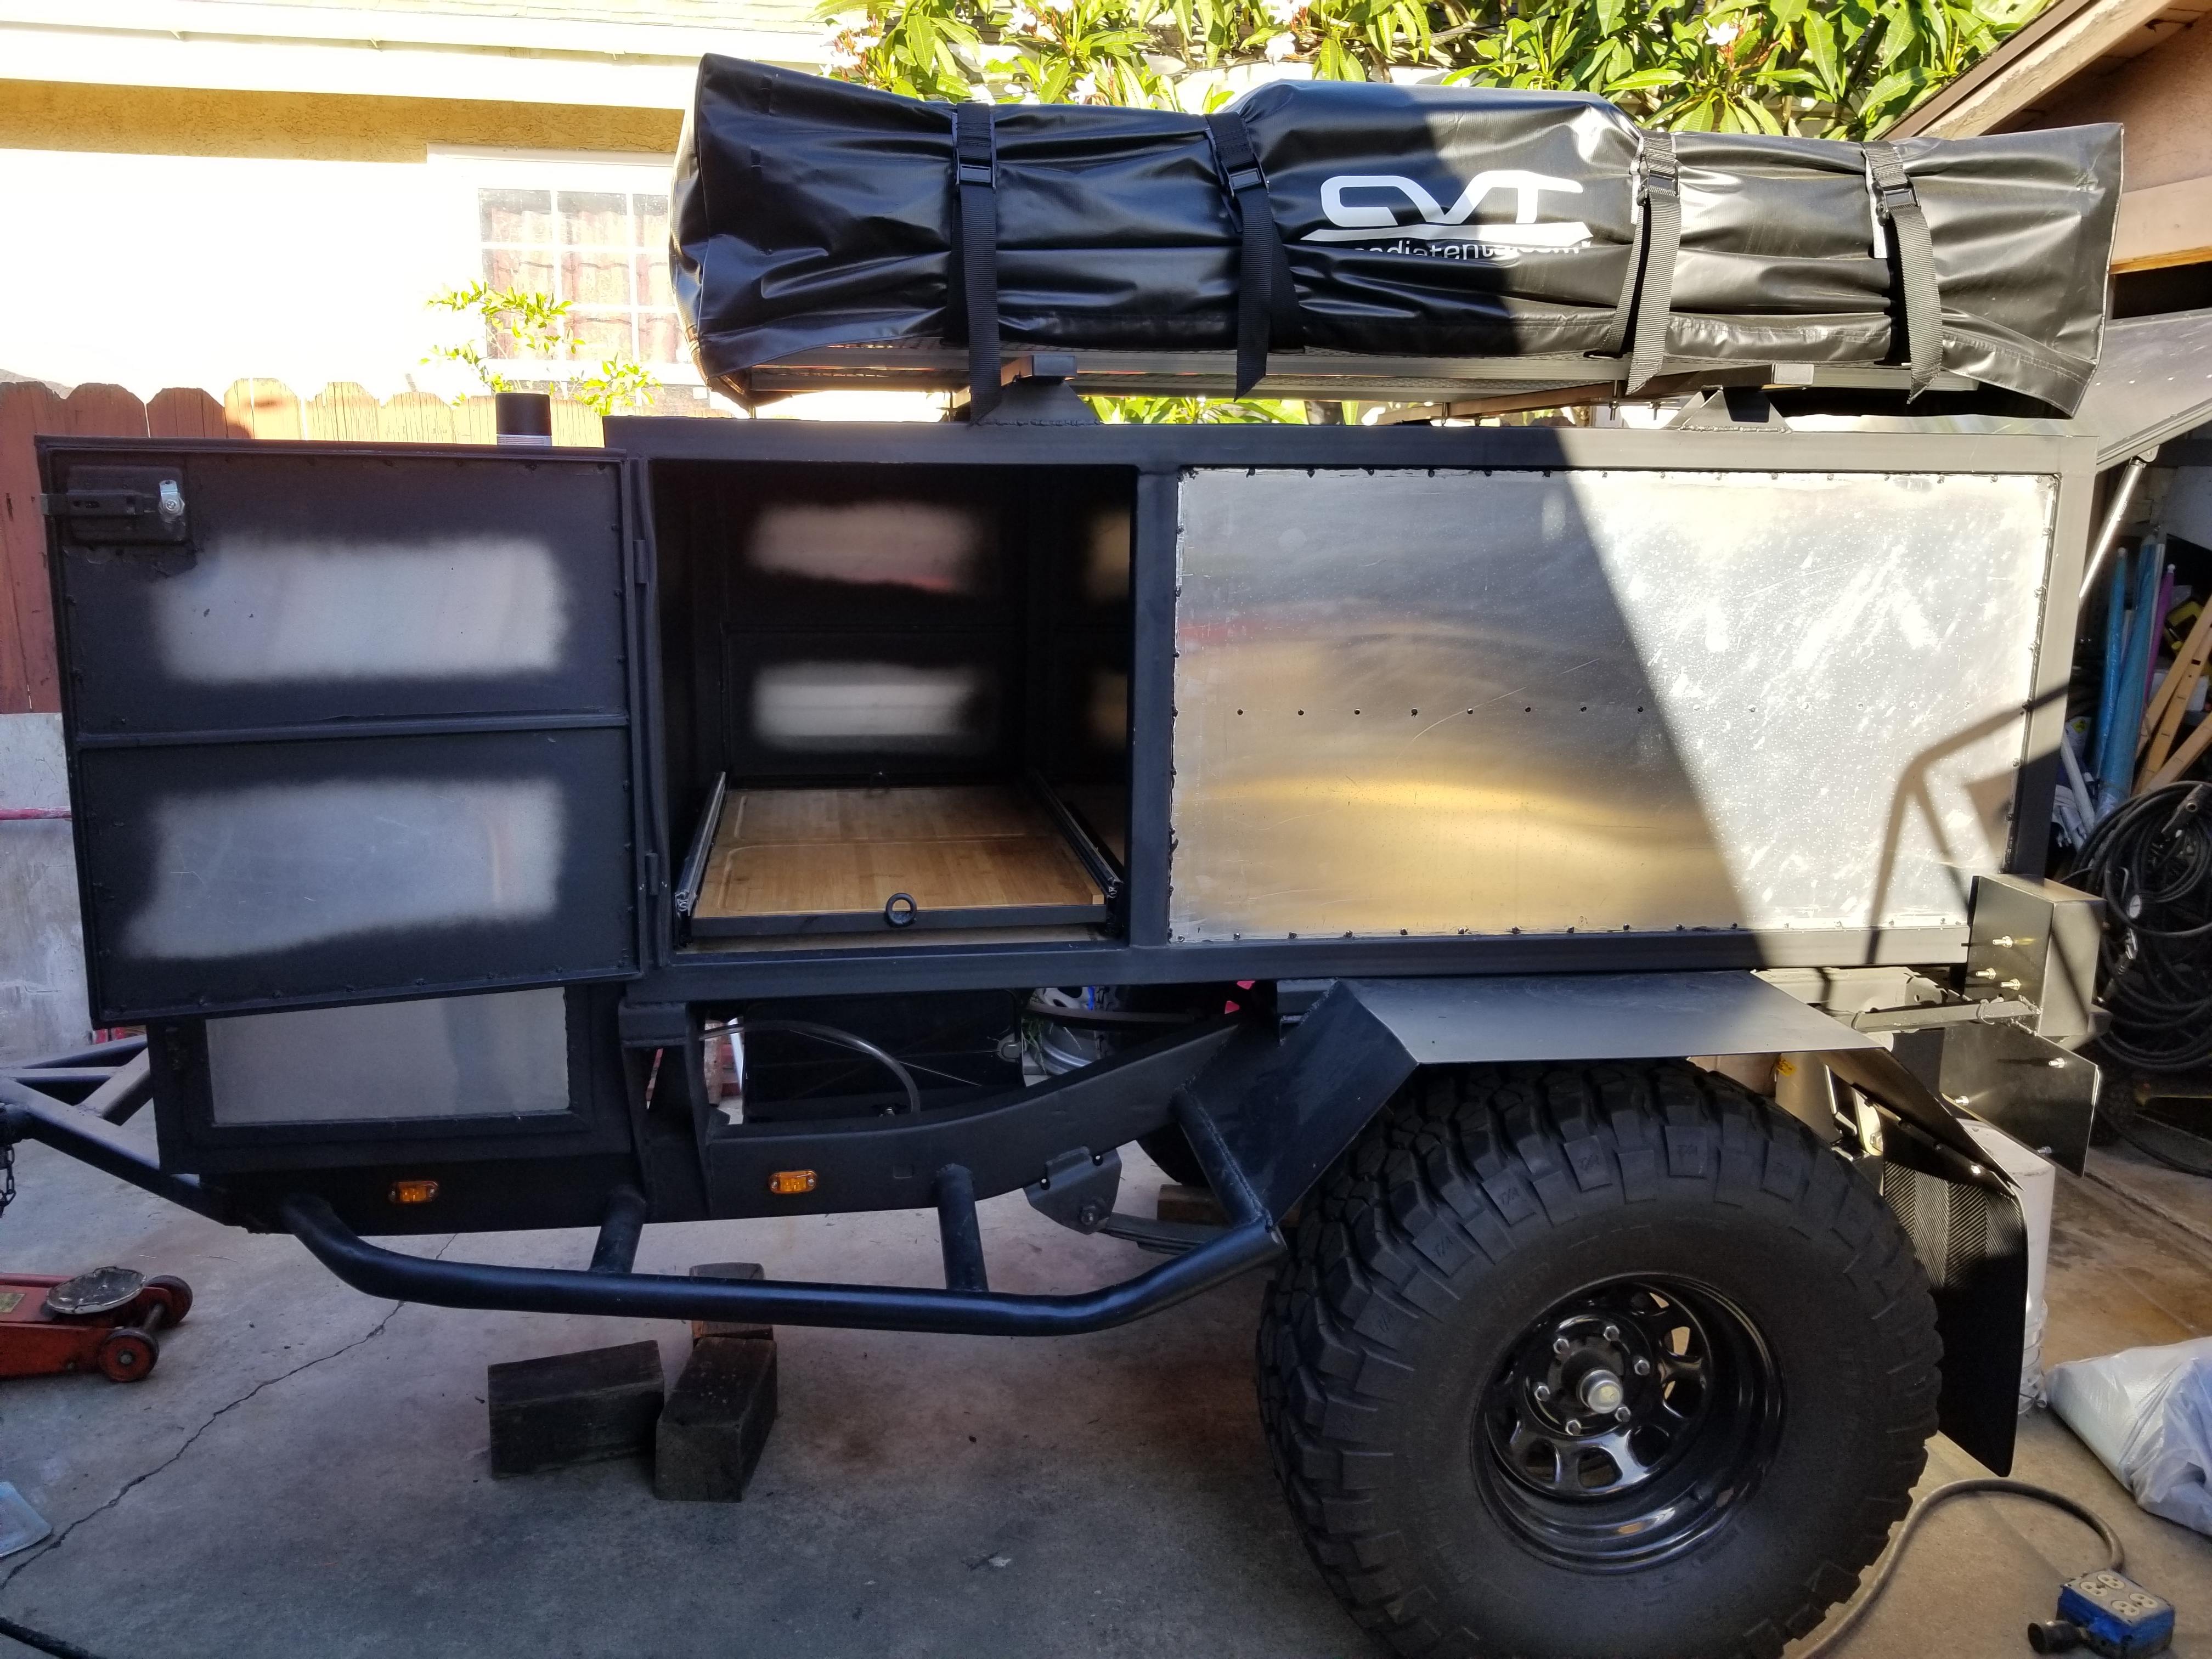
Working on. The cooler slide out. I bought 2 full size 'home kitchen style' bamboo chopping boards at IKEA for about 30 bucks and the 2 of them side by side ended up being the exact dimensions that I needed for the footprint of the Engel Deep Blue 80 cooler. Both chopping boards together measure out to be 18&1/8" � 36&1/4".
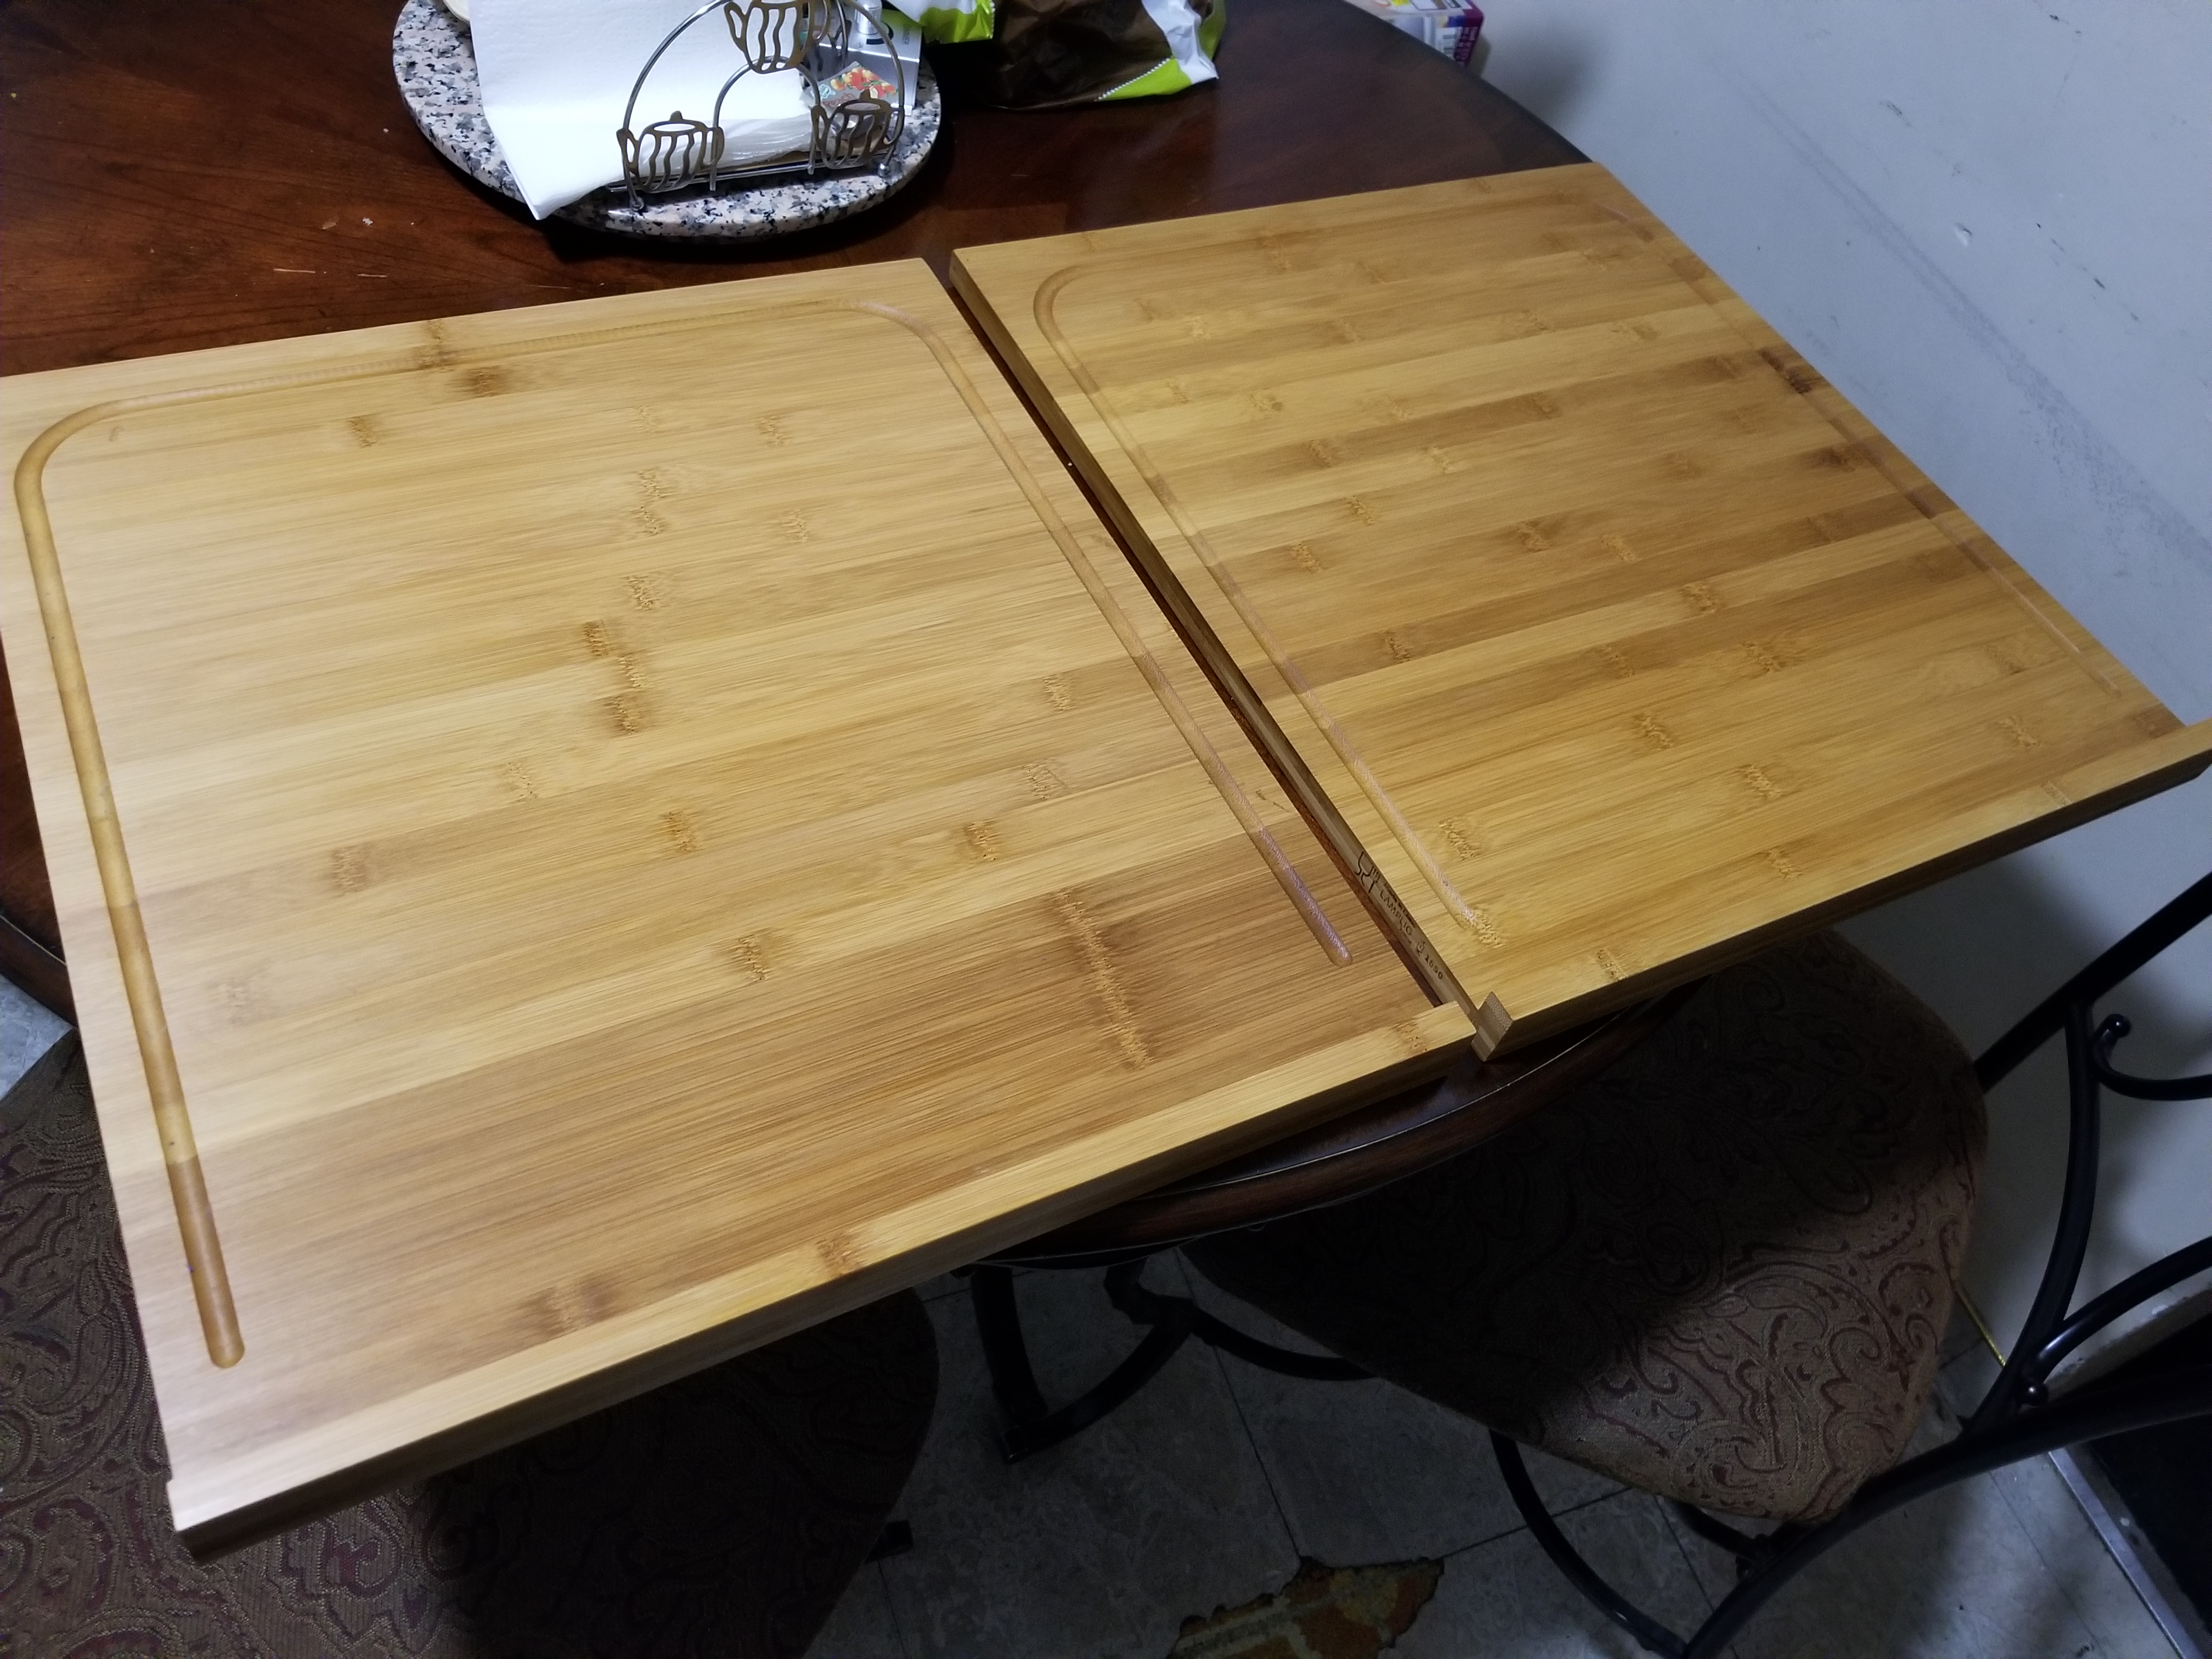
Each chopping board will be able to be removed individually if needed. And I'm contemplating adding brackets underneath to be able to have 2 removable basins which I can utilize as space to wash utensils and such. On the space past the chopping boards I have a 10"�21" space which I plan to use as a spot for a small spice rack, and pantry. I can possibly add a storage for disposable cups and plates because I am able to build this cabinet space up to 20-22" high. We'll see. A lot more to come for this portion of the build.
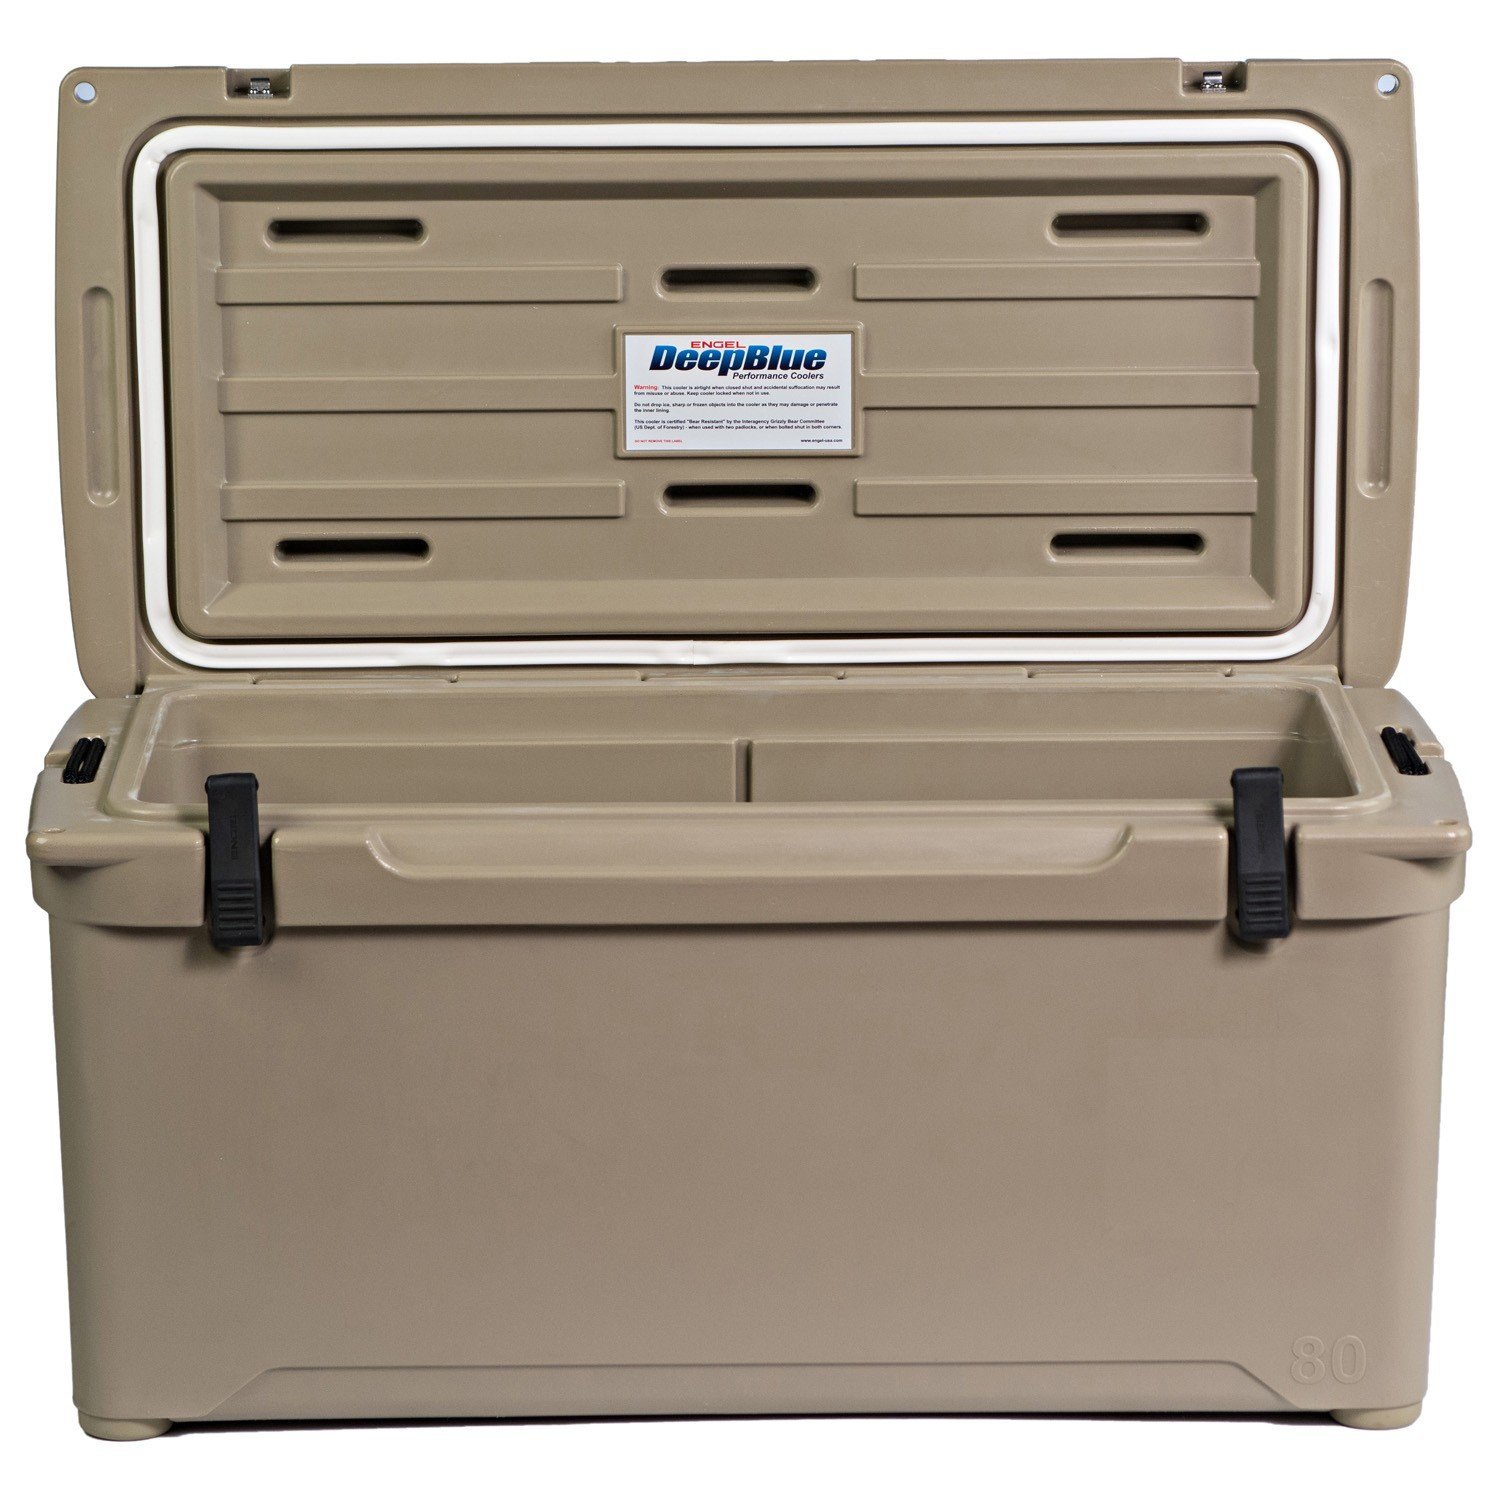
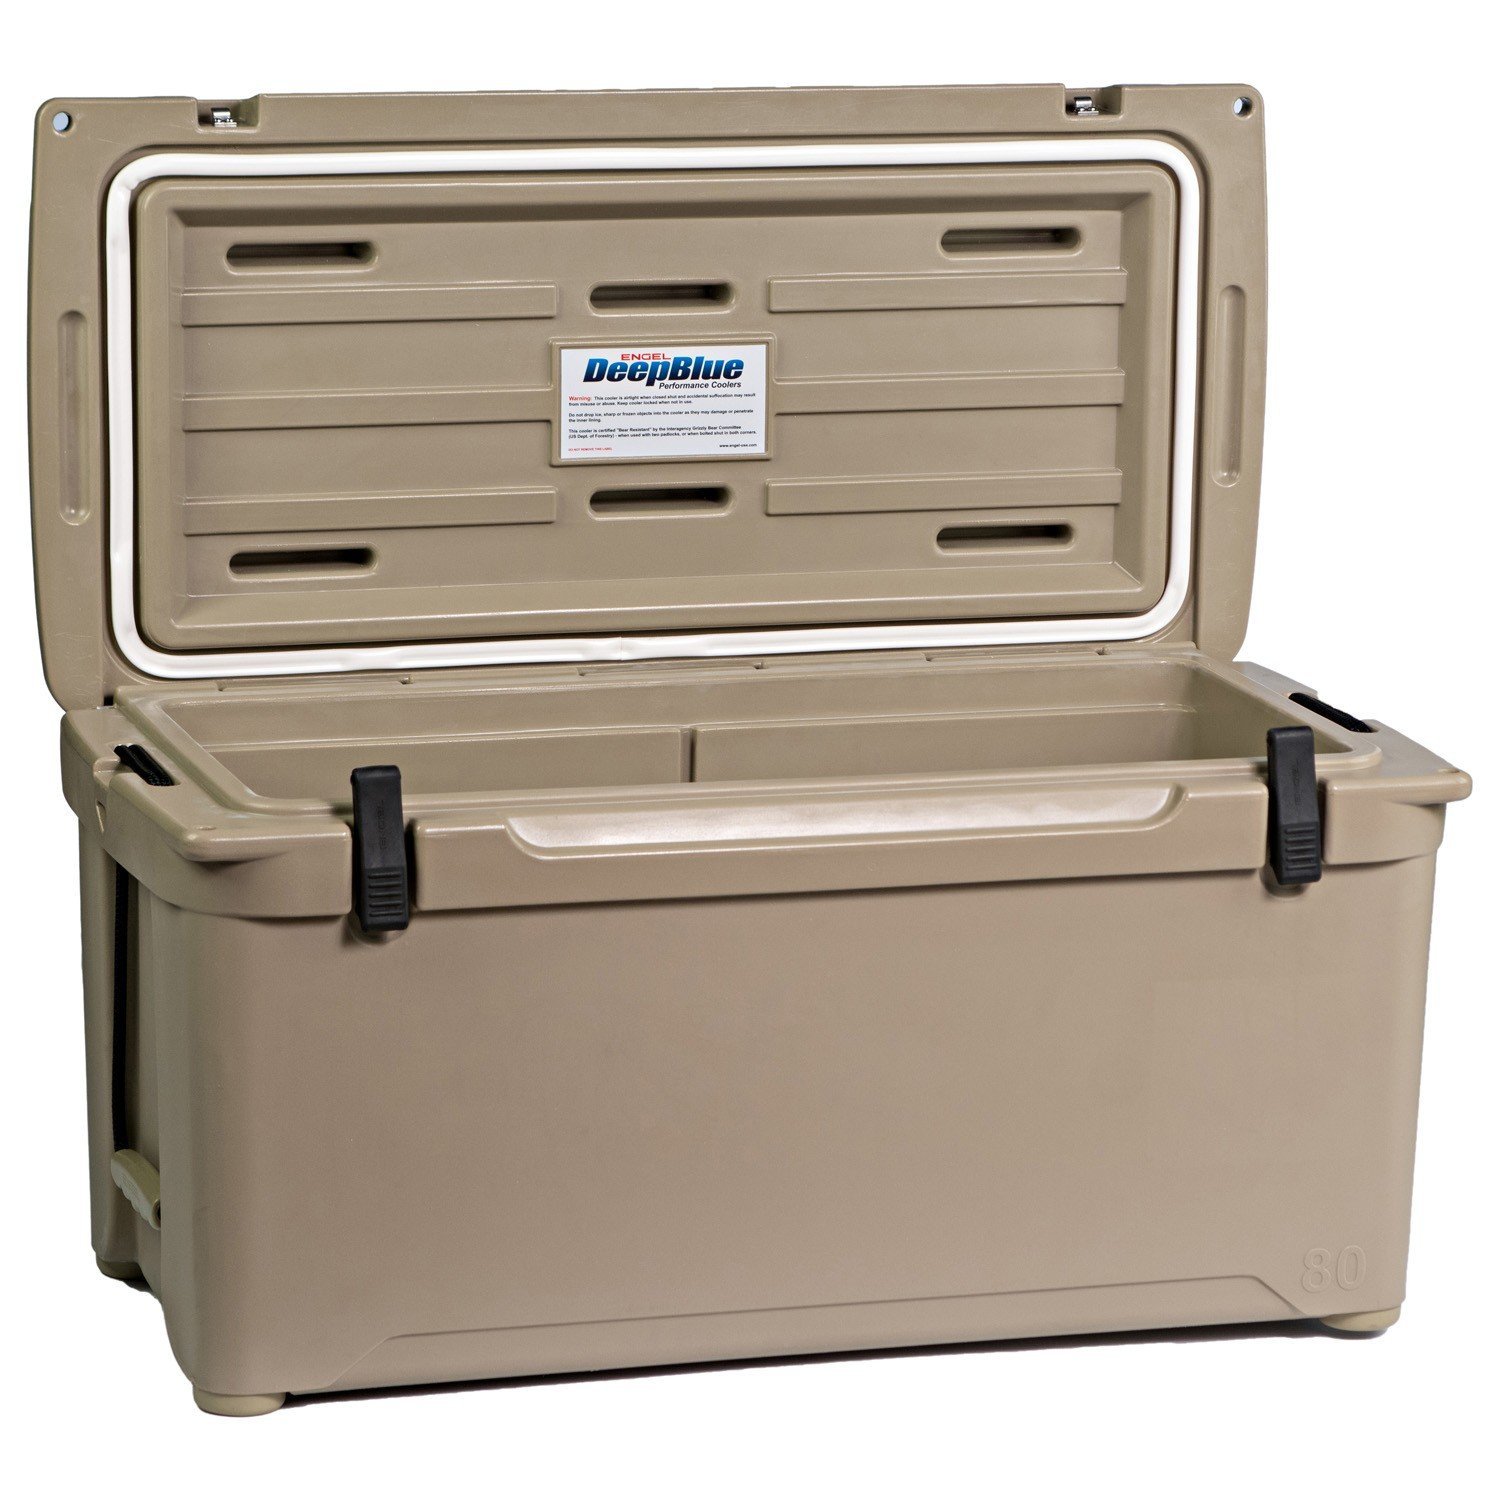
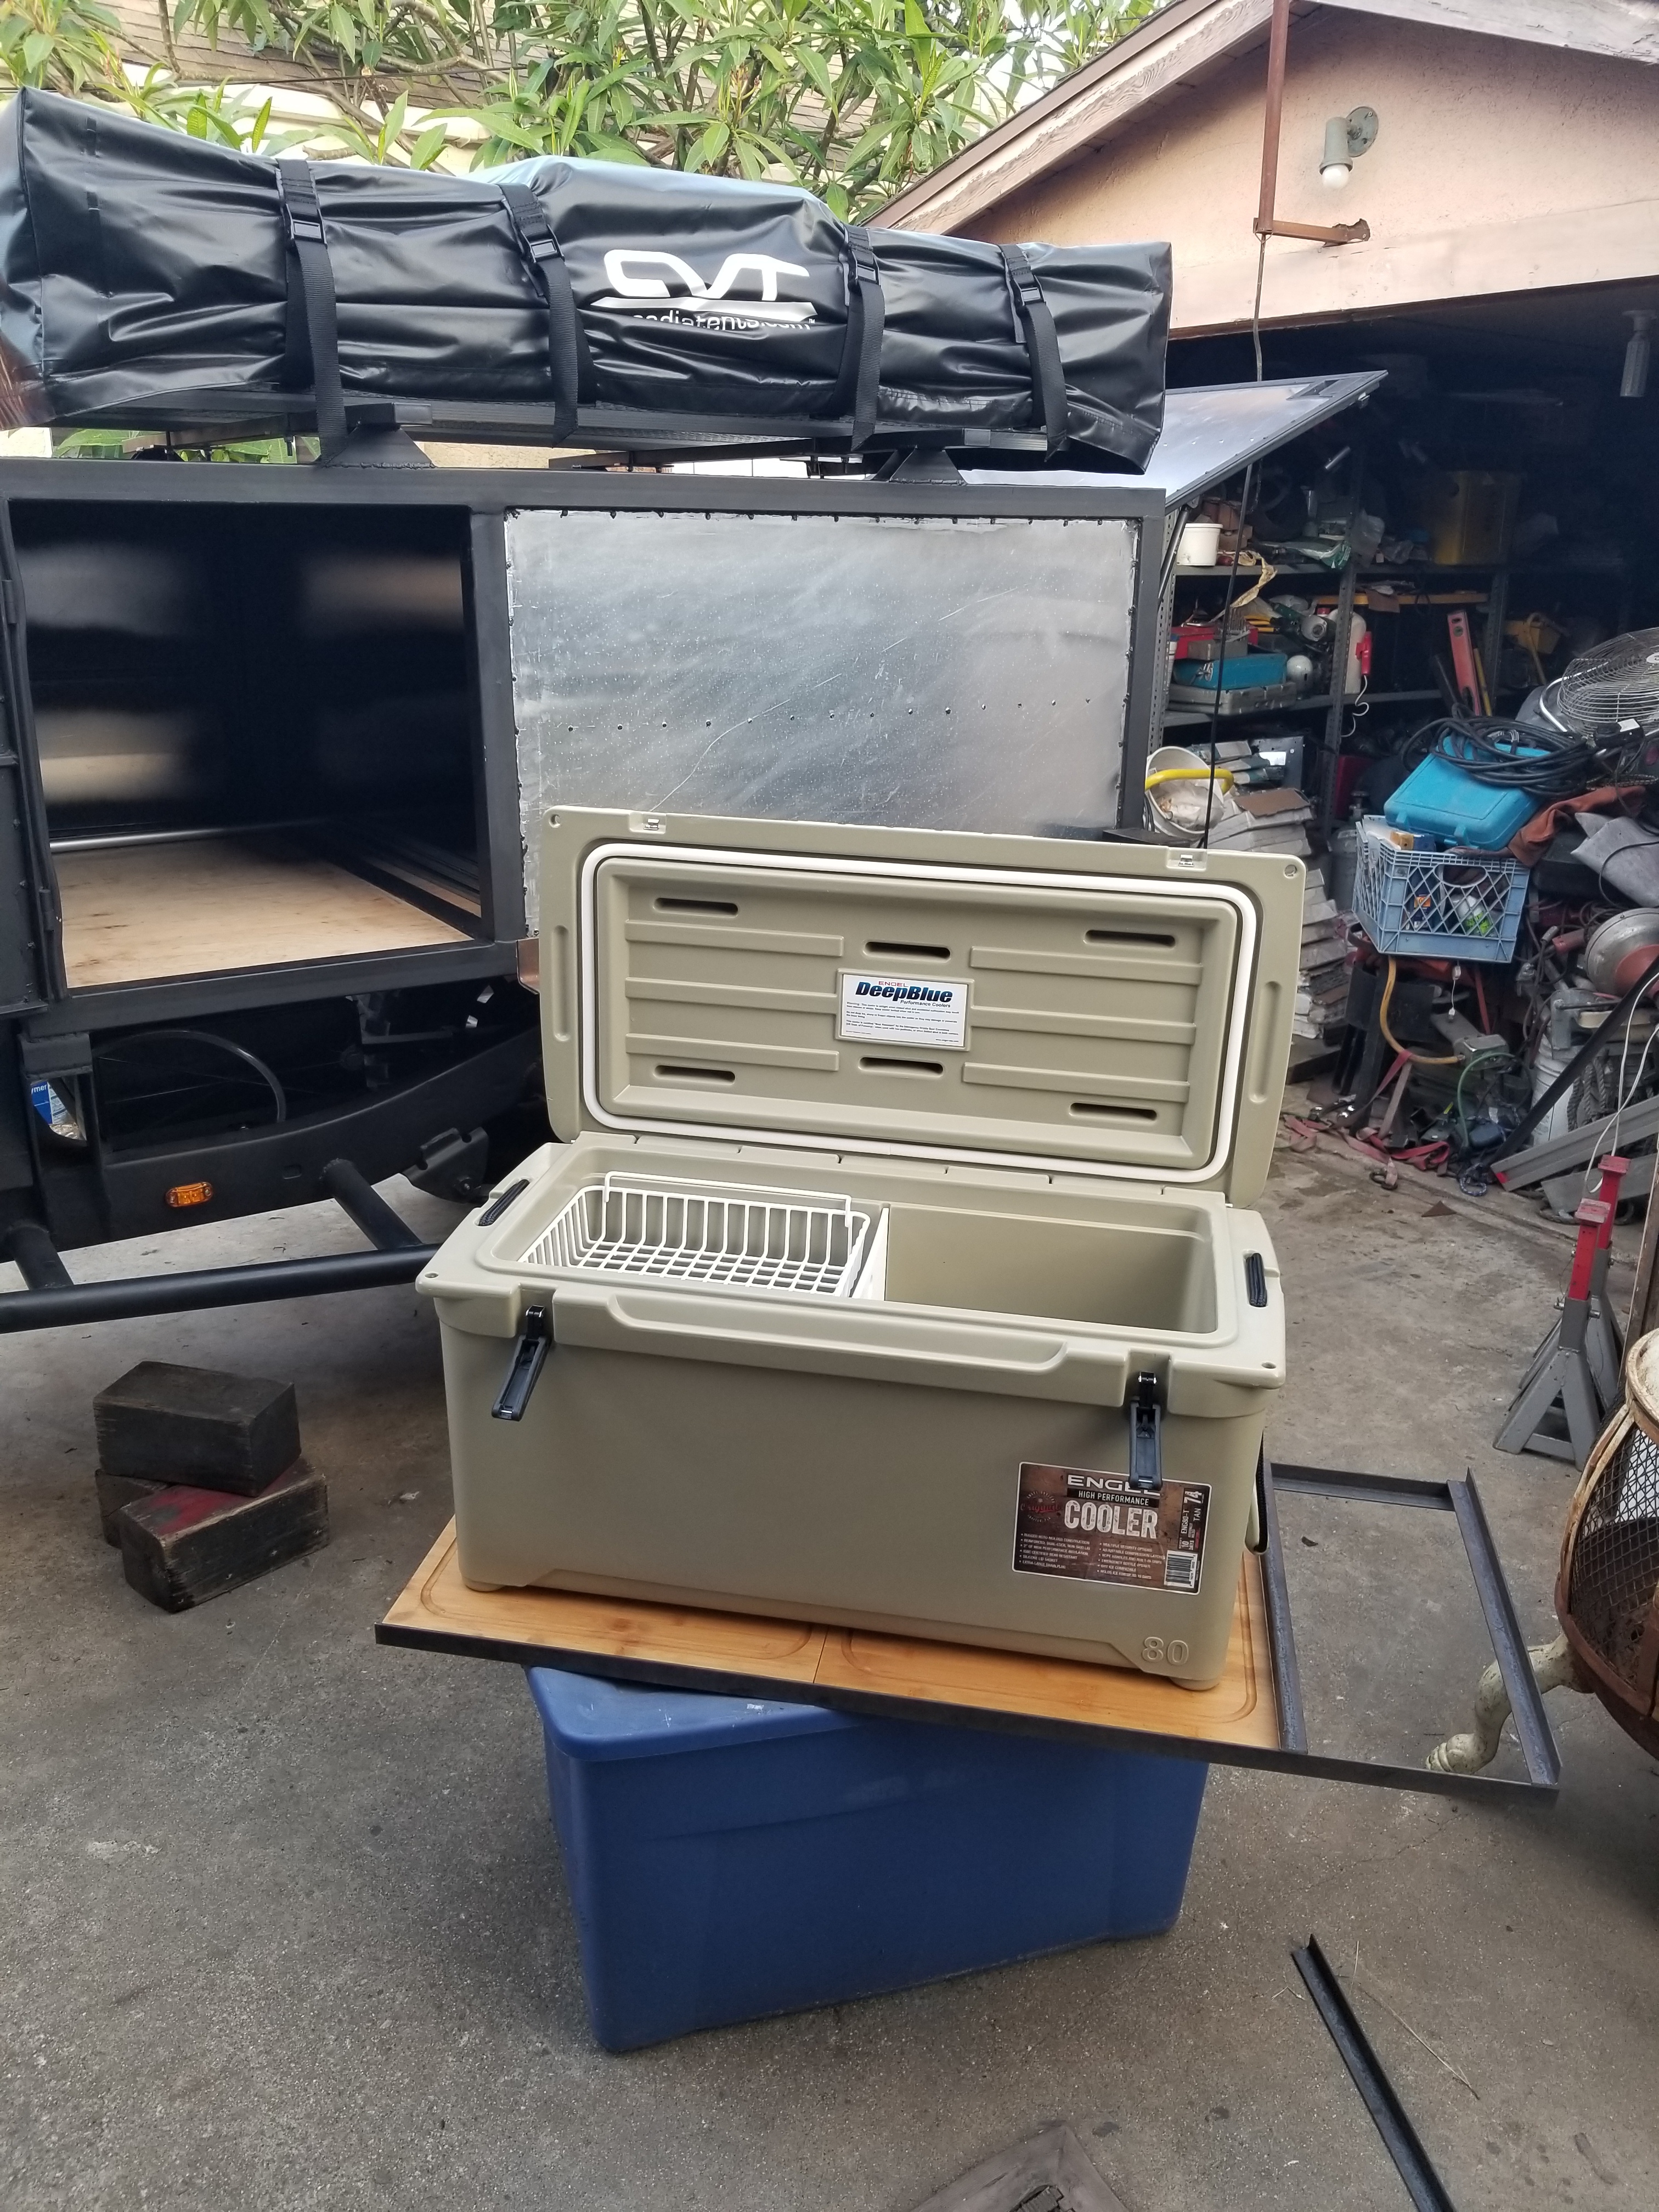
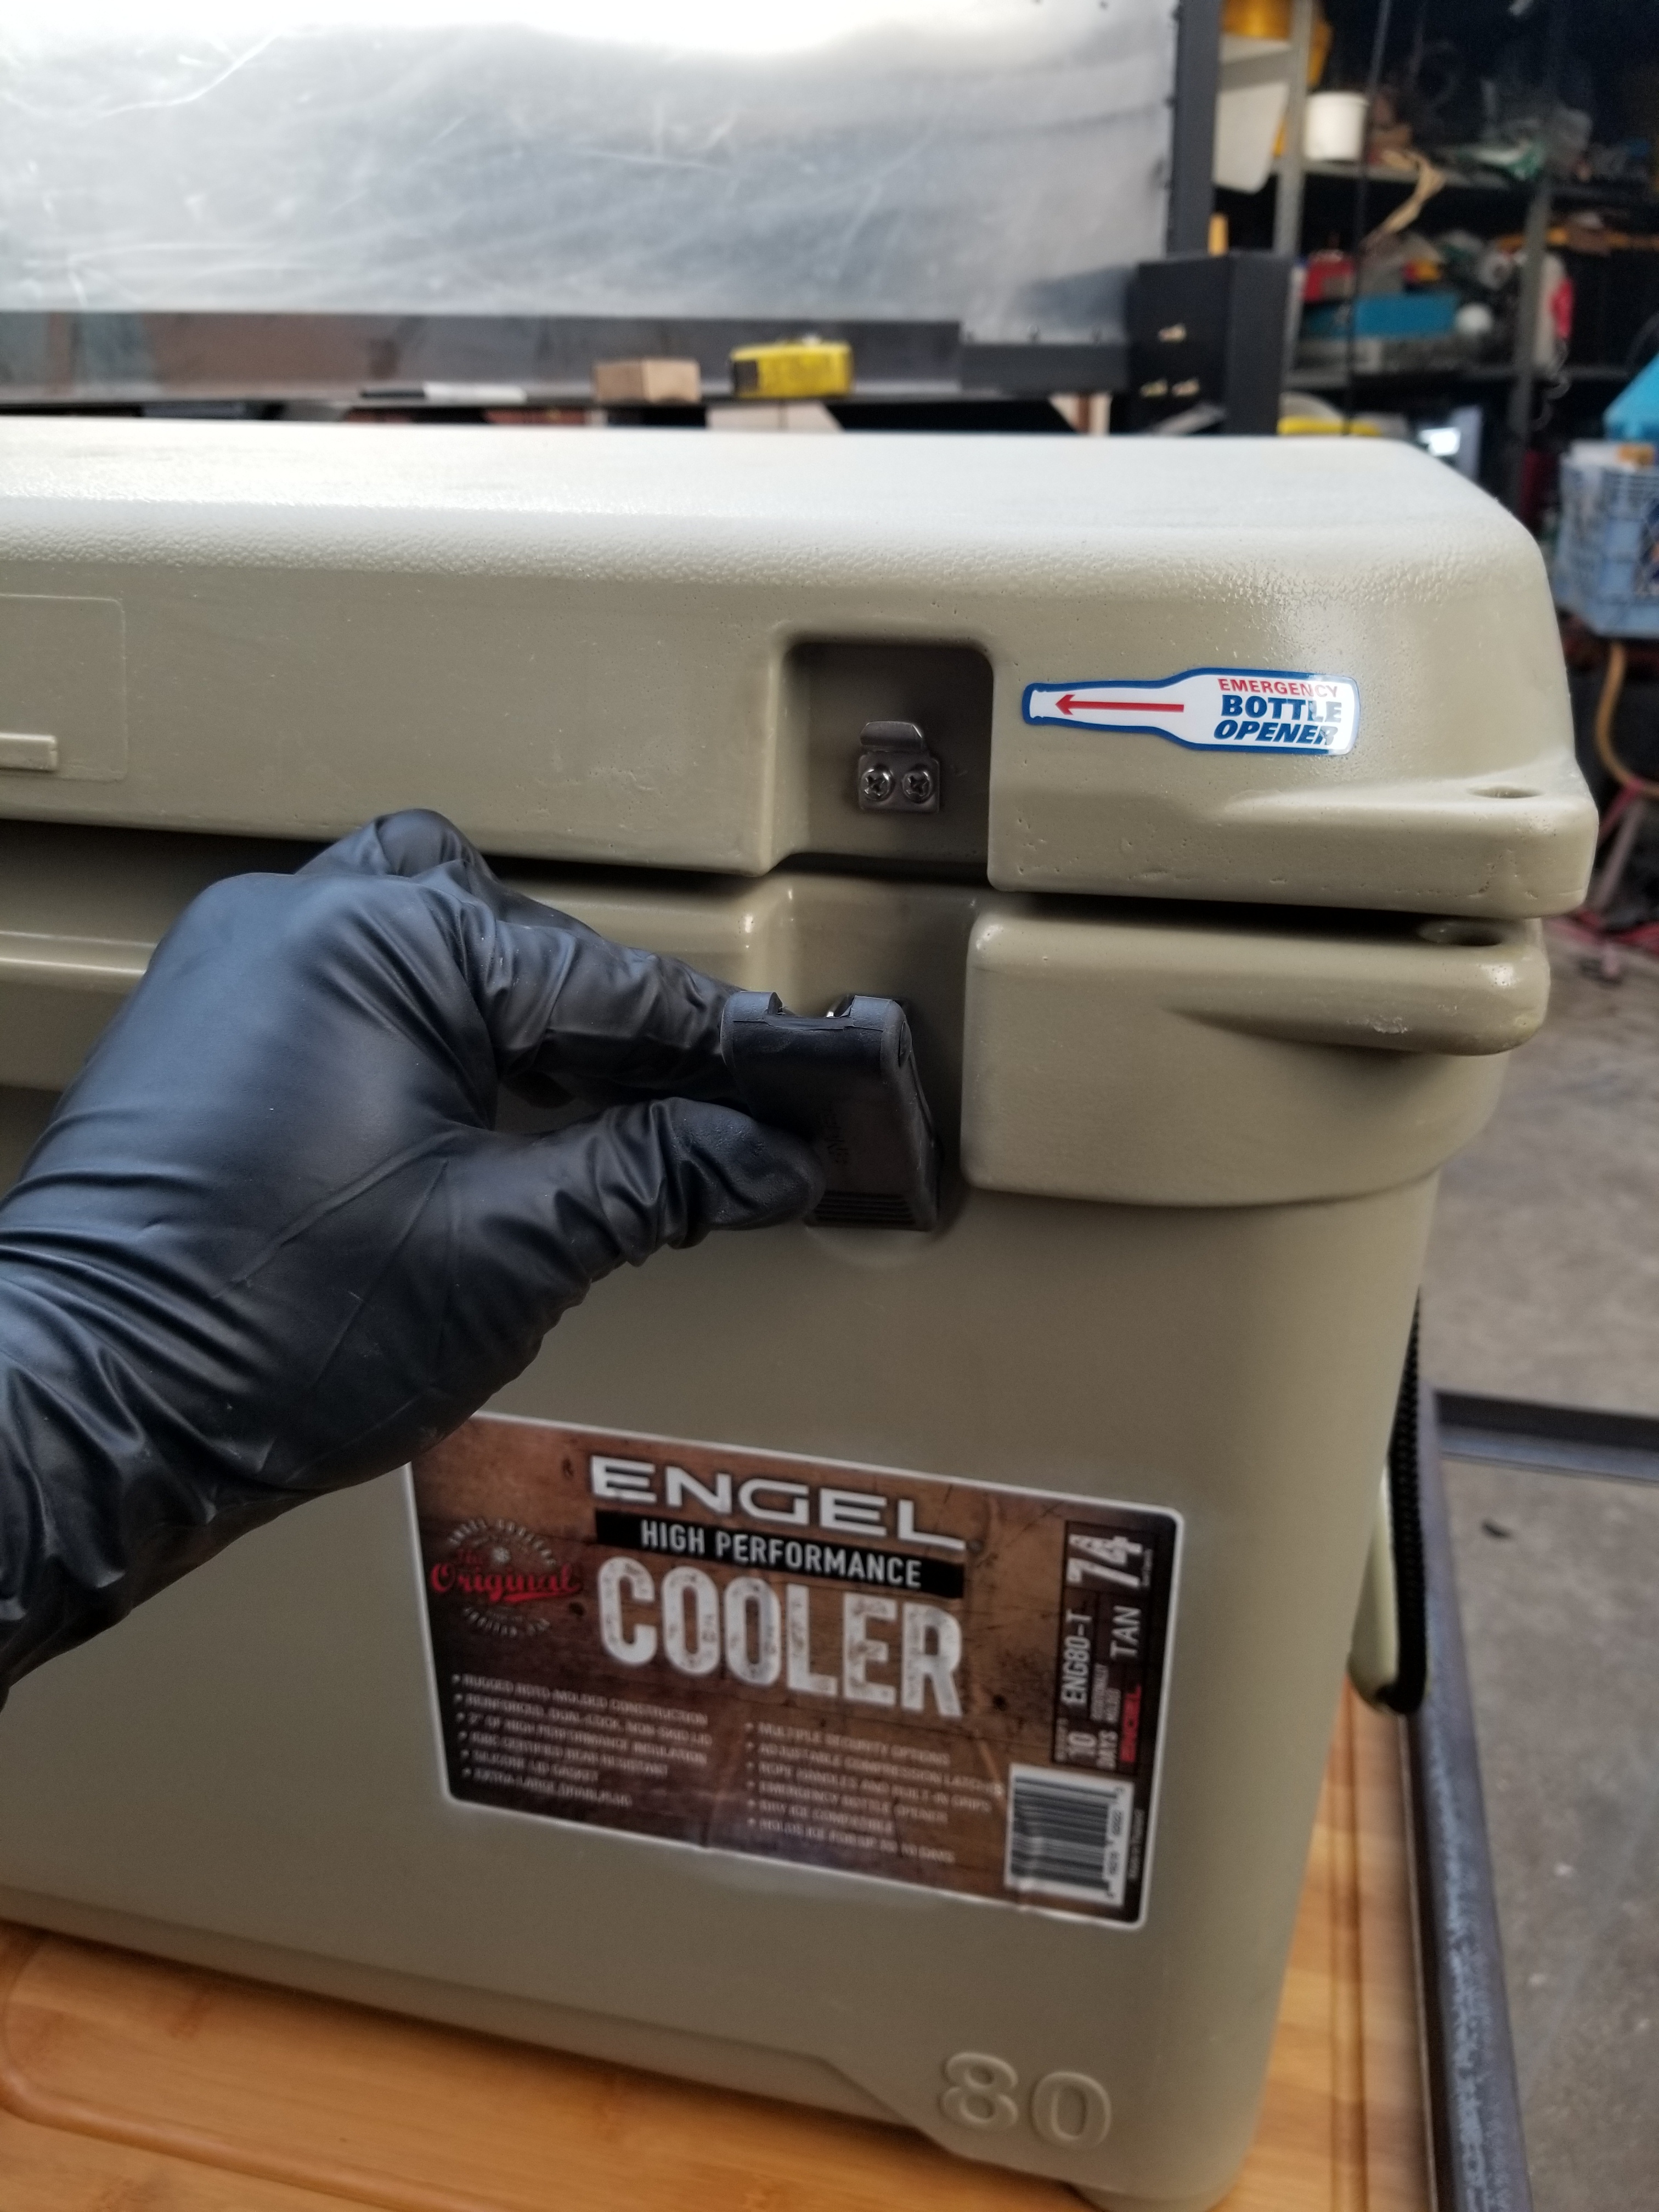
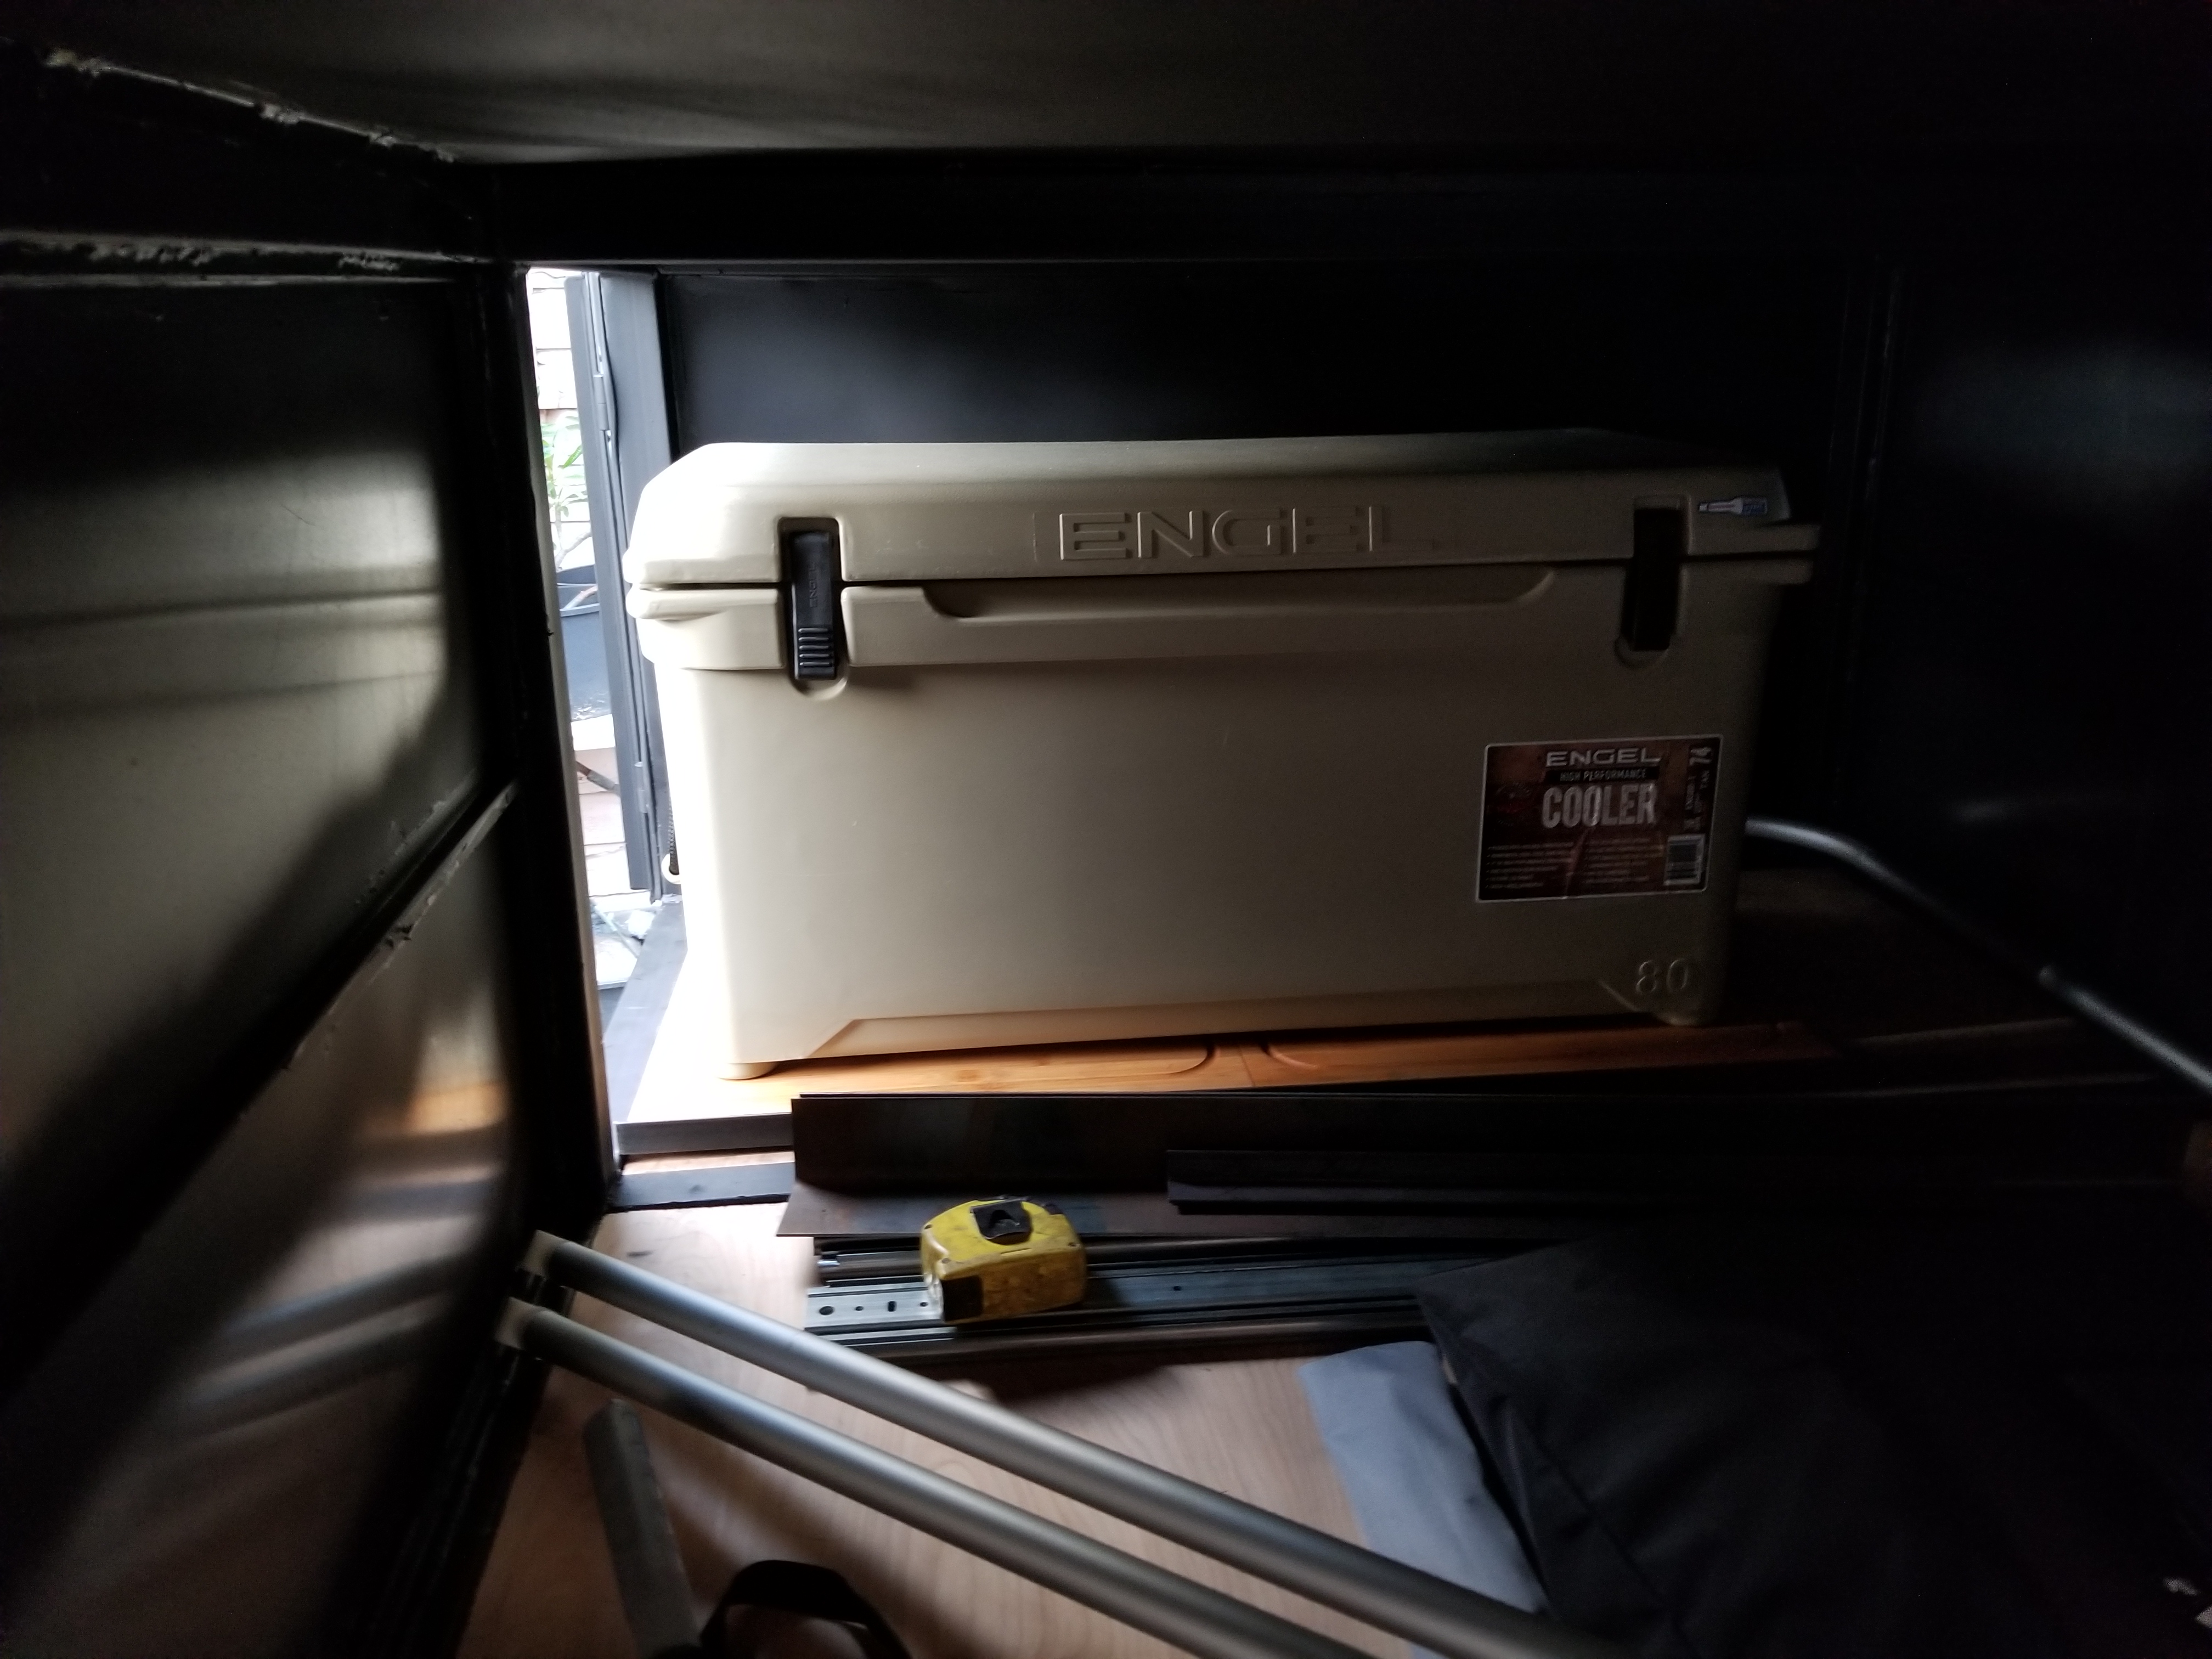
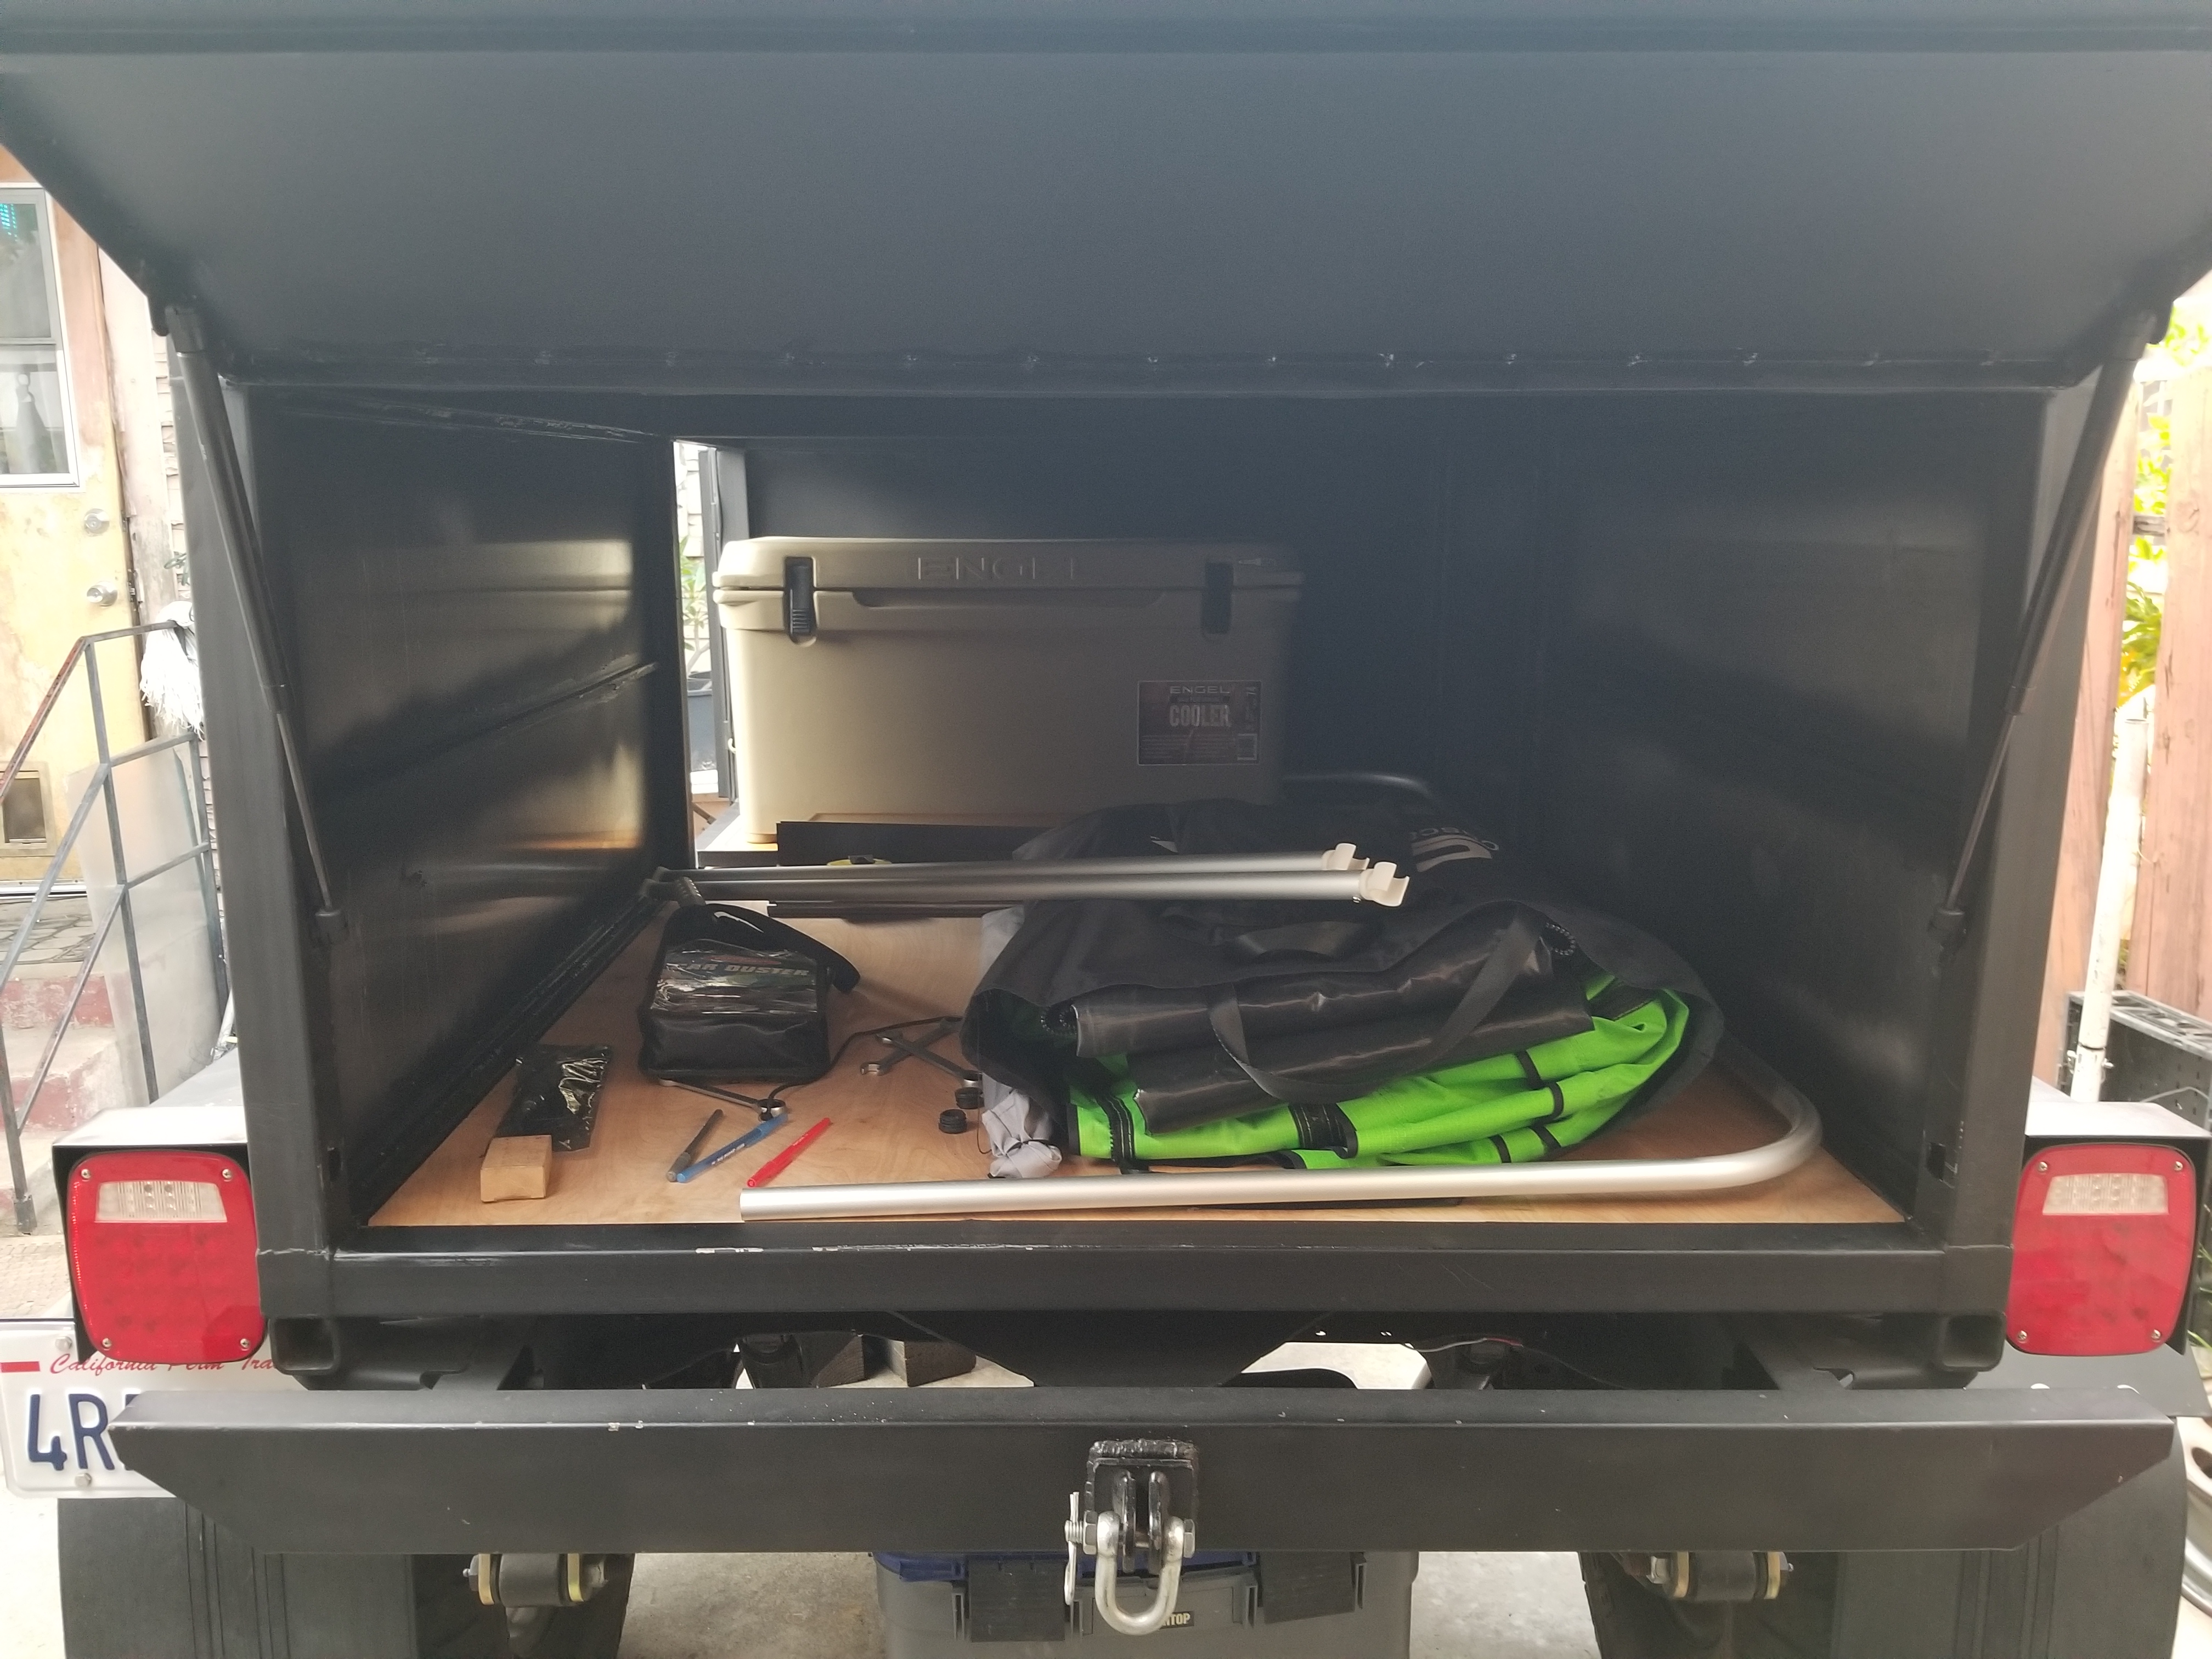
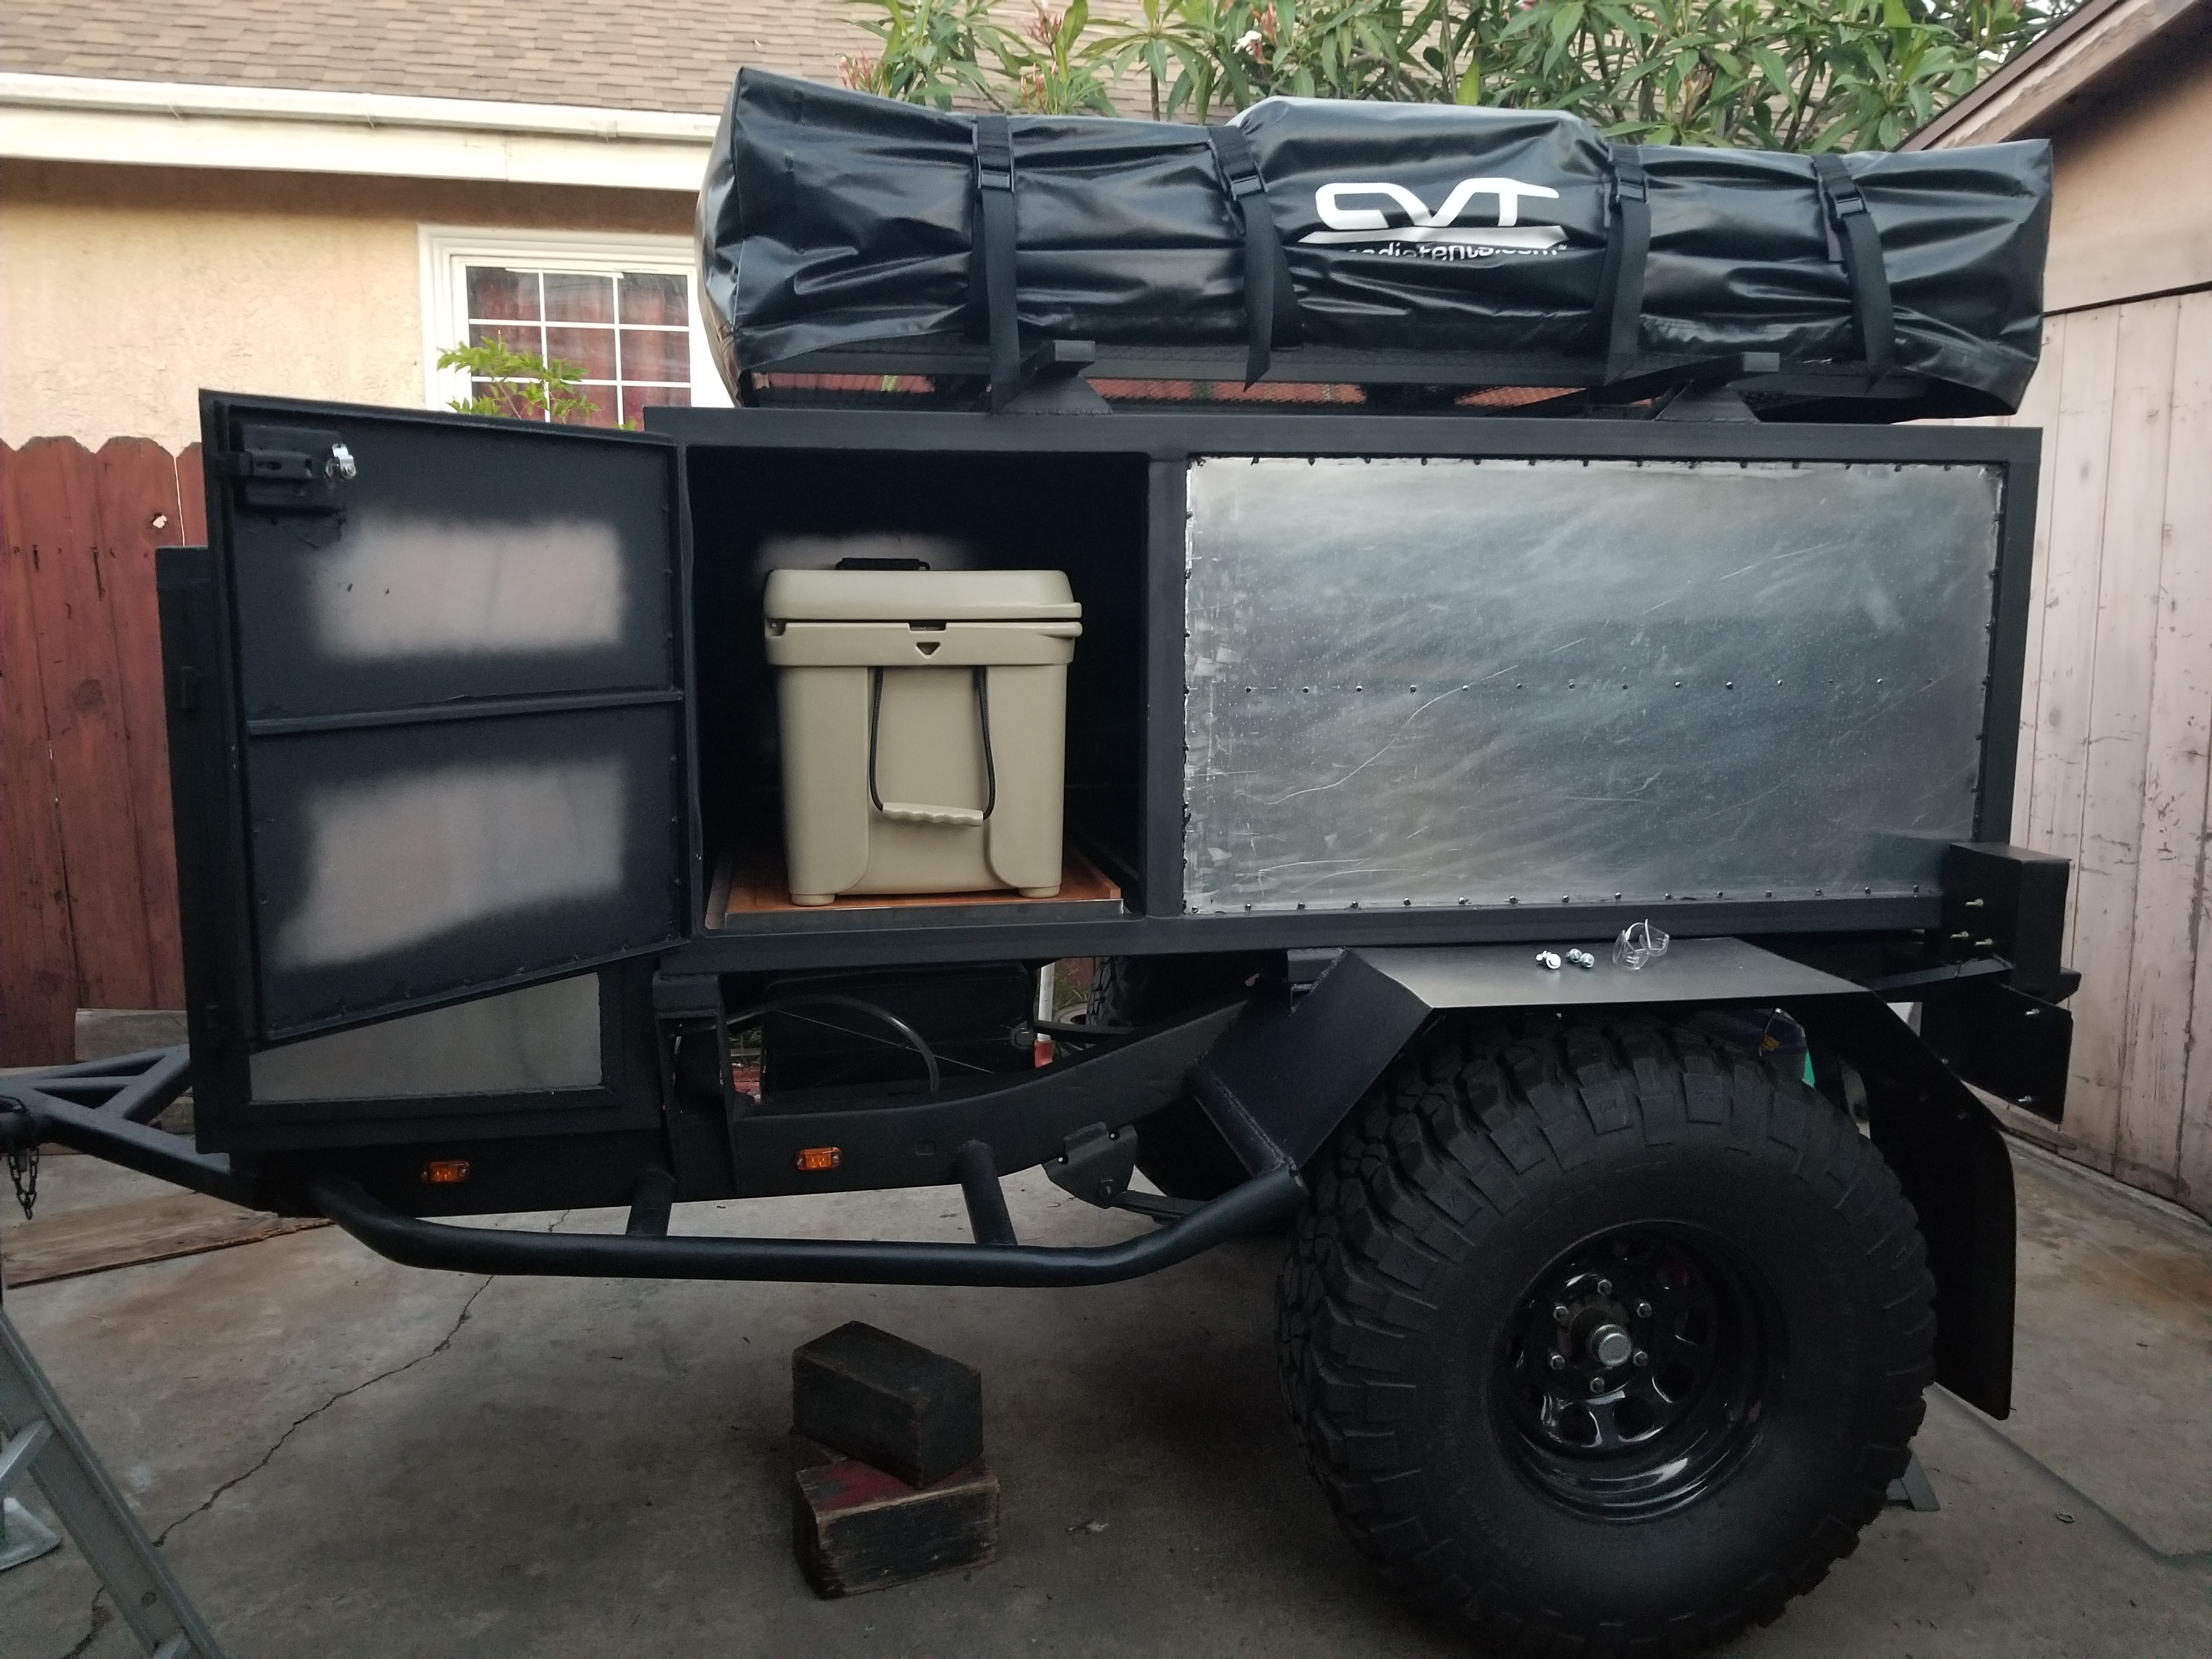
Aside from starting the slide out My Engel Deep Blue 80qt cooler came in this weekend Thanks to my lovely girlfriend who is just as anxious to see this trailer build complete as I am. I think she is just as anxious to try it out too It has so much space. I love the fact that it has a divider to keep items separate and the basket to keep items on top for easy access. Also has a built in emergency bottle opener!
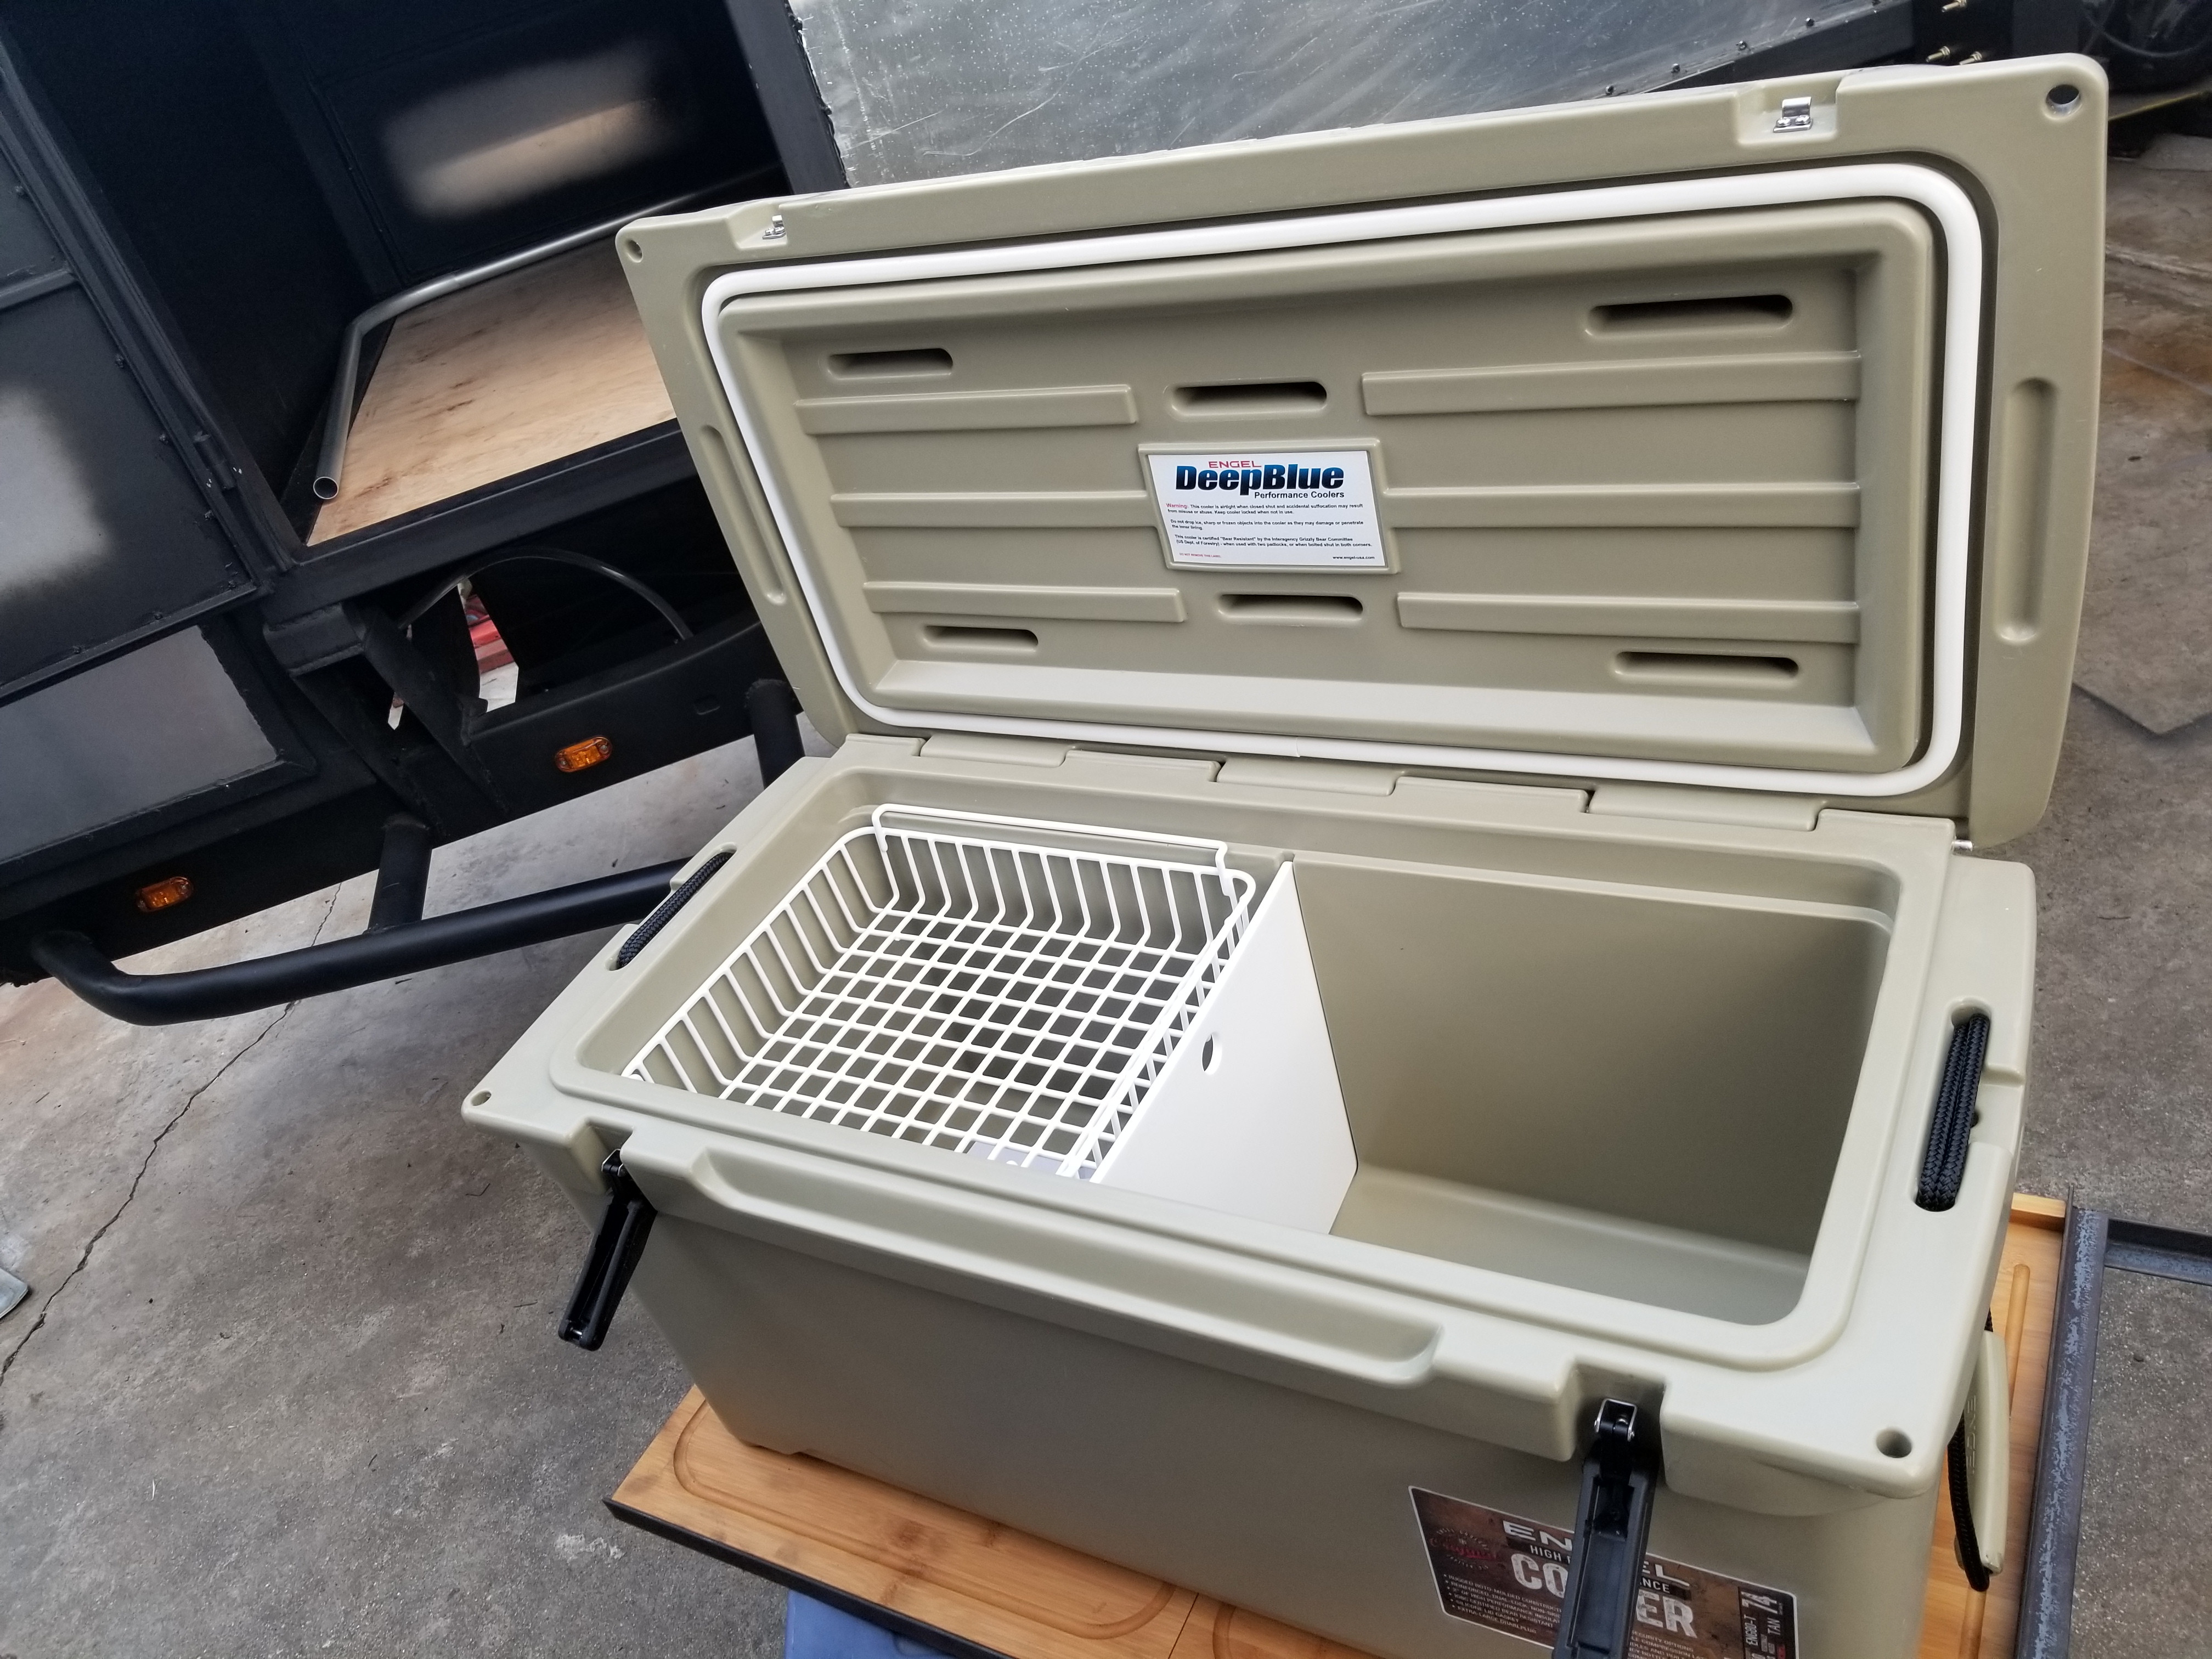
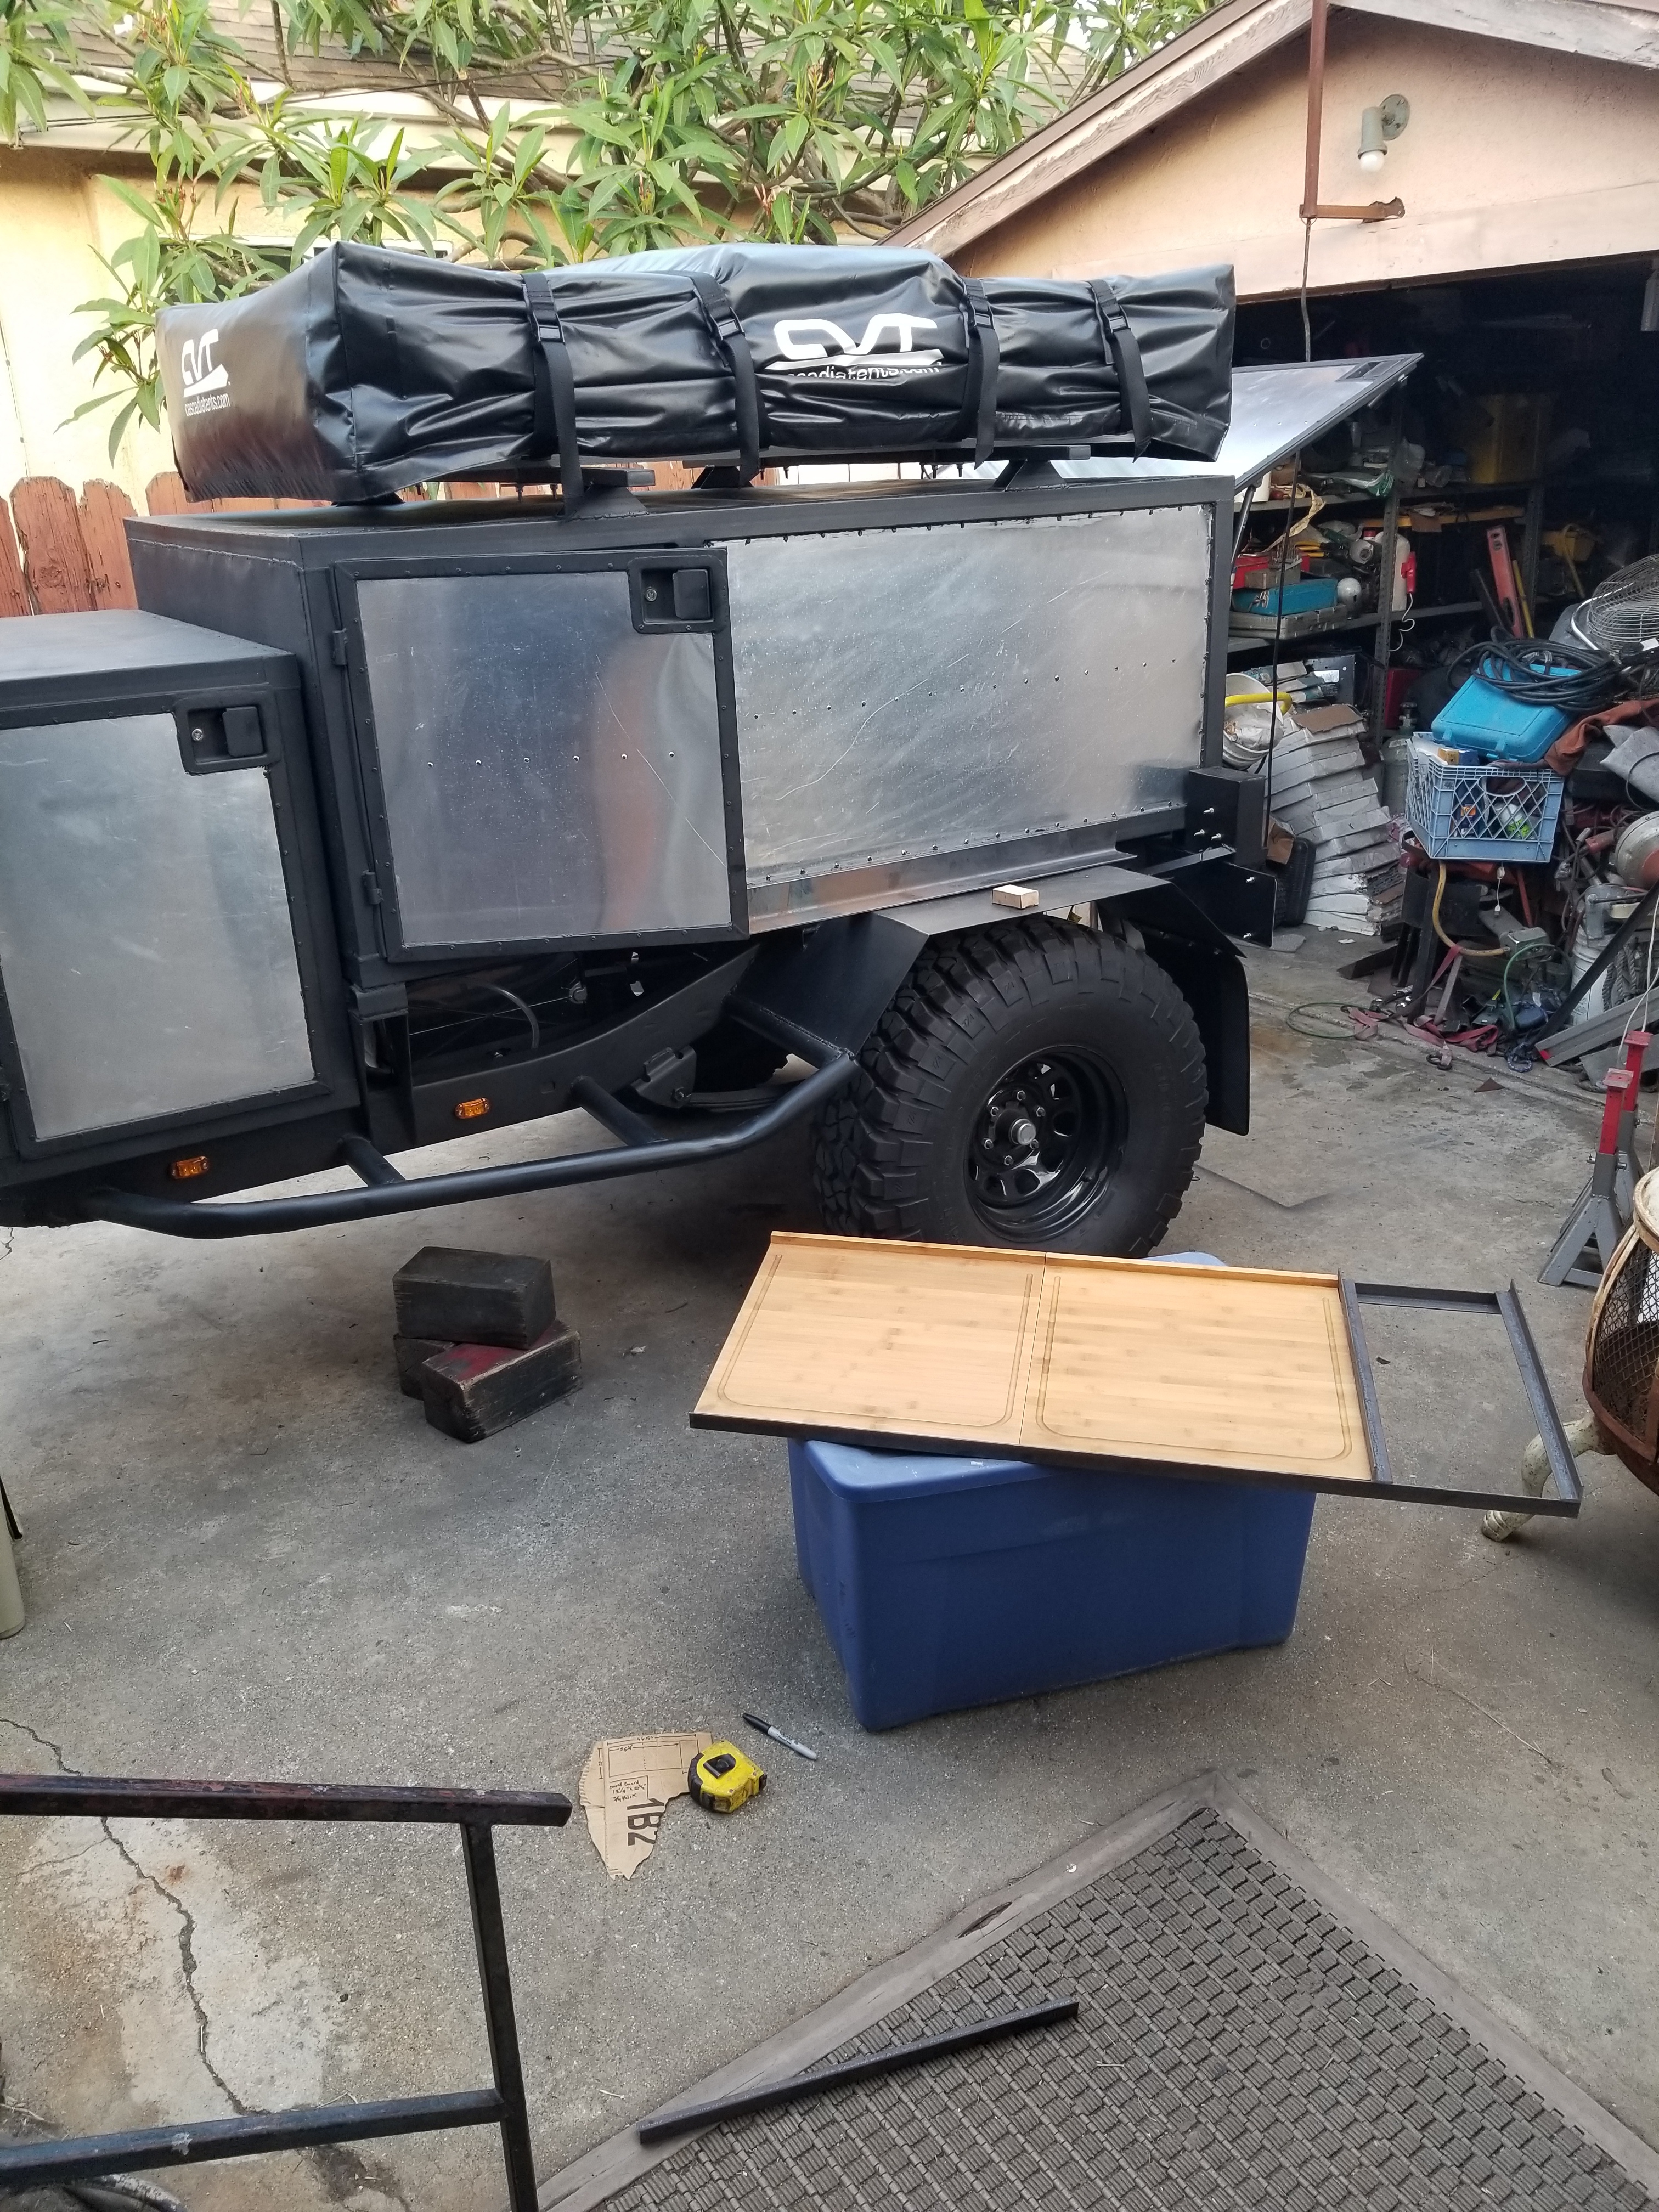
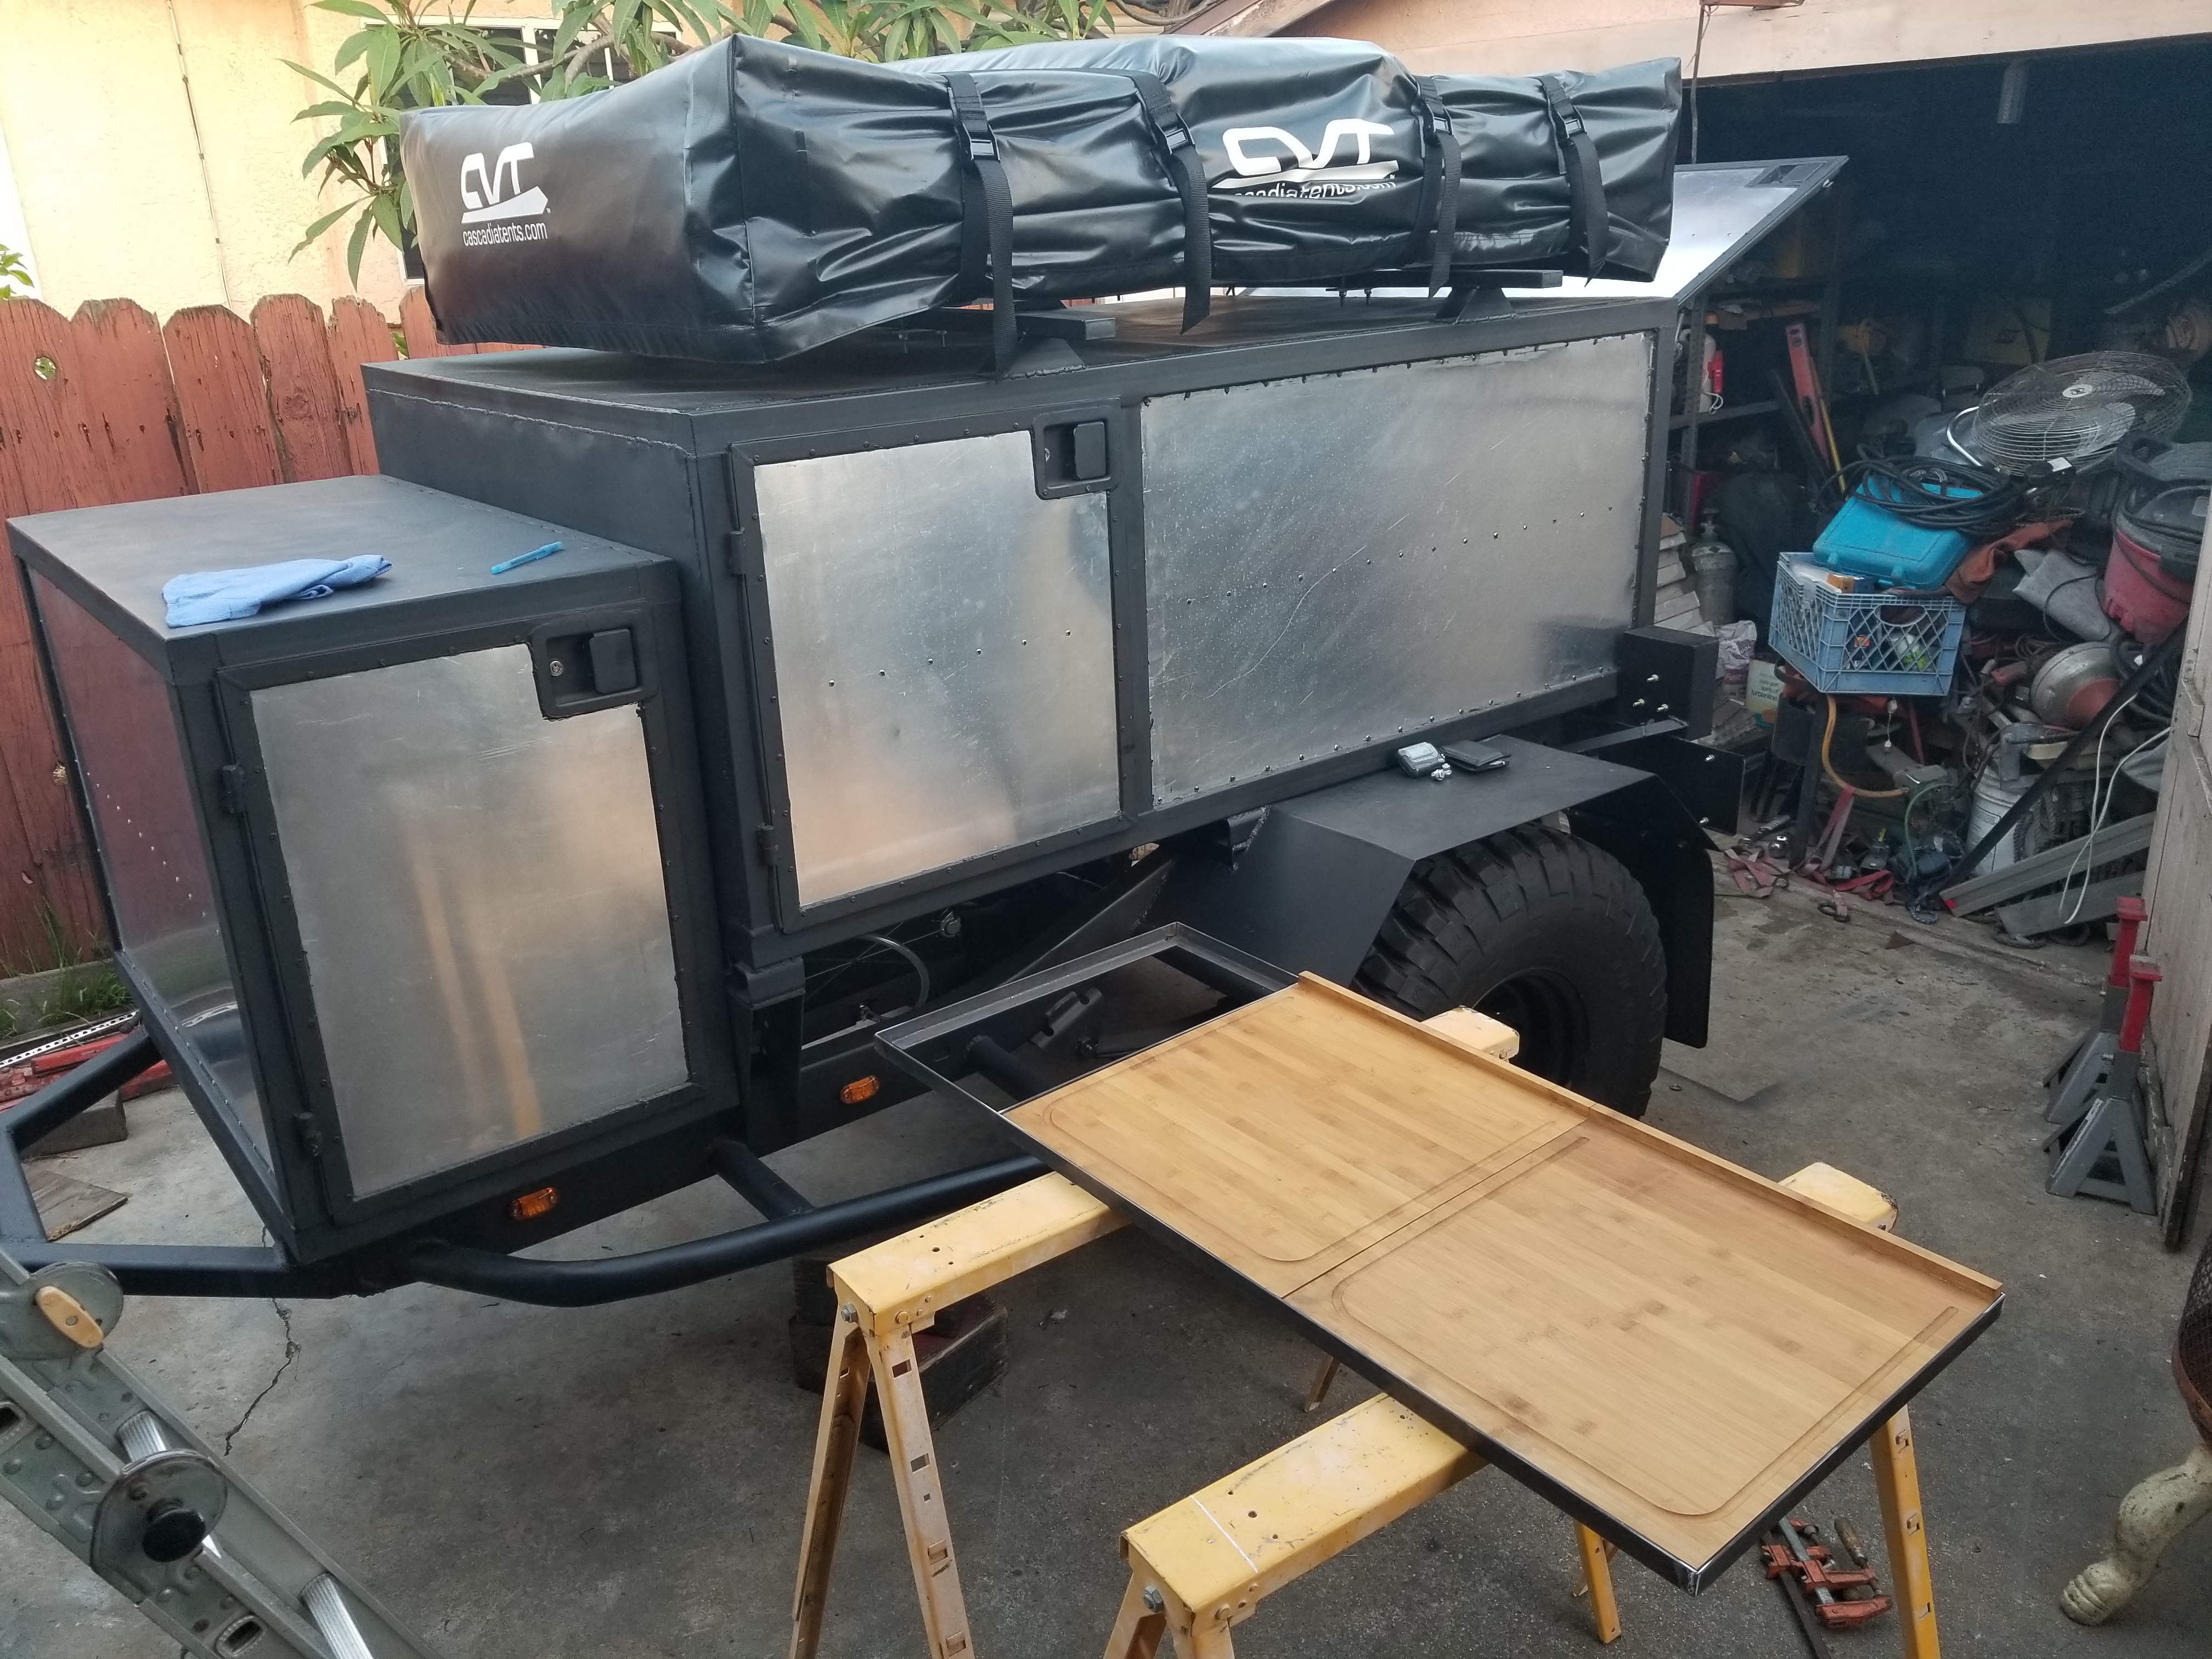
More or less an idea of how it will be
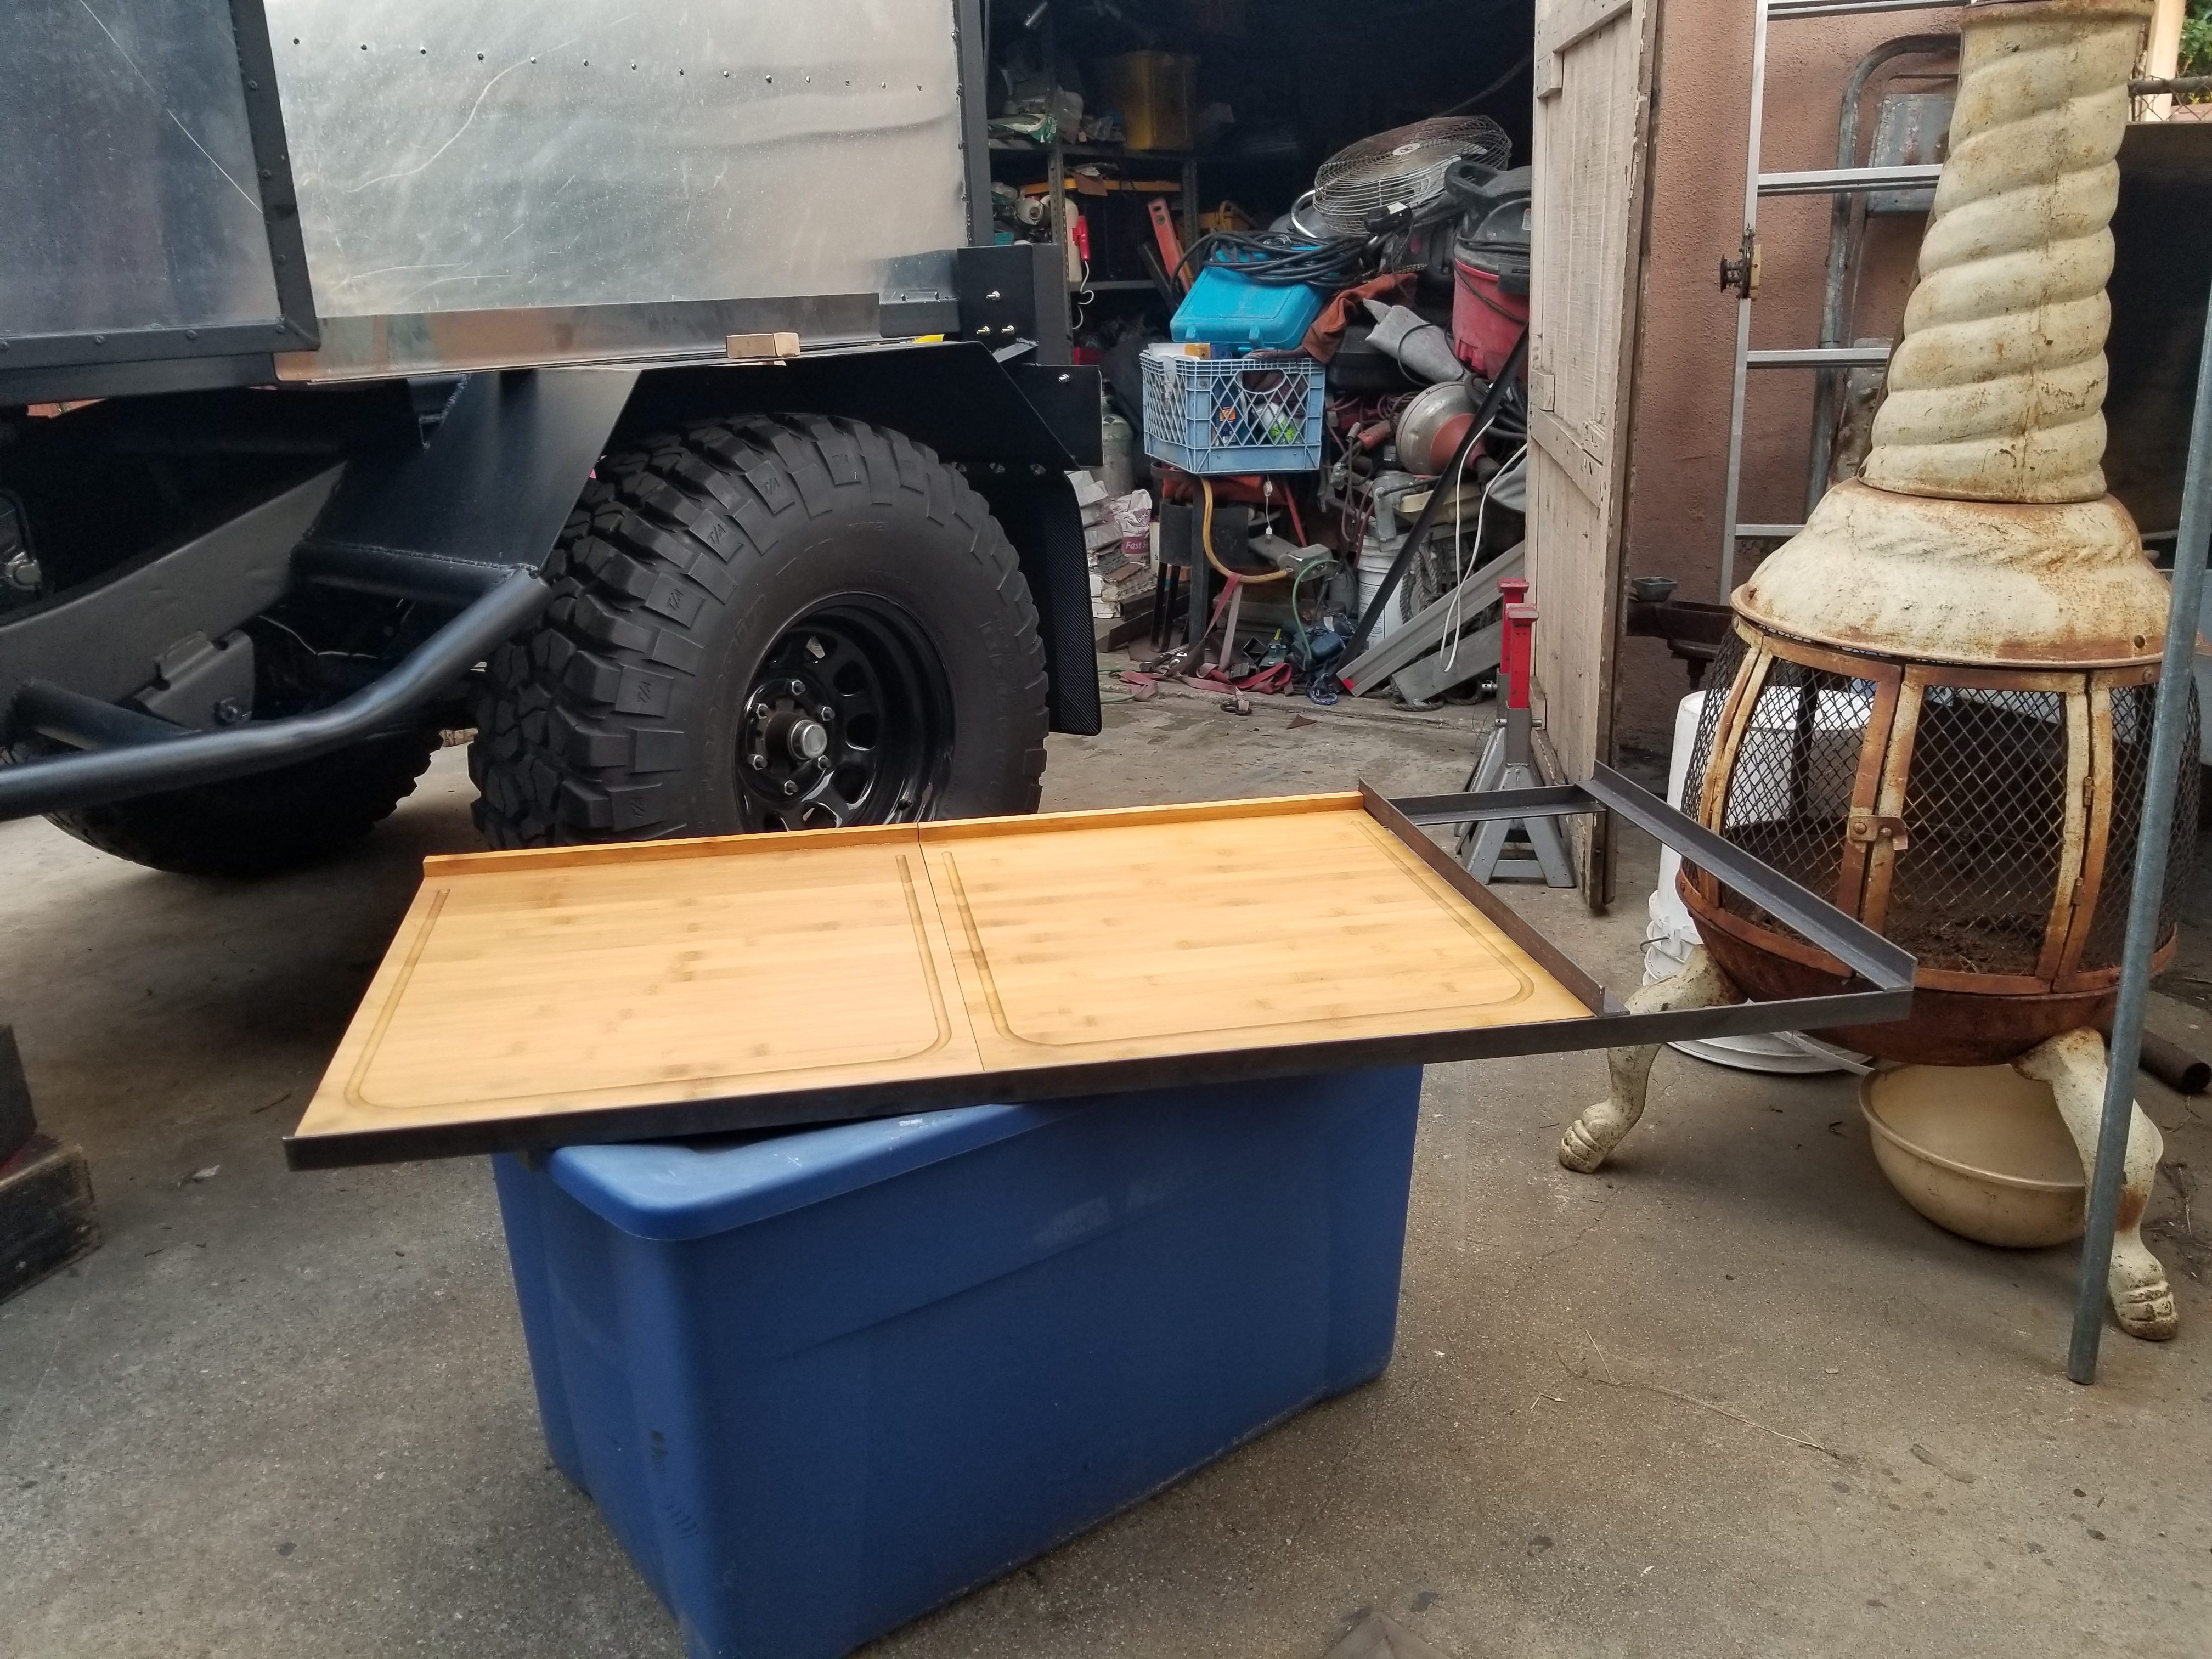
...and how it will fit inside. I'll definitely have to add some hoops so i can strap the cooler into place
Here's the basic outline of how i want it
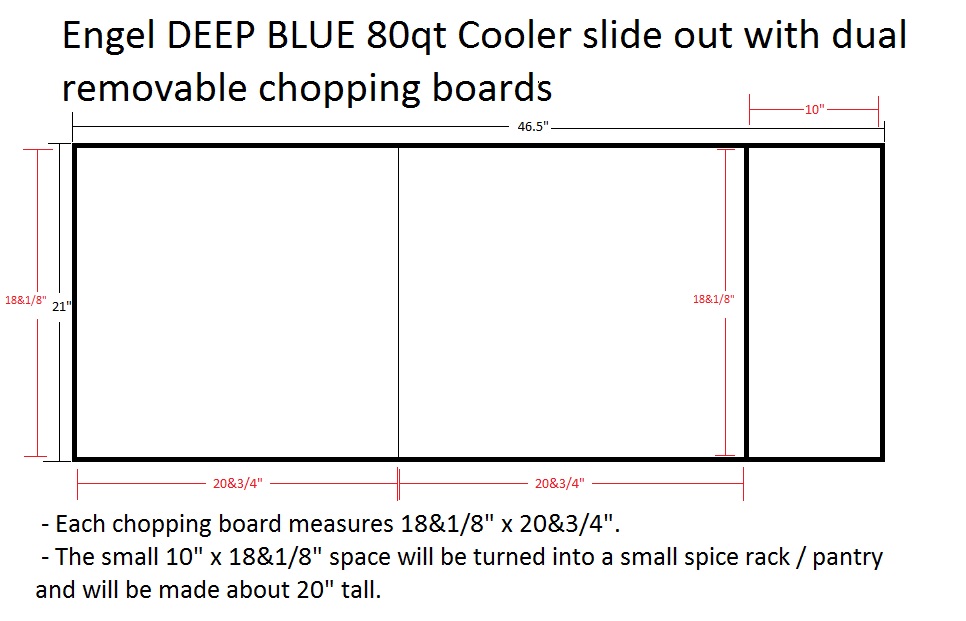

Each chopping board will be able to be removed individually if needed. And I'm contemplating adding brackets underneath to be able to have 2 removable basins which I can utilize as space to wash utensils and such. On the space past the chopping boards I have a 10"�21" space which I plan to use as a spot for a small spice rack, and pantry. I can possibly add a storage for disposable cups and plates because I am able to build this cabinet space up to 20-22" high. We'll see. A lot more to come for this portion of the build.

Aside from starting the slide out My Engel Deep Blue 80qt cooler came in this weekend Thanks to my lovely girlfriend who is just as anxious to see this trailer build complete as I am. I think she is just as anxious to try it out too It has so much space. I love the fact that it has a divider to keep items separate and the basket to keep items on top for easy access. Also has a built in emergency bottle opener!


More or less an idea of how it will be

...and how it will fit inside. I'll definitely have to add some hoops so i can strap the cooler into place


Here's the basic outline of how i want it

Last edited by Redeth005; 06-11-2017 at 08:41 PM.
06-12-2017, 08:40 PM
#139
Registered User
Thread Starter
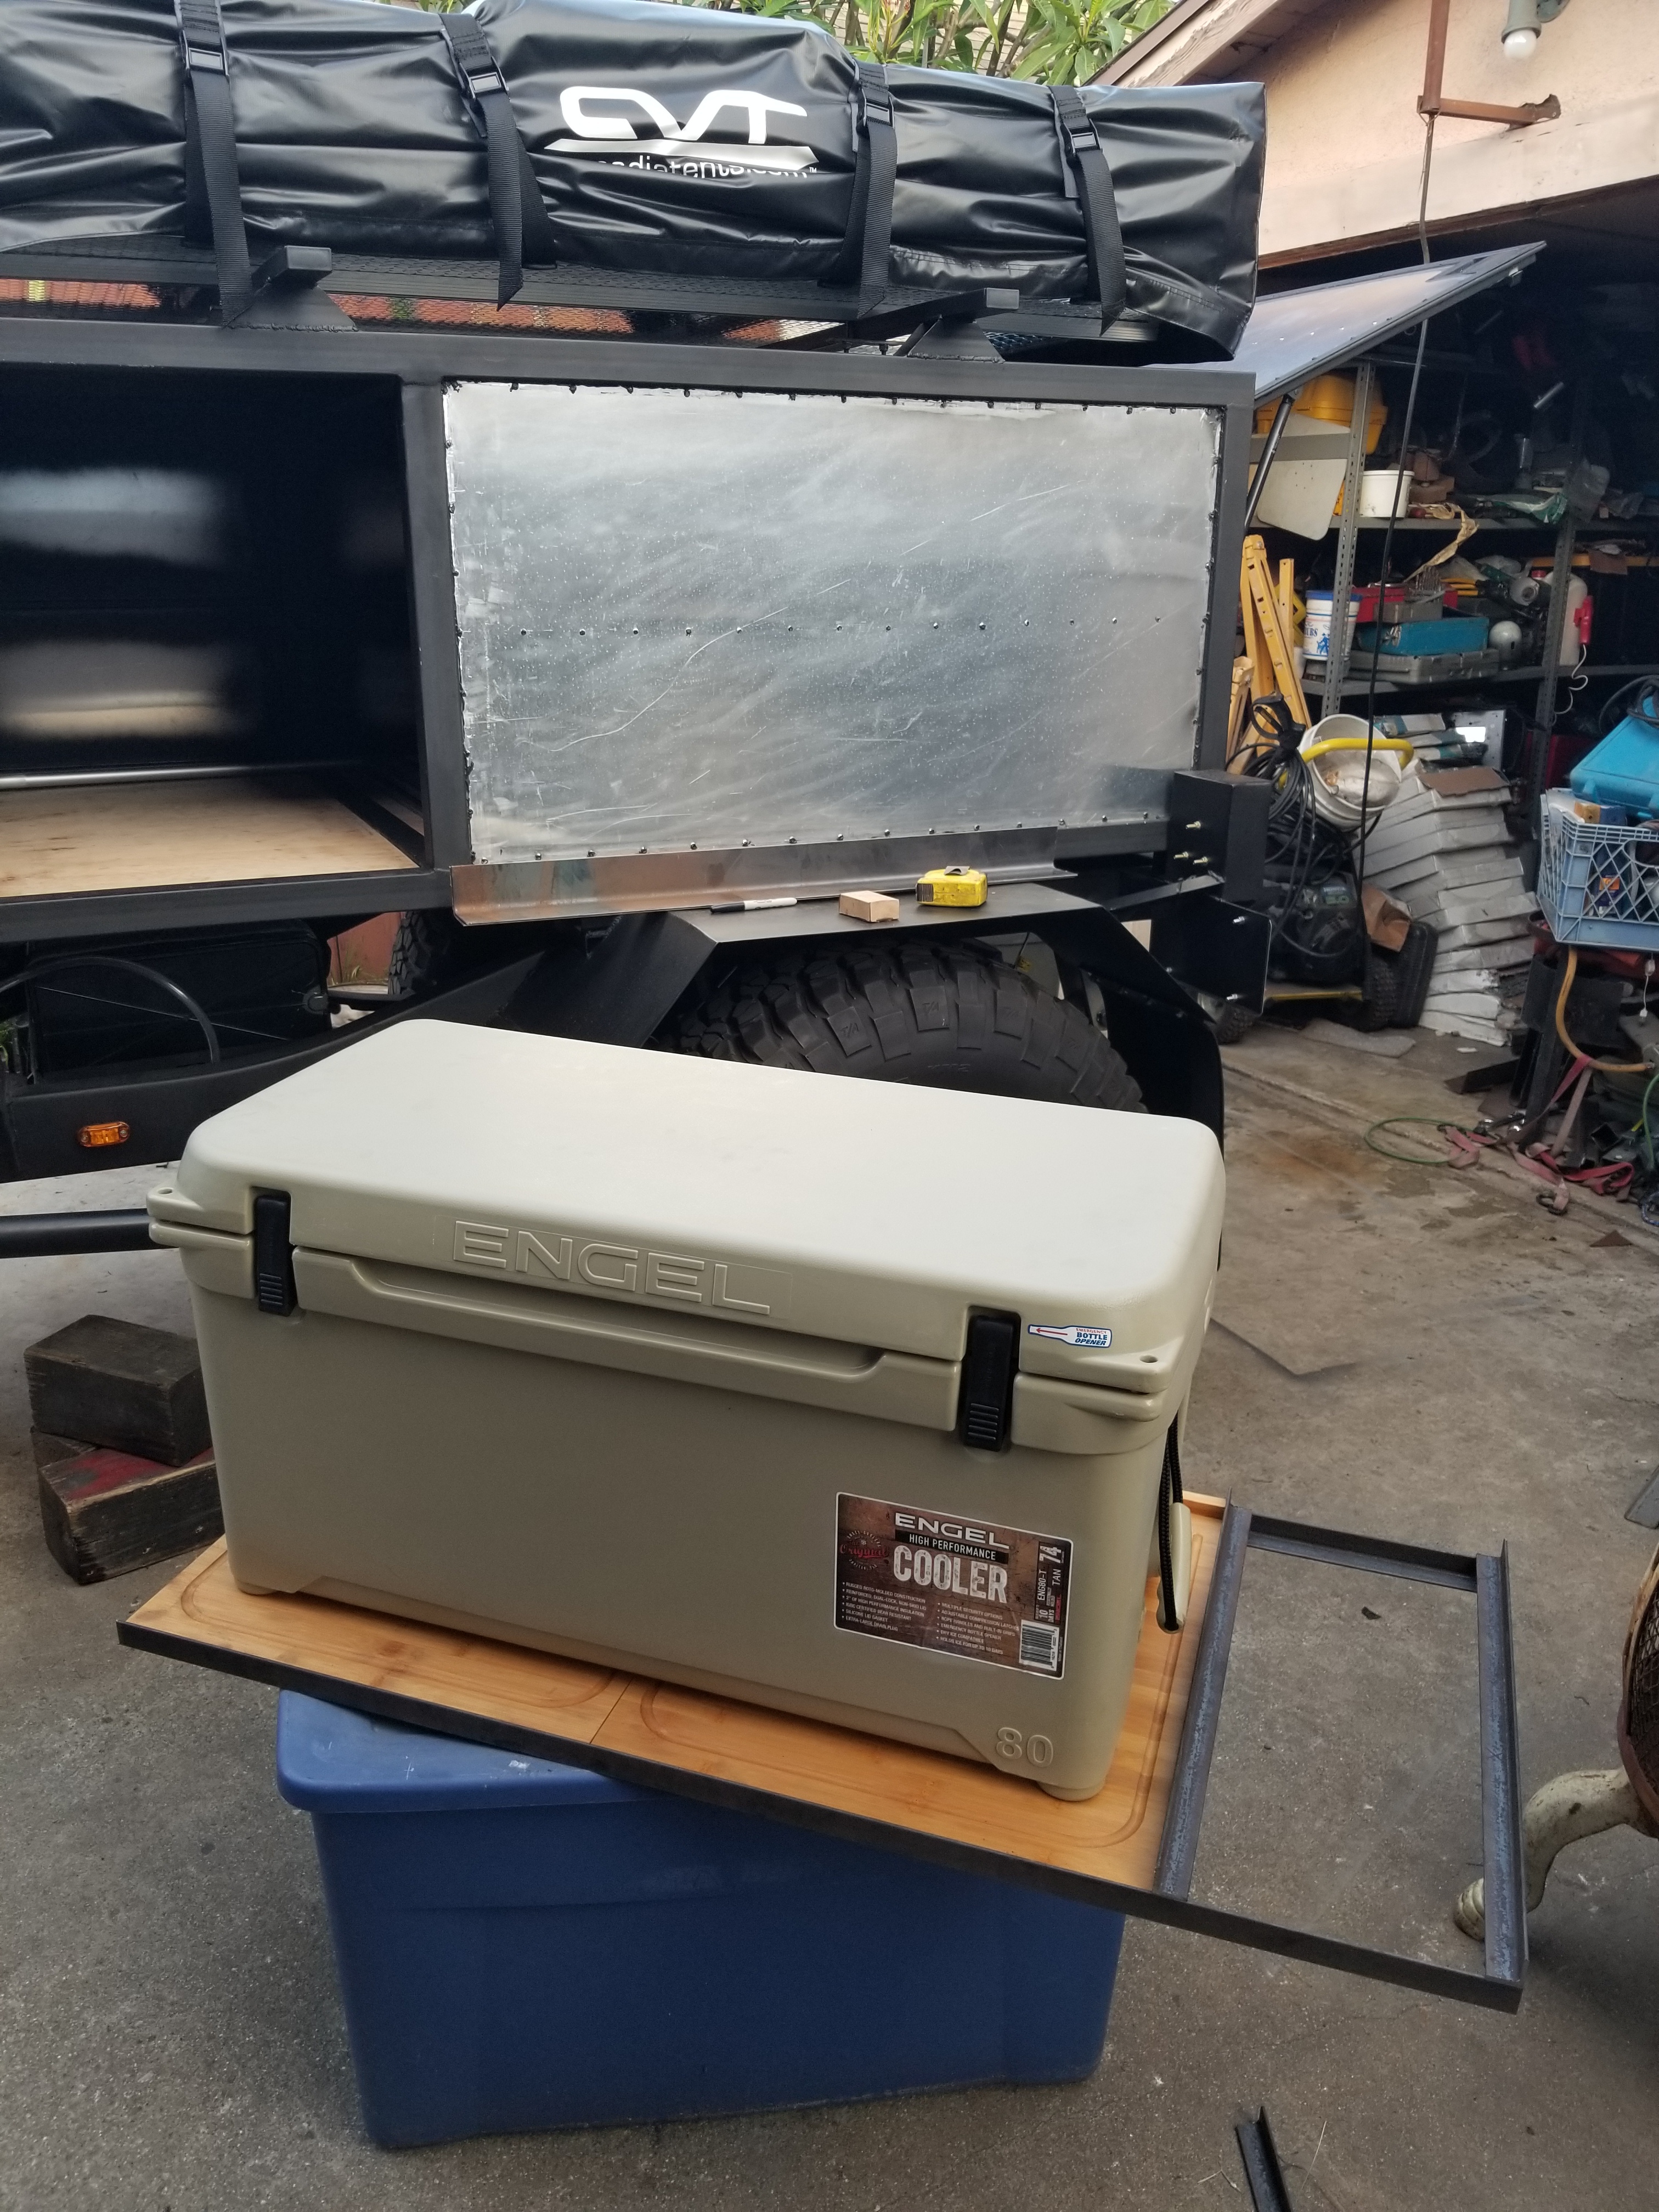
Got some more done. I'm kinda on a deadline with this particular portion of the build. I need this slide out finished by this weekend because next weekend (June 23, 24 & 25 we are heading to Lake Elsinore to camp with the family. i want the slide out to be complete so i can strap the cooler in place on the trailer. If not i will have to take it in my truck because i don't want it flopping around on the trailer floor
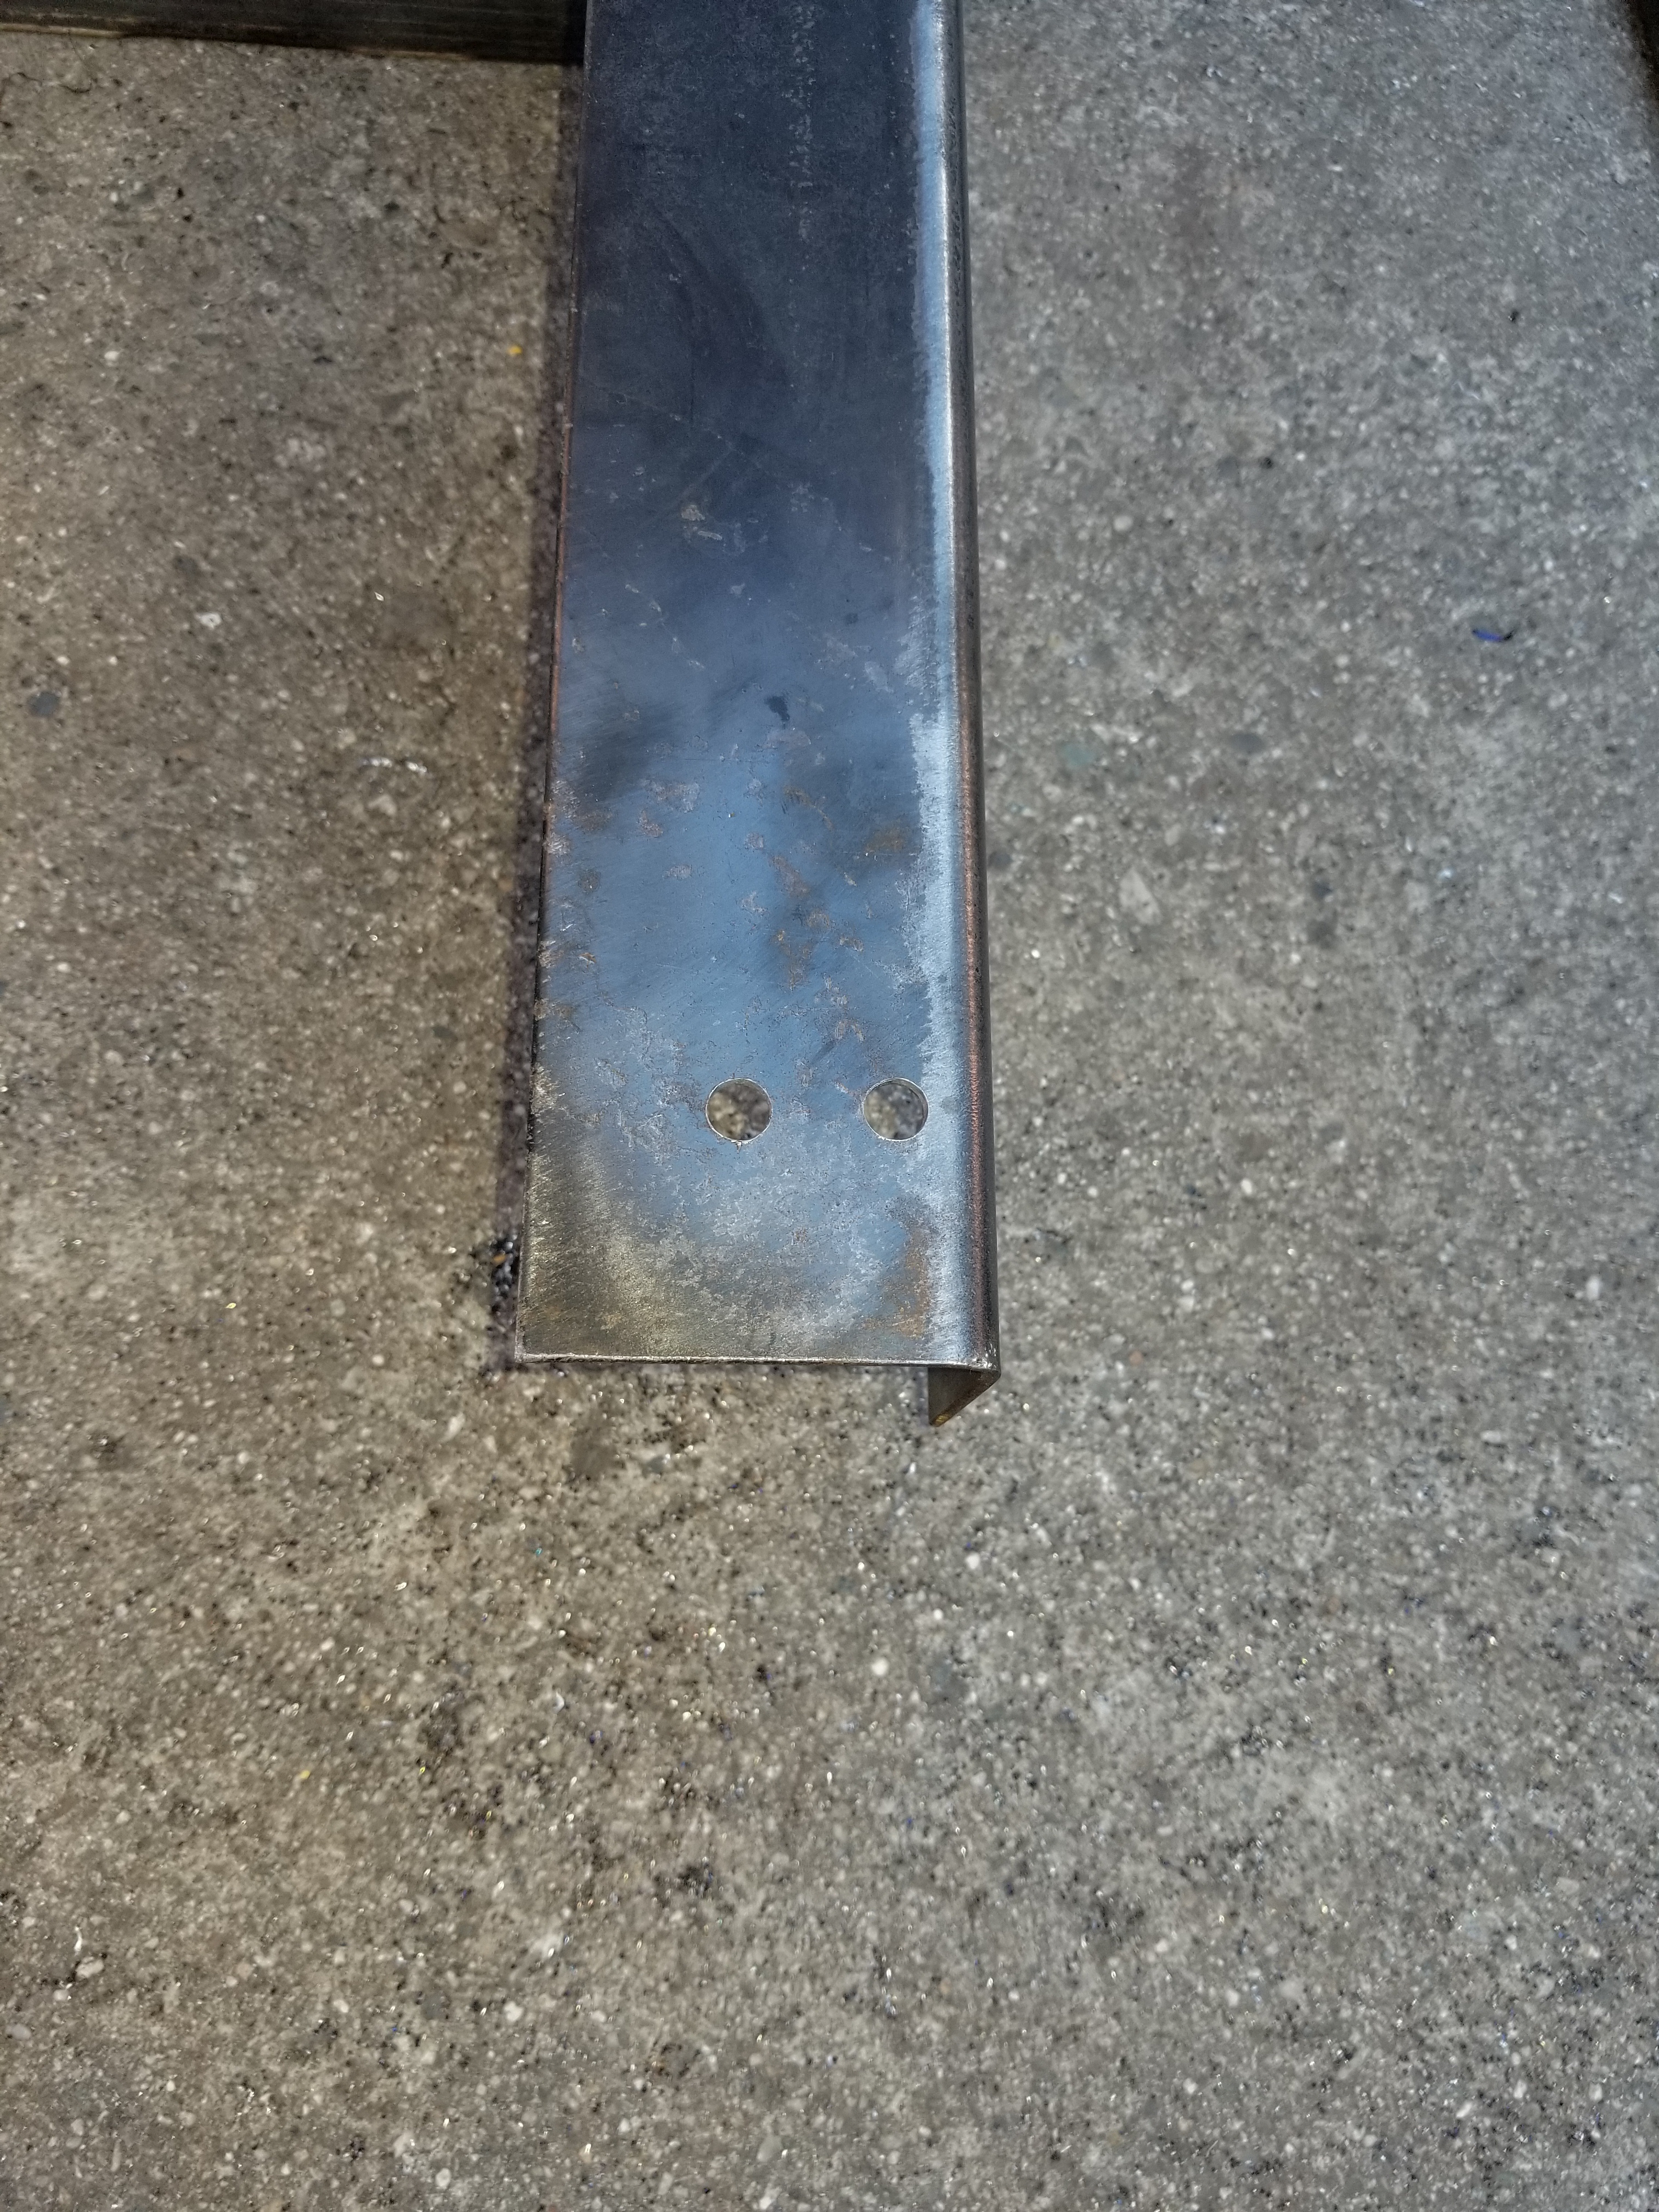
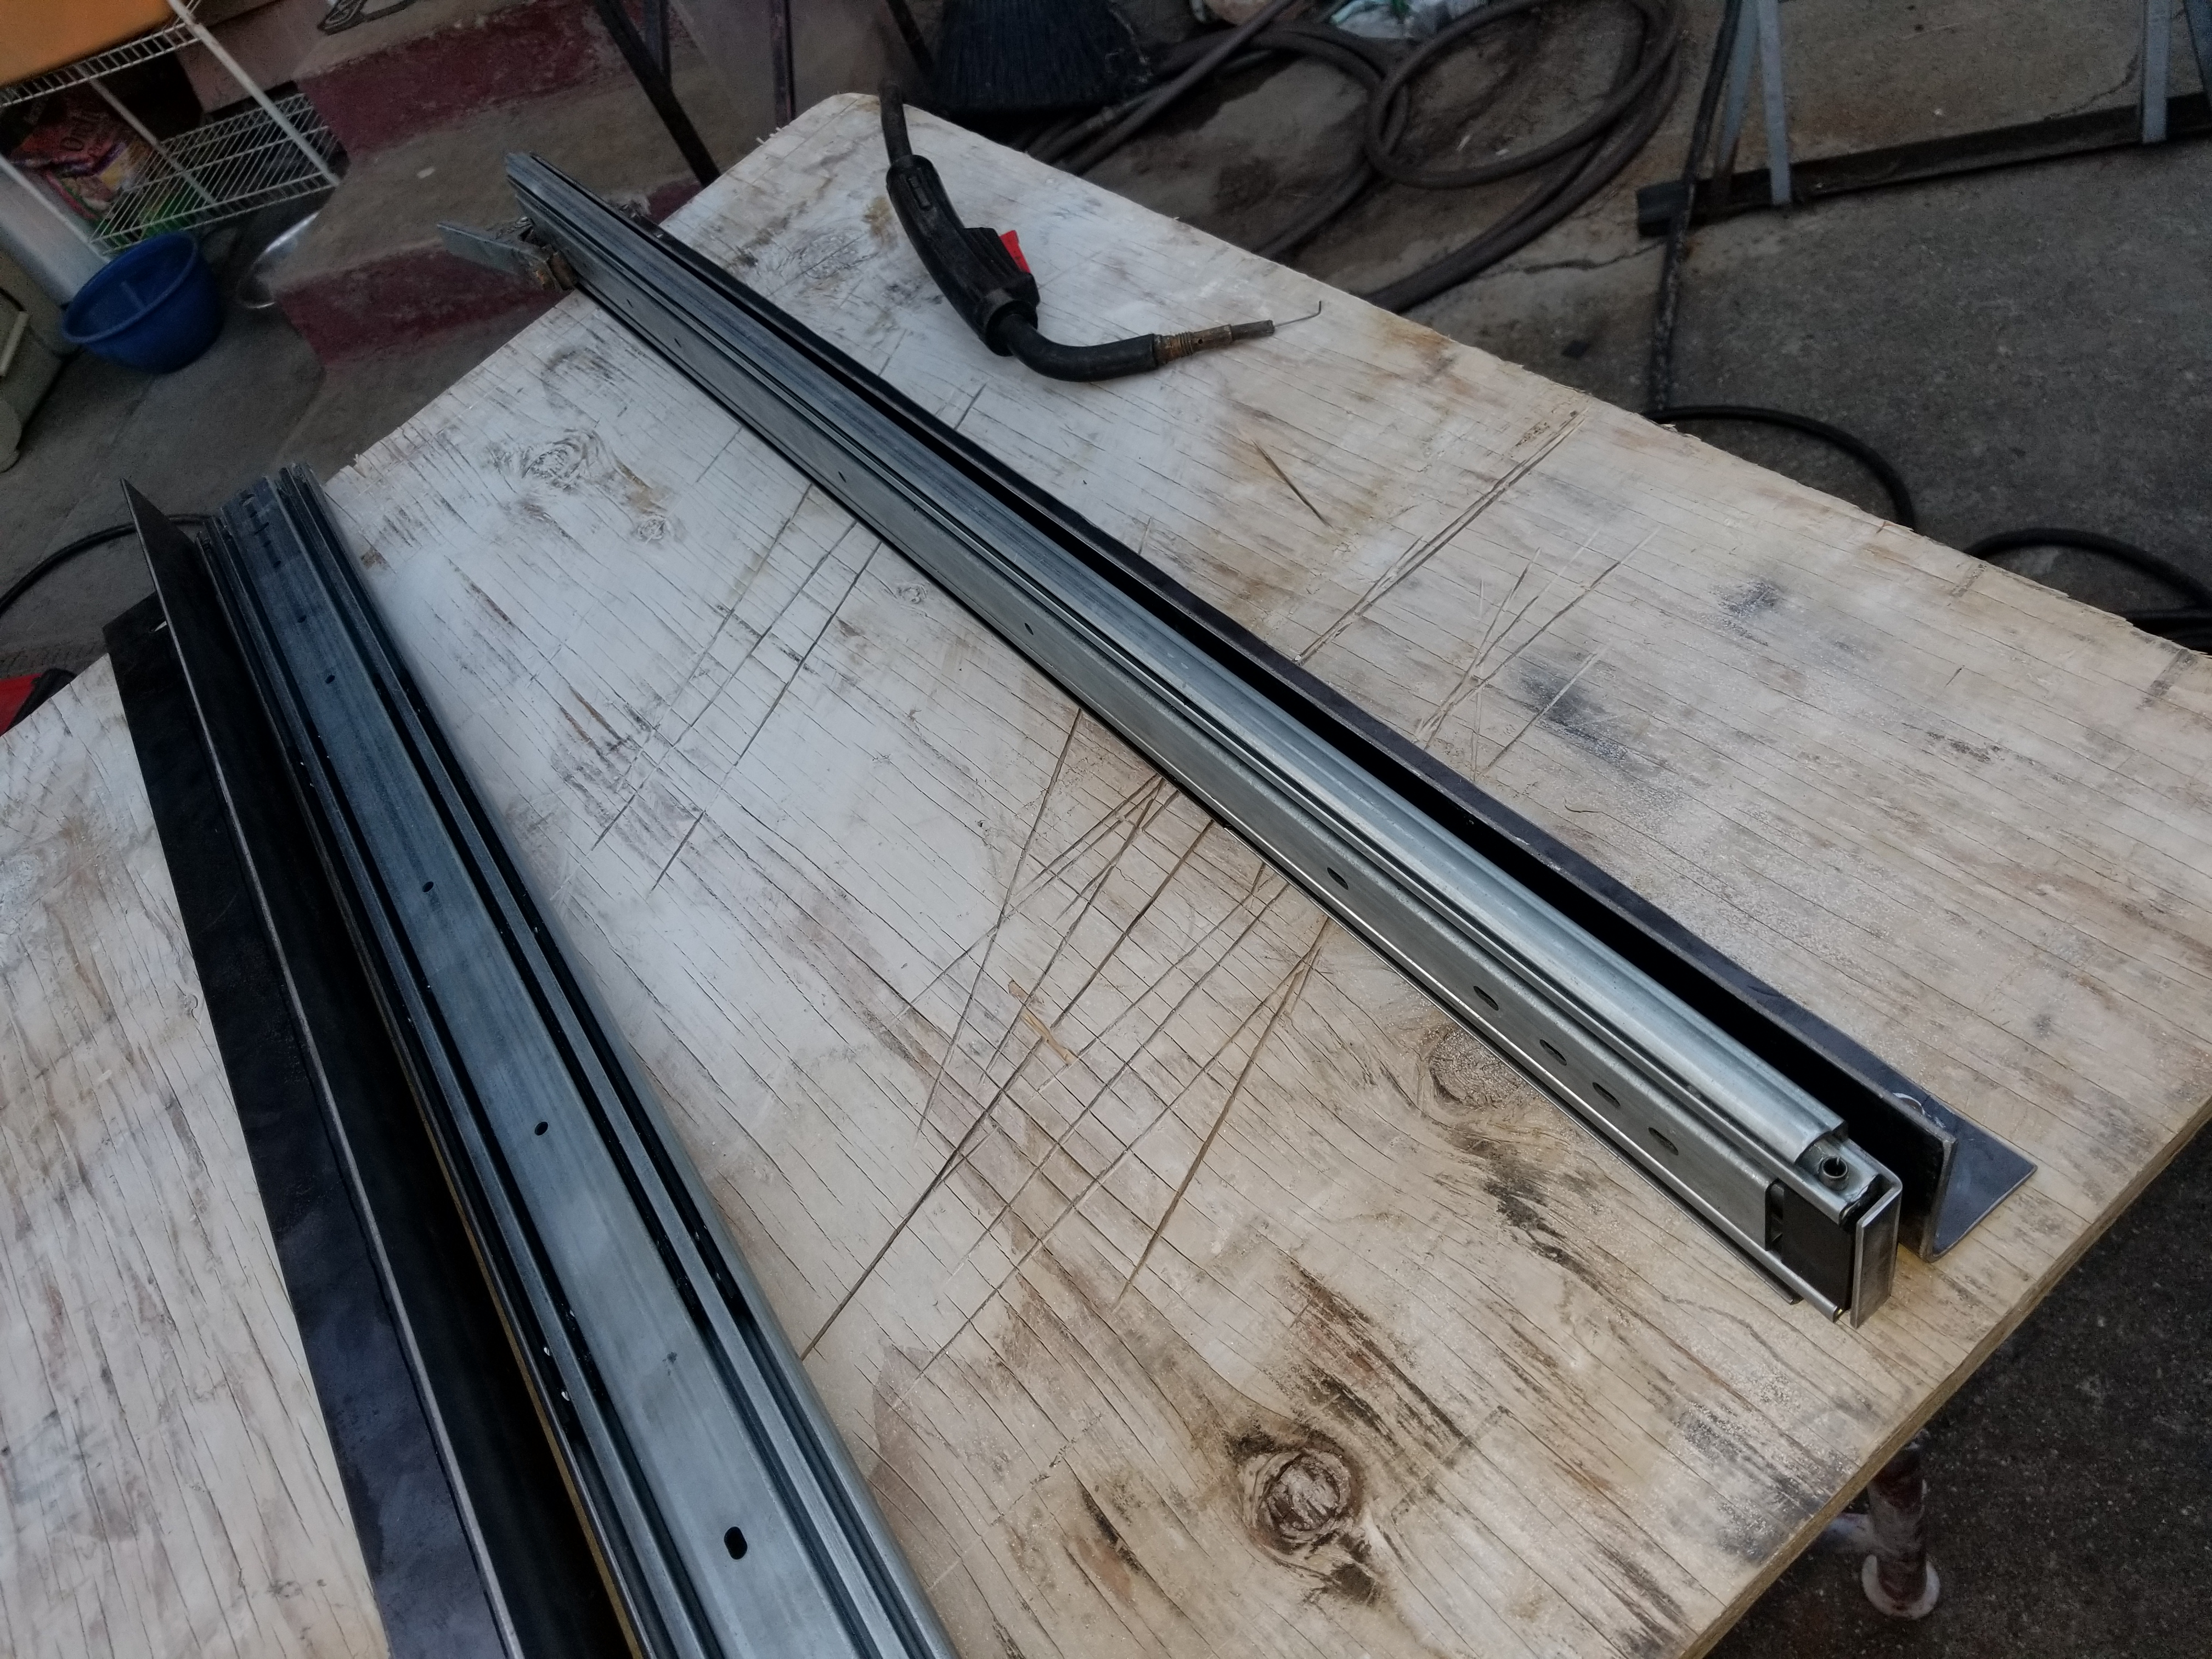
Anyway are the beginning stages of the cooler slide out. I have the frame of it made already I just need to weld some mounting nuts to the actual area on to the trailer so I can adjust it back and forth as needed to center the slide out where I need it to be. The smaller space next to the chopping boards is going to be where I mount the spice rack and pantry box. I still need to create that.
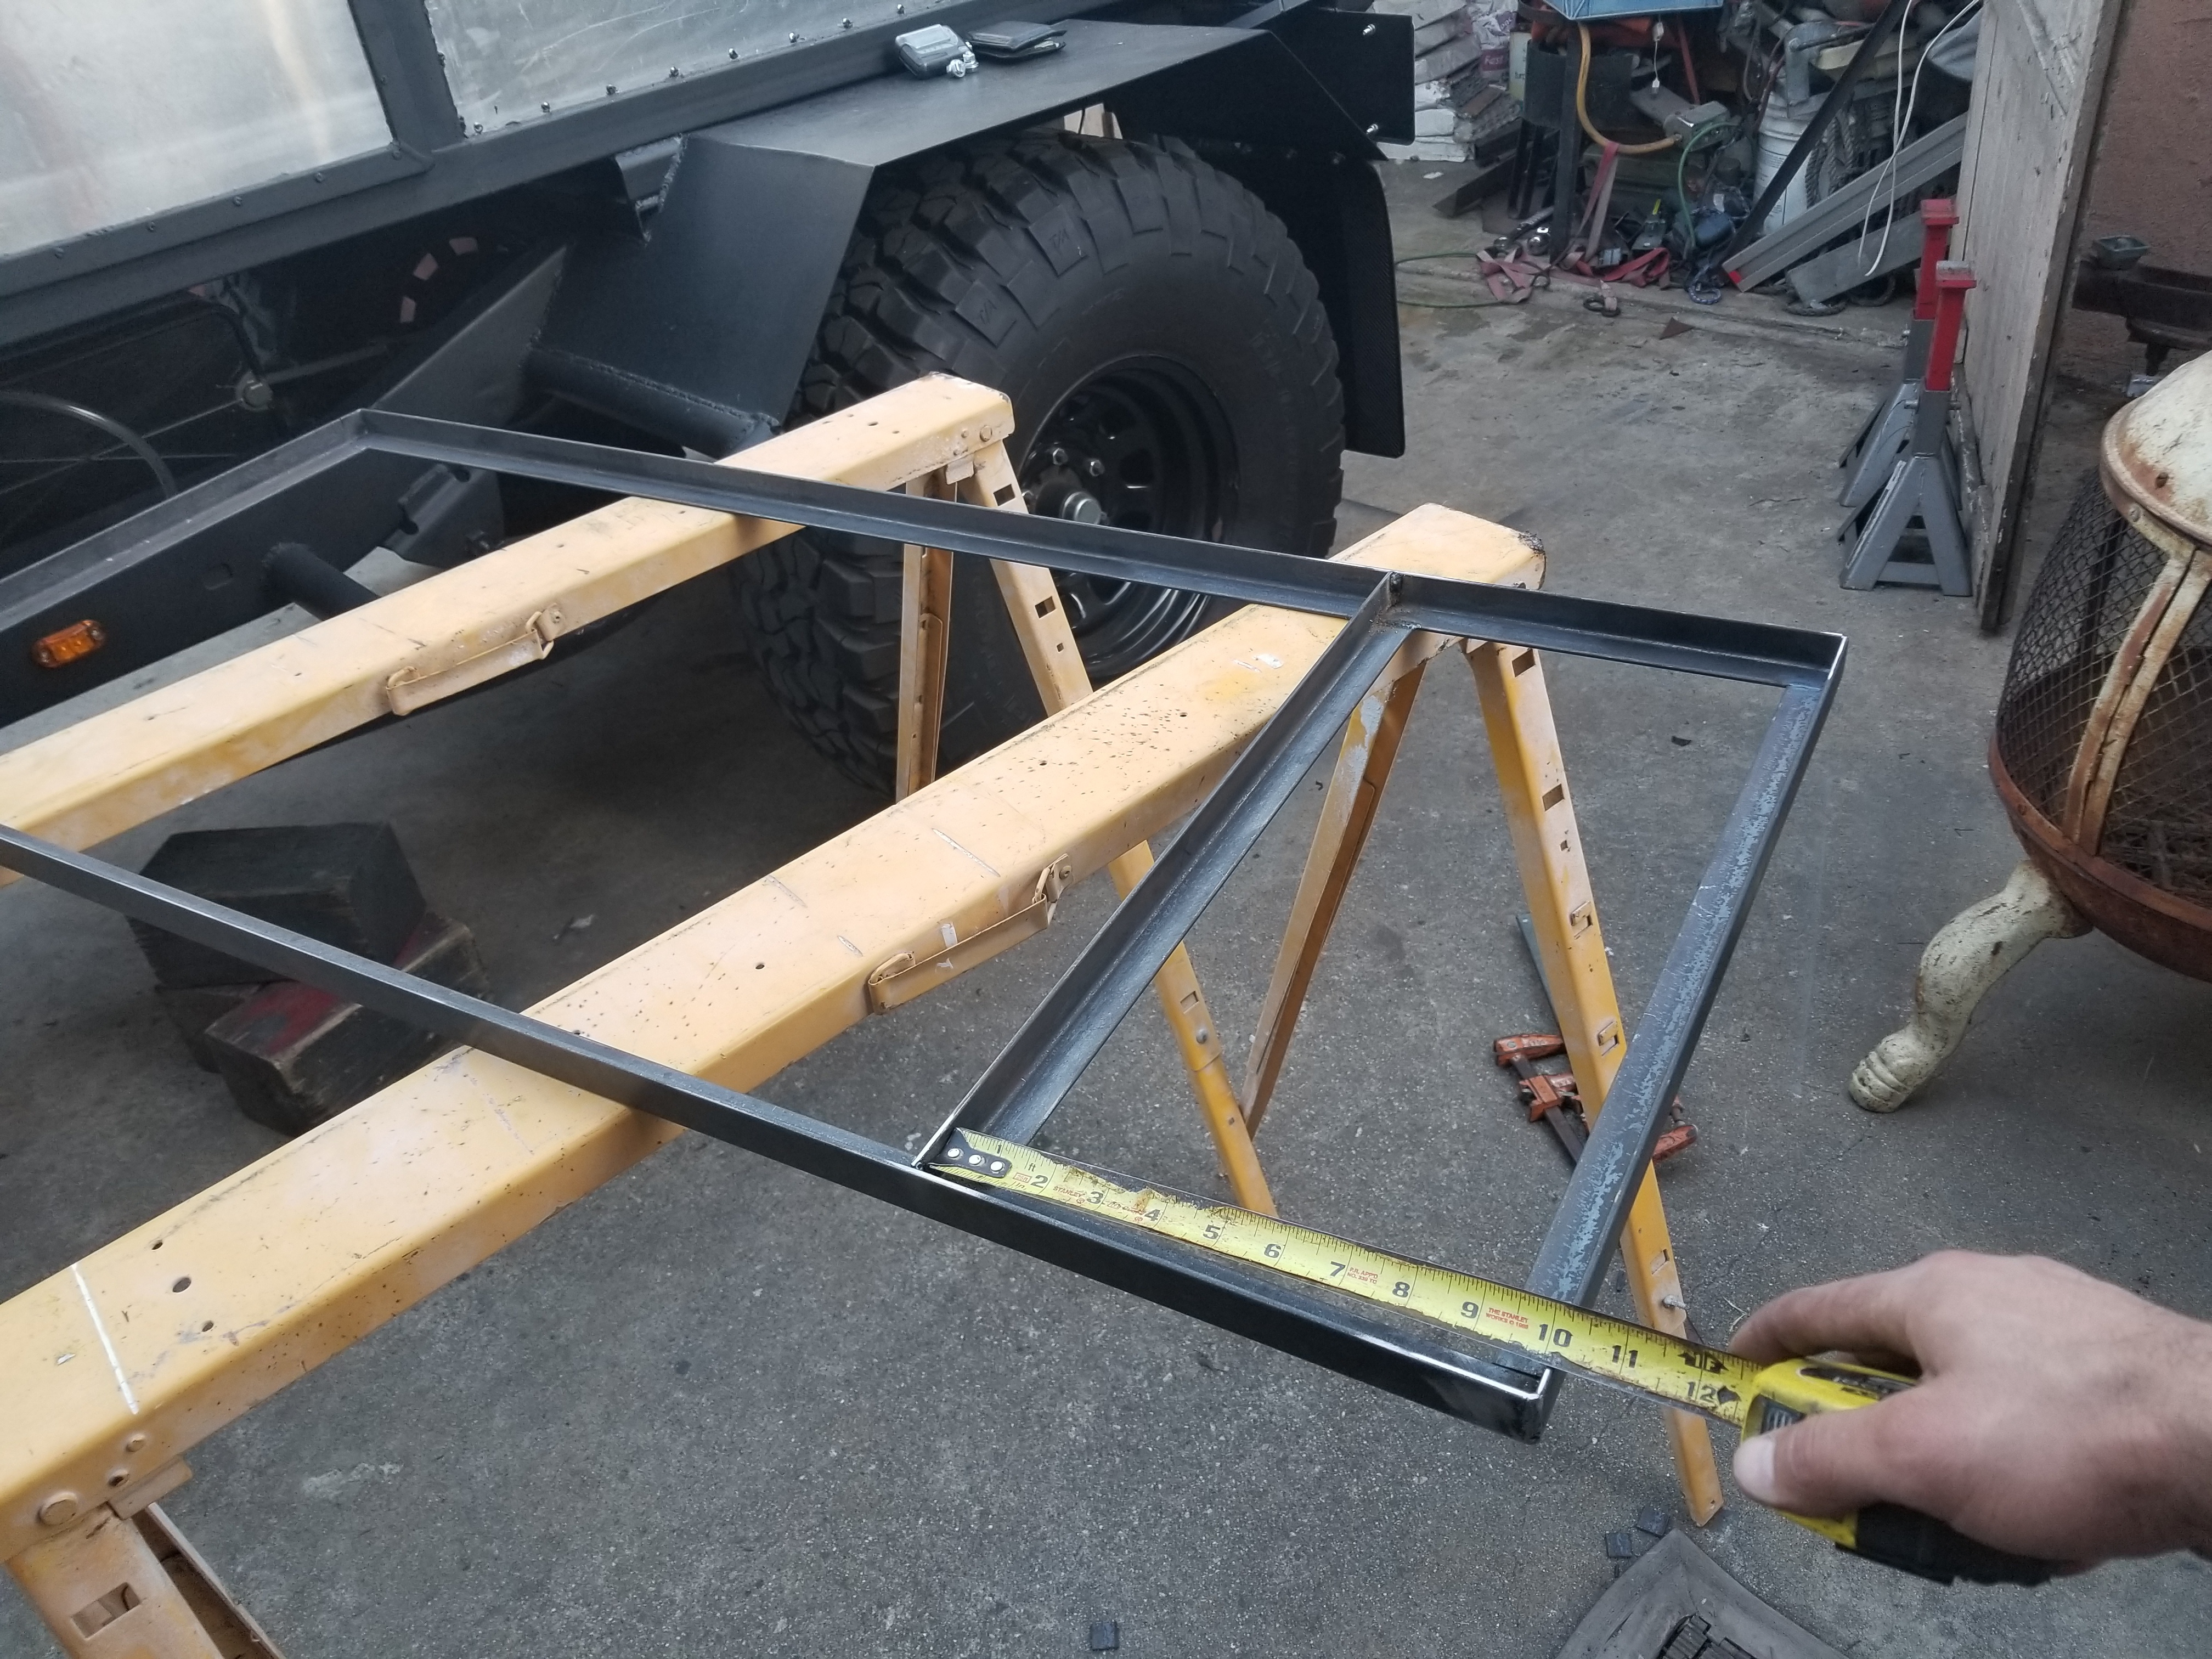
Those Slide out rails have a weight capacity of 500lbs. MORE THAN ENOUGH! and they extend out 36" which is basically he length of the Engel cooler.
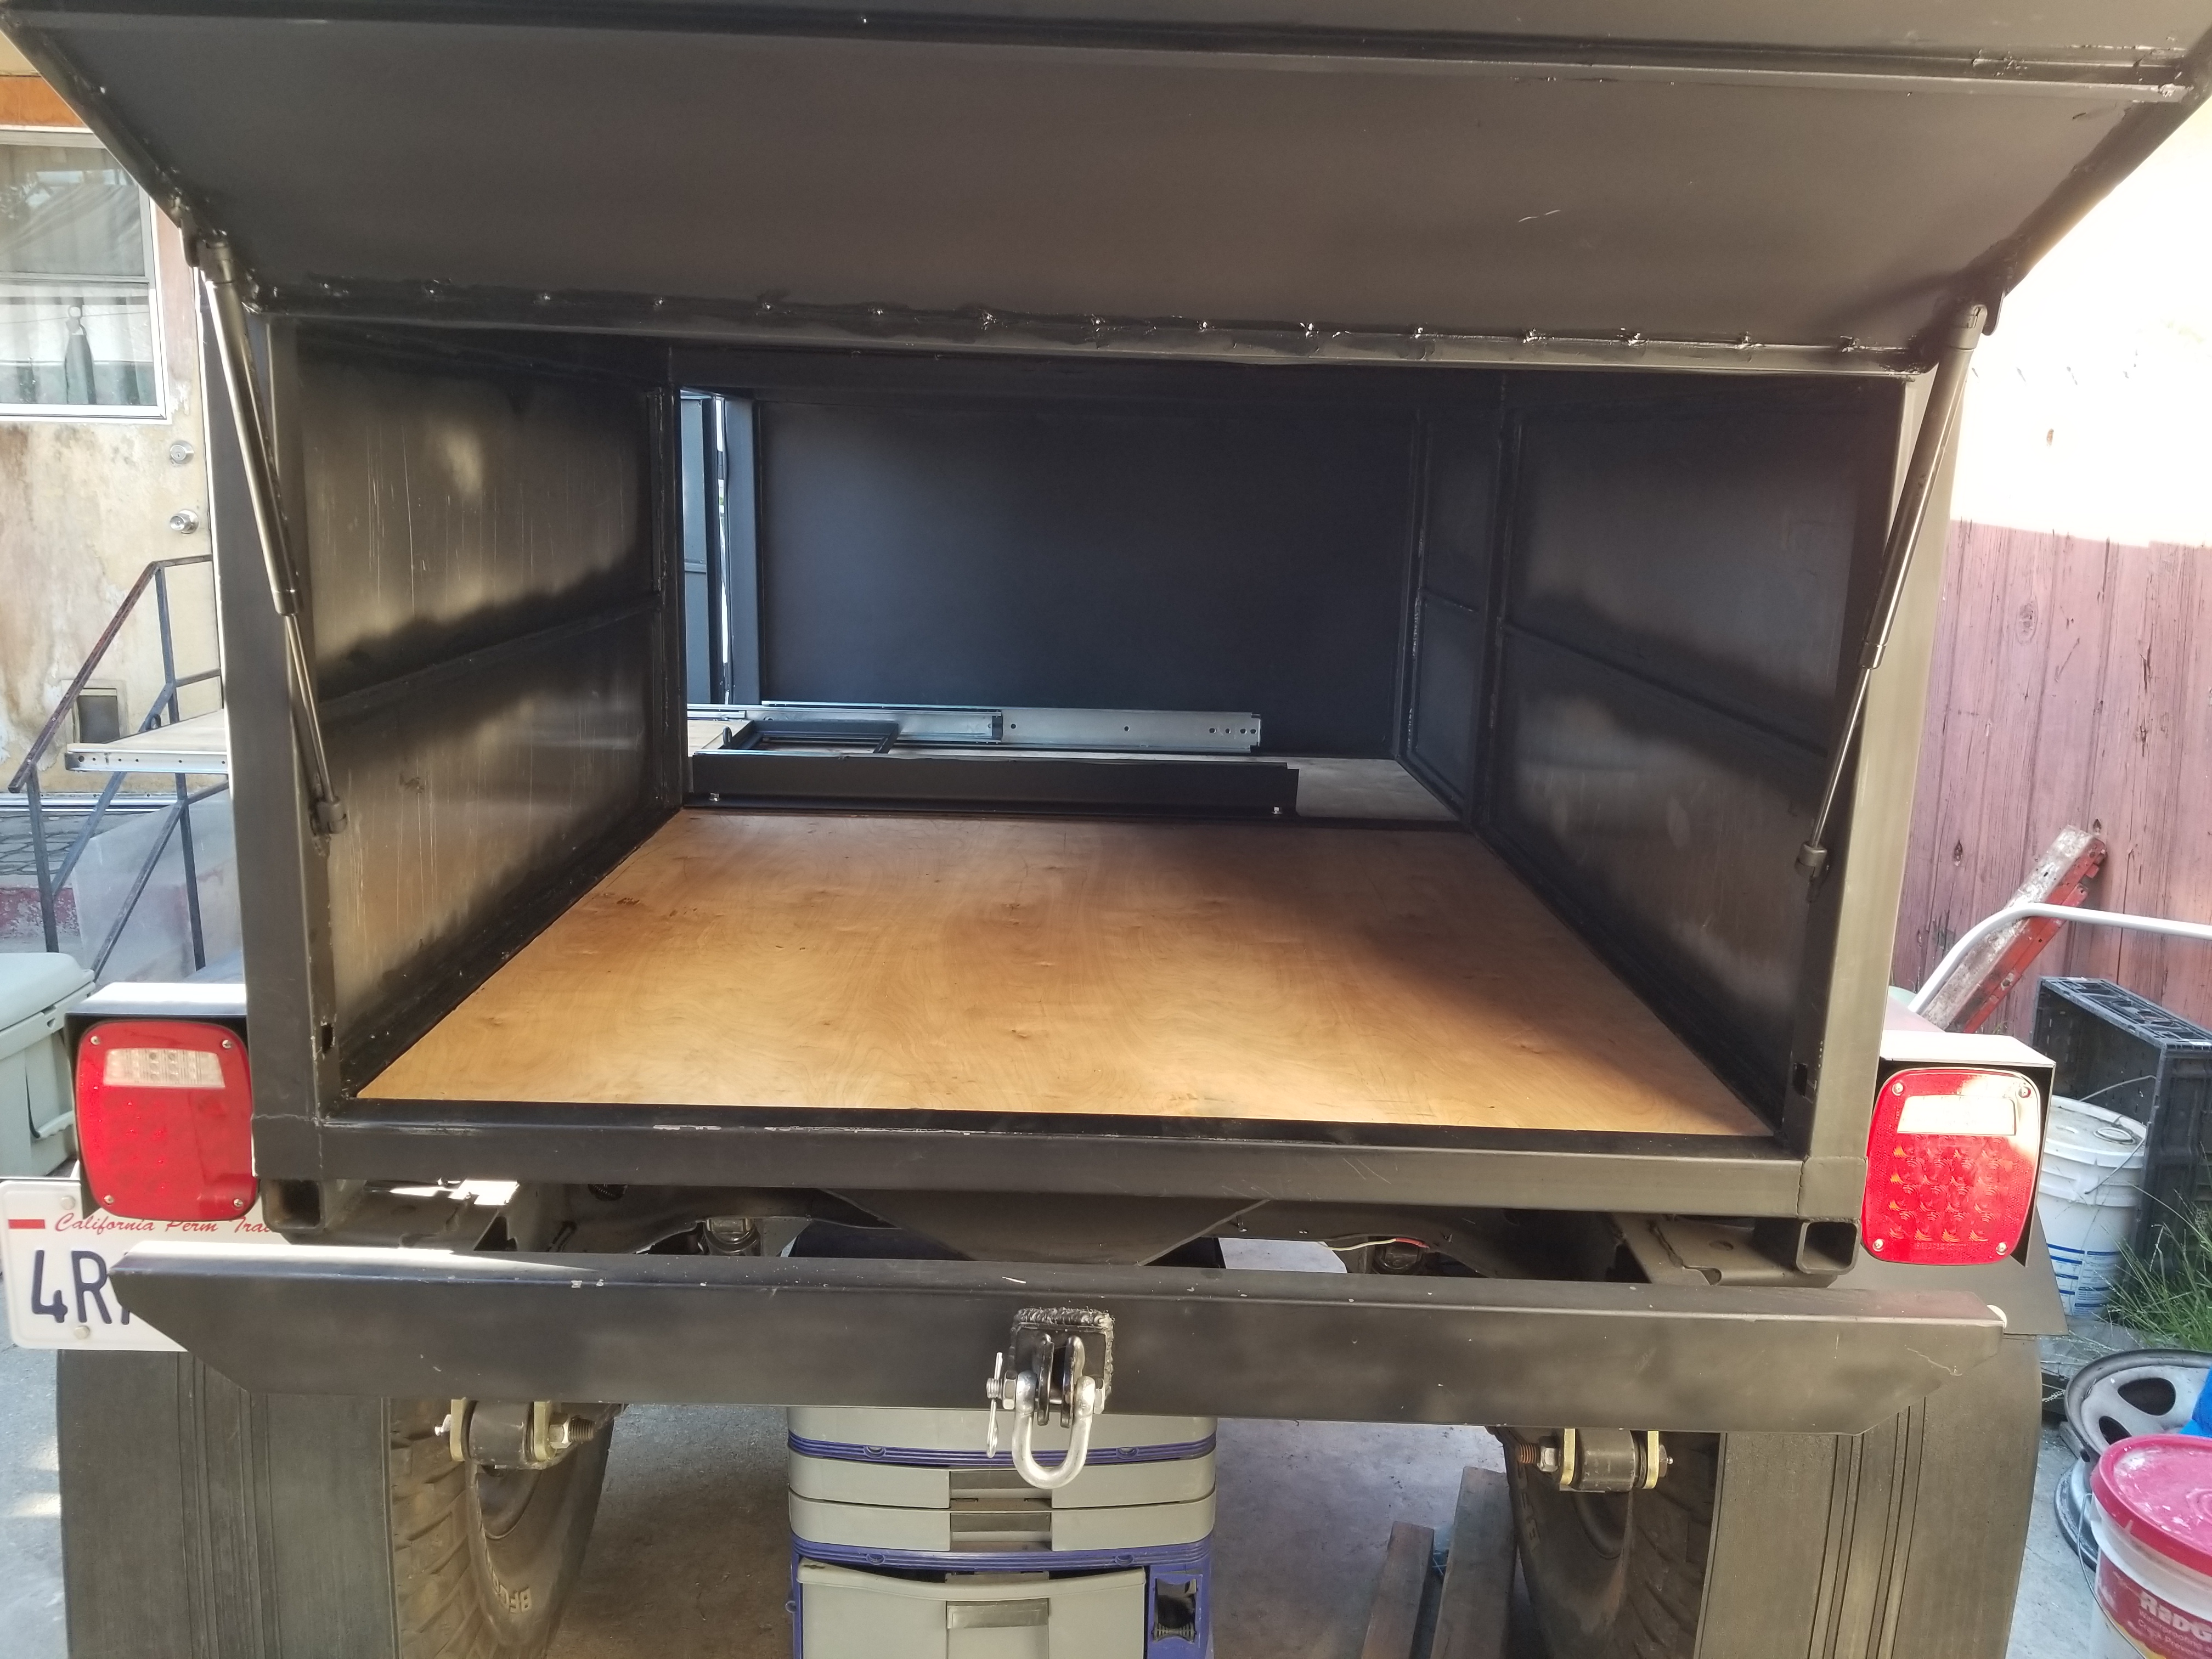
There is how she will sit inside the rear compartment.
---------------------------------------------------------------------------------------------------------------------------------------------------------------------------------------------------------------------------------------
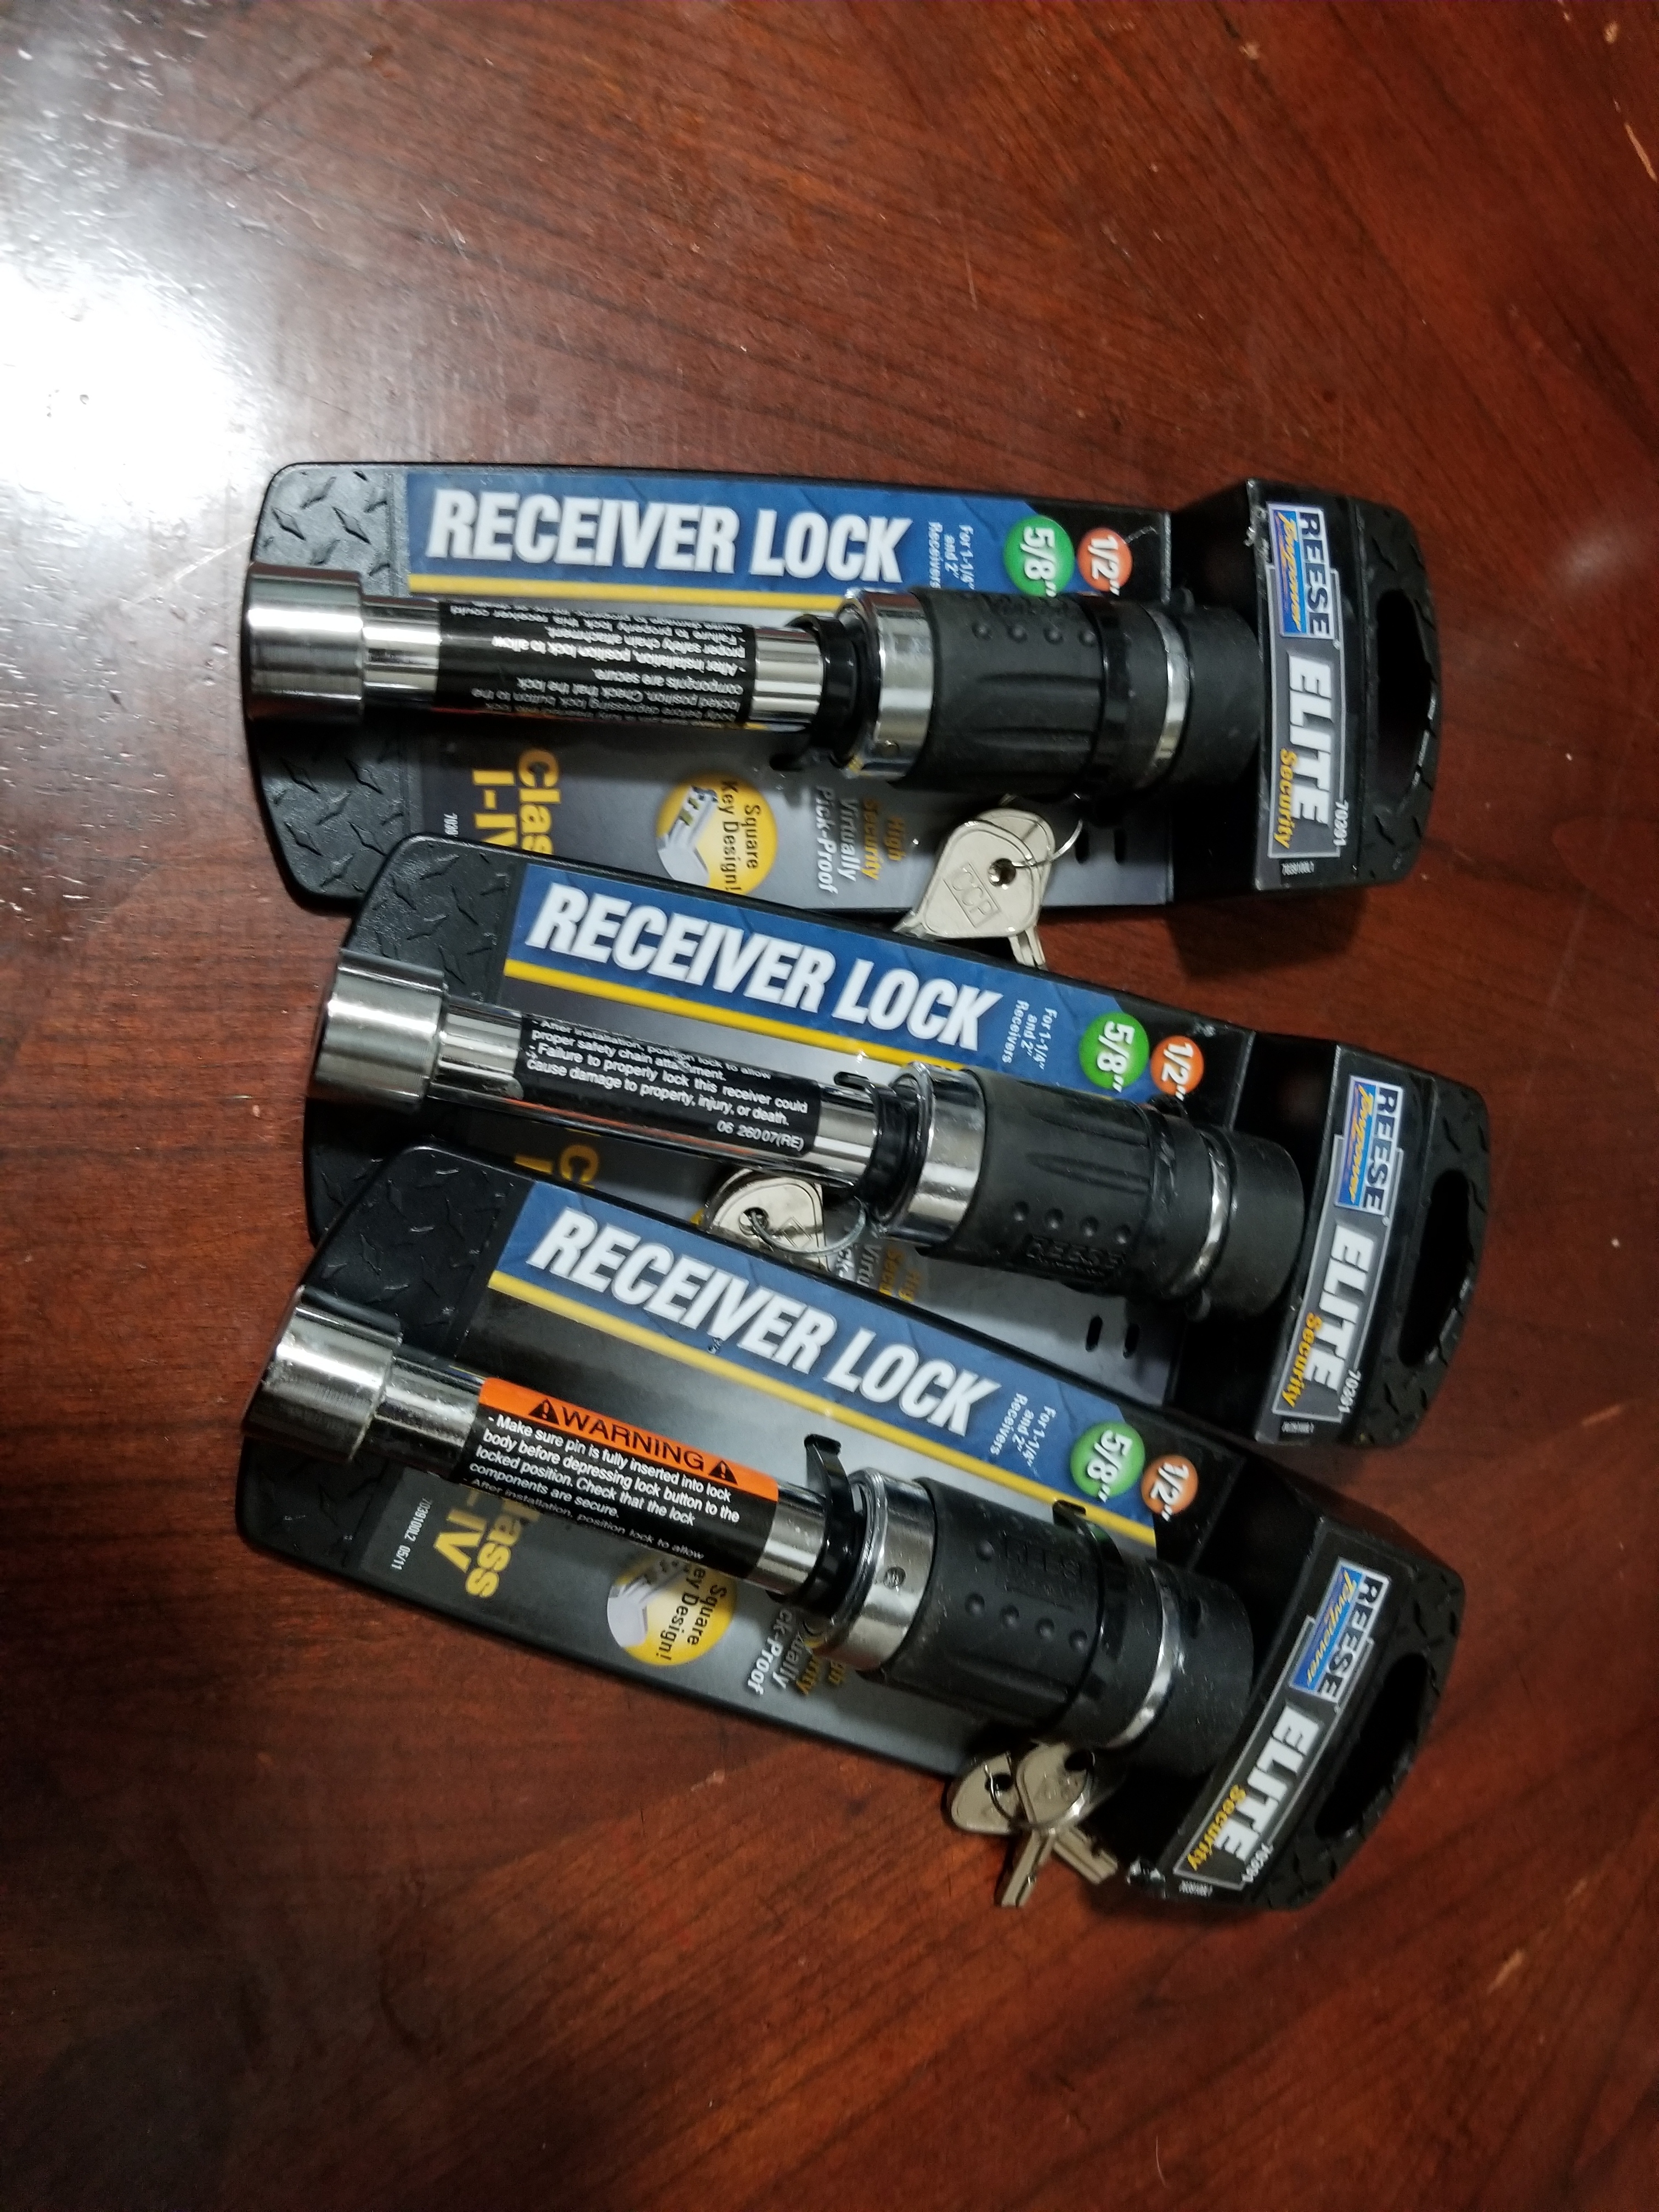
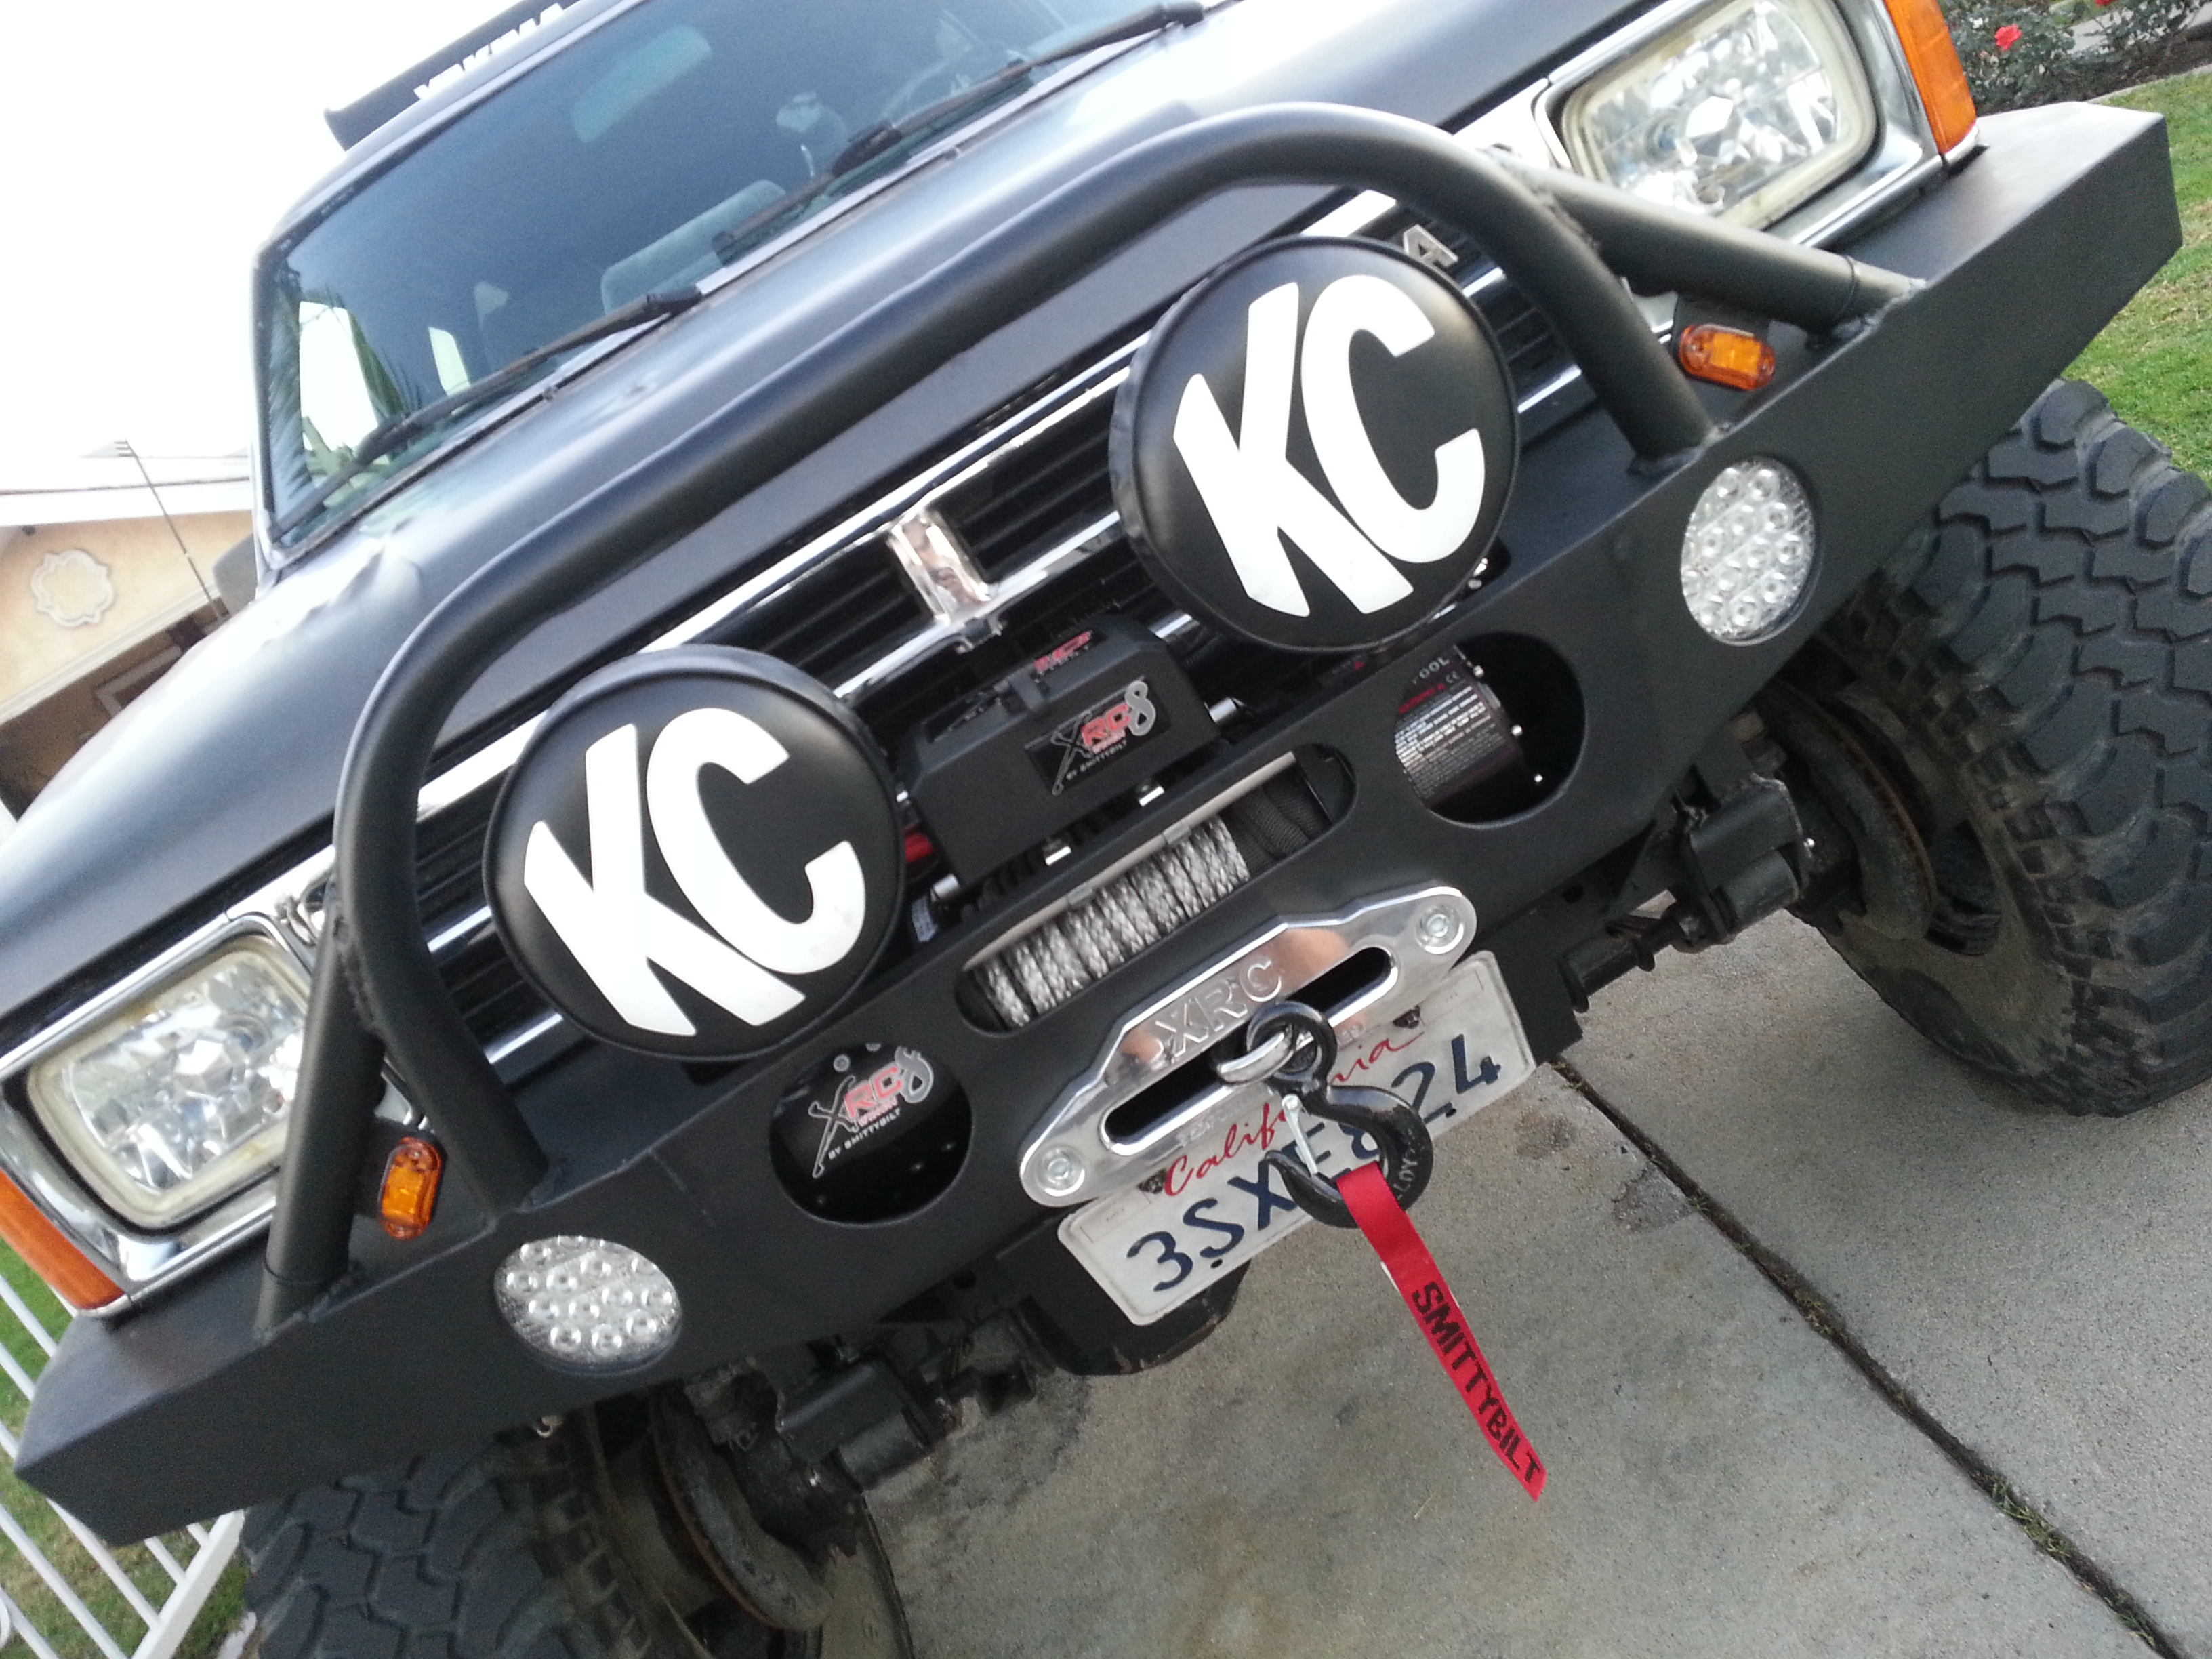
Something else that i ordered this past week were 3 matching hitch locks. They all use the same key, and all 3 match the hitch lock that i use for my front bumper license plate/winch anti-theft plate.
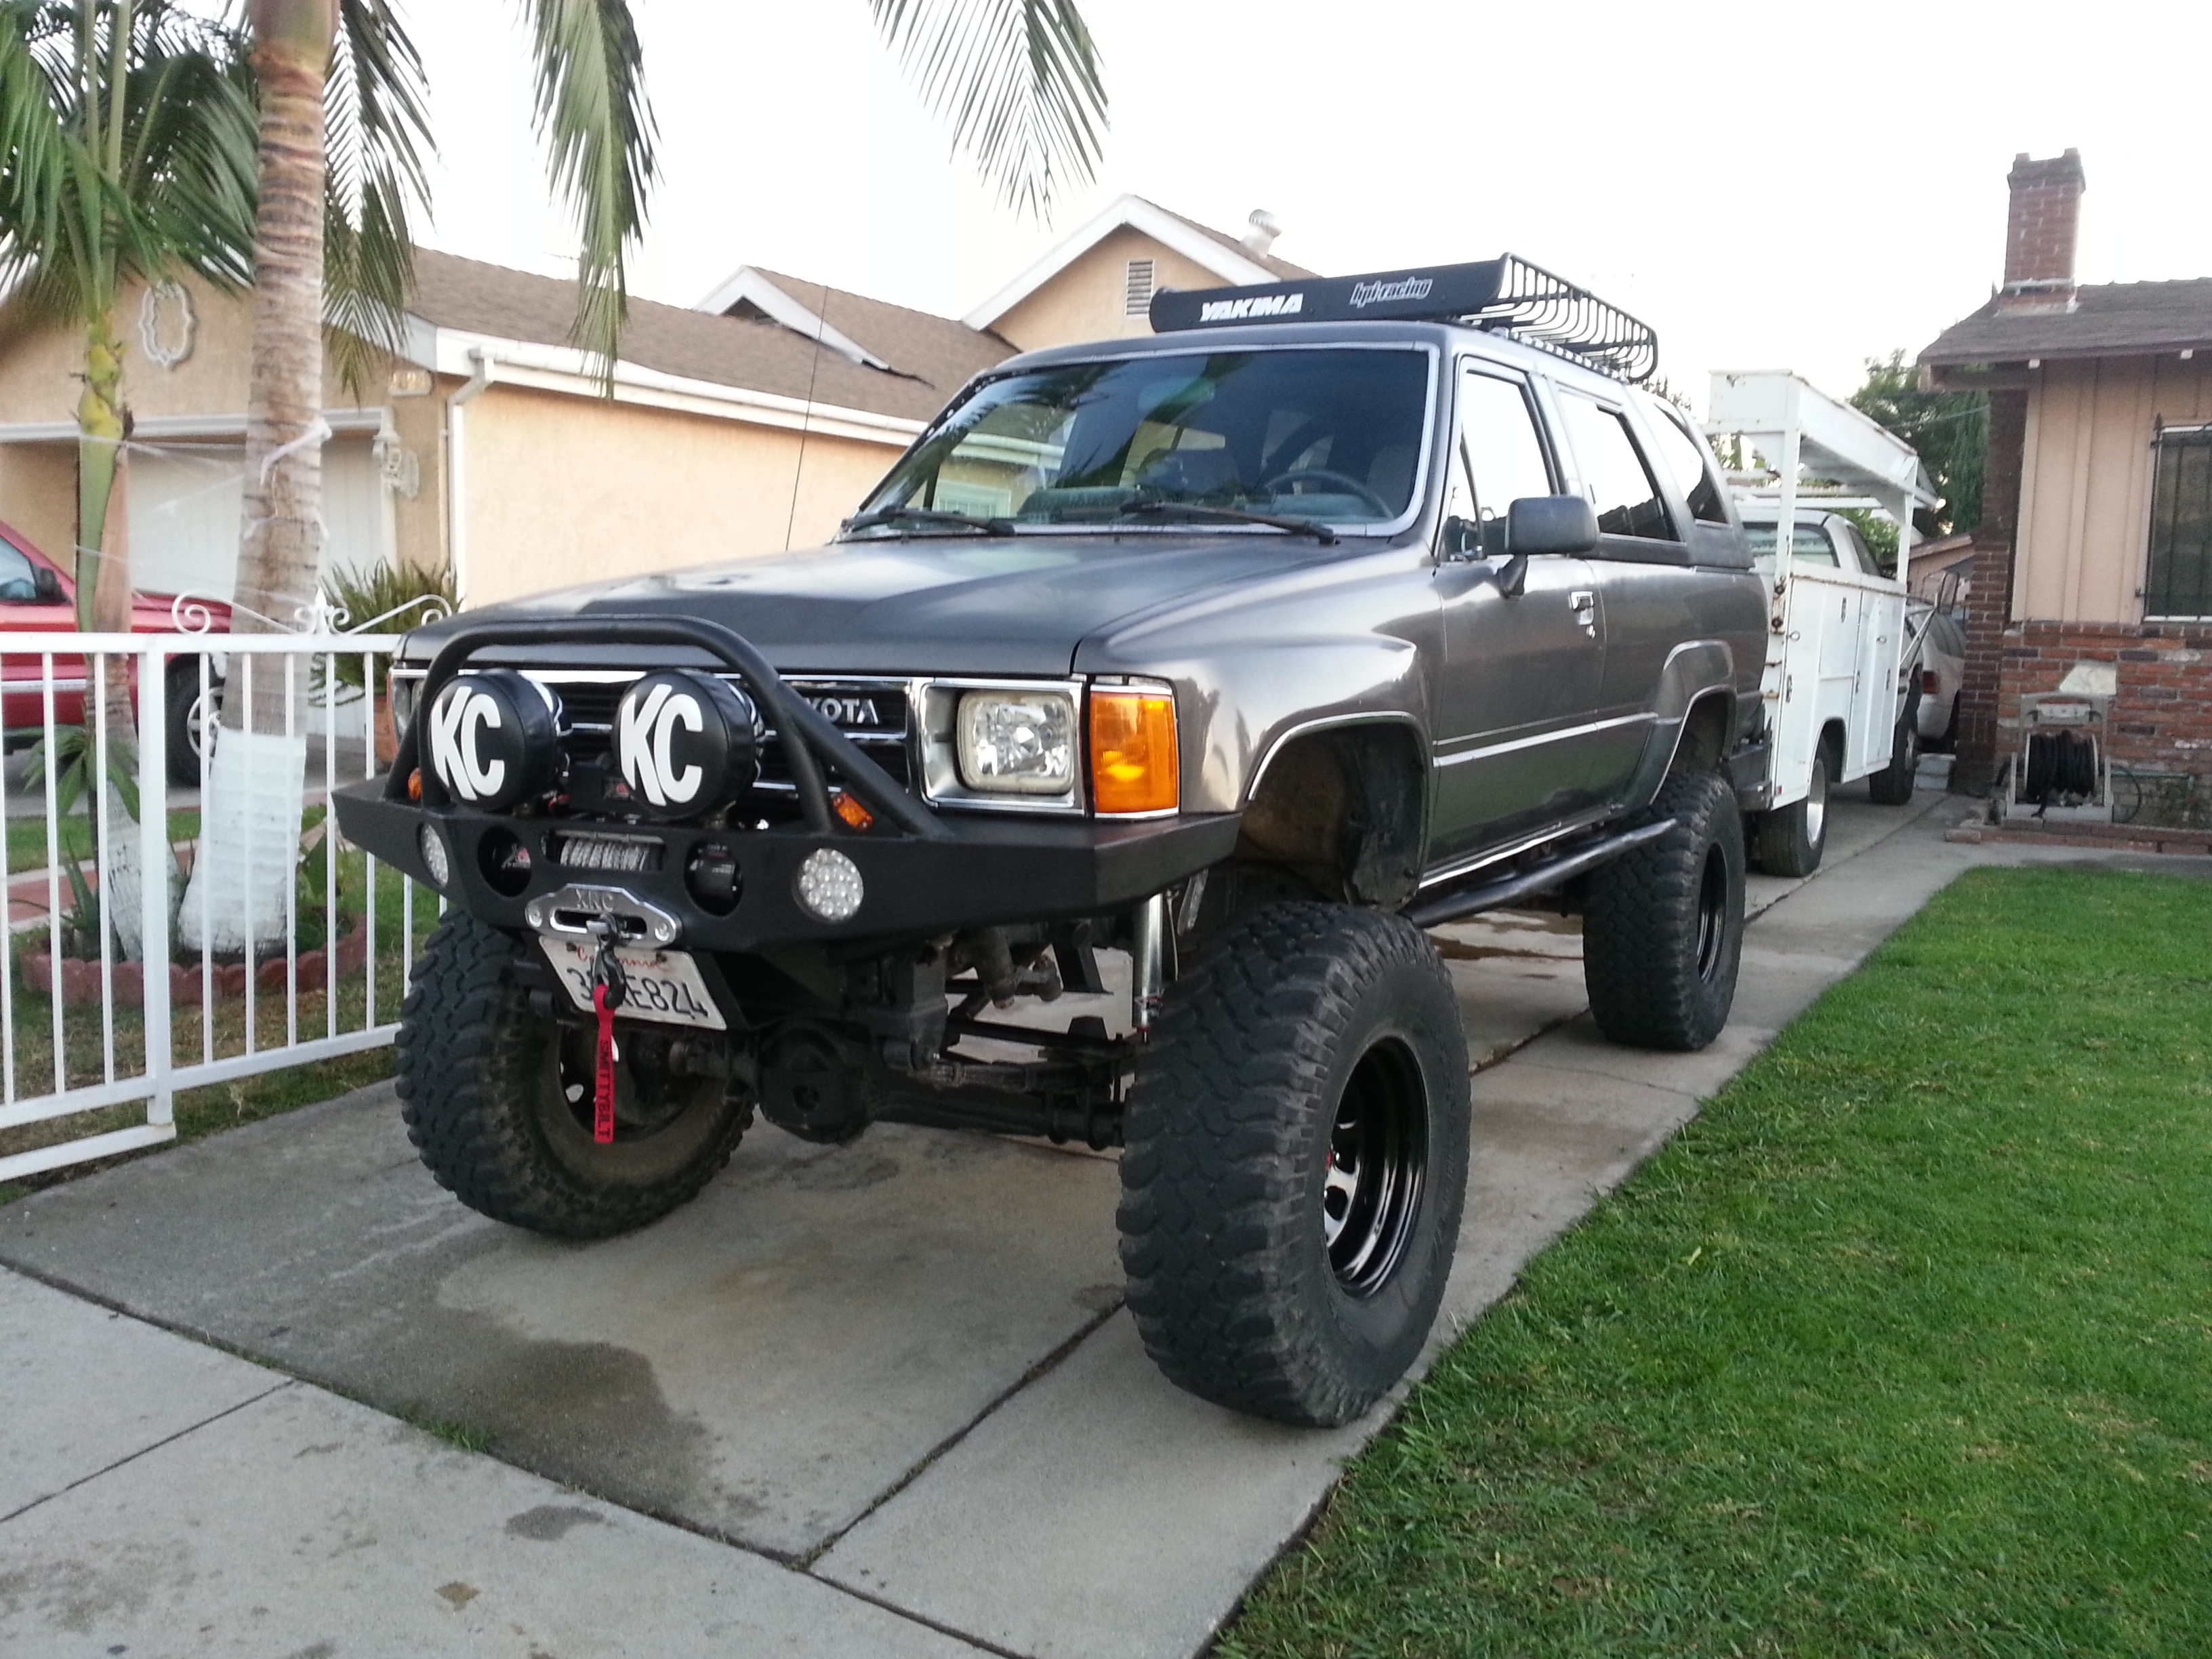
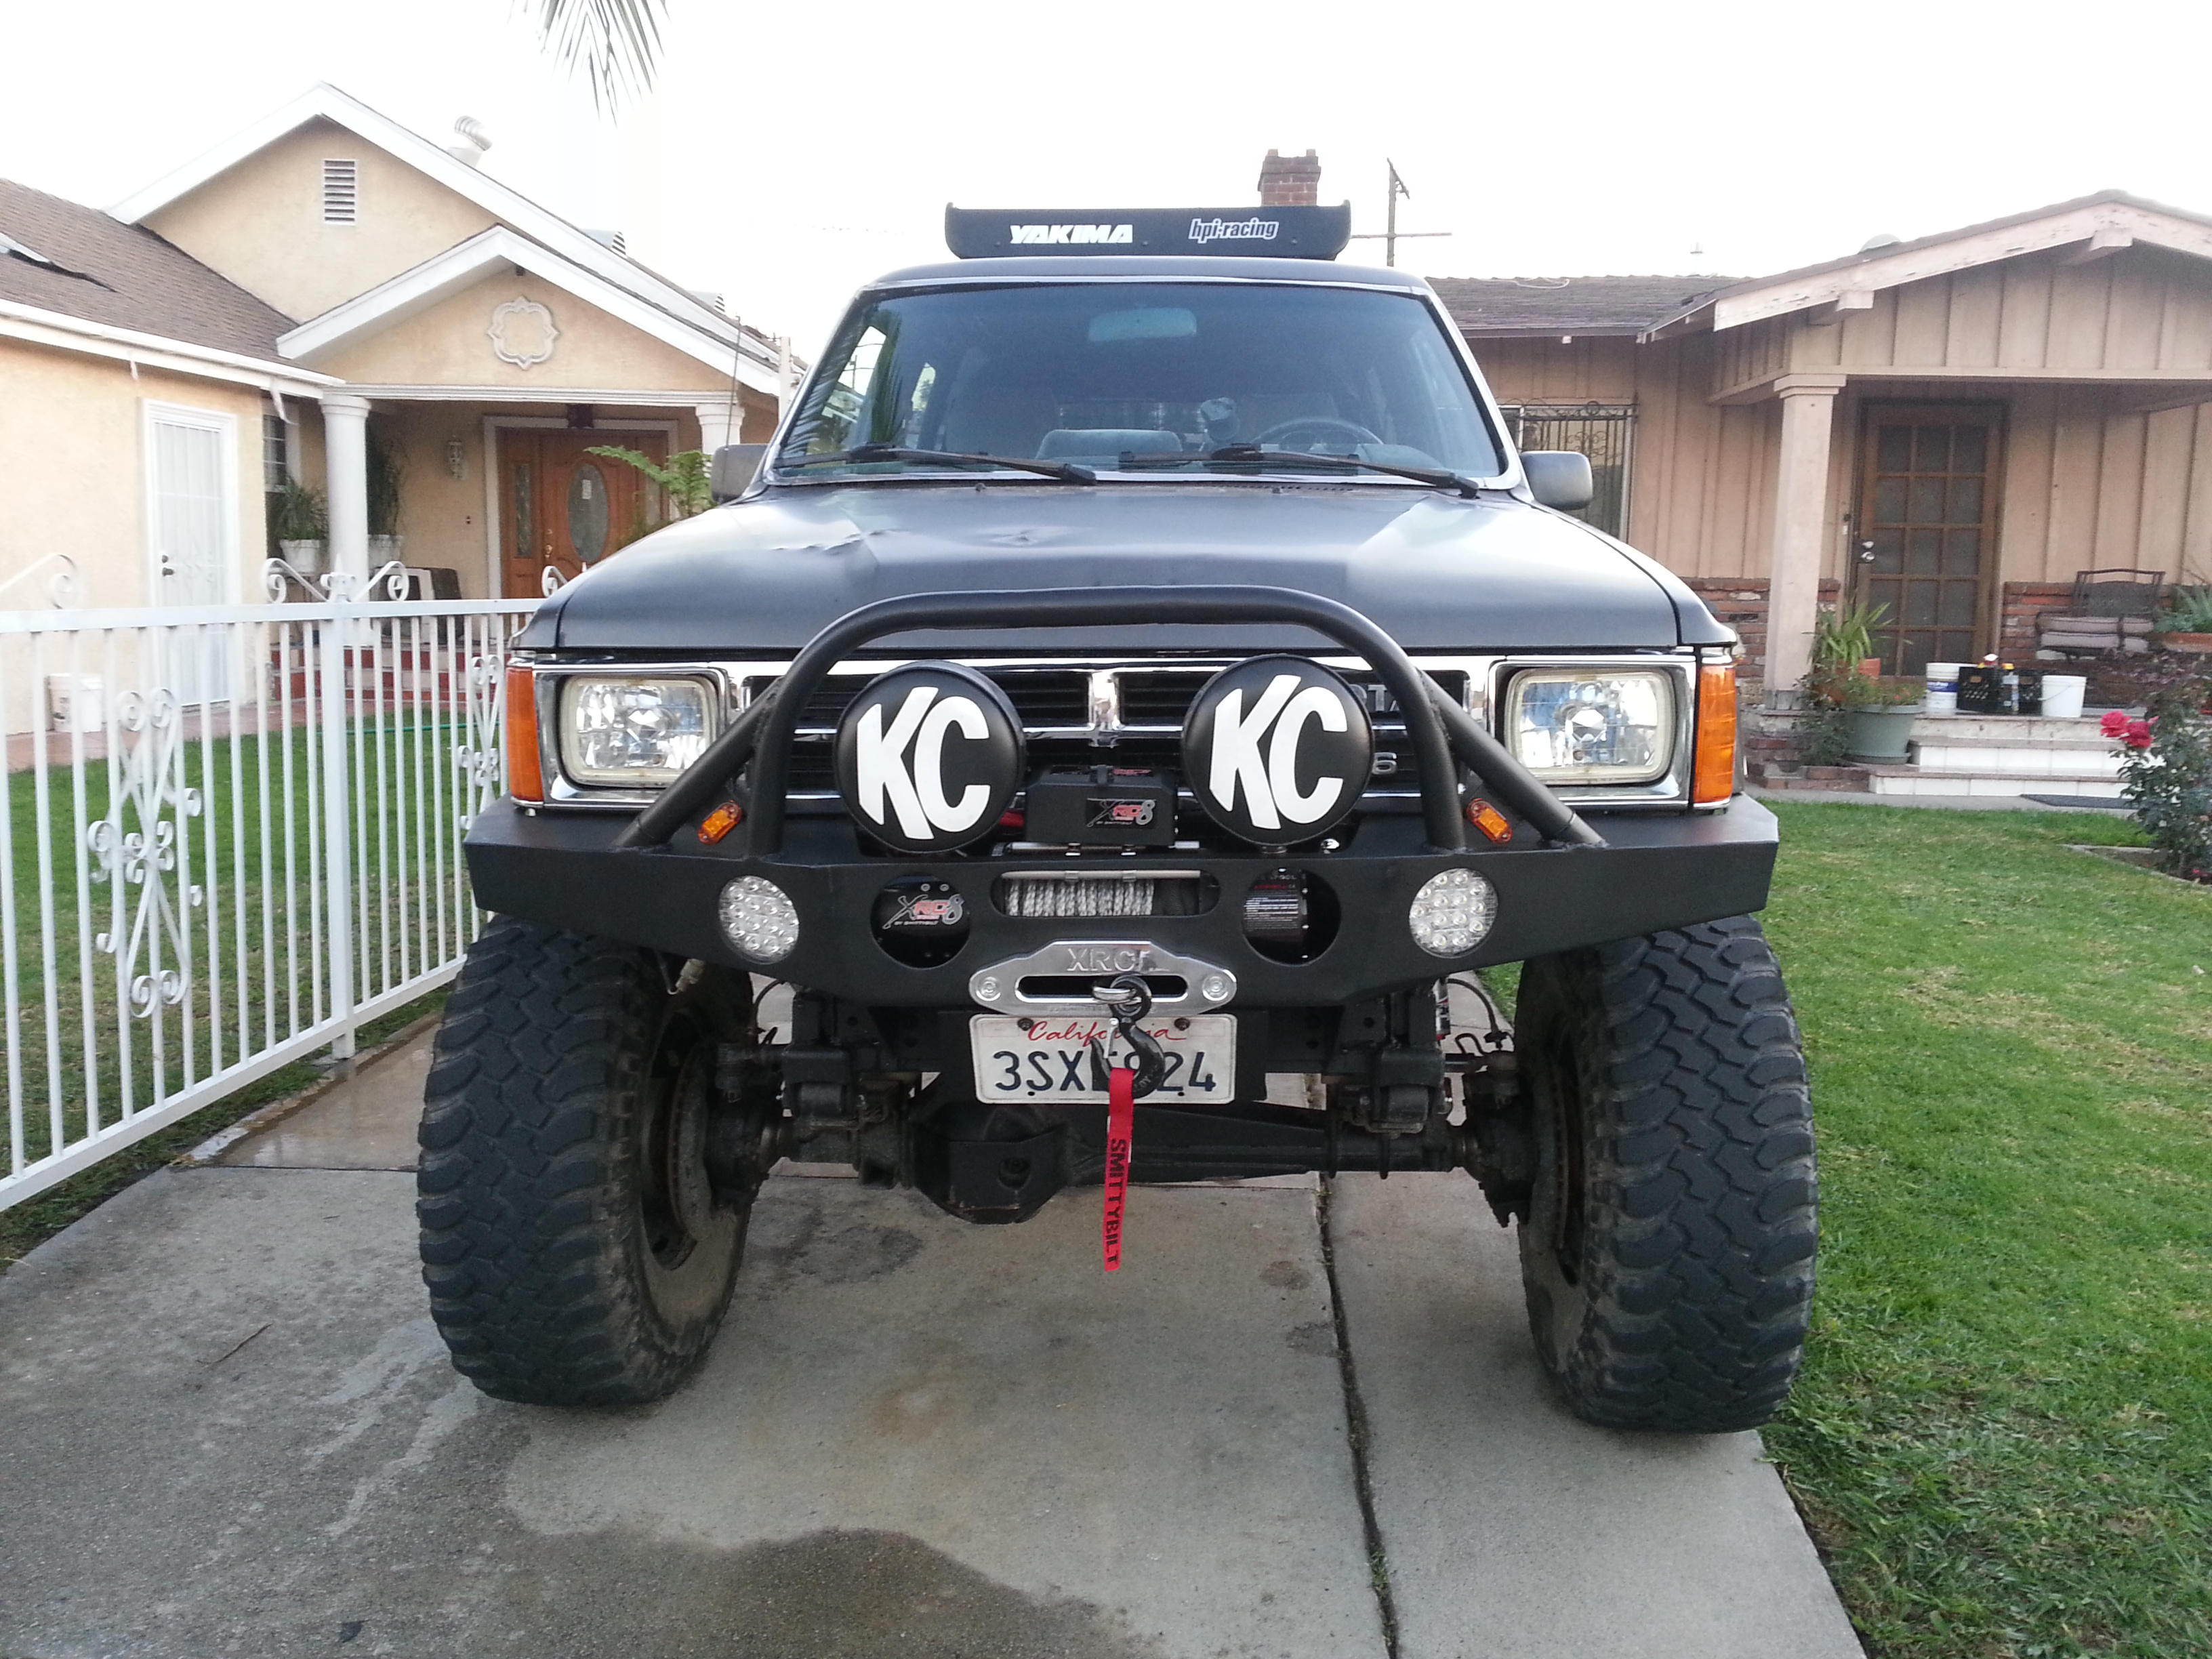
on my front bumper
Gotta keep theives away from stealing my winch.
I seriously wish my truck still looked this clean. I really need to make time to repaint my bumpers, sliders and hard top. Everything is so faded now.
Anyway are the beginning stages of the cooler slide out. I have the frame of it made already I just need to weld some mounting nuts to the actual area on to the trailer so I can adjust it back and forth as needed to center the slide out where I need it to be. The smaller space next to the chopping boards is going to be where I mount the spice rack and pantry box. I still need to create that.


Those Slide out rails have a weight capacity of 500lbs. MORE THAN ENOUGH! and they extend out 36" which is basically he length of the Engel cooler.


There is how she will sit inside the rear compartment.

---------------------------------------------------------------------------------------------------------------------------------------------------------------------------------------------------------------------------------------
Something else that i ordered this past week were 3 matching hitch locks. They all use the same key, and all 3 match the hitch lock that i use for my front bumper license plate/winch anti-theft plate.

on my front bumper


Gotta keep theives away from stealing my winch.

I seriously wish my truck still looked this clean. I really need to make time to repaint my bumpers, sliders and hard top. Everything is so faded now.


Last edited by Redeth005; 06-12-2017 at 09:10 PM.
06-22-2017, 06:21 AM
#140
Registered User
Thread Starter
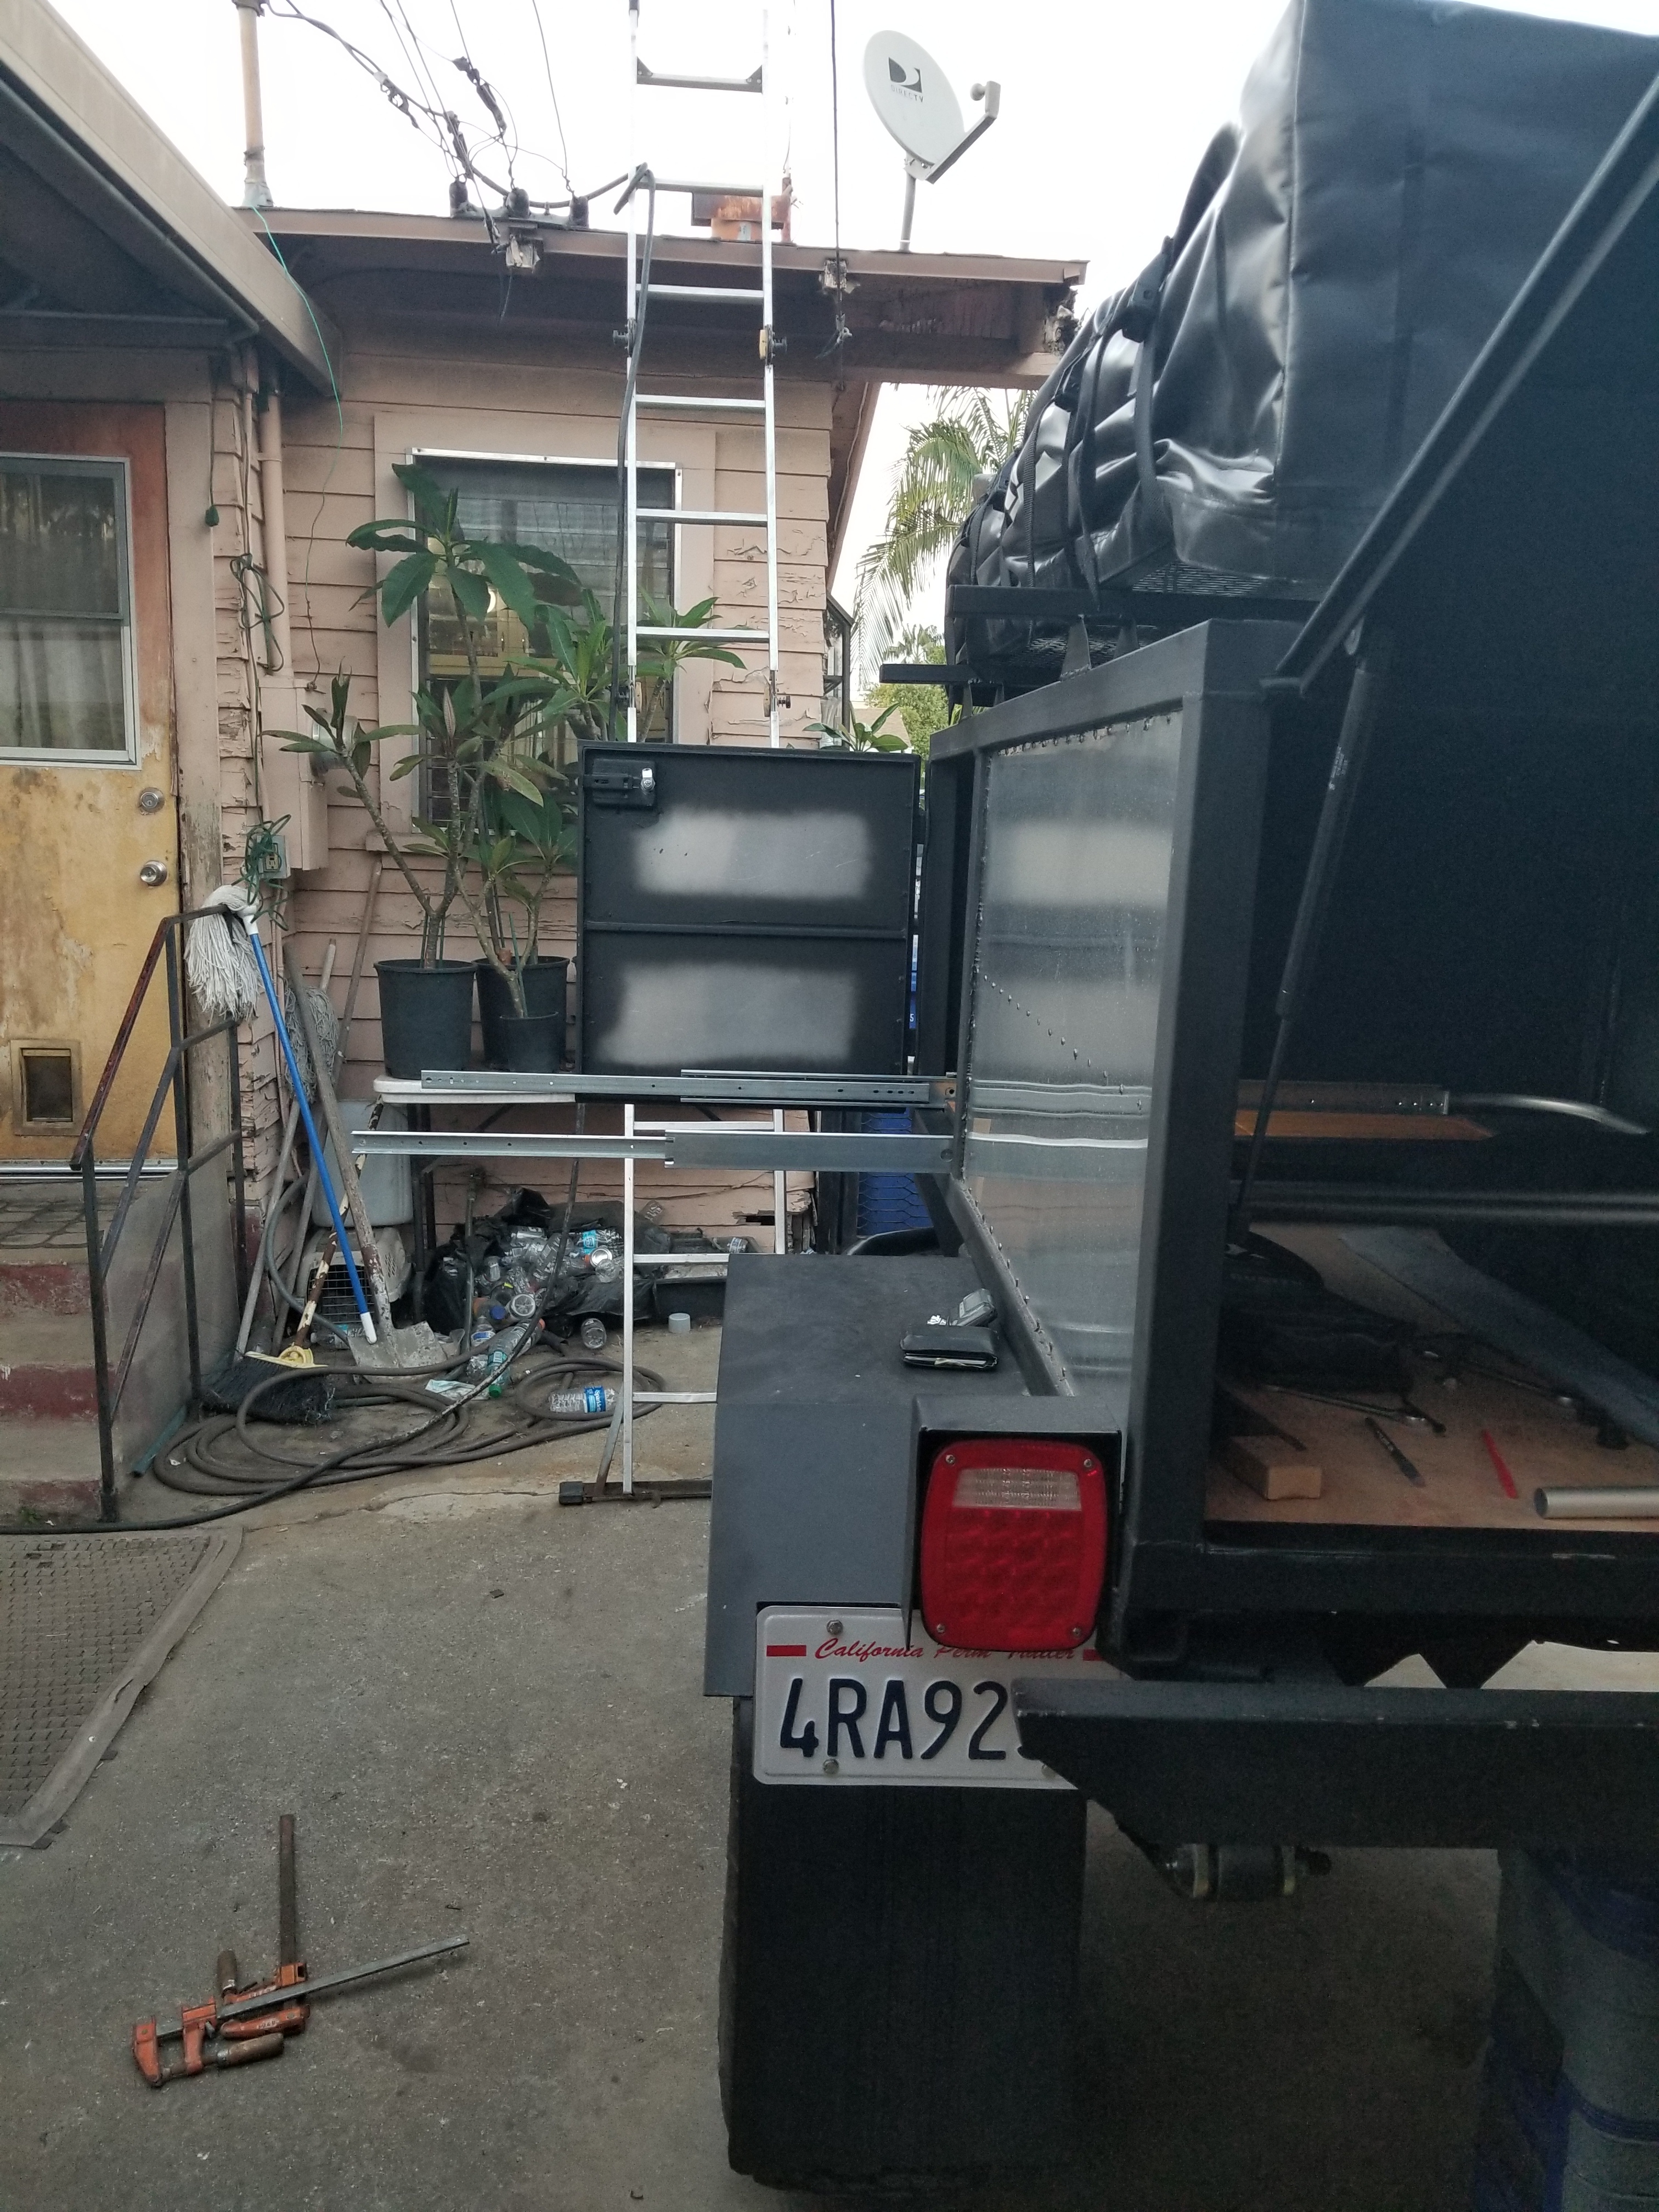
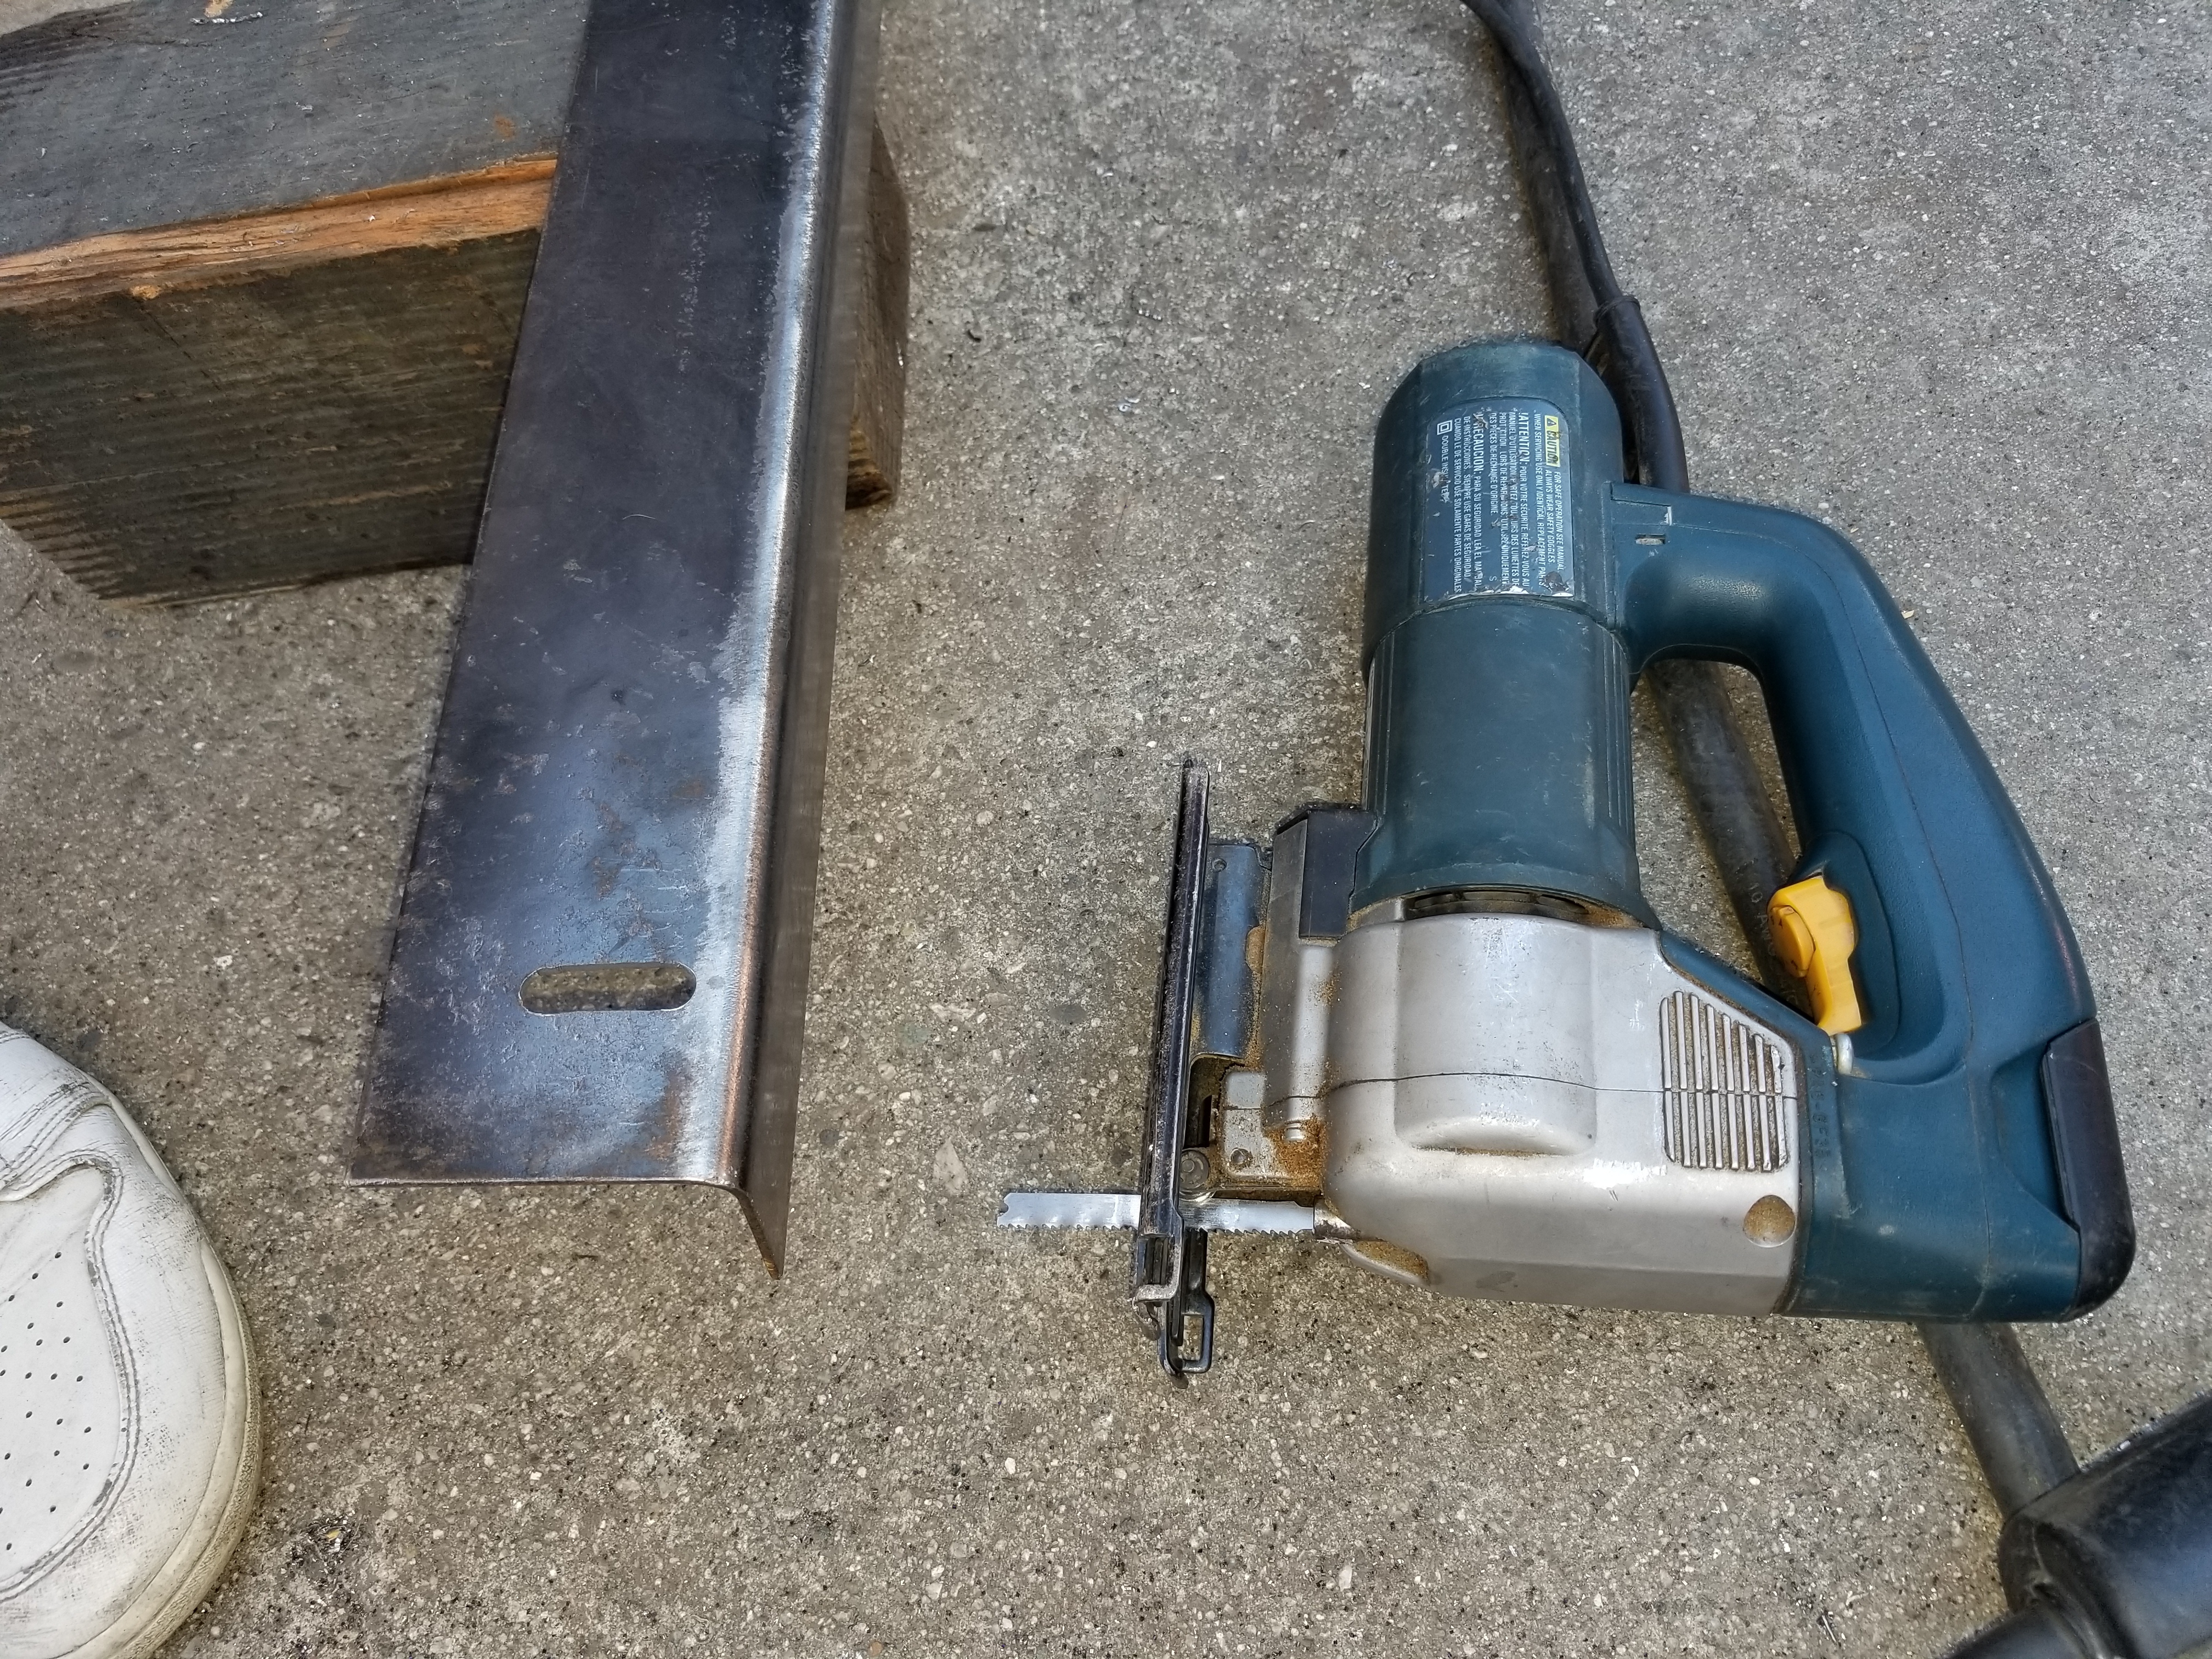
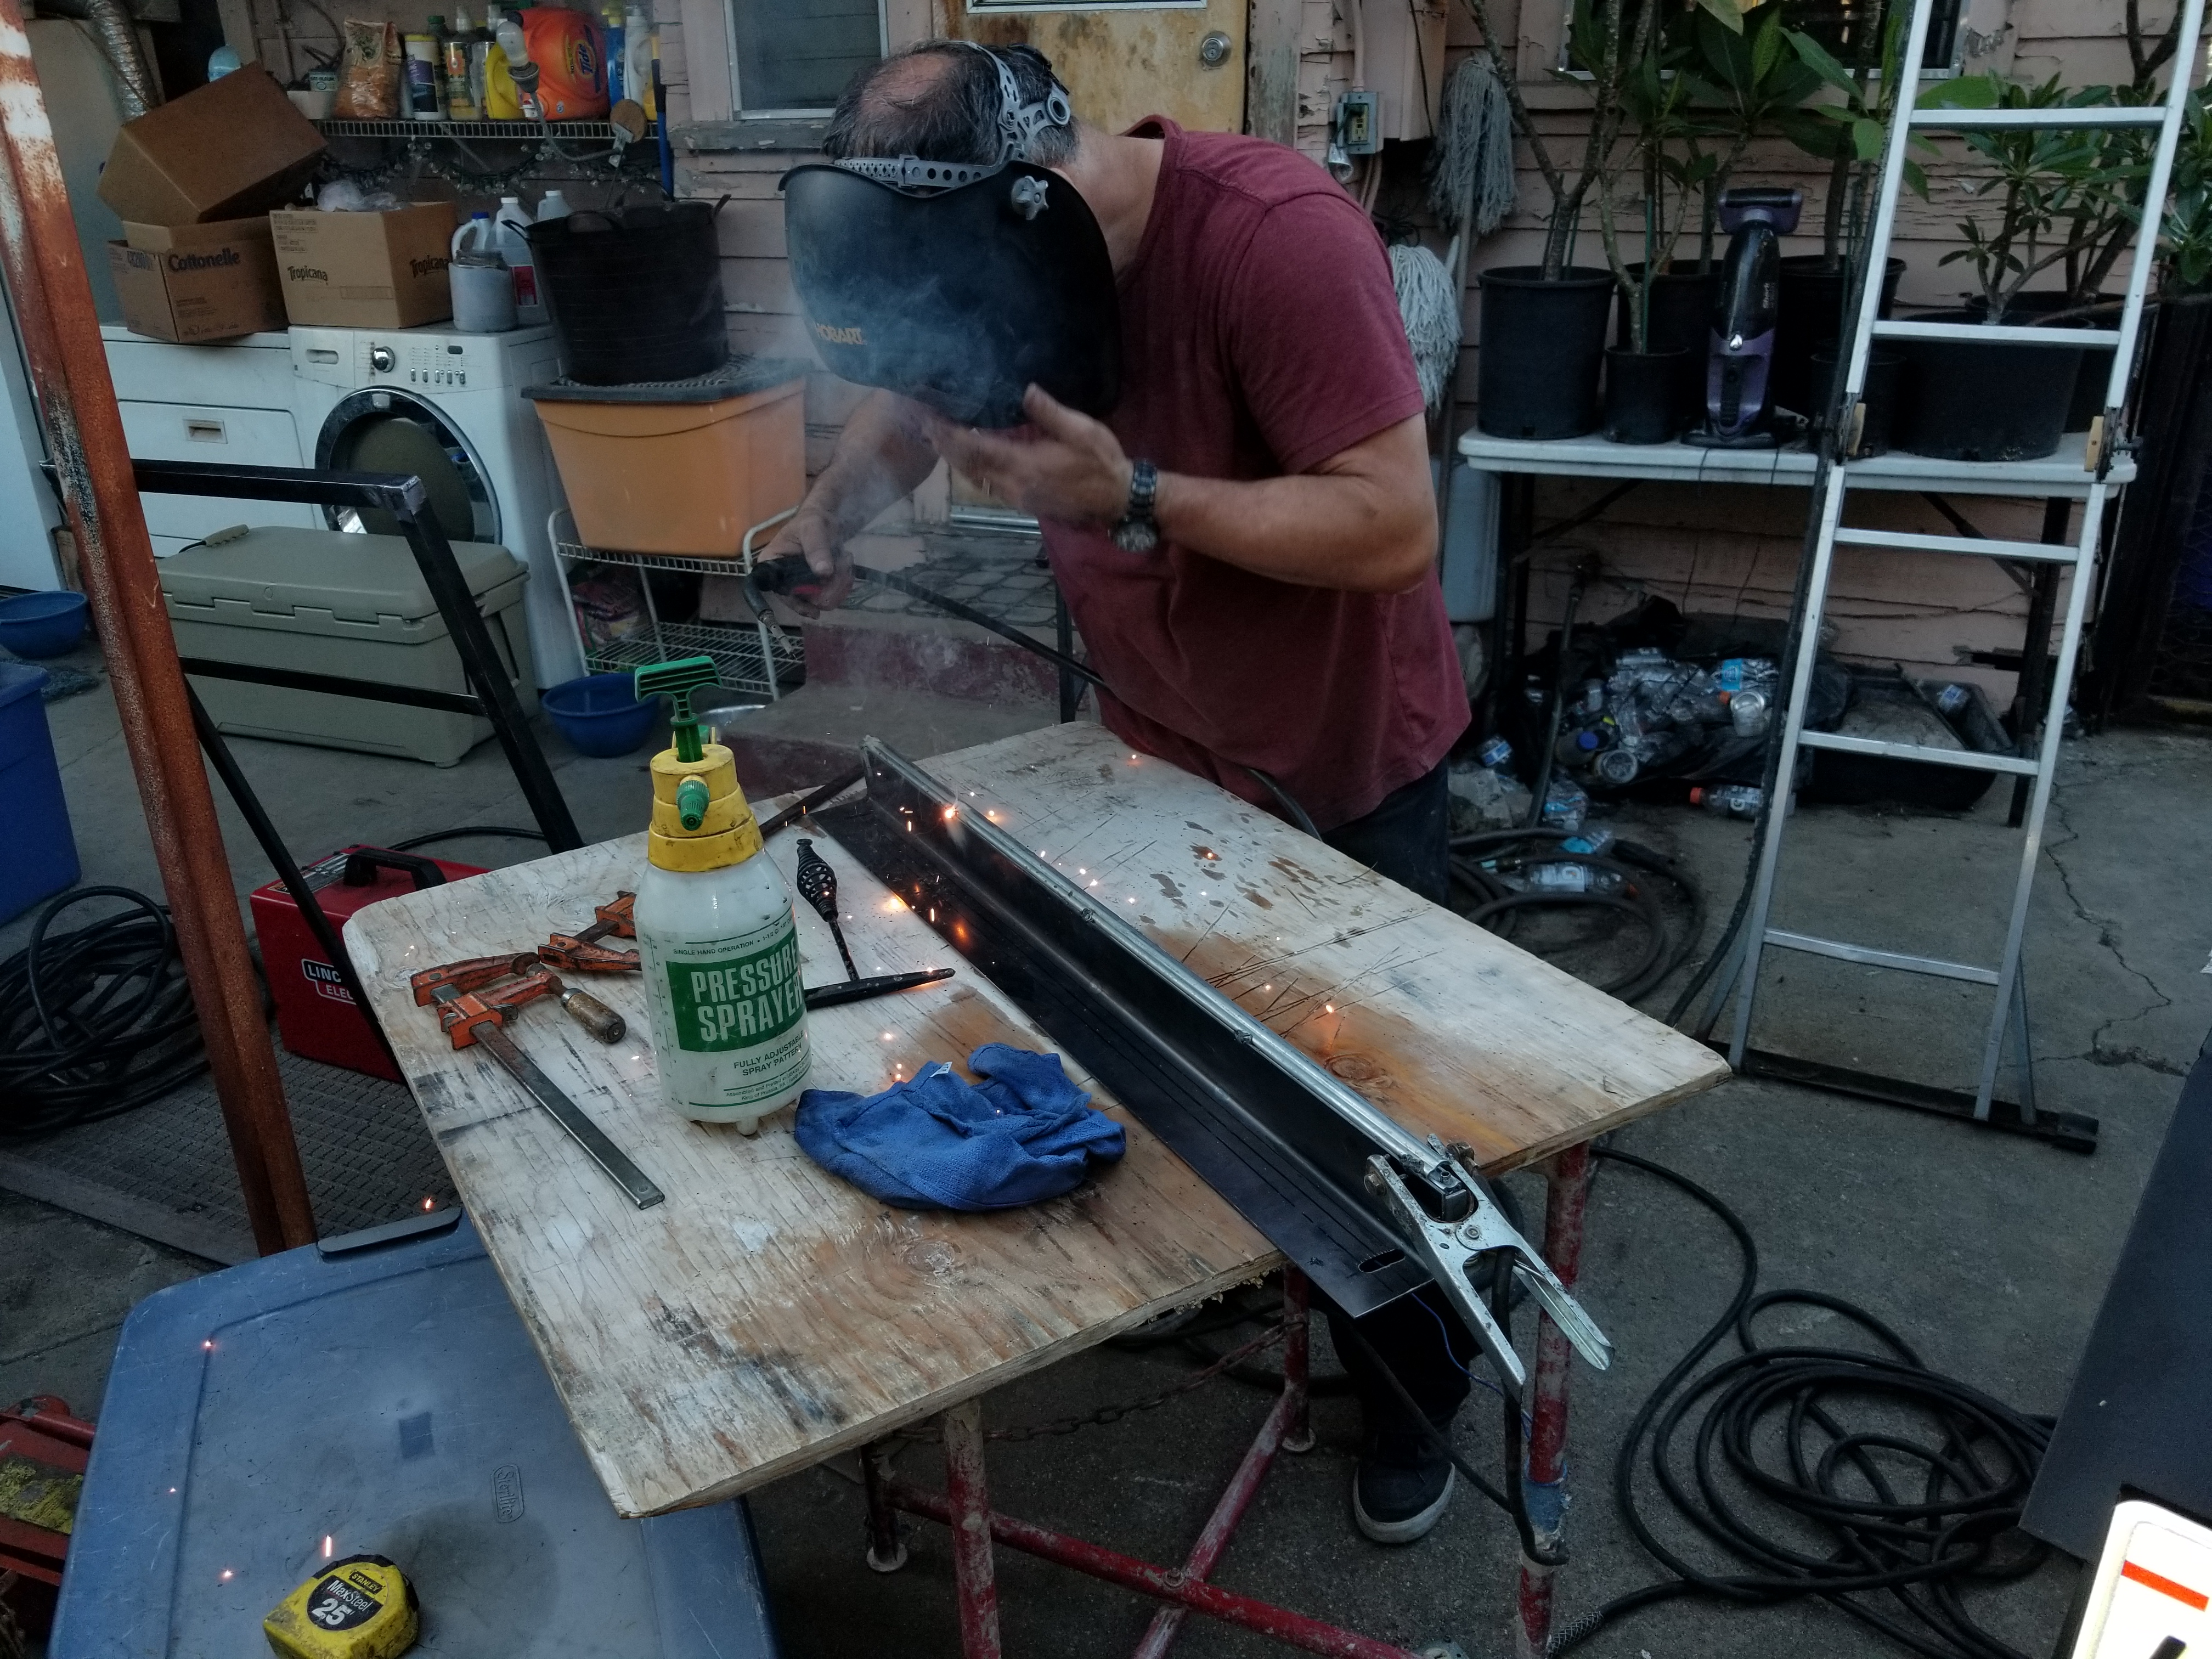
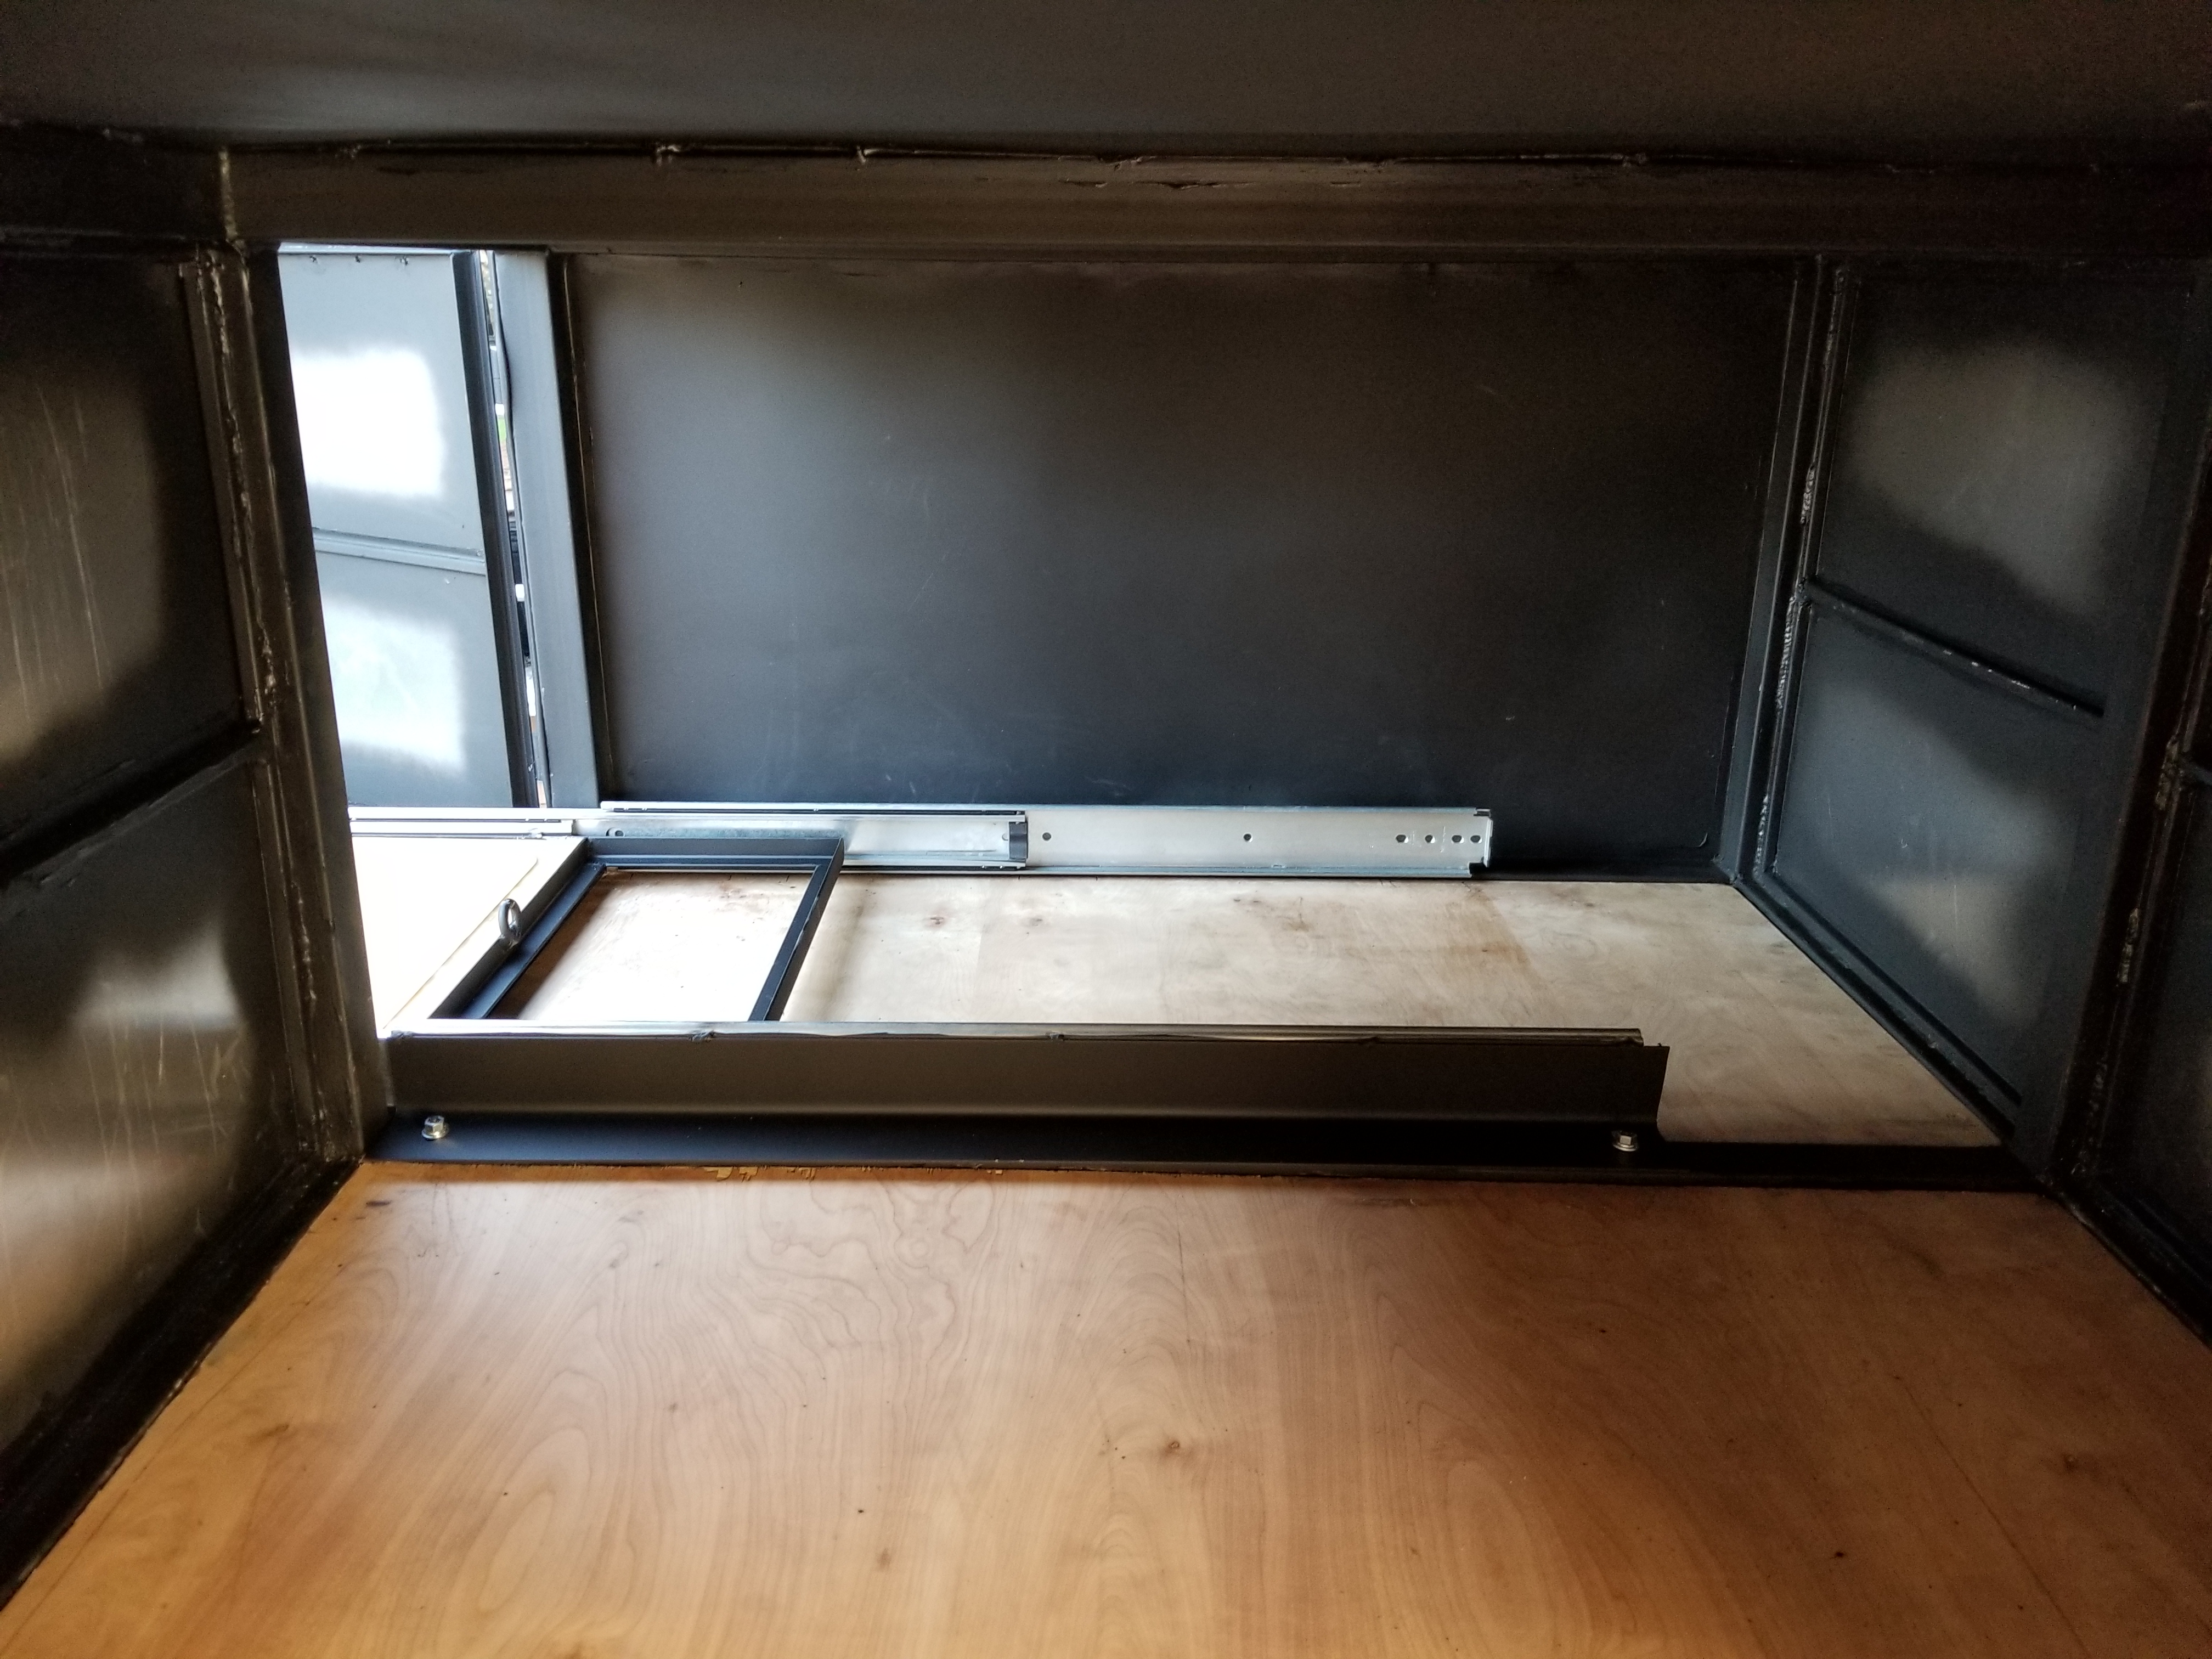
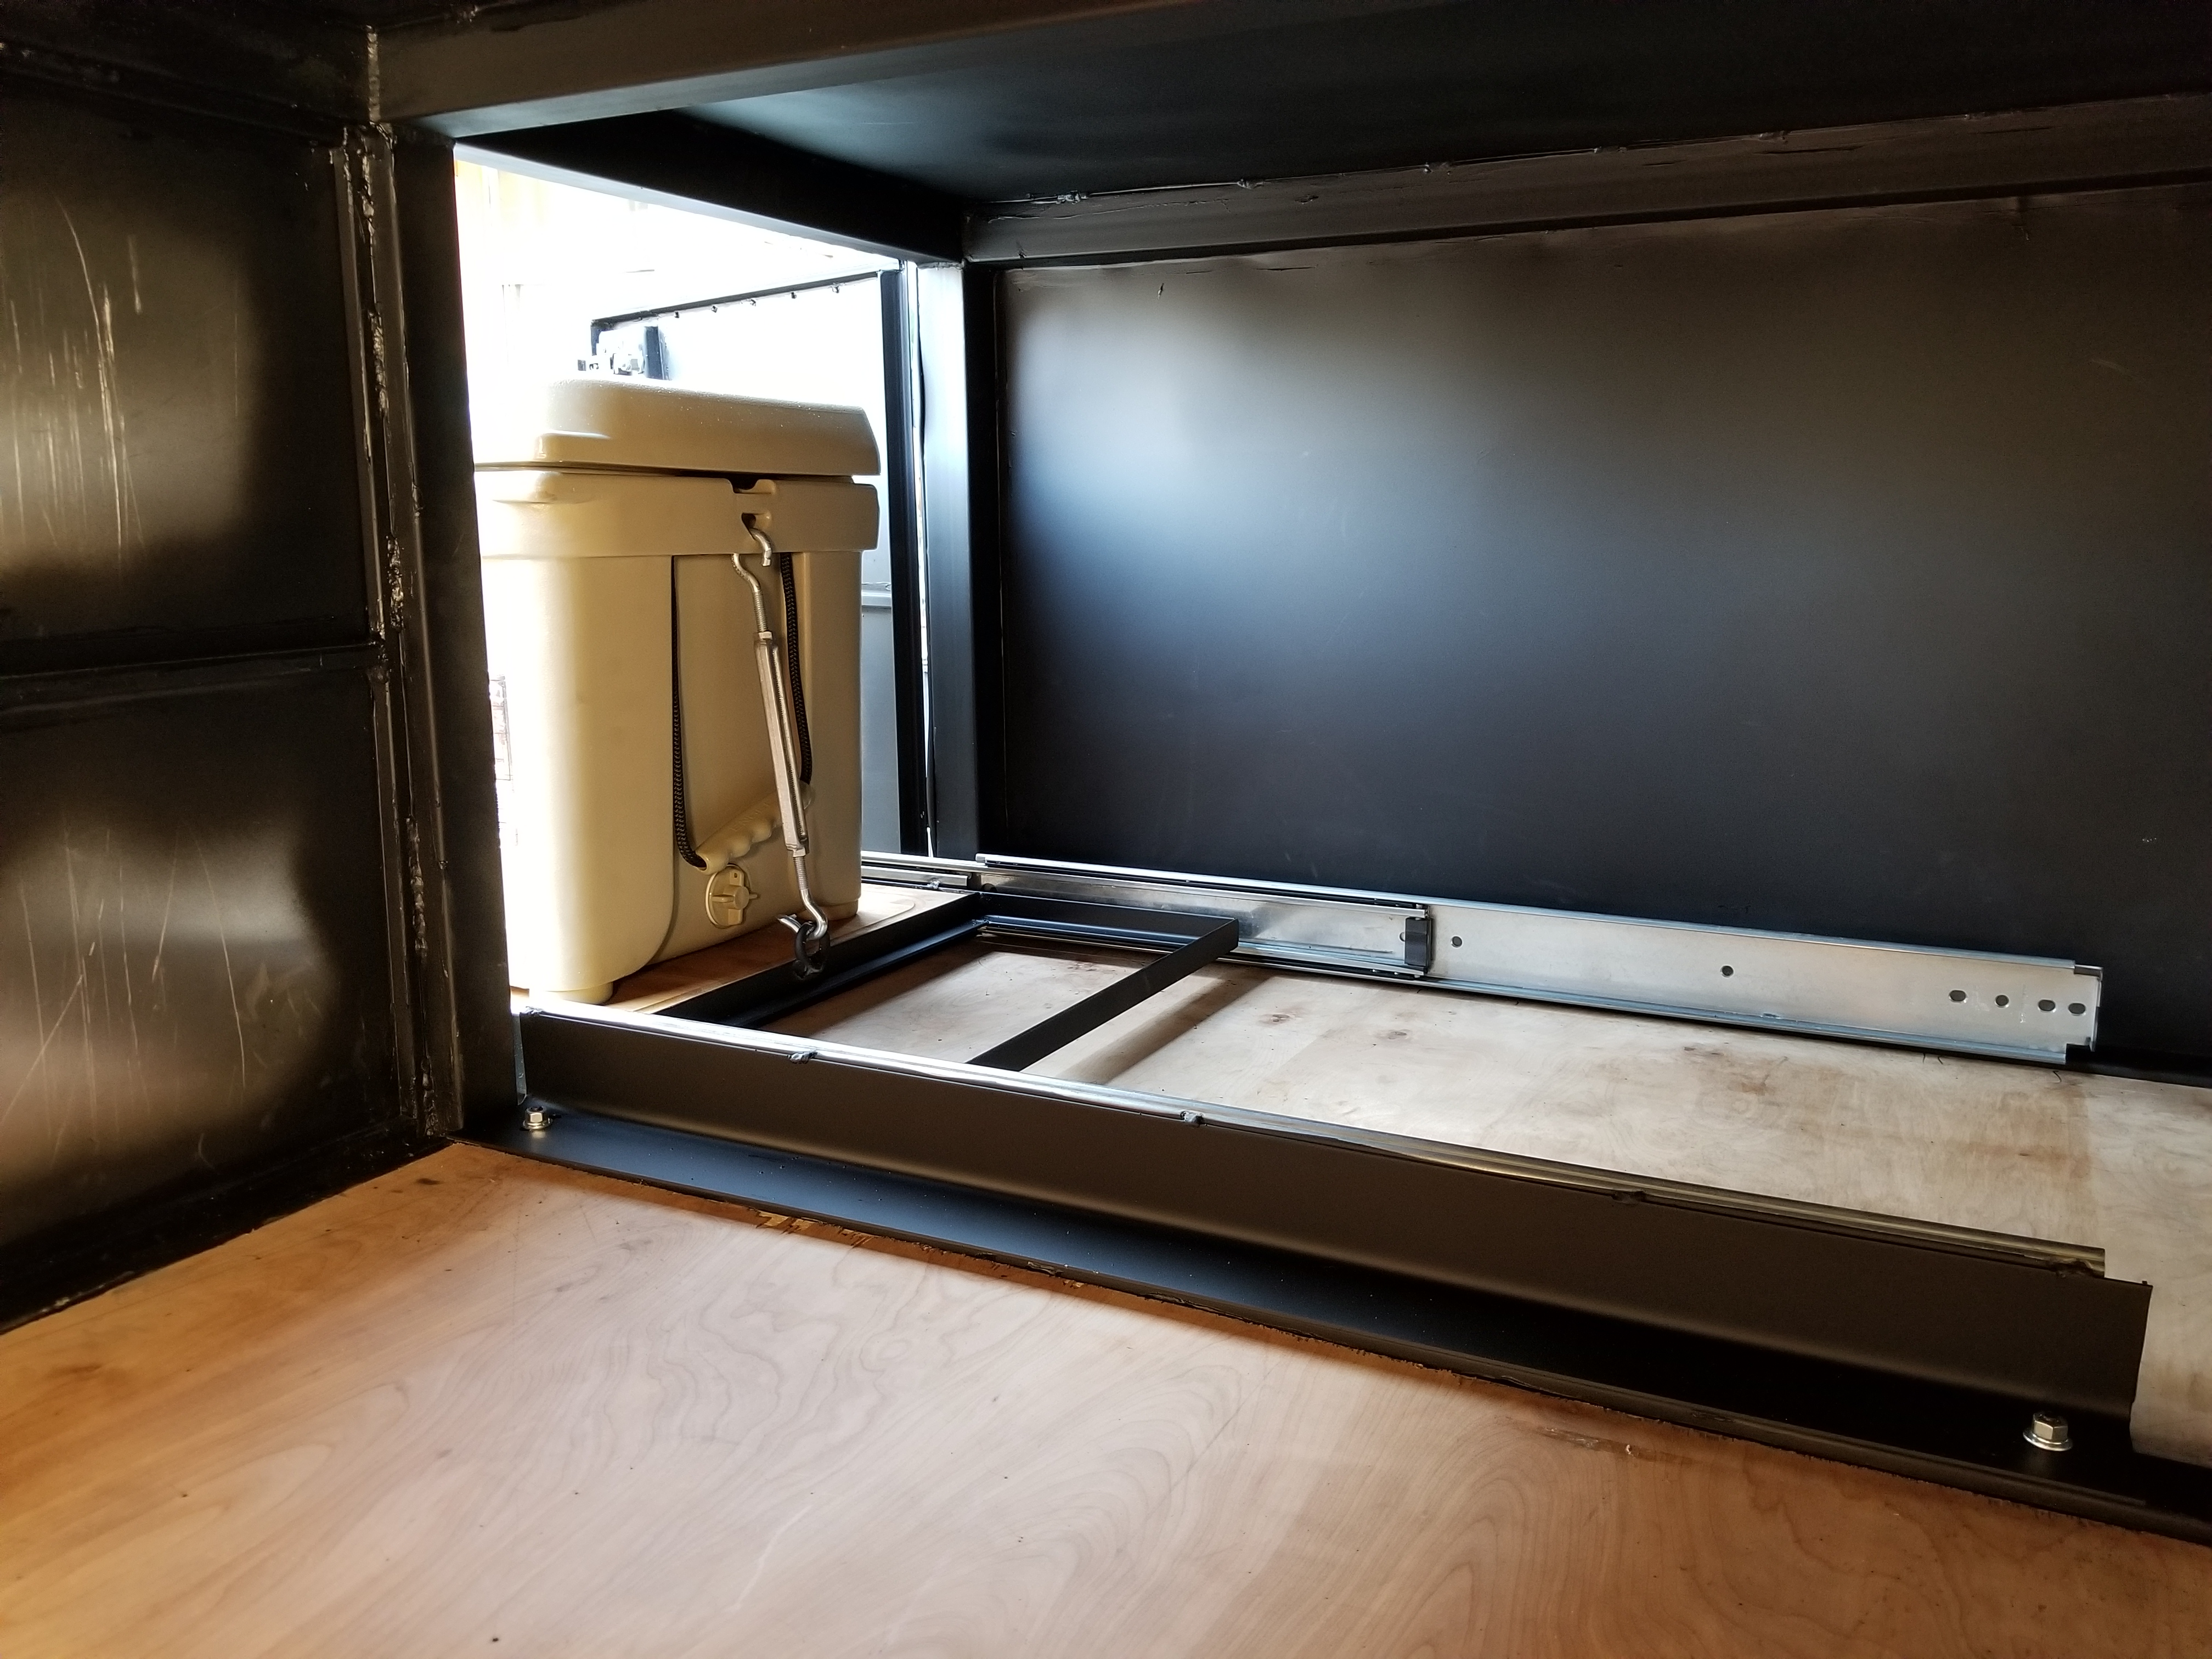
My dad and i finally got around to finishing up the cooler slide out this week. We wanted to make the slide out built to be adjustable to i drilled 2 holes and connected them with a jigsaw creating these oval holes that could then have a bolt through it and be adjusted back and forth then tightened when it was centered at the door.
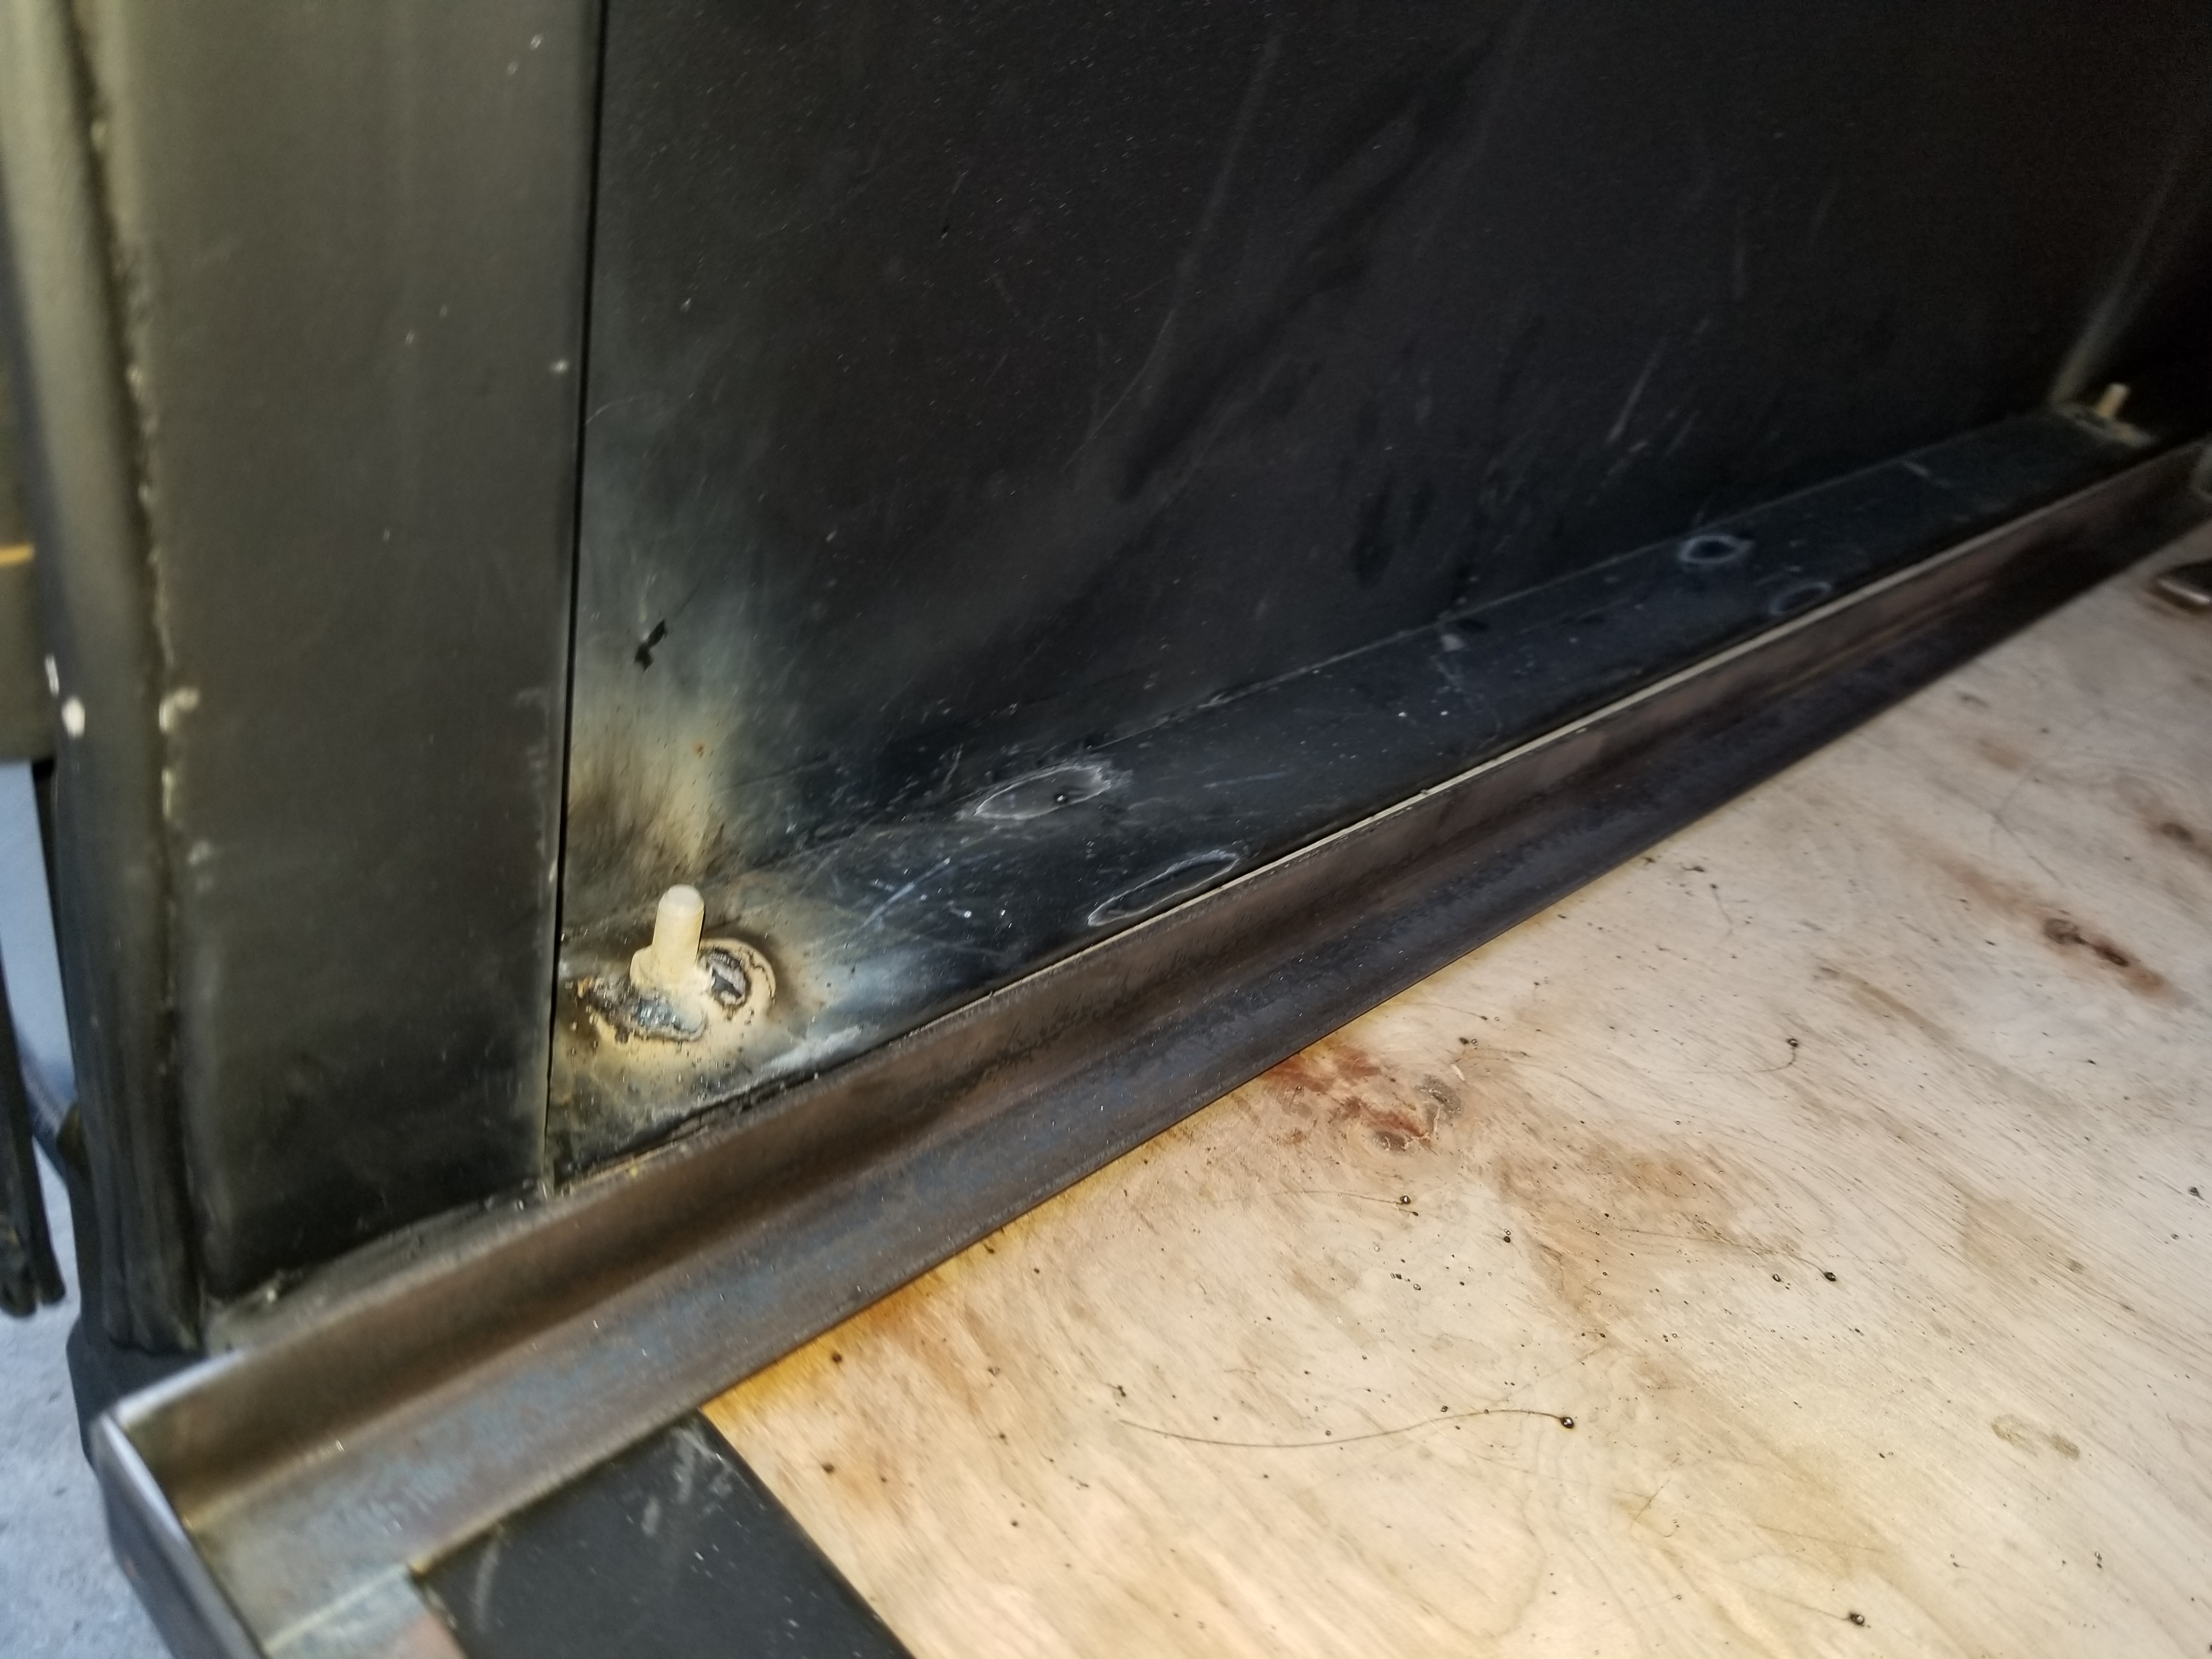
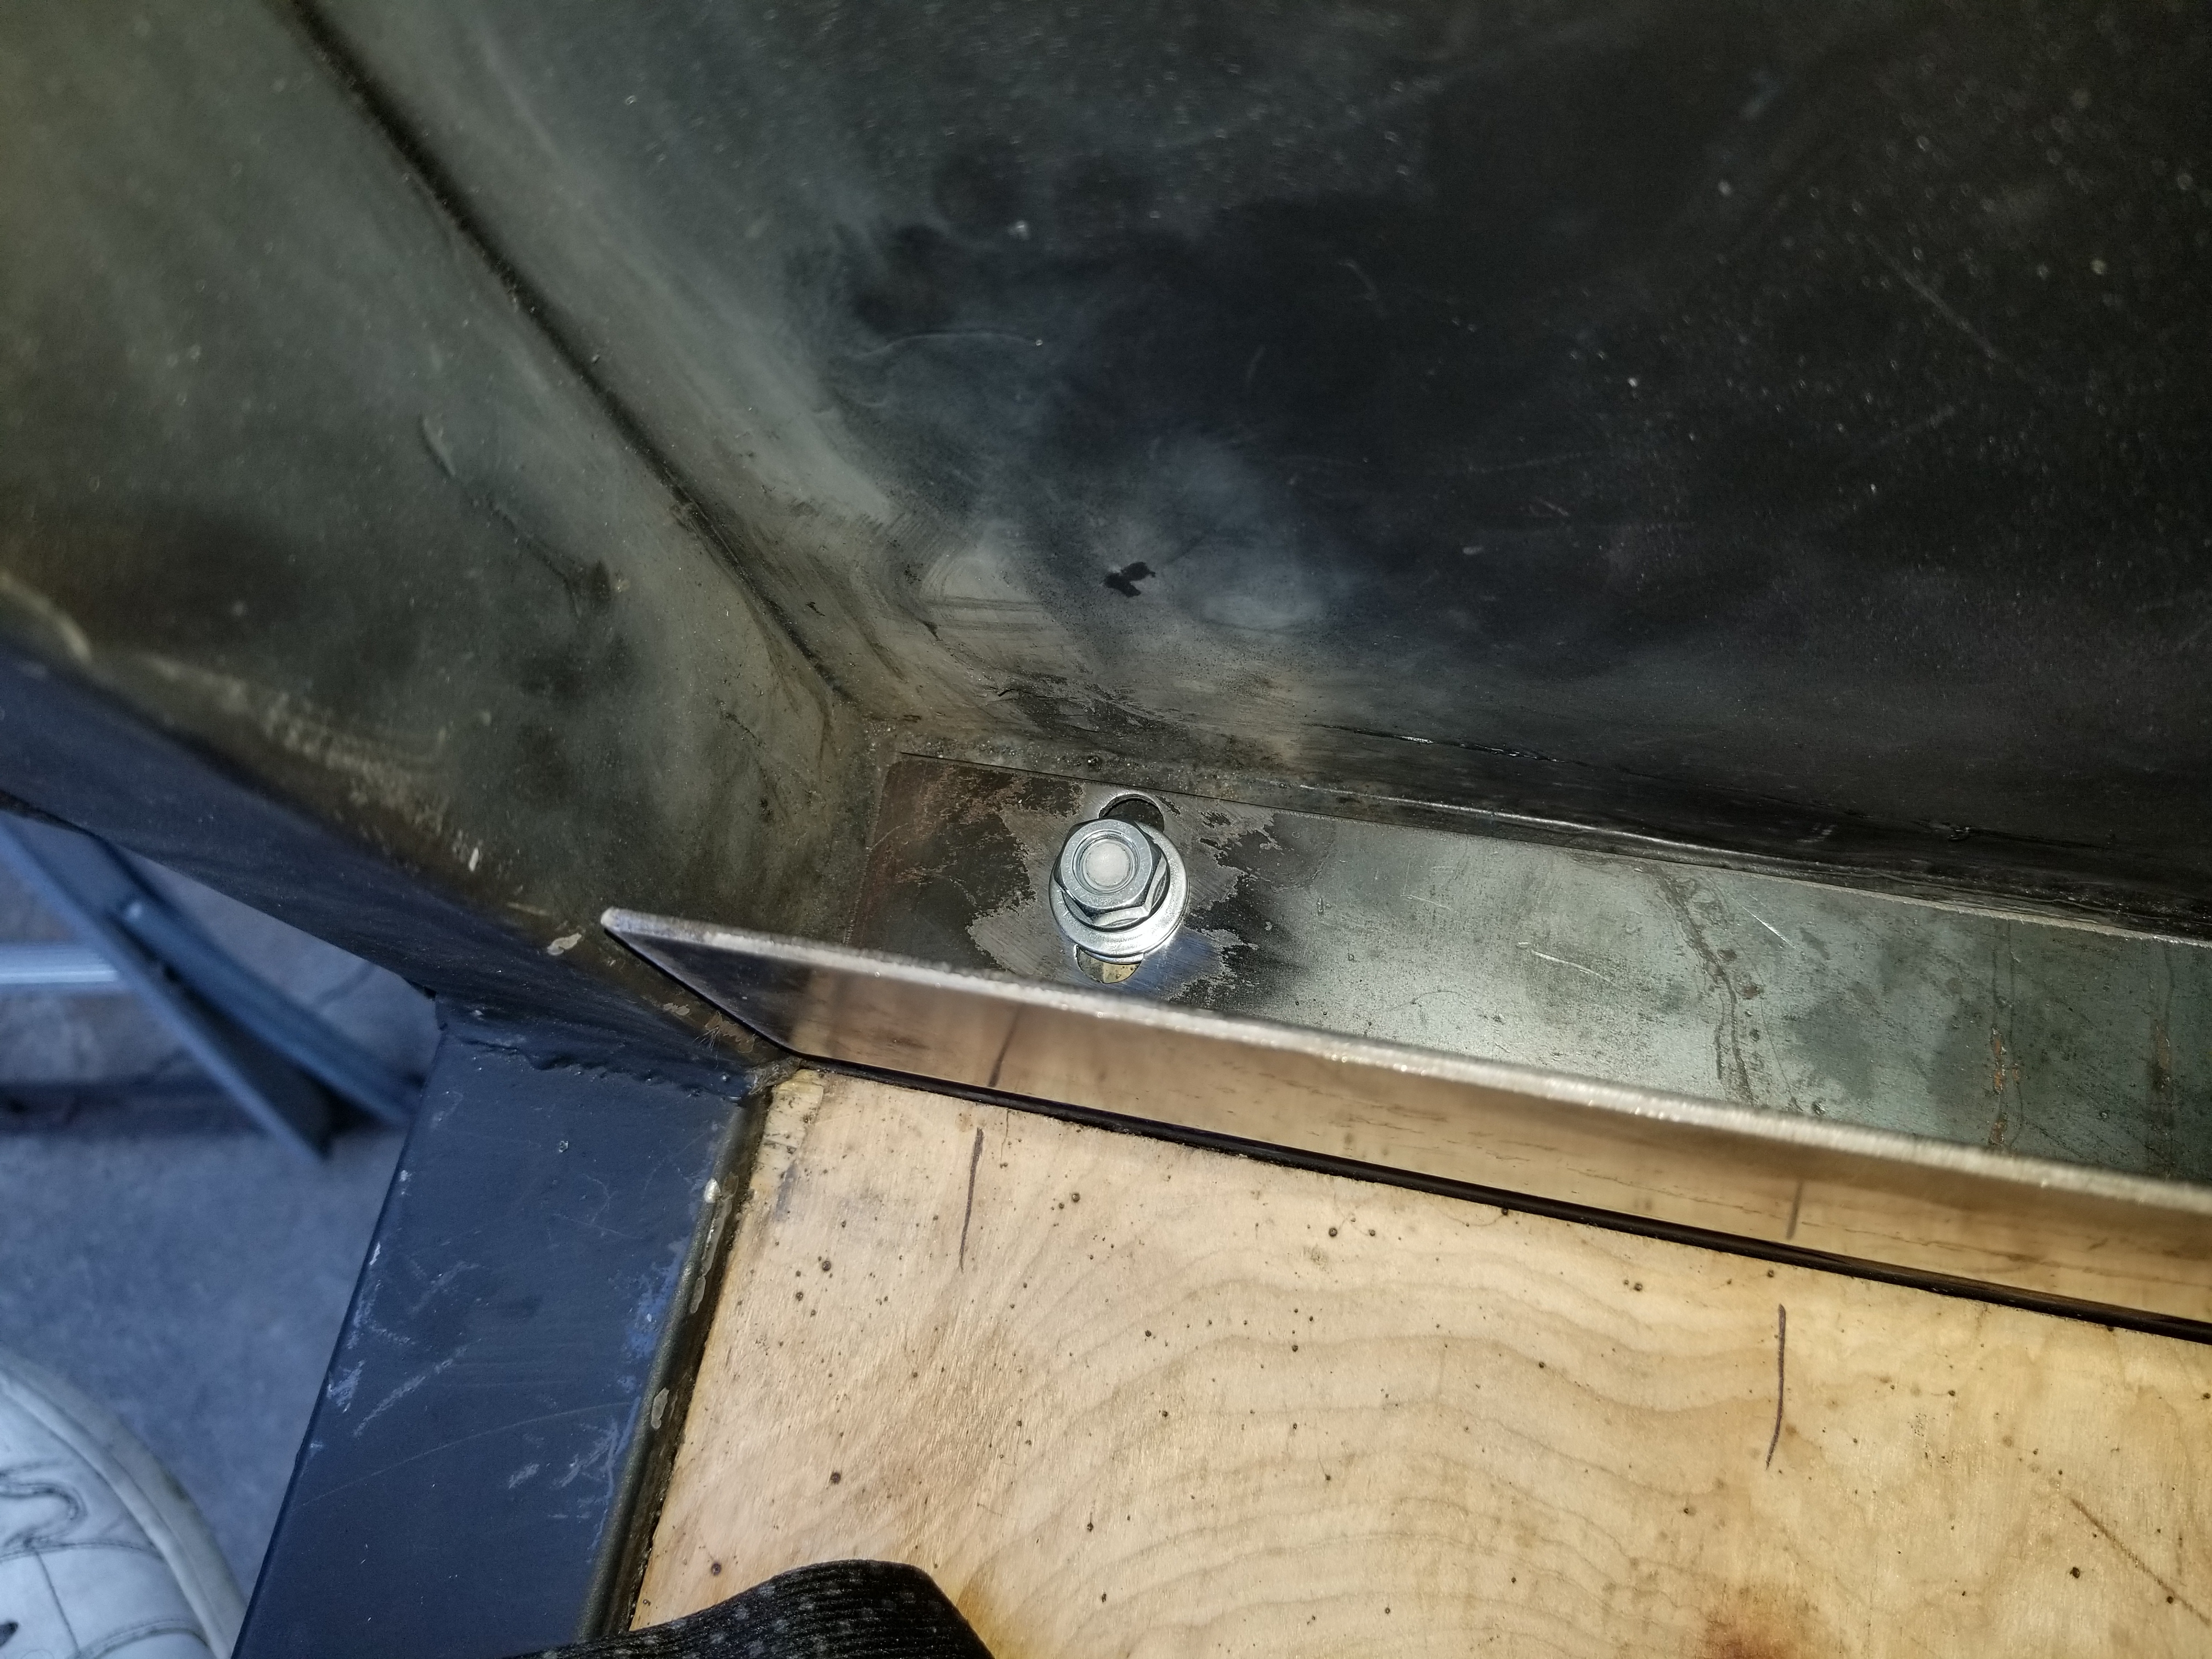
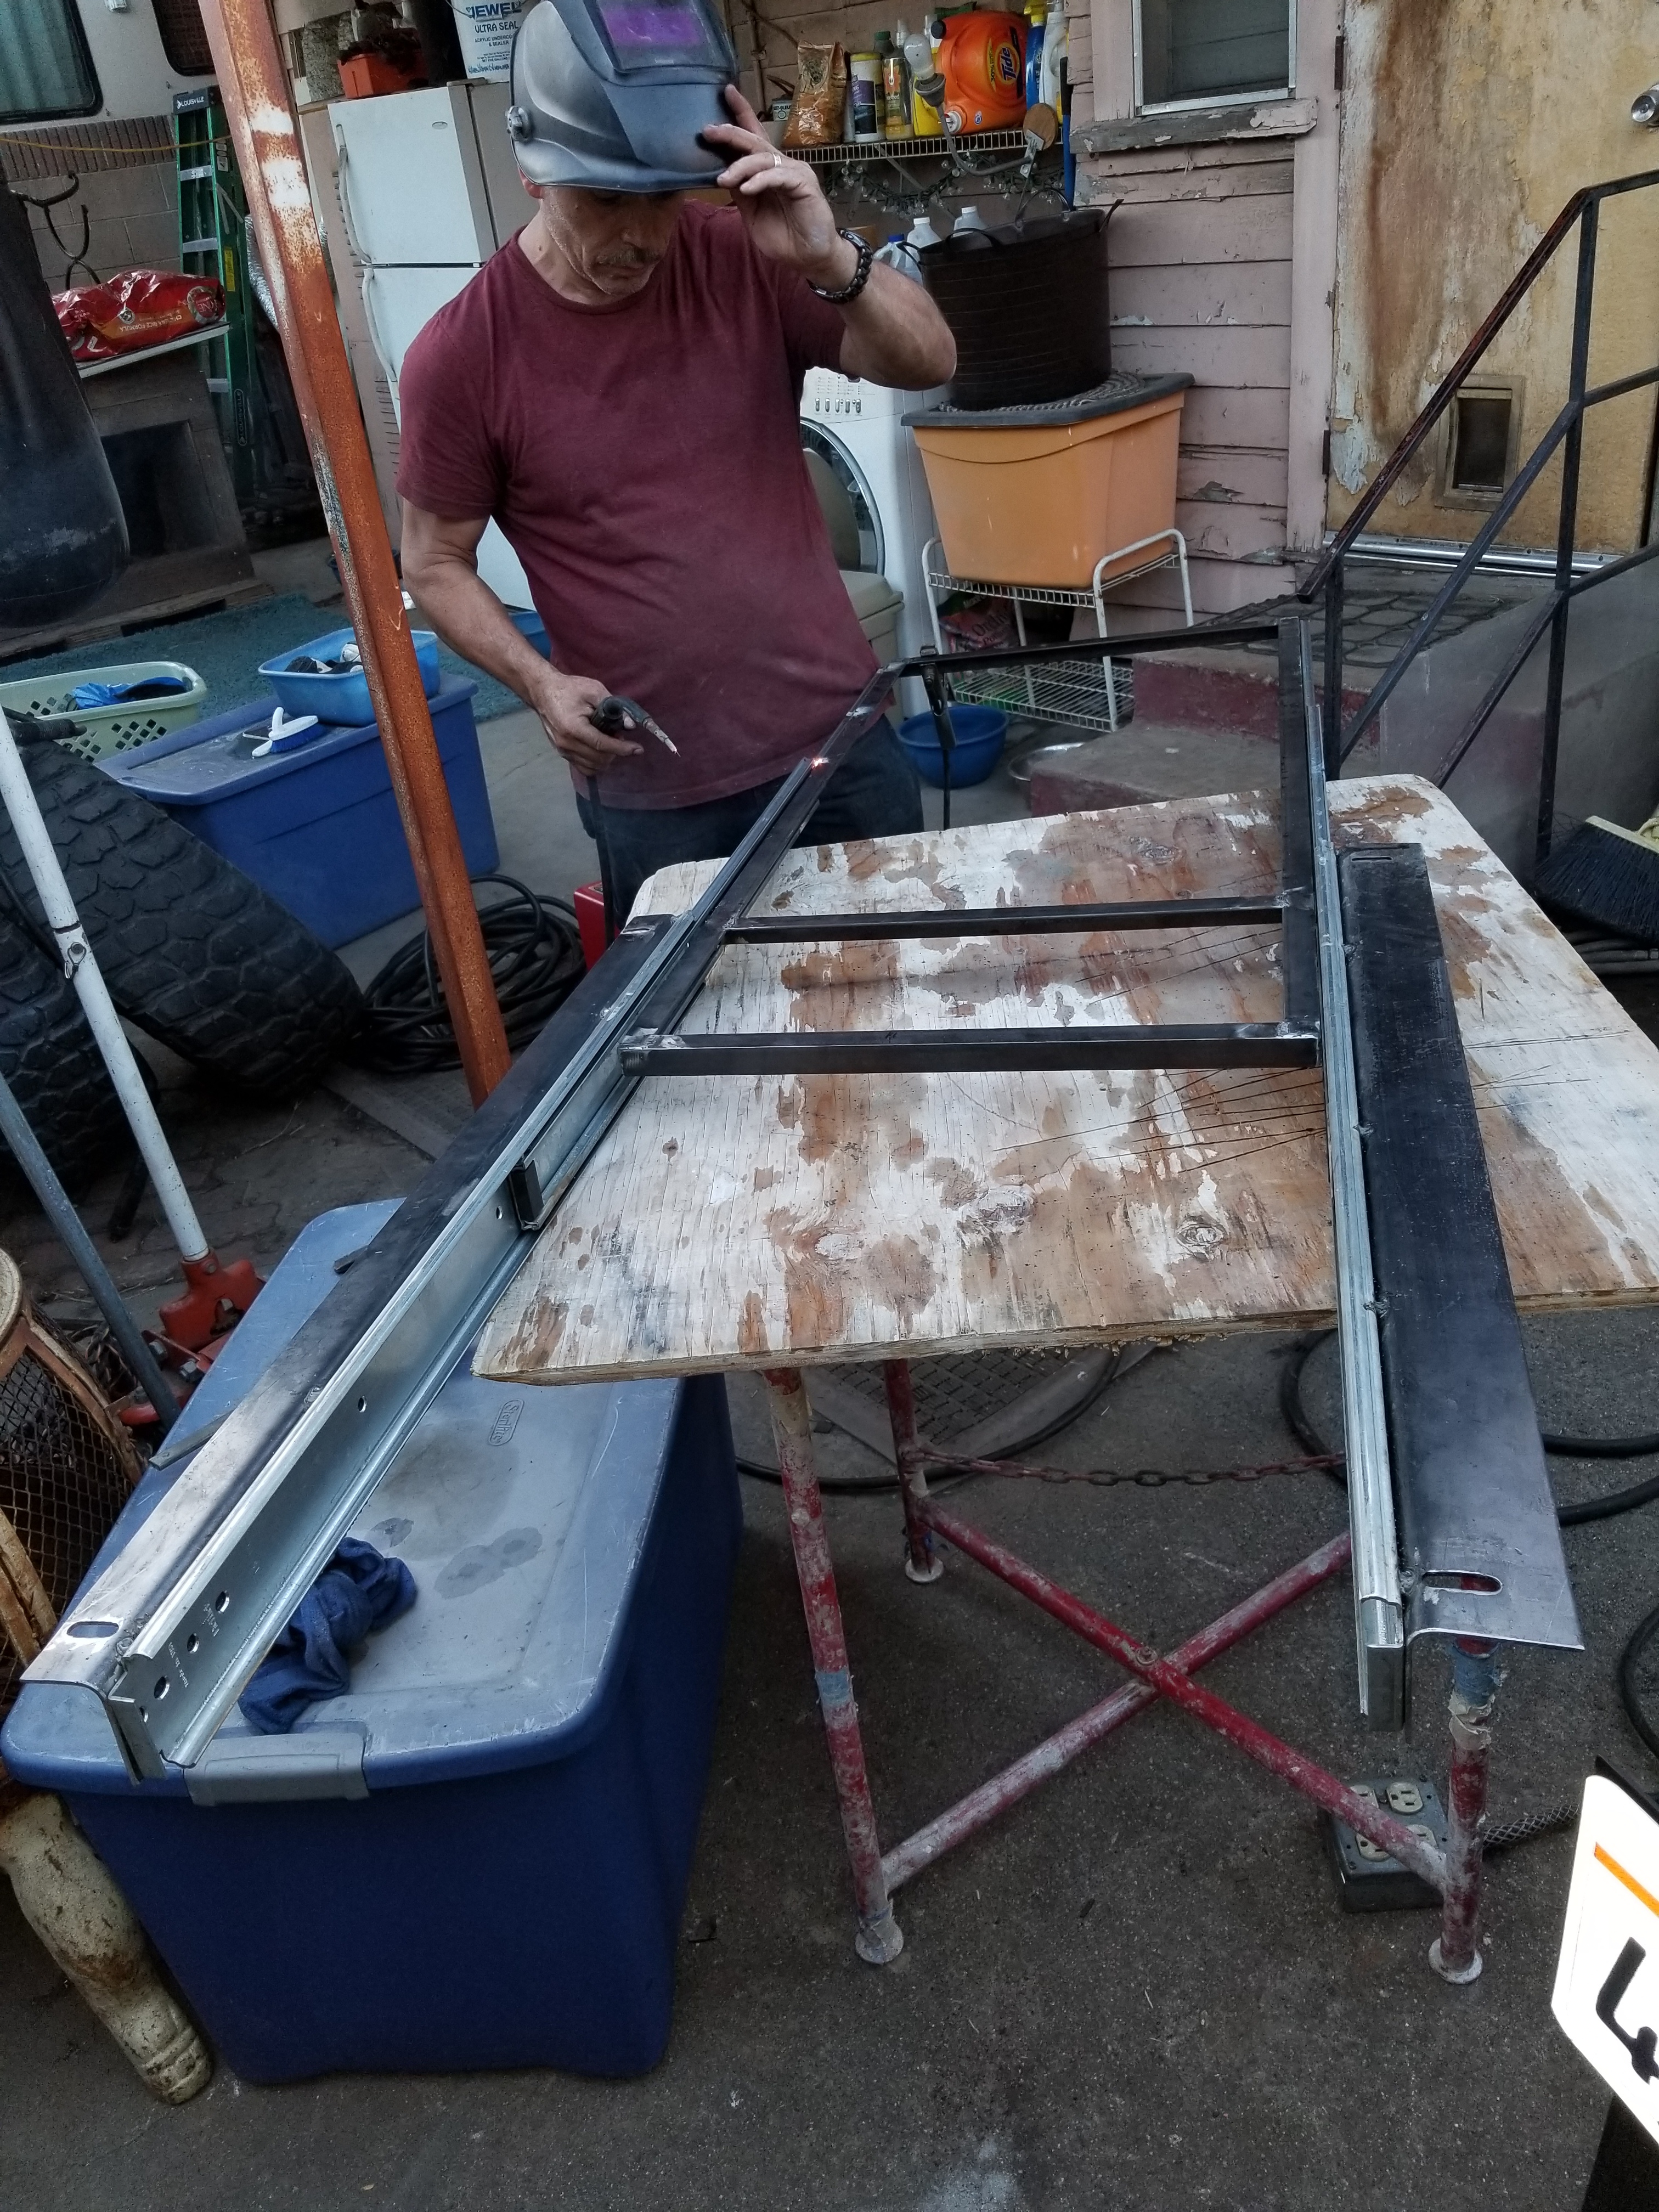
Here is the inside of the trailer. We welded the bolts onto the metal floor rails so we can use a nut on the top side of the slide out bracket to hold it in place. We achieved this by centering the tray that the ice chest would sit on first.
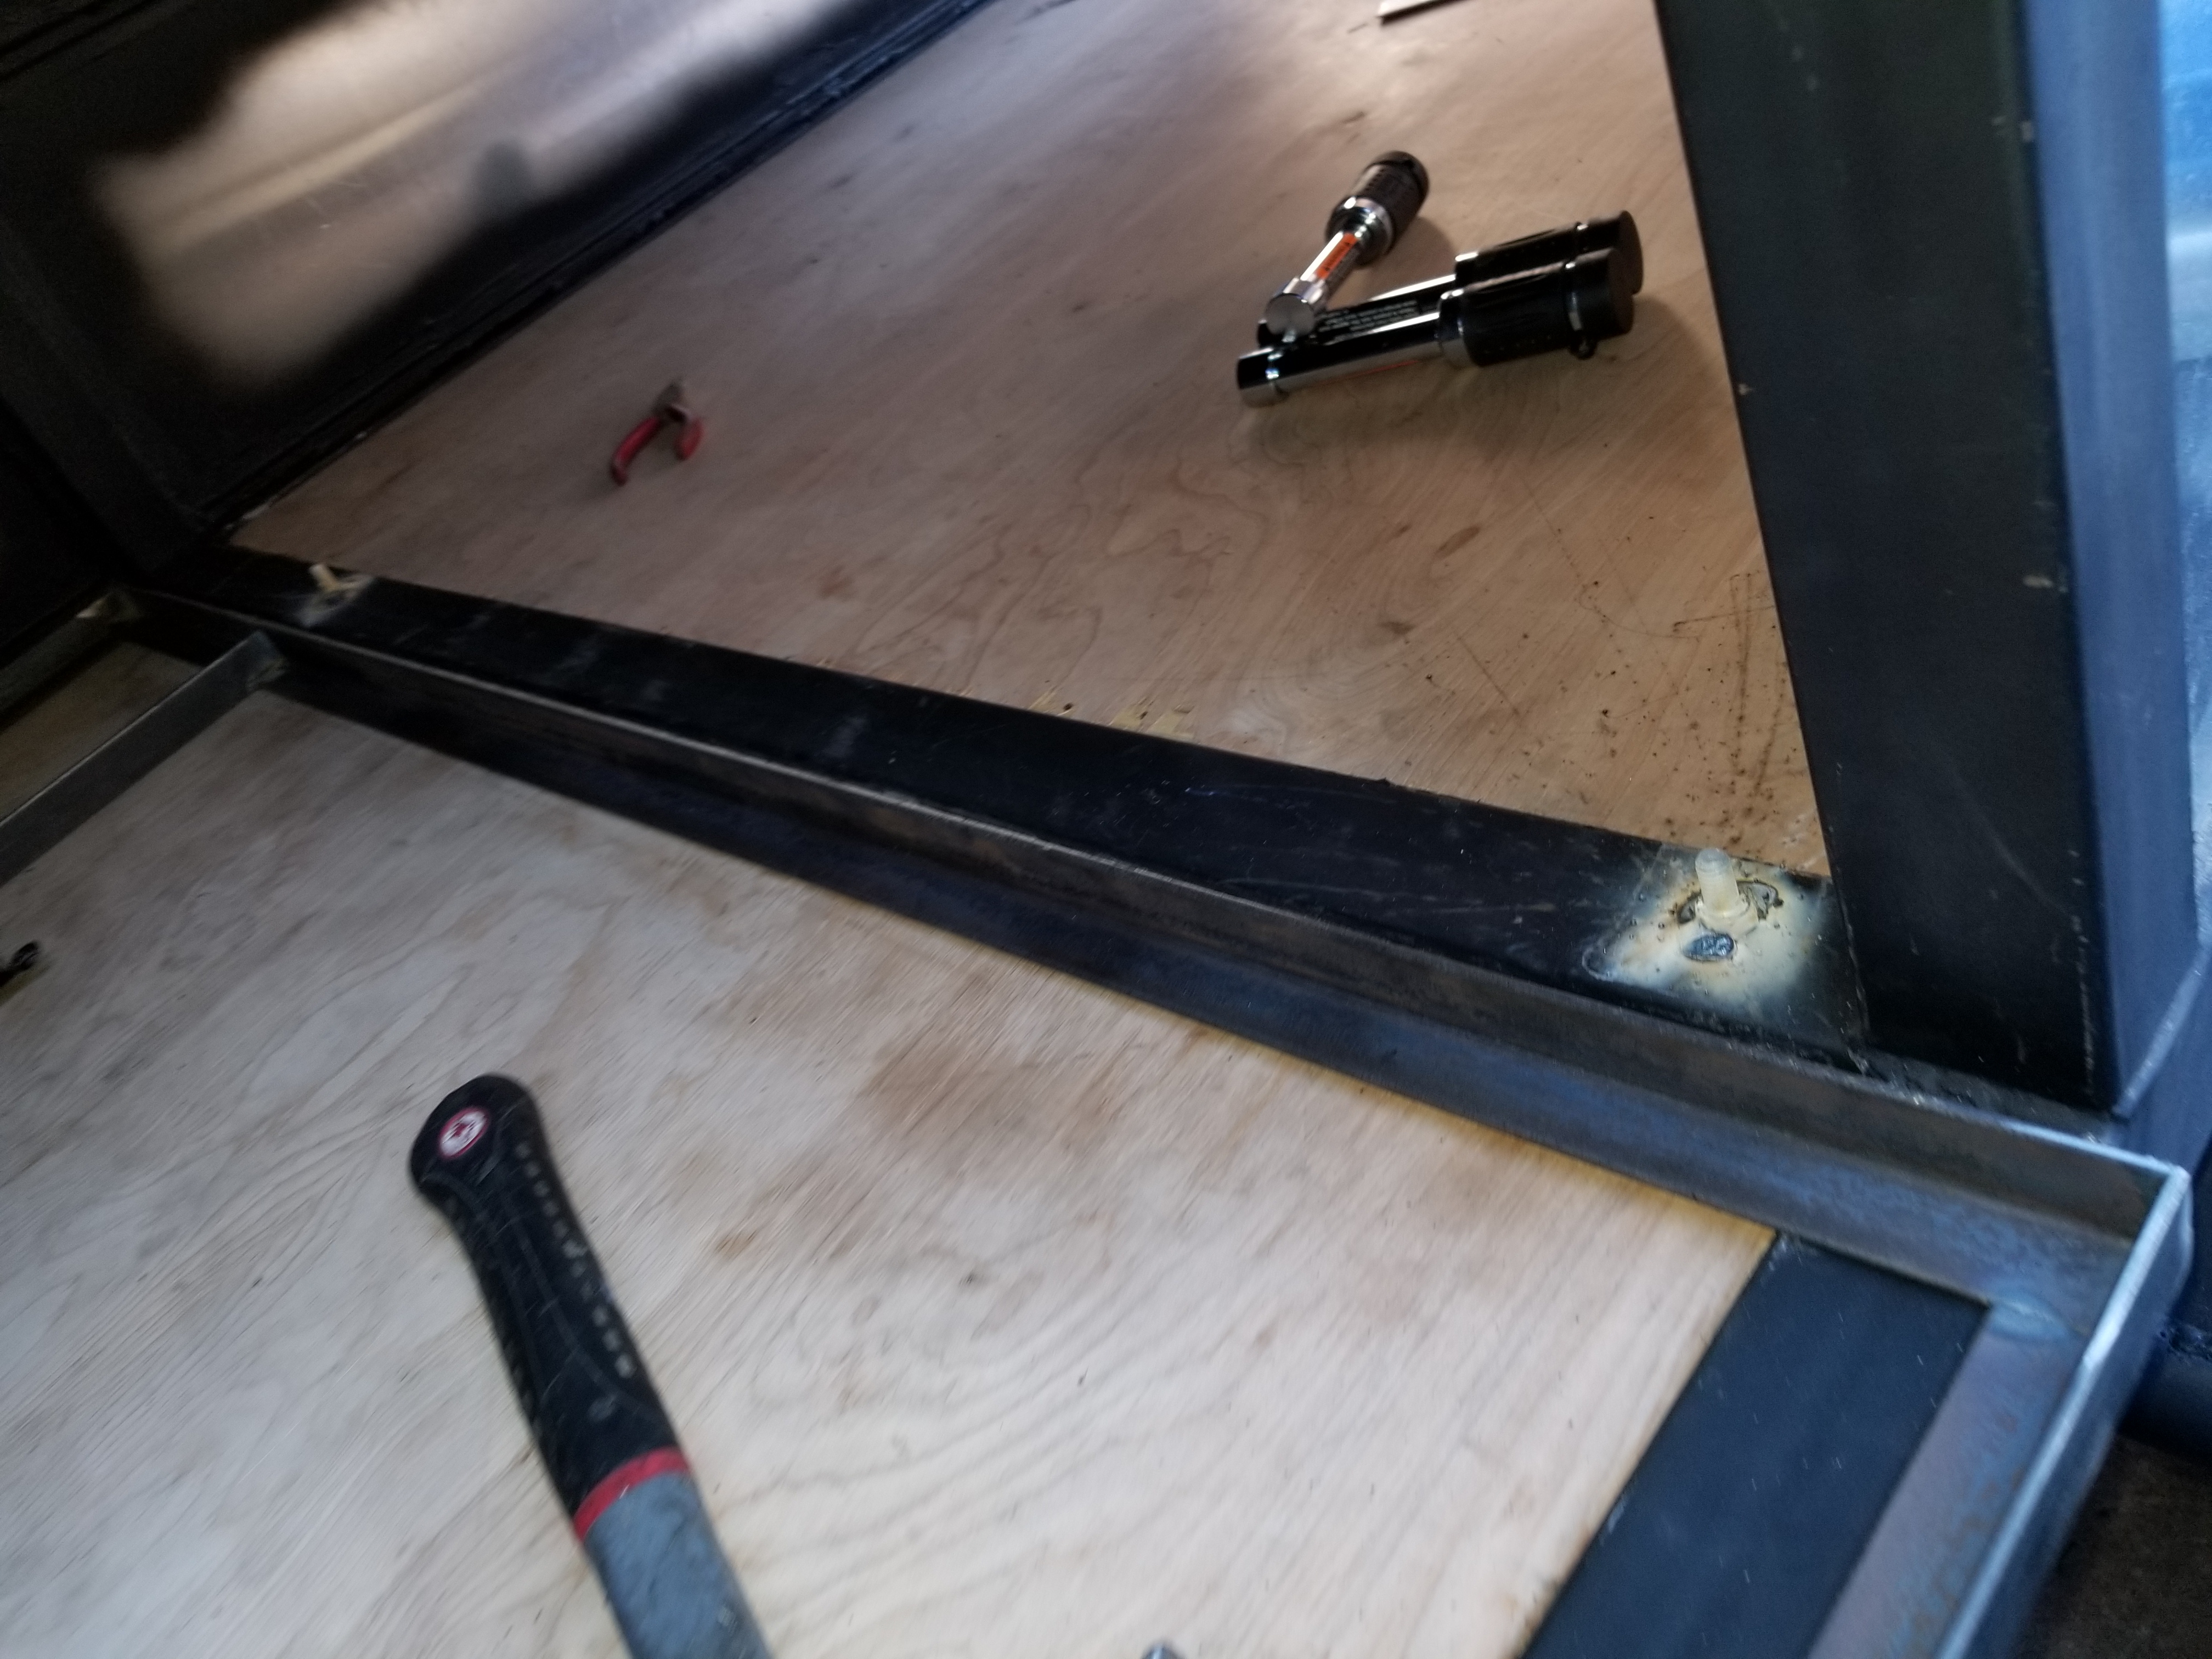
Here you can see how his design would make the rails adjustable.
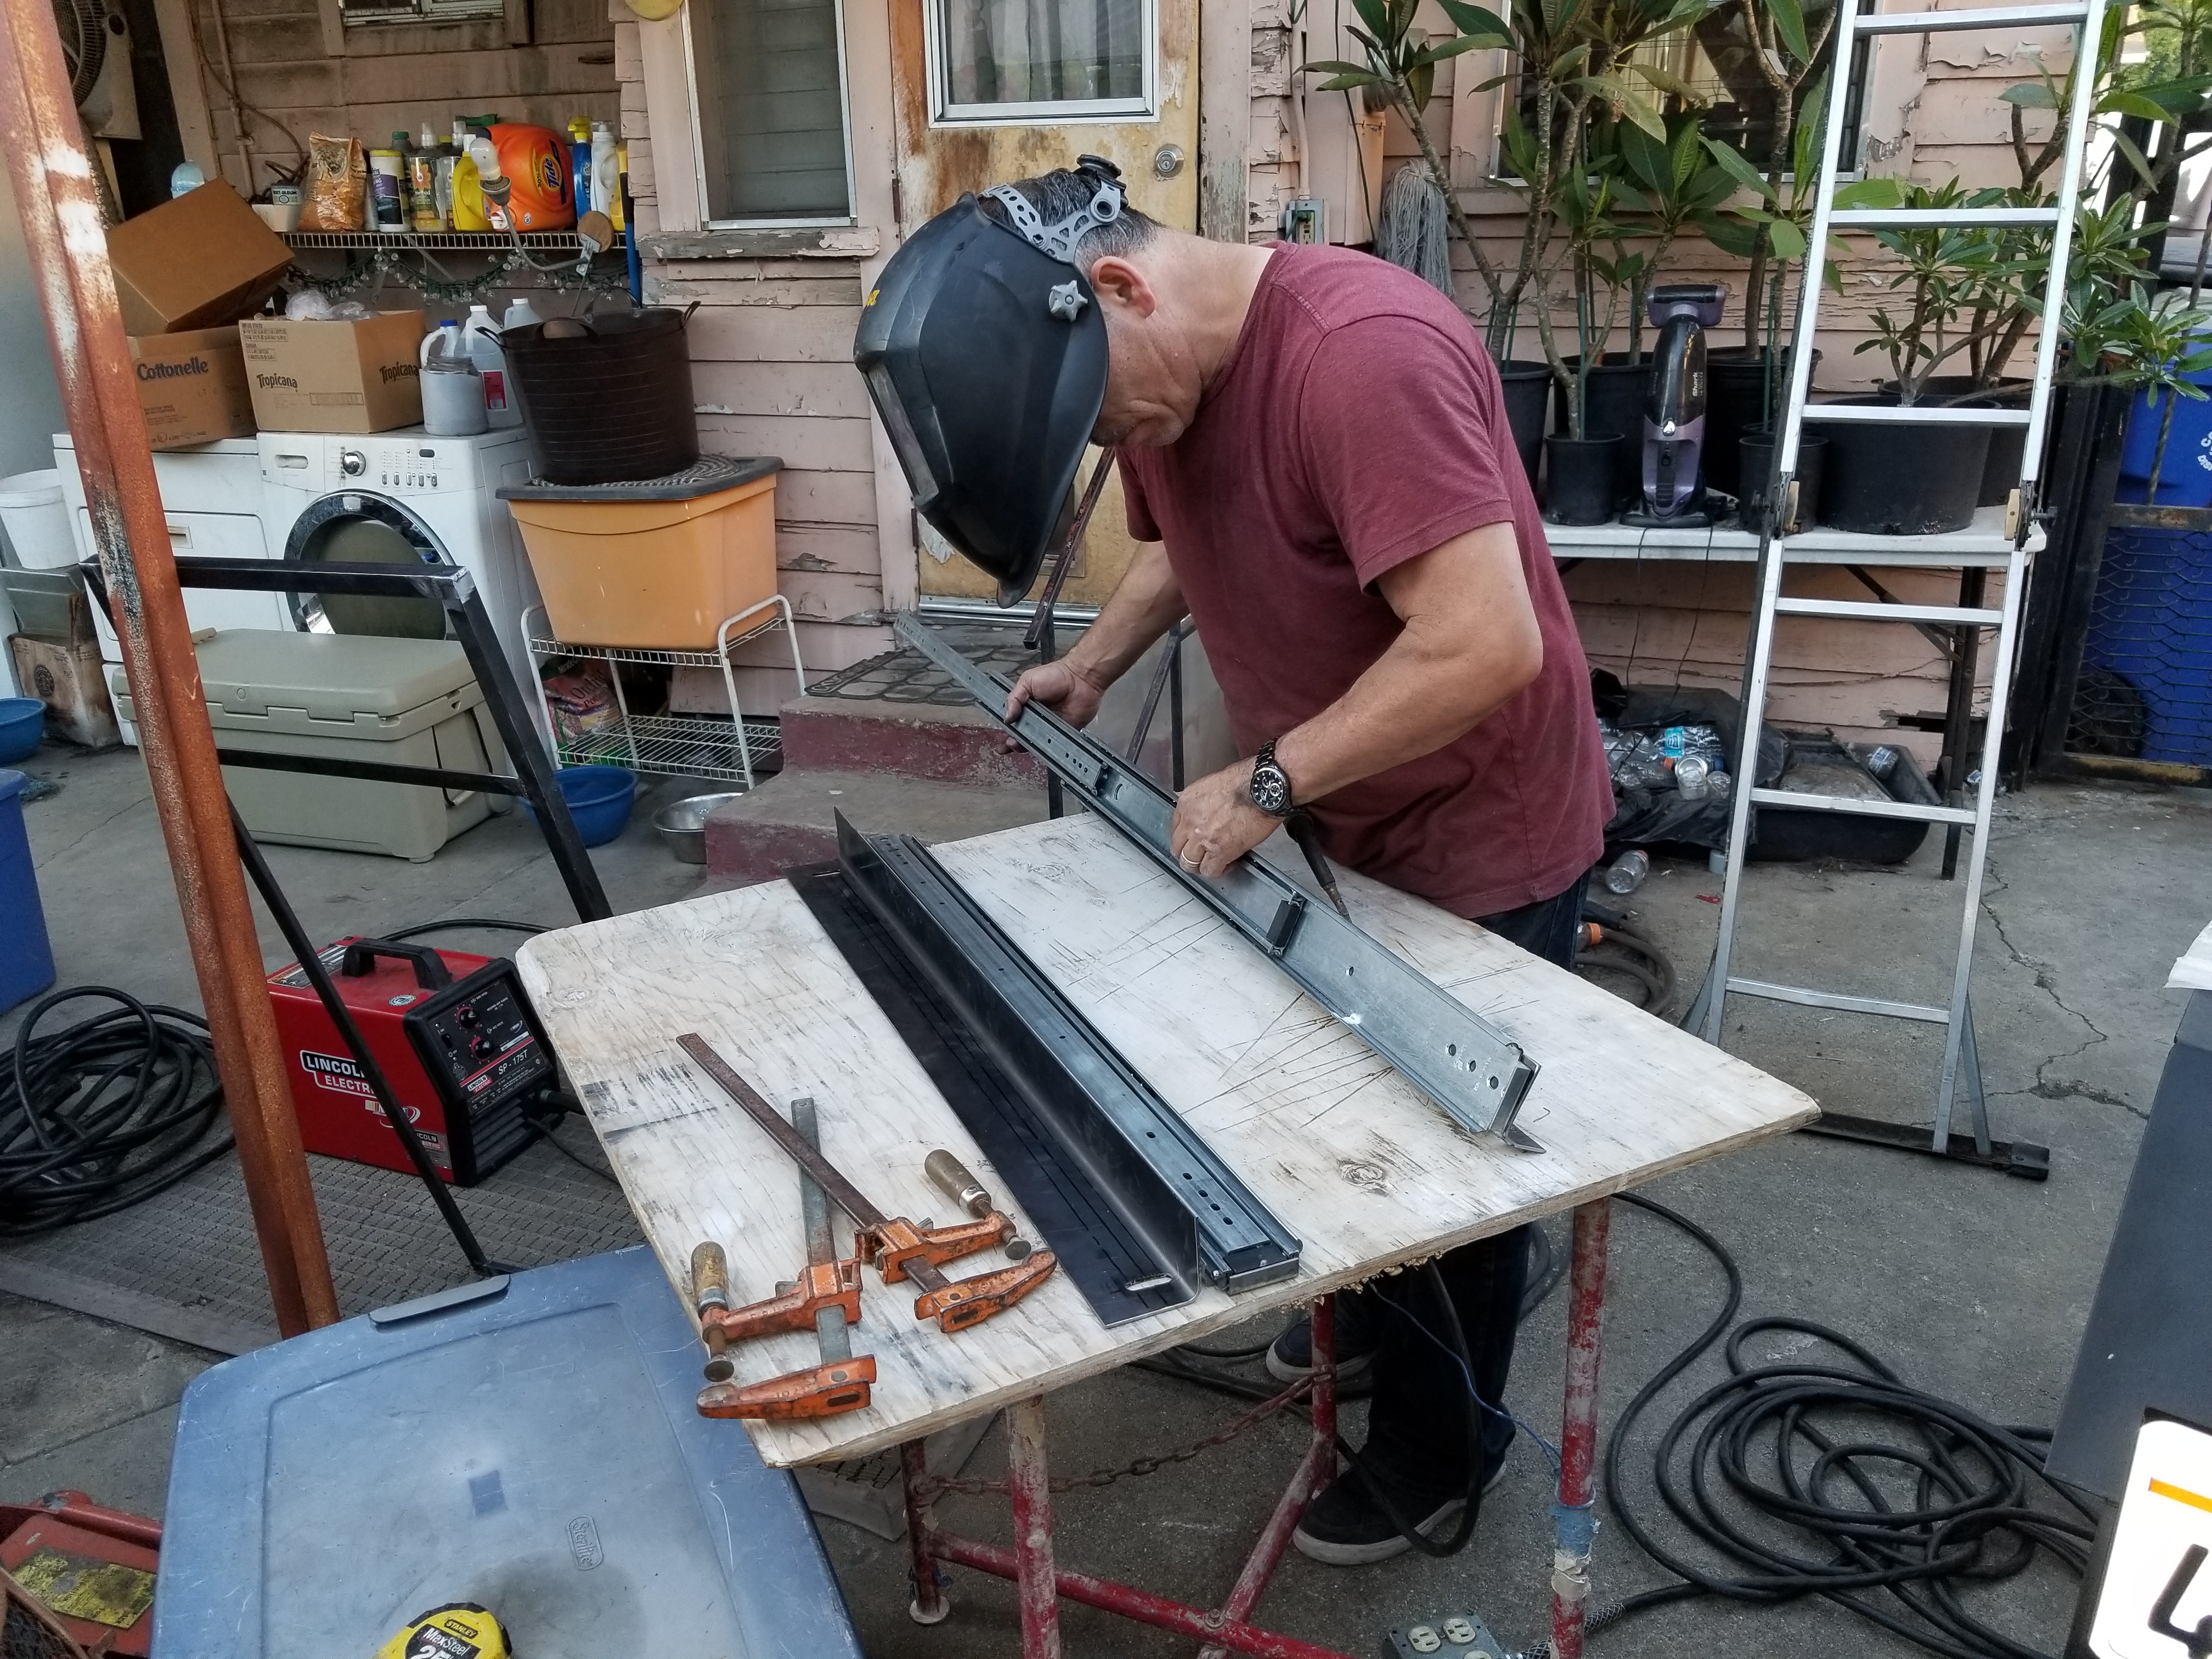
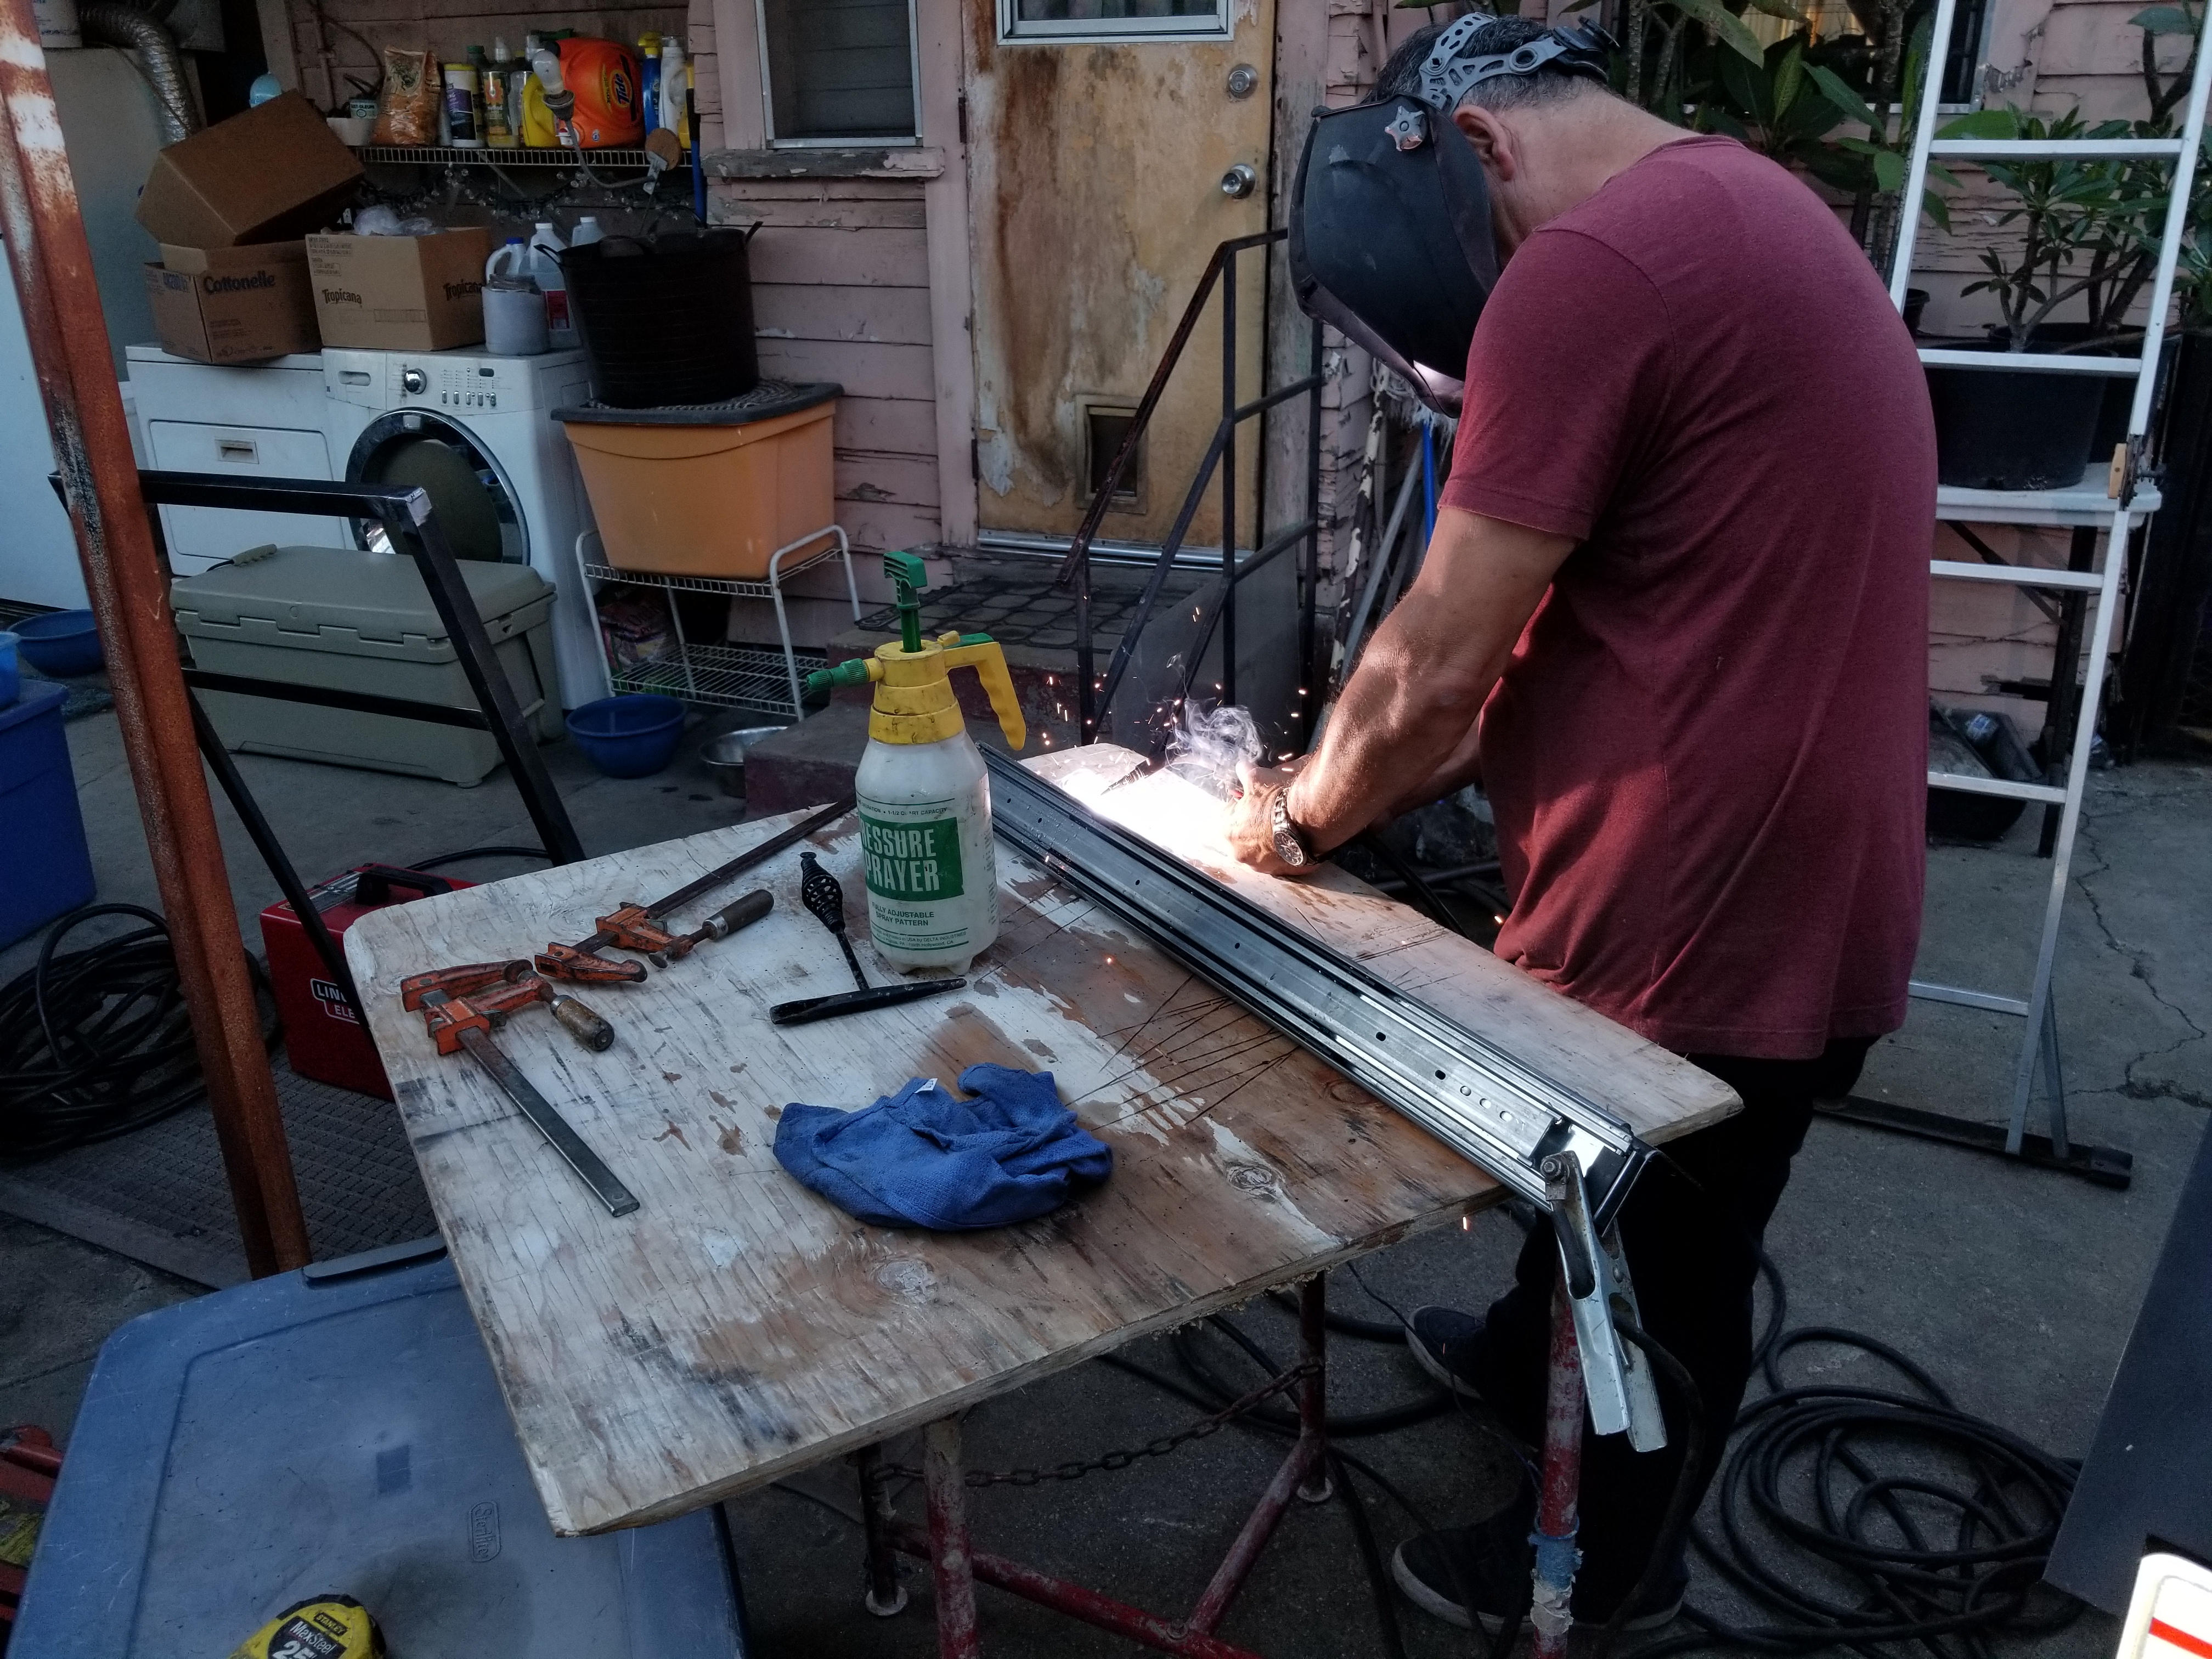
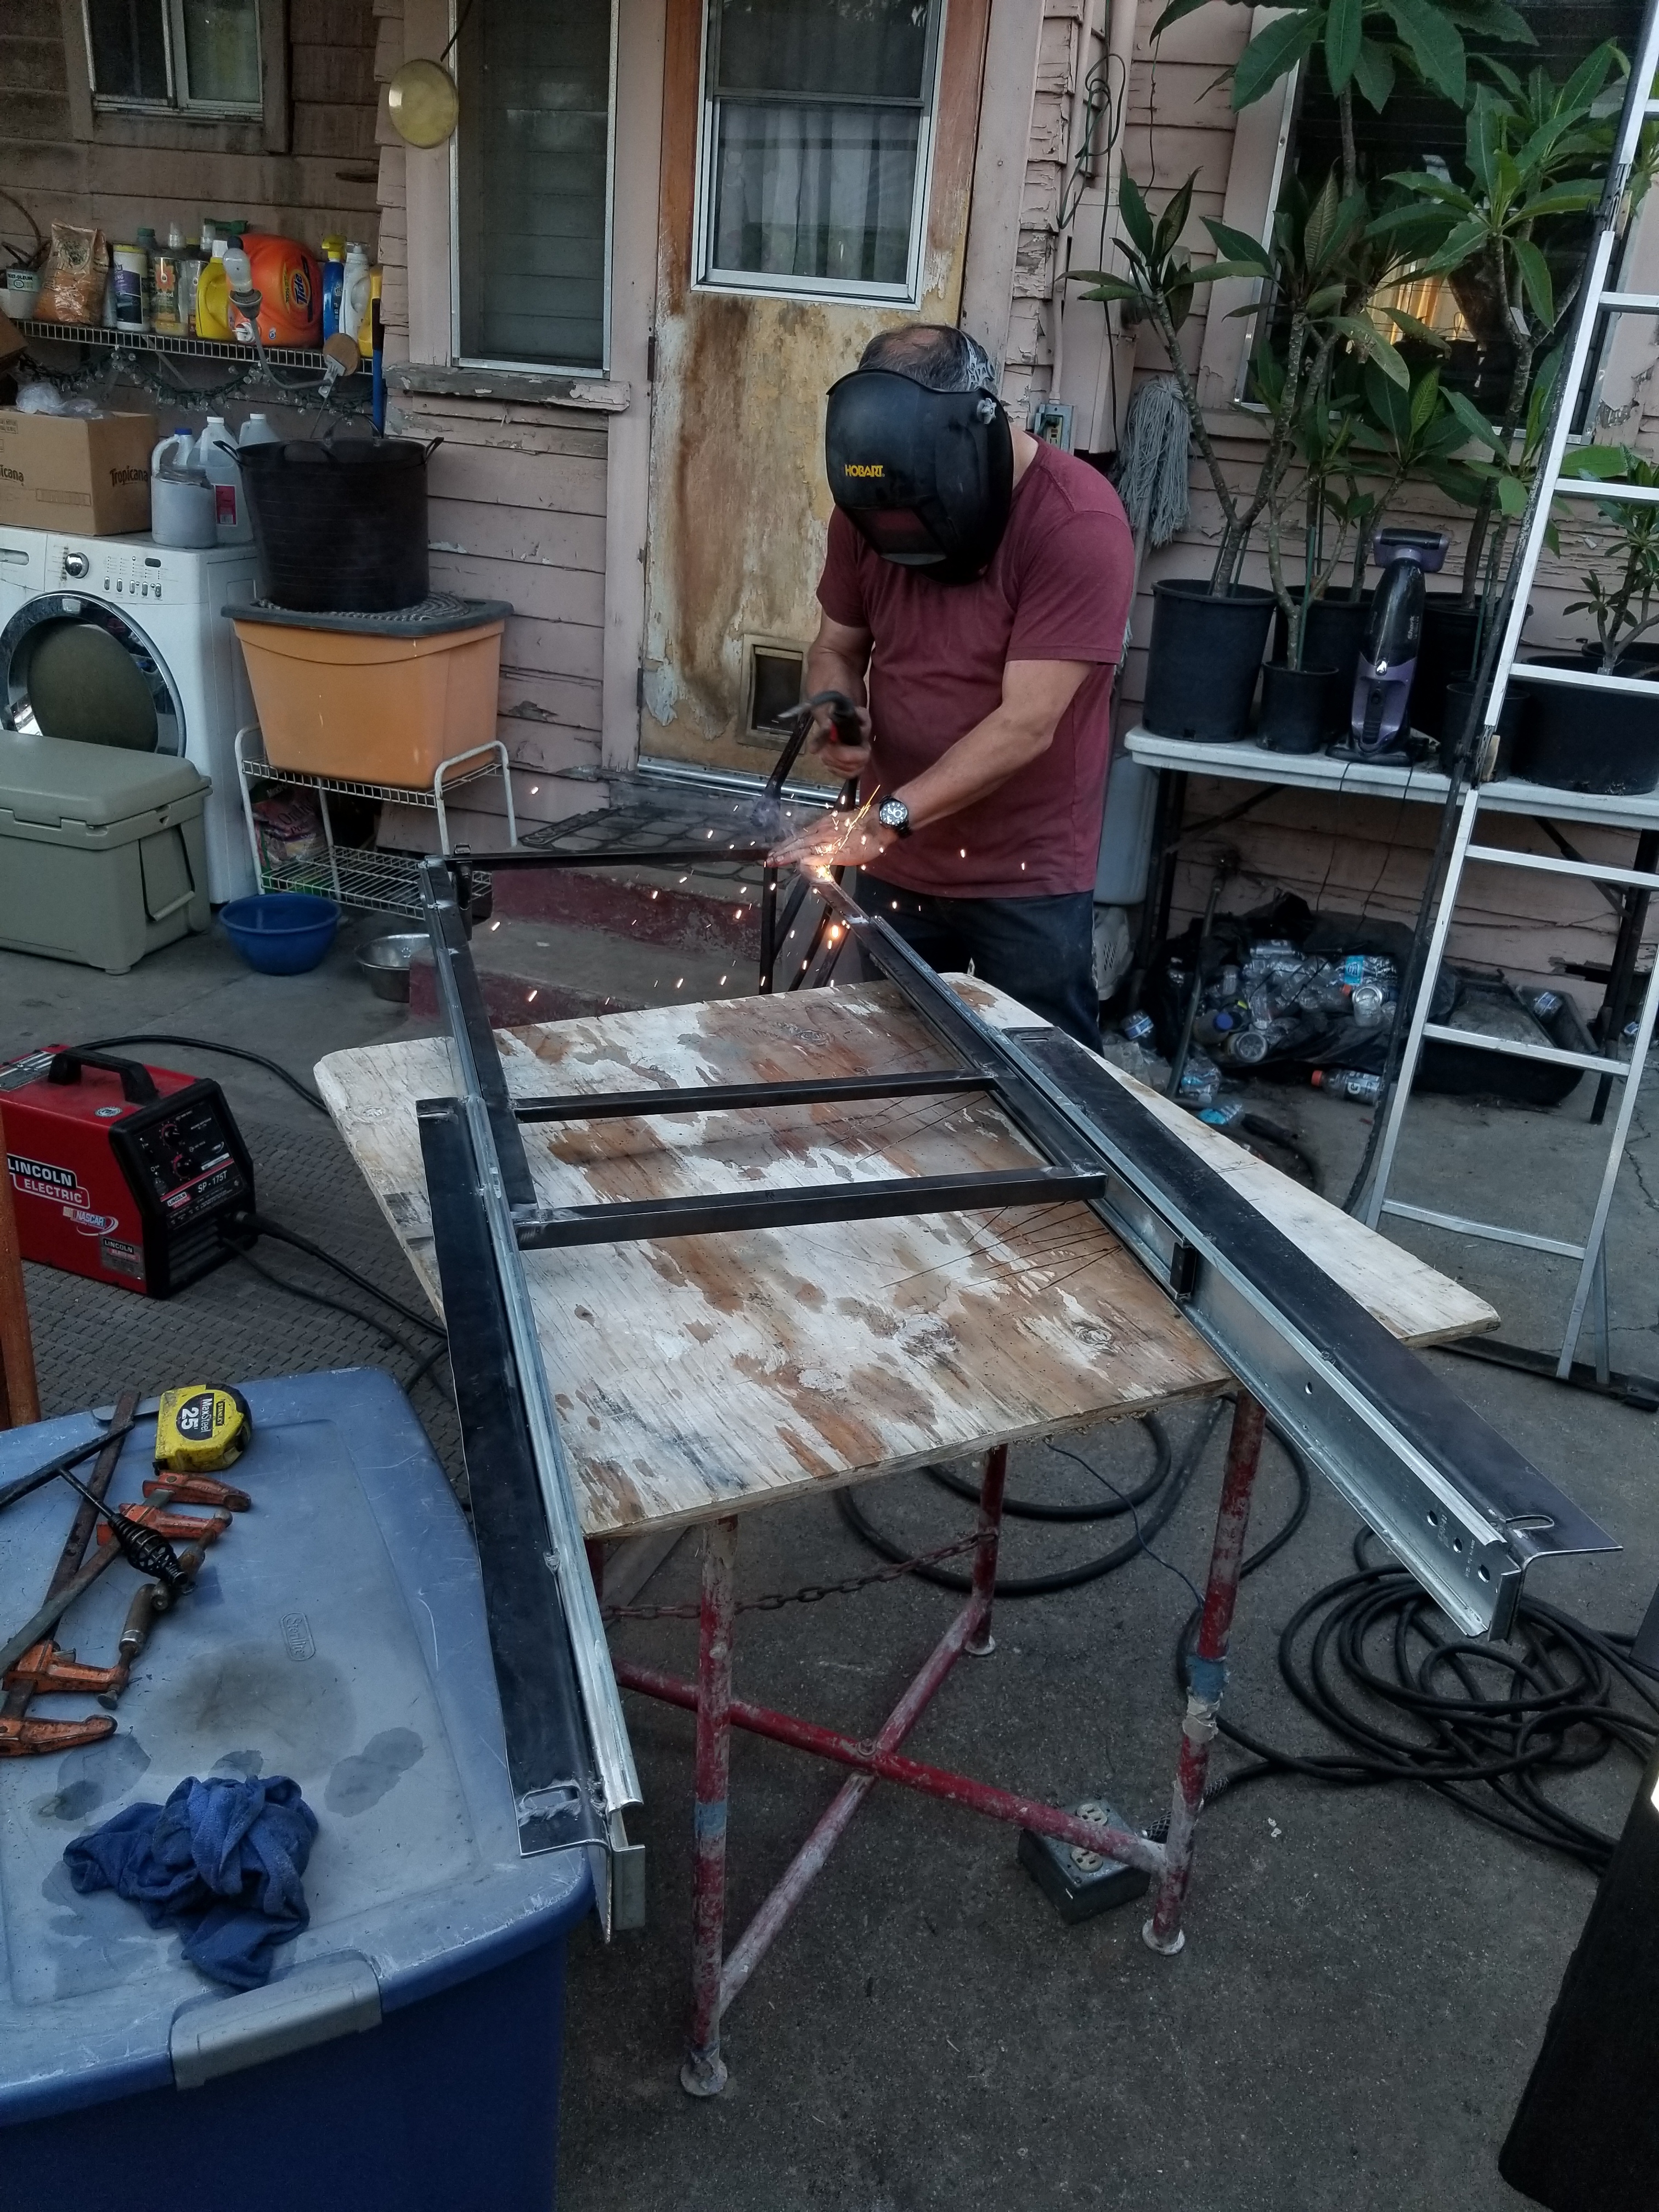
After we were happy with the fit my dad went on to welding the slides making sure not to weld on the areas where the plastic stoppers are on the back side to avoid damaging the slide out. We had a pressurized water spray bottle on stand by in case the rails got too hot which we did have to use a couple of times.
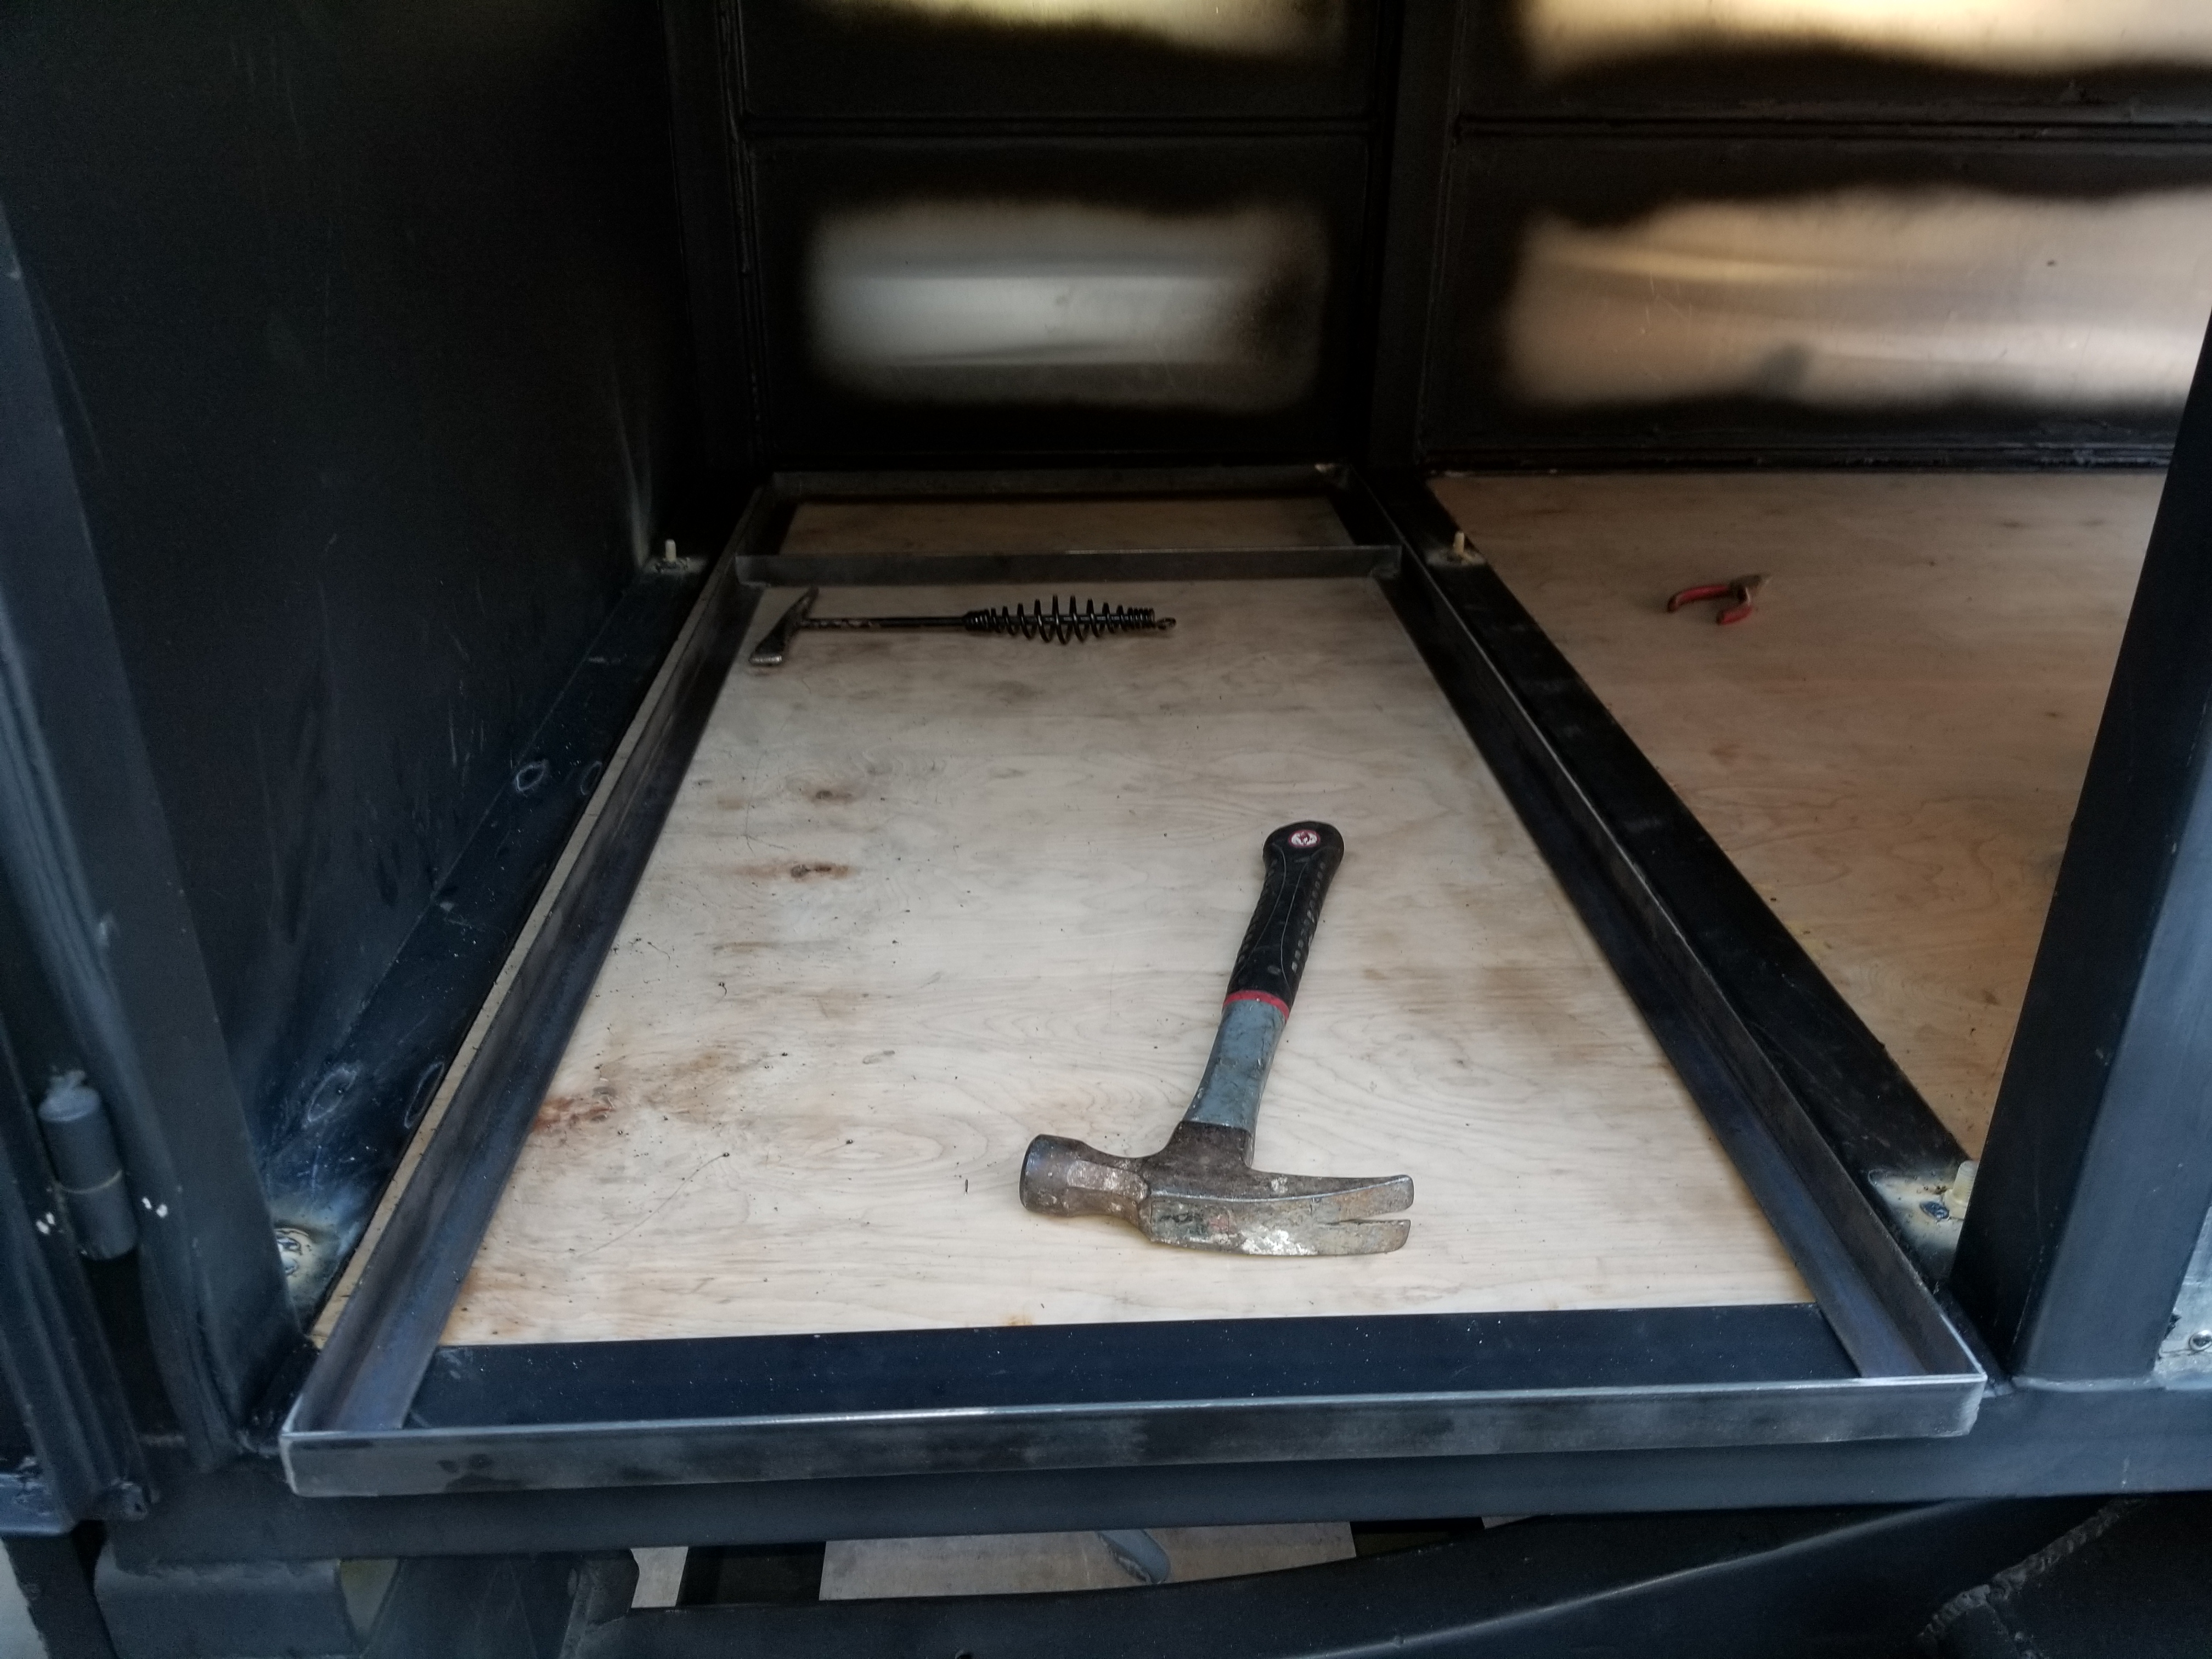
Centering up
Inspecting where the plastic stoppers are
Tack tack tack
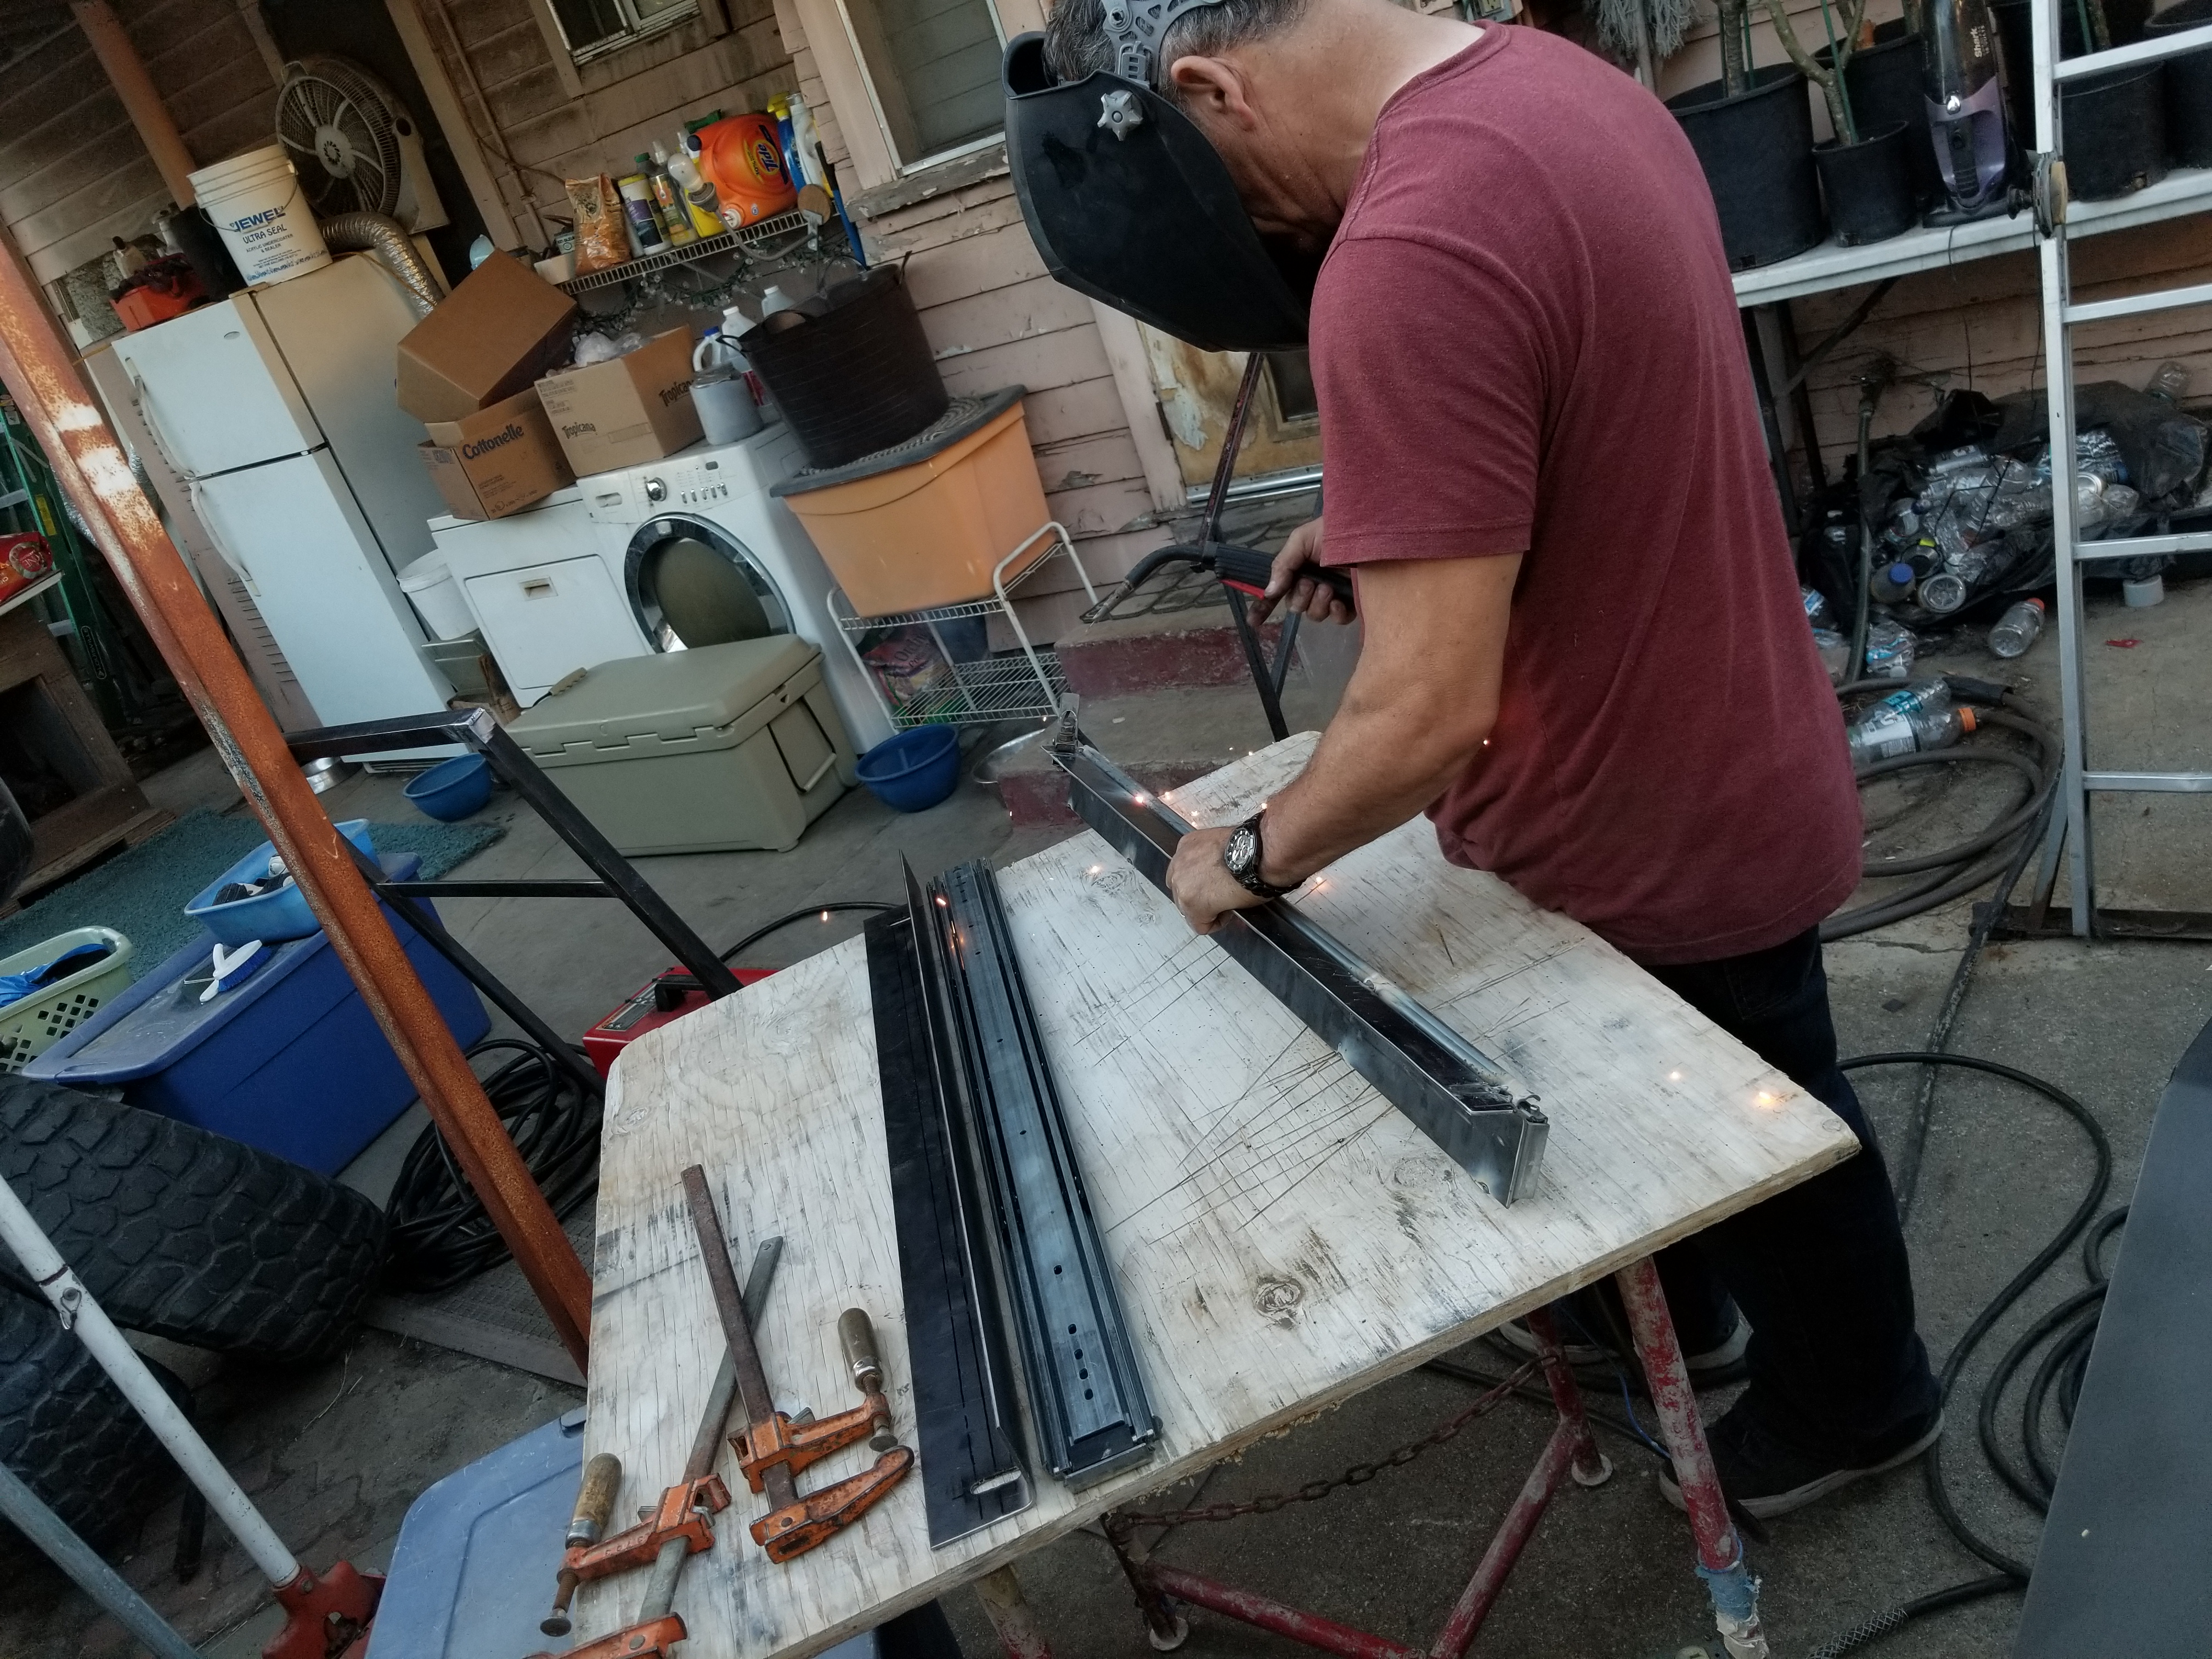
and ready for welds

 \
\
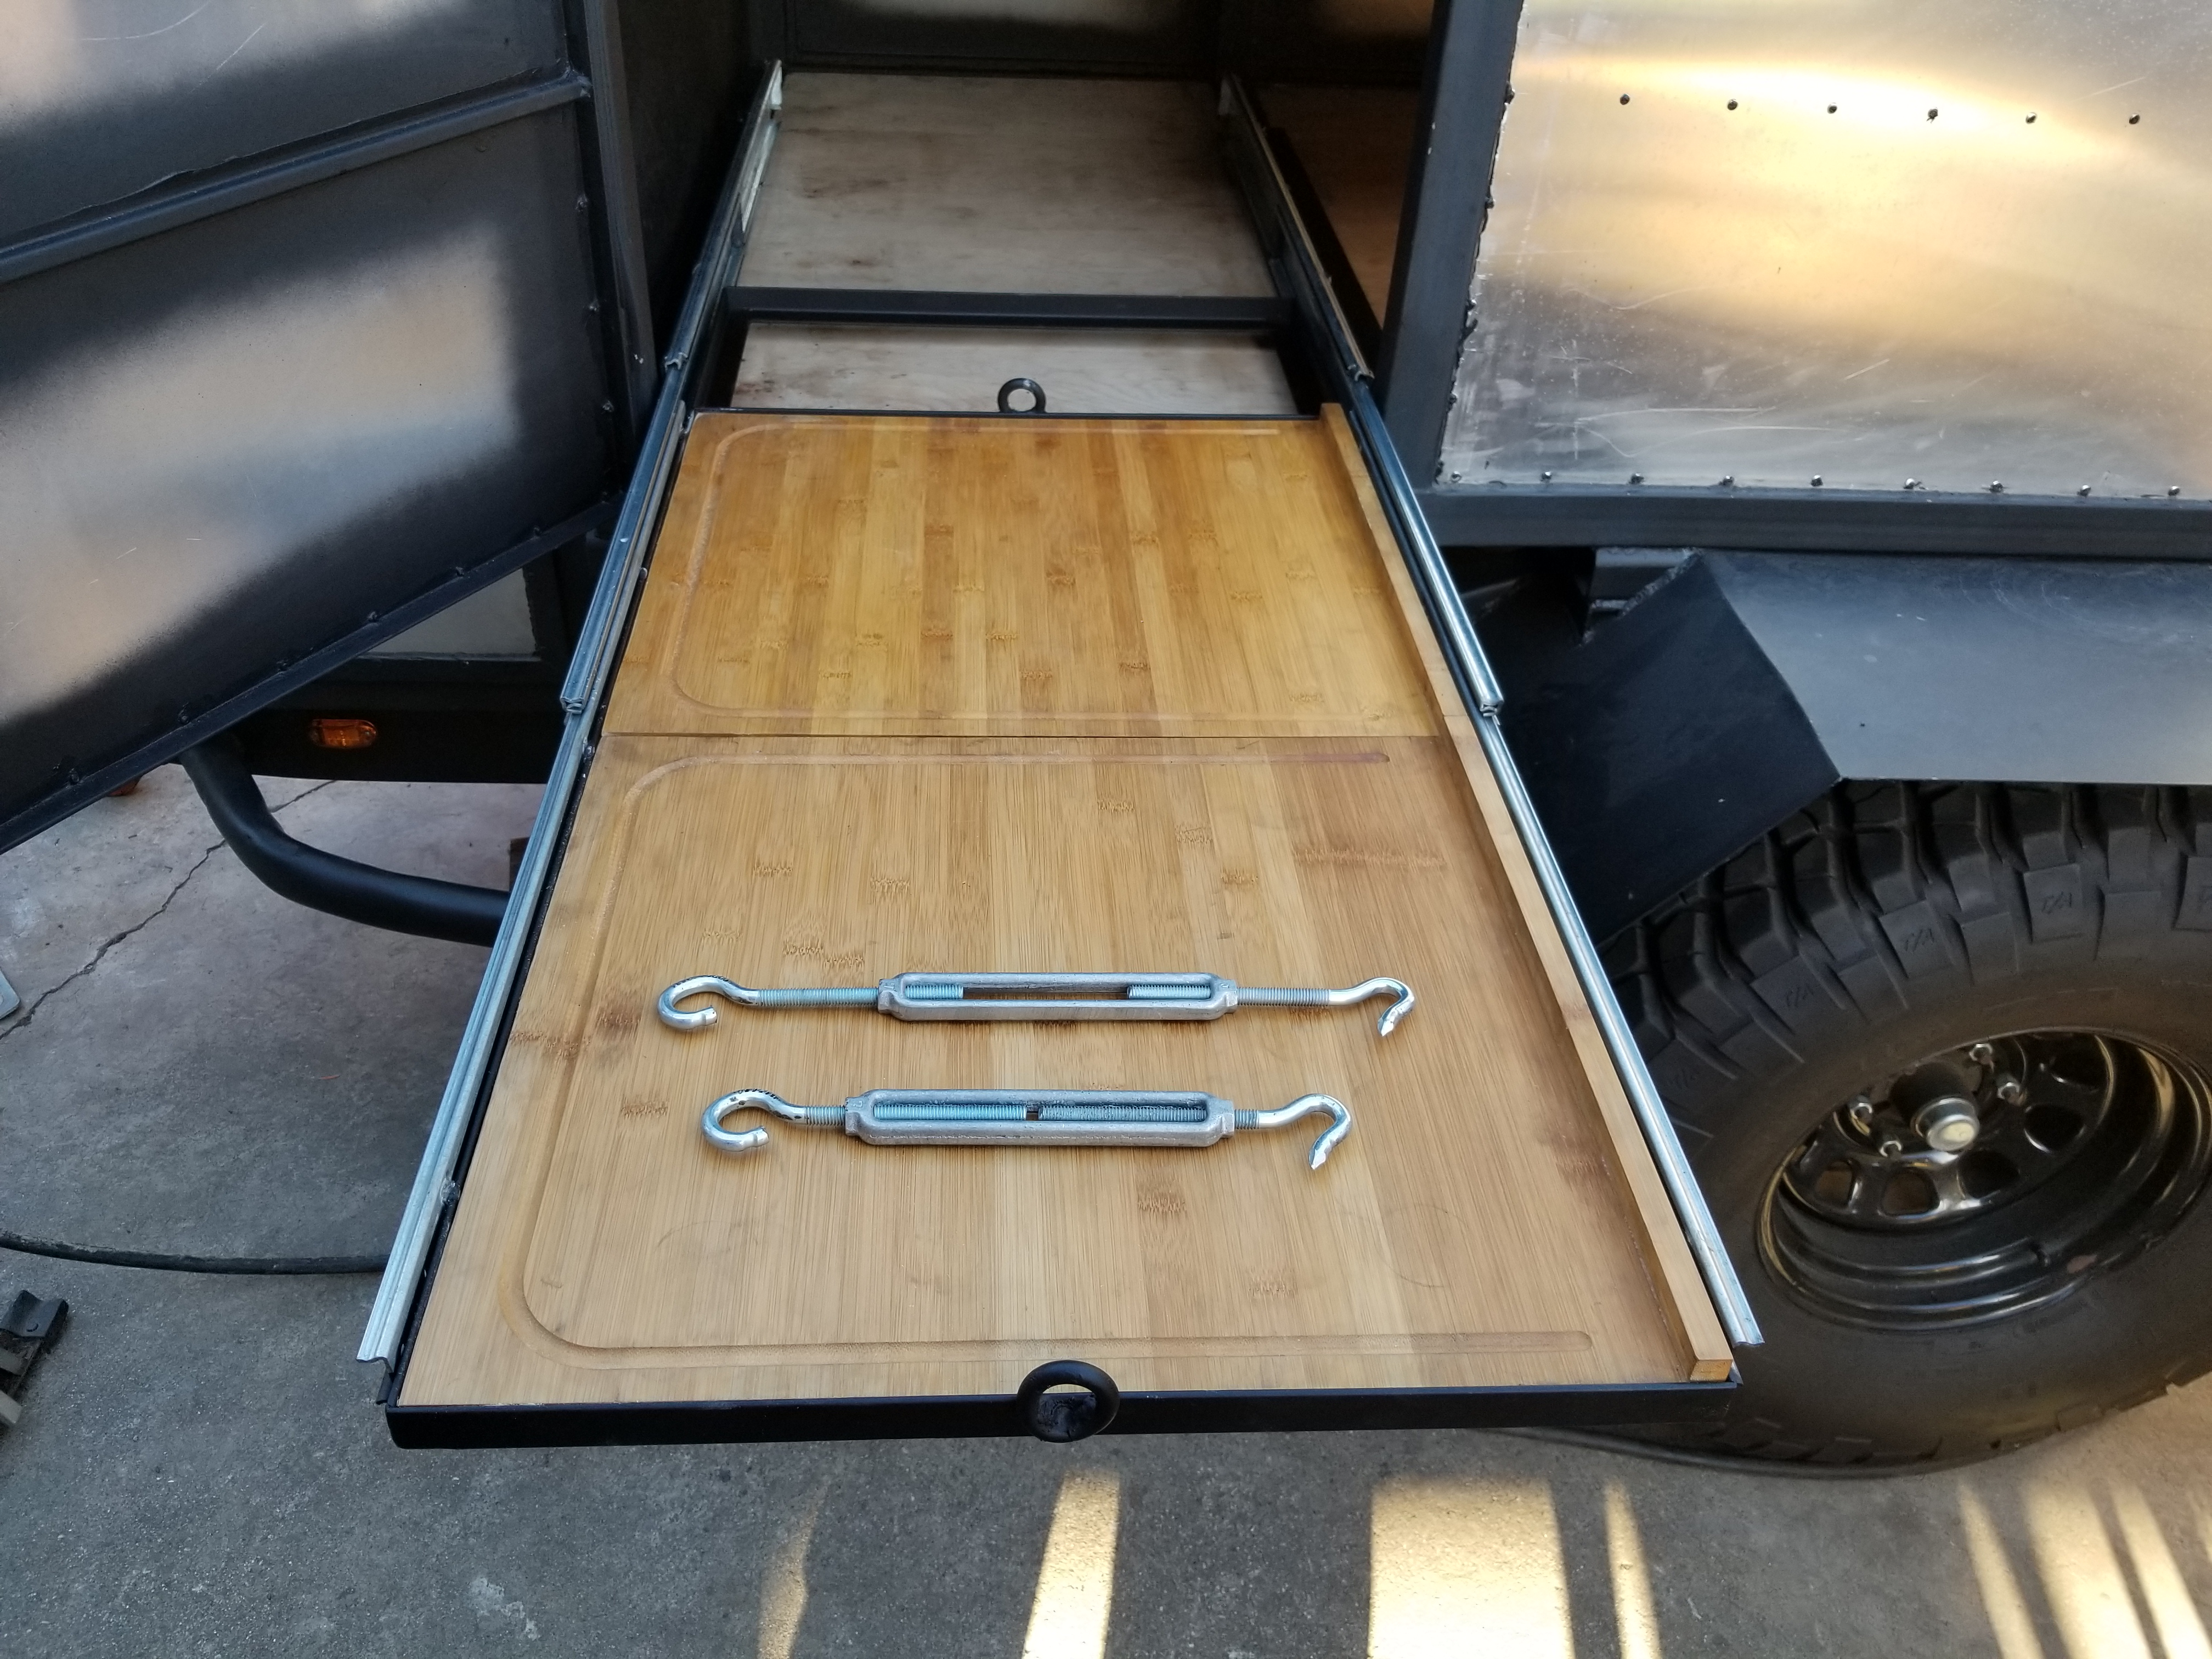
over a couple of days i primed it and then painted it. 3 days later i was ready to install. As you can see it is a pretty tight fit between the door frame. Approximately 3/16" to 1/4" spacing left on each side when you include the thickness of the slide outs. Just enough space to adjust back and forth.

The slides only go up to that point but the remaining portion behind those brackets is going to be for a spice-rack/pantry so the end of that slide out exposes the little cabinet that will eventually be made. You can see the tray for it here on the left.
I bought these steel Hook/eye tie downs for the cooler to keep it in place while on the read, hwy, trail.


Here is the inside of the trailer. We welded the bolts onto the metal floor rails so we can use a nut on the top side of the slide out bracket to hold it in place. We achieved this by centering the tray that the ice chest would sit on first.


Here you can see how his design would make the rails adjustable.

After we were happy with the fit my dad went on to welding the slides making sure not to weld on the areas where the plastic stoppers are on the back side to avoid damaging the slide out. We had a pressurized water spray bottle on stand by in case the rails got too hot which we did have to use a couple of times.
Centering up

Inspecting where the plastic stoppers are

Tack tack tack

and ready for welds


 \
\

over a couple of days i primed it and then painted it. 3 days later i was ready to install. As you can see it is a pretty tight fit between the door frame. Approximately 3/16" to 1/4" spacing left on each side when you include the thickness of the slide outs. Just enough space to adjust back and forth.


The slides only go up to that point but the remaining portion behind those brackets is going to be for a spice-rack/pantry so the end of that slide out exposes the little cabinet that will eventually be made. You can see the tray for it here on the left.

I bought these steel Hook/eye tie downs for the cooler to keep it in place while on the read, hwy, trail.


