4307's Rear Bumper build
 11-18-2008, 07:57 PM
#21
Registered User
Thread Starter
Join Date: Nov 2008
Location: Ontario
Posts: 89
Likes: 0
Received 0 Likes
on
0 Posts

LOL.... Well, the SFA will have to wait a while longer, my money tree died.
I have half the parts for the SAS, slowly restoring my Waggy Dana 44.
In the mean time I have Donahoe coilovers for the front end and 63'' Chevy
leafs for the rear. I need a new money tree and some good fertilizer.
I'll document all my builds in this detailed fashion, I started a build thread, located here....
https://www.yotatech.com/forums/f2/4...l#post50975495
 12-06-2008, 03:32 PM
#22
Registered User
Thread Starter
Join Date: Nov 2008
Location: Ontario
Posts: 89
Likes: 0
Received 0 Likes
on
0 Posts
Rear Tire Gate Design Idea.....
I'm having some fun coming up with a tire gate design.
I did a little Photoshop work, nothing spectacular, just something to get the point across. I wish I had some CAD software, but Photoshop was quick and simple for me.
Anyway.... This design incorporates a caged in spare tire design. The tire is mounted with the back of the wheel facing out, with the gate closed, for security and due partly to the cage design. The cage also acts like a cradle, to accomodate a 33'' tire and a 35'' tire. The tire post will be height adjustable. The outside of the cage will give me a good place to mount the license plate and spot light.
The cage would be fabricated out of 1'' x 2'' rectangular gusseted tube.
The gate is roughly 12'' in height, length is currently unknown.
I want to build a a gate with double barrel hinges welded to a reinforced gusset / bed side protection incorporated tower. This design gives greater strength, getting away from a single spindle hinge design, that has the potential to shear and bounce.
The double Barrel hinge will allow me to remove the swing out gate if I want.
Here is the barrel hinge I'm thinking of using....
http://www.hingesandhardware.com/wel...el_hinges.html
I still have to do the math to come up with a rough weight figure.
I'm not set on this design, I have a couple more to consider. I may actually skip the idea of a swing out gate.
The first image, the gate height is a taller gate design, where the top of the cage cross bar is bisecting the wheels center. Same basic design as the second image....

The second image is a shorter version designed to save a little weight. The wheel mounting post would be easy to incorporate a adjustable height, if I bump the tire size up to 35". The cage width would be built to the specs of a 35 x 12.5'' but still cradle the 33'' tire ....

I'm having some fun coming up with a tire gate design.
I did a little Photoshop work, nothing spectacular, just something to get the point across. I wish I had some CAD software, but Photoshop was quick and simple for me.
Anyway.... This design incorporates a caged in spare tire design. The tire is mounted with the back of the wheel facing out, with the gate closed, for security and due partly to the cage design. The cage also acts like a cradle, to accomodate a 33'' tire and a 35'' tire. The tire post will be height adjustable. The outside of the cage will give me a good place to mount the license plate and spot light.
The cage would be fabricated out of 1'' x 2'' rectangular gusseted tube.
The gate is roughly 12'' in height, length is currently unknown.
I want to build a a gate with double barrel hinges welded to a reinforced gusset / bed side protection incorporated tower. This design gives greater strength, getting away from a single spindle hinge design, that has the potential to shear and bounce.
The double Barrel hinge will allow me to remove the swing out gate if I want.
Here is the barrel hinge I'm thinking of using....
http://www.hingesandhardware.com/wel...el_hinges.html
I still have to do the math to come up with a rough weight figure.
I'm not set on this design, I have a couple more to consider. I may actually skip the idea of a swing out gate.
The first image, the gate height is a taller gate design, where the top of the cage cross bar is bisecting the wheels center. Same basic design as the second image....
The second image is a shorter version designed to save a little weight. The wheel mounting post would be easy to incorporate a adjustable height, if I bump the tire size up to 35". The cage width would be built to the specs of a 35 x 12.5'' but still cradle the 33'' tire ....
12-08-2008, 02:46 PM
#25
Registered User
Join Date: Sep 2004
Location: Plainfield, IL
Posts: 1,515
Likes: 0
Received 0 Likes
on
0 Posts
Nice, but I think if we worked in the same garage I would end up beating you to death with your broom, clamping your nuts with your c-clamps, and shoving your level up your ass. I think I found someone more anal than my grandpa.
12-12-2008, 10:11 AM
#26
Registered User
Thread Starter
Join Date: Nov 2008
Location: Ontario
Posts: 89
Likes: 0
Received 0 Likes
on
0 Posts
Better keep that practice in the family.
The basement shop space is 11'x13', I have to keep it clean i was sick of tripping over . If I had a garage, or a garage-mahal where I could spread out it would be very different.
Stapler!
The basement shop space is 11'x13', I have to keep it clean i was sick of tripping over . If I had a garage, or a garage-mahal where I could spread out it would be very different.
Stapler!
03-26-2011, 08:19 PM
#31
Registered User
Nice... amazing precision.. wish i could do that... looking to build a rear bumper for my 84'.. I'd be interested in some of your concepts for an 84' pickup 4x4?? 
03-27-2011, 01:58 PM
#33
Registered User
Wow this is an old thread that never got finished, can anyone find 4307 and get him to finish this...I want to see it finished up! This is just, wow, amazing...the attention to detail, the precision...this guy did an absolutely amazing job...I applaud you sir!
EDIT: I found the thread that he continues his work on...
https://www.yotatech.com/forums/f200...thread-159420/
EDIT: I found the thread that he continues his work on...
https://www.yotatech.com/forums/f200...thread-159420/
Last edited by iamsuprman13; 03-27-2011 at 04:39 PM.
03-27-2011, 07:32 PM
#34
Registered User
Thread Starter
Join Date: Nov 2008
Location: Ontario
Posts: 89
Likes: 0
Received 0 Likes
on
0 Posts
Ok, I'm back... I received the call out message on our regional club board...Thanks Larry!
I apologize for neglecting this build thread, it wasn't on purpose, I just had a really busy year, building trucks, temporary job loss, life in general..
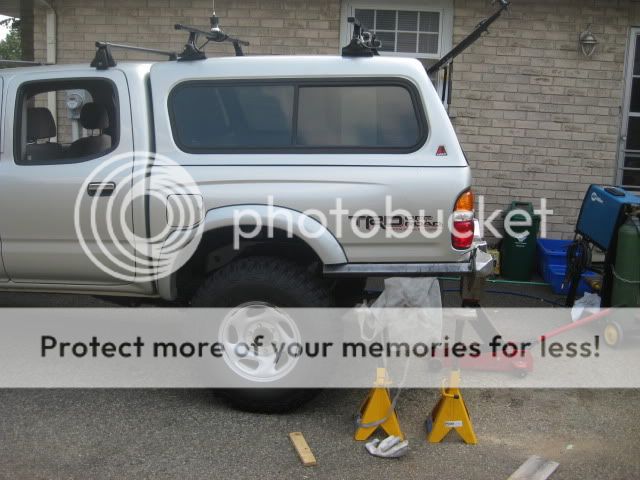
The bumper is on the truck now since last June. It's holding up amazingly (it better, since that sucker is a fricken boat anchor..LOL) Anyway, it's taken some scrapes and hits driving off rock steps.. in other words, it works..
I haven't added a swing out tire gate... yet. This part of the project will be added as soon as the snow disappears.. cant wait!
I'll add more to this thread tomorrow, but I'll add this tidbit for now...
Since this bumper is a bit beefy, and the rear Tacoma frame is less than beefy, frame reinforcement plates are mandatory for heavier rear bumpers 95.5-04 Taco's, especially if a tire swing out gate is added.
I copied this from my build thread on Sontt.com...
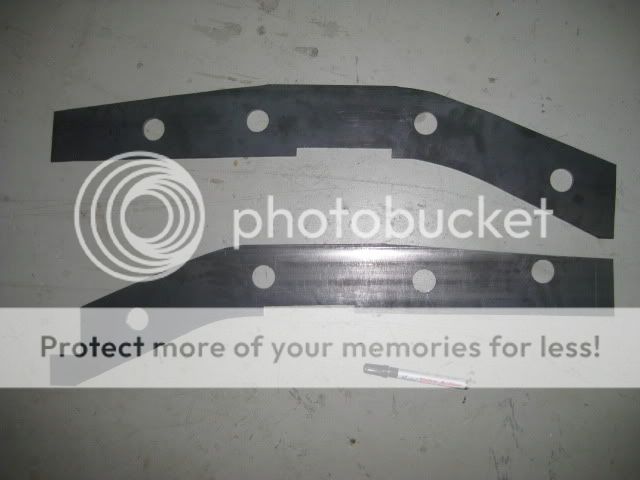
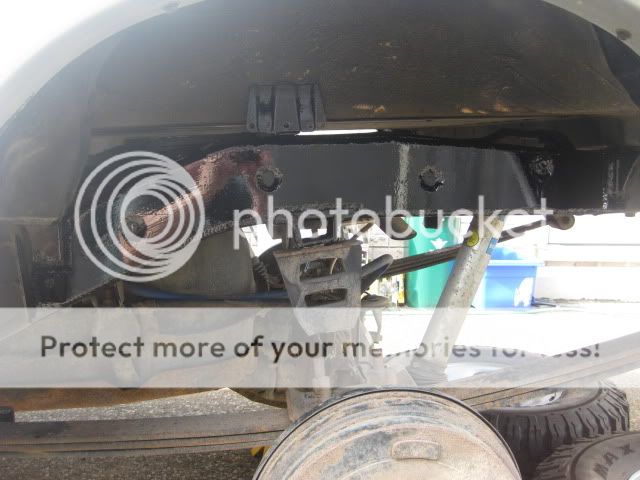
I finally knuckled down and made a pair if rear frame reinforcement plates.. tedious job.
I've been putting it off, for a very long time.
The plate is cut from 1/4'' stock... beef!
Next step is to weld the plates to the frame.
I'm hoping the rear bumper will be mounted for Ardbeg... FINALLY!
Picked up some heavy duty POR-15 type paint called... LOL..... DOM-16...
DOM-16 is a new product from Dominion Sure Seal...
http://www.dominionsureseal.com/prod...d=372&catid=35
I'm testing the paint out for Mike @ Overdrive.
I've used the Dominion products before with good results, so 'what the hey!'.
The bumper will get sand blasted then painted.
The rear lower 1/4 panel will be chopped to make room for the rear quarter bed sliders.
Can't wait!
I apologize for neglecting this build thread, it wasn't on purpose, I just had a really busy year, building trucks, temporary job loss, life in general..
The bumper is on the truck now since last June. It's holding up amazingly (it better, since that sucker is a fricken boat anchor..LOL) Anyway, it's taken some scrapes and hits driving off rock steps.. in other words, it works..
I haven't added a swing out tire gate... yet. This part of the project will be added as soon as the snow disappears.. cant wait!
I'll add more to this thread tomorrow, but I'll add this tidbit for now...
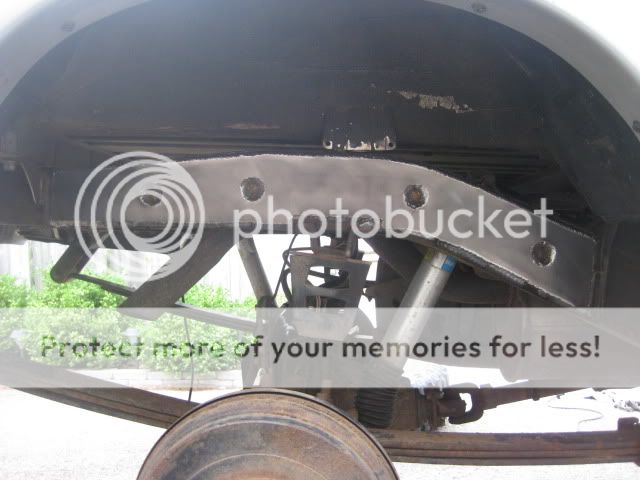
Since this bumper is a bit beefy, and the rear Tacoma frame is less than beefy, frame reinforcement plates are mandatory for heavier rear bumpers 95.5-04 Taco's, especially if a tire swing out gate is added.
I copied this from my build thread on Sontt.com...
I finally knuckled down and made a pair if rear frame reinforcement plates.. tedious job.
I've been putting it off, for a very long time.
The plate is cut from 1/4'' stock... beef!
Next step is to weld the plates to the frame.
I'm hoping the rear bumper will be mounted for Ardbeg... FINALLY!
Picked up some heavy duty POR-15 type paint called... LOL..... DOM-16...
DOM-16 is a new product from Dominion Sure Seal...
http://www.dominionsureseal.com/prod...d=372&catid=35
I'm testing the paint out for Mike @ Overdrive.
I've used the Dominion products before with good results, so 'what the hey!'.
The bumper will get sand blasted then painted.
The rear lower 1/4 panel will be chopped to make room for the rear quarter bed sliders.
Can't wait!
03-27-2011, 07:42 PM
#35
Registered User
Thread Starter
Join Date: Nov 2008
Location: Ontario
Posts: 89
Likes: 0
Received 0 Likes
on
0 Posts
The plates are fully welded.
Next step is mounting my rear bumper and chop my rear quarter panels for bed sliders.
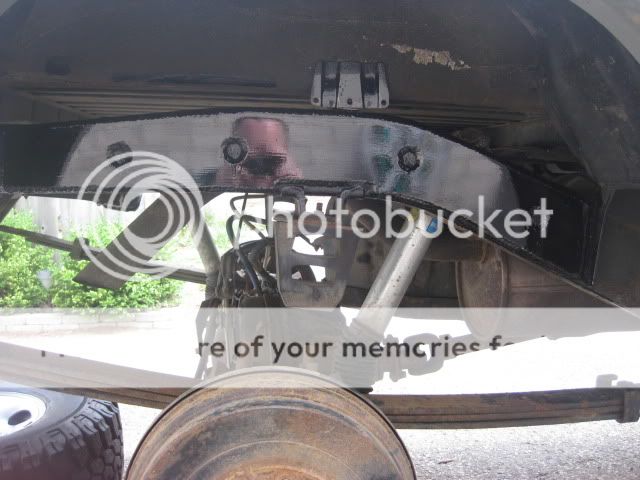
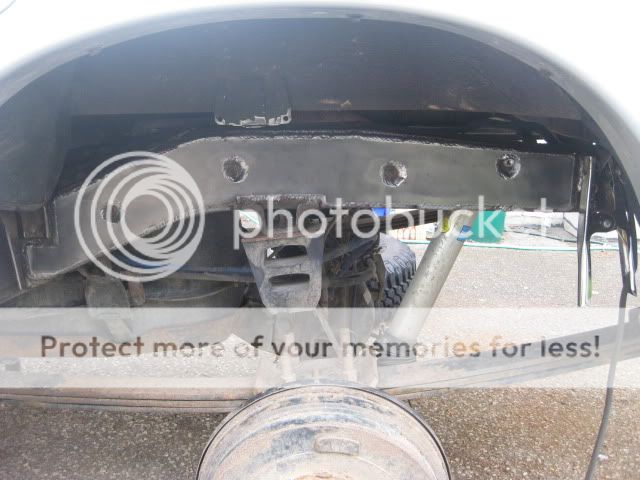
On a side note: The frame plates were painted with DOM-16. This paint looks really durable, easy to apply and quick drying time.
Side note: The DOM-16 paint has held up extremely well, it forms a really hard thick shell. I'll use this paint in all my stuff, including my bumper, hand painted. It also comes in white and clear. The clear would be cool, you can grind mild steel with a flap disk to get a fresh steel look then clear coat it with DOM-16 for a thick protective coat. Handy option for hot rod builds.
Next step is mounting my rear bumper and chop my rear quarter panels for bed sliders.
On a side note: The frame plates were painted with DOM-16. This paint looks really durable, easy to apply and quick drying time.
Side note: The DOM-16 paint has held up extremely well, it forms a really hard thick shell. I'll use this paint in all my stuff, including my bumper, hand painted. It also comes in white and clear. The clear would be cool, you can grind mild steel with a flap disk to get a fresh steel look then clear coat it with DOM-16 for a thick protective coat. Handy option for hot rod builds.
03-28-2011, 05:22 PM
#38
Registered User
Thread Starter
Join Date: Nov 2008
Location: Ontario
Posts: 89
Likes: 0
Received 0 Likes
on
0 Posts
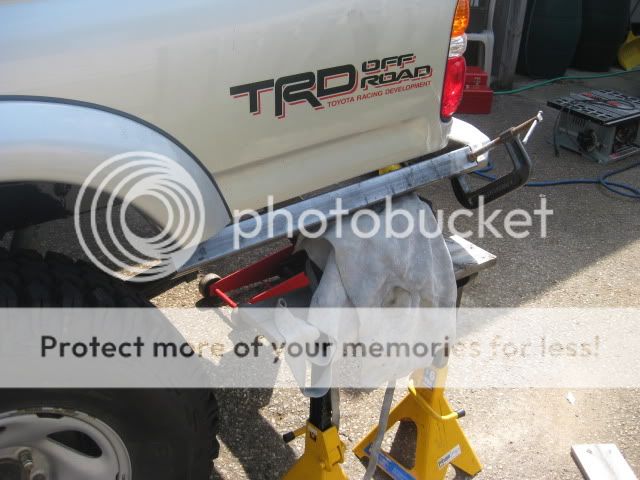
Tyler came by (Sontt member), to help me dry fit the rear bumper.. thanks man!
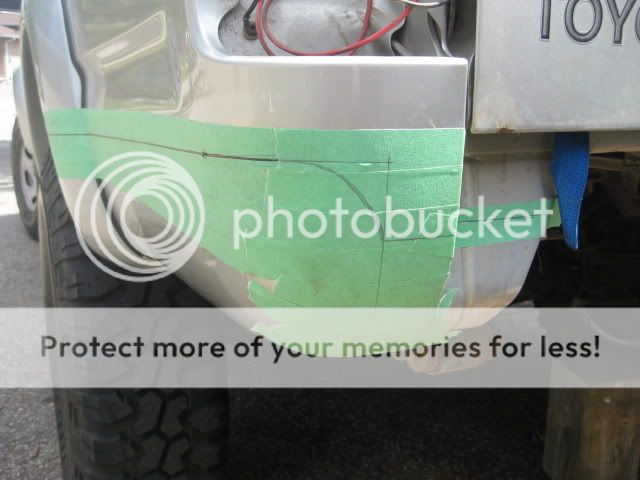
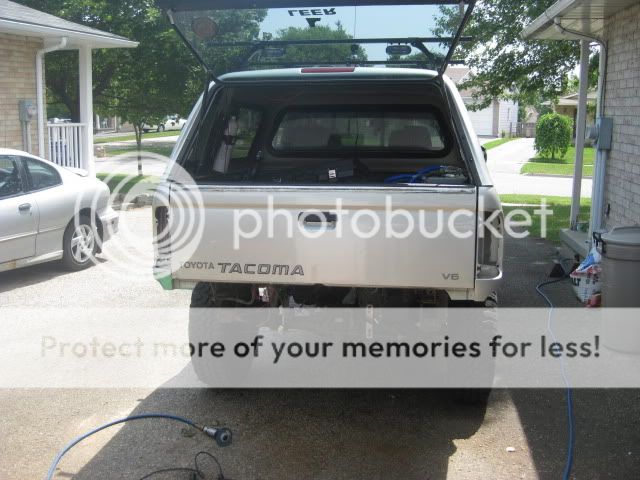
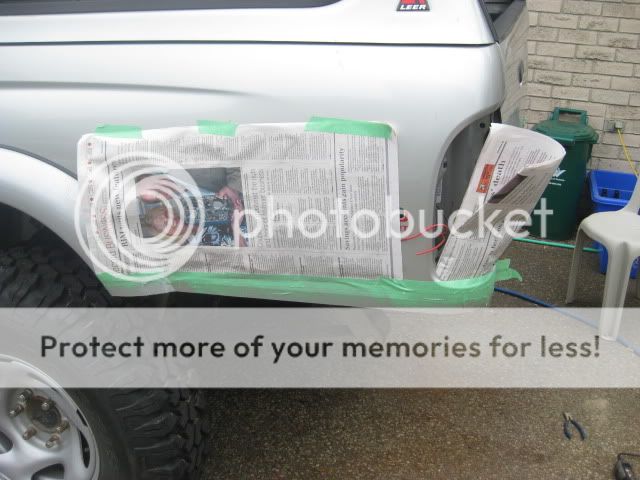
I masked and marked the cut lines for the fender chop. The chop will clear room for my bed sliders.
after hitting a Canadian Tire for a Saws-all blade, we came back and removed the rear tail lights, to release the wiring harness, so they wont get chopped.
Tyler missed the chop-chop, but it took a little while, sitting and staring, to get over the fact, I'm chopping off chunks of a perfectly good section of rear fender... LOL
I chopped the boxed corners under the tail light, with the Saws-all.
The fender length cut was done using a Dremel and cut-off wheels.
The chop took longer than expected.. as usual, but I managed to complete the passenger side ( the shady side of the drive way ) The driver side gets the chop tomorrow (better not rain!)
(That was one really hot day)
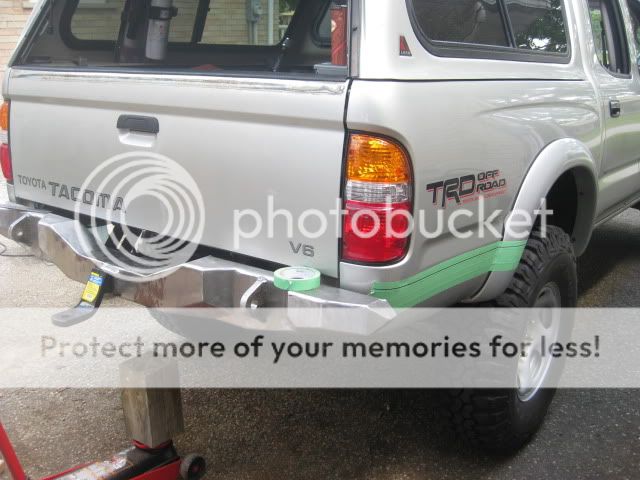
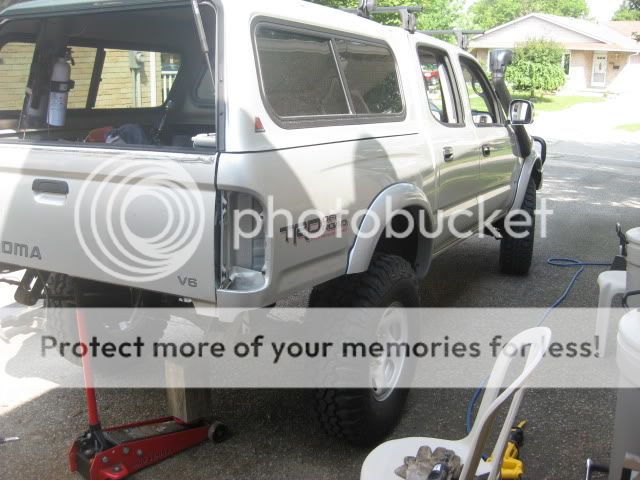
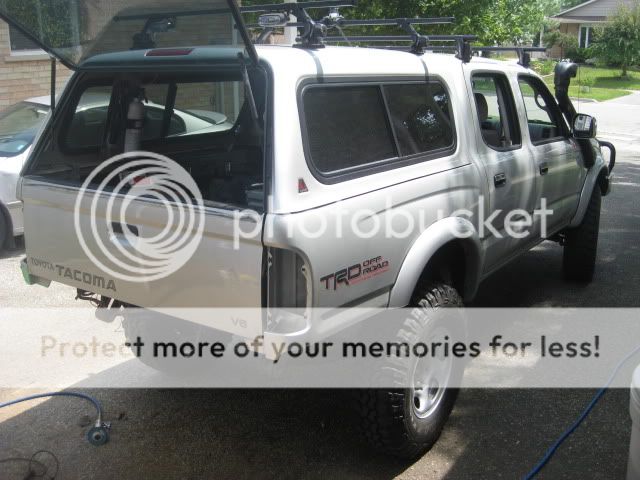
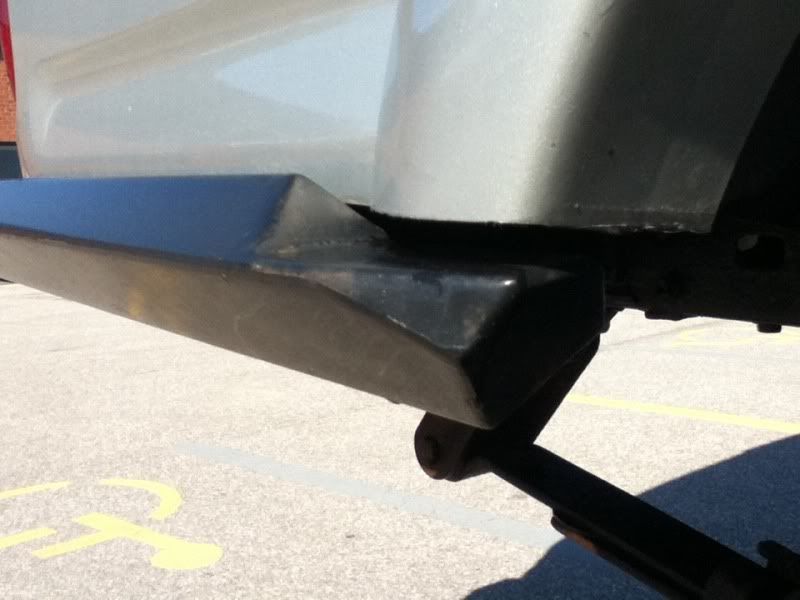
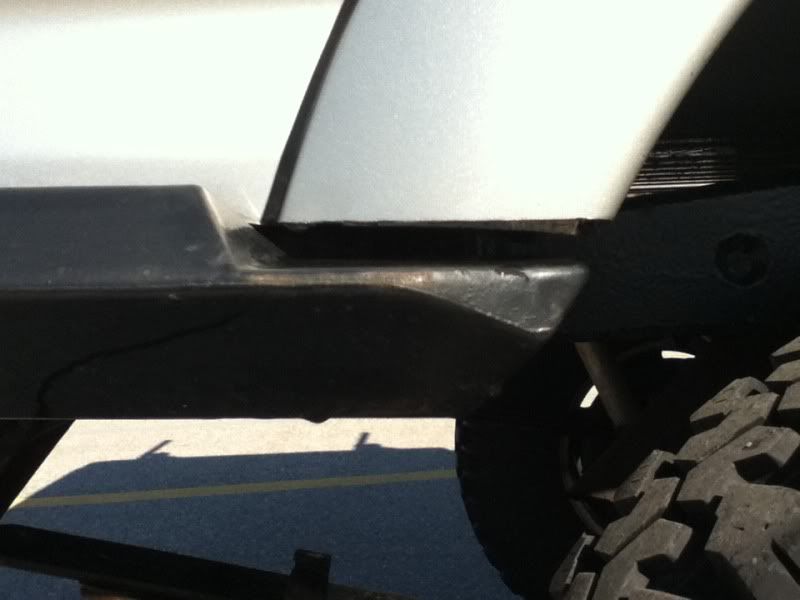
The bed chop was totally worth it !
What a difference. The clearance gain was huge.
I can finally flex the rear suspension to it's maximum.
Anyway.... I finished the job off, by de-burring the cut edge, then paint the edge with a OEM touchup pen.
Tomorrow I'll add the door trim for a cleaner look.
* the door trim was never added, i was concerned it would trap moisture and start to rust. This summer I plan on adding some bed liner along the edge of the trim line. Maybe a 2"- 3" band, of black bed liner.
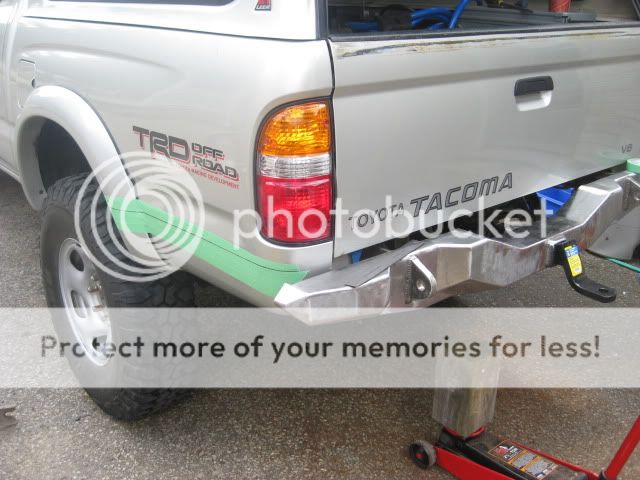
I masked and marked the cut lines for the fender chop. The chop will clear room for my bed sliders.
after hitting a Canadian Tire for a Saws-all blade, we came back and removed the rear tail lights, to release the wiring harness, so they wont get chopped.
Tyler missed the chop-chop, but it took a little while, sitting and staring, to get over the fact, I'm chopping off chunks of a perfectly good section of rear fender... LOL
I chopped the boxed corners under the tail light, with the Saws-all.
The fender length cut was done using a Dremel and cut-off wheels.
The chop took longer than expected.. as usual, but I managed to complete the passenger side ( the shady side of the drive way ) The driver side gets the chop tomorrow (better not rain!)
(That was one really hot day)
The bed chop was totally worth it !
What a difference. The clearance gain was huge.
I can finally flex the rear suspension to it's maximum.
Anyway.... I finished the job off, by de-burring the cut edge, then paint the edge with a OEM touchup pen.
Tomorrow I'll add the door trim for a cleaner look.
* the door trim was never added, i was concerned it would trap moisture and start to rust. This summer I plan on adding some bed liner along the edge of the trim line. Maybe a 2"- 3" band, of black bed liner.
Last edited by 4307; 03-28-2011 at 05:24 PM.
03-28-2011, 05:47 PM
#39
Registered User
Thread Starter
Join Date: Nov 2008
Location: Ontario
Posts: 89
Likes: 0
Received 0 Likes
on
0 Posts
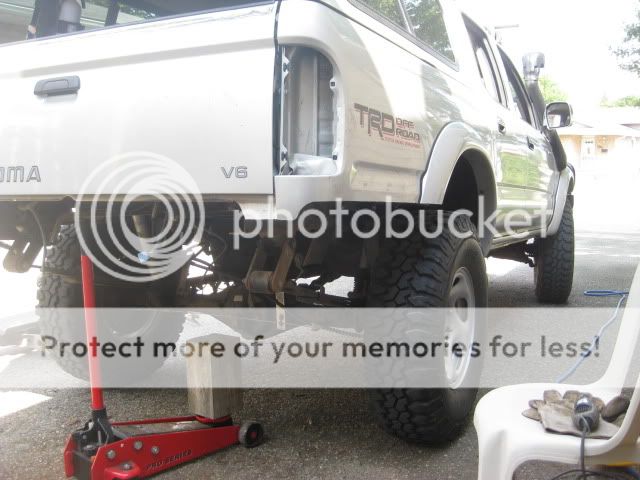
The slider tube will be a little shorter than illustrated in the pic
The slider will be notched to accommodate a hi-lift jack ( I never ended up notching the slider, I didn't feel there was a need for it. I can put the jack anywhere along the slider, this gives more versatility, when given uneven terrain.
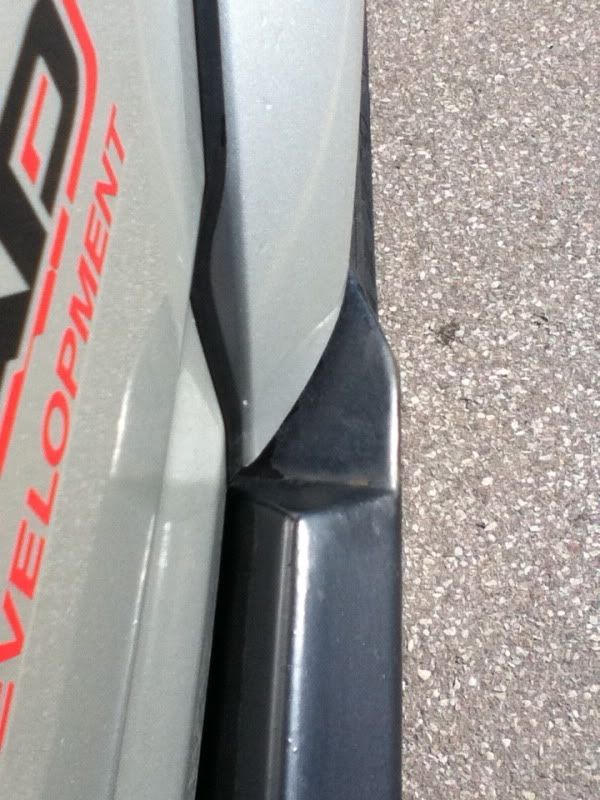
The wheel well end of the slider was capped and shaped to accommodate the fender flare.
 03-28-2011, 05:55 PM
#40
Registered User
Thread Starter
Join Date: Nov 2008
Location: Ontario
Posts: 89
Likes: 0
Received 0 Likes
on
0 Posts
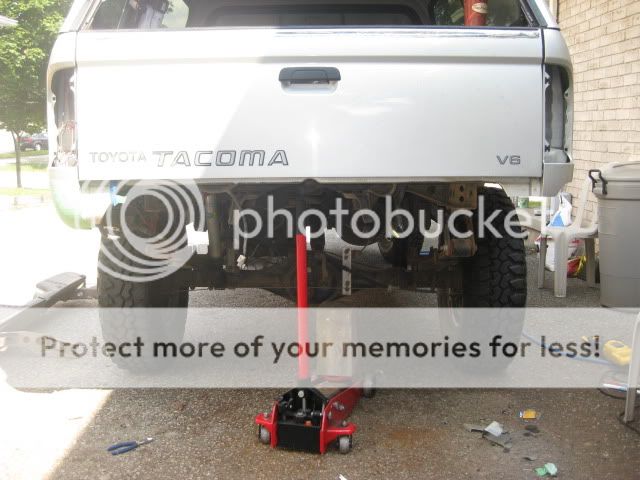
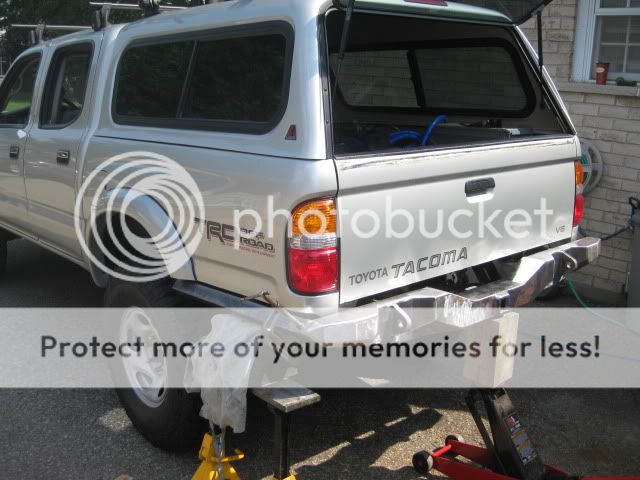
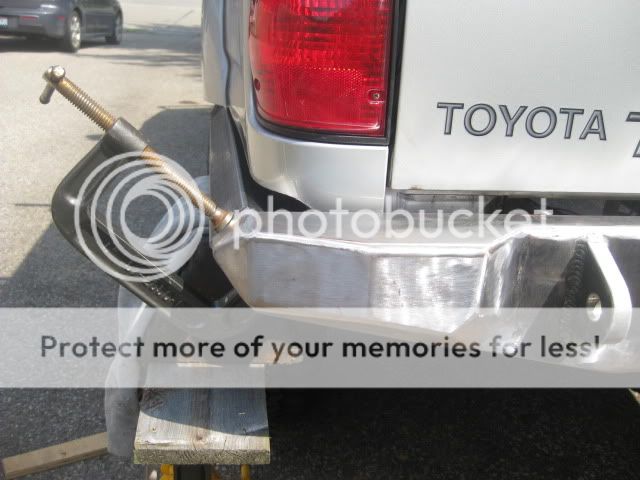
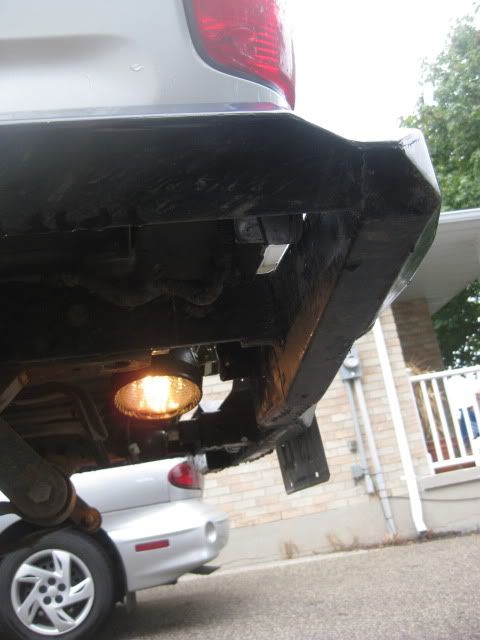
Wired up some rock lights, mounted on the brackets, welded to the inside back of the bumper... The lights are standard tractor utility lights, $6 a piece, expendable if they take a nasty beating.
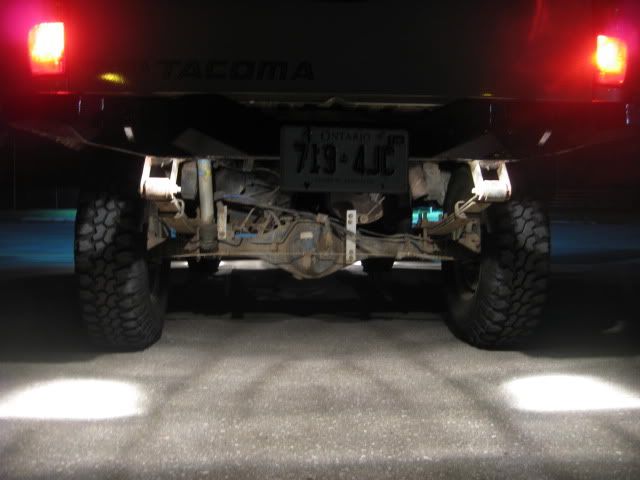
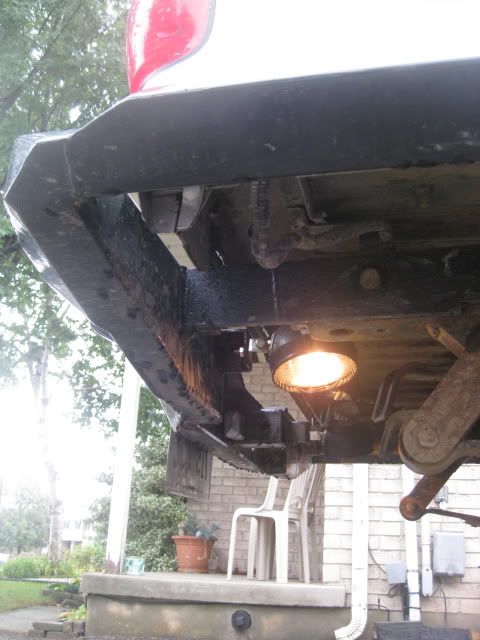
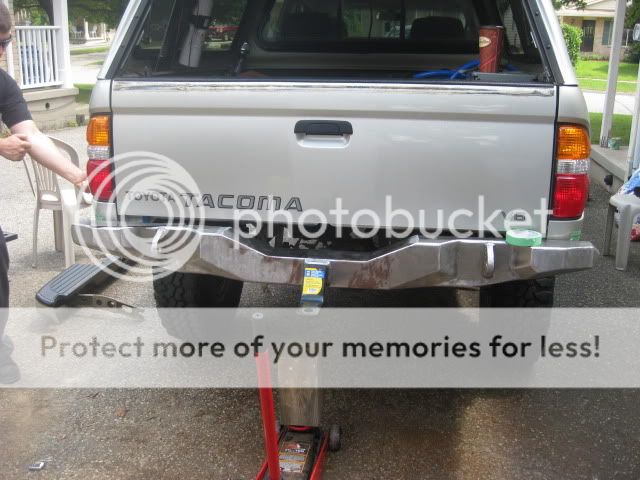
You may notice the license plate is mounted low, in a weird place on the bumper. I was in a rush to finish the bumper before a big club run.
I made a quick mount using square tube and a piece of flat bar. I drilled a hole through the square tube to accommodate a receiver pin with a lock.
This little addition keeps me legal until I build a swing out. I can't say I'm 100% legal, I'm lacking an illumination light, but so far "Smokey" hasn't busted me yet..LOL
The plate is mounted for daily driving, removed for wheeling at the trail head.
Last edited by 4307; 03-28-2011 at 06:05 PM.


