
4307's 2004 Tacoma Build-Up Thread
 Nov 17, 2008 | 06:13 PM
#24
Thread Starter
Registered User
Joined: Nov 2008
Posts: 89
Likes: 0
From: Ontario
So you want a bumper? Hehehe....
I'm trying to wrap my head around the concept of bumper production.
It's the start up $ that has me scratching my head. I need a shop space and a loan of some sort. It's the best time for me to start due to my job situation but the worst time to get a startup loan. LOL figures!
Building the bumper is the easy part.
Do you need help building your sliders?. You're in Ontario.
 Nov 17, 2008 | 09:18 PM
#28

Registered User
Joined: Feb 2007
Posts: 319
Likes: 0
From: Santa Monica, Ca
Ive officially crapped my pants due to:
1. Your tools.
2. Your sketches to product.
3. How good your fab work looks.
4. your tools again - i want the tube bender and the ban saw...
Wow. Nice.
1. Your tools.
2. Your sketches to product.
3. How good your fab work looks.
4. your tools again - i want the tube bender and the ban saw...
Wow. Nice.
Nov 18, 2008 | 07:17 PM
#31
Thread Starter
Registered User
Joined: Nov 2008
Posts: 89
Likes: 0
From: Ontario
It's funny you mention a winch. Originally that was my intention. I can still install one with a slot style aluminum fairlead, where the step recess. The width and height of the step allows for it. If I ever install a rear winch thats another story. Its nice having a winch back there, especially if your touring solo, generally wheeling more conservatively, but you never know when and how you might get stuck.
Nov 18, 2008 | 07:26 PM
#32
Thread Starter
Registered User
Joined: Nov 2008
Posts: 89
Likes: 0
From: Ontario
Alright!
Lately, winter has finally hit, the weather is cold and miserable.
Today started out as a nice day, cold but nice, so I thought I'd weld the step plate and gusset in place. Unfortunately, I didn't get much done, out of nowhere it started snowing like crazy, ended up packing everything up again and called a day.
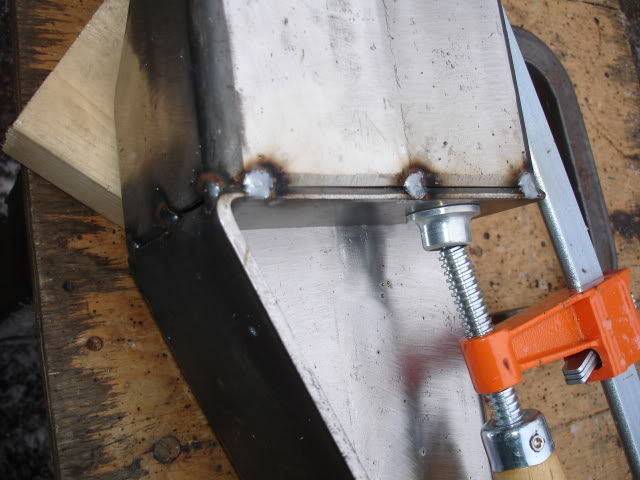
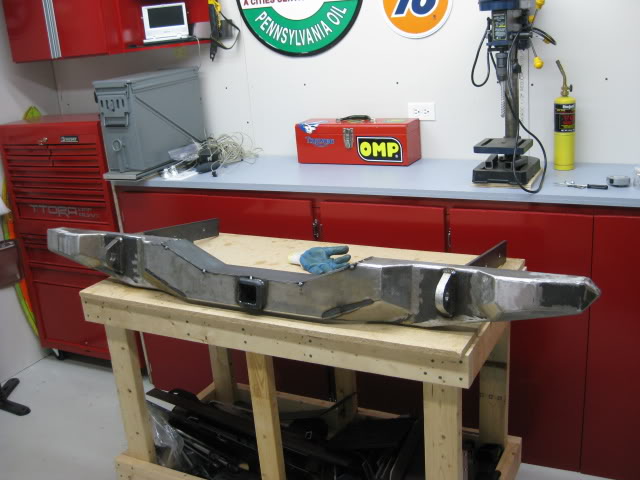
I did a little more grinding, fine tuning the fit for the step plate. I managed to get a nice tight fit. The pics below don't really show the fit, It's hard to tell. I thought I'd post them, for for the sake of posting them.

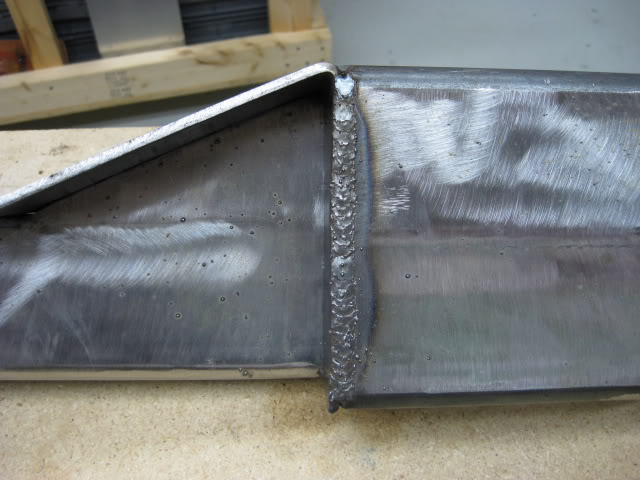
The next step was to weld-in the gusset, to tie the hitch box receiver, to the step plate. First step was to tack weld the gusset into position, check to make sure the gusset surface is level to the bottom surface of the step plate, then weld the length of the seam. Every once and a while the wind would pick up making it hard to weld.
I stopped and took the picture while the wind did it's thing.
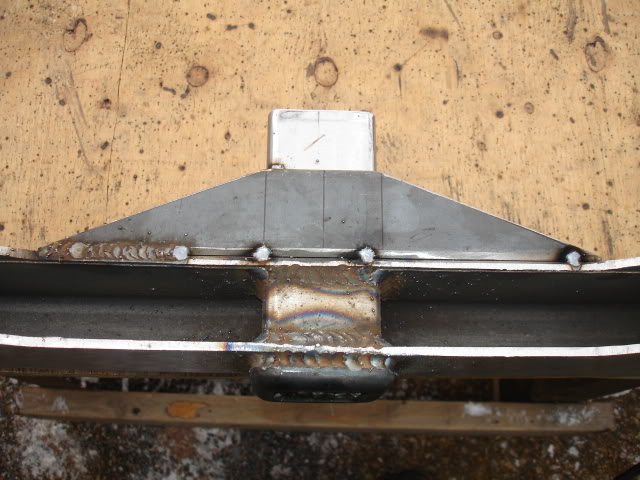
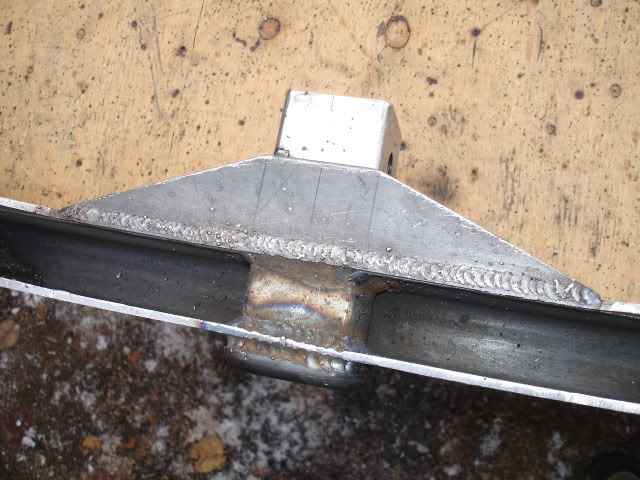
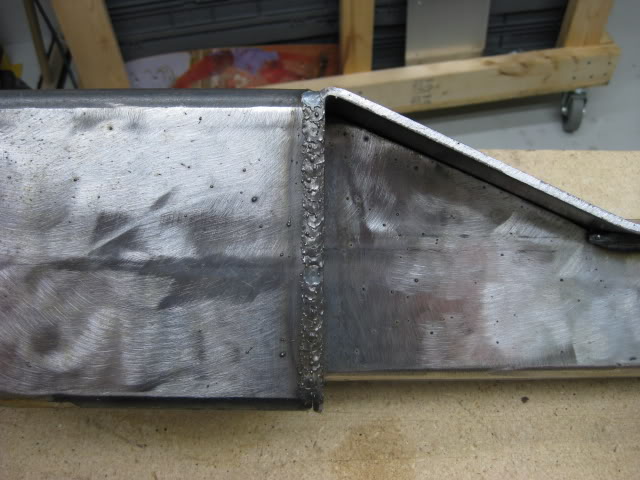
After welding the length of the gusset, I had to grind the weld down to maintain the level, flush, surface. I use a Shop Vac to vacuum the weld slag and grinder dust from the inside, box sections. I added some blue industrial lithium grease to catch the weld slag, as mentioned in a previous post.
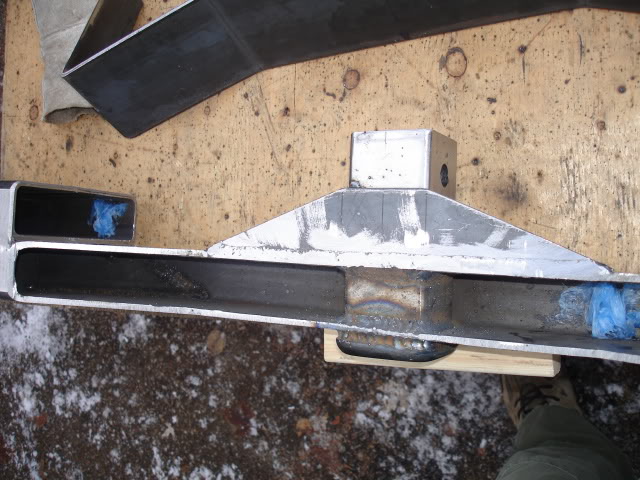
With the step plate in position and clamped, so the plate doesn't shift, I secured it with some tack welds.
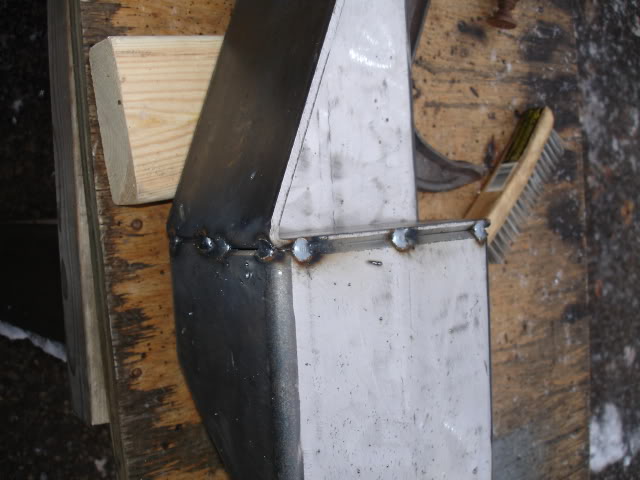
I started welding the back seam, for the end caps, when it started snowing like crazy. I had to pack it in for the day. It was a tough day for controlling welds, the breeze that kicks up was a total pain.
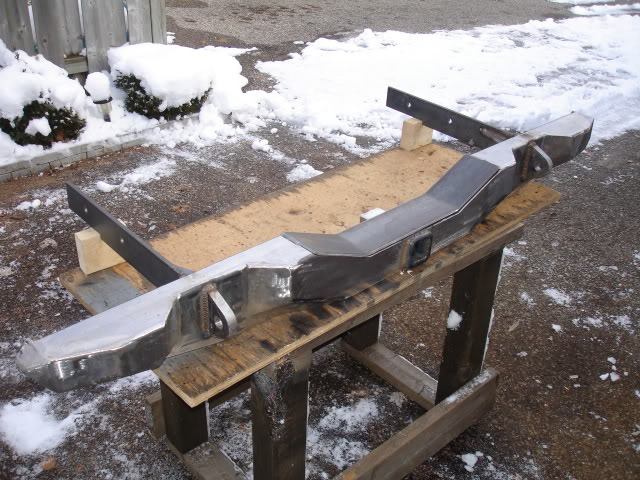
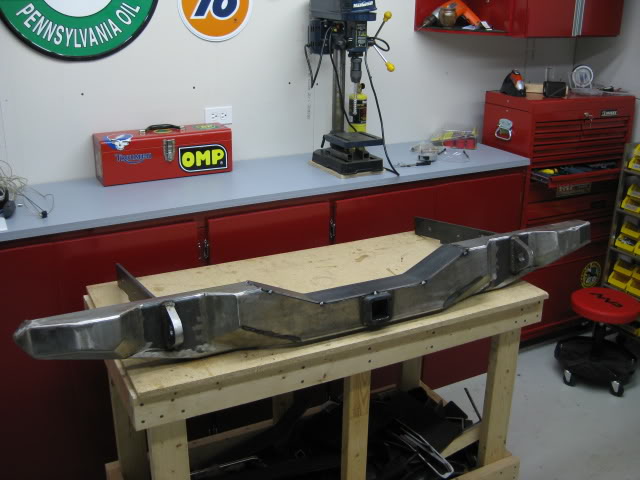
Here's the welds for the back of the end caps.....
Here's the bumper as it stands to date.....
A problem I'm having with the cold weather is the temperature.
I don't leave the bumper in the shed, I keep it in the workshop. The temperature change from the cold to warm causes condensation to form on the exposed steel, I have to constantly wipe the moisture off until the steel normalizes to the room temperature.
I wipe down the bumper as much as possible, but surface rust still forms. I want to avoid this issue as much as possible.
The bumper will be stored for the winter. my shop is dehumidified so condensation isn't really a issue over the winter.
I would love to finish this build over the winter. I still need to do some welding, but not in the house. I made the decision to put the build on hold until the spring.
If a warm, free, nice day, comes along, I might take another crack at it.... We'll see, I not counting on it.
I will be designing the swing out tire gate, cut the steel and dry fit the pieces. I have a few other ideas in mind I'll work on. I'll do this over the winter.
I'll update the build from time to time as things develop.
Until then, that all I have for now.
Lately, winter has finally hit, the weather is cold and miserable.
Today started out as a nice day, cold but nice, so I thought I'd weld the step plate and gusset in place. Unfortunately, I didn't get much done, out of nowhere it started snowing like crazy, ended up packing everything up again and called a day.
I did a little more grinding, fine tuning the fit for the step plate. I managed to get a nice tight fit. The pics below don't really show the fit, It's hard to tell. I thought I'd post them, for for the sake of posting them.
The next step was to weld-in the gusset, to tie the hitch box receiver, to the step plate. First step was to tack weld the gusset into position, check to make sure the gusset surface is level to the bottom surface of the step plate, then weld the length of the seam. Every once and a while the wind would pick up making it hard to weld.
I stopped and took the picture while the wind did it's thing.
After welding the length of the gusset, I had to grind the weld down to maintain the level, flush, surface. I use a Shop Vac to vacuum the weld slag and grinder dust from the inside, box sections. I added some blue industrial lithium grease to catch the weld slag, as mentioned in a previous post.
With the step plate in position and clamped, so the plate doesn't shift, I secured it with some tack welds.
I started welding the back seam, for the end caps, when it started snowing like crazy. I had to pack it in for the day. It was a tough day for controlling welds, the breeze that kicks up was a total pain.
Here's the welds for the back of the end caps.....
Here's the bumper as it stands to date.....
A problem I'm having with the cold weather is the temperature.
I don't leave the bumper in the shed, I keep it in the workshop. The temperature change from the cold to warm causes condensation to form on the exposed steel, I have to constantly wipe the moisture off until the steel normalizes to the room temperature.
I wipe down the bumper as much as possible, but surface rust still forms. I want to avoid this issue as much as possible.
The bumper will be stored for the winter. my shop is dehumidified so condensation isn't really a issue over the winter.
I would love to finish this build over the winter. I still need to do some welding, but not in the house. I made the decision to put the build on hold until the spring.
If a warm, free, nice day, comes along, I might take another crack at it.... We'll see, I not counting on it.
I will be designing the swing out tire gate, cut the steel and dry fit the pieces. I have a few other ideas in mind I'll work on. I'll do this over the winter.
I'll update the build from time to time as things develop.
Until then, that all I have for now.
Nov 30, 2008 | 12:17 PM
#33
Thread Starter
Registered User
Joined: Nov 2008
Posts: 89
Likes: 0
From: Ontario
A Pile-O-Parts ready for spring.....
Donahoe 2.5 adjustable coilovers with weather plating.

Bilstein 5125, 10"

1998, Chevy 63'', 1/2 ton leaf springs for the rear.
Junk yard specials..... Rusty!
Rebuild write-up to come.


U Bolt flip kit...
Can't glue the Chevy's on without these babies.
Ruff Stuffs, Chevy leaf - Toyota axle kit.
They're beefy! 3/8'' plate with three hole choice for center pin location.
Fine thread with 1'' long nuts.
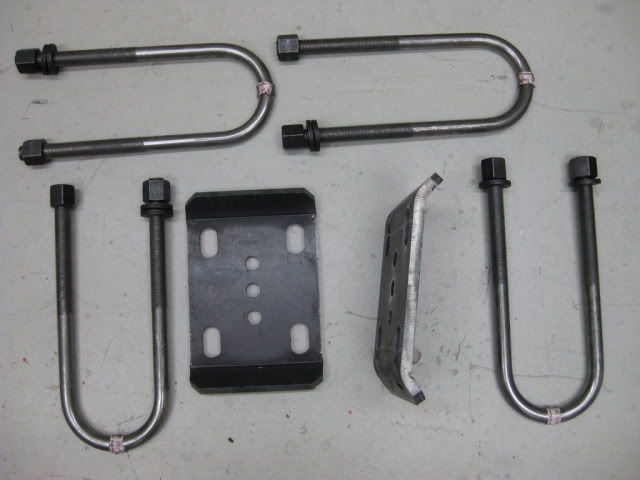
I still need bump stops and extended break lines.
Donahoe 2.5 adjustable coilovers with weather plating.
Bilstein 5125, 10"
1998, Chevy 63'', 1/2 ton leaf springs for the rear.
Junk yard specials..... Rusty!
Rebuild write-up to come.
U Bolt flip kit...
Can't glue the Chevy's on without these babies.
Ruff Stuffs, Chevy leaf - Toyota axle kit.
They're beefy! 3/8'' plate with three hole choice for center pin location.
Fine thread with 1'' long nuts.
I still need bump stops and extended break lines.
Last edited by 4307; Jun 10, 2009 at 07:50 PM.
Nov 30, 2008 | 12:19 PM
#34
Thread Starter
Registered User
Joined: Nov 2008
Posts: 89
Likes: 0
From: Ontario
The budget winch....
The budget winch, a KEW 8000.
The winch was bought at Princess Auto on sale for $300.
If it saves my *** a few times it payed for it's self. Eventually I would like to replace it with a WARN 9000 lbs, and possibly mount this winch in the rear. Until then this winch will have to do.
This winch is identical to the Mile Marker PE 8000.
We'll see how it holds up.
I'll be swapping out the steel cable for synthetic, I'll do that before it's installed, when I mount my ARB.

 Dec 3, 2008 | 10:10 AM
#39
Thread Starter
Registered User
Joined: Nov 2008
Posts: 89
Likes: 0
From: Ontario
Your dad? LOL!
Dec 3, 2008 | 10:14 AM
#40
Thread Starter
Registered User
Joined: Nov 2008
Posts: 89
Likes: 0
From: Ontario
Bow Saw and Storage Tube
Bow Saw Storage Tube....
I never go on trips without one, now I want to make it a permanent item in the trucks tool kit.
This is a super simple solution for storing the buck saw.
The storage tube was made from scrap PVC tubing and end caps I found laying around, while cleaning up the basement.
I cut the tube to length, lined the inside of the end caps with pieces of scrap tool chest drawer mat. The mat acts like a impact cushion.
I made one to be mounted in the truck and one for the Kayak.
This is not a exciting project, but this Bow Saw is pretty cool in my opinion, great rugged product. I have to show you how the saw pieces together.....
I'll start with the storage tube....
Self explanatory.


The Bow Saw....


Bow Saw in the tube...


I'll find a good accessible location to mount the storage tube, holding it in place with some PVC U-clamps used to secure PVC pipe to ceiling joists.
Big Wow! eh? My best build yet .... LOL
LOL
Its a cheap trick.
I never go on trips without one, now I want to make it a permanent item in the trucks tool kit.
This is a super simple solution for storing the buck saw.
The storage tube was made from scrap PVC tubing and end caps I found laying around, while cleaning up the basement.
I cut the tube to length, lined the inside of the end caps with pieces of scrap tool chest drawer mat. The mat acts like a impact cushion.
I made one to be mounted in the truck and one for the Kayak.
This is not a exciting project, but this Bow Saw is pretty cool in my opinion, great rugged product. I have to show you how the saw pieces together.....
I'll start with the storage tube....
Self explanatory.
The Bow Saw....
Bow Saw in the tube...
I'll find a good accessible location to mount the storage tube, holding it in place with some PVC U-clamps used to secure PVC pipe to ceiling joists.
Big Wow! eh? My best build yet ....
LOL Its a cheap trick.


