Dirtco's 1999 4Runner Build-Up Thread
 07-05-2012, 08:24 PM
#621
Registered User
Thread Starter
Join Date: May 2007
Location: Summit County, Colorado
Posts: 1,441
Likes: 0
Received 0 Likes
on
0 Posts
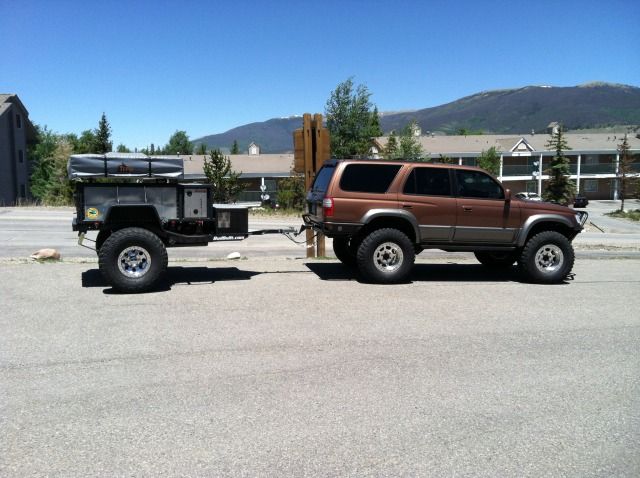
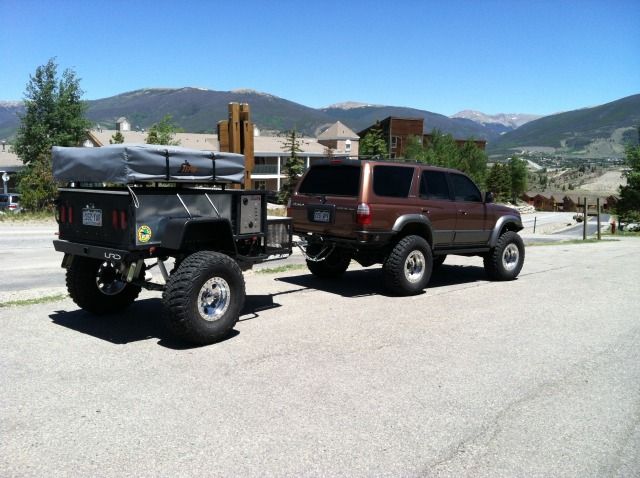
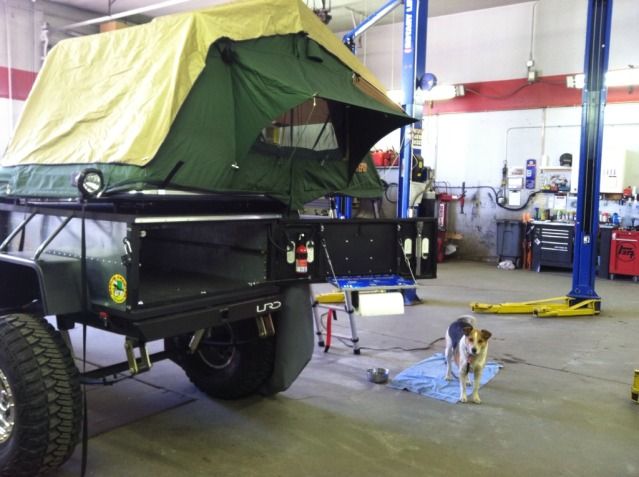
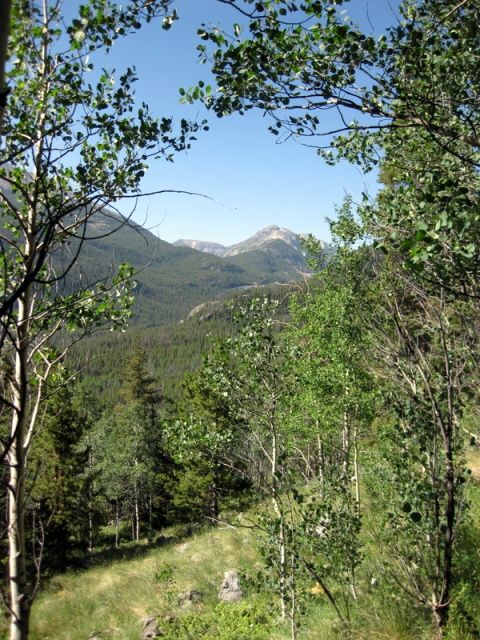
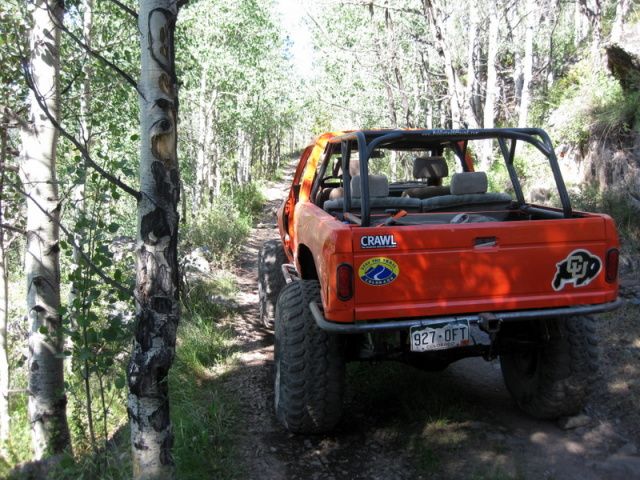
Well, I made a trip over to Holy Cross (Link) a couple weeks ago for some wheeling and camping. It’s one of my favorite trails, and probably one of the hardest Colorado trails (besides maybe Blanca) I plan on running in the 4Runner. It was also going to be the first trip for the trailer, which was very exciting.
While the trailer was not completely done, it was close enough to take it out on a shake down run. I’ve been working on it for over a year and a half, and I just wanted to take it out and use it. It was actually surreal loading it up and leaving town for a couple days. I went up Vail Pass and then cut over Shrine Pass (Link) into Red Cliff. The trailer handled great, on the highway and on Shrine Pass (easy dirt road with some steep sections, washboard and potholes). There are a couple small issues’ I need to work out with the trailer; and I need to watch the ATF temp pulling the passes, but all of that is normal stuff. I was in hurry to set up camp before dark so I forgot to take pictures of the truck and trailer, but these pictures I took a couple days ago explains everything.
While the trailer was not completely done, it was close enough to take it out on a shake down run. I’ve been working on it for over a year and a half, and I just wanted to take it out and use it. It was actually surreal loading it up and leaving town for a couple days. I went up Vail Pass and then cut over Shrine Pass (Link) into Red Cliff. The trailer handled great, on the highway and on Shrine Pass (easy dirt road with some steep sections, washboard and potholes). There are a couple small issues’ I need to work out with the trailer; and I need to watch the ATF temp pulling the passes, but all of that is normal stuff. I was in hurry to set up camp before dark so I forgot to take pictures of the truck and trailer, but these pictures I took a couple days ago explains everything.
 07-05-2012, 08:26 PM
#622
Registered User
Thread Starter
Join Date: May 2007
Location: Summit County, Colorado
Posts: 1,441
Likes: 0
Received 0 Likes
on
0 Posts
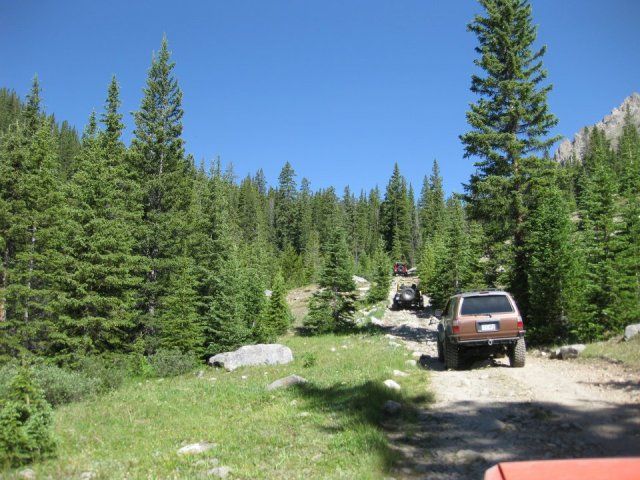
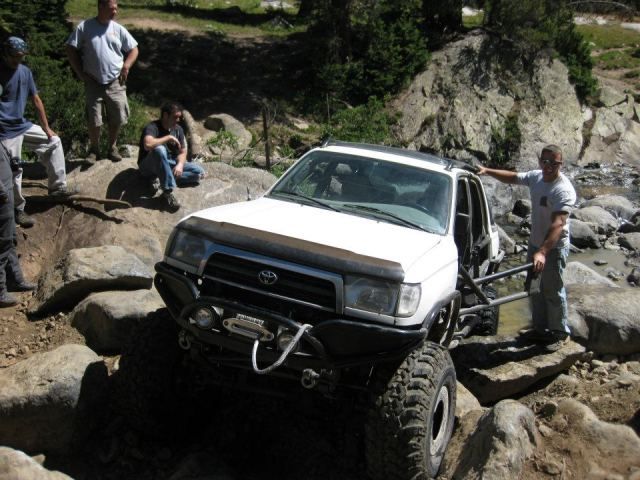
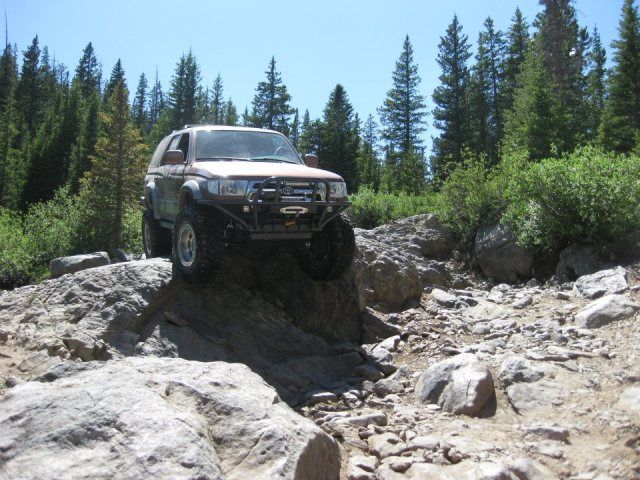
We woke up early Saturday to beat the crowds and started up the trail. Again, I was kind of slacking in the picture department so I stole some of them from others in the group. We had a total of 10 rigs in our group, all of them built; I was the least built out of the whole group.

07-05-2012, 08:28 PM
#623
Registered User
Thread Starter
Join Date: May 2007
Location: Summit County, Colorado
Posts: 1,441
Likes: 0
Received 0 Likes
on
0 Posts
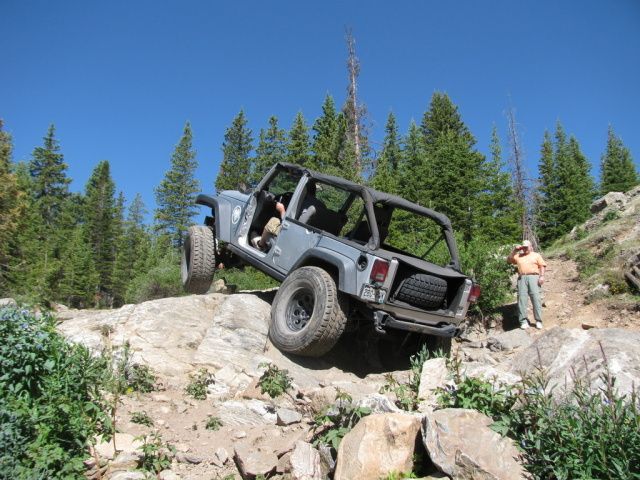
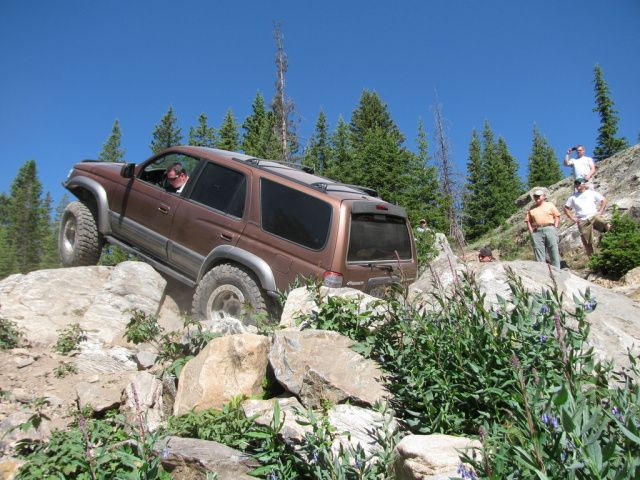
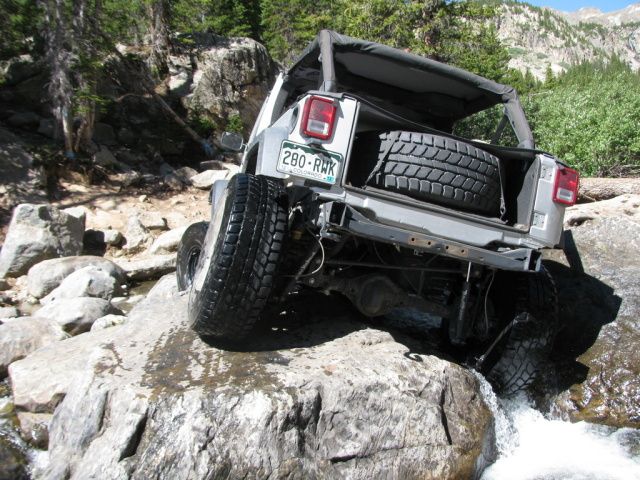
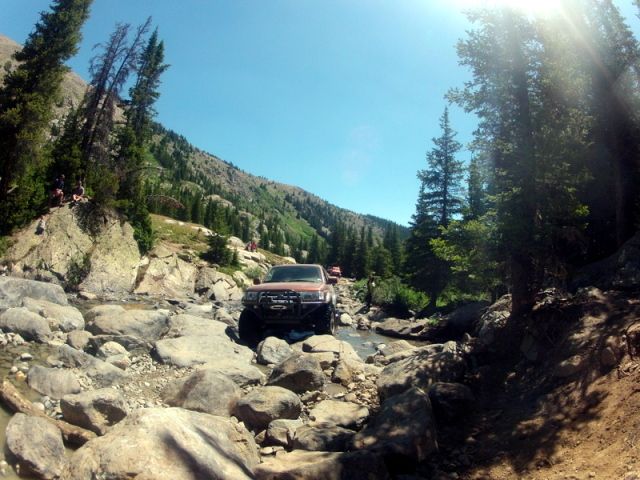
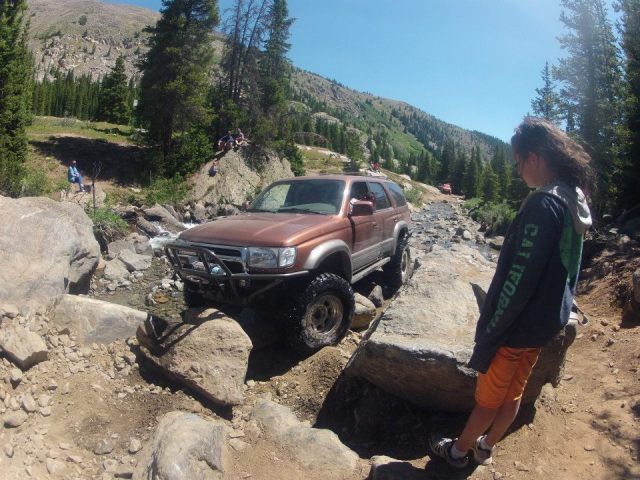
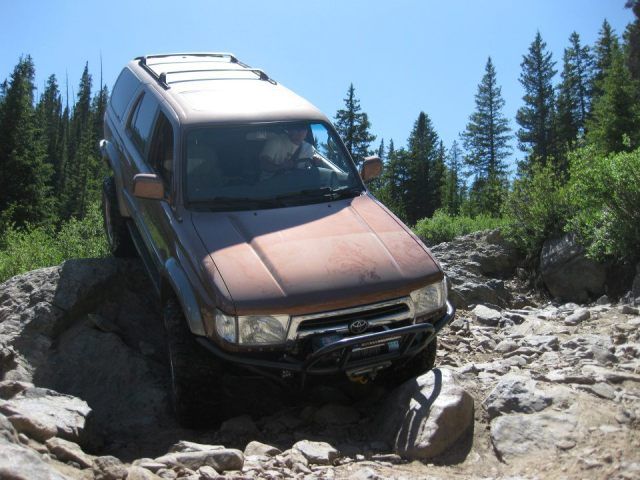
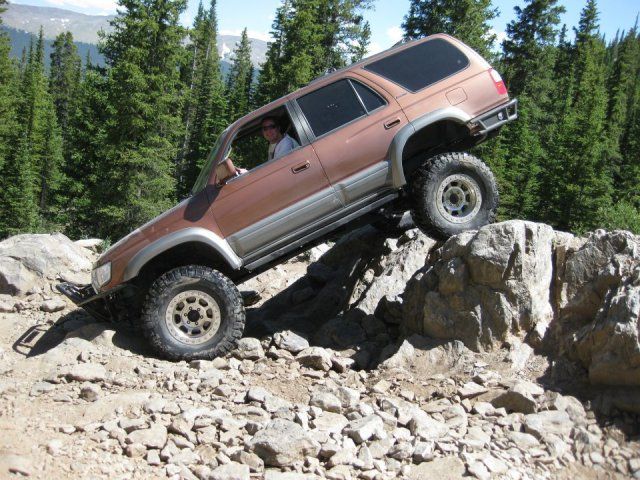
We drove through all the smaller obstacles without stopping much and made our way to the first real challenge, the ledge before French Creek. I’ve gone up it several times in my old rigs, this rig sets a lot lower but I still made it up on my first try.
07-05-2012, 08:29 PM
#624
Registered User
Thread Starter
Join Date: May 2007
Location: Summit County, Colorado
Posts: 1,441
Likes: 0
Received 0 Likes
on
0 Posts
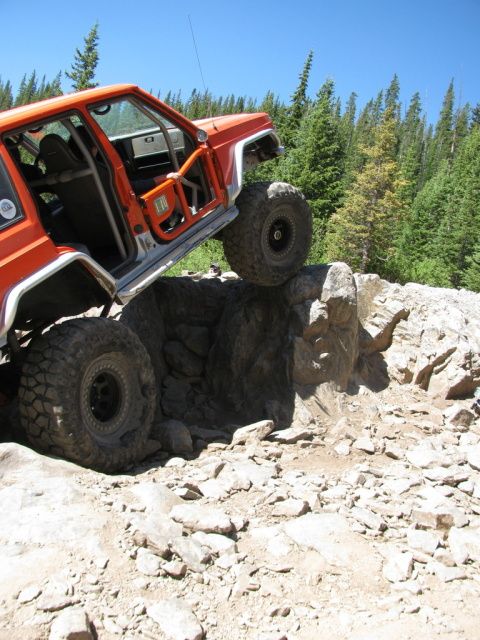
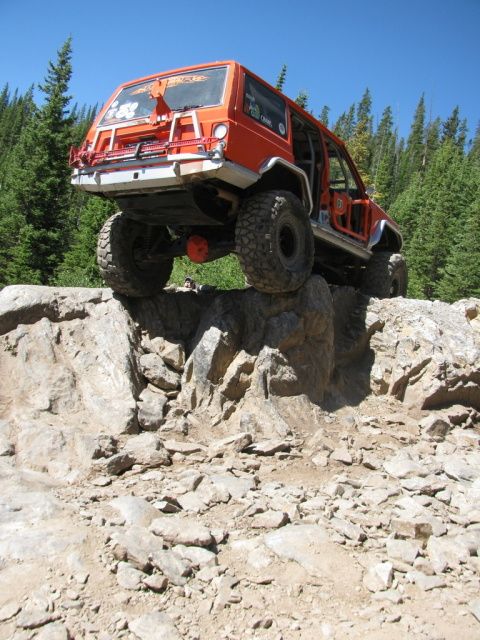
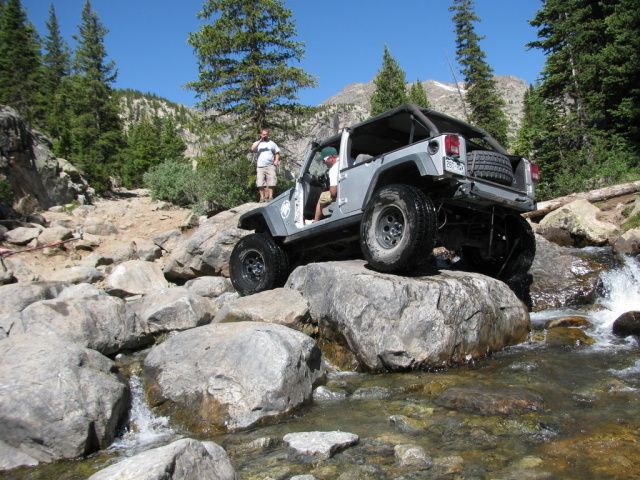
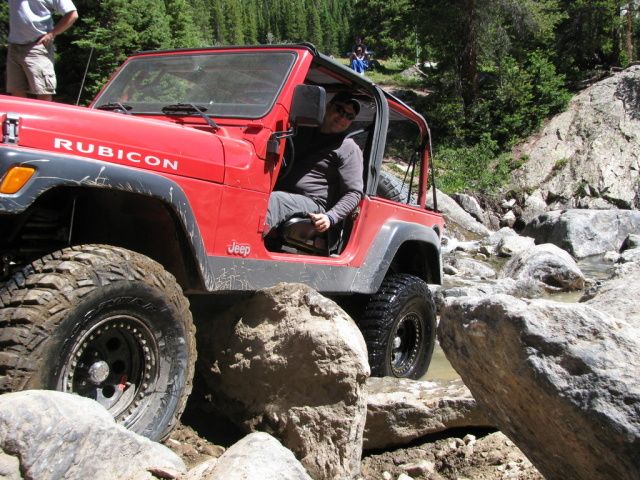
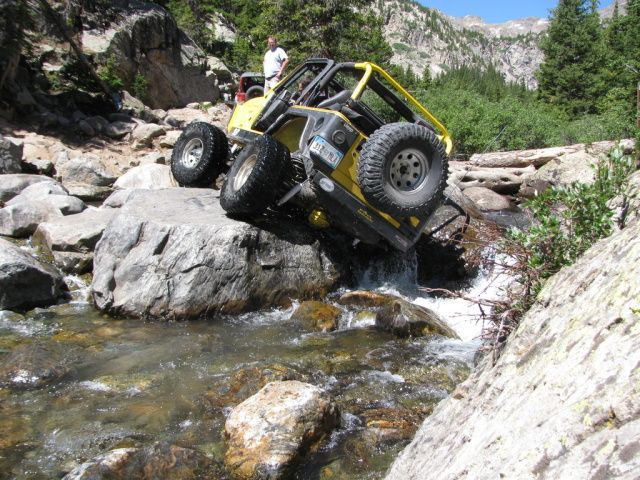
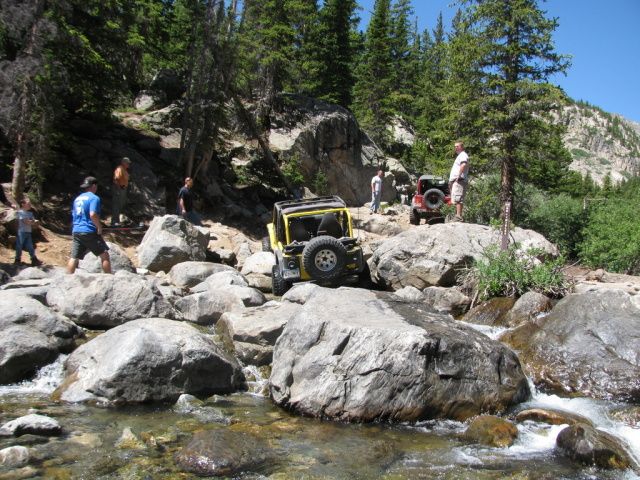
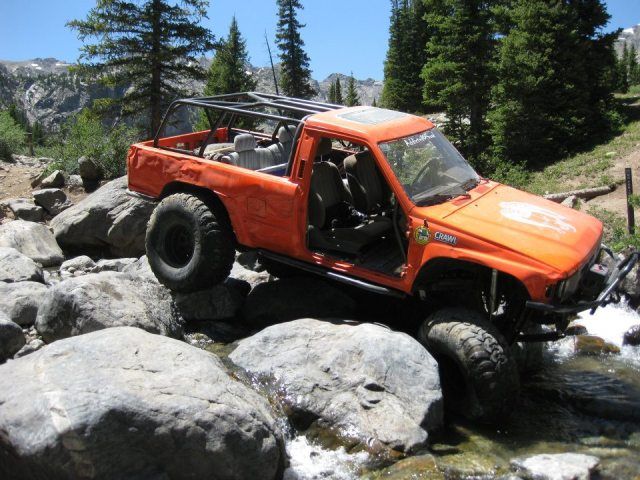
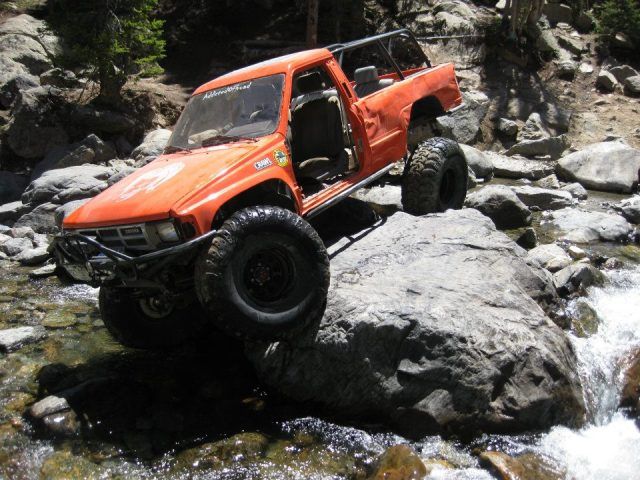
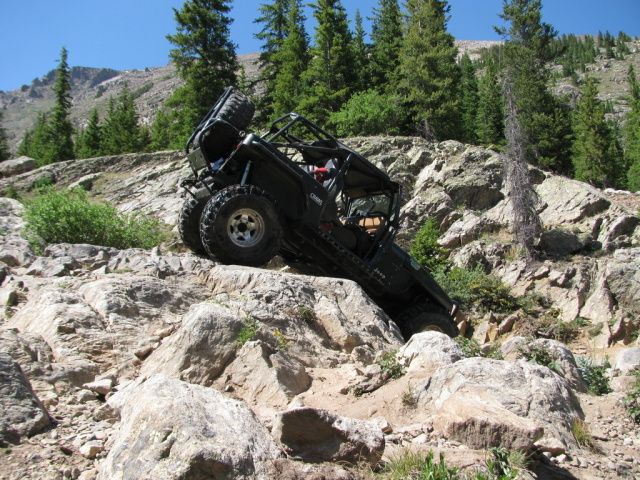
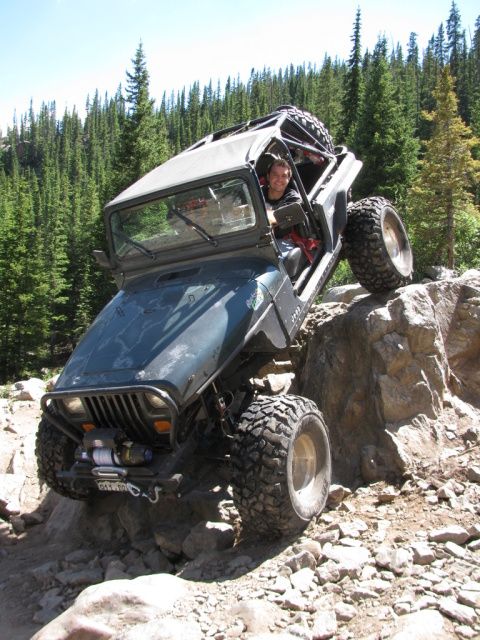
The main obstacle on the trail is French Creek, and it is getting nasty! Every year it gets worse and this season is no different. Here are a couple rigs that ran the creek before I did…
07-05-2012, 08:32 PM
#625
Registered User
Thread Starter
Join Date: May 2007
Location: Summit County, Colorado
Posts: 1,441
Likes: 0
Received 0 Likes
on
0 Posts
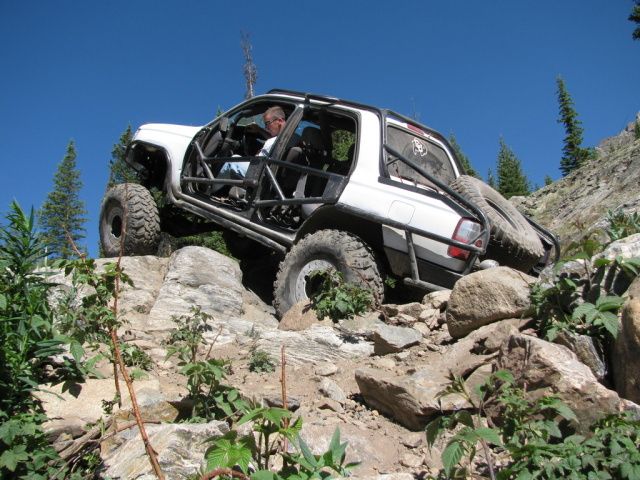
Then it was my turn…
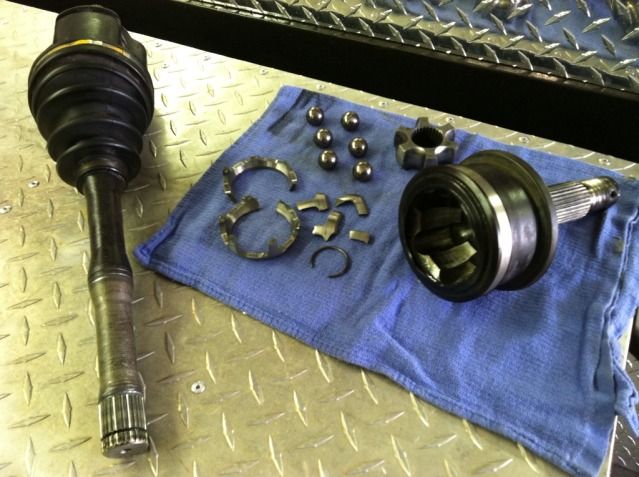
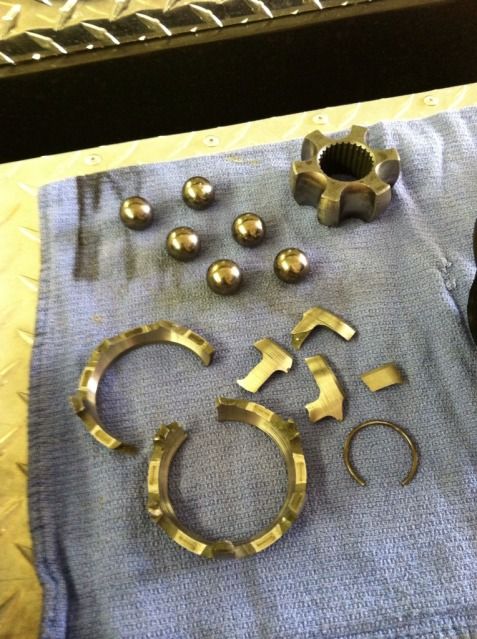
I knew I was in over my head; it was taking the built rigs some time to get through and a few of them had to winch. Also, the rig in front of me flipped one of the boulders up into line and made it even rougher (the boulder under the rocker panel of the red Rubicon). If it wasn’t for that stupid boulder I think I would have made it, or at least been in good position to winch. I made it through the creek without an issue, but then I hit that nasty spot right after the creek. I didn’t have the clearance and the only line I could take was far right; there was a two-foot under cut slab and in the process of climbing it I blew up my passenger side CV joint.
Aaron was taking GoPro video, but the camera was only set to still shots. Here are a couple of the pictures.
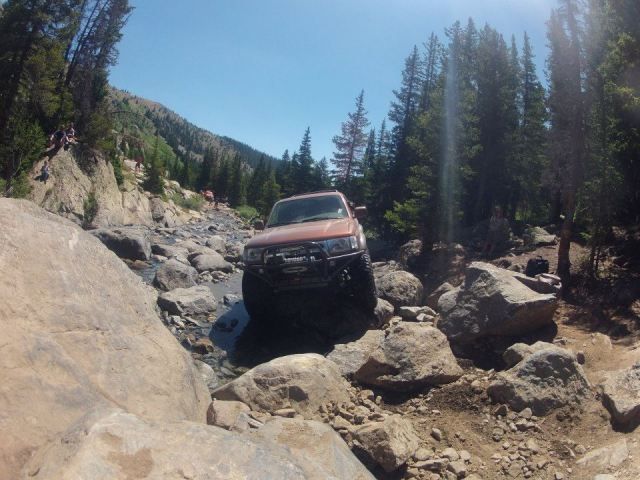
07-05-2012, 08:34 PM
#626
Registered User
Thread Starter
Join Date: May 2007
Location: Summit County, Colorado
Posts: 1,441
Likes: 0
Received 0 Likes
on
0 Posts
I backed out of the creek and found a nice level, shady spot to change out the CV. Aaron stayed to help, and we swapped it out in about 30-45 minutes; most of that was unloading all the tools/spare, talking about random crap and fighting with the Hi-Lift jack. I wasn’t in a hurry since I was blocked in, and I was waiting for the rest of the group to come back down. I bet I could swap one out in around 20 minutes (or less) if I needed to.
We grilled some brats and ate lunch while waiting for the groups behind us to get through, after the crowds cleared out Aaron decided to play around in the creek and his good karma was repaid. He ran the creek the smoothest I saw all day, first try, and I got it on video! I’ll post it up once I get a chance to download it to Youtube.
We grilled some brats and ate lunch while waiting for the groups behind us to get through, after the crowds cleared out Aaron decided to play around in the creek and his good karma was repaid. He ran the creek the smoothest I saw all day, first try, and I got it on video! I’ll post it up once I get a chance to download it to Youtube.
 07-06-2012, 07:06 AM
#628
Registered User
I backed out of the creek and found a nice level, shady spot to change out the CV. Aaron stayed to help, and we swapped it out in about 30-45 minutes; most of that was unloading all the tools/spare, talking about random crap and fighting with the Hi-Lift jack. I wasn’t in a hurry since I was blocked in, and I was waiting for the rest of the group to come back down. I bet I could swap one out in around 20 minutes (or less) if I needed to.

Last edited by sevenphoenix; 07-06-2012 at 07:31 AM.
07-09-2012, 09:05 PM
#629
Registered User
Join Date: Jul 2008
Location: ogden, utah
Posts: 46
Likes: 0
Received 0 Likes
on
0 Posts
i really like how you installed that light in the back door. my question is. how did you install the light? did you run wires from the battery or did you do it from the dome light in the back?
 07-13-2012, 05:12 PM
#632
Registered User
Thread Starter
Join Date: May 2007
Location: Summit County, Colorado
Posts: 1,441
Likes: 0
Received 0 Likes
on
0 Posts
Nothing like a trail fix to encourage efficiency! I'm pretty sure i can tear down and rebuild that front axle/trunion bearing scenario in about 1/10th the time it took at last years Jambo now that i've done it about 5 times....not that i need trunion bearings anymore....
Why have you been going through so many trunion bearings? I've only gone through one the whole life of the Green 4Runner and Turbo 4Runner. Did you get the TG eliminator kit or something else?
Thanks man!
It does not get that hot up here, we peak out in the mid 80's and I would rather have the windows down than use the A/C (unless I'm down in Denver or something). I did use it going over Shrine Pass and up Homestake Road, it was crazy dusty and I din't feel like choking on that crap the rest of the trip.
07-13-2012, 05:18 PM
#633
Registered User
Thread Starter
Join Date: May 2007
Location: Summit County, Colorado
Posts: 1,441
Likes: 0
Received 0 Likes
on
0 Posts
And here are a couple pictures of the broken CV
And the video of it breaking, you can hear it snap at 2:18
http://youtu.be/0pJfAkiTFp0
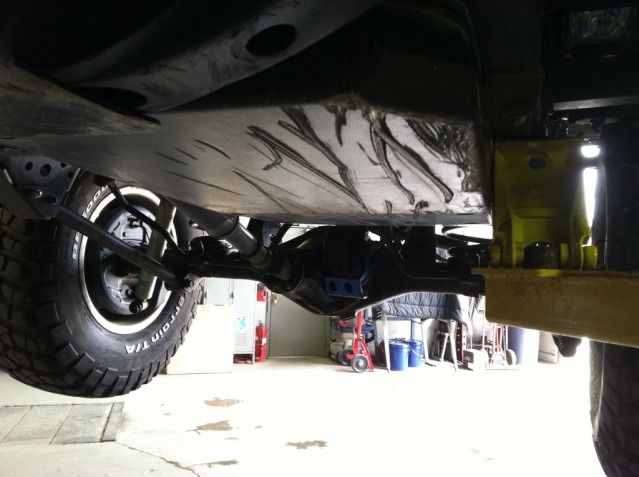
After I run a harder trail and get home, I will spend a few minutes afterwards on a creeper (or throw it on the lift) looking for damage and weak links in the rig. This is my daily driver and it needs to be ready for anything, spending a few minutes looking for loose and damaged parts goes a long ways.
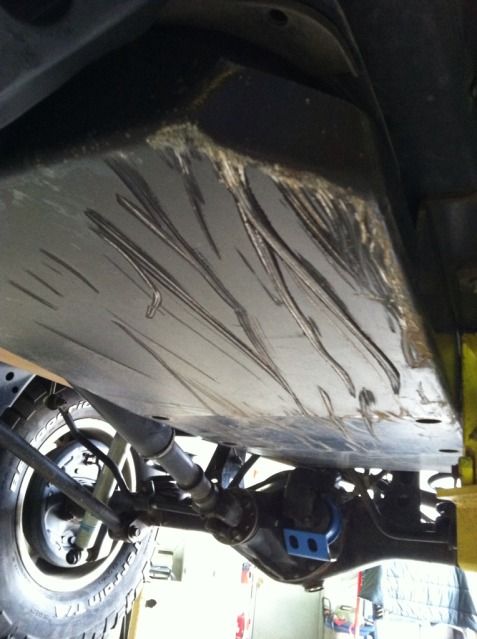
First, I want to say thanks to Gerdo and his gas tank skid plate, Lil' Skip's Offroad . That thing took a beating and didn’t budge! That’s not just little scratches in the picture, it’s deep gouges and it still did not deform or bend. A stock tank skid plate/tank would be trash, even my Budbuilt skid plates deformed and they only got hit a couple times. Awesome product!
And the video of it breaking, you can hear it snap at 2:18
http://youtu.be/0pJfAkiTFp0
After I run a harder trail and get home, I will spend a few minutes afterwards on a creeper (or throw it on the lift) looking for damage and weak links in the rig. This is my daily driver and it needs to be ready for anything, spending a few minutes looking for loose and damaged parts goes a long ways.
First, I want to say thanks to Gerdo and his gas tank skid plate, Lil' Skip's Offroad . That thing took a beating and didn’t budge! That’s not just little scratches in the picture, it’s deep gouges and it still did not deform or bend. A stock tank skid plate/tank would be trash, even my Budbuilt skid plates deformed and they only got hit a couple times. Awesome product!
Last edited by DIRTCO; 07-13-2012 at 05:31 PM.
07-13-2012, 05:19 PM
#634
Registered User
Thread Starter
Join Date: May 2007
Location: Summit County, Colorado
Posts: 1,441
Likes: 0
Received 0 Likes
on
0 Posts
While under the 4Runner I noticed that I bent one of the rear shock bushing washers, this collapses the bushing and chafes against the shock itself as it moves through the normal range of suspension travel. This is the third one I have bent up, so I needed to come up with a solution.
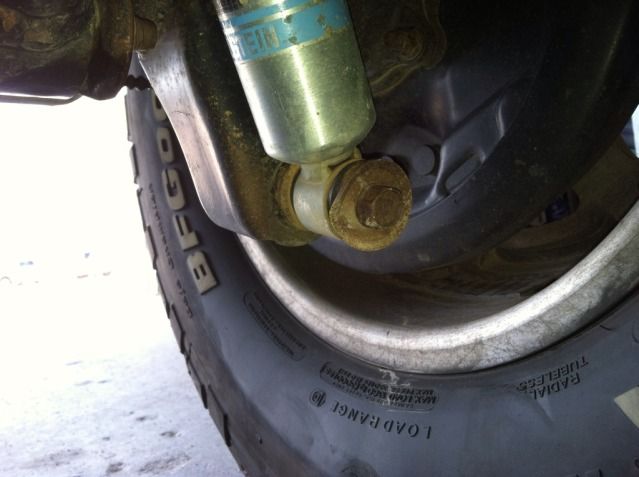

I looked through my scrap metal tote and found a small section of 1.25” .120 wall DOM. I cut a ˝” section and welded it to the stock washer. Not only is it not going to bend anymore, but it also protects the bolt from getting chewed up, gives the shock a little more room between it and the rocks, and there’s enough material to grind against some rocks for a while without any issue’s.
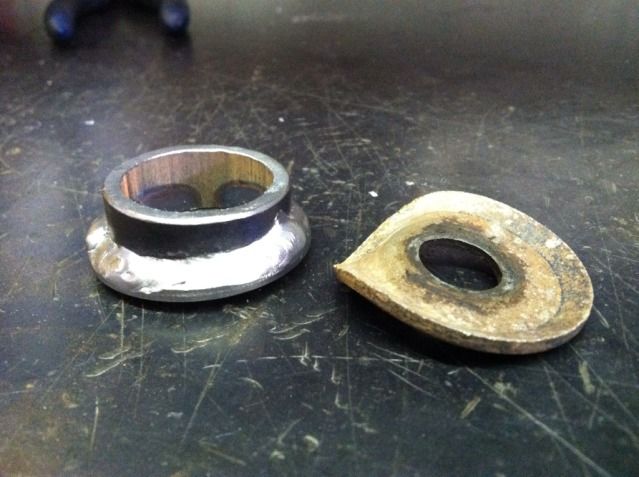
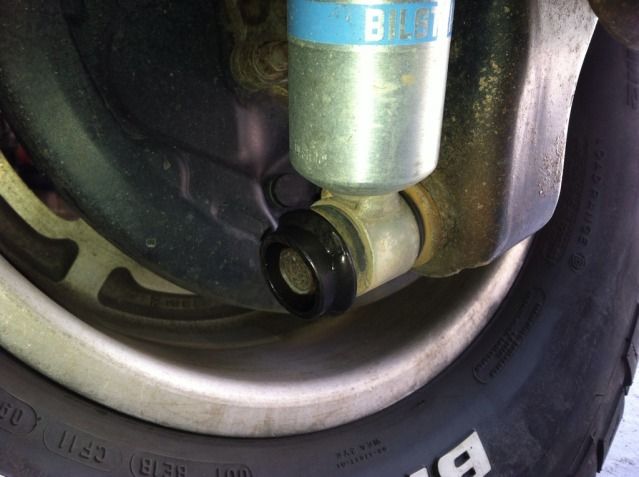
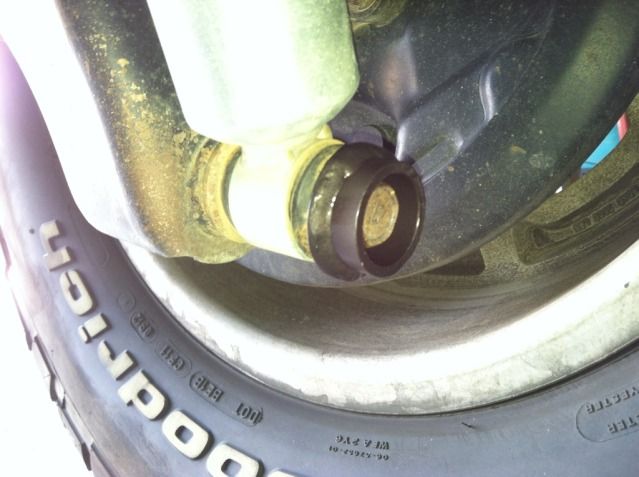
I looked through my scrap metal tote and found a small section of 1.25” .120 wall DOM. I cut a ˝” section and welded it to the stock washer. Not only is it not going to bend anymore, but it also protects the bolt from getting chewed up, gives the shock a little more room between it and the rocks, and there’s enough material to grind against some rocks for a while without any issue’s.
07-13-2012, 05:23 PM
#635
Registered User
Thread Starter
Join Date: May 2007
Location: Summit County, Colorado
Posts: 1,441
Likes: 0
Received 0 Likes
on
0 Posts
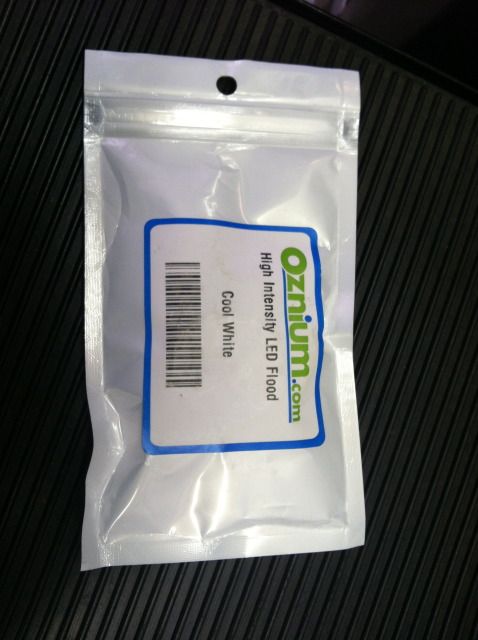
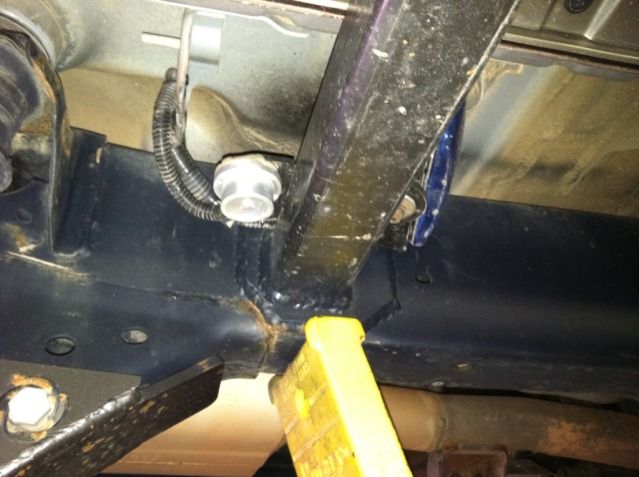
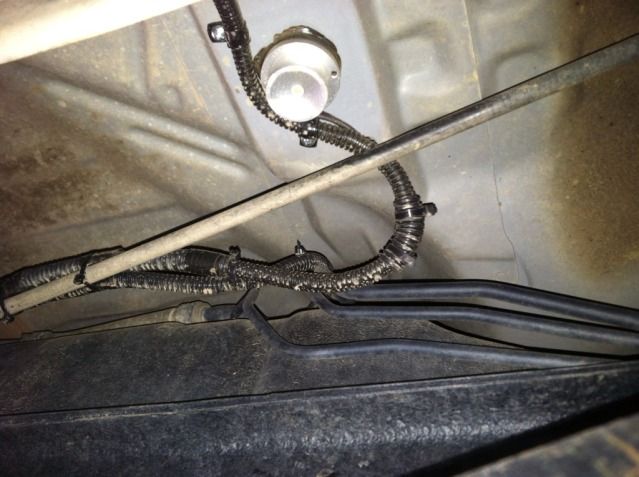
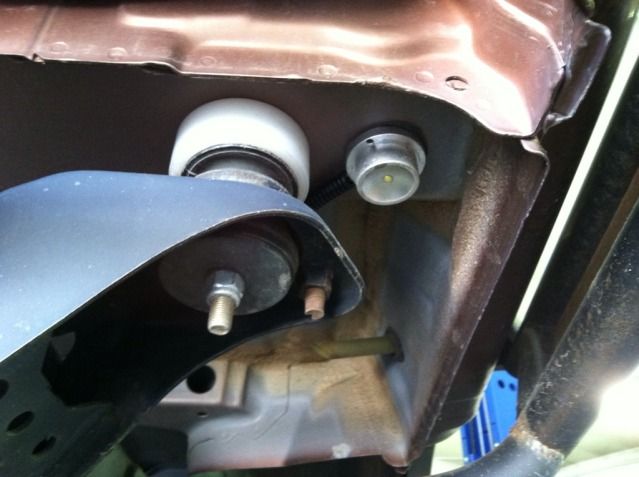
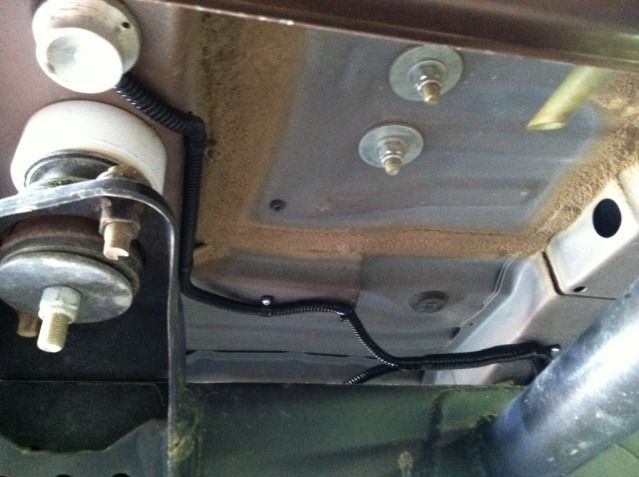
I also started working on my rock lights, and wiring the auxiliary reverse lights. I’ve found that rock lights are not just nice for wheeling in the rocks at night; but also for camping, recovery, airing up, and trail repairs.
I used two different styles of lights; the first are Oznium waterproof LED floodlights, they are small but very bright for the size!
High-Intensity LED Flood Light
Those lights are awesome, but I felt that I wanted some more light output off to the sides of the 4Runner too. I bought some cheap Autozone fog lights for the job and I silicone the hell out of them to make them waterproof. I really don’t see them lasting very long but I needed something there to start the wiring process; I plan on upgrading them to something better, and higher quality in future.
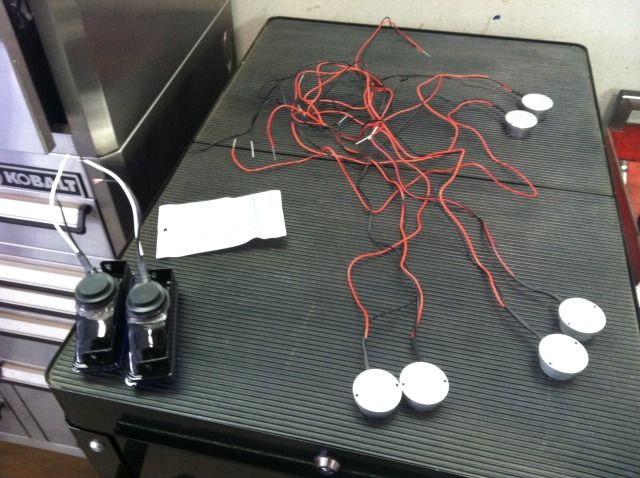
I mounted the actual fog lights on the rear leg of the slider, and I added the LED light to shine some light on the rear tires.
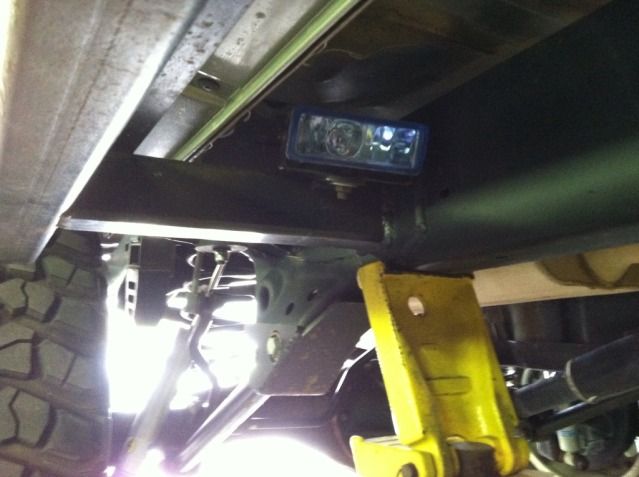
I decided to add a light right under the middle of the 4Runner (under the driveshaft).

And one under the middle of the rear cargo area, this will be nice for unloading/stashing camping gear. The two other lights are my auxiliary reverse lights.
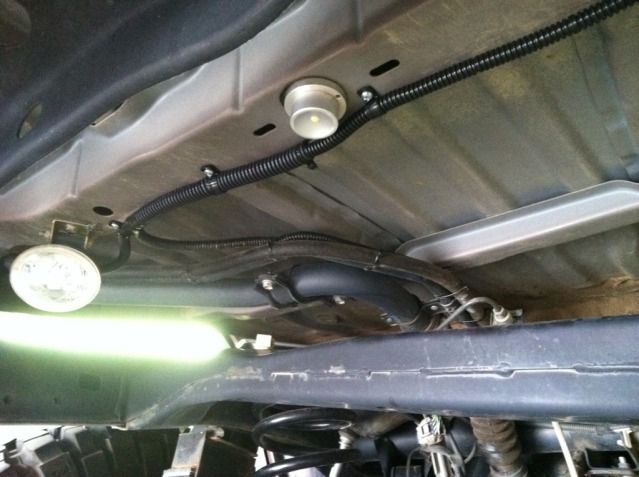
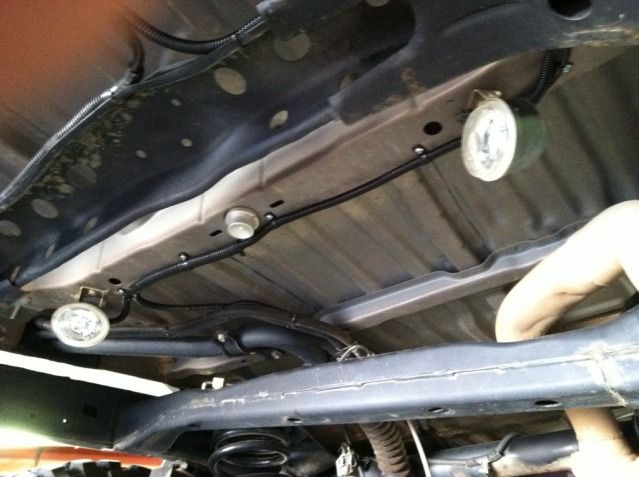
And, I have lights on the rear corners of the 4Runner, for spotting rocks and tire placement. That’s as far as I got, I still to run wiring to the trailer plug (Yes, the trailer has rock lights and a reverse light ) and run the wiring into the cab where I can complete the wiring.
I used two different styles of lights; the first are Oznium waterproof LED floodlights, they are small but very bright for the size!
High-Intensity LED Flood Light
Those lights are awesome, but I felt that I wanted some more light output off to the sides of the 4Runner too. I bought some cheap Autozone fog lights for the job and I silicone the hell out of them to make them waterproof. I really don’t see them lasting very long but I needed something there to start the wiring process; I plan on upgrading them to something better, and higher quality in future.
I mounted the actual fog lights on the rear leg of the slider, and I added the LED light to shine some light on the rear tires.
I decided to add a light right under the middle of the 4Runner (under the driveshaft).
And one under the middle of the rear cargo area, this will be nice for unloading/stashing camping gear. The two other lights are my auxiliary reverse lights.
And, I have lights on the rear corners of the 4Runner, for spotting rocks and tire placement. That’s as far as I got, I still to run wiring to the trailer plug (Yes, the trailer has rock lights and a reverse light
) and run the wiring into the cab where I can complete the wiring.
07-13-2012, 05:37 PM
#636
great idea on the shock bolt protector. should start selling those 
funny that you are doing rock lights as a buddy of mine at work today gave me 6 old fog lights free, two bulbs burnt out but i can replace the bulbs. looks like ill be silicone mine as well, another good tip
funny that you are doing rock lights as a buddy of mine at work today gave me 6 old fog lights free, two bulbs burnt out but i can replace the bulbs. looks like ill be silicone mine as well, another good tip
07-13-2012, 08:55 PM
#637
Registered User
very cool idea for the bolts mine have sufferd the same fate, nice install on the lights as well I need to get some picked up myself just to many things ahead on the list. sorry to hear abot the broken shaft but atleast it was an easy fix. still loving you runner man.
07-14-2012, 05:55 AM
#638
Registered User
I only imploded the one trunion bearing at last years jambo then I put on the TG eliminator kit. The multiple times re-assembling that axle were for other installs, and it seems once or twice just for practice runs to re-adjust things in there.
07-22-2012, 07:09 AM
#639
Registered User

Join Date: Jul 2008
Location: Florida soon to be England
Posts: 28
Likes: 0
Received 0 Likes
on
0 Posts
Great Build!
Great Job Dirt!
Just like everyone else I loved reading the build, it inspired and motivated me.
You should prob change your name to SnowCo.
Can you pm me the specs/measurements for your sliders. I want to build them myself (just bought my first mig) and I really liked the way your turned out. I found a metal supply here in town and I am thinking it will cost me about $70-$80 buck to build a pair of sliders. At that price I could mess up the first 2 sets and still spend less than what some of the companies are charging.
Just like everyone else I loved reading the build, it inspired and motivated me.
You should prob change your name to SnowCo.
Can you pm me the specs/measurements for your sliders. I want to build them myself (just bought my first mig
) and I really liked the way your turned out. I found a metal supply here in town and I am thinking it will cost me about $70-$80 buck to build a pair of sliders. At that price I could mess up the first 2 sets and still spend less than what some of the companies are charging.
07-22-2012, 11:18 AM
#640
Wow, that was my "KICK ARSE 3RD GEN and trailer" FIX for the day! X12 on the Washer trick... Very good idea... And love the rock lights additions... Gonna be like Armageddon under there, right? "Turn away, put on these glasses and don't look into the light!" 
Sweet 'on the trail' CV swap! How many is that now? Bout to have to change out at least the boots on my 87, SOON!.... Tore it last trip up to the Angeles Crest/Back side.
Thanks for the link to the skid plate..... Curious if they do earlier ones. Mine has taken a pretty intense beating and never caved...(87 4Runner Gas Tank skid)... but I'VE SEEN the carnage they can take on! All that just reminds me that I need LOTS more armor besides that! haha
haha
Sweet 'on the trail' CV swap! How many is that now? Bout to have to change out at least the boots on my 87, SOON!.... Tore it last trip up to the Angeles Crest/Back side.
Thanks for the link to the skid plate..... Curious if they do earlier ones. Mine has taken a pretty intense beating and never caved...(87 4Runner Gas Tank skid)... but I'VE SEEN the carnage they can take on! All that just reminds me that I need LOTS more armor besides that!
haha


