

 Feb 9, 2016, 09:09 AM
Last edit by: IB Advertising
See related guides and technical advice from our community experts:
Browse all: Brake Guides
- Toyota 4Runner 1984-1995 How to Replace Brake Fluid
Step by step instructions for do-it-yourself repairs
Browse all: Brake Guides

One man brake bleeding....DONE!
Jul 14, 2008 | 02:48 AM
#1
Thread Starter
Registered User


Joined: Dec 2007
Posts: 582
Likes: 20
From: PNW
One man brake bleeding....DONE!
This post explains how a brake system flush was possible with one person - YOURSELF!  This post is also a result of the numerous posts I've read here on yotatech that have greatly helped me.
The brake bleed kit I got was a universal kit, purchased from Advance Auto Parts (Autozone and Pep Boys also sell similar-priced kits), very cheap compared to other more expensive, but convenient options. The master cylinder for the brake fluid is the very light-green reservoir on the driver's side of the engine comparment. Good condition brake fluid is transparent, old is brown-colored. I used a piece of wood, enough length to nudge between the driver seat and the pedal, scrap wood purchased off Home Depot (they were on a cart indicating so...like a clearance section @ a store; had them cut it in half for free, too).
Tools used:
-combination wrench -plastic container to empty old brake fluid into
-rags -brake bleed kit
-two 12oz bottles DOT3 brake fluid (third bottle in case) or one 32 oz bottle
-piece of wood -funnel if needed
No need to jack up trucks. Use the box end of the wrench or if you want take a 10mm socket & ratchet to break it loose first. But a wrench is only possible while you run the tubing from the bleeder valve. When using the piece of wood, use your driver seat adjustment towards/away from dashboard to change the amount of force to the pedal. There's a particular order for which wheel to start with--driver rear, passenger rear, passenger front, driver front. On some vehicles there's also what's called the LSPV valve. That is bled last. I didn't have one.
Steps:
1) remove bleeder valve cover, will re-use
2) break bleeder nut loose, but do not loosen further (fluid will leak out)
3) attach adapter fitting supplied with kit to bleeder valve snugly, rag underneath to catch any leaks/spills (should be none or very little)
4) other end of adapter goes to tubing-->bottle
5) with magnet attached to bottle, post on frame, etc. that allows bottle to be higher than bleeder valve
6) apply pressure with wood to pedal and hold in place with driver seat (adjust as necessary)
7) loosen bleeder nut 1-2 turns
8) apply steady slow pressure to pedal using wood and hold briefly (do not push pedal all the way to the floor, can damage the master cylinder seals)
9) slowly release pressure to pedal but do not allow pedal to come back up fully, repeat 8-9 til bottle is 3/4 full AND master cylinder has at least enough fluid--I don't go below the MIN level just to be safe; never let MC run empty!
10) hold pedal pressure with wood and secure with driver seat (adjust as necessary)
11) tighten bleeder nut, fluid should not continue draining from valve, but do not overtighten
12) release pressure off pedal
13) top off master cylinder with new fluid, do not spill! esp on auto paint, use funnel if needed
14) unscrew bottle and empty old fluid into plastic container, but leave small amount in bottle to maintain air lock; do not have to disturb magnet, tubing placement; re-attach bottle
15) repeat 6-14 til fluid runs clear or relatively to, tighten bleeder nut
16) replace valve cover; when removing adapter from bleeder valve, first empty out bottle, then position bottle below tubing otherwise fluid in tubing will spill out
17) move on to next wheel in order
Top off MC as needed before it runs empty during bleeding--you do this throughout. Make sure you have enough new fluid to do the final topoff when you're done with bleeding. Avoid prolonged exposure of fluid to open air--deteriorates quality of fluid properties. Wear gloves too, don't get the fluid on you and wash it off with soap if you do. Make sure bleeder nuts are all tight, valve covers back on.
Final test is to start engine, let idle, press and hold brake pedal, turn engine off, continue holding pedal down for 15-20 secs. If no sinking to floor or sponginess, system is airtight. Check bleeder valve nuts for leaks.
Costs:
Brake fluid from Walmart - $2.60 per bottle
One-man brake bleed kit - $7.24
Scrap wood - $1.00
Time spent:
5 hrs (1st time attempt)
Advanced Auto even took back the used brake fluid for disposal. Cool.
helpful links:
http://www.4x4wire.com/toyota/mainte...leedingbrakes/
http://www.corral.net/tech/maintenance/brakebleed.html
https://www.yotatech.com/forums/f116...brakes-145334/
...and several other yota posts found via 'brake bleeding' search strings
This site
This post is also a result of the numerous posts I've read here on yotatech that have greatly helped me. The brake bleed kit I got was a universal kit, purchased from Advance Auto Parts (Autozone and Pep Boys also sell similar-priced kits), very cheap compared to other more expensive, but convenient options. The master cylinder for the brake fluid is the very light-green reservoir on the driver's side of the engine comparment. Good condition brake fluid is transparent, old is brown-colored. I used a piece of wood, enough length to nudge between the driver seat and the pedal, scrap wood purchased off Home Depot (they were on a cart indicating so...like a clearance section @ a store; had them cut it in half for free, too).
Tools used:
-combination wrench -plastic container to empty old brake fluid into
-rags -brake bleed kit
-two 12oz bottles DOT3 brake fluid (third bottle in case) or one 32 oz bottle
-piece of wood -funnel if needed
No need to jack up trucks. Use the box end of the wrench or if you want take a 10mm socket & ratchet to break it loose first. But a wrench is only possible while you run the tubing from the bleeder valve. When using the piece of wood, use your driver seat adjustment towards/away from dashboard to change the amount of force to the pedal. There's a particular order for which wheel to start with--driver rear, passenger rear, passenger front, driver front. On some vehicles there's also what's called the LSPV valve. That is bled last. I didn't have one.
Steps:
1) remove bleeder valve cover, will re-use
2) break bleeder nut loose, but do not loosen further (fluid will leak out)
3) attach adapter fitting supplied with kit to bleeder valve snugly, rag underneath to catch any leaks/spills (should be none or very little)
4) other end of adapter goes to tubing-->bottle
5) with magnet attached to bottle, post on frame, etc. that allows bottle to be higher than bleeder valve
6) apply pressure with wood to pedal and hold in place with driver seat (adjust as necessary)
7) loosen bleeder nut 1-2 turns
8) apply steady slow pressure to pedal using wood and hold briefly (do not push pedal all the way to the floor, can damage the master cylinder seals)
9) slowly release pressure to pedal but do not allow pedal to come back up fully, repeat 8-9 til bottle is 3/4 full AND master cylinder has at least enough fluid--I don't go below the MIN level just to be safe; never let MC run empty!
10) hold pedal pressure with wood and secure with driver seat (adjust as necessary)
11) tighten bleeder nut, fluid should not continue draining from valve, but do not overtighten
12) release pressure off pedal
13) top off master cylinder with new fluid, do not spill! esp on auto paint, use funnel if needed
14) unscrew bottle and empty old fluid into plastic container, but leave small amount in bottle to maintain air lock; do not have to disturb magnet, tubing placement; re-attach bottle
15) repeat 6-14 til fluid runs clear or relatively to, tighten bleeder nut
16) replace valve cover; when removing adapter from bleeder valve, first empty out bottle, then position bottle below tubing otherwise fluid in tubing will spill out
17) move on to next wheel in order
Top off MC as needed before it runs empty during bleeding--you do this throughout. Make sure you have enough new fluid to do the final topoff when you're done with bleeding. Avoid prolonged exposure of fluid to open air--deteriorates quality of fluid properties. Wear gloves too, don't get the fluid on you and wash it off with soap if you do. Make sure bleeder nuts are all tight, valve covers back on.
Final test is to start engine, let idle, press and hold brake pedal, turn engine off, continue holding pedal down for 15-20 secs. If no sinking to floor or sponginess, system is airtight. Check bleeder valve nuts for leaks.
Costs:
Brake fluid from Walmart - $2.60 per bottle
One-man brake bleed kit - $7.24
Scrap wood - $1.00
Time spent:
5 hrs (1st time attempt)
Advanced Auto even took back the used brake fluid for disposal. Cool.
helpful links:
http://www.4x4wire.com/toyota/mainte...leedingbrakes/
http://www.corral.net/tech/maintenance/brakebleed.html
https://www.yotatech.com/forums/f116...brakes-145334/
...and several other yota posts found via 'brake bleeding' search strings
This site
 It took you 5 hours to bleed the brakes?
Jul 14, 2008 | 06:29 AM
It took you 5 hours to bleed the brakes?
Jul 14, 2008 | 06:29 AM
#4
Registered User
Joined: May 2006
Posts: 2,377
Likes: 2
From: St. Loser, Misery

Trending Topics
Jul 14, 2008 | 08:04 AM
#8
Registered User
Joined: Feb 2006
Posts: 1,485
Likes: 1
From: Austin Texas
All that seems a little excessive--what about the old bottle and tube over the bleeder screw trick.
$1.49--bottle of Gatorade
$1.00--Hose that will slip over and attach to bleeder screw
$~3.00-10.00--Brake Fluid
1. Drink Gatorade--mm good
2. Clean out bottle and dry
3. Fill about 1/4th with new Brake Fluid
4. Loosen the Bleeder screws just enough to get the juice flowing (just enough)
5. Put hose over nipple and the other end into the Bottle
6. Pump Brakes (watch Resevior level)
7. Tighten nipple and repeat for the other wheels (follow the proper sequence)
30 minutes
Jul 14, 2008 | 08:14 AM
#9
Registered User
Joined: May 2006
Posts: 2,377
Likes: 2
From: St. Loser, Misery
All that seems a little excessive--what about the old bottle and tube over the bleeder screw trick.
$1.49--bottle of Gatorade
$1.00--Hose that will slip over and attach to bleeder screw
$~3.00-10.00--Brake Fluid
1. Drink Gatorade--mm good
2. Clean out bottle and dry
3. Fill about 1/4th with new Brake Fluid
4. Loosen the Bleeder screws just enough to get the juice flowing (just enough)
5. Put hose over nipple and the other end into the Bottle
6. Pump Brakes (watch Resevior level)
7. Tighten nipple and repeat for the other wheels (follow the proper sequence)
30 minutes
$1.49--bottle of Gatorade
$1.00--Hose that will slip over and attach to bleeder screw
$~3.00-10.00--Brake Fluid
1. Drink Gatorade--mm good
2. Clean out bottle and dry
3. Fill about 1/4th with new Brake Fluid
4. Loosen the Bleeder screws just enough to get the juice flowing (just enough)
5. Put hose over nipple and the other end into the Bottle
6. Pump Brakes (watch Resevior level)
7. Tighten nipple and repeat for the other wheels (follow the proper sequence)
30 minutes

 Jul 14, 2008 | 04:29 PM
#12
Registered User
Joined: Mar 2005
Posts: 1,756
Likes: 7
From: New Brunswick, Canada
First of all, good job doing the work yourself. Much better to learn how to do things yourself instead of always bringing vehicles into shops to get simple jobs done. That being said, check out my post here for an easier and somewhat more efficient way to bleed your brakes when you're alone. It will take approx 20 minutes.
Jul 16, 2008 | 01:57 PM
#13
Registered User
Joined: Apr 2008
Posts: 47
Likes: 0
First of all, good job doing the work yourself. Much better to learn how to do things yourself instead of always bringing vehicles into shops to get simple jobs done. That being said, check out my post here for an easier and somewhat more efficient way to bleed your brakes when you're alone. It will take approx 20 minutes.
Rick
Jan 2, 2009 | 03:58 PM
#14
Registered User
Joined: May 2008
Posts: 3,277
Likes: 23
From: way way nor cal
#3 says - " fill about 1/4 with new Brake Fluid.
Does this mean to fill the Gatorade bottle with fluid or to fill the Master with fluid?
THanks
Does this mean to fill the Gatorade bottle with fluid or to fill the Master with fluid?
THanks
All that seems a little excessive--what about the old bottle and tube over the bleeder screw trick.
$1.49--bottle of Gatorade
$1.00--Hose that will slip over and attach to bleeder screw
$~3.00-10.00--Brake Fluid
1. Drink Gatorade--mm good
2. Clean out bottle and dry
3. Fill about 1/4th with new Brake Fluid
4. Loosen the Bleeder screws just enough to get the juice flowing (just enough)
5. Put hose over nipple and the other end into the Bottle
6. Pump Brakes (watch Resevior level)
7. Tighten nipple and repeat for the other wheels (follow the proper sequence)
30 minutes
$1.49--bottle of Gatorade
$1.00--Hose that will slip over and attach to bleeder screw
$~3.00-10.00--Brake Fluid
1. Drink Gatorade--mm good
2. Clean out bottle and dry
3. Fill about 1/4th with new Brake Fluid
4. Loosen the Bleeder screws just enough to get the juice flowing (just enough)
5. Put hose over nipple and the other end into the Bottle
6. Pump Brakes (watch Resevior level)
7. Tighten nipple and repeat for the other wheels (follow the proper sequence)
30 minutes
 Jan 2, 2009 | 06:20 PM
#16
toyospearo, hross is talking about putting brake fluid in the gatorade bottle. thats how i bled my brakes the last time i did it. works real well, its cheap and easy, in my book thats a win.
75w90- good write up
75w90- good write up
Jan 3, 2009 | 10:10 AM
#17

Registered User
Joined: Dec 2007
Posts: 434
Likes: 1
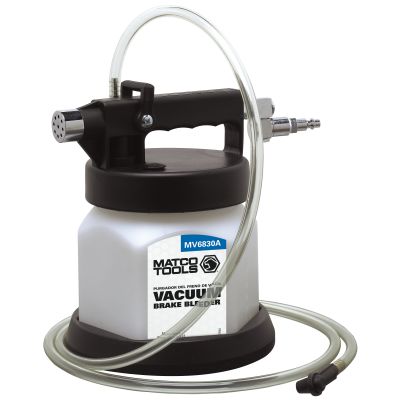
I use one of these..Works great.
http://www.amazon.com/gp/product/B000BPFB3A
http://www.amazon.com/gp/product/B000BPFB3A
Jan 3, 2009 | 11:31 AM
#18
Registered User
Joined: Aug 2007
Posts: 1,133
Likes: 7
From: PDX
I don't know about the rest of you, but I'm lazy. Gravity bleed FTW
1- connect one end of tube to bleeder and stick the other end into a drain pan
2- top off master cylinder reservoir and leave the cap loose
3- crack open bleeder
4- drink beer, smoke a cigarette, work on something else for a few minutes
5- look at fluid coming out of tube, is it clear yet?
6- another swig of beer
7- close bleeder, recheck master cylinder reservoir
8- repeat on other brake bleed screws
I've also use this whenever I replace calipers or wheel cylinders and it gets all the air out
Jan 3, 2009 | 12:15 PM
#19

Registered User
Joined: Oct 2008
Posts: 74
Likes: 0
From: Parker, Co
I did the manual brake thing for years. Now I use that device which creates pressure in the brake reservoir. It not only changes the fluid (which should be done religiously) but also bleeds the brakes.
Of course, you can make it hard on yourself or spend $50 for life. Your call.
Of course, you can make it hard on yourself or spend $50 for life. Your call.
Oct 10, 2016 | 01:30 PM
#20
Thread Starter
Registered User
Joined: Dec 2007
Posts: 582
Likes: 20
From: PNW
Gravity bleed is how I sometimes do it. Still do it solo with the tubing and pedal-seat block trick, but wonder how it took me that long back then. Just an overly cautious guy learning his way. Taking pictures and glossing over them adds time too. I've passed up more expensive ways of doing it. Call me cheap. I'd rather use that extra money elsewhere. Nice to see this sites still alive. It's helped me back then. I hope it's still a resource.
I did look at seeing if speed bleeders could be swapped in, but couldn't find any made for 13WL calipers from the autoparts store. Whatever. I'm fine as it is.
Thanks.
I did look at seeing if speed bleeders could be swapped in, but couldn't find any made for 13WL calipers from the autoparts store. Whatever. I'm fine as it is.
Thanks.


