Green Bast 4Runner 7MG-TE SAS build
 03-30-2014, 09:16 PM
#1
Registered User
Thread Starter
Join Date: Oct 2009
Location: sask
Posts: 91
Likes: 0
Received 0 Likes
on
0 Posts
Green Bast 4Runner 7MG-TE SAS build
Making this thread to follow the build of my trustworthy 1988 4runner.
I bought the truck for 700$ and installed a used transmission and away we went. Ive had the truck for 4 years now and she has treated me well. The ol' 22re has sure seen some things over its 450 000 km journey and it is time to put that old sewing machine to rest, and come out swinging.
The Build:
7MGTE swap
single T-case (for now)
SAS
RUF
chevy springs
5.29 gears
35's
Last edited by saskyrunner88; 03-30-2014 at 09:29 PM.

Trending Topics
04-06-2014, 09:24 PM
#11
Registered User
Thread Starter
Join Date: Oct 2009
Location: sask
Posts: 91
Likes: 0
Received 0 Likes
on
0 Posts
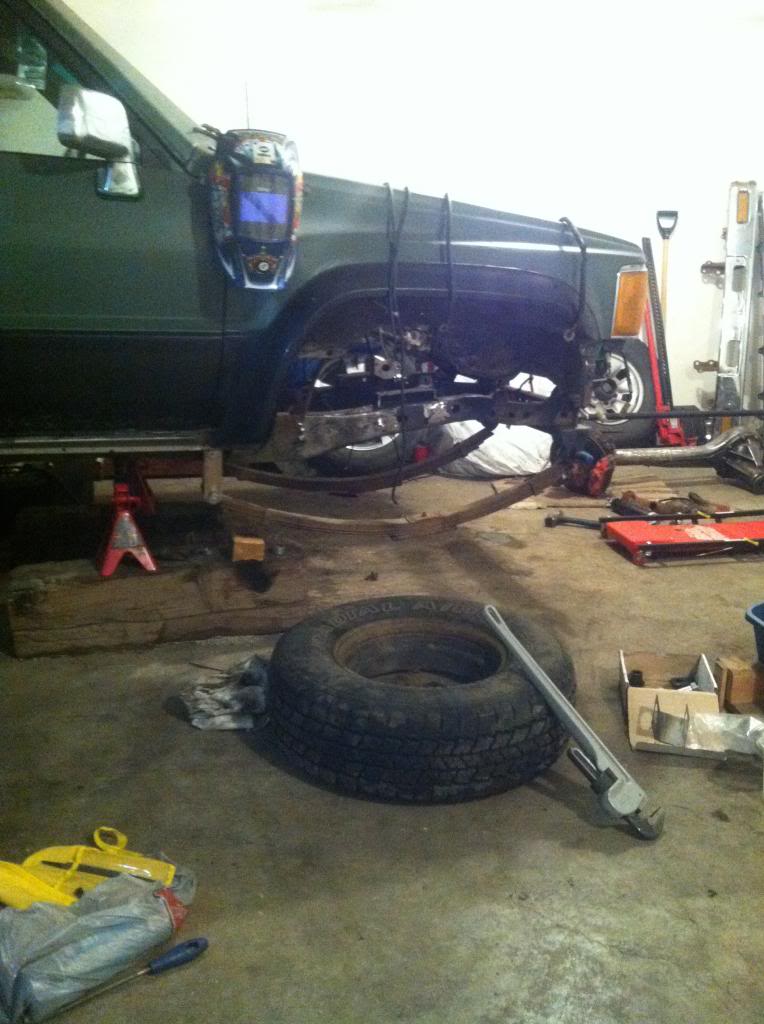
Ive got the front axle prepared just waiting on some parts to continue the SAS (Hangers ,Ubolts ect). Tranny is removed and I will pull the engine tomorrow
04-07-2014, 11:13 AM
#12
Registered User
iTrader: (1)
Join Date: Nov 2012
Location: Elko NV, at the foot of the Rubys
Posts: 358
Likes: 0
Received 0 Likes
on
0 Posts
Looking great. I always have liked the "while I am hear might as well get it all knocked out" approach. Very labor intensive, but worth every bit. Saves from having to go back and do it again.
 04-07-2014, 09:31 PM
#14
Registered User
Thread Starter
Join Date: Oct 2009
Location: sask
Posts: 91
Likes: 0
Received 0 Likes
on
0 Posts
With everything pulled you have such easy access to so much that would otherwise be a headache to do. Lets hope I don't have to go back for too much!
04-08-2014, 09:33 AM
#15
If I could make a suggestion, I would tack weld your front spring hanger in place ( just in case you need to move it later) once the engine and trans are in and weight is on the springs, you'll have a better idea if your shackle angle is good, then you can burn in the front spring hanger. I wish I'd done that on mine, my shackle angle isn't horrible, but I could have moved my hanger back a little and improved it, that is if I hadn't of burned it in already, lol.
Cool build, look forward to seeing more!
Last edited by rustED; 04-08-2014 at 09:41 AM.
 04-08-2014, 09:58 PM
#17
Registered User
Thread Starter
Join Date: Oct 2009
Location: sask
Posts: 91
Likes: 0
Received 0 Likes
on
0 Posts
I did like you, engine swap and SAS at the same time, like you said, having the engine/trans out makes it so much easier to clean up the frame rails and get all the ifs brackets ground down and to get the new springs and front axel mocked into place. The only draw back is without the weight of the engine on the front springs, its hard to tell if your front shackle angle is set up correctly.
If I could make a suggestion, I would tack weld your front spring hanger in place ( just in case you need to move it later) once the engine and trans are in and weight is on the springs, you'll have a better idea if your shackle angle is good, then you can burn in the front spring hanger. I wish I'd done that on mine, my shackle angle isn't horrible, but I could have moved my hanger back a little and improved it, that is if I hadn't of burned it in already, lol.
Cool build, look forward to seeing more!


