chukarhunt's 1992 "Jake" Pickup Build-up Thread
 04-19-2014, 09:27 AM
#61
Registered User
Thread Starter
iTrader: (1)
Join Date: Nov 2012
Location: Elko NV, at the foot of the Rubys
Posts: 358
Likes: 0
Received 0 Likes
on
0 Posts
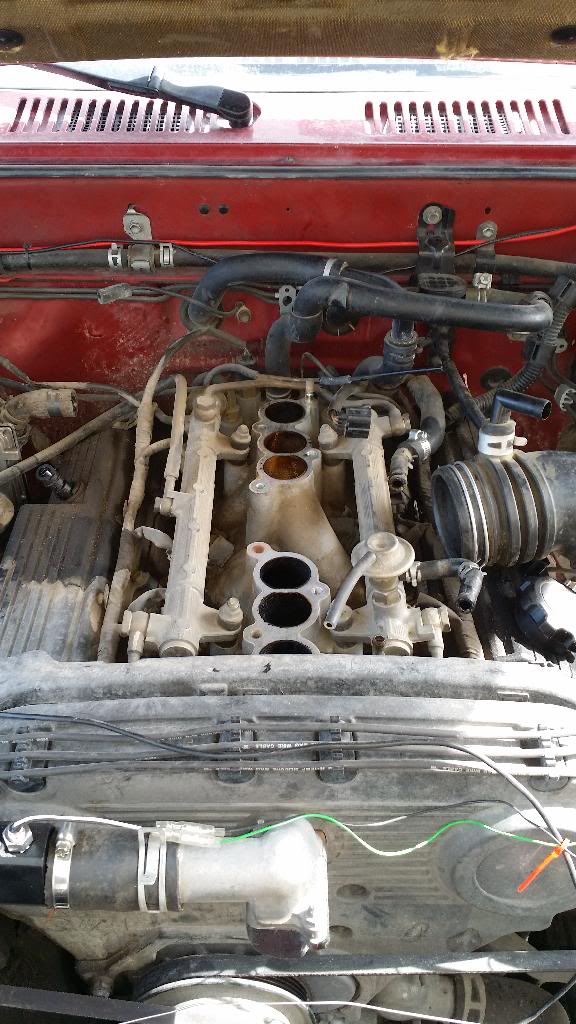
Upper intake plenum buildup
So, the chore for today, is to find a vacuum leak on the truck...
Can anybody say with me?
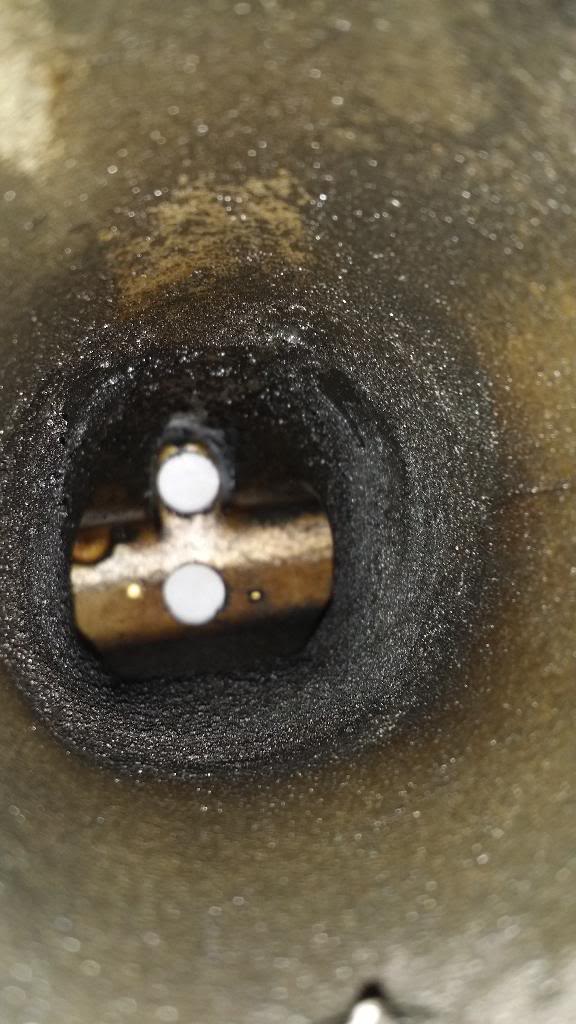
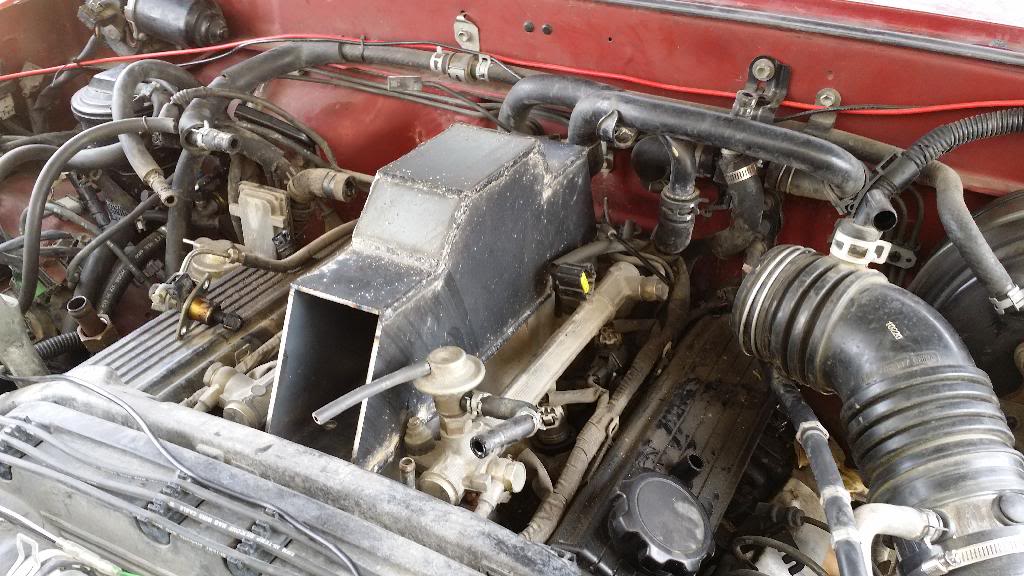
The rear three cylinders got cleaned by the seafoam when I sucked it in through the brake booster hose. I later learned that is not the way to do it, as it evident below:
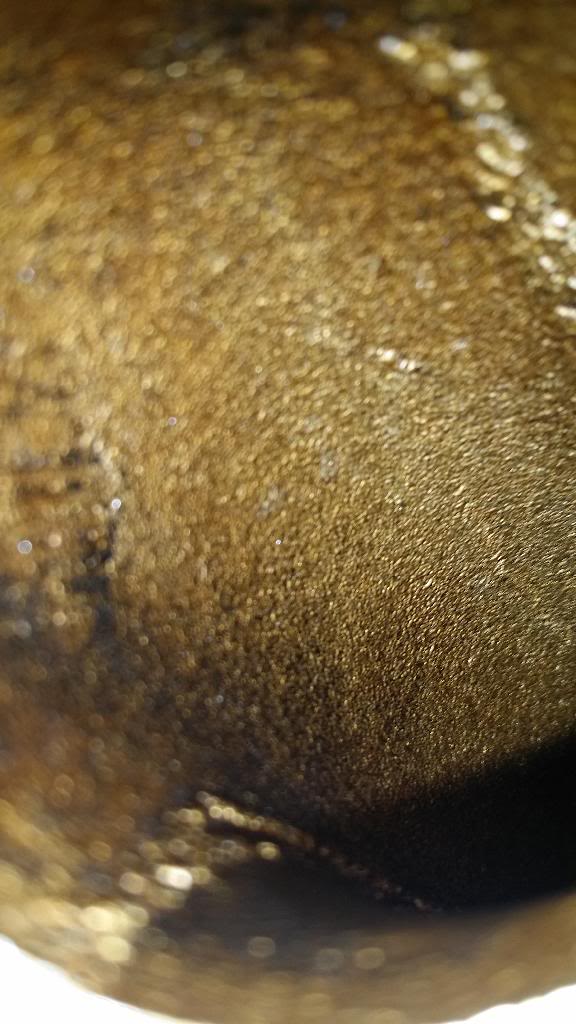
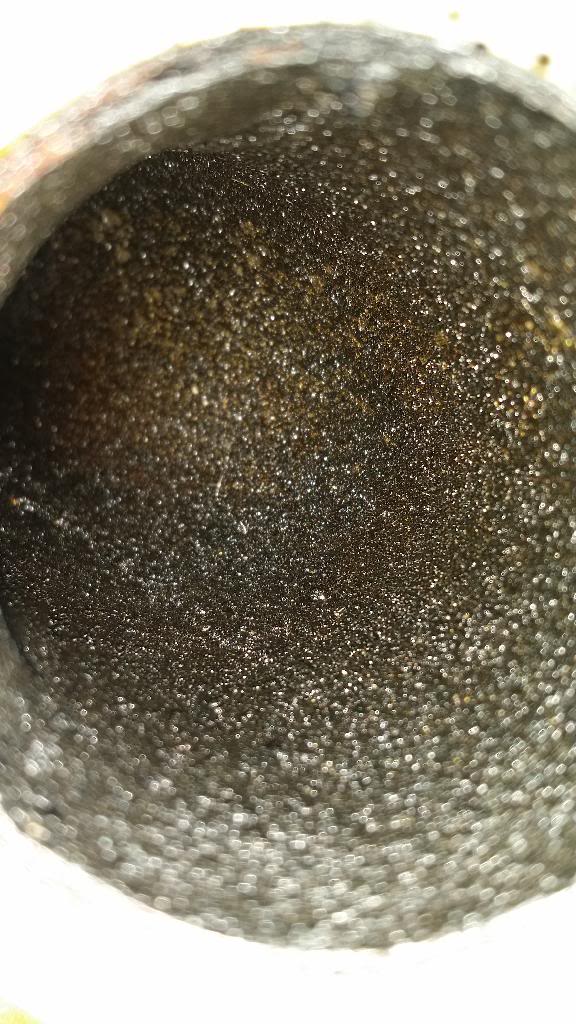
The front three cylinders along with the upper plenum are filthy. Remember, when doing seafoam, go through the throttle body.
This is not the only reason for pulling everything apart. something very unique is going to come along here... hopefully today...

Can anybody say
with me?
The rear three cylinders got cleaned by the seafoam when I sucked it in through the brake booster hose. I later learned that is not the way to do it, as it evident below:


The front three cylinders along with the upper plenum are filthy. Remember, when doing seafoam, go through the throttle body.
This is not the only reason for pulling everything apart. something very unique is going to come along here... hopefully today...
 04-19-2014, 12:07 PM
#62
I've had decent results with seafoam. But you are right with the way you induce it. Sometimes through the booster it does not get to everything. I have found that I get the best results from just taking the intake off and cleaning it out with a hotsy or power washer after soaking it.
04-20-2014, 10:45 AM
#63
Super Moderator
Staff
iTrader: (1)
Join Date: Aug 2008
Location: Anderson Missouri
Posts: 11,788
Likes: 0
Received 21 Likes
on
19 Posts
Seafoam helps but I too take mine apart and take it to the car wash. You will be suprised at the gunk that comes out. For the vacuum lines, I go by a couple of feet and change a piece at a time.
Chevy trucks from 29-72 were called Stovebolts as it looked like the bolts on alot of the motors were assembled with stovebolts. I am hoping to get to work on my 64 later this summer. http://stovebolt.com/ I have learned alot from Chevy Restore sites for restoring our Toyotas as well.
Chevy trucks from 29-72 were called Stovebolts as it looked like the bolts on alot of the motors were assembled with stovebolts. I am hoping to get to work on my 64 later this summer. http://stovebolt.com/ I have learned alot from Chevy Restore sites for restoring our Toyotas as well.
04-20-2014, 11:52 AM
#64
Registered User
Thread Starter
iTrader: (1)
Join Date: Nov 2012
Location: Elko NV, at the foot of the Rubys
Posts: 358
Likes: 0
Received 0 Likes
on
0 Posts
I've had decent results with seafoam. But you are right with the way you induce it. Sometimes through the booster it does not get to everything. I have found that I get the best results from just taking the intake off and cleaning it out with a hotsy or power washer after soaking it.
Seafoam helps but I too take mine apart and take it to the car wash. You will be suprised at the gunk that comes out. For the vacuum lines, I go by a couple of feet and change a piece at a time.
Chevy trucks from 29-72 were called Stovebolts as it looked like the bolts on alot of the motors were assembled with stovebolts. I am hoping to get to work on my 64 later this summer. http://stovebolt.com/ I have learned alot from Chevy Restore sites for restoring our Toyotas as well.
Chevy trucks from 29-72 were called Stovebolts as it looked like the bolts on alot of the motors were assembled with stovebolts. I am hoping to get to work on my 64 later this summer. http://stovebolt.com/ I have learned alot from Chevy Restore sites for restoring our Toyotas as well.
Thanks for the site link Terry! Already saved to my favorites. Looks like there is more than I need to know on there!
 04-20-2014, 11:56 AM
#65
Registered User
Thread Starter
iTrader: (1)
Join Date: Nov 2012
Location: Elko NV, at the foot of the Rubys
Posts: 358
Likes: 0
Received 0 Likes
on
0 Posts
Custom Upper Intake
So, you know that chore? the vacuum leak search/special project?
Well it lead to this...
Custom Upper intake anyone?
What do you all think? I want to hear your opinions, tech, ideas on how this will work. Throttle body is still bolted to the side in its original location due to hood clearance.
Thanks! Happy Easter!
Well it lead to this...
Custom Upper intake anyone?


What do you all think? I want to hear your opinions, tech, ideas on how this will work. Throttle body is still bolted to the side in its original location due to hood clearance.
Thanks! Happy Easter!
04-20-2014, 02:51 PM
#67
Super Moderator
Staff
iTrader: (1)
Join Date: Aug 2008
Location: Anderson Missouri
Posts: 11,788
Likes: 0
Received 21 Likes
on
19 Posts
The gunk you have in there is from the EGR. I dont know the 3.0, but EGRs make a huge mess in the intake. On a 22r motor, I just make a block off plate in between the Plenum and where the EGR hooks up to. With the plate in, the computer thinks the EGR is still functioning and wont throw codes. I am sure this would work on a 3.0 as well. I have seen chunks the were probably 1/4 in thick.
I would like to see if you could make a new style intake. The 3.0 as it is looks like it would restrict flow and could be a better design.
Do NOT become a member of the 60-66 Chevy website. The administrators dont monitor it any more and I got 2-300 spam mails from it a day. Luckily it goes to my spam box but still is frustrating as I only visit a few websites and it is the only place I get spam from. The site has some great info on it as mostly stovebolt refers to the three 6 cylinder motors that was offered in them trucks.
04-20-2014, 06:07 PM
#68
Registered User
Thread Starter
iTrader: (1)
Join Date: Nov 2012
Location: Elko NV, at the foot of the Rubys
Posts: 358
Likes: 0
Received 0 Likes
on
0 Posts
The gunk you have in there is from the EGR. I dont know the 3.0, but EGRs make a huge mess in the intake. On a 22r motor, I just make a block off plate in between the Plenum and where the EGR hooks up to. With the plate in, the computer thinks the EGR is still functioning and wont throw codes. I am sure this would work on a 3.0 as well. I have seen chunks the were probably 1/4 in thick.
I would like to see if you could make a new style intake. The 3.0 as it is looks like it would restrict flow and could be a better design.
Do NOT become a member of the 60-66 Chevy website. The administrators dont monitor it any more and I got 2-300 spam mails from it a day. Luckily it goes to my spam box but still is frustrating as I only visit a few websites and it is the only place I get spam from. The site has some great info on it as mostly stovebolt refers to the three 6 cylinder motors that was offered in them trucks.
I would like to see if you could make a new style intake. The 3.0 as it is looks like it would restrict flow and could be a better design.
Do NOT become a member of the 60-66 Chevy website. The administrators dont monitor it any more and I got 2-300 spam mails from it a day. Luckily it goes to my spam box but still is frustrating as I only visit a few websites and it is the only place I get spam from. The site has some great info on it as mostly stovebolt refers to the three 6 cylinder motors that was offered in them trucks.
 And do you mean a lower intake as well? That would take more work than my tools will allow lol, but the lower intake is fairly open in my opinion, but who knows. It would be interesting to take it all apart and look closely.
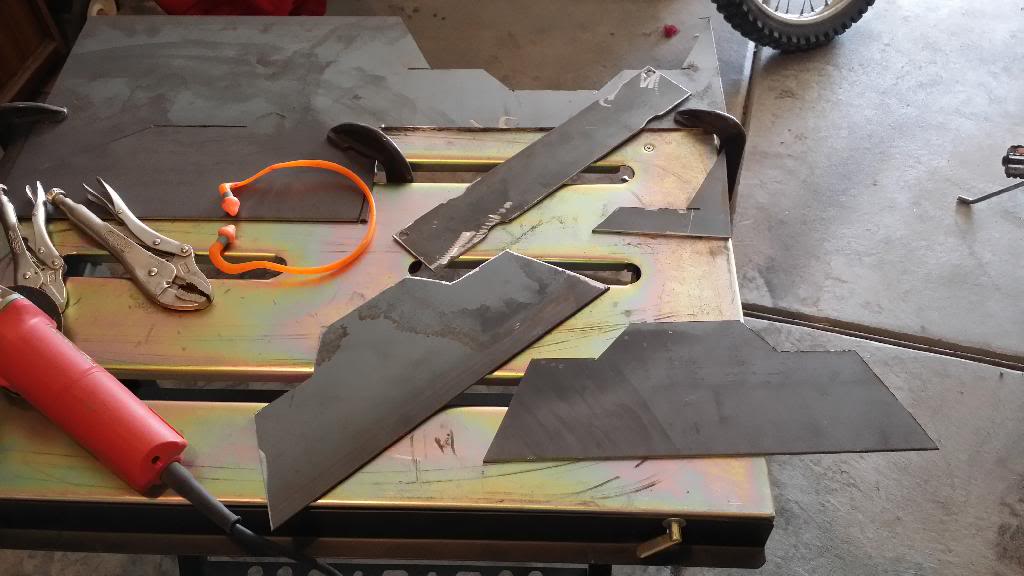
Well, my progress for today:
This took WAY too long, but they just barely line up with the lower intake.

Welding on thicker steel is MUCH better.


I had a little hood clearance issue...

An inside view

The problem with cutting a round hole with a flat grinding disk... you get a not so circle opening, but it will work. The throttle body opening is smaller than this.

I tapped into the side and mounted the throttle body. So far a nice fit.

All I have left is the cold start injector to install, throttle cable, and vacuum ports for brakes and fuel regulator.

I didnt realize it at first, but it looks like another little truck under the hood...


My thoughts on the airflow, which I wish I would have made the top of the intake one piece instead of making it change direction twice, is that I am actually creating more turbulence with this setup. Why? Well the air collides into the other wall, which it did in the other intake. But then it has to pass by the length of the bolts that will go through the top of the intake to hold it down. So after it collides with the wall, passes by the length of the bolts on the side, then it enters the lower intake, where the lip itself will create some turbulence.
So, turbulent air is slower air. We want laminar flow. Well I do not have the capablity of bending tube, so my hopes are that the larger chamber will allow the engine to draw a larger volume of air in, therefore offsetting the turbulent air. As long as the volume of air supercedes the turbulent air, this will be a success. If not, well then I learned a lot today.

Comments? Suggestions? What are your guys ideas on how this will work?
Thanks!
 04-21-2014, 07:47 PM
#69
Registered User
Thread Starter
iTrader: (1)
Join Date: Nov 2012
Location: Elko NV, at the foot of the Rubys
Posts: 358
Likes: 0
Received 0 Likes
on
0 Posts
Wow, talk about one thing after the other! Trying to address some vacuum leaks currently, but the truck runs. So far I can't tell a performance difference,  but I am going to blame that on the vacuum leaks for now. I am on my phone so i cant quite post a pic, but there is a ton more room under the hood. Anyway, I am still hoping for the best. Throttle cable is one of the last things to deal with.
but I am going to blame that on the vacuum leaks for now. I am on my phone so i cant quite post a pic, but there is a ton more room under the hood. Anyway, I am still hoping for the best. Throttle cable is one of the last things to deal with.
Last edited by chukarhunt; 04-21-2014 at 07:50 PM.
04-22-2014, 12:31 AM
#70
Super Moderator
Staff
iTrader: (1)
Join Date: Aug 2008
Location: Anderson Missouri
Posts: 11,788
Likes: 0
Received 21 Likes
on
19 Posts
I think that it is cool that you built your own intake system. I can see how it would make servicing it easier already. As far a turbulence, I wouldn't think to much of it as the piston should still pull in enough air that it needs. If this was a high performance motor then it might be an issue but I wouldn't be concerned with it.
04-22-2014, 05:47 AM
#71
Registered User
Thread Starter
iTrader: (1)
Join Date: Nov 2012
Location: Elko NV, at the foot of the Rubys
Posts: 358
Likes: 0
Received 0 Likes
on
0 Posts
Thanks Terry! I agree with you, if this was a high performance engine, then there would probably be some issues.
What do you think about cork gaskets? I need to make a custom gasket that is thick and compressible, do you trust cork to seal out air? Where can I get some thick cork gasket sheets to cut out a template? I am currently using silicone, but it isn't working very well, and I can't clean up the surfaces and pour new sealant everytime I take this thing off.
I used silicone for now to help fill the voids in the uneven surfaces, but again, I need something servicable. For testing purposes though, I am going to seal up all the vacuum leaks with silicone until I work out all the bugs.
04-22-2014, 05:52 AM
#72
Registered User
Thread Starter
iTrader: (1)
Join Date: Nov 2012
Location: Elko NV, at the foot of the Rubys
Posts: 358
Likes: 0
Received 0 Likes
on
0 Posts
Custom Upper Intake
Forgot to post pics! Here it is as it sits now:
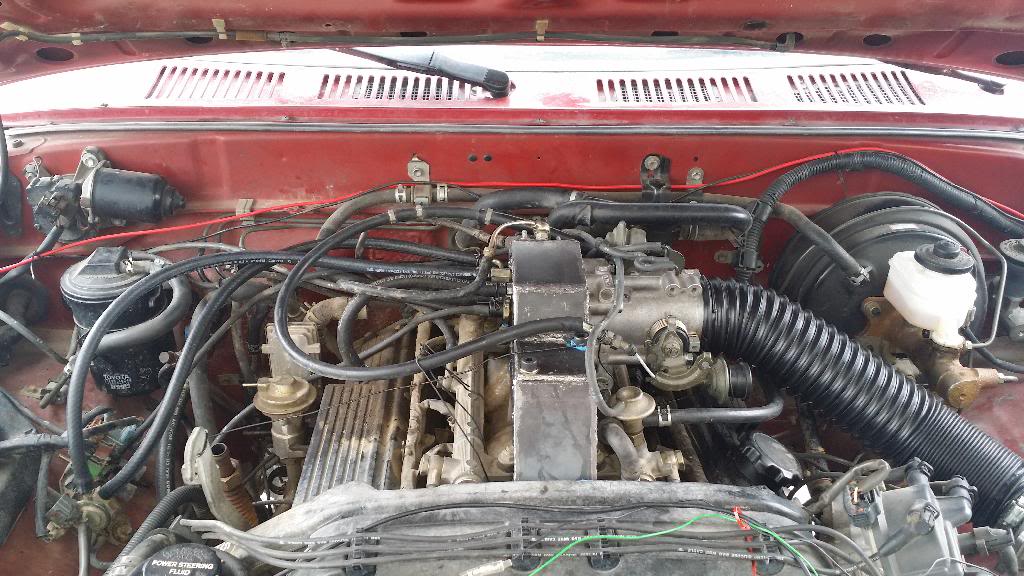
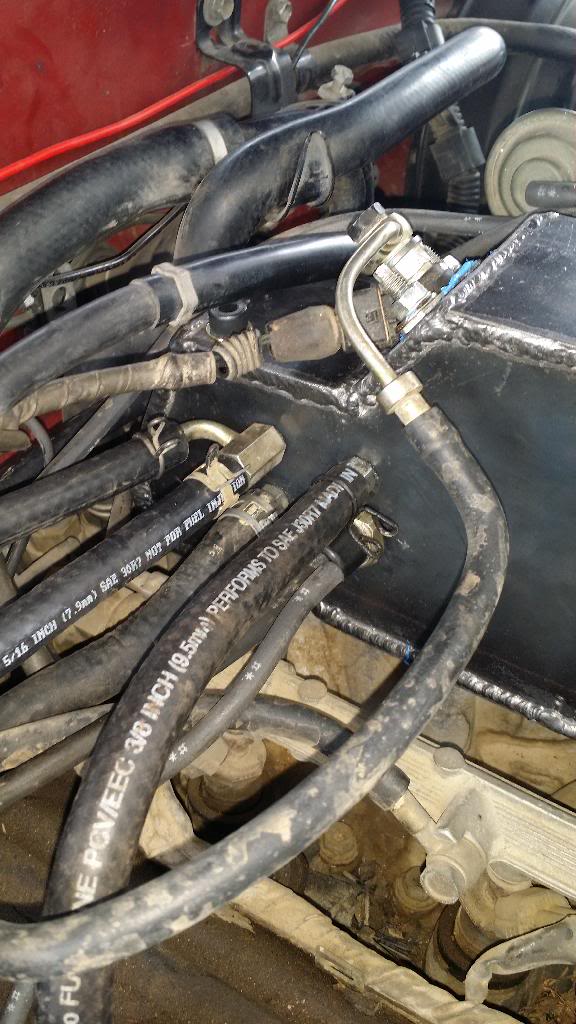
so far I believe everything is hooked up in the right order. Just need to seal a few spots.
How important is it to have vacuum at the valve cover port next to the oil cap? I have seen people put breathers there, do I need vacuum? truck runs like crap without it, but do I just need to raise the idle or what?
Thanks!
 04-22-2014, 01:35 PM
#74
Registered User
Join Date: Apr 2014
Location: Tennessee
Posts: 62
Likes: 0
Received 0 Likes
on
0 Posts
NICE!!! you have some great ideas man! I may take a few from you and adopt them on my truck.
And that intake... WHA??? That is awesome! Creative for sure. Im going to keep an eye on this.
And that intake... WHA??? That is awesome! Creative for sure. Im going to keep an eye on this.
04-23-2014, 11:18 AM
#75
Registered User
Thread Starter
iTrader: (1)
Join Date: Nov 2012
Location: Elko NV, at the foot of the Rubys
Posts: 358
Likes: 0
Received 0 Likes
on
0 Posts
Thanks teaMJPx! That is what build threads are for! to get more ideas from each other. Most of the things I have done are from this site, except the roll bar, that is mine. 
04-25-2014, 05:39 AM
#76
Super Moderator
Staff
iTrader: (1)
Join Date: Aug 2008
Location: Anderson Missouri
Posts: 11,788
Likes: 0
Received 21 Likes
on
19 Posts
I will be at a parts store today and will see if they sell a sheet of cork gasket. Several years ago I was able to buy a sheet of rubber gasket to make my own on something and jsut cant remember what it was now.
I dont know about the vacuum question or how to make that your avatar. It took me forever just to get to the basics on computer stuff for YT. To bad the monster is purple and the kid is doing it to Barney. lol
Flamethrower is giving out a set of injectors for the 89-95s. I like mine for my 86. He ask you to test them for him and post your results.
Last edited by Terrys87; 04-25-2014 at 05:44 AM.
04-25-2014, 07:17 AM
#77
Registered User
Thread Starter
iTrader: (1)
Join Date: Nov 2012
Location: Elko NV, at the foot of the Rubys
Posts: 358
Likes: 0
Received 0 Likes
on
0 Posts
Hey Terry! I was at the auto parts store yesterday and found a roll of cork gasket, but thanks for checking, glad you are looking out for me! I will most likely pick it up today and start cutting it to size so I can get this truck on the road.
Ya, it would have been even funnier if it had been barney! You made my day lol.
I saw he was giving out a set, I sent him a PM, just waiting on a response. He may not go for it since I kinda stand out with the upper intake, it could skew his results, but I figured I would ask. It was brought to my attention that this upper intake may cause unnatural turbulence, which was my whole thought from the start, but that this turbulence will cause a cylinder or two to become too lean. So, I don't have a way to test the AFR right now, but I did fire the truck up the other day and take it for a drive.
It runs smooth as butter when there are no vacuum leaks(created one on the test drive). As far as horsepower? I feel I gained some torque, but I need to do further testing and invest in AFR gauge and sensors to get numbers before I can confirm anything. So far so good though.
I will most likely pick it up today and start cutting it to size so I can get this truck on the road.Ya, it would have been even funnier if it had been barney! You made my day lol.
I saw he was giving out a set, I sent him a PM, just waiting on a response. He may not go for it since I kinda stand out with the upper intake, it could skew his results, but I figured I would ask. It was brought to my attention that this upper intake may cause unnatural turbulence, which was my whole thought from the start, but that this turbulence will cause a cylinder or two to become too lean. So, I don't have a way to test the AFR right now, but I did fire the truck up the other day and take it for a drive.
It runs smooth as butter when there are no vacuum leaks(created one on the test drive). As far as horsepower? I feel I gained some torque, but I need to do further testing and invest in AFR gauge and sensors to get numbers before I can confirm anything. So far so good though.
04-30-2014, 06:35 AM
#78
Registered User
Thread Starter
iTrader: (1)
Join Date: Nov 2012
Location: Elko NV, at the foot of the Rubys
Posts: 358
Likes: 0
Received 0 Likes
on
0 Posts
Well, not much to update on, needed to wait on funds to pile up before I can fix the vacuum leaks in the intake, but I did receive this in the mail:
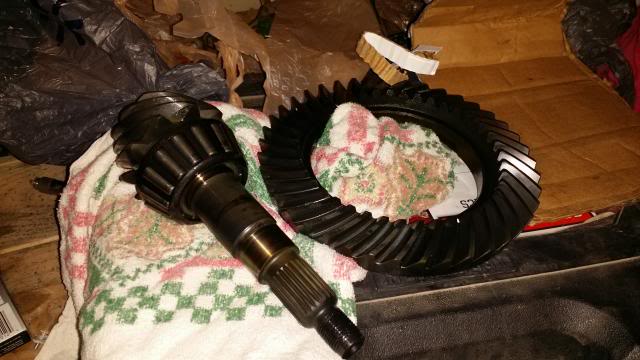
7.5 inch 4.10 ring and pinion to match the elocker. Thanks goes out to coryc85! Made me an excellent deal, beats buying brand new. I ordered the elocker gasket and studs through low range off road, so I am hoping the parts will show up in time for this weekend, but we shall see.
Other than that I am missing driving my truck. I just filled up the suburban and we got 12.8 mpg, so needless to say I need my Yota back!
The more I tear into this guy, the more I realize I need headers. Not necessarily for the power gain but rather so I can monitor each cylinder individually with these modifications, see what the engine is doing. Anyone have a good deal on headers?
Last edited by chukarhunt; 04-30-2014 at 06:37 AM.
05-01-2014, 07:39 PM
#79
Registered User
Thread Starter
iTrader: (1)
Join Date: Nov 2012
Location: Elko NV, at the foot of the Rubys
Posts: 358
Likes: 0
Received 0 Likes
on
0 Posts
HE'S ALIVE!!! alright, so Jake is running again, and he is purring like a kitten, no more vacuum leaks, the cork gasket maker worked great. This is the smoothest this engine has run for me since I bought it, I kid you not. It idles smooth, no hesitations, no pulsing, just butter smooth... awww yeah...
Power? I feel I gained substantial low end torque. Now when I step on it, I feel the frame twist and the truck push on my back, and I can get up to speed in second gear alone. Now I need to do more controlled runs to get numbers for you all, which will hopefully take place this weekend.
My plan is to have the wife help me. We will do a few runs from 10-60 mph runs with the custom intake to get an average acceleration time. I will clean up my old intake and reinstall it, and do the same runs to get an average. This will tell me how much it helped.
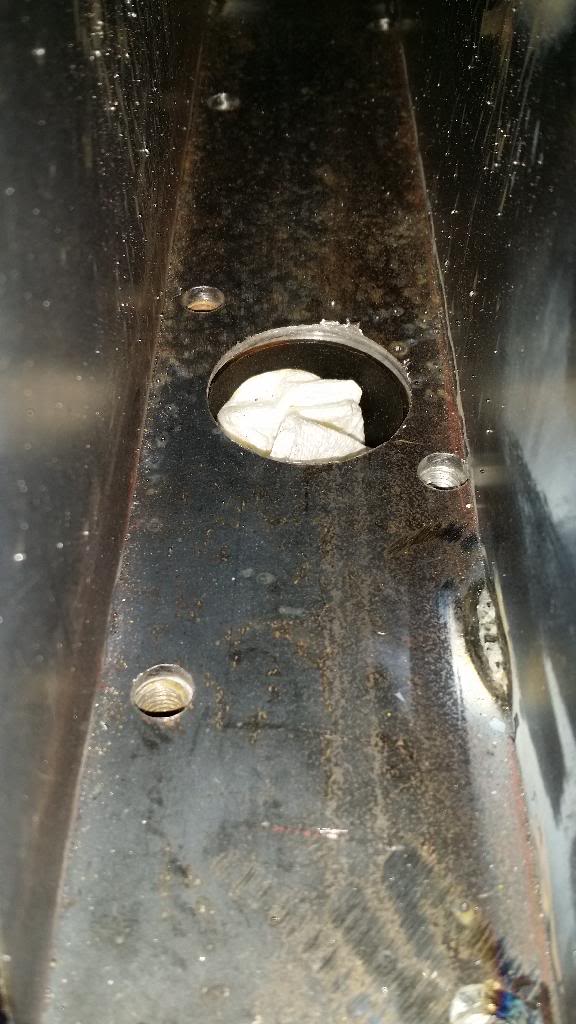
I need to reinstall the old intake anyway. When putting the custom intake back on, one of the throttle body bolt holes stripped out, so I had to use a c clamp to hold it on for testing lol. You can see it in the attachment. I will have to fix the hole to run it permanently. as far as I can hear, there is no apparent knocking, so far so good.
Power? I feel I gained substantial low end torque. Now when I step on it, I feel the frame twist and the truck push on my back, and I can get up to speed in second gear alone. Now I need to do more controlled runs to get numbers for you all, which will hopefully take place this weekend.
My plan is to have the wife help me. We will do a few runs from 10-60 mph runs with the custom intake to get an average acceleration time. I will clean up my old intake and reinstall it, and do the same runs to get an average. This will tell me how much it helped.
I need to reinstall the old intake anyway. When putting the custom intake back on, one of the throttle body bolt holes stripped out, so I had to use a c clamp to hold it on for testing lol. You can see it in the attachment. I will have to fix the hole to run it permanently. as far as I can hear, there is no apparent knocking, so far so good.
 JK Looks cool though.


