85sr5excab's 85 sr5 ex cab build
 03-28-2014, 11:58 PM
#61
Super Moderator
Staff
iTrader: (1)
Join Date: Aug 2008
Location: Anderson Missouri
Posts: 11,788
Likes: 0
Received 21 Likes
on
19 Posts
A little table like that come in handy for several different things from welding to just having a table next to you when working on the actual truck. That is on my list eventually.
 05-05-2014, 05:48 AM
#62
Registered User
Thread Starter
Join Date: Sep 2012
Location: iowa
Posts: 618
Likes: 0
Received 0 Likes
on
0 Posts
I ran into a bit of a snag with the truck lately. I realized when I went to put the axle back under the truck that I had no way to pick the truck up high enough for the springs to clear the axle. Luckily yesterday my dad had the skid loader out at the farm so we used that to pick the truck up and got the axle slid under it. Nothing too exciting but it is sitting under the truck again and bolted in. Front spring hanger is just ratchet - strapped to the front crossmember because I wasn't sure where it needed to be to get my shackle angle where I want. Pretty pleased with how it sits. Fairly level front to back. 
 05-05-2014, 06:13 AM
#63
I ran into a bit of a snag with the truck lately. I realized when I went to put the axle back under the truck that I had no way to pick the truck up high enough for the springs to clear the axle. Luckily yesterday my dad had the skid loader out at the farm so we used that to pick the truck up and got the axle slid under it. Nothing too exciting but it is sitting under the truck again and bolted in. Front spring hanger is just ratchet - strapped to the front crossmember because I wasn't sure where it needed to be to get my shackle angle where I want. Pretty pleased with how it sits. Fairly level front to back. 
05-05-2014, 09:11 PM
#64
Registered User
Thread Starter
Join Date: Sep 2012
Location: iowa
Posts: 618
Likes: 0
Received 0 Likes
on
0 Posts
05-05-2014, 11:03 PM
#65
Super Moderator
Staff
iTrader: (1)
Join Date: Aug 2008
Location: Anderson Missouri
Posts: 11,788
Likes: 0
Received 21 Likes
on
19 Posts
Yours is drivable and that is giving the incentive to get mine going. I see yours moving and the stripe pattern on it and just makes me want to get on mine as soon as I can. You are motivating for some of us out here. Keep it up.
05-06-2014, 07:21 AM
#66
Registered User
Thread Starter
Join Date: Sep 2012
Location: iowa
Posts: 618
Likes: 0
Received 0 Likes
on
0 Posts
Thanks Terry. It's not drivable at this point. Gotta get the spring hanger welded on and high steer mounted up. Oh and shock hoops mounted and get the shocks ordered but I see the light at the end of the tunnel. It's all u guys on yotatech that keep me motivated.
07-19-2014, 10:57 AM
#68
Registered User
Thread Starter
Join Date: Sep 2012
Location: iowa
Posts: 618
Likes: 0
Received 0 Likes
on
0 Posts
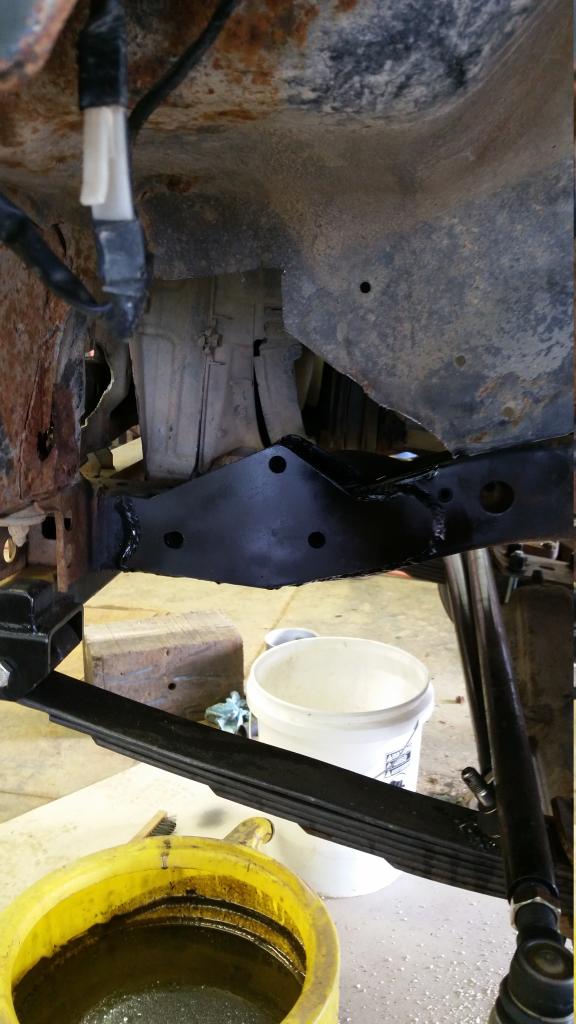
I've made very little progress lately but I'll try to post up a few pics of what I have done. Front spring hanger is welded in the front. Lots of weeds grown up around it lol. I'm really dragging my feet on it cuz I need to get it into my dad's garage but the garage is PACKED full of junk....I mean treasures. Been working on other projects too. Made a pickup box trailer from an old ranger to haul junk and made a car hook for the tractor that runs off the 3 point hitch.
07-31-2014, 08:47 PM
#69
Registered User
Thread Starter
Join Date: Sep 2012
Location: iowa
Posts: 618
Likes: 0
Received 0 Likes
on
0 Posts
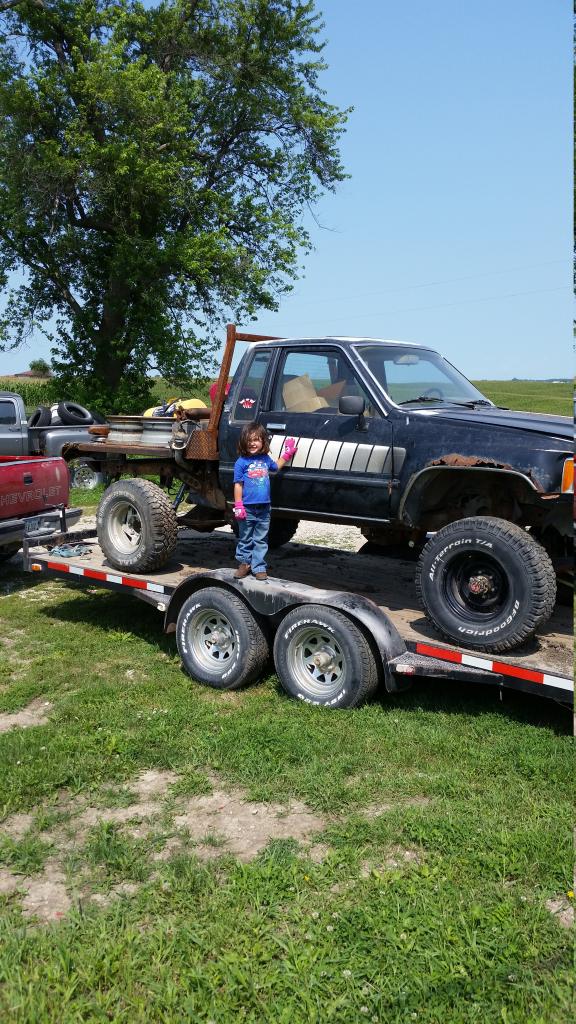
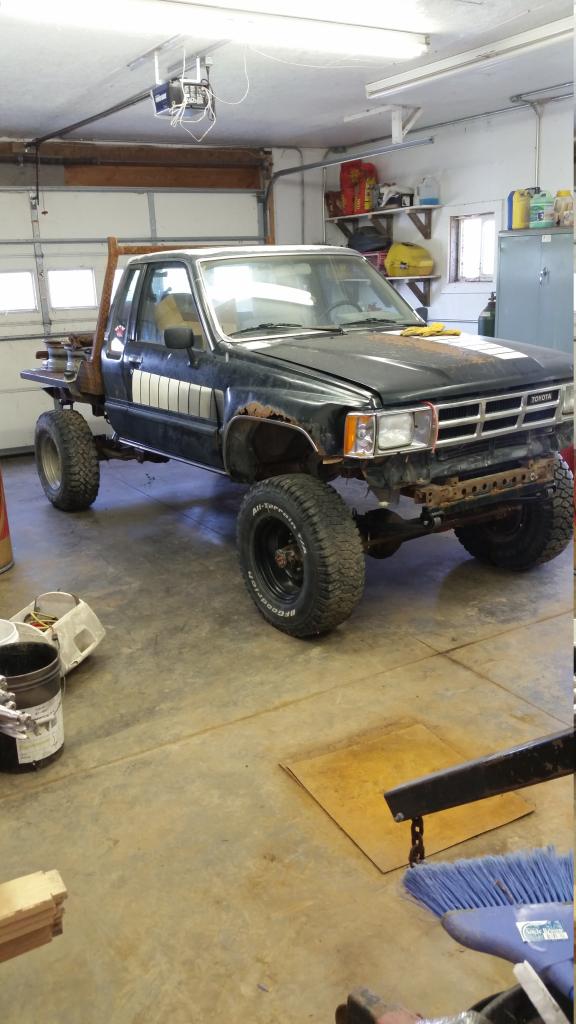
Small update. I'm hoping to start working on this again soon. Drug it out of the weeds and put it in the garage. Had plans on tearing into it sat but was informed tonight that I will be working on Saturday. Anyways, here's a couple pics as promised.

 07-31-2014, 11:24 PM
#70
Super Moderator
Staff
iTrader: (1)
Join Date: Aug 2008
Location: Anderson Missouri
Posts: 11,788
Likes: 0
Received 21 Likes
on
19 Posts
At least you got it in the shop now and that makes it a little easier to work on. I hear you about work and everything else that comes up. Getting the time to work on these can be difficult at times. Really thought I would of had mine up and going along time ago.
08-02-2014, 08:51 AM
#71
Registered User
Thread Starter
Join Date: Sep 2012
Location: iowa
Posts: 618
Likes: 0
Received 0 Likes
on
0 Posts
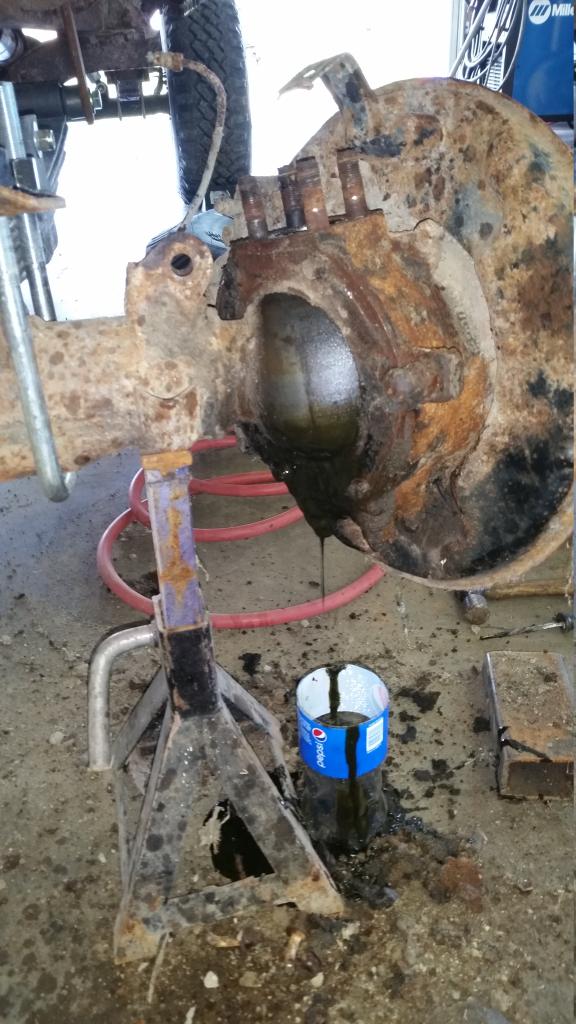
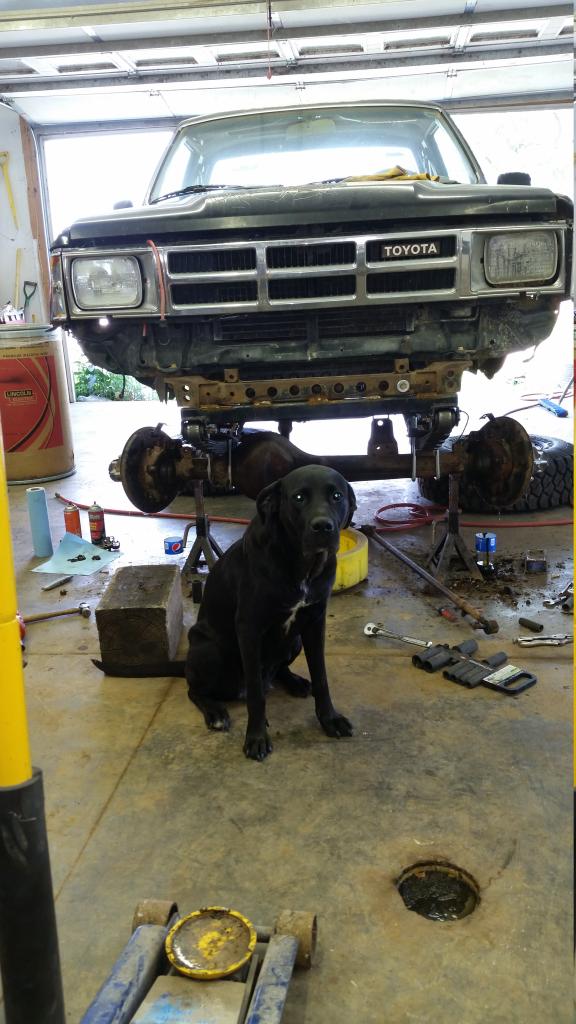
Thought I'd try to get a lil done before work today. Got tie rod and steering arms off. Not near as bad as I thought it would be. Only took about an hour.
Knuckle balls started leaking like a sieve when I got the steering arms off.
Had my pooch watching the whole time lol.
Knuckle balls started leaking like a sieve when I got the steering arms off.

Had my pooch watching the whole time lol.
 08-03-2014, 11:50 AM
#72
Registered User
Thread Starter
Join Date: Sep 2012
Location: iowa
Posts: 618
Likes: 0
Received 0 Likes
on
0 Posts
Gah! I'm in the process of putting the high steer and ifs box in the truck and had my first f#ck up. As I was welding the steering box mounts in the welder nozzle touched the radiator causing it to arc against it and popped a hole in it. Just my luck haha. Luckily I have a spare. Figured I come on here and rant about it while I settle down. More pics and updates of the process later. Better get back to work.

 08-03-2014, 10:39 PM
#75
Registered User
Thread Starter
Join Date: Sep 2012
Location: iowa
Posts: 618
Likes: 0
Received 0 Likes
on
0 Posts
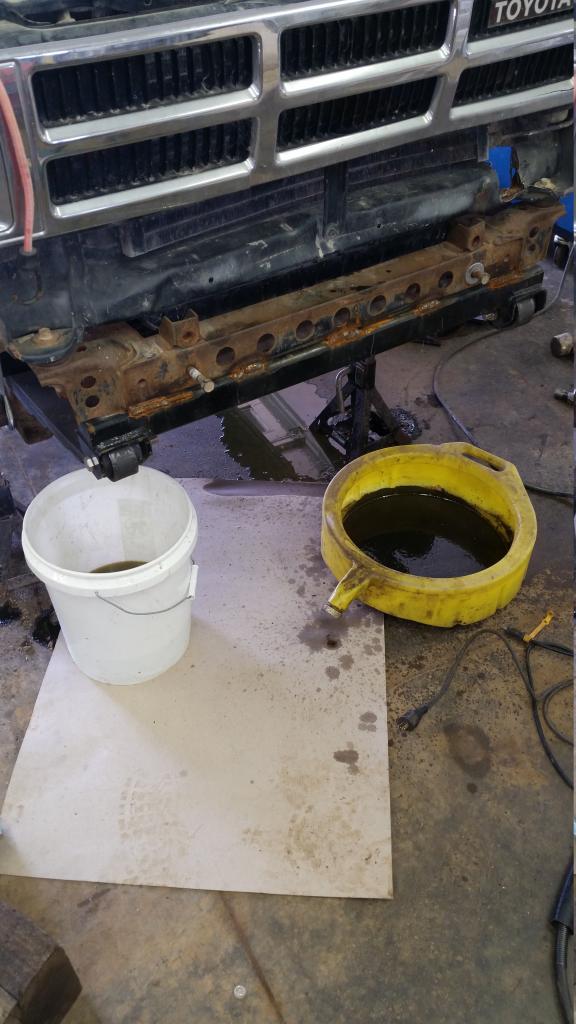
It's all good. I was checking our ur broke n driftin thread during the process. My goal was to get it back together enough to take it for a lil cruise tonight but the cards were not in my favor. It's back together, radiator and all, but I still have to fill the front dif with oil, tighten the nuts on the tie rod ends, hook up the front driveshaft, and a couple other minor things so I said screw it. I already put 12 hours into it today. I'm gonna go ahead and yank the front axle out 2moro and start rebuilding it. On a positive note the steering appears to be working great in the shop and I had some old rancho shocks off a first Gen that will get me by til I can get some billys.
08-03-2014, 10:41 PM
#76
Registered User
Thread Starter
Join Date: Sep 2012
Location: iowa
Posts: 618
Likes: 0
Received 0 Likes
on
0 Posts
08-04-2014, 06:31 AM
#77
Registered User
Thread Starter
Join Date: Sep 2012
Location: iowa
Posts: 618
Likes: 0
Received 0 Likes
on
0 Posts
Ok time for a proper update. After I removed the old steering arms, which by the way was not difficult, I cleaned up as best I could and set the new ones in place. Put the tie rods in also just to see how they fit. 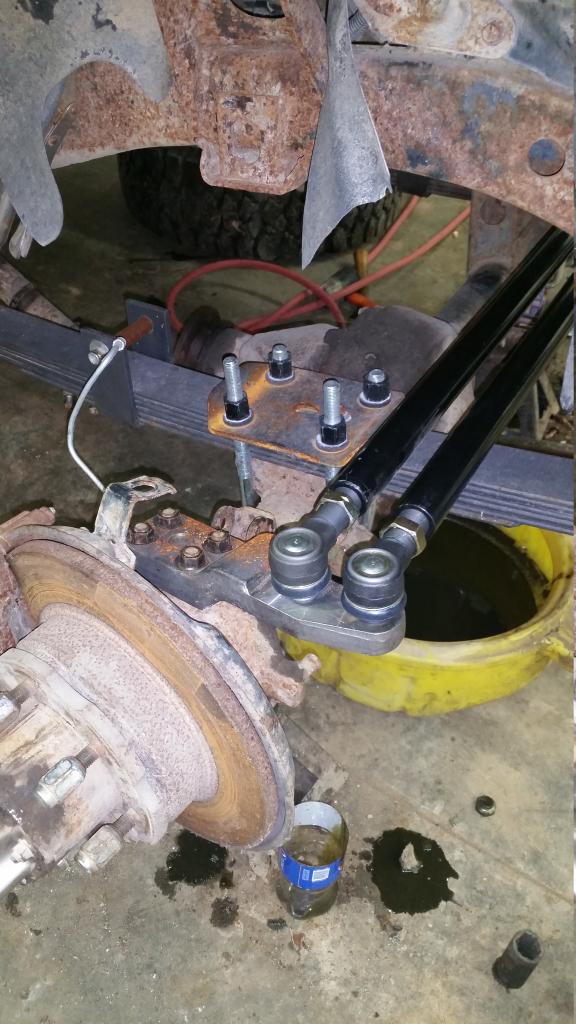
Then it was onto the steering box. I found an old power steering line from a chevy that had the rite size fitting and a rubber hose on it that I used to "plug" the ports on the box so all the fluid wasn't running out of the box.


Then it was onto the steering box. I found an old power steering line from a chevy that had the rite size fitting and a rubber hose on it that I used to "plug" the ports on the box so all the fluid wasn't running out of the box.
 08-04-2014, 06:35 AM
#78
Registered User
Thread Starter
Join Date: Sep 2012
Location: iowa
Posts: 618
Likes: 0
Received 0 Likes
on
0 Posts
Then I set the box up in the vise to swap pitman arms. Again this went much smoother than I anticipated. Unscrewed the nut with my trusty bfw lol, tightened up the puller, gave it a couple whacks with a hammer, and it popped right off. 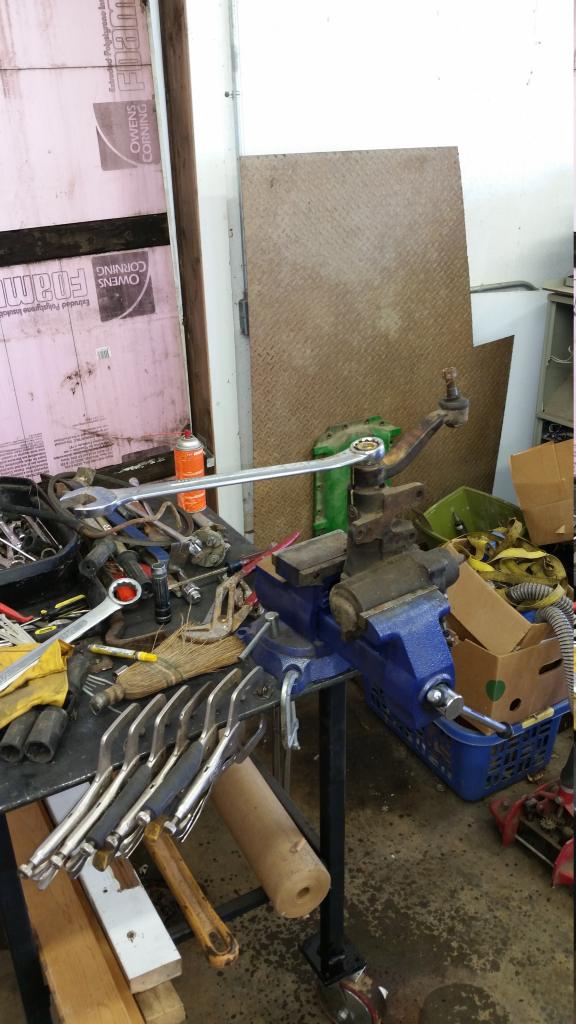 Oh, I forgot to mention that I also marked the center line on the box and the shafts so I knew where to put the new pitman arm and have it be centered. It was just a matter of bolting the arm on after that.
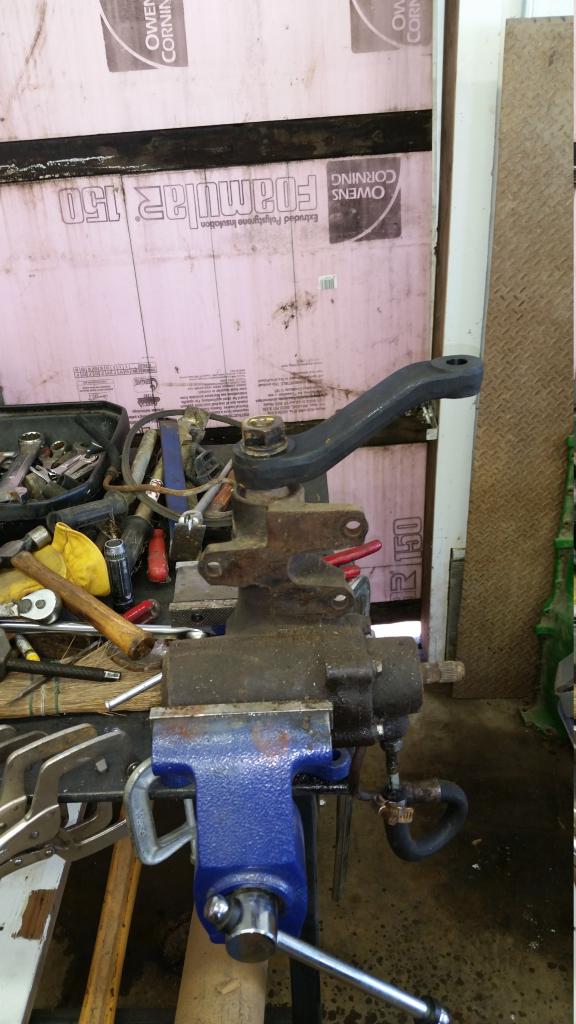
 Oh, I forgot to mention that I also marked the center line on the box and the shafts so I knew where to put the new pitman arm and have it be centered. It was just a matter of bolting the arm on after that.
Last edited by 85sr5excab; 08-04-2014 at 06:40 AM.
08-04-2014, 06:37 AM
#79
Registered User
The oil oozing out after you took the steering arm off is most likely an inner axle seal that has gone bad. Time for that knuckle rebuild!
Progress looks good!
Progress looks good!
Last edited by rattlewagon; 08-04-2014 at 06:39 AM.
08-04-2014, 06:55 AM
#80
Registered User
Thread Starter
Join Date: Sep 2012
Location: iowa
Posts: 618
Likes: 0
Received 0 Likes
on
0 Posts
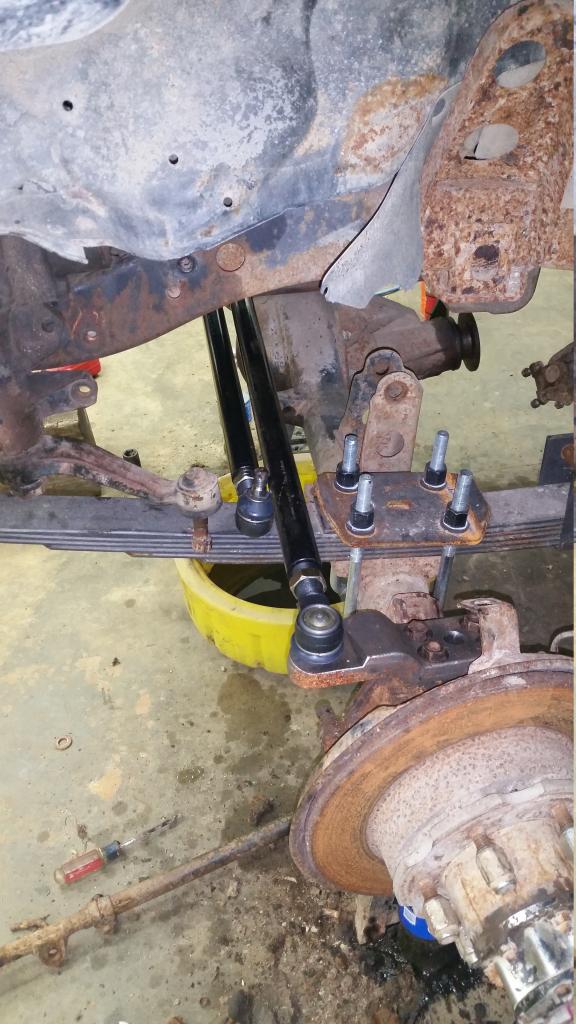
Next up was mounting the box and plates to the frame. I put a bolt in the top hole to secure the outer plate to the box and started the test fitting process. I must've test fit that thing 20 times I'll bet. I had to notch the inner fender a bit and the radiator support/body mount area to get it far enough forward. I clamped the outer plate to the frame in the location I wanted, transfer punched the 2 holes to drill, center drilled them so the drill bit wouldn't wander, and drilled them out to 1/2" with the outer plate still clamped in place for extra insurance. Then I pulled the plate off and drilled the holes out to 3/4" for the sleeves to fit thru. 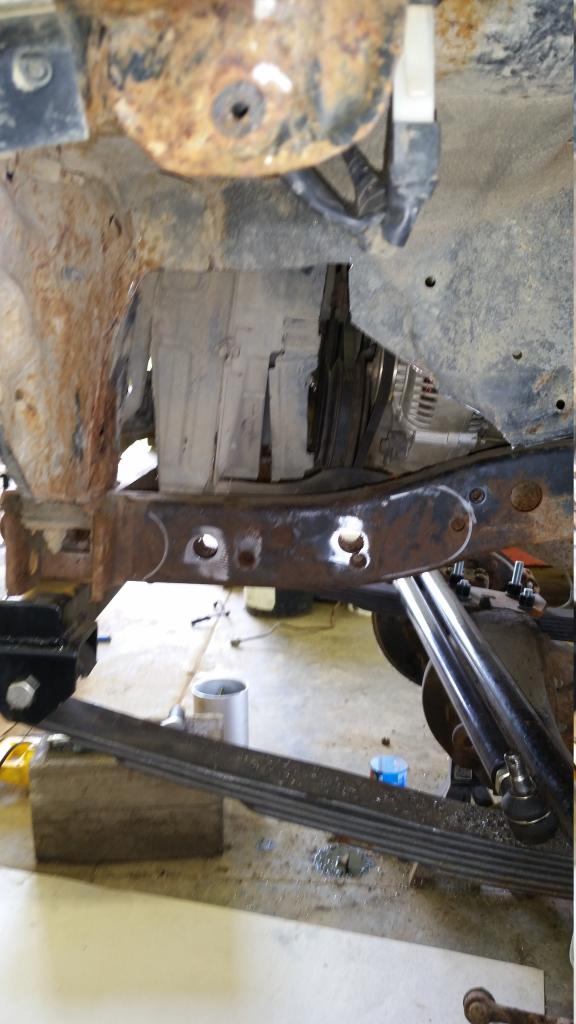 I kinda slacked on picture taking after that. I welded the sleeves on the outside of the frame and ground them smooth. Next I clamped both plates on the frame using the bolts to align them and used a Sawzall to trim the extra length off the sleeves on the inside of the frame. Ground them smooth and test fit the box one last time. Everything looked good so I welded the plates on and threw a quick coat of paint on them.
And here's the box bolted on.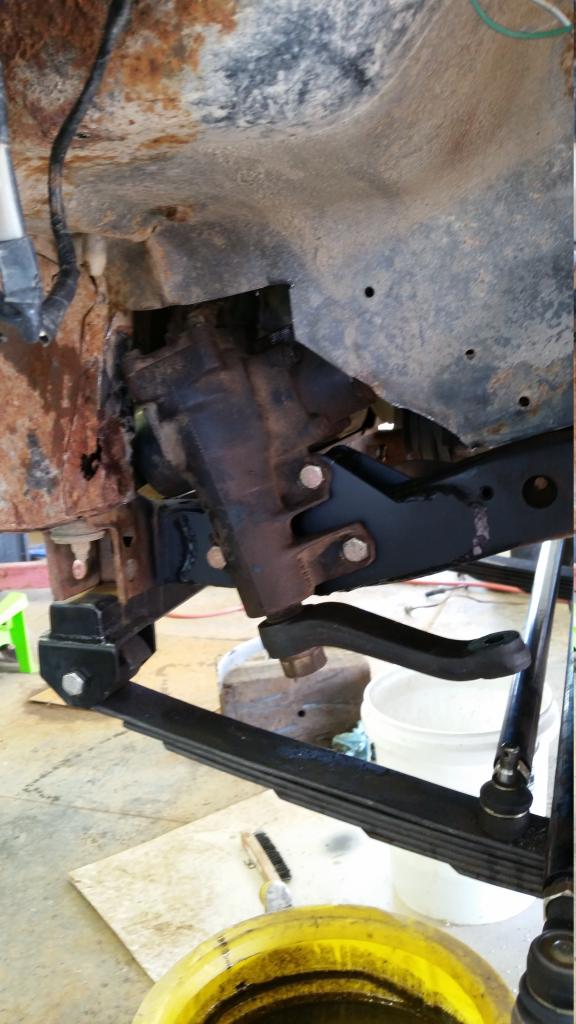
 I kinda slacked on picture taking after that. I welded the sleeves on the outside of the frame and ground them smooth. Next I clamped both plates on the frame using the bolts to align them and used a Sawzall to trim the extra length off the sleeves on the inside of the frame. Ground them smooth and test fit the box one last time. Everything looked good so I welded the plates on and threw a quick coat of paint on them.
And here's the box bolted on.

Last edited by 85sr5excab; 08-04-2014 at 06:57 AM.


