PowerstrokeJoe's om617 Turbo Diesel swap/build in 1990 P/up
 11-27-2011, 08:57 AM
#61
Registered User
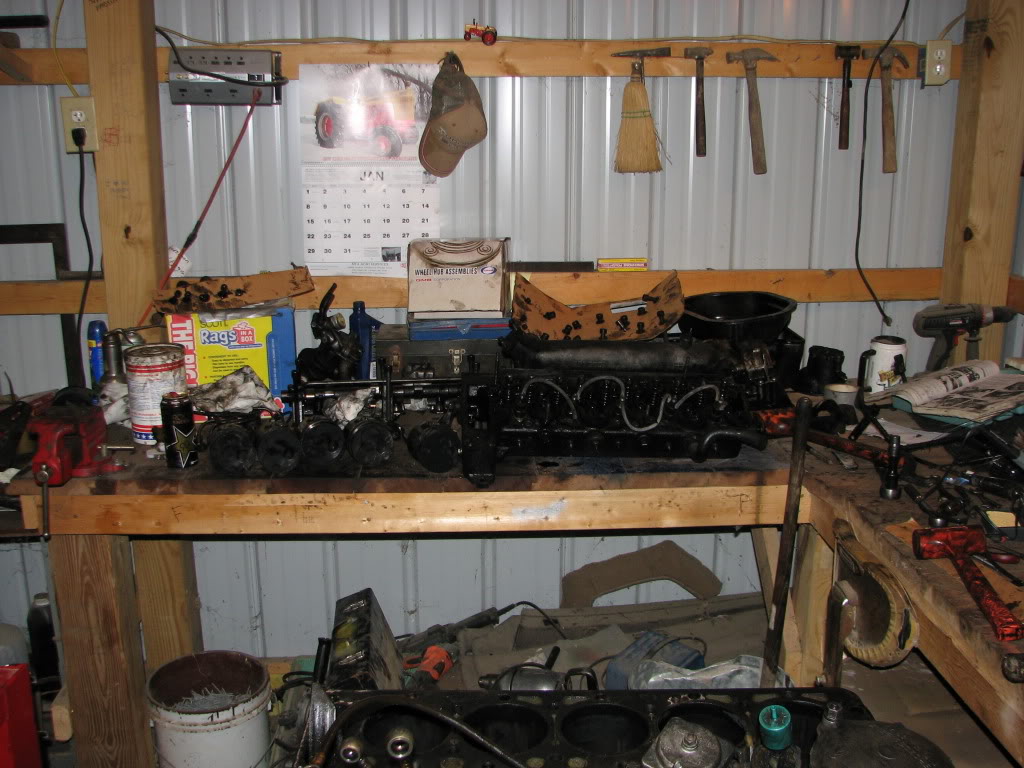
Okay, my engine progress is going really slow from rounded bolts and weird Euro sizes. PowerstrokeJoe, can you tell me what to use to get the valve cover off? No one around here knows where to get 12-point torx bits.
 11-27-2011, 12:12 PM
#62
Registered User

Join Date: Nov 2008
Posts: 4
Likes: 0
Received 0 Likes
on
0 Posts
I have these and they work great..
http://www.amazon.com/gp/product/B00...CNEHHB10MR4Z1Q
http://www.amazon.com/gp/product/B00...CNEHHB10MR4Z1Q
11-27-2011, 02:25 PM
#64
Registered User
Join Date: Nov 2008
Posts: 4
Likes: 0
Received 0 Likes
on
0 Posts
OK, the rocker cover is just a metric socket I think it's a 13mm. The XZN or triple square head bolts are head bolts and they are XZN112 or 12mm, these bolts are stretch to yield and if you loosen them they need to be replaced and re torqued. Just use your socket set to remove the rocker cover, 14mm wrench's to adjust the valves. If you need to pull the head, you will need the XZN set.
11-27-2011, 06:43 PM
#65
Registered User
Thread Starter
Join Date: Apr 2011
Location: Sedalia, MO
Posts: 317
Likes: 0
Received 0 Likes
on
0 Posts
Aviator that is my plan as long as I have time lol.
Pyrojoe-phatfj is right it should be 4 13mm nuts holding it on. The 12 point wrench you are referring to is a triple square wrench that most any auto parts store carries. I believe mine are s&k or Mac I don't remember.
Well I have major issues at this point ... check this out.
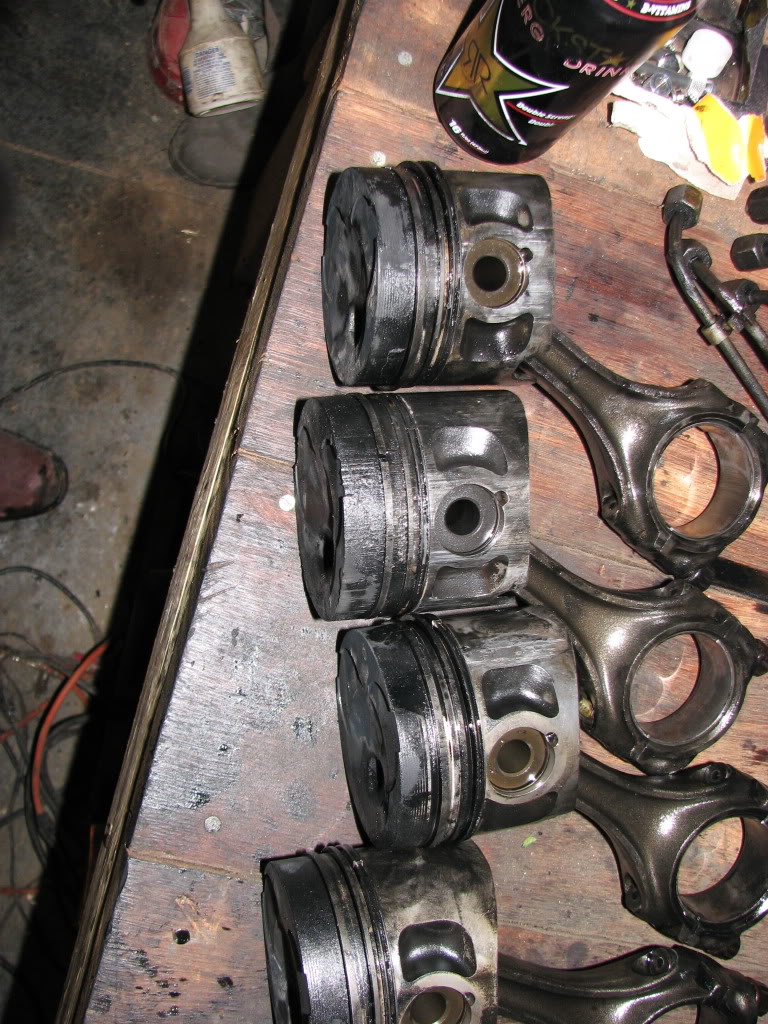
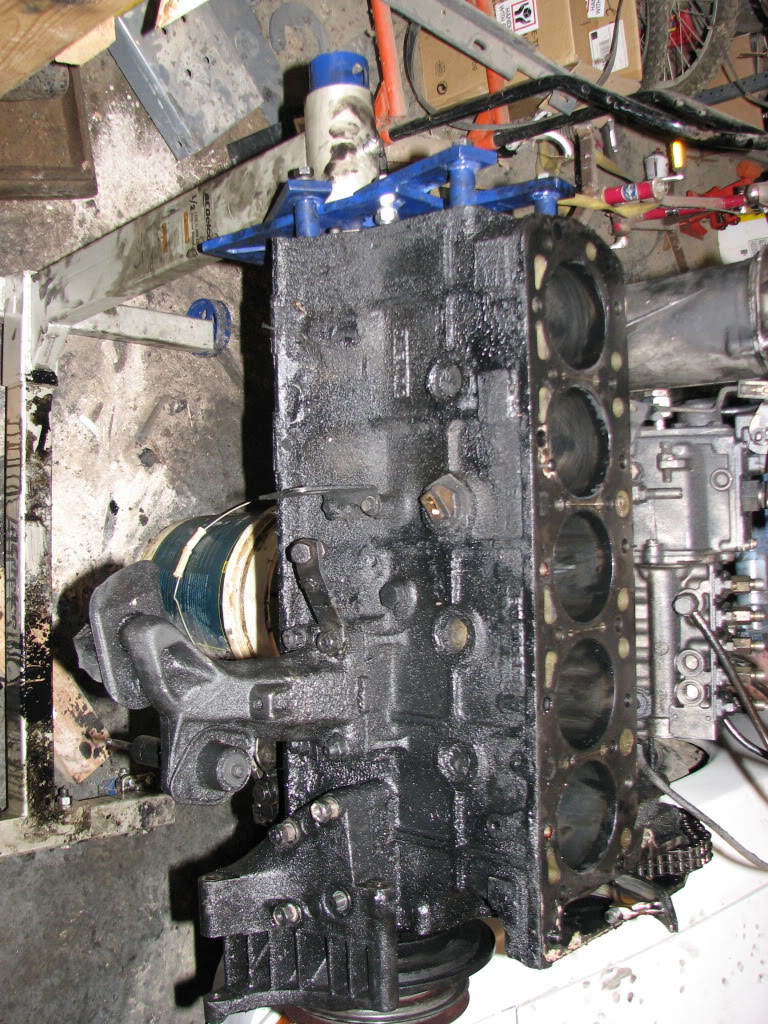
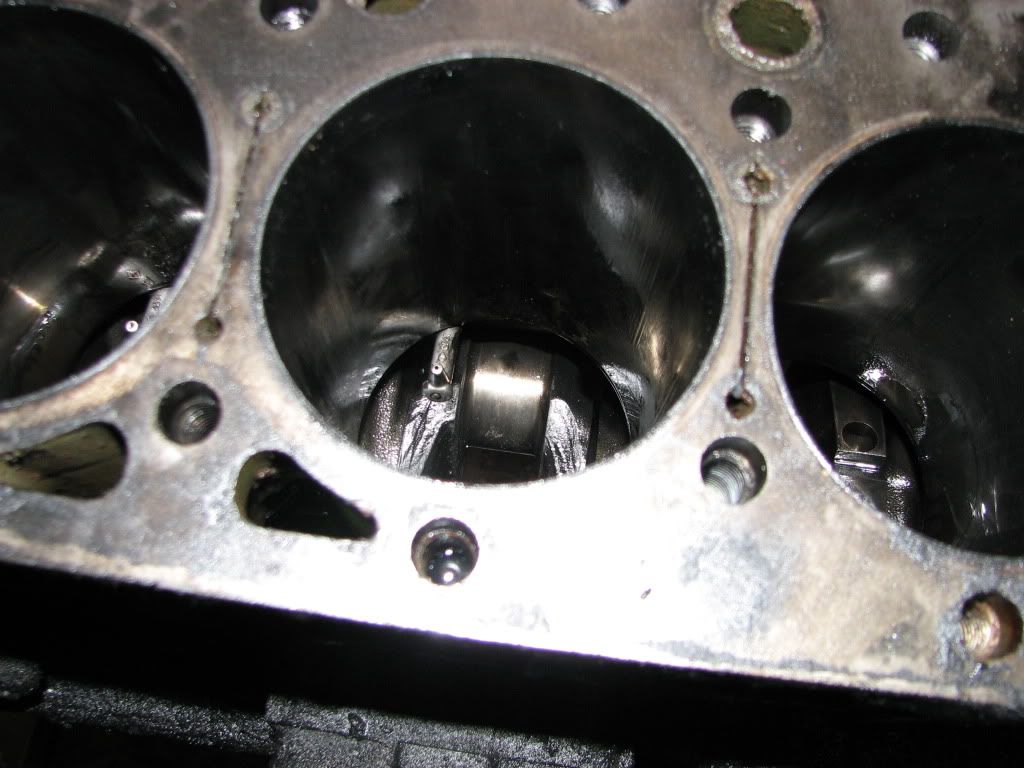
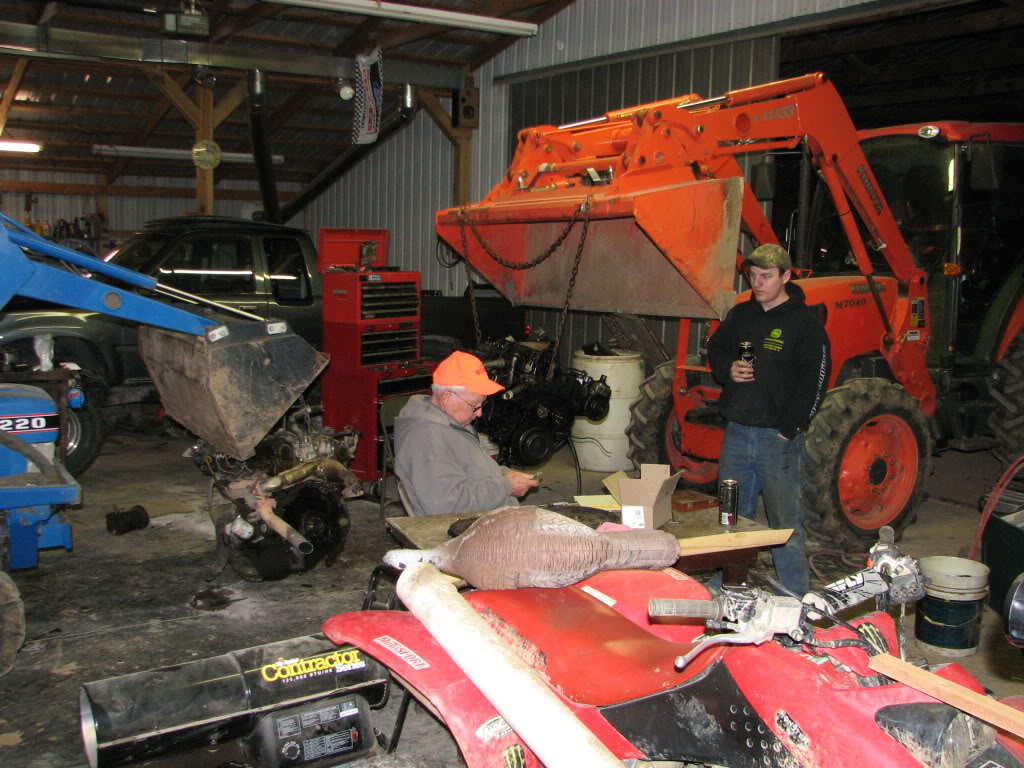
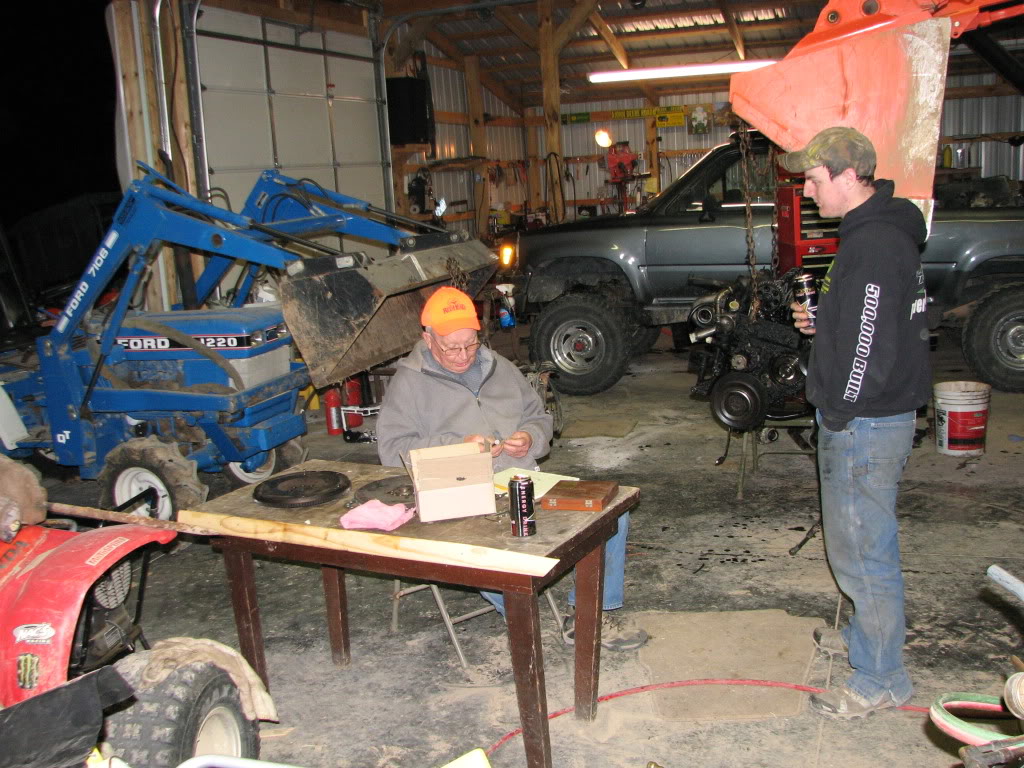
Yep I had to tear it down. I found some metal chunks in the old oil and upon inspection i saw some scoring in one of the bores. Well bottom line Cylinders 1,2,3 need re sleeved and I need 5 new pistons. I am going to try to locate a nother engine or I may re build this one but either way I have a ways to go. I did get the pilot bearing adapter made. I'll get more pictures tomorrow but here are a few of my grandpa and a buddy working on measuring for it.
So thats the weekend update. I am not sure how much is going to get done this week. Its looking like I am going to do a High pressure fuel pump on a Duramax with a friend at some point. We shall see.
Pyrojoe-phatfj is right it should be 4 13mm nuts holding it on. The 12 point wrench you are referring to is a triple square wrench that most any auto parts store carries. I believe mine are s&k or Mac I don't remember.
Well I have major issues at this point ... check this out.
Yep I had to tear it down. I found some metal chunks in the old oil and upon inspection i saw some scoring in one of the bores. Well bottom line Cylinders 1,2,3 need re sleeved and I need 5 new pistons. I am going to try to locate a nother engine or I may re build this one but either way I have a ways to go. I did get the pilot bearing adapter made. I'll get more pictures tomorrow but here are a few of my grandpa and a buddy working on measuring for it.
So thats the weekend update. I am not sure how much is going to get done this week. Its looking like I am going to do a High pressure fuel pump on a Duramax with a friend at some point. We shall see.
11-27-2011, 08:46 PM
#66
Contributing Member
Join Date: Mar 2003
Location: COTKU,Ontario,Canada
Posts: 11,334
Likes: 0
Received 0 Likes
on
0 Posts
Is it that bad? what about just honing the cylinders and installing new rings?
I see the cyl. tops look a little beaten up... or have they got actual holes blown through them?
here's a link that may help you
http://w124-zone.com/viewpage.php?page_id=4
I see the cyl. tops look a little beaten up... or have they got actual holes blown through them?
here's a link that may help you
http://w124-zone.com/viewpage.php?page_id=4
Last edited by aviator; 11-27-2011 at 08:48 PM.
 11-28-2011, 05:20 AM
#69
Registered User
Join Date: Nov 2008
Posts: 4
Likes: 0
Received 0 Likes
on
0 Posts
Aviator that is my plan as long as I have time lol.
Pyrojoe-phatfj is right it should be 4 13mm nuts holding it on. The 12 point wrench you are referring to is a triple square wrench that most any auto parts store carries. I believe mine are s&k or Mac I don't remember.
Well I have major issues at this point ... check this out.
Yep I had to tear it down. I found some metal chunks in the old oil and upon inspection i saw some scoring in one of the bores. Well bottom line Cylinders 1,2,3 need re sleeved and I need 5 new pistons. I am going to try to locate a nother engine or I may re build this one but either way I have a ways to go. I did get the pilot bearing adapter made. I'll get more pictures tomorrow but here are a few of my grandpa and a buddy working on measuring for it.
So thats the weekend update. I am not sure how much is going to get done this week. Its looking like I am going to do a High pressure fuel pump on a Duramax with a friend at some point. We shall see.
 11-28-2011, 09:22 AM
#71
Contributing Member
Join Date: Mar 2003
Location: COTKU,Ontario,Canada
Posts: 11,334
Likes: 0
Received 0 Likes
on
0 Posts
PeachParts! That's the name I was trying to remember! Thanks Phat...
I was looking for some parts to fix a buddy's 300E tranny awhile back and they came up... was trying to remember them to suggest as a source for pistons/sleeves...
I was looking for some parts to fix a buddy's 300E tranny awhile back and they came up... was trying to remember them to suggest as a source for pistons/sleeves...
11-28-2011, 12:04 PM
#72
Registered User
Okay, I'll check for the timing chain stretch. Can I adjust my valves right now, too?
And Aviator, is there a way to change the title of my thread so more people will look at it? I'd like to include "86 p/u sas/om617 swap"
And Aviator, is there a way to change the title of my thread so more people will look at it? I'd like to include "86 p/u sas/om617 swap"
11-28-2011, 12:34 PM
#73
Contributing Member
Join Date: Mar 2003
Location: COTKU,Ontario,Canada
Posts: 11,334
Likes: 0
Received 0 Likes
on
0 Posts
11-29-2011, 10:04 AM
#75
Registered User
Thread Starter
Join Date: Apr 2011
Location: Sedalia, MO
Posts: 317
Likes: 0
Received 0 Likes
on
0 Posts
Aviator- The pistons are done. The ring grooves are worn way out of spec and the pistons are out of round. Pistons are $300 a piece. I have a line on a couple of engines yet. I am glad I got the car for the extra parts.
PhatFJ- It is sleeved but it would be cheaper just to bore it out oversize as its a dry sleeve and even the new sleeves have to be bored and honed. Thank you for your kind words!
Blake- see my explanation to PhatFJ. Parts for the turbo engine are no longer made and they have to be imported.
Pyrojoe- Check the timing chain tensioner for grooves. If it is worn real bad it might be worth the extra money to replace it.
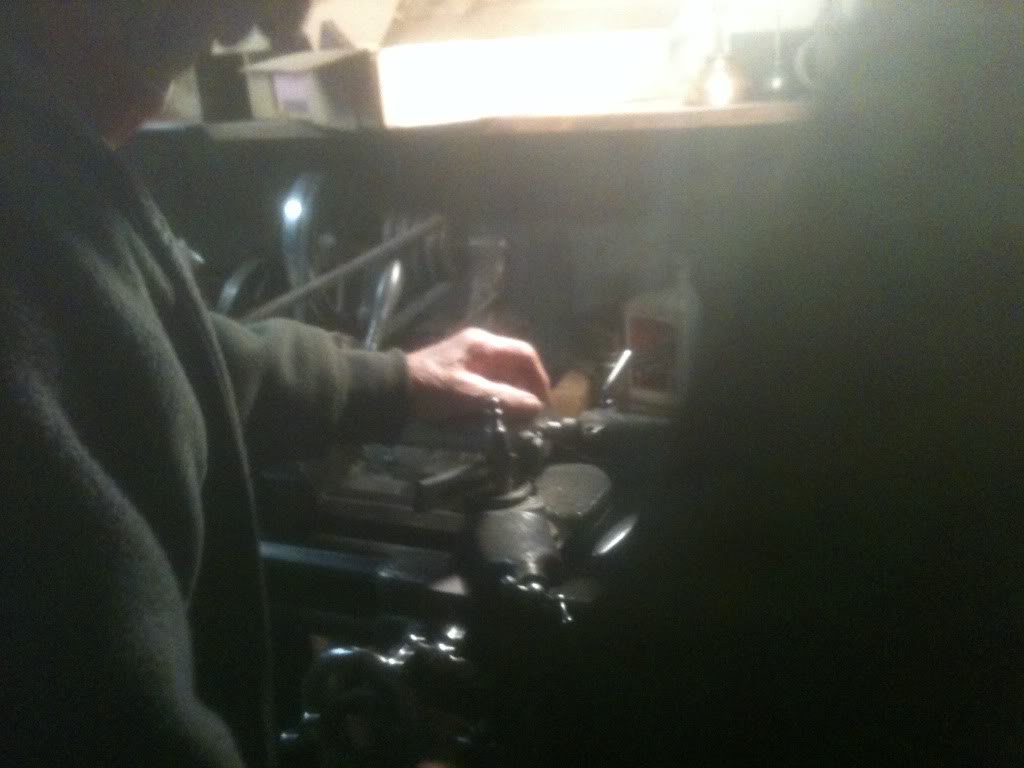
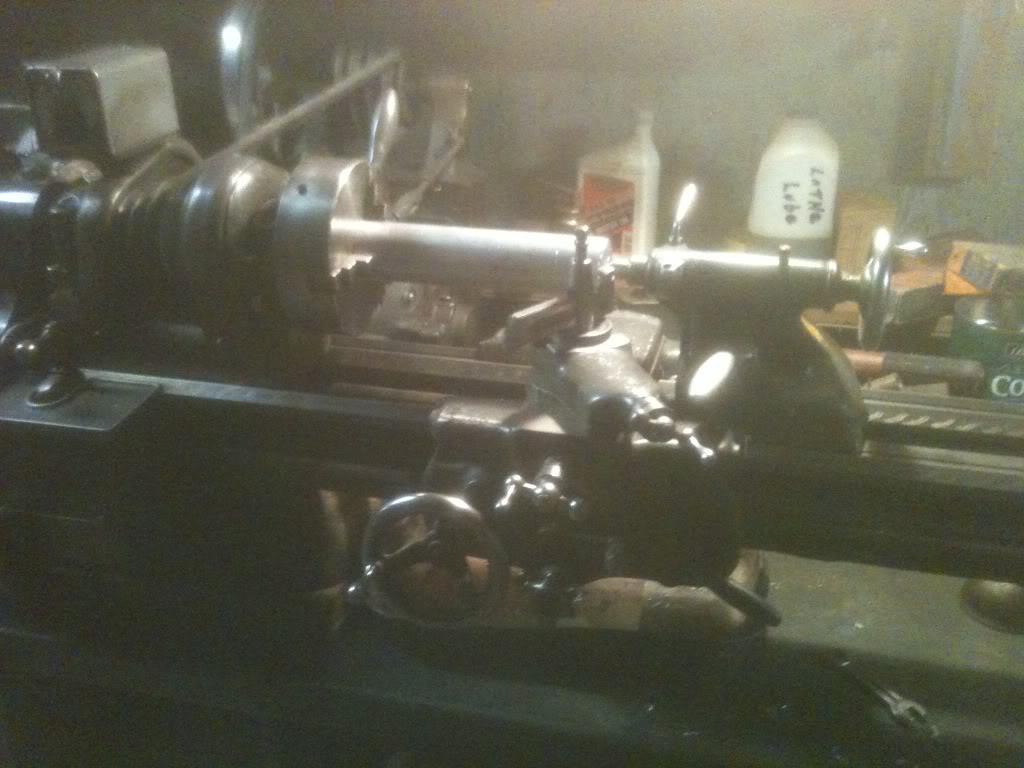
Well I really don't have much news. I figured I'd post up the pilot bearing adapter machining process. I left my camera behind on accident so I had a buddy take them on his iphone.
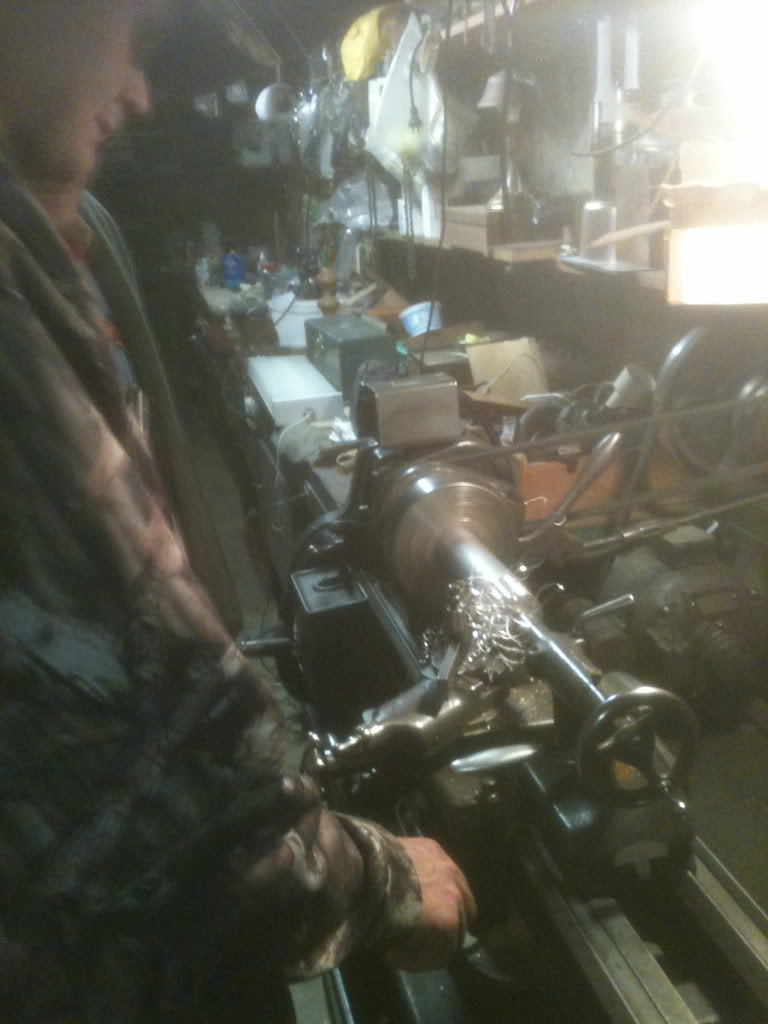
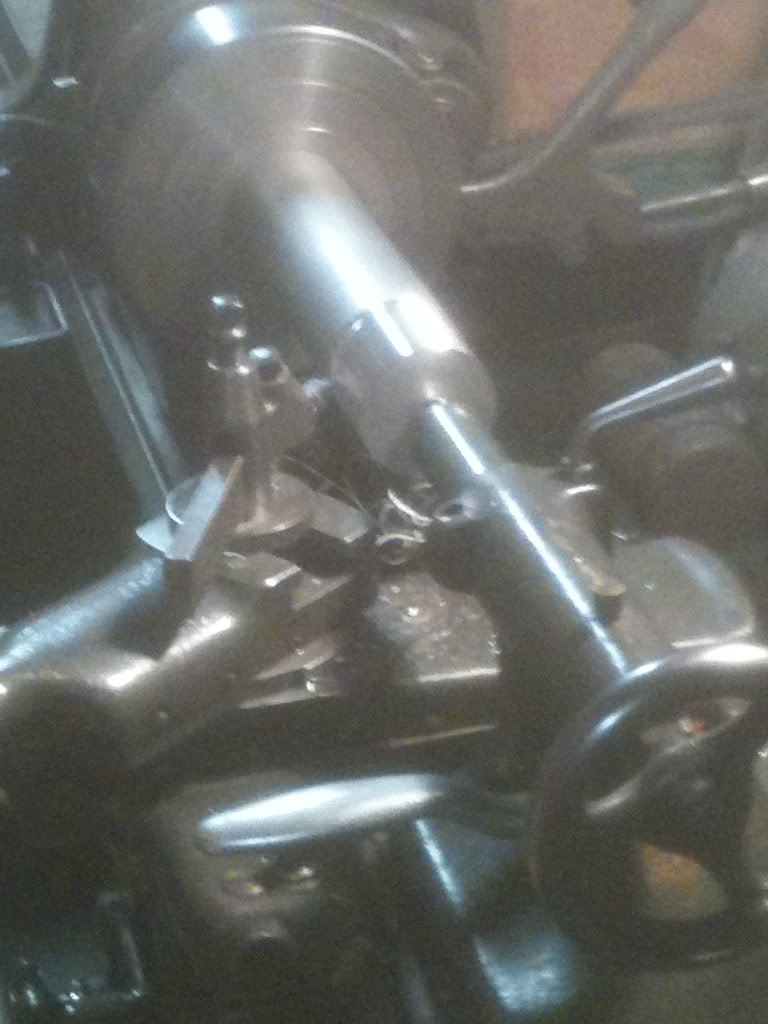
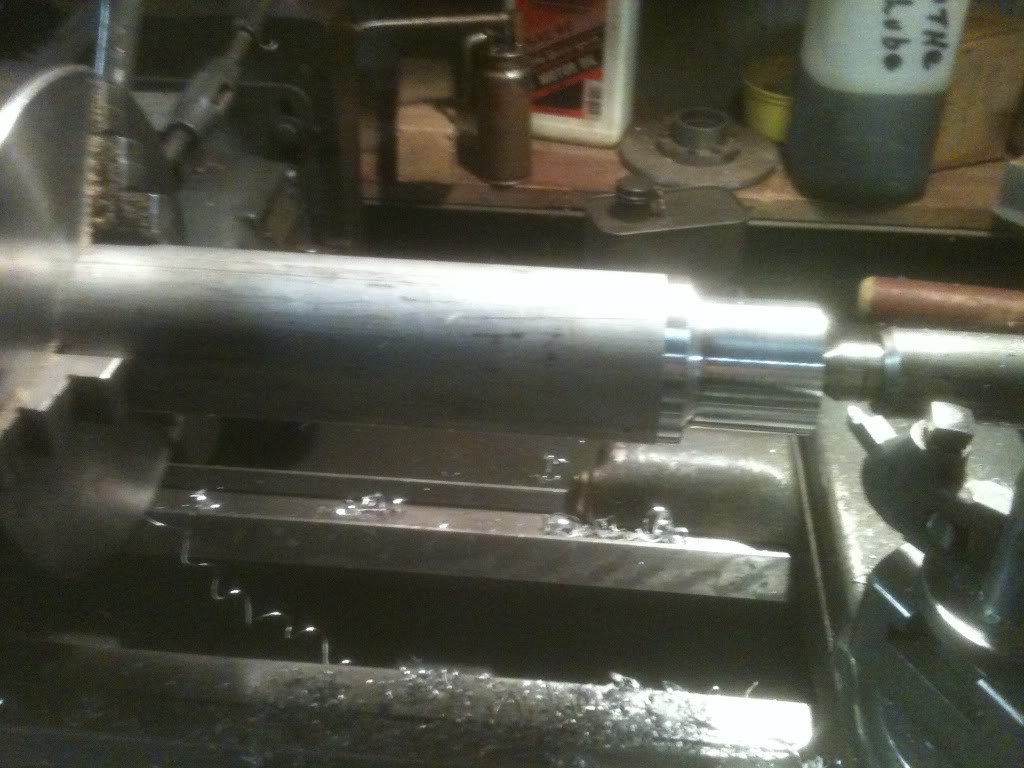
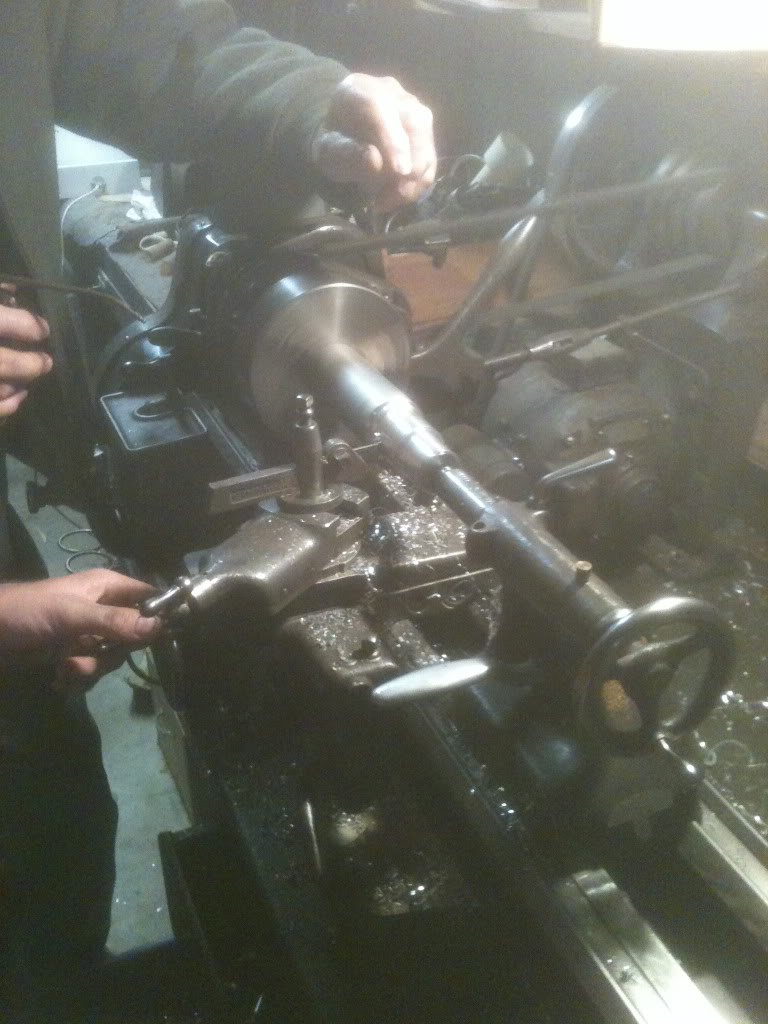
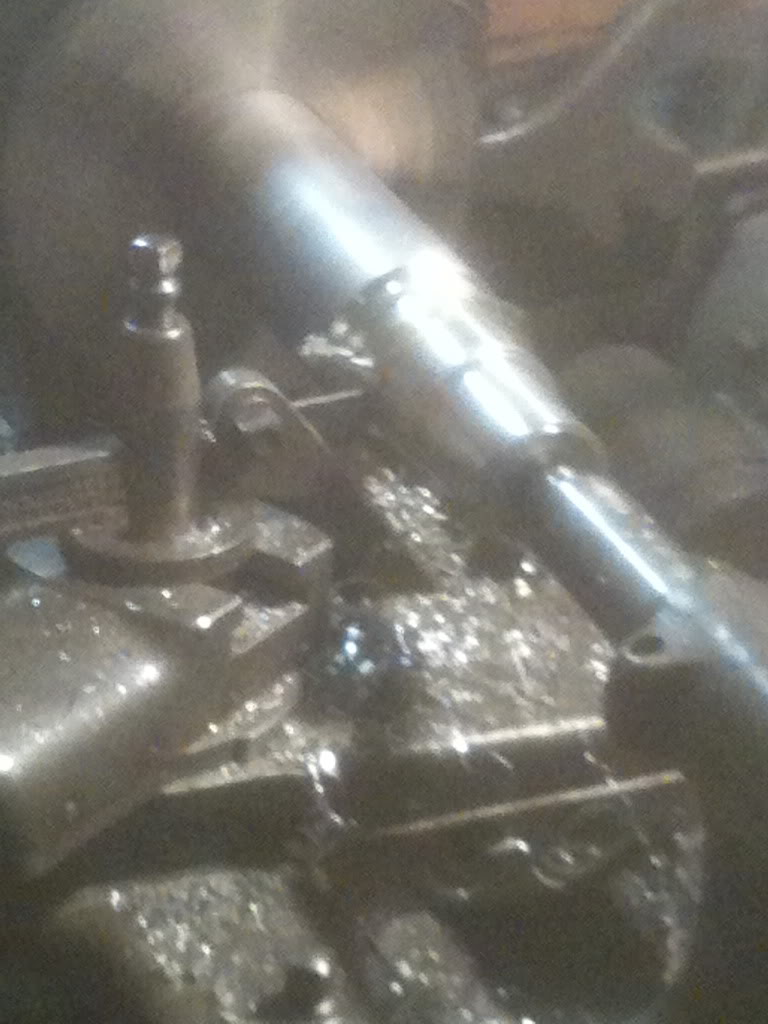
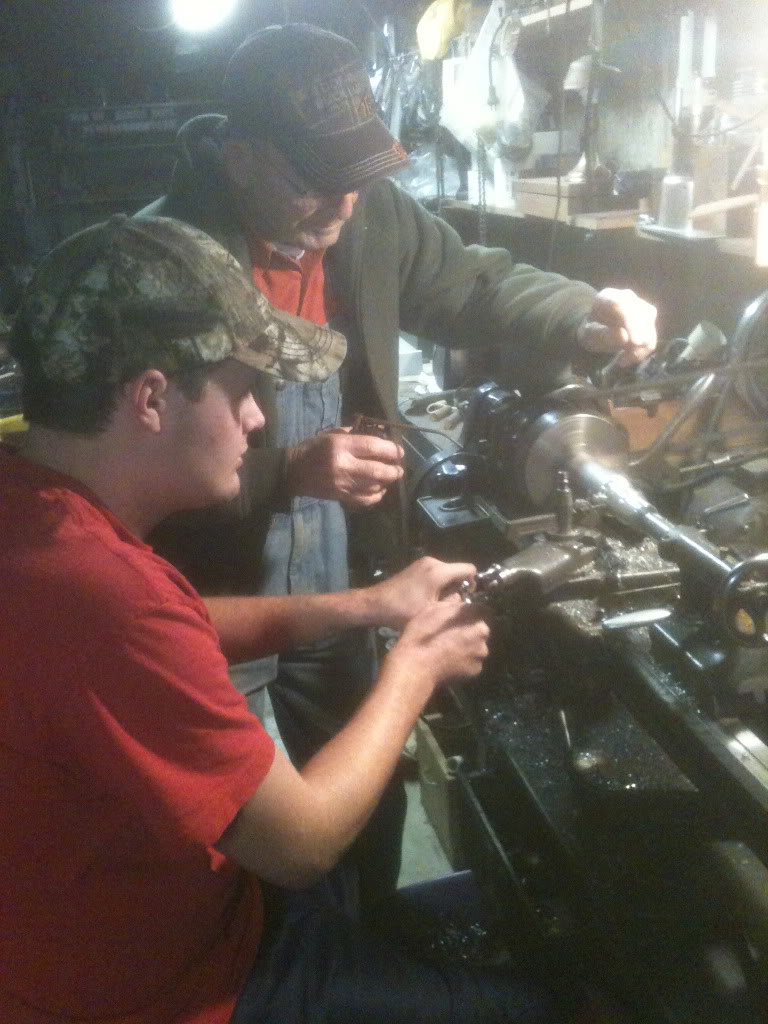
I'll grab some pics of the finished product later on as Grandpa has it right now because he is working on my flywheel and getting it drilled. I plan to make a trip to the city this weekend and scour every junkyard I can find for an engine. I'll keep y'all updated.
PhatFJ- It is sleeved but it would be cheaper just to bore it out oversize as its a dry sleeve and even the new sleeves have to be bored and honed. Thank you for your kind words!
Blake- see my explanation to PhatFJ. Parts for the turbo engine are no longer made and they have to be imported.
Pyrojoe- Check the timing chain tensioner for grooves. If it is worn real bad it might be worth the extra money to replace it.
Well I really don't have much news. I figured I'd post up the pilot bearing adapter machining process. I left my camera behind on accident so I had a buddy take them on his iphone.
I'll grab some pics of the finished product later on as Grandpa has it right now because he is working on my flywheel and getting it drilled. I plan to make a trip to the city this weekend and scour every junkyard I can find for an engine. I'll keep y'all updated.
11-29-2011, 01:05 PM
#76
Contributing Member
Join Date: Mar 2003
Location: COTKU,Ontario,Canada
Posts: 11,334
Likes: 0
Received 0 Likes
on
0 Posts
Just had an idea... sort of related to your build... have you still got the donor MB lying around the shop?
If so I was thinking about adapting the high lift MB hood hinge to the Toyota hood. You'd be able to get rid of the prop rod and get better access to the engine... I'm just not sure if there is space for the side mounted MB hinge or if the rear side of the hood arc would clear the cowling at the full 90* lift pt.
Just something extra you might want to look at while you're waiting for eng. parts...
12-03-2011, 08:12 AM
#77
Registered User
Thread Starter
Join Date: Apr 2011
Location: Sedalia, MO
Posts: 317
Likes: 0
Received 0 Likes
on
0 Posts
Aviator I may have to give that a try. it would sure be nice to be rid of that prop rod.
Well I have finally managed to track down a good low mileage (100k) engine. It is coming out of Indianapolis. I am going to have to use my head as this one came out of a wagon so it has the SLS pump in the head. It should be here next week sometime. I am looking forward to getting this project back on track again. Grandpa also got started re-drilling my flywheel. Thats about the only updates I have for now.
Well I have finally managed to track down a good low mileage (100k) engine. It is coming out of Indianapolis. I am going to have to use my head as this one came out of a wagon so it has the SLS pump in the head. It should be here next week sometime. I am looking forward to getting this project back on track again. Grandpa also got started re-drilling my flywheel. Thats about the only updates I have for now.
12-03-2011, 09:53 AM
#79
Registered User
I really don't want to thread jack, but I was wondering if anyone following this thread can tell me about shimming my steering knuckles on my 85 solid axle? I put the stock shims back in and have 5-7lbs resistance of pull (the axle shafts are not in and felt is not attached to knuckle). Don't know if I should take shims out or add more. This is the only thing keeping me from making any more progress on my project. Any help is appreciated. Thanks


