1UZ-FE into 1988 4runner 3.0 3vze
 07-28-2009, 03:48 PM
#61
Contributing Member
Thread Starter
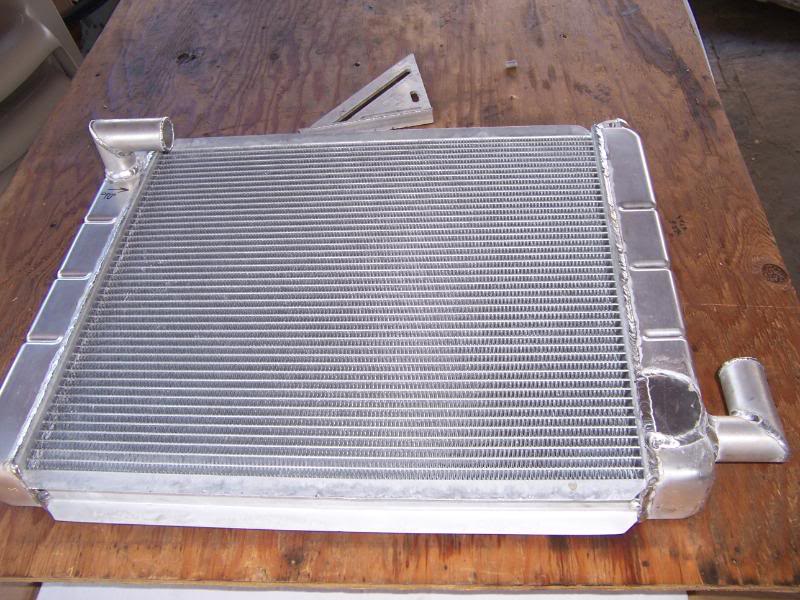
So I got my radiator back from the welders,should work now.Final price for the radiator was $250 thats with the customizing of the in and outs .
Considering Advanced adapters has a direct fit V8 swap radiator for $425 and the local radiator shop wanted $500 to make me a radiator with 4 rows , direct fit I think thats good .
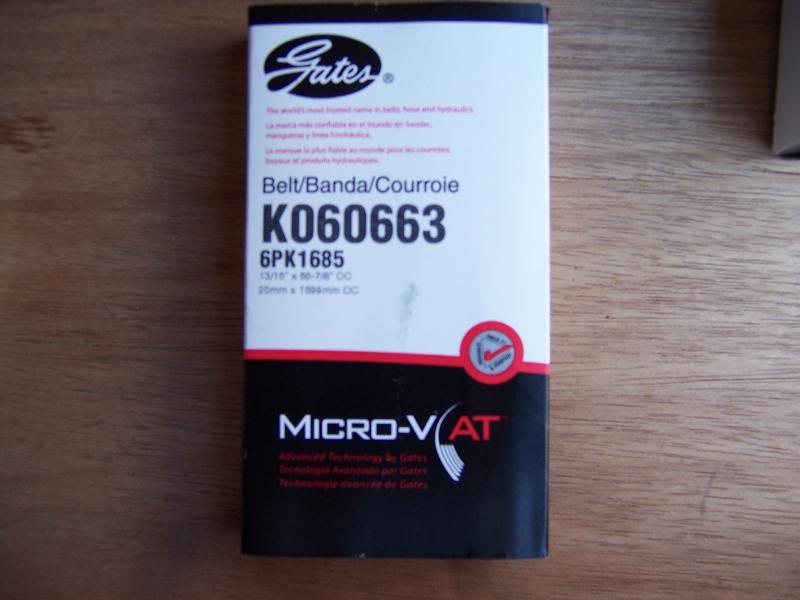
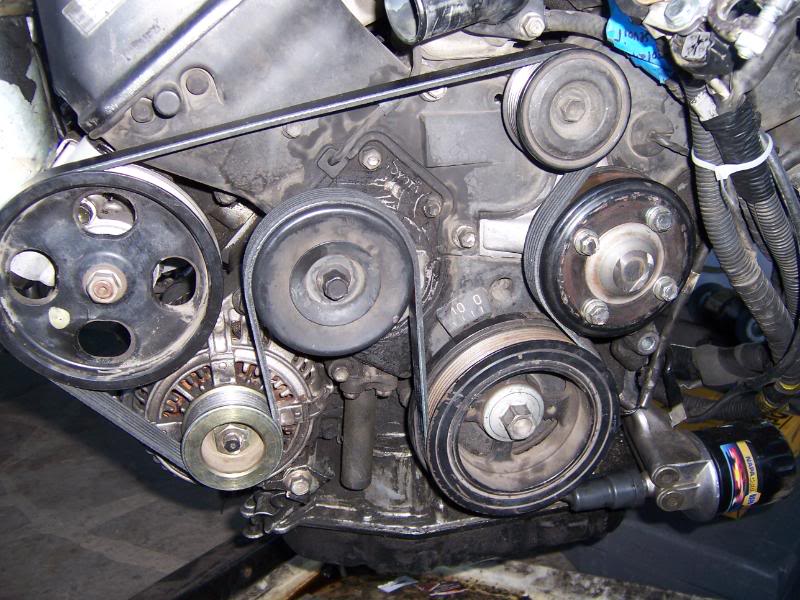
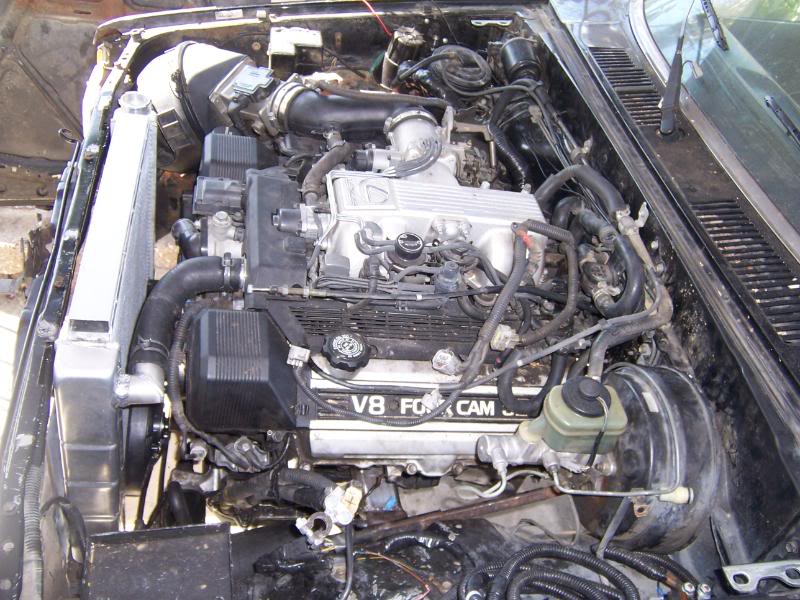
I also was able to finally find a serpintine belt for this engine without a/c .
Took me a while but finaly found one in stock a local autoparts store.
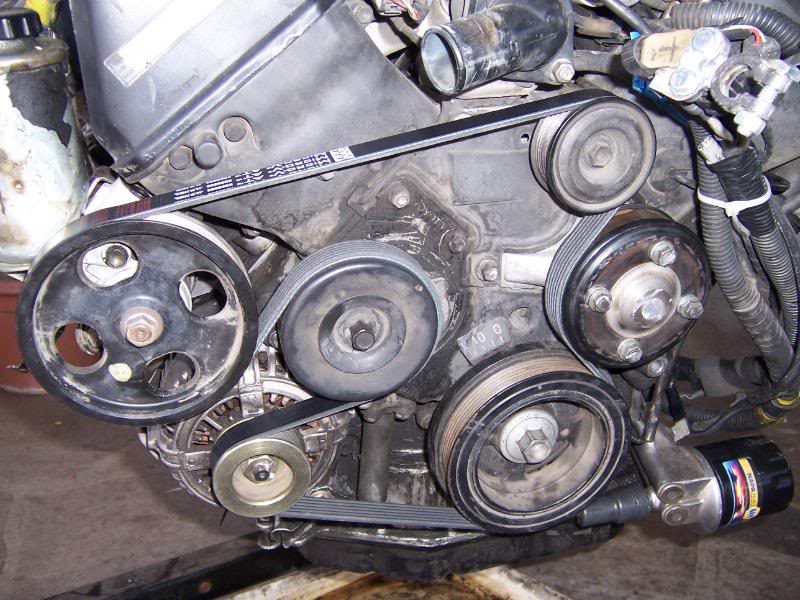
If you guys see something wrong with the way the belt is installed please speak up.I think it will work like this.
I had to extend the oil pressure connector about 6" for the sc oil filter housing,the alternator wiring at the plug was bad so I re wired that today also.
Hopefully I can put this engine in the truck this weekend and finally leave it there, I pulled this thing about 10 times.
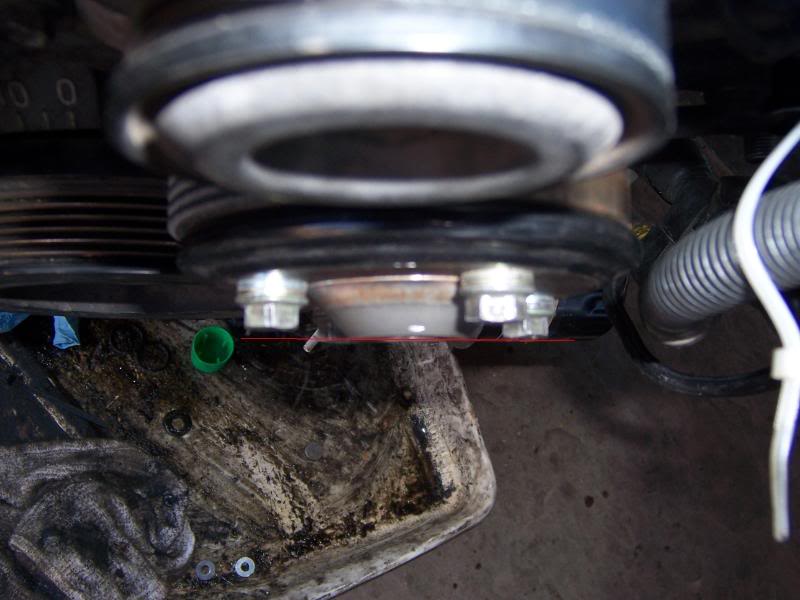
Oh I also took the el cheapo ryobi grinder with a cut off wheel and cut about 1/2" off of the pilot thing for the original clutch fan,for a little more room.
Considering Advanced adapters has a direct fit V8 swap radiator for $425 and the local radiator shop wanted $500 to make me a radiator with 4 rows , direct fit I think thats good .
I also was able to finally find a serpintine belt for this engine without a/c .
Took me a while but finaly found one in stock a local autoparts store.
If you guys see something wrong with the way the belt is installed please speak up.I think it will work like this.
I had to extend the oil pressure connector about 6" for the sc oil filter housing,the alternator wiring at the plug was bad so I re wired that today also.
Hopefully I can put this engine in the truck this weekend and finally leave it there, I pulled this thing about 10 times.
Oh I also took the el cheapo ryobi grinder with a cut off wheel and cut about 1/2" off of the pilot thing for the original clutch fan,for a little more room.
Last edited by RMA; 07-28-2009 at 04:05 PM.
 07-28-2009, 05:42 PM
#62
Contributing Member
Thread Starter
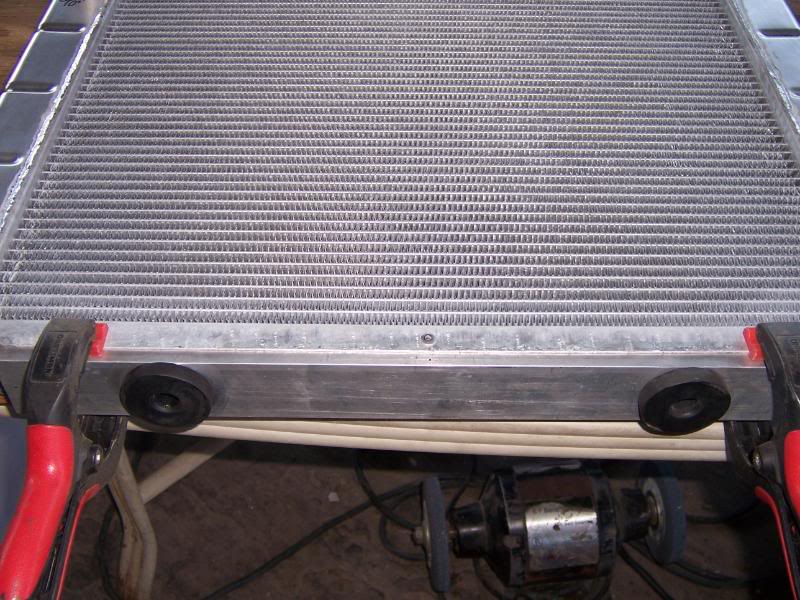
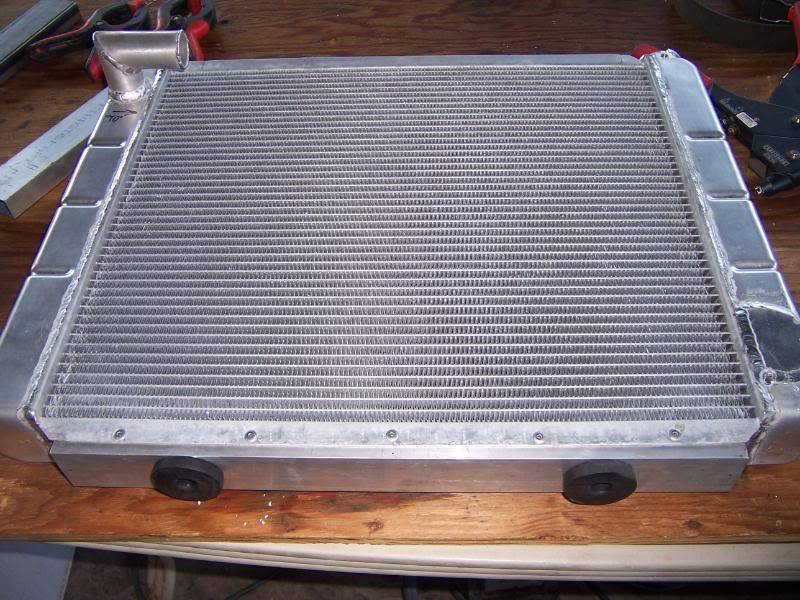
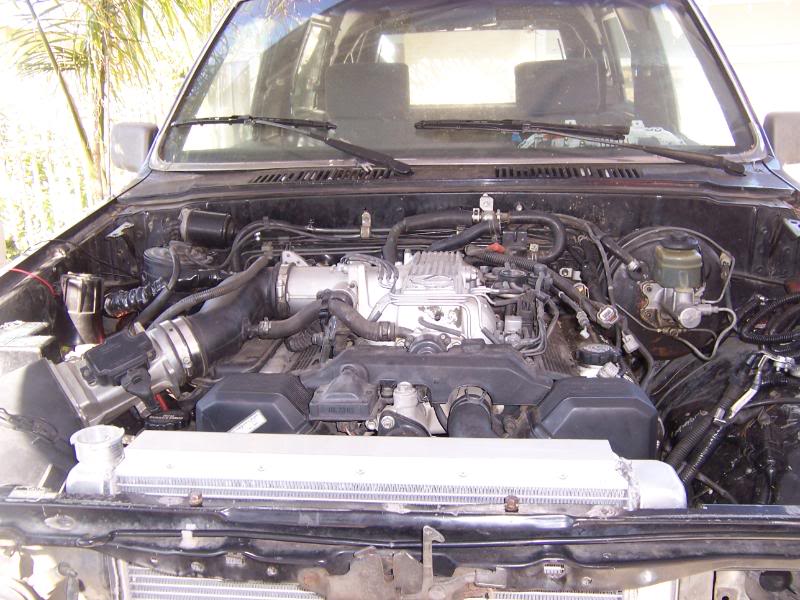
Ok quick update ,I added the radiator rubbers from the lexus to the new radiator ,I dont have a way to weld aluminum so I used 2" x 1" aluminum tubing and 3/16 x 1/4 aluminum rivets then drilled 1 1/2 " hole for the rubbers.
I am unsure about the top right now , I bought some steel tubing I thought I was going to use but I like the way the aluminum looks and I think the rivets will hold just fine I used 10 on the bottom.
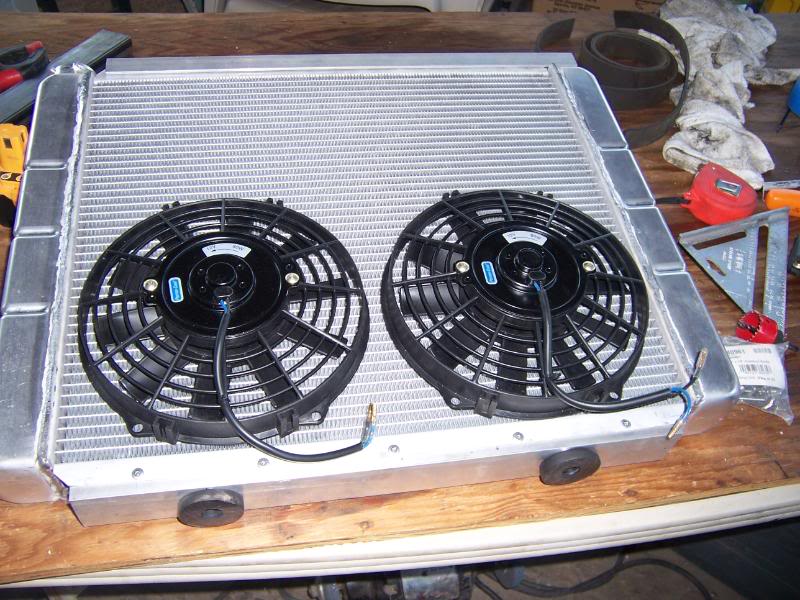
I also want to find a way to mount the fans other than the zip ties that come with the fans .
Right now I have 2 fans and will wait and see how they work , I may have to get 1 more , but I hope not.
and since I like pictures more than words Here are some .
I am unsure about the top right now , I bought some steel tubing I thought I was going to use but I like the way the aluminum looks and I think the rivets will hold just fine I used 10 on the bottom.
I also want to find a way to mount the fans other than the zip ties that come with the fans .
Right now I have 2 fans and will wait and see how they work , I may have to get 1 more , but I hope not.
and since I like pictures more than words Here are some .
07-29-2009, 07:36 AM
#63
Registered User

RMA - Most of the other detailed 1UZ swaps are a few years old or from another region. Thanks for sharing your current experience! I hope you don't mind a few off-topic questions.
Why did you choose to go with the Inchworm Pre-Runner adapter kit instead of modifying the LS400's A341e using parts from a compatible A340F transmission?
How much do you estimate you'll recover from parting out the LS400? How did you go about pricing the bits?
Why did you choose to go with the Inchworm Pre-Runner adapter kit instead of modifying the LS400's A341e using parts from a compatible A340F transmission?
How much do you estimate you'll recover from parting out the LS400? How did you go about pricing the bits?
07-29-2009, 08:39 AM
#64
Contributing Member
Thread Starter
Thanks , and no problem I will try to answers what I can .
I chose the inchworm adapter simply because I thought it would be the easiest.
I took a A340h apart just to get an idea what was going on and did not really feel comfortable trying to dissasemble 2 trannies to make one.
I have been able to sell about $1000 in parts from the lexus so far .I also sold the 3.0 and tranny that were in the truck .
and sorry I dont know what you mean by "pricing the Bits".
I did read all the threads on the 1uz swap That I could find and finally got tired of reading conflicting info and said screw it Just do it.
If you have anymore question feel free , I will try to help .
Just remember I still have not got this thing running and have a lot to get done still.
07-29-2009, 04:32 PM
#68
Contributing Member
Thread Starter
To be Honest I dont know ,Ive never done this before so I really dont know what they will look for .
I did read the engine has to be newer than the one installed and all the emissions stuff from the new engine has to be installed also.
So thats what Im trying to do.
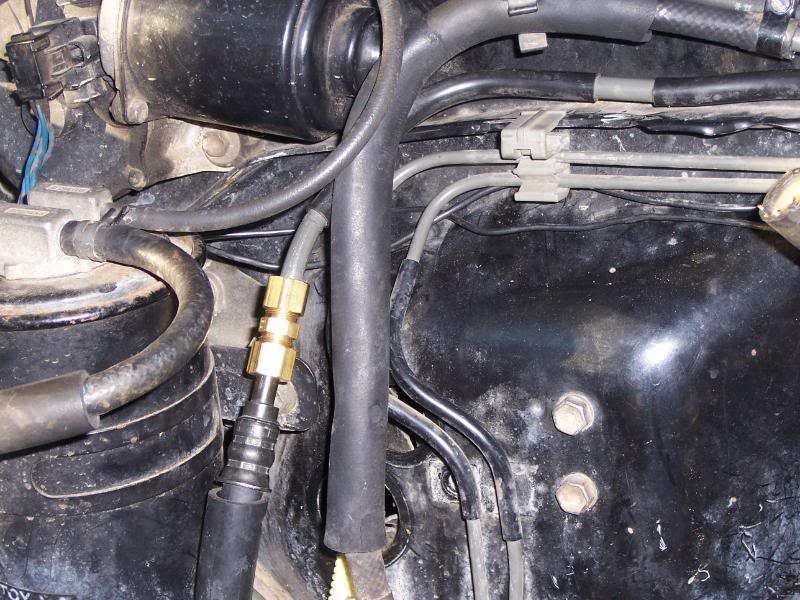
I am worried about the fuel lines right now Im not sure If I could use brass compression fittings to connect the hard line to a small section of rubber hose .
I did read the engine has to be newer than the one installed and all the emissions stuff from the new engine has to be installed also.
So thats what Im trying to do.
I am worried about the fuel lines right now Im not sure If I could use brass compression fittings to connect the hard line to a small section of rubber hose .
07-31-2009, 06:54 PM
#69
Contributing Member
Thread Starter
Ok update ...
IAfter staring at the motor a while I noticed that the belt may slip when wet or when I floor it so I returned the belt and got one 2 " shorter.This looks better I think.
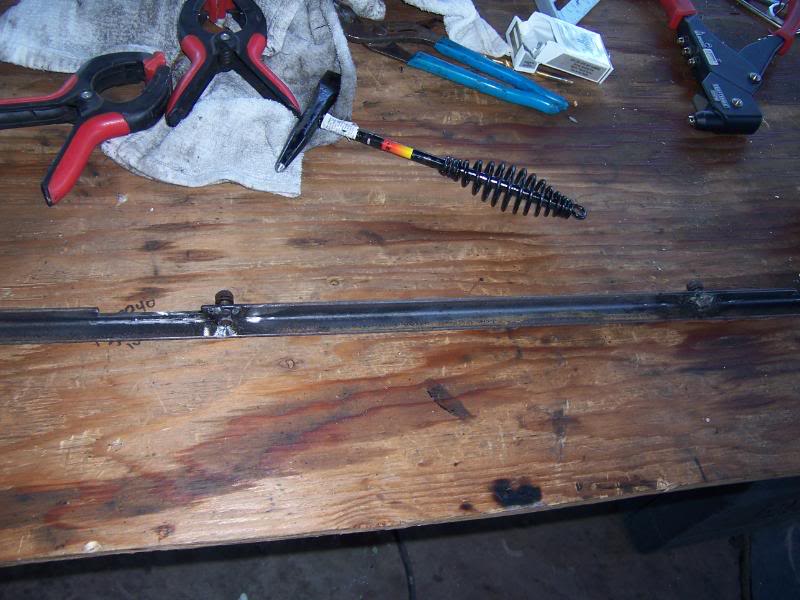
Also I decided to add some support to the upper part of the radiator supprt , I added 3/4 x 3/4 x 1/8 angle iron with a couple of nuts weldeed to it for anchoring the radiator at the top.
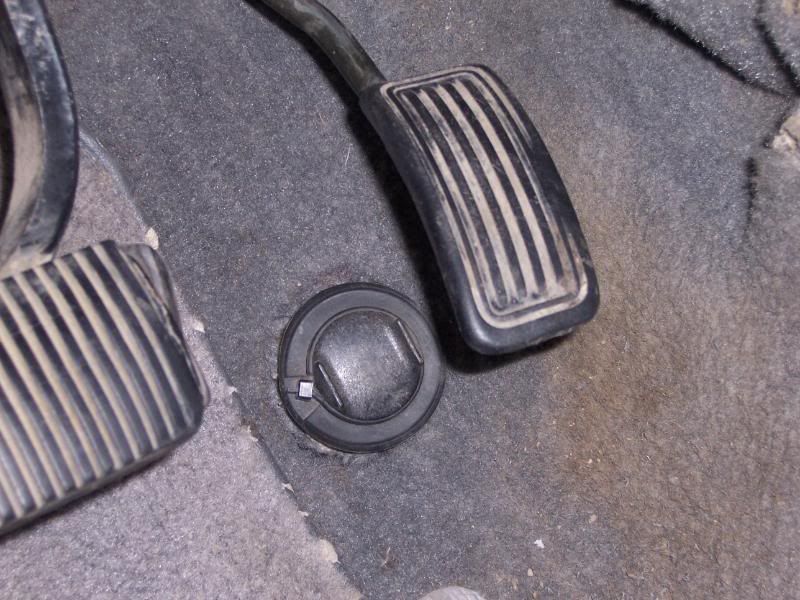
I also connected the two pieces of supply line with a compression fitting and installed the kick down switch from the lexus.I dont know what this switch is for but its connected to the computer so I installed it. I thought the cable from the throttle body was doing the kick down but whatever.
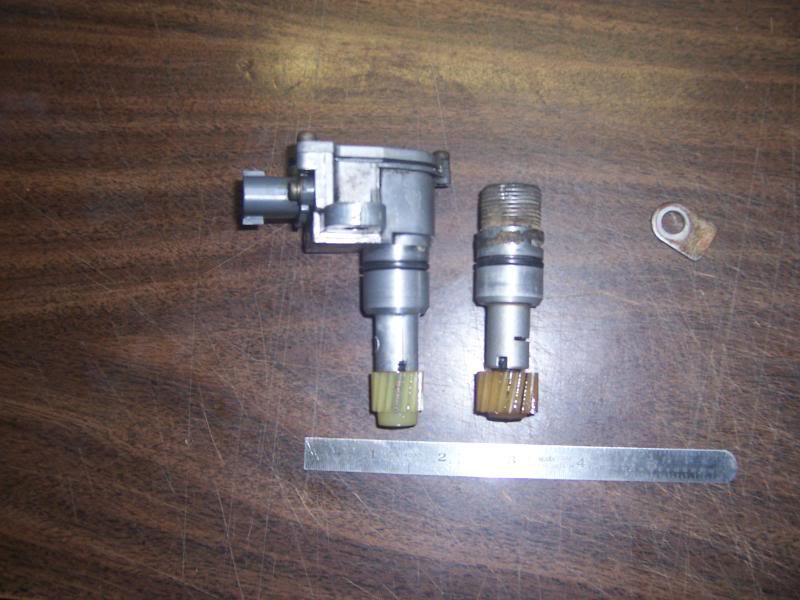
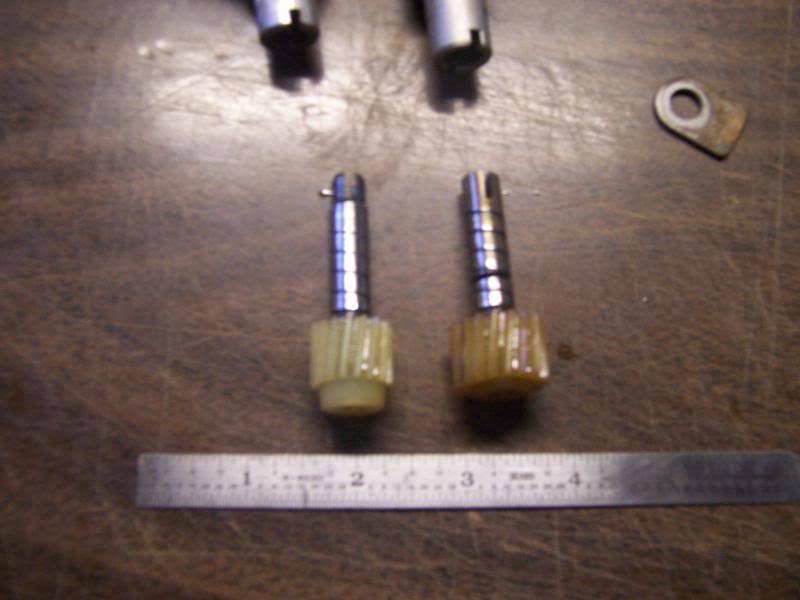
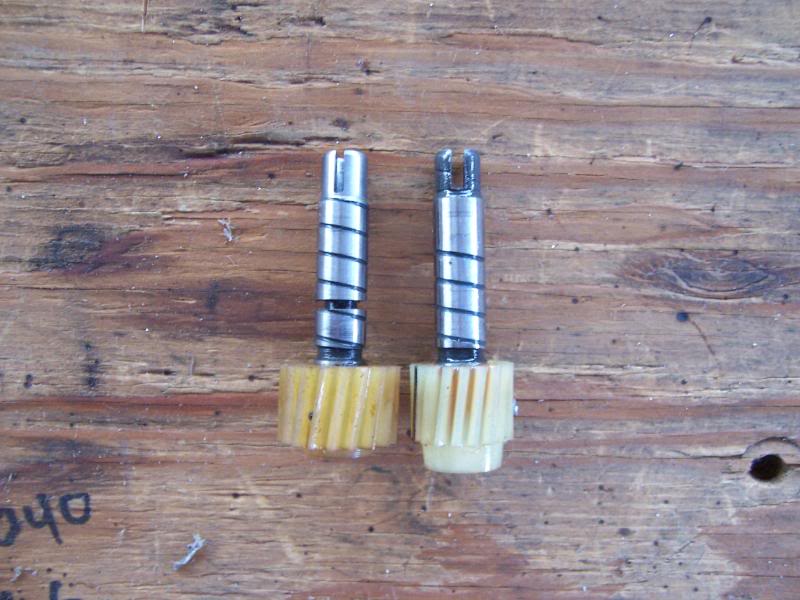
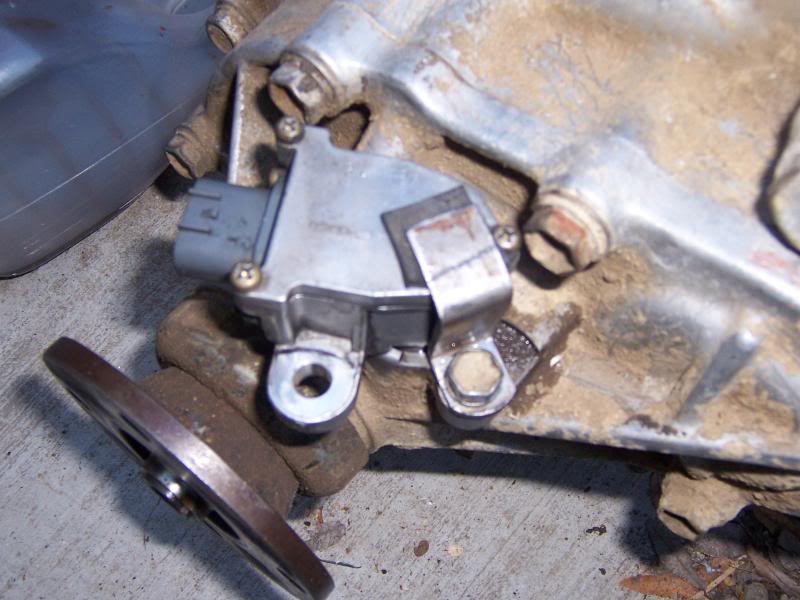
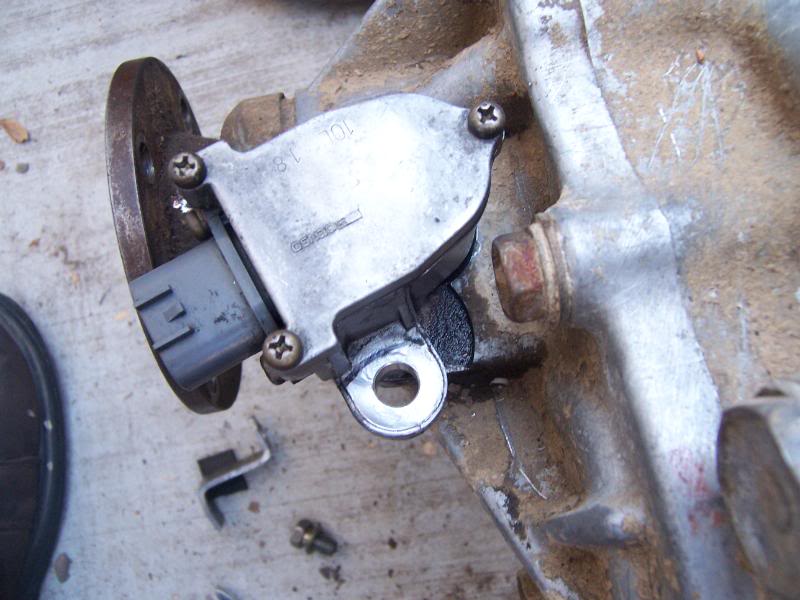
speed sensor , I thought I was going to be able to just install the lexus sensor in the transfer case and thats it, but Noo that would have been to easy.
The lexus sensor gear has 17 yes 17 teeth and the transfer case sensor gear has 18 teeth so I just shorted the transfer case sensor gear and notched it like the lexus then had my friend machine a taper to it like the lexus one and then made a small bracket to hold it in . Now you could buy a sensor or an adapter from marlin ,but since I had both of these and my friend charged me nothing Ill see if this works if not I will buy the adapter for the transfer case sensor. The sensor now fits fine and does turn 3 for 1 like it did in the lexus tranny.
Hopefully I can install the engine and radiator along with hooking eveything up in the engine bay this weekend for the last time.
I cut the sc manifolds a bit but they still hit the upper a arm brackets ,so Im just waiting for the tundra manifolds ,they still have not arrived.
IAfter staring at the motor a while I noticed that the belt may slip when wet or when I floor it so I returned the belt and got one 2 " shorter.This looks better I think.
Also I decided to add some support to the upper part of the radiator supprt , I added 3/4 x 3/4 x 1/8 angle iron with a couple of nuts weldeed to it for anchoring the radiator at the top.
I also connected the two pieces of supply line with a compression fitting and installed the kick down switch from the lexus.I dont know what this switch is for but its connected to the computer so I installed it. I thought the cable from the throttle body was doing the kick down but whatever.
speed sensor , I thought I was going to be able to just install the lexus sensor in the transfer case and thats it, but Noo that would have been to easy.
The lexus sensor gear has 17 yes 17 teeth and the transfer case sensor gear has 18 teeth so I just shorted the transfer case sensor gear and notched it like the lexus then had my friend machine a taper to it like the lexus one and then made a small bracket to hold it in . Now you could buy a sensor or an adapter from marlin ,but since I had both of these and my friend charged me nothing Ill see if this works if not I will buy the adapter for the transfer case sensor. The sensor now fits fine and does turn 3 for 1 like it did in the lexus tranny.
Hopefully I can install the engine and radiator along with hooking eveything up in the engine bay this weekend for the last time.
I cut the sc manifolds a bit but they still hit the upper a arm brackets ,so Im just waiting for the tundra manifolds ,they still have not arrived.
 08-01-2009, 04:11 PM
#71
Contributing Member
Thread Starter
Yea Brian thanks !! It is taking all my free time right now to do this thing.The wiring was what took me a long time , the lexus cluster in the 4runner was a big headache.
This is what I was able to get done today.
Install engine
Install evap from lexus
connect fuel lines to engine
install radiator (still need to make upper mounts)
install igniters
install maf and massage old battery seat so it could fit.
install 3.0 power steering lines (worked good).
heater core lines
hose from brake booster to intake (shortened it a bit)
I just realized I am missing somethings and will order them asap.
Radiator cap ,overflow tank
small fitting for radiator to attach hose to overflow tank
I have a fan controler I was going to use , but will order a new one to be safe.
 08-01-2009, 04:31 PM
#73
Contributing Member
Thread Starter
Yea me to , all though I havent been able to follow others lately, when I can I follow them.
I am still waiting for my friend to finish the cluster surround ,hes doing it on his free time to save me some money . Hopefully he can finish it soon.He owns a shop here in town ( SJ Customs ) and has been pretty busy lately.
Your work Table came out looking really good , I wish I could have something like that here ,I may make one like yours but alot smaller.
Thanks for following.
08-01-2009, 07:41 PM
#74
Contributing Member
Thread Starter
well after a little break , I went to the truck and looked around for a bit a decided I could put power to the truck and take a look at the cluster for the first time.
I connected the battery and blinkers and the alarm came on so I turned the blinkers off and the alarm off and re connected the battery.
Here is a little vid of the cluster it will be on all the time , it has a tint to it this is the way its in the lexus.
I have a couple lites on and will check to see whats up with that.
The oil may just be because the engine has no oil I drained it.
Th radiator light may just be because its not connected to anything , I think.
This was super exciting to see, it worked for the first time and no fuses blown.
sorry about the quality, it was taken with with a kodak easy share real quick , I will try and use the other camera for the other vids.
[YOUTUBE]http://www.youtube.com/watch?v=n2akc86mHZo[/YOUTUBE]
Last edited by RMA; 08-01-2009 at 07:43 PM.
08-02-2009, 02:25 AM
#75
Contributing Member
Join Date: Feb 2007
Location: maple ridge, British Columbia, Canada
Posts: 9,055
Likes: 0
Received 9 Likes
on
5 Posts
Sweet!!
Nice to see somebody doing this swap around here. Now if you guys would do a 5sp swap!!!!
Love the progess, if only I could afford to do the swap. Can't find a lexus for under 5 g's around here..
Nice to see somebody doing this swap around here. Now if you guys would do a 5sp swap!!!!
Love the progess, if only I could afford to do the swap. Can't find a lexus for under 5 g's around here..
08-02-2009, 08:46 AM
#76
Contributing Member
Thread Starter
Thanks !!
Maybe you should think about coming down here for one , if you are patient you can get one for $500.
I just got offered another 1992 ls 400 wrecked at the front passanger corner for $500 by some one that replied to my ad for parts , that then decided they did not want to fix it.
If all goes well on this runner I will be doing the 1uz 5speed on 89 2wd pick up .
I also have a few friends waiting on me to finish so They can put one in their trucks.
One of them is a 1965 landcruiser.
08-02-2009, 02:05 PM
#77
Contributing Member
Thread Starter
so I checked the oil light and it is the oil level light and its on because theres no oil in the engine right now.(Duh)
the radiator light Im still not sure why its on I did not hook it up.
I also cracked the fuel line open at the fuel rail and Im getting fuel there , which is another good sigh. Meaning so far so good COR is working .
made a couple brackets for the top of the radiator and just primered them , will paint them in a bit.
I really want to start this thing but I was told not to with out exhaust manifolds on . So Ill wait.
back to work..
08-02-2009, 02:16 PM
#78
Registered User
Join Date: Dec 2008
Location: DFW, Texas!
Posts: 1,015
Likes: 0
Received 0 Likes
on
0 Posts
08-02-2009, 02:45 PM
#79
Contributing Member
Thread Starter
Maybe , Ill look in to it.
I looked at the diargam and it shows a "normally open switch" which tells me the switch closes to provide ground to then turn the light on.
It also shows the bulb always having power and its just waiting for ground "switch".
I must have grounded the wire i wasnt going to connect.
I will tear into it an see where I messed up at.
Thanks !!
08-02-2009, 04:09 PM
#80
Registered User
Wow I missed this..
Lookin good man !! If your done by September you should come out to pismo so I can drool in person.
Now I know this is here I'll be watching

Lookin good man !! If your done by September you should come out to pismo so I can drool in person.
Now I know this is here I'll be watching


