88 4Runner 3.4 swap w/auto to Marlin 4.7 T-case
 03-16-2010, 05:43 AM
#1
Registered User
Thread Starter
Join Date: Sep 2007
Location: Lafayette, La
Posts: 99
Likes: 0
Received 0 Likes
on
0 Posts
88 4Runner 3.4 swap w/auto to Marlin 4.7 T-case
Just sharing with those that like to read project threads.
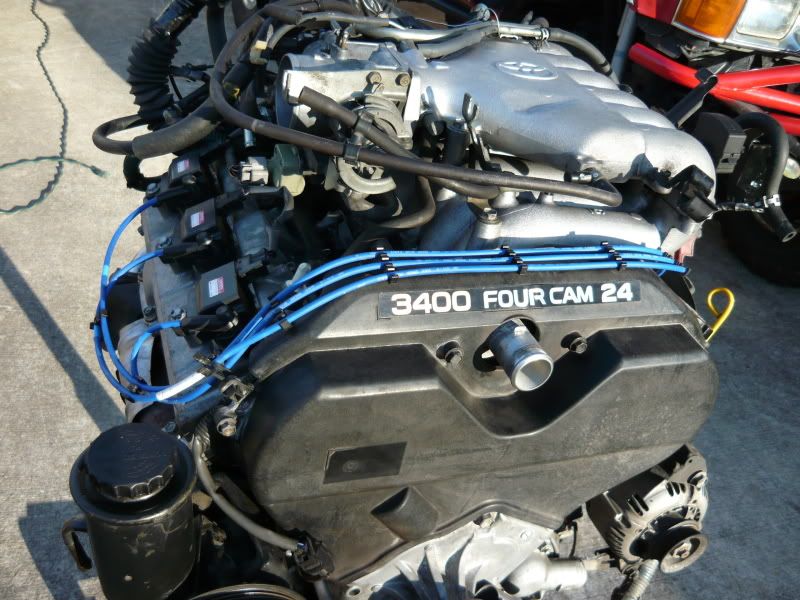
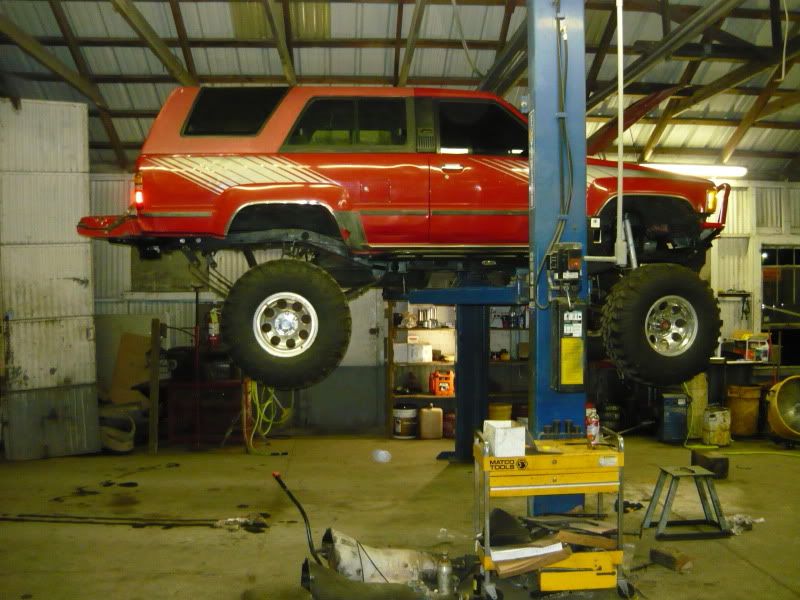
Doing a 3.4 swap on my 88 4runner with a 95 T100 motor, 97 harness, ECU, and automatic trans. Putting a marlin adapter to a 4.7 marlin T-case with twin sticks and FROR crossmember to hold it in place.
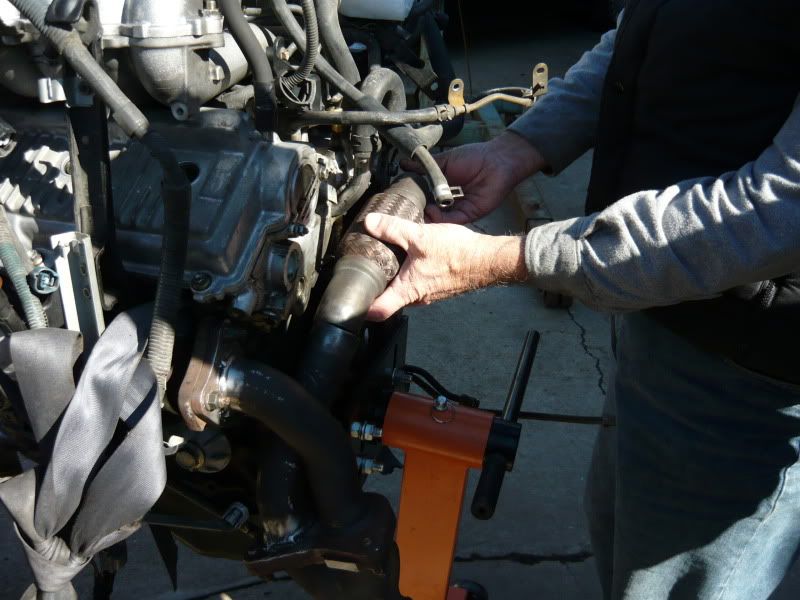
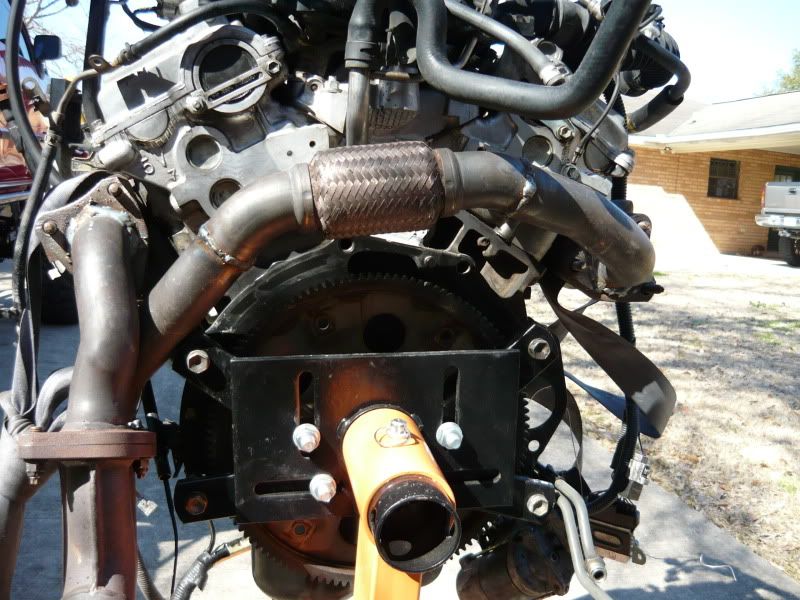
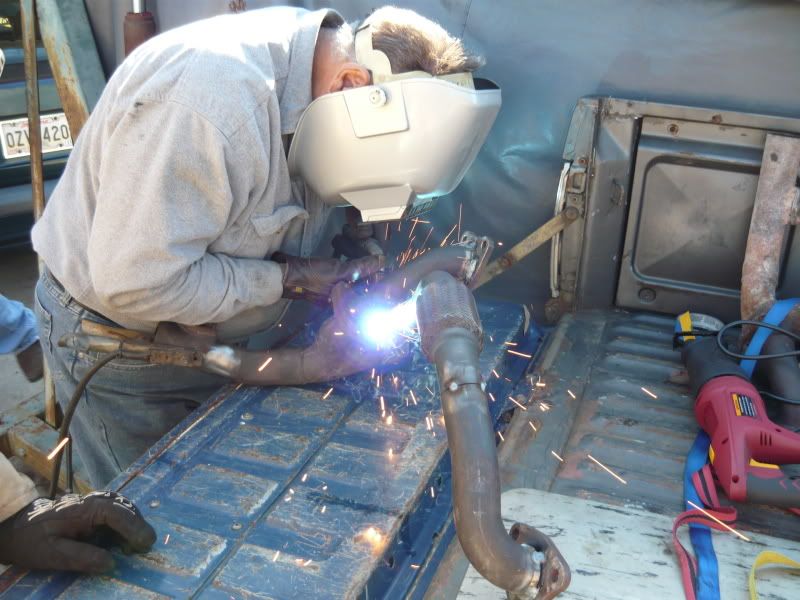
Found a good build thread for a the crossover pipe on Yota Tech.Build your own 3.4 crossover pipe - YotaTech Forums
Well it looks like I am a little ahead of schedule with the motor maintence. Changed the timing belt, valve cover gaskets, rear cam seals, plugs, wires, termostat and alot of cleaning. Installed the 97 wiring harness on the 95 T100 motor along with the 97 intakes and valve covers. Swapped a 3.0L water neck along with 3.0 motor mount brackets. Followed the previous mentioned thread about the crossover exhaust mod, and Mr. Paul stuck it all together for me while I broke some of his tools. Not sure yet but we might try to swap the engines on Saturday down in Franklin while the shop is closed for the weekend. More pics follow the link.
http://s556.photobucket.com/albums/s...1/5VZE%20Swap/
Doing a 3.4 swap on my 88 4runner with a 95 T100 motor, 97 harness, ECU, and automatic trans. Putting a marlin adapter to a 4.7 marlin T-case with twin sticks and FROR crossmember to hold it in place.
Found a good build thread for a the crossover pipe on Yota Tech.Build your own 3.4 crossover pipe - YotaTech Forums
Well it looks like I am a little ahead of schedule with the motor maintence. Changed the timing belt, valve cover gaskets, rear cam seals, plugs, wires, termostat and alot of cleaning. Installed the 97 wiring harness on the 95 T100 motor along with the 97 intakes and valve covers. Swapped a 3.0L water neck along with 3.0 motor mount brackets. Followed the previous mentioned thread about the crossover exhaust mod, and Mr. Paul stuck it all together for me while I broke some of his tools.
Not sure yet but we might try to swap the engines on Saturday down in Franklin while the shop is closed for the weekend. More pics follow the link.http://s556.photobucket.com/albums/s...1/5VZE%20Swap/
Last edited by John S.; 03-16-2010 at 05:52 AM.
 03-16-2010, 05:47 AM
#2
Registered User
Thread Starter
Join Date: Sep 2007
Location: Lafayette, La
Posts: 99
Likes: 0
Received 0 Likes
on
0 Posts
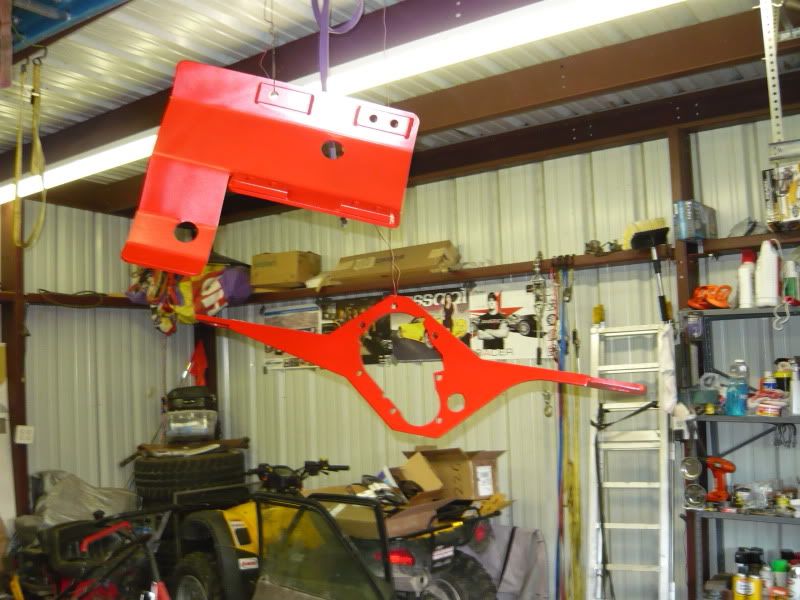
Painted the Front Range Crossmember and skid plate.
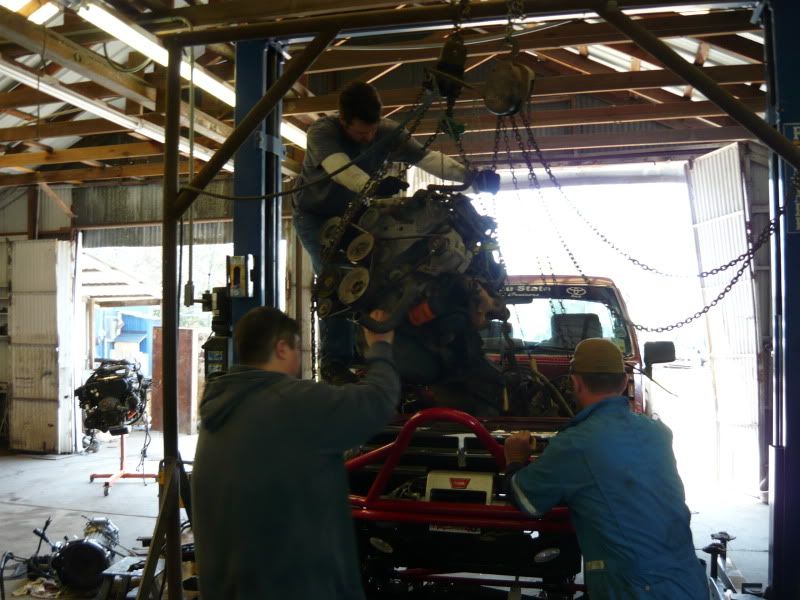
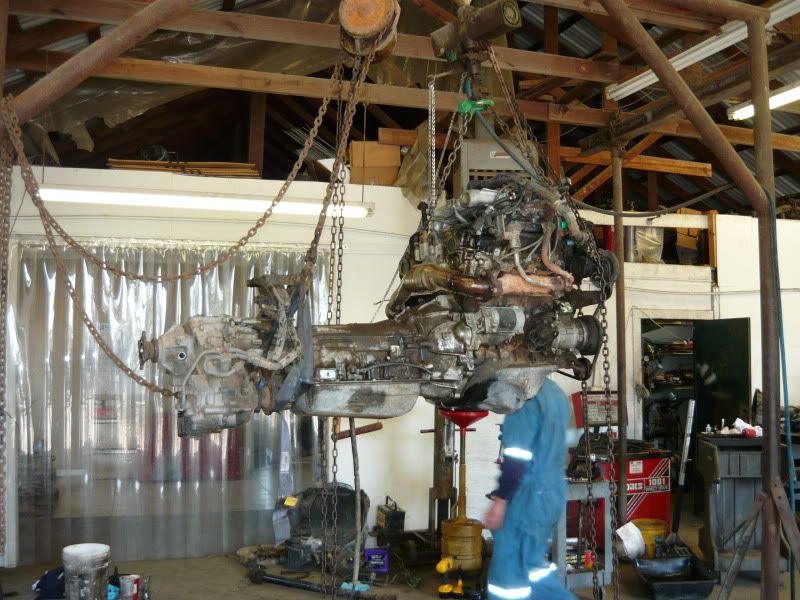
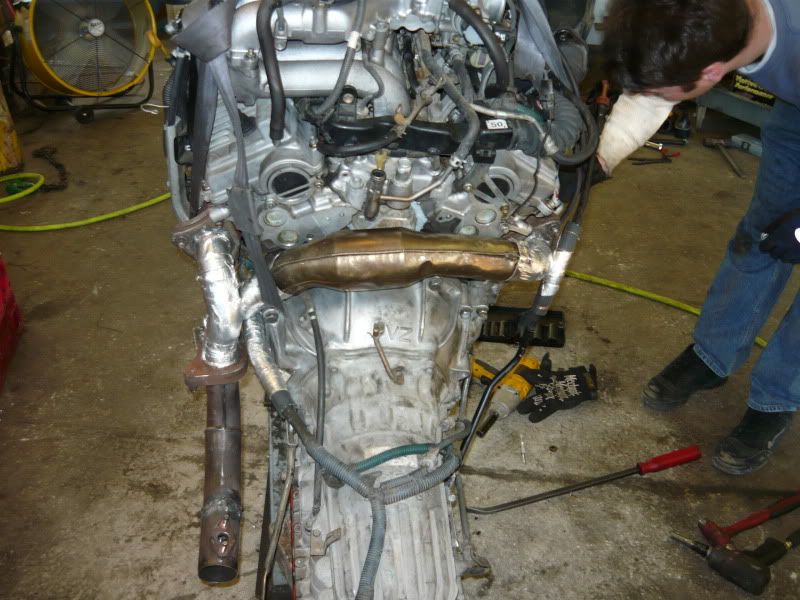
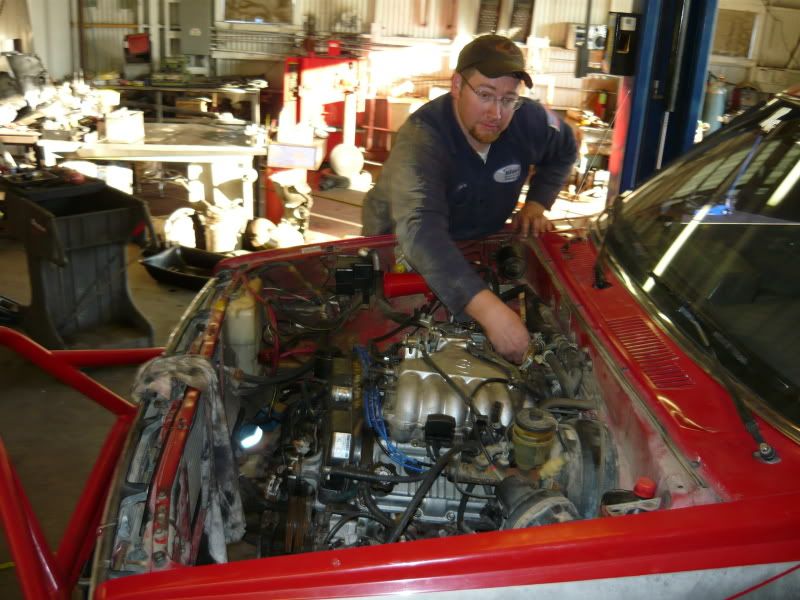
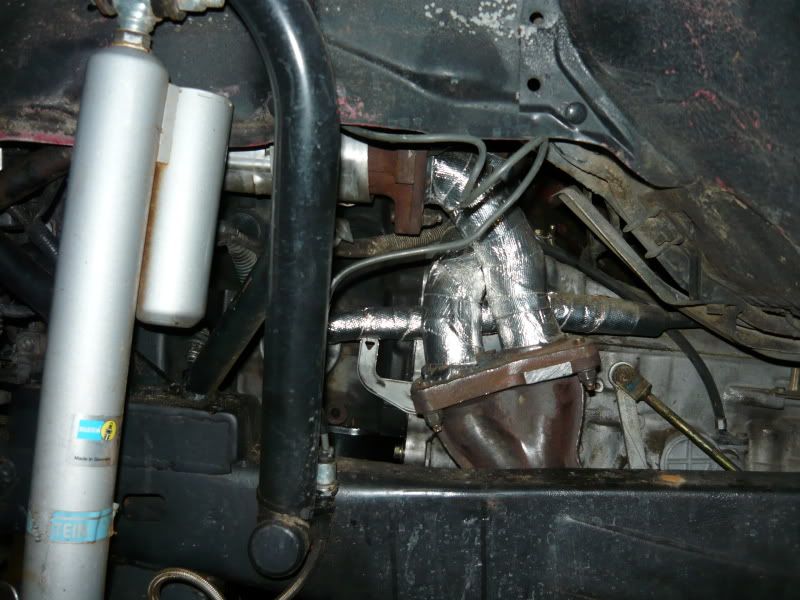
Started around 8:30 am and by noon the engine and trans was seperated in the bed of the truck. Took a lunch break before final prep of motor to begin install. Discovered a hole in the new transmission pan had to weld in a plug, , grind smooth, clean, and paint. Sealed up the pan reinstalled and mated it to the 3.4, found that the trans harness travels very close to the new exhaust crossover. Wrapped the exhaust with some heat wrap, covered the wire loom with heater hose and also some wrap for add protection. Lifted the assembly as high as we colud and started dropping the new powerplant in with two guys standing on the tail end one operating the hoist and I was underneath guiding what I could into the tight fit. Motor mounts tight and trans held up by a ratchet strap we started connecting what we could around 5 pm. We pulled a vacum on the AC and seems to hold well. My buddy showed up with some beers and the BS started until it was on the trailer and headed home. Still have the wiring, T-case, belts, radiator, and shifter before we are mobile again. But all this was alot easier with the help of my local club members Mike and Dan, along with Kyle and his brother's shop, Thanks guys.
Started around 8:30 am and by noon the engine and trans was seperated in the bed of the truck. Took a lunch break before final prep of motor to begin install. Discovered a hole in the new transmission pan had to weld in a plug, , grind smooth, clean, and paint. Sealed up the pan reinstalled and mated it to the 3.4, found that the trans harness travels very close to the new exhaust crossover. Wrapped the exhaust with some heat wrap, covered the wire loom with heater hose and also some wrap for add protection. Lifted the assembly as high as we colud and started dropping the new powerplant in with two guys standing on the tail end one operating the hoist and I was underneath guiding what I could into the tight fit. Motor mounts tight and trans held up by a ratchet strap we started connecting what we could around 5 pm. We pulled a vacum on the AC and seems to hold well. My buddy showed up with some beers and the BS started until it was on the trailer and headed home. Still have the wiring, T-case, belts, radiator, and shifter before we are mobile again. But all this was alot easier with the help of my local club members Mike and Dan, along with Kyle and his brother's shop, Thanks guys.
Last edited by John S.; 03-16-2010 at 05:59 AM.
03-16-2010, 06:05 AM
#3
Registered User
Thread Starter
Join Date: Sep 2007
Location: Lafayette, La
Posts: 99
Likes: 0
Received 0 Likes
on
0 Posts
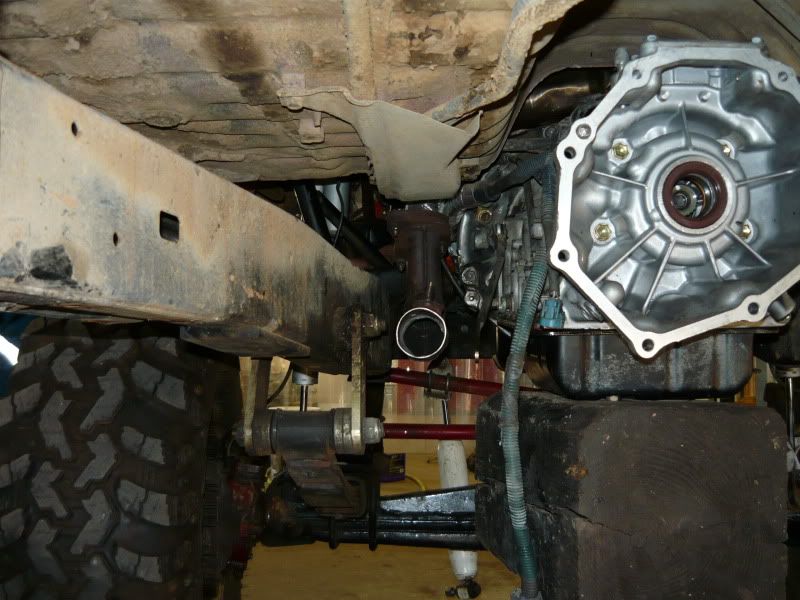
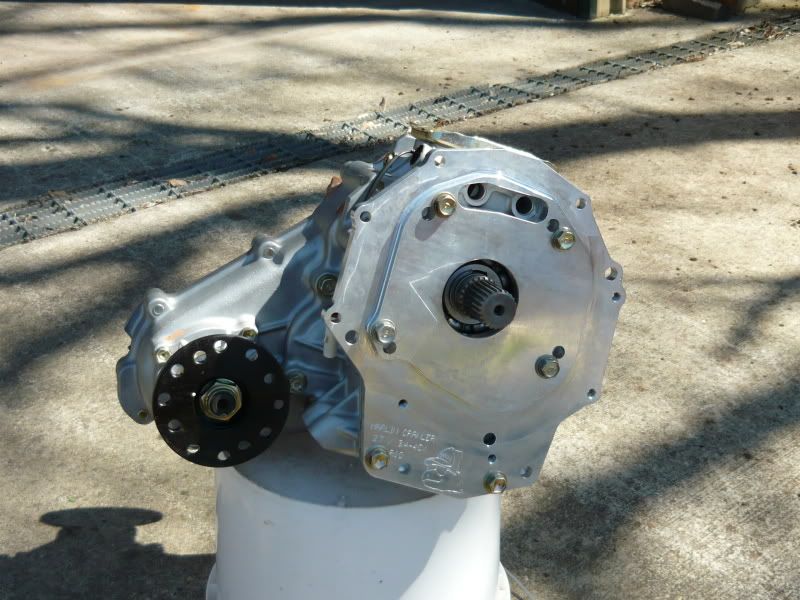
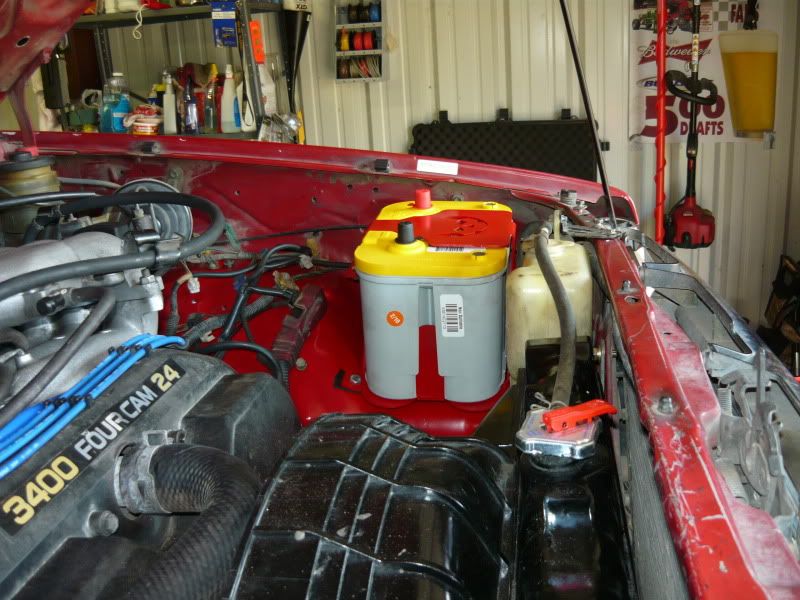
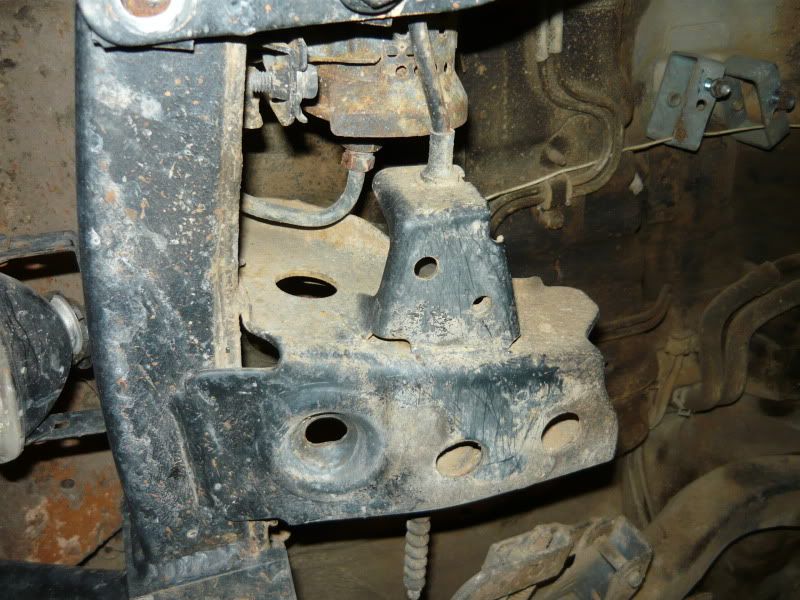
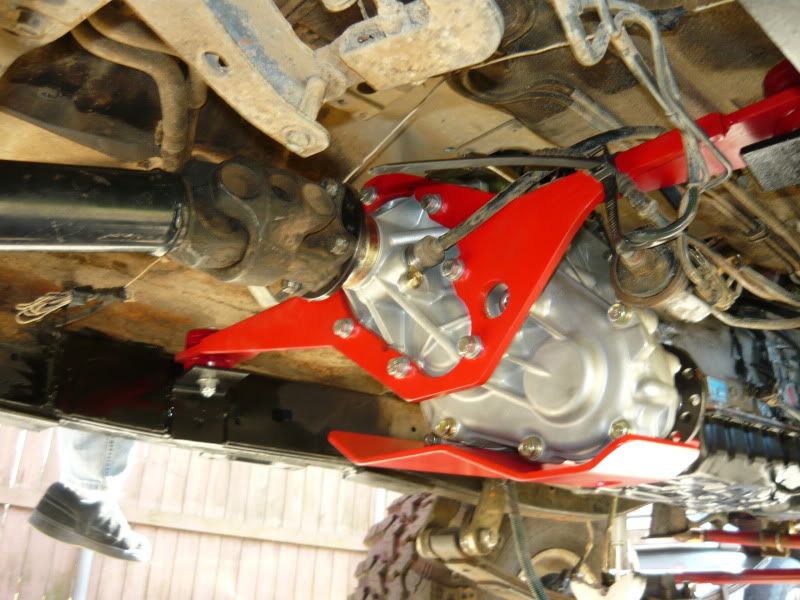
Got a late start to the days off but got a few things done this afternoon. Installed the painted battery holder, optima 34/78 series battery, cut the torsion bar brackets off, and mounted the rear crossmember section to the new Marlin T-case with 3.4 adapter. Well the T-case bolts and coupler was not in the box from Marlin, but I called and he had them out the door today so final install will have to wait.

03-16-2010, 06:11 AM
#4
Registered User
Going the same route with the marlin adapter. Curious as to how it turns out. I have the same battery box as well. Well made piece from Ballistic Fab i think it was and really cheap considering.
Keep up the posts; i'll be following.
Keep up the posts; i'll be following.
03-16-2010, 06:12 AM
#5
Registered User
Thread Starter
Join Date: Sep 2007
Location: Lafayette, La
Posts: 99
Likes: 0
Received 0 Likes
on
0 Posts
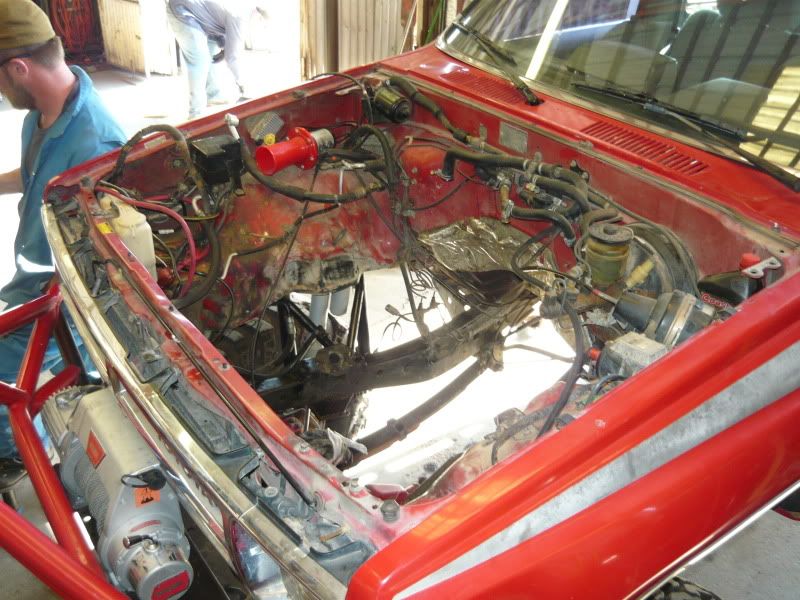
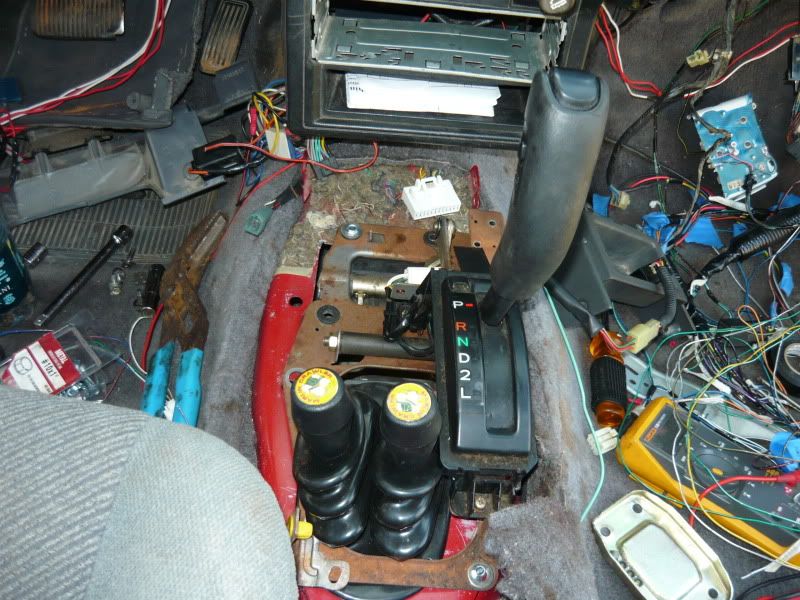
So now I am at the hard part for me the wiring, if anyone has more advice I will gladly take it. Starting with wires that Elovate's thread suggested, but still haveing trouble with it all. Have not found a good 3.0 EWD for an 88 4runner yet.
Did anyone use these large 3.4 plugs or just cut and splice the wires?
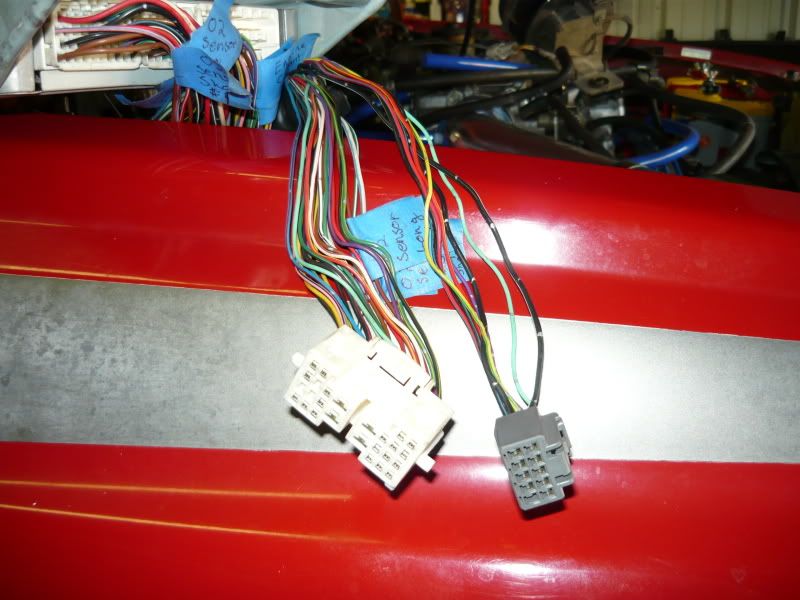
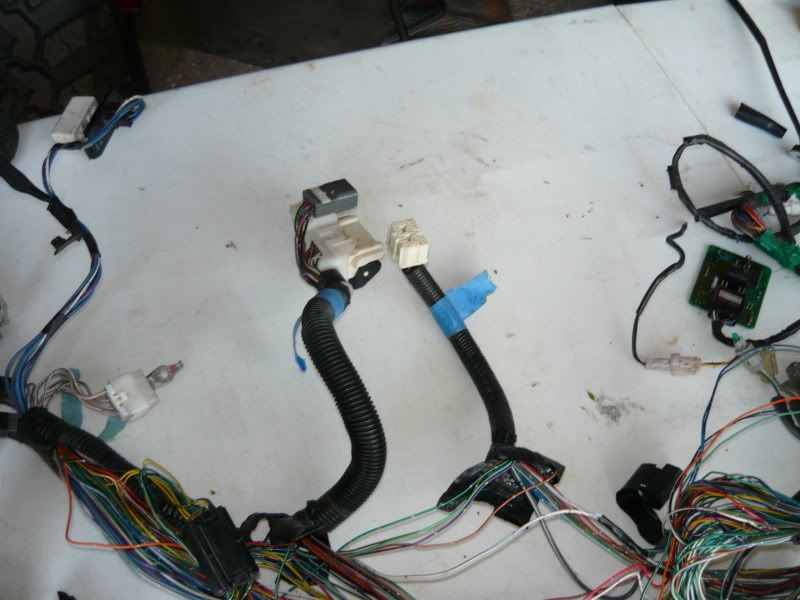
These are the plugs I have inside.
Did anyone use these large 3.4 plugs or just cut and splice the wires?
These are the plugs I have inside.
03-16-2010, 06:52 AM
#6
Registered User
Thread Starter
Join Date: Sep 2007
Location: Lafayette, La
Posts: 99
Likes: 0
Received 0 Likes
on
0 Posts
Thanks, I got a lot of good info from this section so far, such as the battery box you used.
Trending Topics
03-16-2010, 04:47 PM
#10
Registered User
I have it as well if that falls through.
Use the FULL VERSION of Adobe Acrobat to help you find the wires. Demonkid did a post on this here
Youcan get a 30 day trial of Acrobat from Adobe.com or if you are a torrent user then a permanent free version there.
The two plugs you are talking about I cut but on the other side of the plug so i still have a way to quick disconnect everything. I think that I only used one wire from the smaller one.
03-17-2010, 02:41 PM
#12
Registered User
Thread Starter
Join Date: Sep 2007
Location: Lafayette, La
Posts: 99
Likes: 0
Received 0 Likes
on
0 Posts
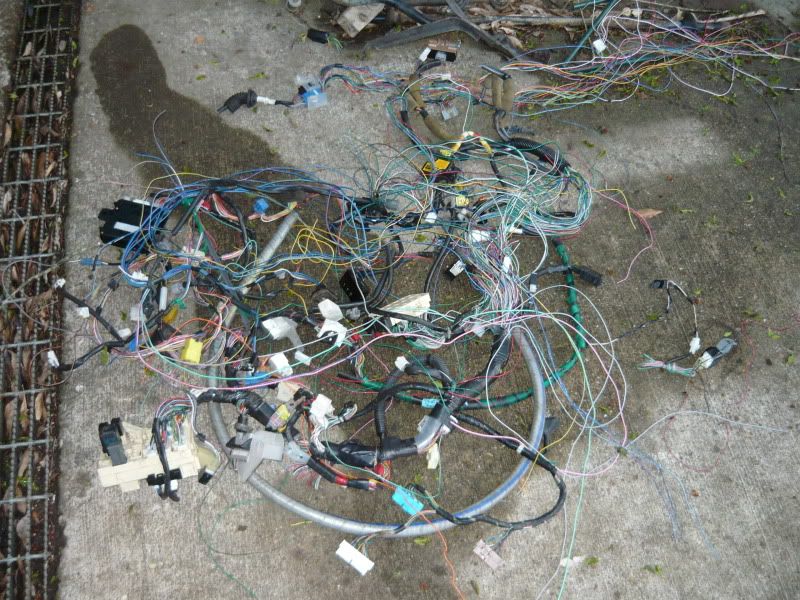
Got the 3.4 harness labeled and ready to go it lost about ten pounds of wire. Now just have to find out the 88 wires and color combo, splice, solider, repeat.
3.4 harness we started with:
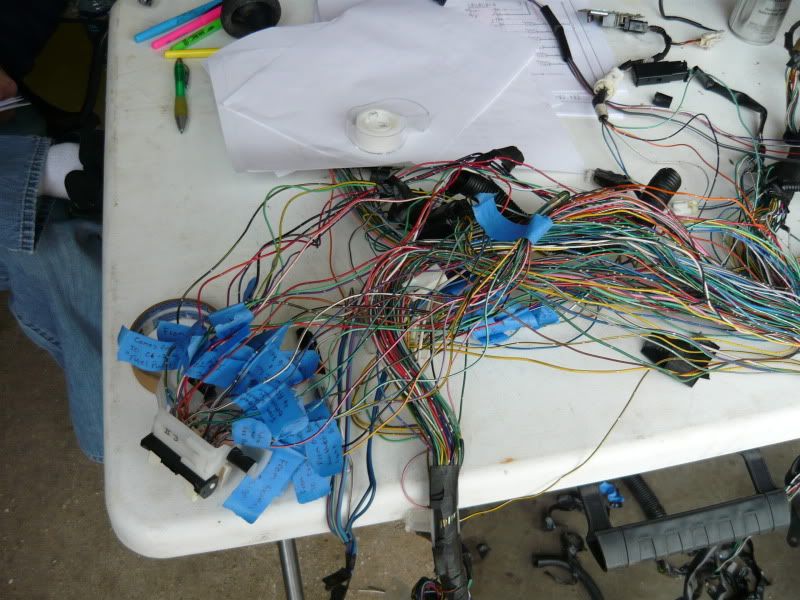
What was left that we think we need:

Left over:
3.4 harness we started with:
What was left that we think we need:
Left over:
Last edited by John S.; 03-17-2010 at 04:48 PM.
03-17-2010, 05:34 PM
#14
Registered User

Join Date: Dec 2004
Posts: 95
Likes: 0
Received 0 Likes
on
0 Posts
Did your adapter plate from Marlin come with gaskets or just the grey silicone?
Got a late start to the days off but got a few things done this afternoon. Installed the painted battery holder, optima 34/78 series battery, cut the torsion bar brackets off, and mounted the rear crossmember section to the new Marlin T-case with 3.4 adapter. Well the T-case bolts and coupler was not in the box from Marlin, but I called and he had them out the door today so final install will have to wait.
03-18-2010, 04:07 AM
#15
Registered User
Thread Starter
Join Date: Sep 2007
Location: Lafayette, La
Posts: 99
Likes: 0
Received 0 Likes
on
0 Posts
No mounting hardware yet, they are ground shipping the forgotten pieces, but I think it silicones together. I plan to ruff up the smooth surface so that the silicone will stick better, unless the provide a gasket.
03-18-2010, 02:40 PM
#16
Registered User
Join Date: Dec 2004
Posts: 95
Likes: 0
Received 0 Likes
on
0 Posts
Thanks John. I got everything but gaskets. I talked to the tech person and he at first said I should have gotten gaskets with the kit, but then said the silicone works better and gaskets wouldn't be needed.
Your crossover pipe work is nice. Mines came out looking like , but functional I hope.
Your crossover pipe work is nice. Mines came out looking like , but functional I hope.
03-19-2010, 04:31 AM
#17
Registered User
Thread Starter
Join Date: Sep 2007
Location: Lafayette, La
Posts: 99
Likes: 0
Received 0 Likes
on
0 Posts
Found this for the 85 tach that looks like my 88 so I will give it a try when its time. Ran the 3.4 cruise control wires through the fender and mounted the actuator on the fender with some bracket mod of course yesterday. Located some 3.0 engine harness male plugs and plan to make some pigtail connectors.
https://www.yotatech.com/forums/f160...et-5vz-195749/
https://www.yotatech.com/forums/f160...et-5vz-195749/
03-23-2010, 07:21 AM
#18
Registered User
Thread Starter
Join Date: Sep 2007
Location: Lafayette, La
Posts: 99
Likes: 0
Received 0 Likes
on
0 Posts
Finally got the 23 spline coupling and mounting hardware for the T-case to performe the final install. Went to install the coupling into the rear of the transmission and it will not fit though the rear bearing which is not mentioned in the Marlin Crawler instructions. Removed the tail housing, bearing and found the ID of the bearing was indeed to small. Since it was Sunday we were unable to call Marlin for any suggestions so first thing Monday morning went to get a bearing that fits over the coupling then reinstalled bearing bath and tail housing. Followed by installing T-case then mounting brackets to the frame for the crossmember which a local neighbor welded for me. Topped off all the fluids mounted the shifters and turned the key.......it runs:clap::clap:.Had a water leak but we know why from the removal of the 3.0 and the transmission lines to the radiatoror are to big, easy fixes. Still have to finish the interior and exhaust, but its getting better.
5VZE Swap pictures by John350Z71 - Photobucket
5VZE Swap pictures by John350Z71 - Photobucket
04-04-2010, 01:19 PM
#19
Registered User
Join Date: Dec 2004
Posts: 95
Likes: 0
Received 0 Likes
on
0 Posts
John-
I have the same problem you had with the coupler not fitting through the bearings in the tail of the tranny. Where did you get the bearing from and do you have any part numbers for it?
I have the same problem you had with the coupler not fitting through the bearings in the tail of the tranny. Where did you get the bearing from and do you have any part numbers for it?
04-08-2010, 06:06 PM
#20
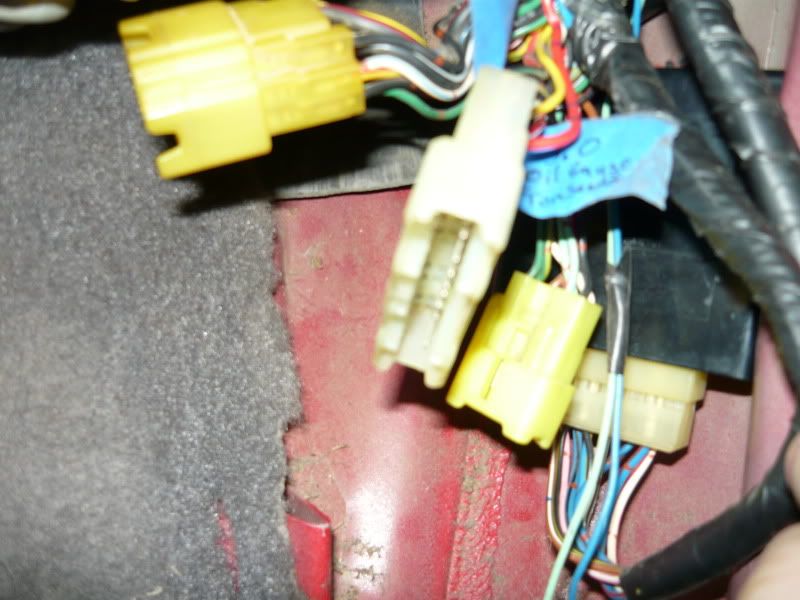
Registered User
Did you ever find a good '88 EWD? I am about to make a ?88 5speed harness to 97 5speed 3.4 and i cant seem to find anything on it. I have the same two yellow body plugs that you have in the picture above, which I believe are only used in 88 on the 4Runners, with the 3.0.
Any help would be appreciated.
Any help would be appreciated.


