Scuba's 99 Single Cab SAS.. 5 Years in the Making
 03-28-2014, 02:09 PM
#41
Registered User
Thread Starter
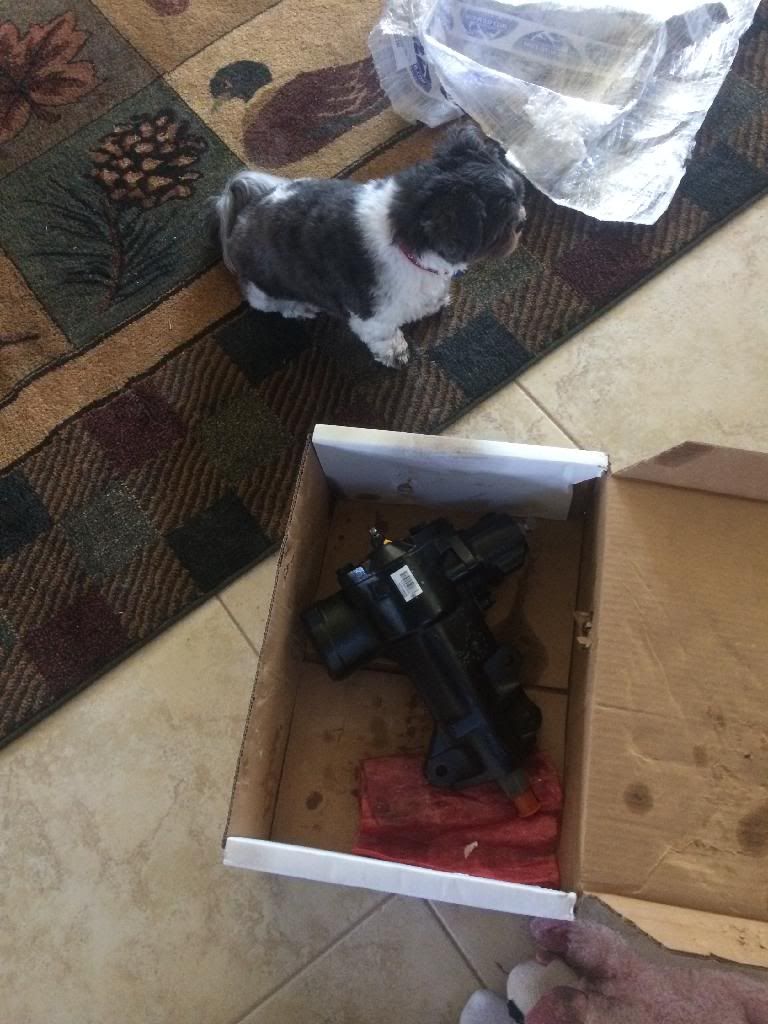
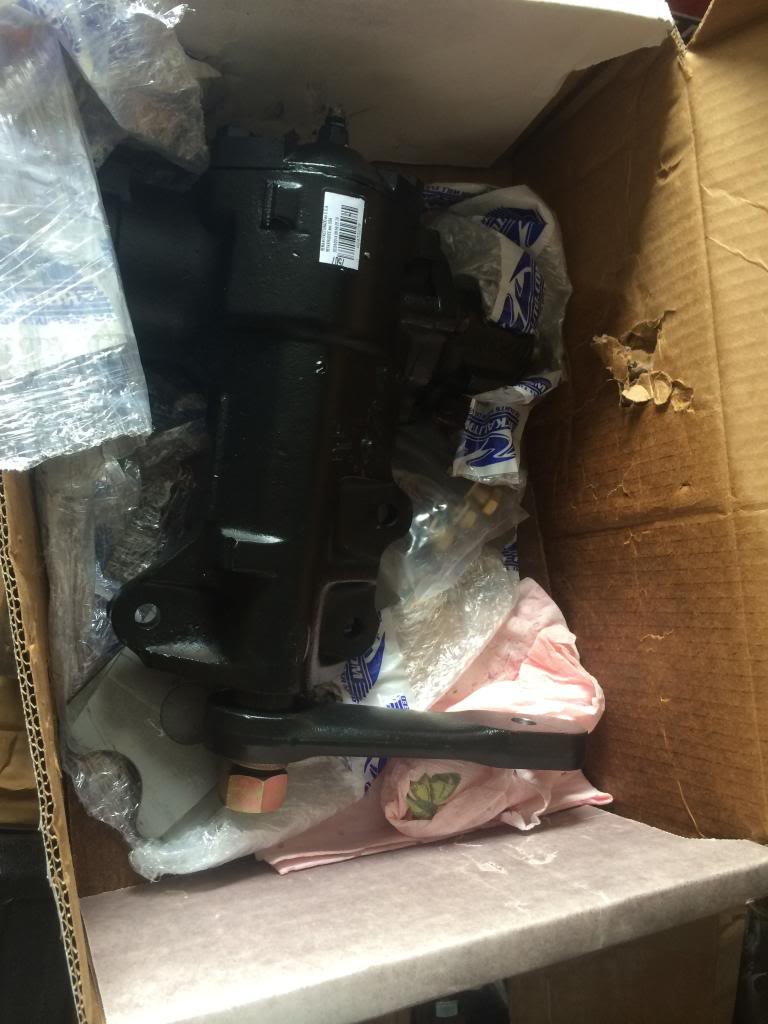
Today I got the steering box, the FROR hanger kit, and the fitting for a high pressure line on the pump. This gear box is HUGE!
Also found out I need to exchange a u-joint for my steering system from summit. (Wish me luck)

Also found out I need to exchange a u-joint for my steering system from summit. (Wish me luck)
 04-04-2014, 11:45 AM
#43
Registered User
Thread Starter
Ordered my 23mm FJ80 TRE's from All-Pro just a few days ago. Should have those soon.
Also ordered my Parts Mike flat pitman arm today.
I need some high pressure lines and a couple other 6AN fittings and the steering will be done except for one part... My drivers side MC high steer arm.
When I pressed out the stock pin from the arm, something gouged up the inside of the hole. I didn't realize this until after I had pressed in the new 25mm pin. After I pressed it in I realized it was sitting level on the bottom of the arm. I pressed it back out and realized the arm was gouged as well as the new 25mm pin which became trashed in the process.
I leveled out the bottom of the arm with a belt sander and pressed the new pin back in.
I tried installing it on the knuckle but it will not mount up. There's some clear interference between the pin and the bearing. It simply will not mount up.
Anyway. I sent a message to Big Mike from MC and will see how we can work this out.
04-05-2014, 07:40 PM
#45
Registered User
Thread Starter
Sorry. Originally, after pressing the new 25mm pin in, I noticed it WASN'T sitting level. That's some of the reason why it's not fitting on the knuckle. The gouging from the inside of the hole took some material out towards the bottom of the hole which made the immediate radius of the hole (on the bottom surface of the arm) distorted.
Big issue.
Big issue.
Last edited by scuba; 04-05-2014 at 07:44 PM.
04-10-2014, 03:06 PM
#47
Registered User
Thread Starter
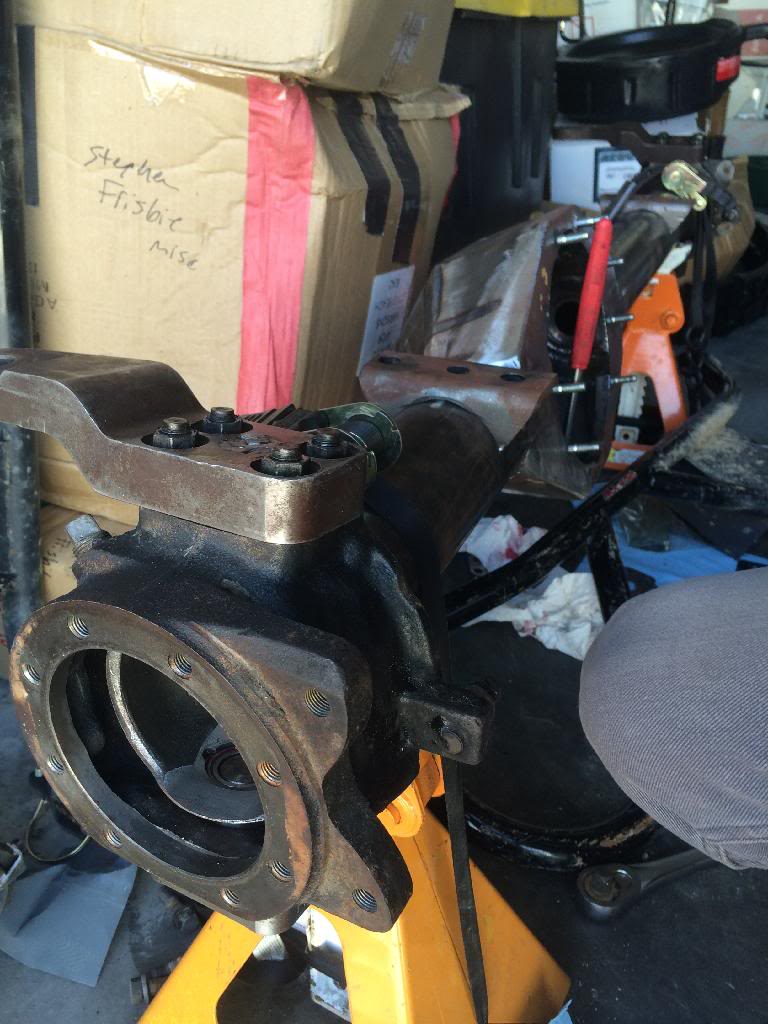
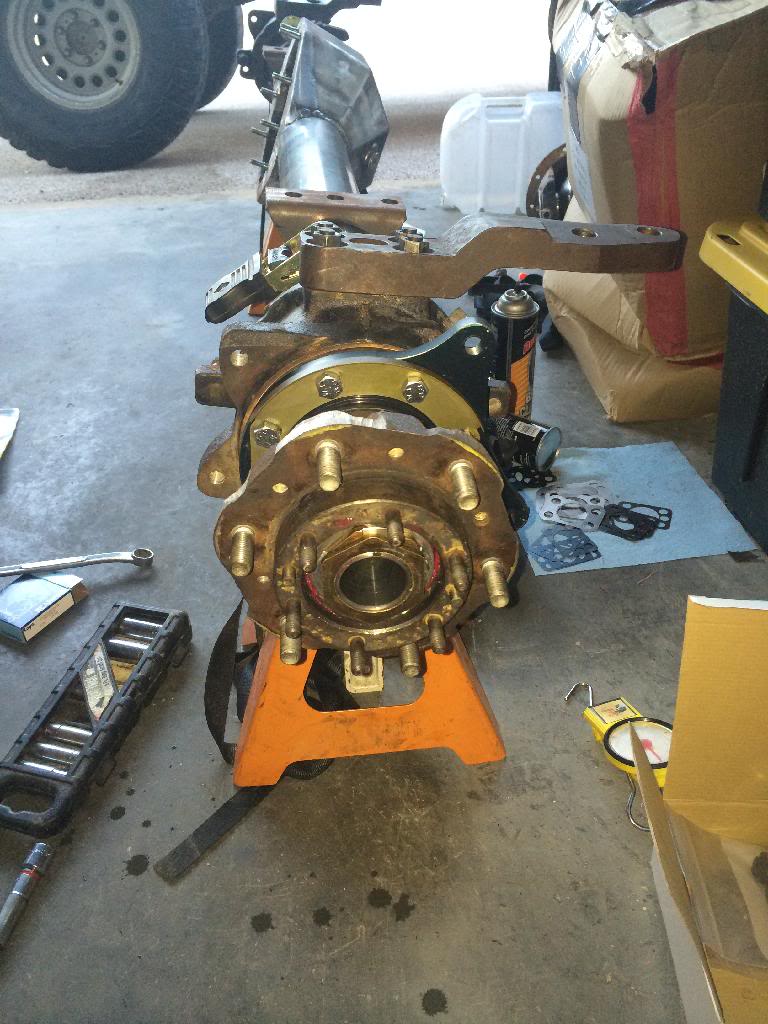
Looks like I fixed the issue with the drivers side steering arm.
The pin was simply way too oversized to fit in the bearing. I finally got the bright idea to try and dry fit a bearing onto the pin and found the issue. I took some 60 grit sand paper to it for about a 1/2 hour and got the bearing to fit.
Only took 2 tries to set the preload, it's at ~13.
I still need to get the passenger side preload set, but it's close.
Took a selfie with this thing.
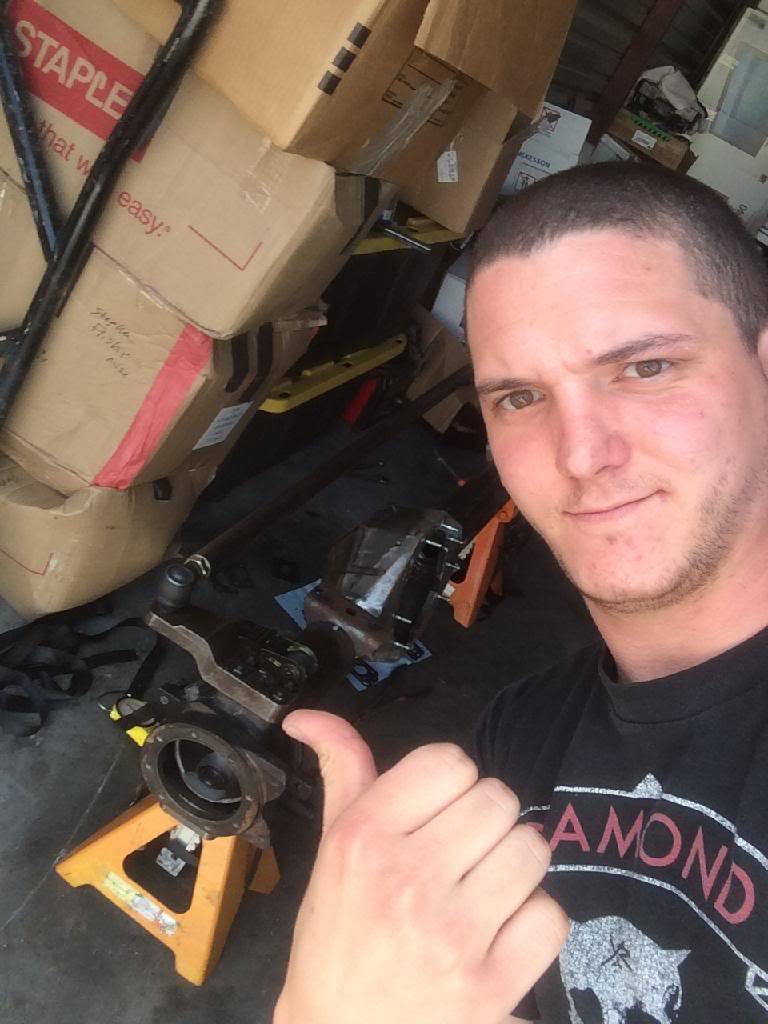
Tie rod on.
The pin was simply way too oversized to fit in the bearing. I finally got the bright idea to try and dry fit a bearing onto the pin and found the issue. I took some 60 grit sand paper to it for about a 1/2 hour and got the bearing to fit.
Only took 2 tries to set the preload, it's at ~13.
I still need to get the passenger side preload set, but it's close.

Took a selfie with this thing.

Tie rod on.
 04-11-2014, 02:47 PM
#50
Registered User
Thread Starter
Finally got the passenger side knuckle preload set.
Both knuckles are set right about 12-13 pounds.
Might start on the wheel bearings, might not.
Both knuckles are set right about 12-13 pounds.
Might start on the wheel bearings, might not.
04-12-2014, 07:16 PM
#52
Looking good...I know this is an expensive project but Low Range or Frontier recent had a deal on six shooter knuckles and arms for around $260 or so..killer deal..
The 4runner chop you were working on too is making me think a 2nd gen runner might be a next project..I want a DC taco but 4runners can be found dirt cheap with head gasket issues..
The 4runner chop you were working on too is making me think a 2nd gen runner might be a next project..I want a DC taco but 4runners can be found dirt cheap with head gasket issues..
04-13-2014, 12:23 AM
#53
Registered User
Thread Starter
Looking good...I know this is an expensive project but Low Range or Frontier recent had a deal on six shooter knuckles and arms for around $260 or so..killer deal..
The 4runner chop you were working on too is making me think a 2nd gen runner might be a next project..I want a DC taco but 4runners can be found dirt cheap with head gasket issues..
The 4runner chop you were working on too is making me think a 2nd gen runner might be a next project..I want a DC taco but 4runners can be found dirt cheap with head gasket issues..
Just not worth it to me considering the arms were free and the upgrade was only a couple hundred 2 years ago.
The 4Runner chop top is just a buddy's truck we're messing around on. None of us have done anything similar except a bed bob.
One of the guys that was here earlier, Jeremy, builds rat rods in his free time and worked at Austin Speed Shop (before Jesse James bought the place) in the past. We were lucky we had him to cut/ trim and fit the rear window piece on or else we would have been dead in the water way before we got it welded on.
I do agree, though. The 4Runners with a chop look awesome as hell!
Spearo: it's been so long I forgot your name! However, I certainly appreciate you looking in on my swap! Your work has always been an inspiration, my friend! I hope you're pleased with what comes out of this swap.
04-15-2014, 06:33 PM
#55
Registered User
Thread Starter
Got the passenger side wheel bearings started.
I think I left it way too loose. Will probably work on it tomorrow or Thursday depending on my work schedule.
I think I left it way too loose. Will probably work on it tomorrow or Thursday depending on my work schedule.
04-25-2014, 01:15 PM
#58
Registered User
Thread Starter
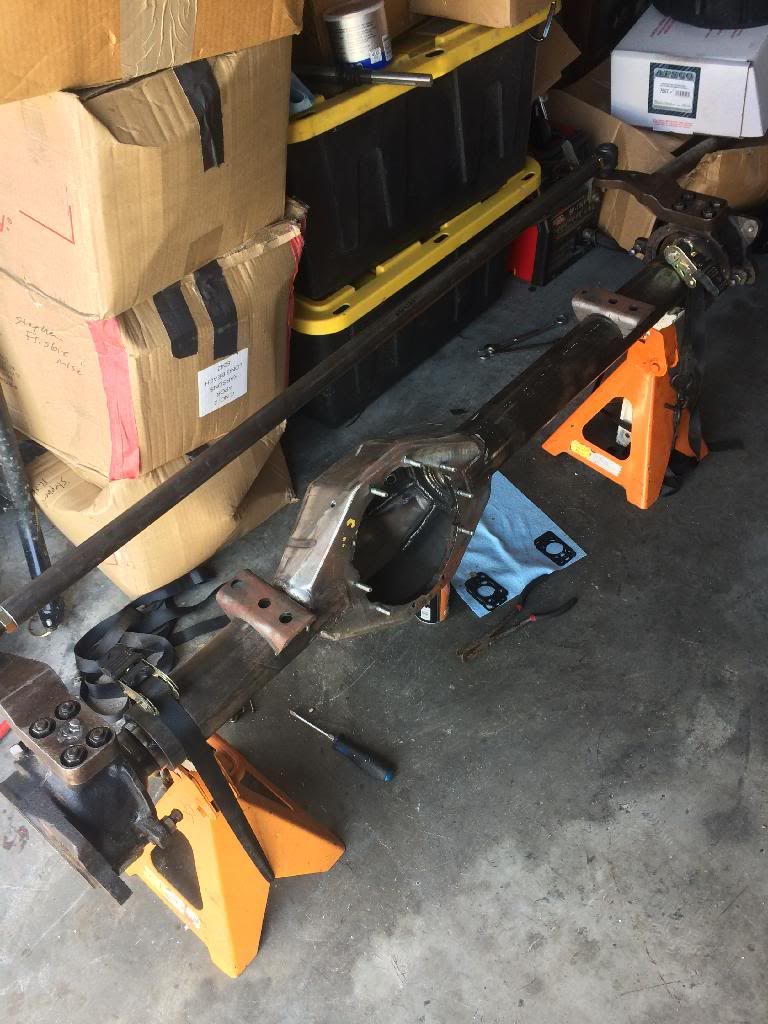
Both wheel bearings are set up. The axle is as assembled as I can get it until after it's hung under the truck.
Called today to check on my parts mike pitman arm. For some reason it was drilled but never reamed. Waiting on a call back for ETA.
Bought the rest of my power steering lines and fittings from PSC today. Should have those early next week. Next Friday, at the latest, is when I'll be ordering the rear suspension setup. That's basically the final piece of the puzzle.
I've requested 3 days off of work for May 9-12. That should give me enough time to get the truck drivable.
T-minus 2 weeks!
05-02-2014, 01:39 PM
#60
Registered User
Thread Starter
Rear suspension is on the way! Unfortunately All-Pro ran out of 5" springs and they won't have any more until late next week. I settled for a set of 6" springs and will remove leafs to get it slightly lower.
Finally got my Parts Mike pitman arm. It fits great!
The 7/8 nut was picked up at Fastenal, glad I found that!
1 week from today the truck will be ridded of the IFS!
Finally got my Parts Mike pitman arm. It fits great!
The 7/8 nut was picked up at Fastenal, glad I found that!
1 week from today the truck will be ridded of the IFS!


