
Rear lift
 01-27-2009, 10:45 AM
#1
Contributing Member
Thread Starter
Join Date: Nov 2007
Location: Indiana
Posts: 776
Likes: 0
Received 0 Likes
on
0 Posts
Trail Gear Rear lift?s
I have been throwing around rear lift ideas for my truck. It has blocks in the back from the pro comp stage 2 lift that I put on in 05. I am finally getting around to eliminating them. Due to a lack of 4 inch lift springs for the stock hanger locations and the rediculousness of the pricing. $440 for just springs from NWOR $500 from ALCAN. Skyjacker has some but everyone says they ride like garbage. In which case I am leaning towards the Marlin or Trail Gear kits because at some point my ifs will be replaced. I have a few questions.
1.To eliminate the 4 inch lift blocks wich trail gear kit should I get. By that I mean does the 4 inch kit translate to exactly 4 inches after settling etc.
2. Would I need to get my drive shaft lengthened. I have had not issues currently with the drive shaft and the blocks. I would assume the axle would be roughly in the same location. If I do end up having drive shaft issues would a spacer suffice or is the length to much to make up with a spacer?
3. Anyone have any used parts that would be applicable here that they would be willing to sell.
Also just fyi looking to do 4.7 transfercase gears at some point two. If anyone knows of anyone who has either some used gears or a used transfer case with that ratio let me know.
Thanks for the help.
Last edited by saitotiktmdog; 01-27-2009 at 10:52 AM.
 01-27-2009, 11:46 AM
#2
Registered User

Your driveshaft will not need to be lengthened. However, if you have vibes due to pinion angle, you might just have a double cardan installed like on the front driveshaft. A lot of people's trucks handle 4" without vibe but I found I got them if I went any higher and the double cardan was the solution.
Can't help much with the rest.
Can't help much with the rest.
01-27-2009, 12:29 PM
#3
Contributing Member
Thread Starter
Join Date: Nov 2007
Location: Indiana
Posts: 776
Likes: 0
Received 0 Likes
on
0 Posts
Your driveshaft will not need to be lengthened. However, if you have vibes due to pinion angle, you might just have a double cardan installed like on the front driveshaft. A lot of people's trucks handle 4" without vibe but I found I got them if I went any higher and the double cardan was the solution.
Can't help much with the rest.
Can't help much with the rest.
01-27-2009, 12:50 PM
#4
Contributing Member
Thread Starter
Join Date: Nov 2007
Location: Indiana
Posts: 776
Likes: 0
Received 0 Likes
on
0 Posts
One more thing. how well do the trail gear kits do when loaded down. Say with two dirt bikes in the bed or a bed full of firewood. Say between 500 and 800 lbs.
01-27-2009, 01:38 PM
#5
OK. A bit of a rant and then on to constructive stuff.
I don't agree that the cost of NWOR or Alcan springs is unreasonable. First, the front lift from Procomp is $1000. (but did find some used for 4-500) So why doesn't the rear of the truck deserve $400-500 worth of attention? Sure TG springs are $299, but then you need $65 worth of hangers and you have also bitten off some fab work in the process too. If you weld, great, but I don't so it's always a consideration on a project. So $365 + fab costs vs $440-500 for bolt on simplicity. Not really that much of a difference.
On the other hand... the longer springs will probably work better overall. Specifically for you, it may be even better as it sounds like you have more plans for the future. I don't know how it compares to the lift you have but my SAS has TG 4" in the front and 5" in the rear and we still had to do some tweaks to get it where we wanted it. At the end of this I'll link my build thread to Pg 3 where the pics start, but the real useful stuff to you is on pg 5 where you can see some of the tweaks Steve Schaefer did to try to level the truck out. I don't know about your payload question but Steve and I are guessing the 4runner roof at somewhere between 250-400# to give you an idea. My guess is that you would want the 5" springs and adjust from there.
Also note the pic of my driveshaft in there. Elvota swears he didn't need to do anything with his before he got dual cases but I'm not so sure with mine. Perhaps it's the mounting platforms we made for the shackle hangers that made such a difference. IDK
link https://www.yotatech.com/forums/f66/...72/index3.html
01-28-2009, 09:42 AM
#6
Contributing Member
Thread Starter
Join Date: Nov 2007
Location: Indiana
Posts: 776
Likes: 0
Received 0 Likes
on
0 Posts
OK. A bit of a rant and then on to constructive stuff.
I don't agree that the cost of NWOR or Alcan springs is unreasonable. First, the front lift from Procomp is $1000. (but did find some used for 4-500) So why doesn't the rear of the truck deserve $400-500 worth of attention? Sure TG springs are $299, but then you need $65 worth of hangers and you have also bitten off some fab work in the process too. If you weld, great, but I don't so it's always a consideration on a project. So $365 + fab costs vs $440-500 for bolt on simplicity. Not really that much of a difference.
On the other hand... the longer springs will probably work better overall. Specifically for you, it may be even better as it sounds like you have more plans for the future. I don't know how it compares to the lift you have but my SAS has TG 4" in the front and 5" in the rear and we still had to do some tweaks to get it where we wanted it. At the end of this I'll link my build thread to Pg 3 where the pics start, but the real useful stuff to you is on pg 5 where you can see some of the tweaks Steve Schaefer did to try to level the truck out. I don't know about your payload question but Steve and I are guessing the 4runner roof at somewhere between 250-400# to give you an idea. My guess is that you would want the 5" springs and adjust from there.
Also note the pic of my driveshaft in there. Elvota swears he didn't need to do anything with his before he got dual cases but I'm not so sure with mine. Perhaps it's the mounting platforms we made for the shackle hangers that made such a difference. IDK
link https://www.yotatech.com/forums/f66/...72/index3.html
I don't agree that the cost of NWOR or Alcan springs is unreasonable. First, the front lift from Procomp is $1000. (but did find some used for 4-500) So why doesn't the rear of the truck deserve $400-500 worth of attention? Sure TG springs are $299, but then you need $65 worth of hangers and you have also bitten off some fab work in the process too. If you weld, great, but I don't so it's always a consideration on a project. So $365 + fab costs vs $440-500 for bolt on simplicity. Not really that much of a difference.
On the other hand... the longer springs will probably work better overall. Specifically for you, it may be even better as it sounds like you have more plans for the future. I don't know how it compares to the lift you have but my SAS has TG 4" in the front and 5" in the rear and we still had to do some tweaks to get it where we wanted it. At the end of this I'll link my build thread to Pg 3 where the pics start, but the real useful stuff to you is on pg 5 where you can see some of the tweaks Steve Schaefer did to try to level the truck out. I don't know about your payload question but Steve and I are guessing the 4runner roof at somewhere between 250-400# to give you an idea. My guess is that you would want the 5" springs and adjust from there.
Also note the pic of my driveshaft in there. Elvota swears he didn't need to do anything with his before he got dual cases but I'm not so sure with mine. Perhaps it's the mounting platforms we made for the shackle hangers that made such a difference. IDK
link https://www.yotatech.com/forums/f66/...72/index3.html
If the hangers turn out well I may put some pictures up. I am in the early stages of planning etc so it may be a bit before I get around to it.
Thanks for the help.
Trending Topics
01-28-2009, 09:57 AM
#8
Registered User
he said he wants stock hanger locations but really, your asking for something that you're probly not gonna find for as cheap as you want. i say jsut do the chev 63's i'm running em on my truck
Last edited by algranger; 01-28-2009 at 09:59 AM.
01-28-2009, 10:04 AM
#9
Registered User
Join Date: Mar 2008
Location: Chico, California
Posts: 3,870
Likes: 0
Received 0 Likes
on
0 Posts

Im debating whether or not i want to run the chevys or go with another kit for the rear.
01-28-2009, 01:31 PM
#10
Contributing Member
Thread Starter
Join Date: Nov 2007
Location: Indiana
Posts: 776
Likes: 0
Received 0 Likes
on
0 Posts
I decided against making my own hangers. Found them for cheaper than trail gear at Datin Fab. Its worth the money I think to be sure its right. Ill use the plate elswhere. I have an idea for a crossmember modification.
02-13-2009, 08:10 AM
#11
Contributing Member
Thread Starter
Join Date: Nov 2007
Location: Indiana
Posts: 776
Likes: 0
Received 0 Likes
on
0 Posts
Few more questions as I get closer to putting my truck under the knife for what seems the umpteenth time. I am also thinking about cutting out the back of the front fender wells to help clear my 35s. Where the pinch welds are. I know there are several threads out there but as usual whenever I am sepcifically looking for a certain thread I can never find it. So if anyone knows the link to a thread it would be appreciated. Also there was a thread that showed someone fixing the cross tube that holds the gas tank by sleeving it with 1 and 5/8 tubing. I cant find that one either. If anyone can point me in that direction it would be appreciated. One last thing. I am throwing around Ideas for what to do with my rear bumper mounting. I had to reconstruct the last unboxed section about 4 years ago because the PO had been rear ended and they were all twisted. I used angle iron. I need a stronger set up but I do not want to raise it up any more or my liscense plate will get covered up. Any ideas suggestions or pictures would be awesome.
04-06-2009, 04:09 AM
#14
Contributing Member
Thread Starter
Join Date: Nov 2007
Location: Indiana
Posts: 776
Likes: 0
Received 0 Likes
on
0 Posts
So this weekend I finally got around to starting the project. Saturday I got the bed off, the gas tank out, the axle out. The ubolt nuts weren't budging so I used my plasma cutter and cut the bolts off. I then cut off the old spring hangers. Yesterday I did a bit of clean up and got the rest of the old spring hangers off. Also I got the old spring perches torched off and the did some grinding. I ran into a snag as right where the drivers side front spring hanger was was a small rust hole that surfaced when I knocked the innter weld tab off the spring hanger. I decided to cut it out. I kept cuttin until I hit good solid metal. So now I have a foot long and about 4 inch tall hole on the inside of my frame rail. I will try and get some pictures but I dont have access to a digital camera at the moment. I did a mockup yesterday and got the pinion angle set and tacked the new spring perches on. I have a lot of quarter inch plat that I am thinking of using as a patch plat/reinforcement. I am goig check the passenger side frame rail as well and weld a plate on there also just for good measrue. I may even cut a small hole out to pull crud out from inside the frame rail. I am also planning on running some 2"wide 1/8" thick strap along the bottom of the fram rails around the spring hangers and then tie into the patch plates. So far its going a lot smoother than I thought with the exception of the hole in the frame. I am also sleeving the tube that the gas tank mounts to with 1 5\8 tubing and cutting out the rusty sections. If anyone has some advice for me about patching the frame I would appreciate it. I have some ideas but have never actually done it before.
04-07-2009, 04:46 AM
#15
Contributing Member
Thread Starter
Join Date: Nov 2007
Location: Indiana
Posts: 776
Likes: 0
Received 0 Likes
on
0 Posts
Nobody has any advice for me. Well so far yesterday I took 1/8 thick strap that was the width of the frame rail and welded it in from the new spring hanger location to the bump pad ont he frame along the bottom of the frame rail. Ill do the same from the spring hanger forward about a foot. (drivers side) Ill also do the same on the passenger side and this should help with using 1/4 inch plate for my patches. I would use 1/8 but I have so much quarter inch plate, that it makes no sense to go out and buy someting else. Ill just make sure I weld to thicker parts of the frame and tie it into the spring hanger.
04-07-2009, 07:39 AM
#17
Well I don't have much for you as it's not really my area. Pics would help, at least to visualize what you are proposing. The only other thing I can think of is for the patch, extend it well past the ends of the hole to good metal and then swiss cheese the patch so you can plug weld it. Like this:


What did you finally decide to use for springs?
What did you finally decide to use for springs?
04-07-2009, 08:15 AM
#18
Contributing Member
Thread Starter
Join Date: Nov 2007
Location: Indiana
Posts: 776
Likes: 0
Received 0 Likes
on
0 Posts
I went with the trail gear springs. I actually got them from Datin Fab because the spring hangers etc were cheaper from there than trail gear. I will try and get some pictures. May use my phone. The outside is solid its the inside frame rail thats screwed. So far besides the hole in the frame everything is going alot better than expected.
04-08-2009, 04:04 AM
#19
Contributing Member
Thread Starter
Join Date: Nov 2007
Location: Indiana
Posts: 776
Likes: 0
Received 0 Likes
on
0 Posts
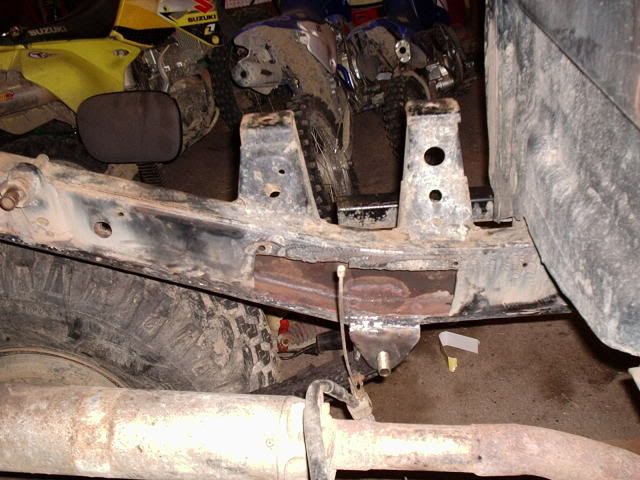
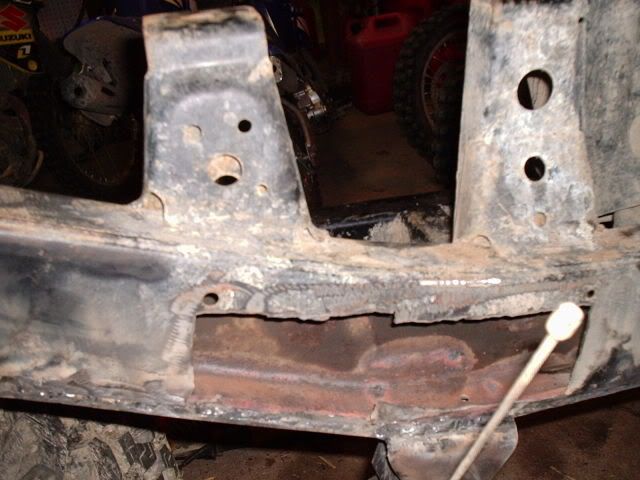
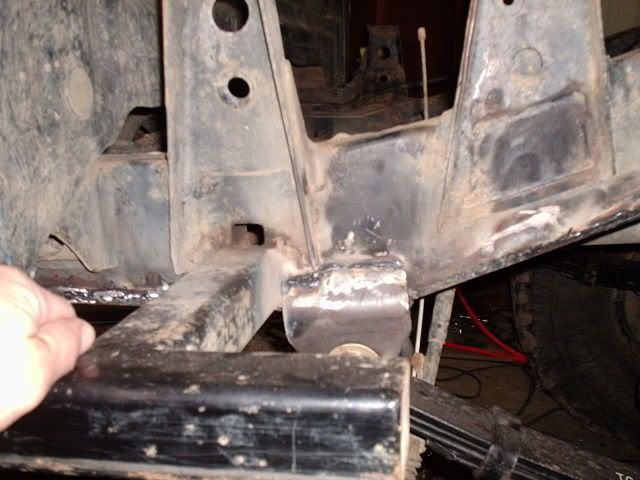
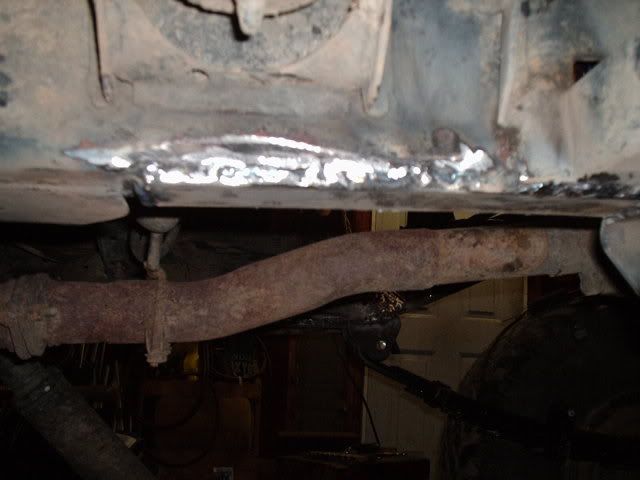
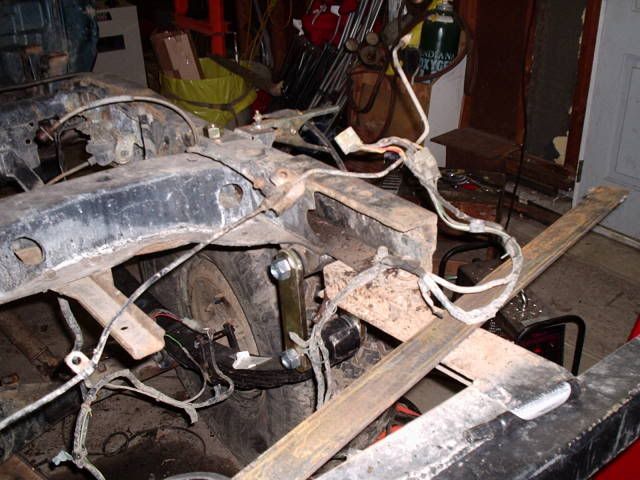
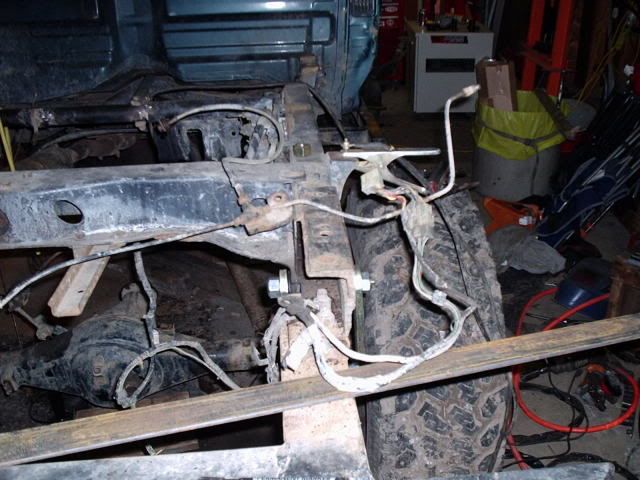
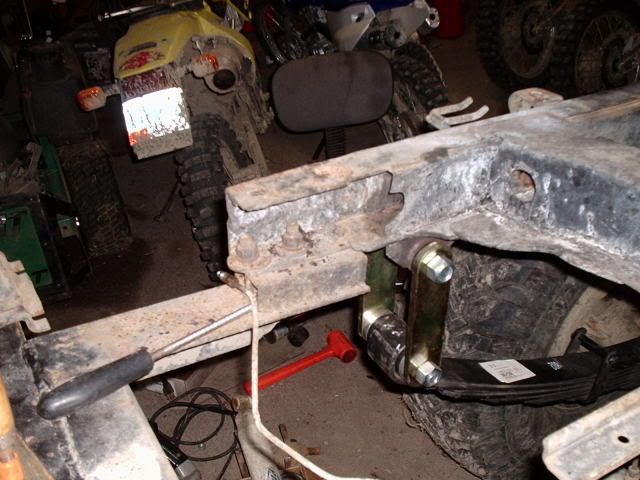
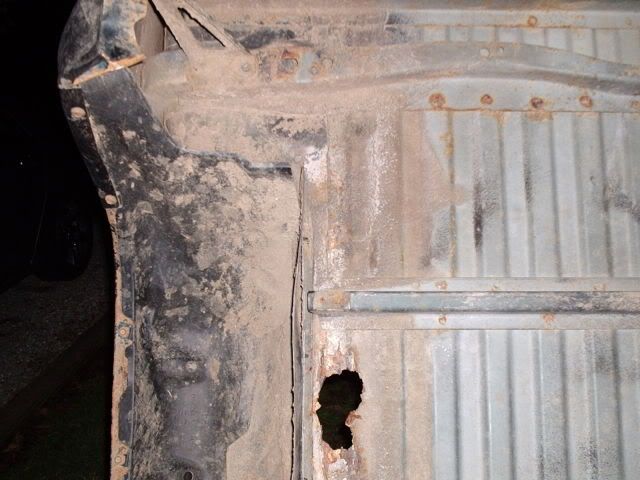
Got some pictures
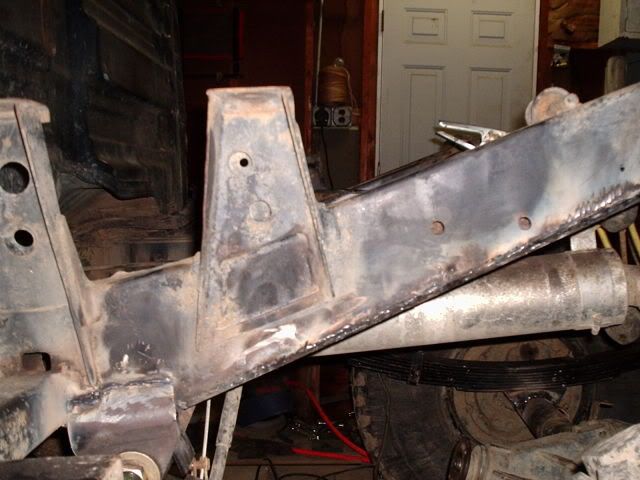
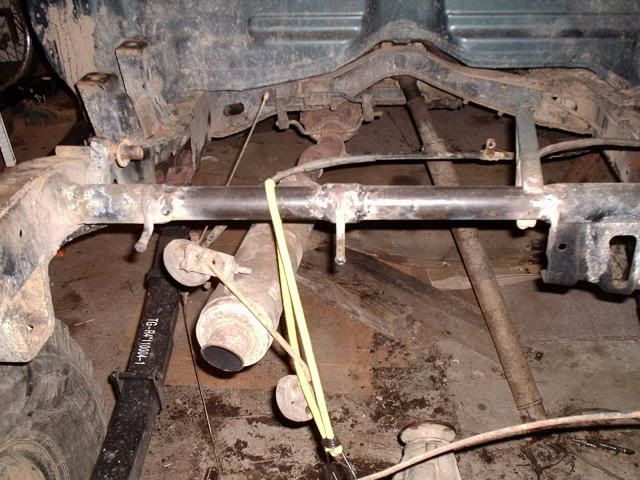
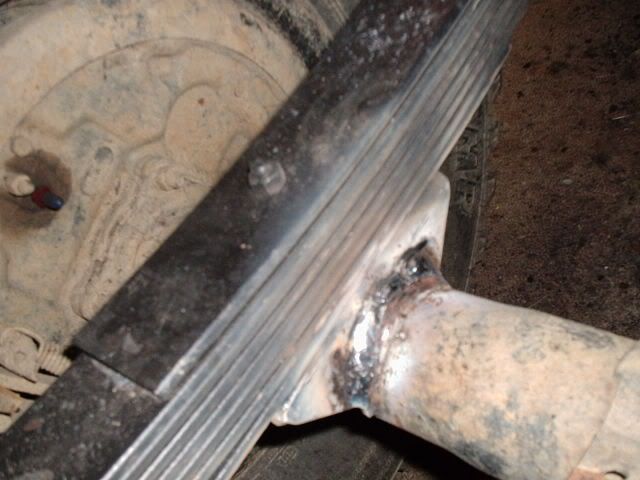
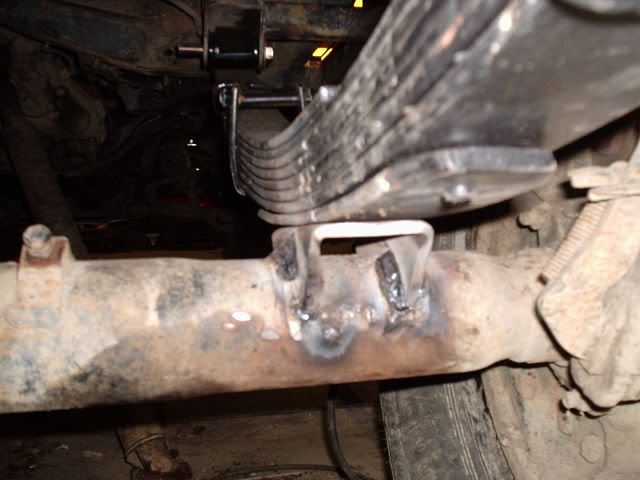
Here are some pictures of my progress. Fixed the crossover tube by removing the rusted sections and sleeving it with 1 and 5/8 DOM. Welded 2 inch by 1/8 strap to bottom of frame rails 10" before hanger and from hanger to bump stop pad on frame. Doing the sme to the other side. Now I need to decide what to do about the hole in the frame. Whatever I do to the hole side I want to do the other side. I also added some pictures of the spring perches welded on etc. No clean up yet on the welds. I am using a lincoln stick welder. I am not an expert welder and find it especially difficult to weld upside down. It takes a while and they dont look the best but theyll hold. Plus a nice coat of mud when its all done and know one will know right. SHH dont tell. Plus the new welding rods I got yesterday are not what I remember 6013 to be like. Thye look like 6011 but they say 6013. They dont weld like I remember. Oh and I also added a few pics of how my bumper currently mounts. I need to redo it as it is not strong enough. Dont know what made me think it was a good idea at the time but oh well. Could be that I had just spent a rediculously long time putting my lift kit on and was tired of working on it and wanted a quick fix. Oh and I also included a picture of my rusted out bed. At some point ill allpro flat bed the truck. When all the fab is done I am going to roll it out of the garage and sand blast the back half with my portable sand blaster. Should I do this before I patch the hole in the frame and blast the inside of the frame rail. At least what I can see. I also cut out a small hole on the fuel tank side and pulled out any debri. I also think when its all done I mayb poor used oil down each frame rail. I have heard of that being done.

Last edited by saitotiktmdog; 04-08-2009 at 04:12 AM.
04-21-2009, 01:52 PM
#20
Contributing Member
Thread Starter
Join Date: Nov 2007
Location: Indiana
Posts: 776
Likes: 0
Received 0 Likes
on
0 Posts
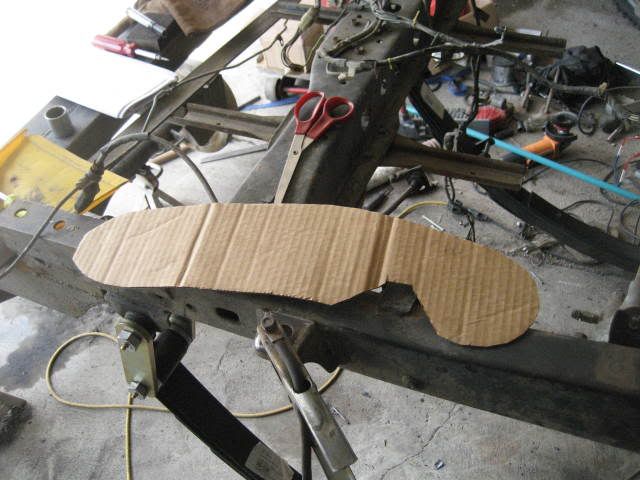
Pattern
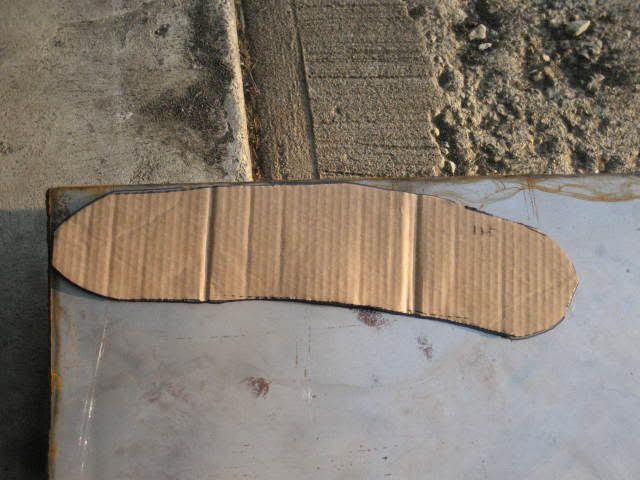
Traced pattern
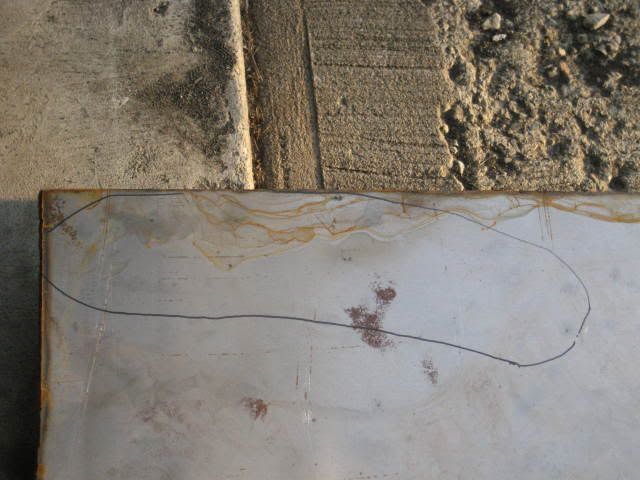
rough cut with plasma
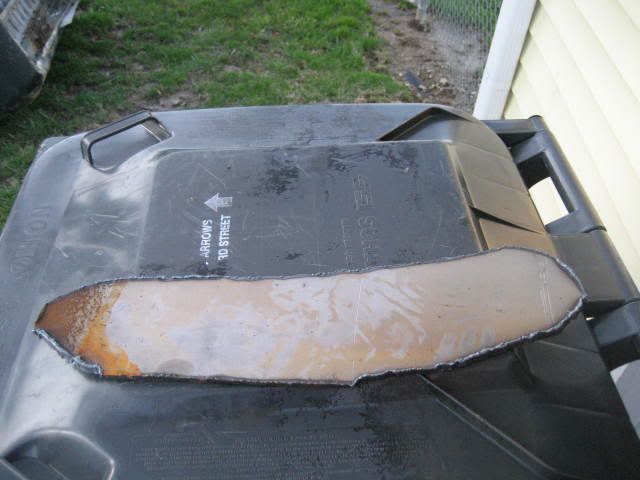
Cleaned up with grinder
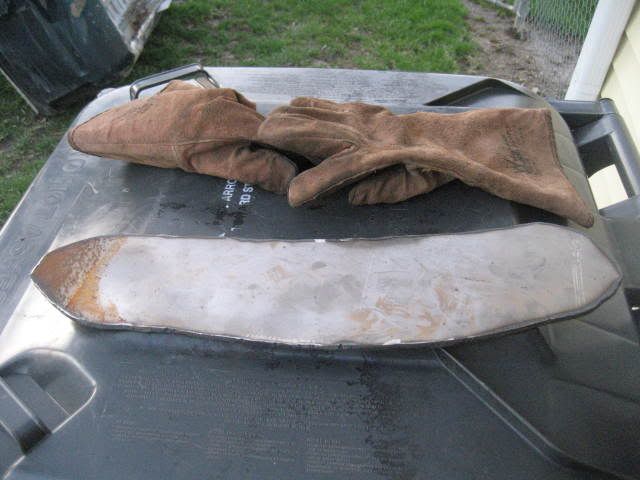
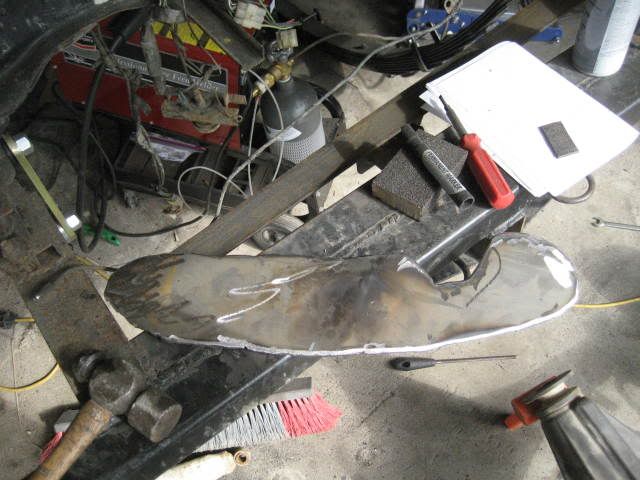
welded in
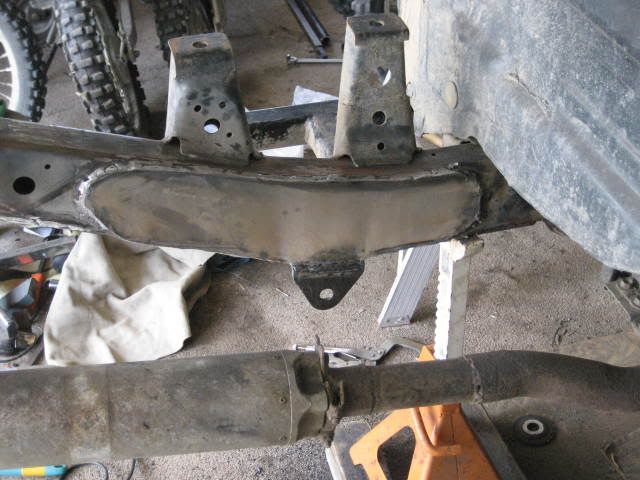
Beginning of reinforcement for other side
This is as far as I have gotten. Broke down and got a new welder too. the stick is fine for everything except for upside down welding. AAAHHH.
Got a Hobart 187 handler. Now it just needs to get here so I can finish the other side.
Traced pattern
rough cut with plasma
Cleaned up with grinder
welded in
Beginning of reinforcement for other side
This is as far as I have gotten. Broke down and got a new welder too. the stick is fine for everything except for upside down welding. AAAHHH.
Got a Hobart 187 handler. Now it just needs to get here so I can finish the other side.


