

 04-05-2016, 09:17 AM
Last edit by: IB Advertising
See related guides and technical advice from our community experts:
Browse all: Toyota 4Runner Exterior Guides
- Toyota 4Runner 1996-2002: How to Remove Windshield Trim
Step by step instructions for do-it-yourself repairs.
Browse all: Toyota 4Runner Exterior Guides

89-95 4Runner Trim Removal
01-02-2010, 05:06 PM
#1
Registered User
Thread Starter
Join Date: Dec 2009
Location: Minnesota, USA
Posts: 94
Likes: 0
Received 0 Likes
on
0 Posts
89-95 4Runner Trim Removal
To the crafty and intelligent 4runner owners: Any of you successfully remove trim? If so, what steps can you recommend?
Mine is a 92 in particular.
Respectfully,
Ben
Mine is a 92 in particular.
Respectfully,
Ben
Last edited by BeenYota; 01-02-2010 at 05:11 PM.
 01-02-2010, 05:51 PM
#3
Registered User
Thread Starter
Join Date: Dec 2009
Location: Minnesota, USA
Posts: 94
Likes: 0
Received 0 Likes
on
0 Posts
Response to the vague
To start I'd like to remove the black strips down the sides of the body. Does anyone know if there are punch holes behind, or is this just adhesive?
Next, I'll be working on the interior trim. Anyone add wood grain, brushed aluminum, anything worth mentioning or posting a picture of?
Best,
Ben
Next, I'll be working on the interior trim. Anyone add wood grain, brushed aluminum, anything worth mentioning or posting a picture of?
Best,
Ben
03-05-2010, 05:27 PM
#4
Registered User
many of the removal procedures are described either in the FSM or clymer's. have you checked 'em both out? my first tip is never use metal to remove plastic. oh, and always expect to break clips. they suck.
maybe you've already heard of this trick: you can sand hard plastic interior trim smooth with fine paper; then sand briefly with a very course piece. put in some scratches about the depth of scratches in brushed aluminum. then paint the trim with silver or chrome paint. it might be chrome. it doesn't come out very chromey, just shiny silvery. THEN you take some slightly thinned black paint, and rub it on with a thinner damp rag.
then wipe off the trim with another damp rag until you get the black off. try not to remove the chrome base. use a matte clear if necessary.
the black will stay in the scratches but wipe off the surface. looks like brushed aluminum, no fabrication. only crafty paint tricks one cool method is duplicating that method where you put a round scratch pad in a drill and make the marks like fish scales overlapping. same method with plastic. but i'd use thinned silver over the chrome. not black.
there's a method for doing wood grain too. any "stain" or "wood" you want. one way is to cut up sponges a certain way and apply paint with them. and when you clear that style, it looks like laquered wood. make the entire interior look lined in cherry wood. haha!
p.s. sorry for a quick threadjack, but if anyone can post a link to how remove the outer "4RUNNER" logo black panel, right behind each side window, 1st gen?? i've done searches a dozen different ways and it's not coming up. ok, hijack off.
Last edited by tj884Rdlx; 03-05-2010 at 05:30 PM.
 03-07-2010, 05:24 PM
#7
Registered User
Thread Starter
Join Date: Dec 2009
Location: Minnesota, USA
Posts: 94
Likes: 0
Received 0 Likes
on
0 Posts
Heat
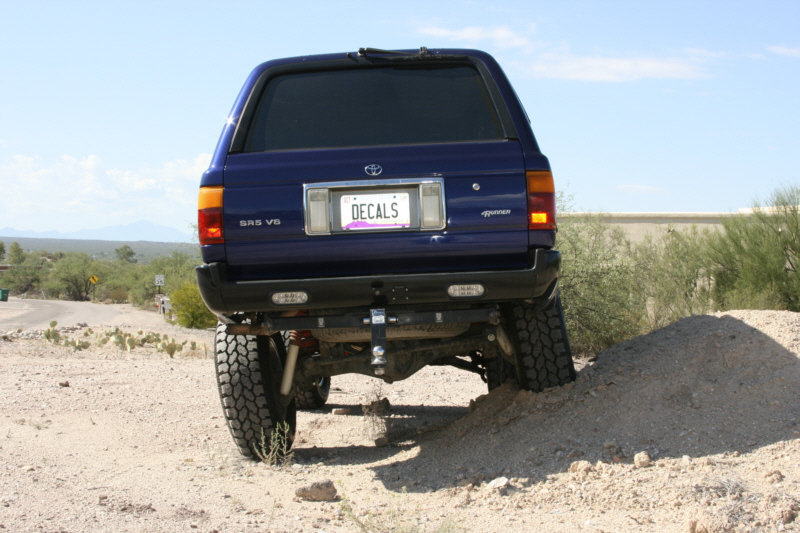
A heat gun and a dribble of goo gone took the black trim pieces off quickly. With the strips and adhesive absent, there is only glossy paint.
Thanks for the tips.
Thanks for the tips.
Last edited by BeenYota; 03-07-2010 at 05:26 PM.
Trending Topics
 03-08-2010, 05:02 AM
#10
Contributing Member
Your molding is just an adheasive "off the roll" body side molding. There shouldn't be any holes under it, unless the owner was trying to cover something up. The only trim holes I know of are the two for the center Toyota logo in the tailgate. The SR5, V6 and 4Runner don't have any holes.
Your flares look like an "off the roll" flair as well. You cut it to length, rolled it in position, inserted flat 4" plates that had holes in each end into a groove, and screwed it to the inside wheel well.

Your flares look like an "off the roll" flair as well. You cut it to length, rolled it in position, inserted flat 4" plates that had holes in each end into a groove, and screwed it to the inside wheel well.
03-08-2010, 05:07 AM
#11
Contributing Member
They were just held on with tension pins or christmas trees, unfortunately because of of their age the pins or mounts usually break when you try to remove them.
03-08-2010, 07:08 AM
#12
Registered User
Thread Starter
Join Date: Dec 2009
Location: Minnesota, USA
Posts: 94
Likes: 0
Received 0 Likes
on
0 Posts
airkewld4life,
They are as James mentioned "off the roll" type flares. Inexpensive and a little ugly. I've got my eye out for the next best thing. To be street legal in MN they recommend having enough body or mud flap to cover any wheel protrusion. I'd like to find a flare that looks decent enough to paint.
Respectfully,
03-08-2010, 08:10 AM
#13
Registered User

Join Date: Sep 2009
Posts: 259
Likes: 0
Received 0 Likes
on
0 Posts
airkewld4life,
They are as James mentioned "off the roll" type flares. Inexpensive and a little ugly. I've got my eye out for the next best thing. To be street legal in MN they recommend having enough body or mud flap to cover any wheel protrusion. I'd like to find a flare that looks decent enough to paint.
Respectfully,
They are as James mentioned "off the roll" type flares. Inexpensive and a little ugly. I've got my eye out for the next best thing. To be street legal in MN they recommend having enough body or mud flap to cover any wheel protrusion. I'd like to find a flare that looks decent enough to paint.
Respectfully,
03-12-2010, 01:29 PM
#14
Registered User
@ BY: Bushwacker makes 5 different flares now. i think your best bet for a '92 is the "extend a fender" model. it's the biggest without going to the pocket style with the "bolt notches" around the edge. site says it adds 1.25" of tire coverage.
these would look most "oem" when painted. check 'em out at the bushwacker site. here's a pic:

Last edited by tj884Rdlx; 03-12-2010 at 01:31 PM.

Thread
Thread Starter
Forum
Replies
Last Post
WTB[WestCanada]: 1989 4runner stock front bumper and other items
lledwod
Items Wanted
1
08-30-2016 01:03 PM
FS[SouthEast]: 1st Gen 4Runner Slider Window, Driver Side
coryc85
Misc Stuff (Vehicle Related)
0
07-06-2015 04:07 AM


