
2JZ-GE + turbo swap

 03-07-2007, 03:21 PM
#42
Registered User

Join Date: Jan 2007
Posts: 7
Likes: 0
Received 0 Likes
on
0 Posts
Heres a link for some awesome slim line fans, they move tons of air and they only take up 2" front to back. http://www.jaycorptech.com/showcateg...x?categoryid=2
BTW Faubrunner, the 2JZ is 3.0L.
BTW Faubrunner, the 2JZ is 3.0L.
03-07-2007, 03:26 PM
#43
Registered User
Join Date: Jan 2007
Posts: 7
Likes: 0
Received 0 Likes
on
0 Posts
2jz
Here is a link for SPAL slim line fans, they move tons of air and they are only about 2" from front to back. http://www.jaycorptech.com/showcateg...x?categoryid=2
BTW Faubrunner the 2JZ is a 3.0L.
BTW Faubrunner the 2JZ is a 3.0L.
03-08-2007, 09:10 AM
#44
Contributing Member
Thread Starter
Join Date: May 2003
Location: the Netherlands
Posts: 460
Likes: 0
Received 0 Likes
on
0 Posts
It's a 3.0 from a lexus GS300. Needed to be 3.0 because of the paperwork of the car (it's not allowed to raise the displacement).
But it's a 240hp NA 3.0. That's the same as a 7M-GTE.
Got in touch with my tuner to inform him it's finally running like it should.
He has just moved to a bigger garage so he's short in time, but he will contact me in a month or so to do the fuel injection etc.
Since I have no idea how to get more fuel at turboboost I'm depending on him for this. He does plenty of supra's and lexus, even some nissan's plus he knows what he's doing, so I think I'll follow his advice on how to do this.
I searched the net on piggy back systems etc, but there so much stuff out there, with high pricetags, that I'm not gone try this myself.
I'm an electronic and mechanical engineer by trade, so hooking it all up is no problem, the programming with my laptop probably not either, but I have no idea what to program at given pressures and rpm's. In other words; I could blow it up in the process
To do list for the next weeks:
new 2 3/4" SS exhaust and silencer from the downpipe to the side or rear
reroute the exhaust a tad so the front prop shaft fits again
new larger intercooler with 3" piping
3" snorkel
new fenders
air scoop to help keep the engine bay cool
paint job
second fan and thermostat for the radiator
shorten all pipes, lines etc on the engine
shorten the throttlecable
new throttle cable bracket
new thicker oil return line for the turbo
change the angle of the wateroutlet so the hose doesn't collaps anymore
new 3" intake piping from maf to turbo
new 440cc injectors
and finally
convert maf to pressure sensor with adjustable wave generator
03-17-2007, 01:23 PM
#45
Contributing Member
Thread Starter
Join Date: May 2003
Location: the Netherlands
Posts: 460
Likes: 0
Received 0 Likes
on
0 Posts
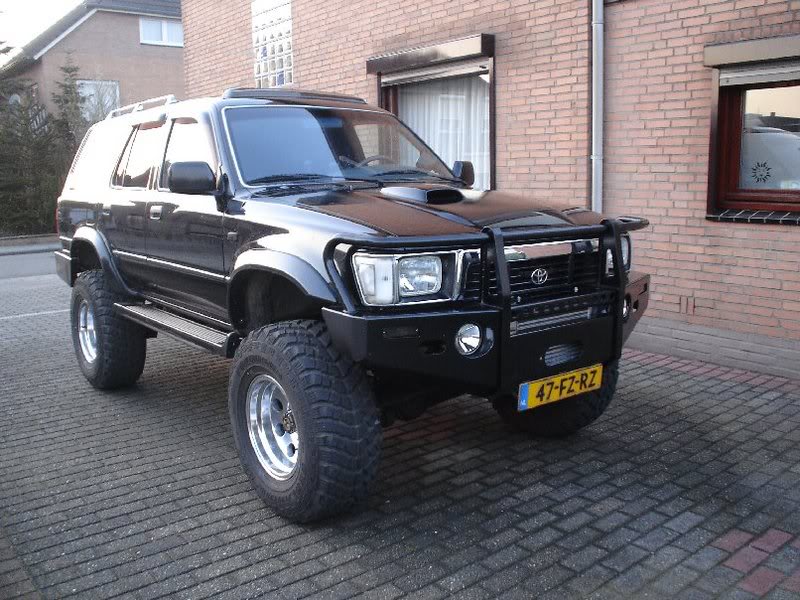
hoodscoop
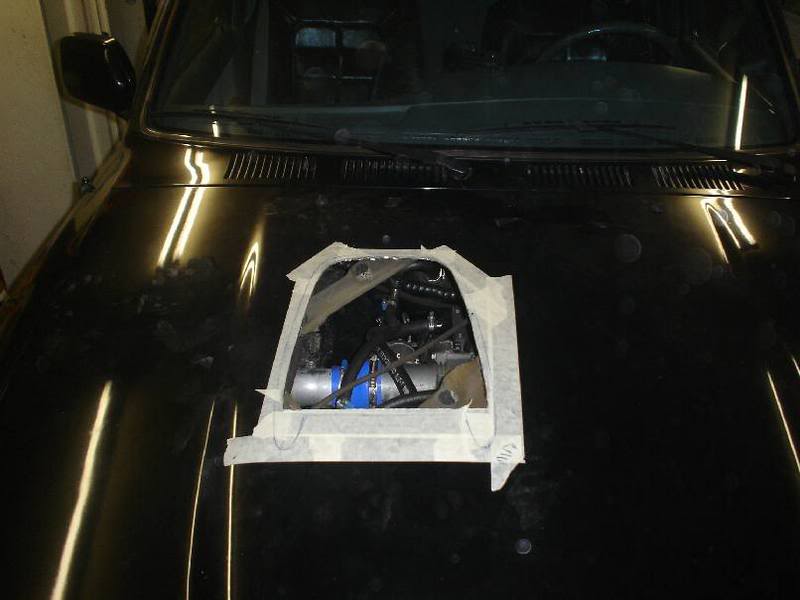
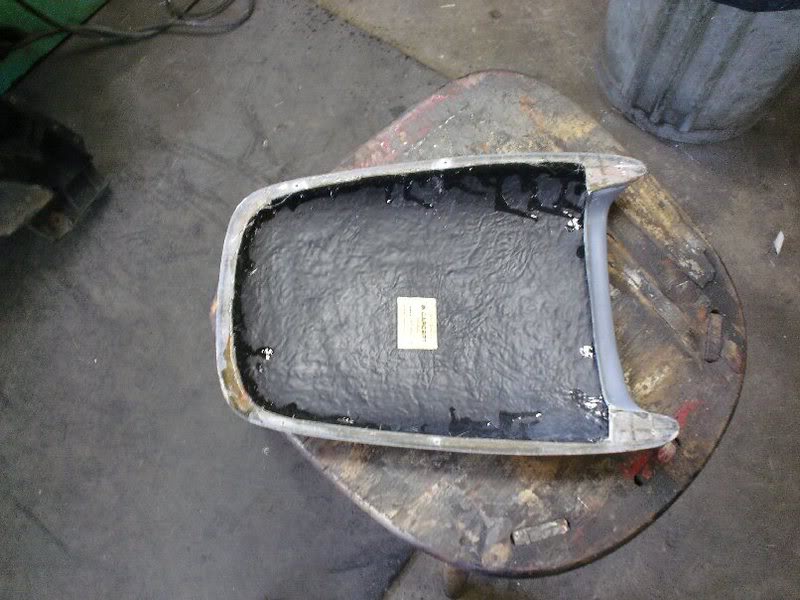
Gathered some parts this week, plus the new intercooler is in
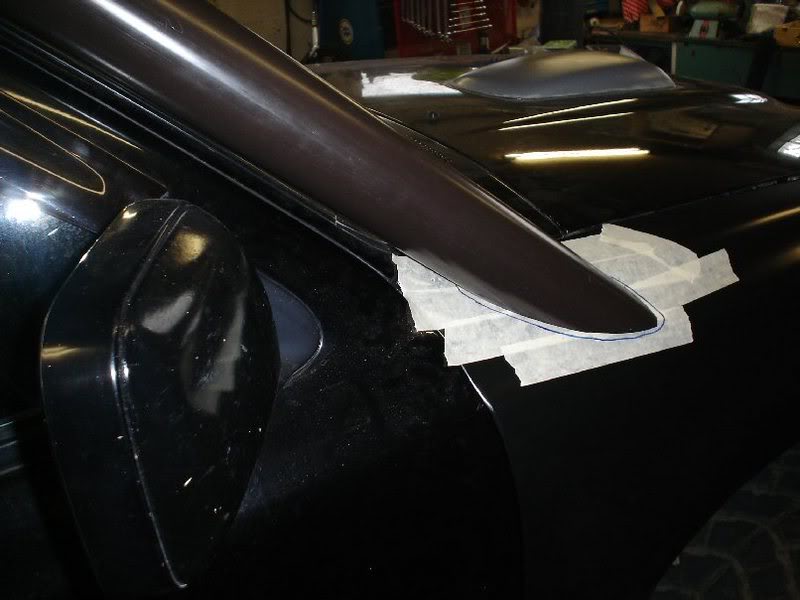
I started with getting some fresh air under the hood.
Fired up the angle grinder and this is the result af tonight:
I bought a polyester scoop and am now altering it so it can be glued on.
This is how it should look:
I used some fiberglass to prepare it for final fixing. It's drying now so i should get it finished tomorrow.
I also opened the front so fresh air can get in, just think I should mention it before people start making smart remarks
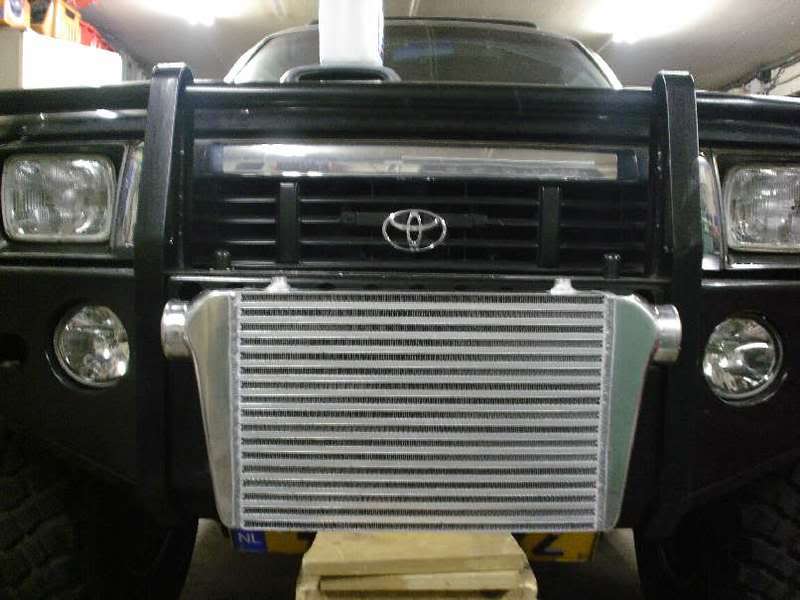
The intercooler is the maximum size I can fit (3" in and outlet) behind the bumper, it's gonna take a lot of cutting to get it to fit:
I'll post another update tomorrow.
I started with getting some fresh air under the hood.
Fired up the angle grinder and this is the result af tonight:
I bought a polyester scoop and am now altering it so it can be glued on.
This is how it should look:
I used some fiberglass to prepare it for final fixing. It's drying now so i should get it finished tomorrow.
I also opened the front so fresh air can get in, just think I should mention it before people start making smart remarks
The intercooler is the maximum size I can fit (3" in and outlet) behind the bumper, it's gonna take a lot of cutting to get it to fit:
I'll post another update tomorrow.
03-18-2007, 01:08 PM
#47
Contributing Member
Thread Starter
Join Date: May 2003
Location: the Netherlands
Posts: 460
Likes: 0
Received 0 Likes
on
0 Posts
Thanks, yeah sure can do. You pay for the trip? Dunno what an ticket fron the netherlands to the US and vice versa cost...
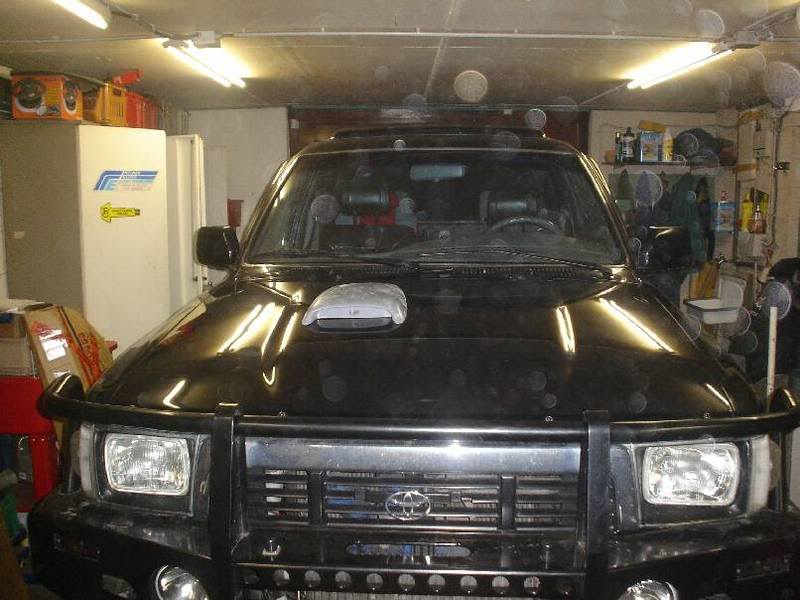
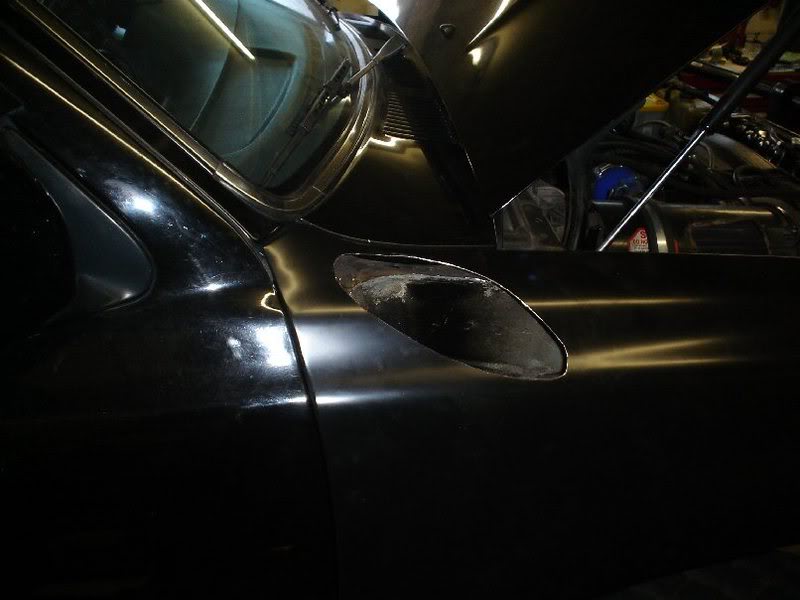
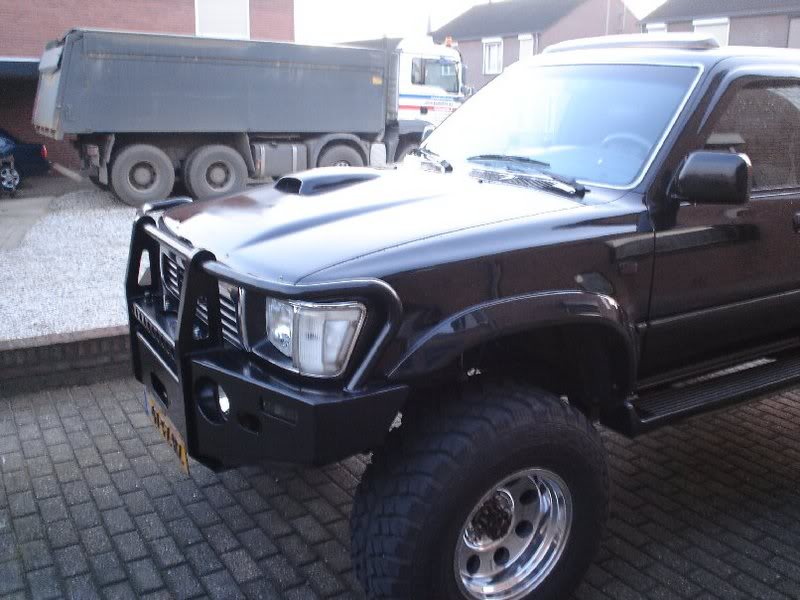
Did some more work today. Removed the scoop and it looked like this:
It now followes the shape of the hood perfectly.
Cleaned it up and drilled 6 holes in the hood and scoop for a few pop rivits.
Als mounted the new fender and started on the snorkel. You can also see the scoop glued to the hood. Some filler, grinding and spraying and I'm done.

I used a piece of drain pipe (PVC) as a jig to mark the fender. Than I started Dremmeling (is that a word?) away.
And finally, my new fender:
Later
Did some more work today. Removed the scoop and it looked like this:
It now followes the shape of the hood perfectly.
Cleaned it up and drilled 6 holes in the hood and scoop for a few pop rivits.
Als mounted the new fender and started on the snorkel. You can also see the scoop glued to the hood. Some filler, grinding and spraying and I'm done.
I used a piece of drain pipe (PVC) as a jig to mark the fender. Than I started Dremmeling (is that a word?) away.
And finally, my new fender:
Later
03-19-2007, 02:03 PM
#50
Contributing Member
Thread Starter
Join Date: May 2003
Location: the Netherlands
Posts: 460
Likes: 0
Received 0 Likes
on
0 Posts
Hi,
those I took those home from work. Couldn't get them any cheaper.
I believe those are 150N a piece with about an 8"-9" stroke. I used to have a lot of those and experimented which one would hold the hood open in every angle, but don't give you a thump on your chin whenever you open them. These work perfect, I can look up the data on them tomorrow.
those I took those home from work.
Couldn't get them any cheaper.I believe those are 150N a piece with about an 8"-9" stroke. I used to have a lot of those and experimented which one would hold the hood open in every angle, but don't give you a thump on your chin whenever you open them.
These work perfect, I can look up the data on them tomorrow.
03-20-2007, 02:25 PM
#51
Contributing Member
Thread Starter
Join Date: May 2003
Location: the Netherlands
Posts: 460
Likes: 0
Received 0 Likes
on
0 Posts
Correction; 250N and 7" stroke.
Got some more work done tonight.
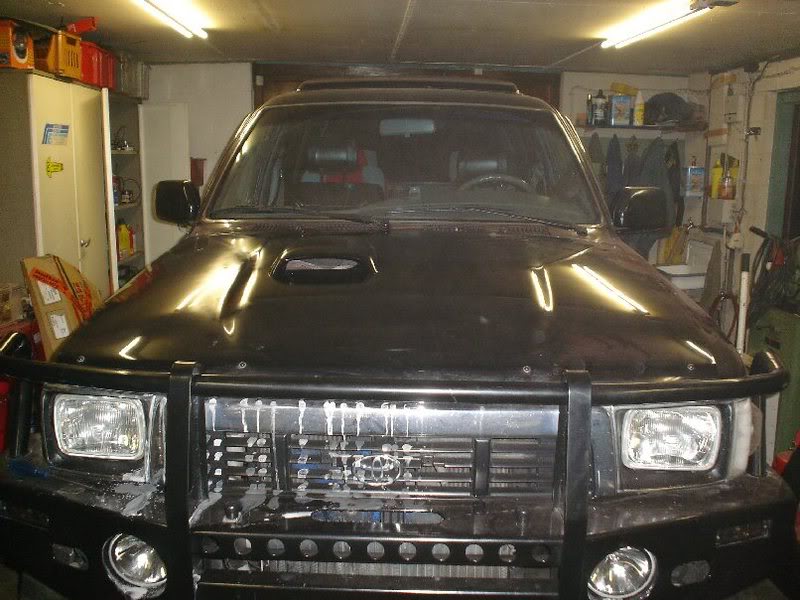
Sanded and sprayed the hood. Nothing fancy, just for the time until I have the whole car sprayed:
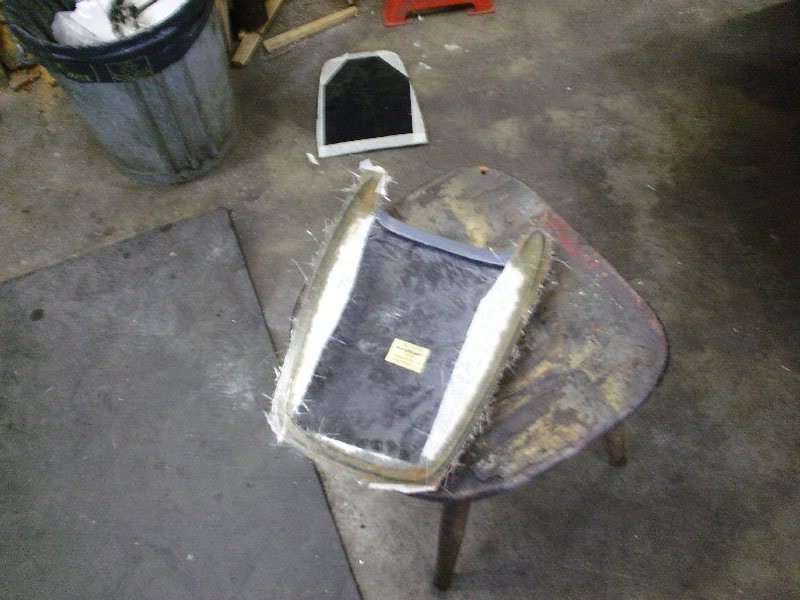
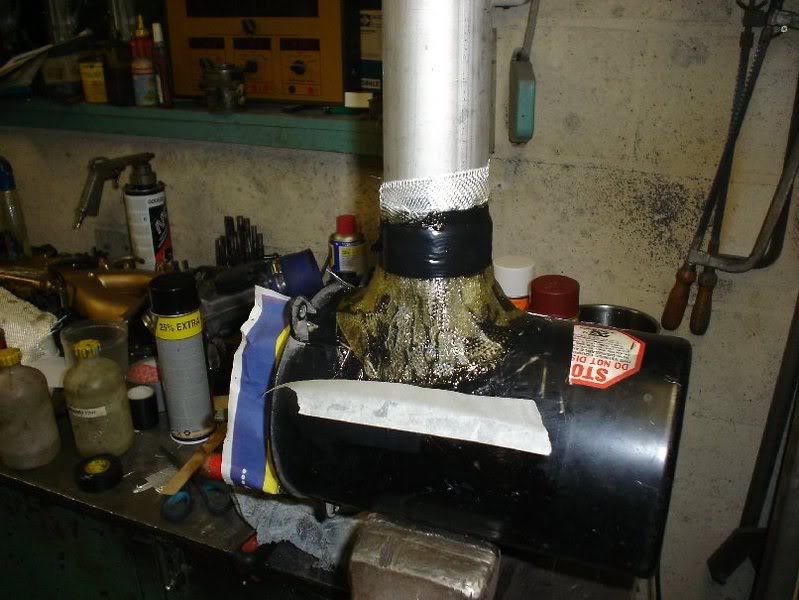
While that was drying I started on the airbox and the connection for the external sucktion tube.
I used a pice of pipe and lots of ducktape and PVC tape to make the mold:
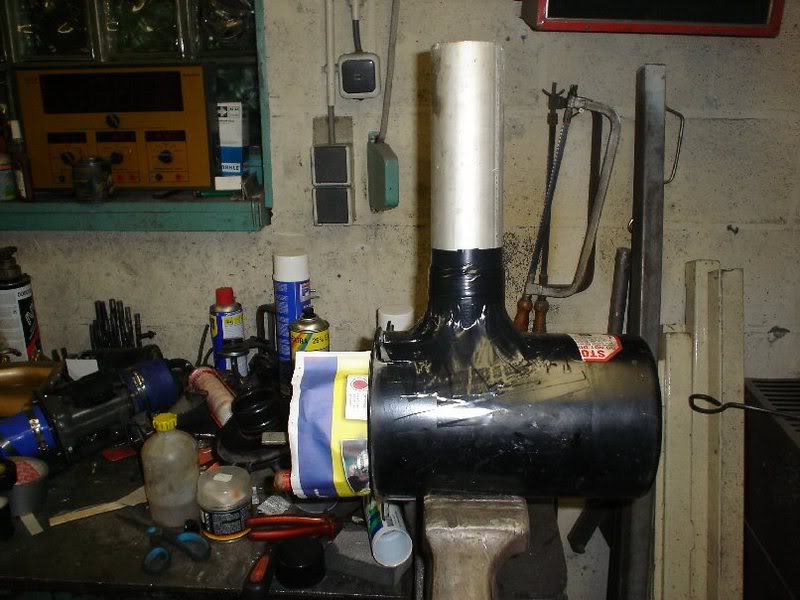
Put some glassfiber on and taped the piece where the hose will connect. Just to keep it in shape until it's dry.
Probably add a layer or two tomorrow.
Pic is kinda crap, looks better in reallife:
Got some more work done tonight.
Sanded and sprayed the hood. Nothing fancy, just for the time until I have the whole car sprayed:
While that was drying I started on the airbox and the connection for the external sucktion tube.
I used a pice of pipe and lots of ducktape and PVC tape to make the mold:
Put some glassfiber on and taped the piece where the hose will connect. Just to keep it in shape until it's dry.
Probably add a layer or two tomorrow.
Pic is kinda crap, looks better in reallife:
03-24-2007, 11:58 AM
#52
Contributing Member
Thread Starter
Join Date: May 2003
Location: the Netherlands
Posts: 460
Likes: 0
Received 0 Likes
on
0 Posts
intercooler
Hi folks.
Got the mandrell bends yesterday so I started working on the new intercooler setup.
I finished the air box and rerouted some wiring, moved the fusebox etc. This to make room for the 3" piping which turned out to be HUGE. Luckily I have a 4" holesaw which I started with today. Chopped a piece out of the bumper and drilled 2 holes in the body.
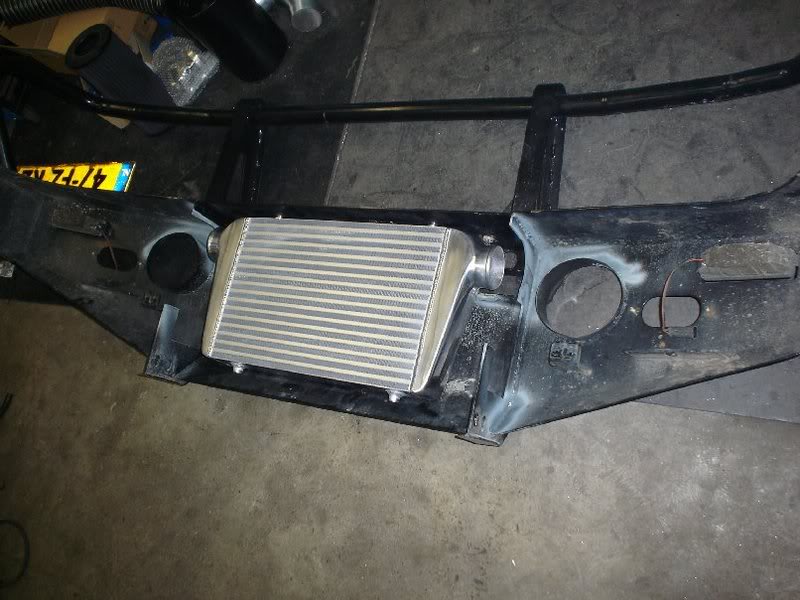
I fixed the intercooler to the bumper. Was the easiest thing to do, only 2 small brackets to make. I do have to disconnect the intercooler tubes in the future to remove the bumper.
This is the intercooler in its final resting space with 2 silicone 90 degree elbows attached.

Hooked up the turbo outlet with a silicone 90 degree bend and a reducer.
This is what it looks like without the grille.
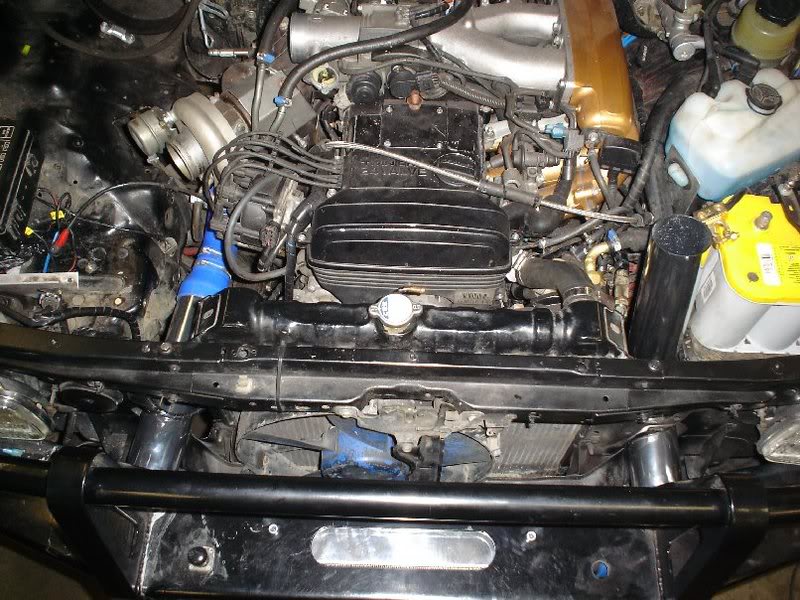
This was the easy one.
The other side will be a pain to do and probably look like crap. If I had the intake on the other side like the 2JZ-GTE it would be easier.
Maybe it's an idea to use a different intake, but that's gone have to wait for now since the wife needs the car next monday so I must fab something up for a short time.
It's also gone be a pain to route the tubing over the turbo to the intake, there's only minimal clearance so it looks like i have to make a new heatshield.
Keep you guys update tomorrow.
Got the mandrell bends yesterday so I started working on the new intercooler setup.
I finished the air box and rerouted some wiring, moved the fusebox etc. This to make room for the 3" piping which turned out to be HUGE. Luckily I have a 4" holesaw which I started with today. Chopped a piece out of the bumper and drilled 2 holes in the body.
I fixed the intercooler to the bumper. Was the easiest thing to do, only 2 small brackets to make. I do have to disconnect the intercooler tubes in the future to remove the bumper.
This is the intercooler in its final resting space with 2 silicone 90 degree elbows attached.
Hooked up the turbo outlet with a silicone 90 degree bend and a reducer.
This is what it looks like without the grille.
This was the easy one.
The other side will be a pain to do and probably look like crap. If I had the intake on the other side like the 2JZ-GTE it would be easier.
Maybe it's an idea to use a different intake, but that's gone have to wait for now since the wife needs the car next monday so I must fab something up for a short time.
It's also gone be a pain to route the tubing over the turbo to the intake, there's only minimal clearance so it looks like i have to make a new heatshield.
Keep you guys update tomorrow.
 03-24-2007, 11:22 PM
#56
Contributing Member
Thread Starter
Join Date: May 2003
Location: the Netherlands
Posts: 460
Likes: 0
Received 0 Likes
on
0 Posts
Oops, my mistake.
The radiator is from a Hilux or Landcruiser 70 diesel. The dimensions are the same, except for the radiatorcap and both spouts. Drops right in.
The radiator is from a Hilux or Landcruiser 70 diesel. The dimensions are the same, except for the radiatorcap and both spouts. Drops right in.
03-25-2007, 05:10 AM
#57
Registered User
the theft issue is big over there aye? Are guns legal in your country? If so, now is the time to get one and make it known.... Theives will move on to easier targets.
03-25-2007, 07:54 AM
#58
Contributing Member
Thread Starter
Join Date: May 2003
Location: the Netherlands
Posts: 460
Likes: 0
Received 0 Likes
on
0 Posts
Thanks to better theftprevention systems thieves moved from newer cars to older cars. I have been warned several times that people had an eye on my 4R.
That's why I have a 1300$ alarm system with two immobilizers. Plus a complete engine/ECU wiring I build myself. I want to see the guy who gets this thing running without the remote and key in an hour.
Guns are forbidden over here. Jail if you get caught. Everybody has one but that's another issue....
I'm almost done, it's all hooked up and I can fire it up in an hour or so. I'll post later tonight (if everything works.. )
That's why I have a 1300$ alarm system with two immobilizers. Plus a complete engine/ECU wiring I build myself. I want to see the guy who gets this thing running without the remote and key in an hour.
Guns are forbidden over here. Jail if you get caught. Everybody has one but that's another issue....
I'm almost done, it's all hooked up and I can fire it up in an hour or so. I'll post later tonight (if everything works..
)
03-25-2007, 11:04 AM
#60
Contributing Member
Thread Starter
Join Date: May 2003
Location: the Netherlands
Posts: 460
Likes: 0
Received 0 Likes
on
0 Posts
That's a good idea for later as soon the fuel problem is solved and I can open up the turbo.
Did some testdriving and she responds much better now. Picks up easier cause she gets the air in much easier. Specially noticable at low rpms.
The turbo does only 0.3 bar cause the wastegate is still disconnected, but she still goes like a bat from hell. From 4500 rpm its a fast go to 6500-7000 rpm.
And she still is smooth and quit, even at high revs.
I did finish it quikly so my wife has transportation. That's why the hoses and wires are a mess and an abundance of zipties was used
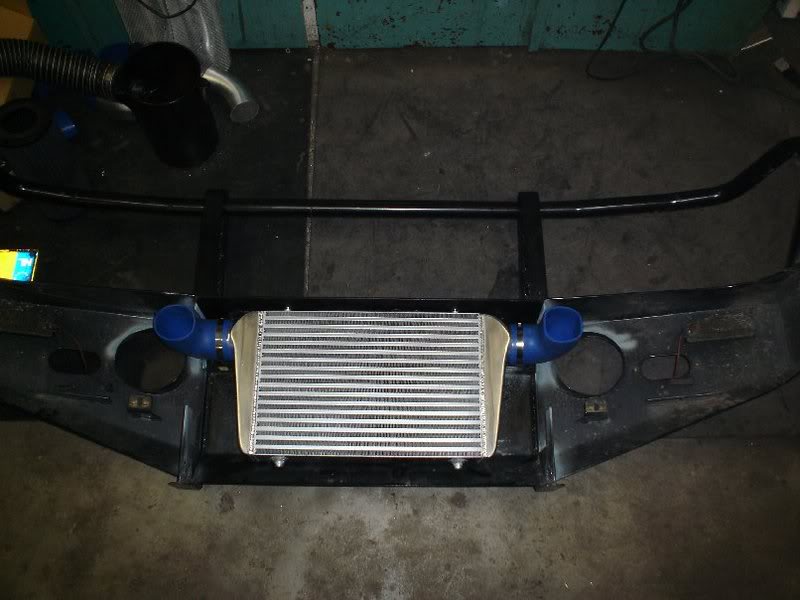
This is how the inercooler piping looks like, I think this will be my final setup, except for the blowoff valve which I still need to hook up.
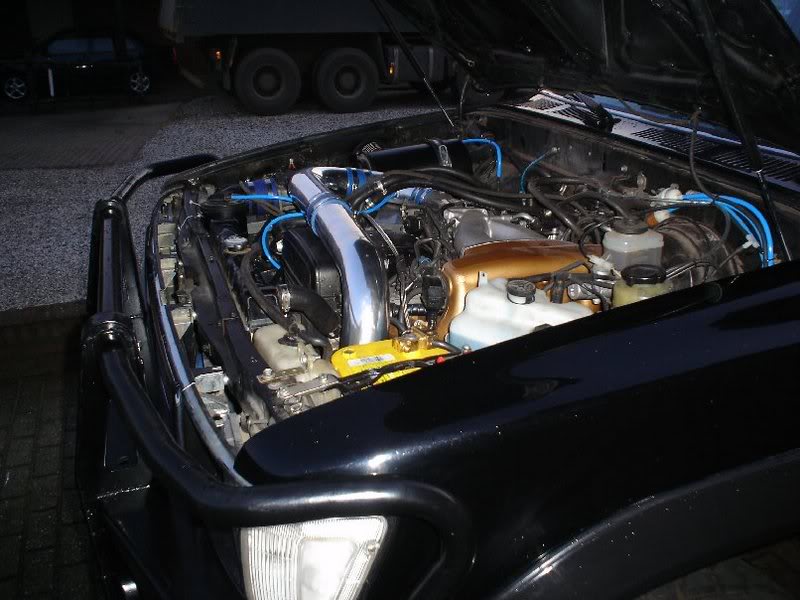
Front shot (I am really pleased with the look of the scoop):
And a side shot:
Did some testdriving and she responds much better now. Picks up easier cause she gets the air in much easier. Specially noticable at low rpms.
The turbo does only 0.3 bar cause the wastegate is still disconnected, but she still goes like a bat from hell. From 4500 rpm its a fast go to 6500-7000 rpm.
And she still is smooth and quit, even at high revs.
I did finish it quikly so my wife has transportation. That's why the hoses and wires are a mess and an abundance of zipties was used
This is how the inercooler piping looks like, I think this will be my final setup, except for the blowoff valve which I still need to hook up.
Front shot (I am really pleased with the look of the scoop):
And a side shot:


