4rnnr33's 94 excab build
 11-14-2010, 12:05 PM
#21
Registered User
Thread Starter
Join Date: Jan 2008
Location: castle rock, wa
Posts: 327
Likes: 0
Received 0 Likes
on
0 Posts
probably about an hour haha maybe less. the most time consuming part is tightening the bolts that go through the bracket into the t case because there is barely enough room to get a 1/4 turn each time other than thats its pretty simple.
 11-14-2010, 12:08 PM
#22
Registered User
Thread Starter
Join Date: Jan 2008
Location: castle rock, wa
Posts: 327
Likes: 0
Received 0 Likes
on
0 Posts
I dont like them theyre too tall for me and they ride like hell. But when I had them in my 4runner I liked them because it was alot heavier so they rode alot better and sagged more. I have already pulled the HD spring out of the front pack and am almost thinking about pulling out another one. I would definately go with the 4" springs from what Ive seen they are alot softer when they are broken in.
Last edited by 4rnnr33; 11-14-2010 at 12:09 PM.
11-14-2010, 12:18 PM
#23
Registered User
Thread Starter
Join Date: Jan 2008
Location: castle rock, wa
Posts: 327
Likes: 0
Received 0 Likes
on
0 Posts
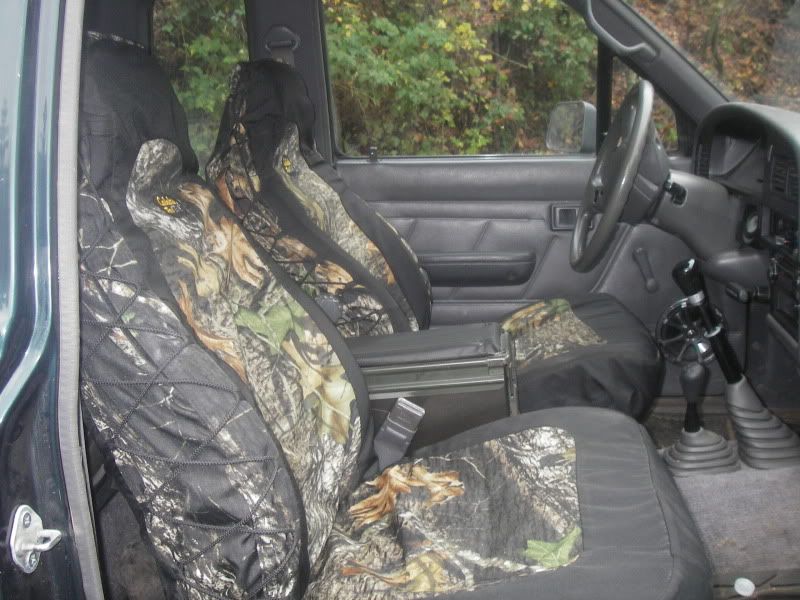
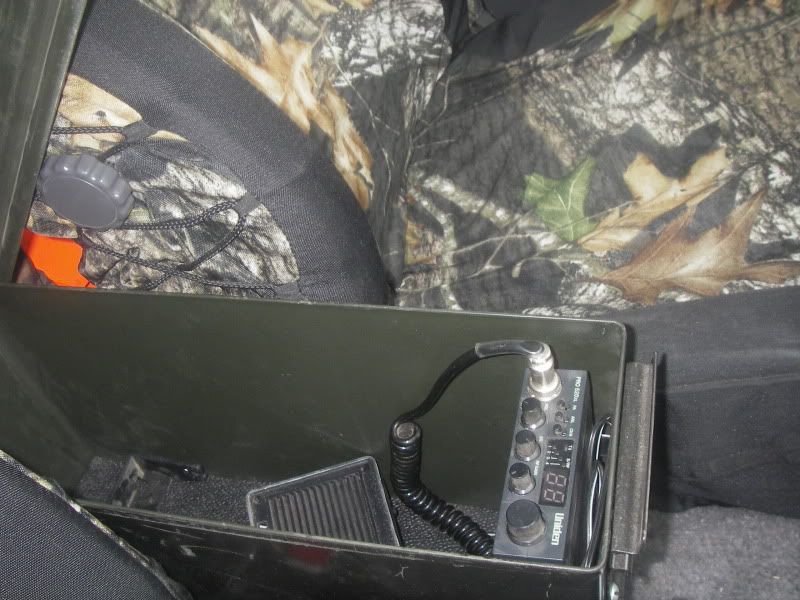
Heres a few interior shots I robbed the sr5 buckets seats out of my old 4runner and used an ammo can for my center console and installed the cb inside of it

11-14-2010, 12:21 PM
#24
Registered User
Join Date: Feb 2010
Location: N. Lake Tahoe/Chico CA
Posts: 1,934
Received 0 Likes
on
0 Posts
I dont like them theyre too tall for me and they ride like hell. But when I had them in my 4runner I liked them because it was alot heavier so they rode alot better and sagged more. I have already pulled the HD spring out of the front pack and am almost thinking about pulling out another one. I would definately go with the 4" springs from what Ive seen they are alot softer when they are broken in.
 11-30-2010, 01:49 PM
#26
Registered User
Thread Starter
Join Date: Jan 2008
Location: castle rock, wa
Posts: 327
Likes: 0
Received 0 Likes
on
0 Posts
Well I have gotten a few more things done on the truck.
started getting the on board air set up which uses an ac compressor. I didnt take very many pictures but heres somthing that I havent seen before. If you cut the end of the stock ac hose off at the fitting on the compressor. heres a pic
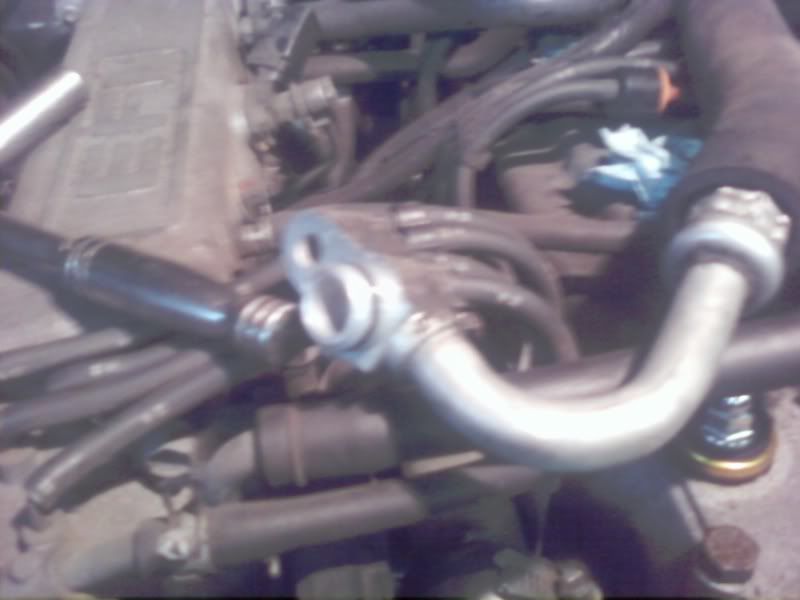
you can drill out the hole to 7/16 like so
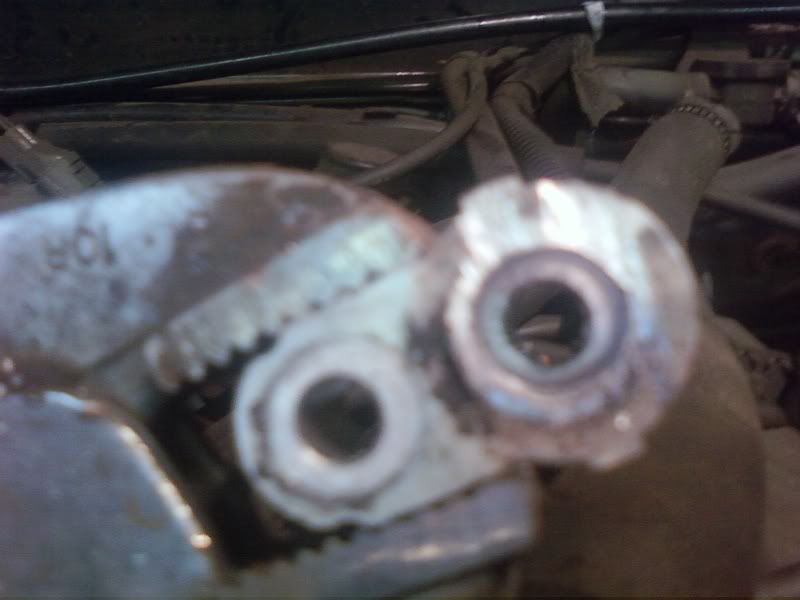
then tap it to 1/4" npt and you then have a custom adapter fitting to go to whatever hose you wanna use
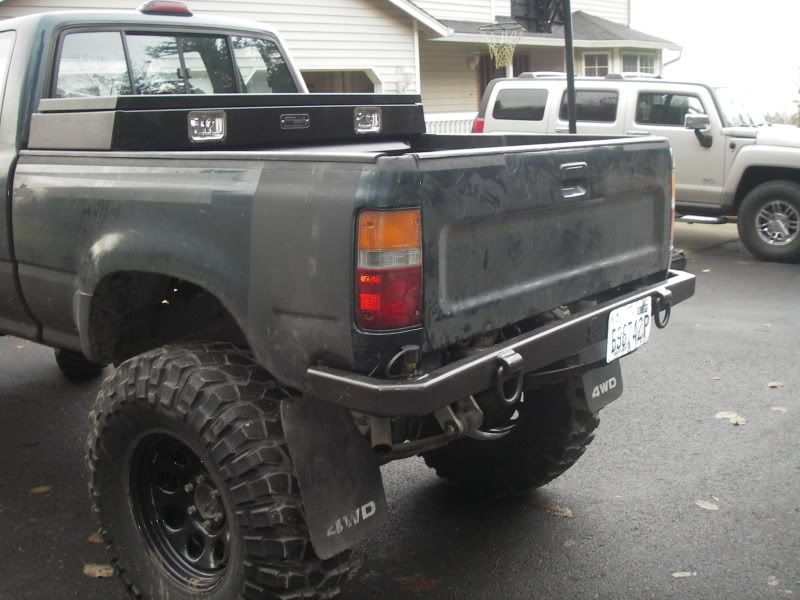
Ill take some more pics of the rest of my setup once I get back up to the shop and I also have my rear bumper done so ill get some pics of that also. Thats all for now Sorrry for the crappy pics
started getting the on board air set up which uses an ac compressor. I didnt take very many pictures but heres somthing that I havent seen before. If you cut the end of the stock ac hose off at the fitting on the compressor. heres a pic
you can drill out the hole to 7/16 like so
then tap it to 1/4" npt and you then have a custom adapter fitting to go to whatever hose you wanna use
Ill take some more pics of the rest of my setup once I get back up to the shop and I also have my rear bumper done so ill get some pics of that also. Thats all for now Sorrry for the crappy pics
11-30-2010, 03:37 PM
#28
Registered User
Thread Starter
Join Date: Jan 2008
Location: castle rock, wa
Posts: 327
Likes: 0
Received 0 Likes
on
0 Posts
12-02-2010, 01:42 PM
#32
Registered User
Thread Starter
Join Date: Jan 2008
Location: castle rock, wa
Posts: 327
Likes: 0
Received 0 Likes
on
0 Posts
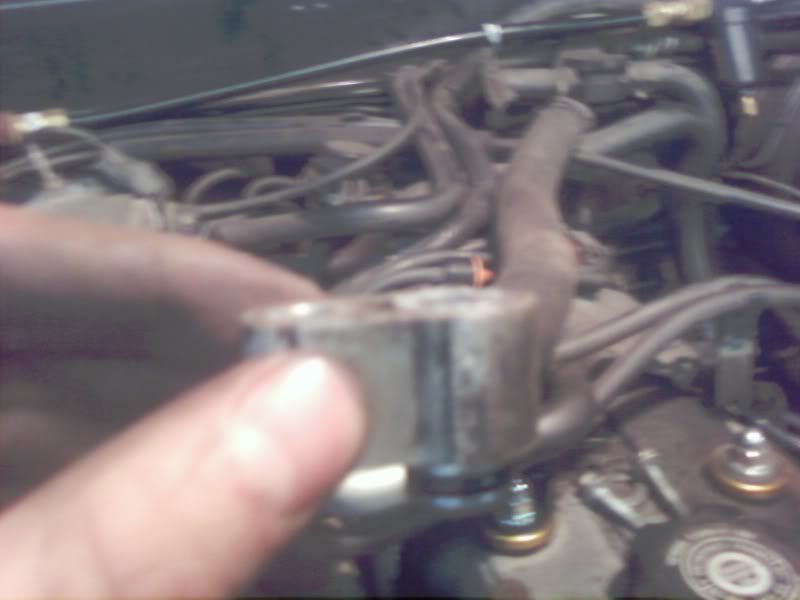
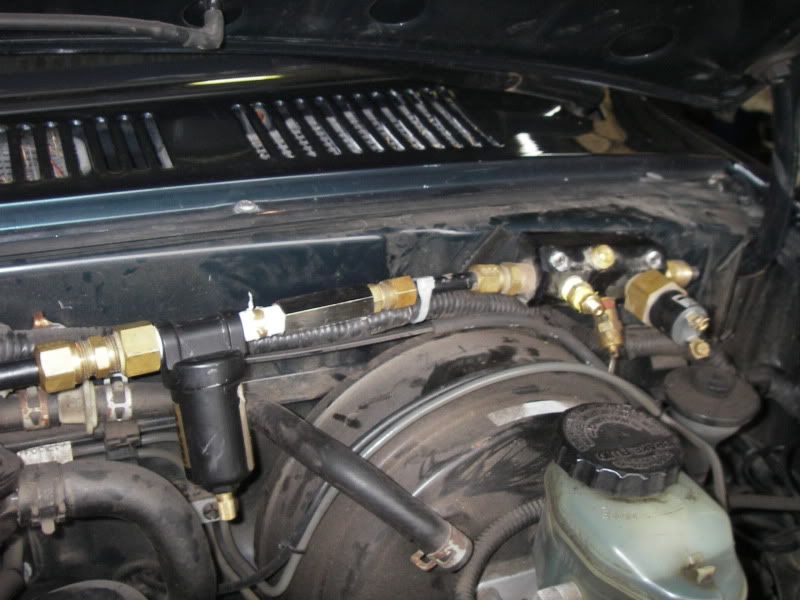
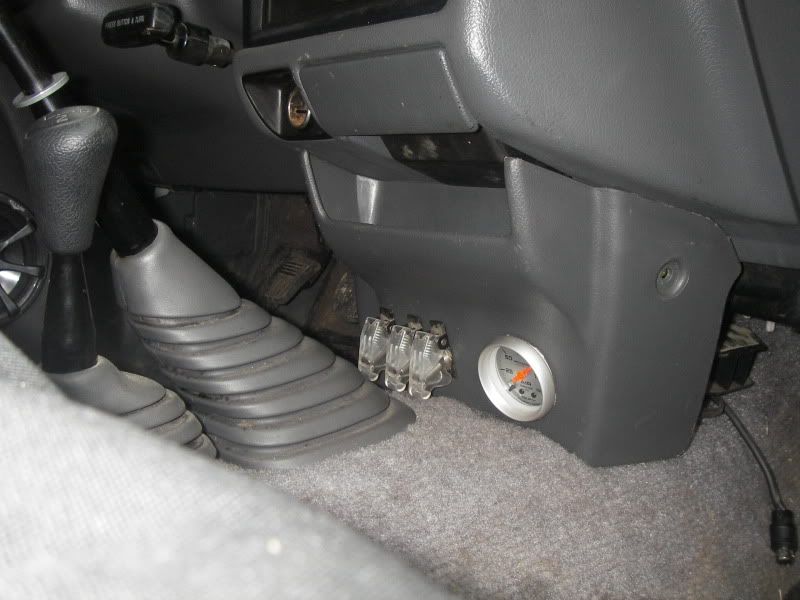
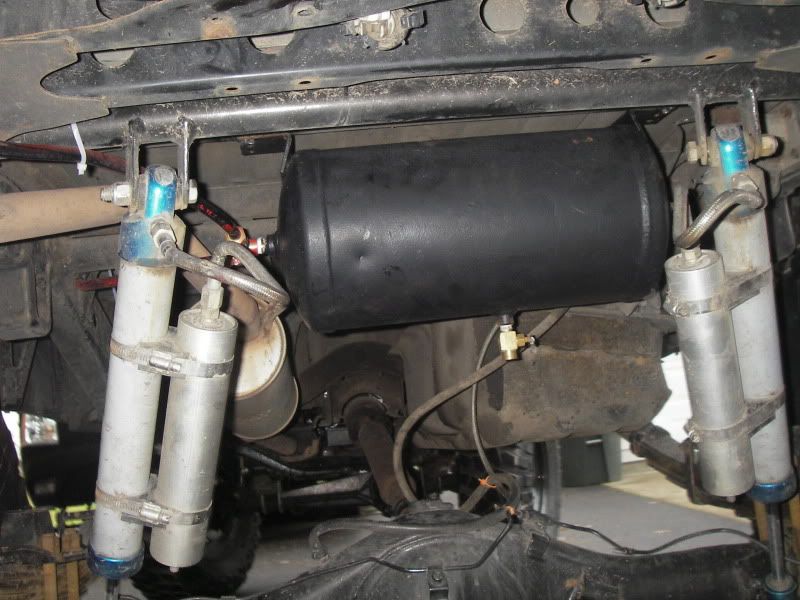
Well I just got done with my on board air setup using the ac compressor and I havent seen a whole lot of pics out there of this setup so here are mine:
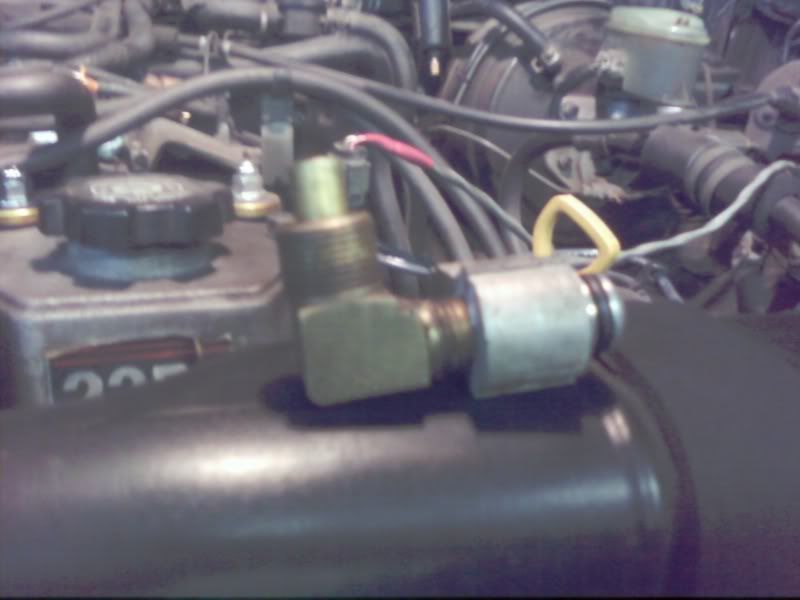
Heres the stock fitting on the pressure side that I cut off the aluminum hose the drilled the hole out to 7/16" and tapped to 1/4" NPT
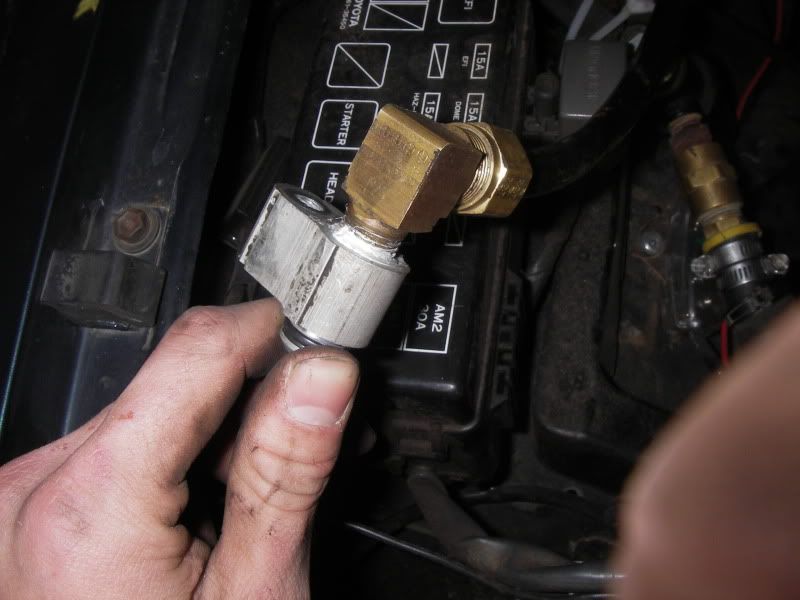
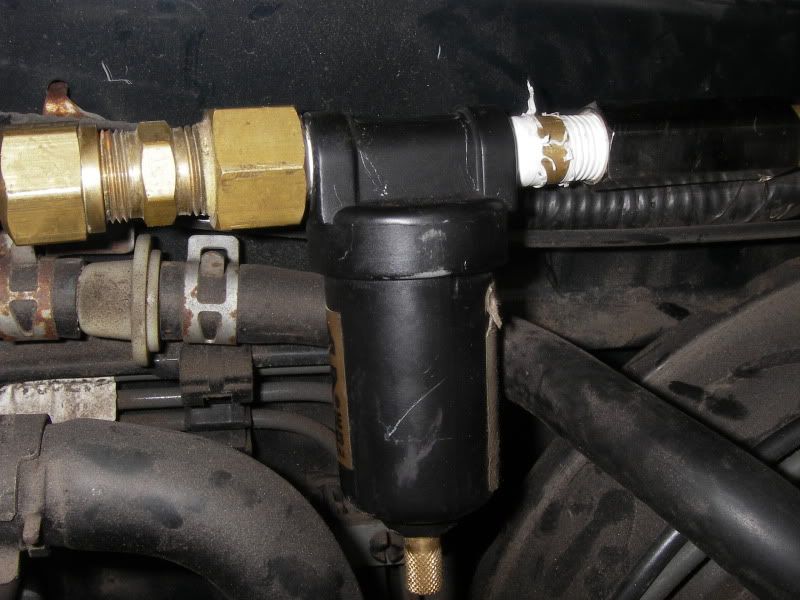
Heres the suction side I just cut the stock ac hose and hose clamped it to a hose barb then theres the inline oiler and filter
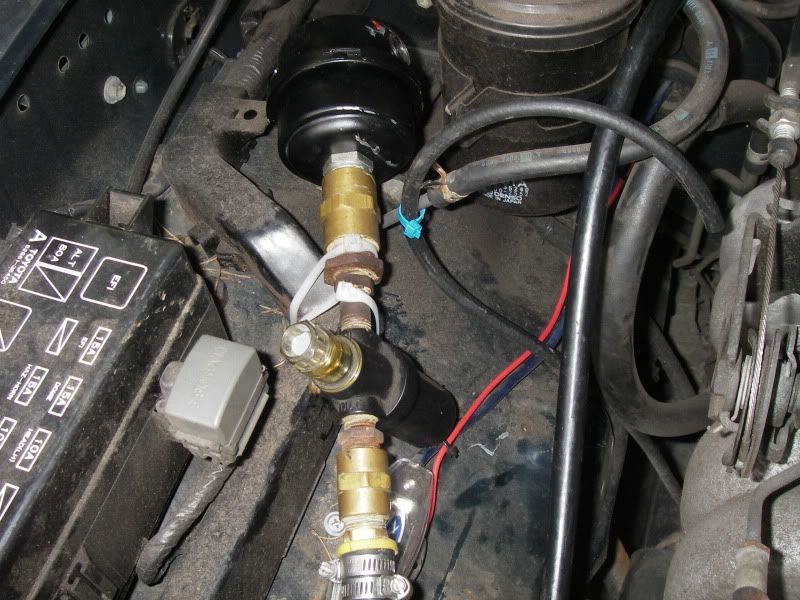
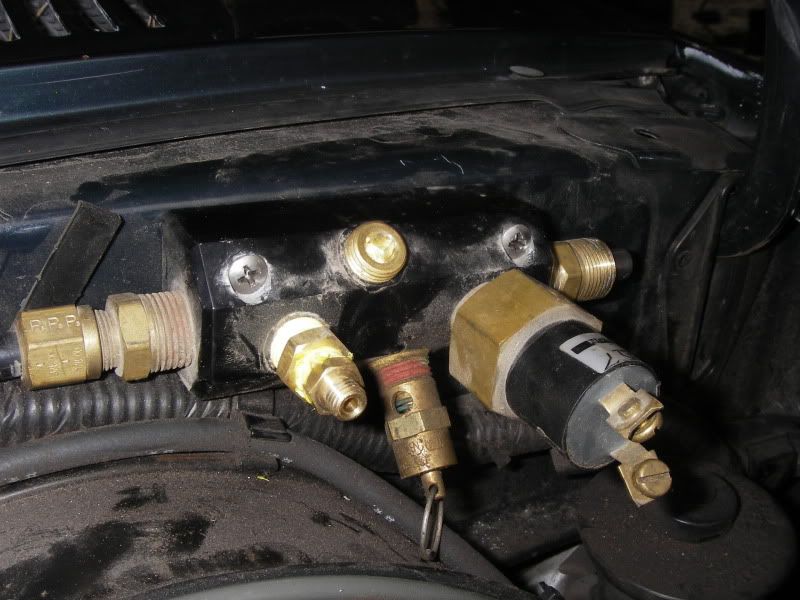
Heres the rest of the pressure side. Oil separator and manifold with pressure switch, pressure gauge fitting and safety valve
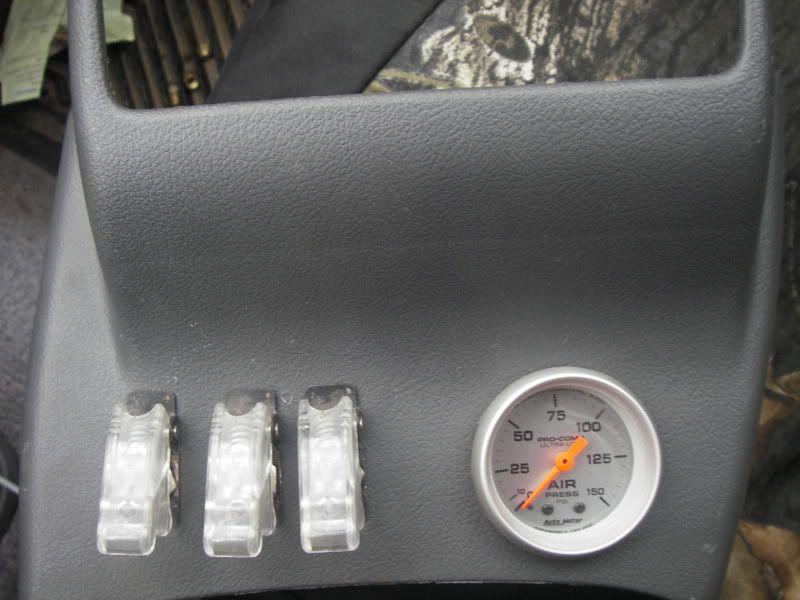
Heres how I mounted my air pressure gauge and some switches in the cab
And the airtank
Heres the stock fitting on the pressure side that I cut off the aluminum hose the drilled the hole out to 7/16" and tapped to 1/4" NPT
Heres the suction side I just cut the stock ac hose and hose clamped it to a hose barb then theres the inline oiler and filter
Heres the rest of the pressure side. Oil separator and manifold with pressure switch, pressure gauge fitting and safety valve
Heres how I mounted my air pressure gauge and some switches in the cab
And the airtank
 12-02-2010, 05:00 PM
#34
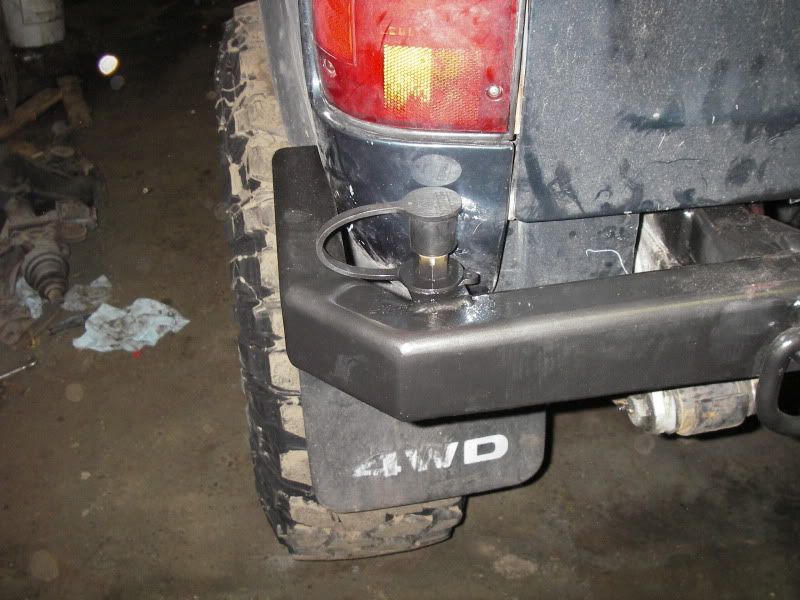
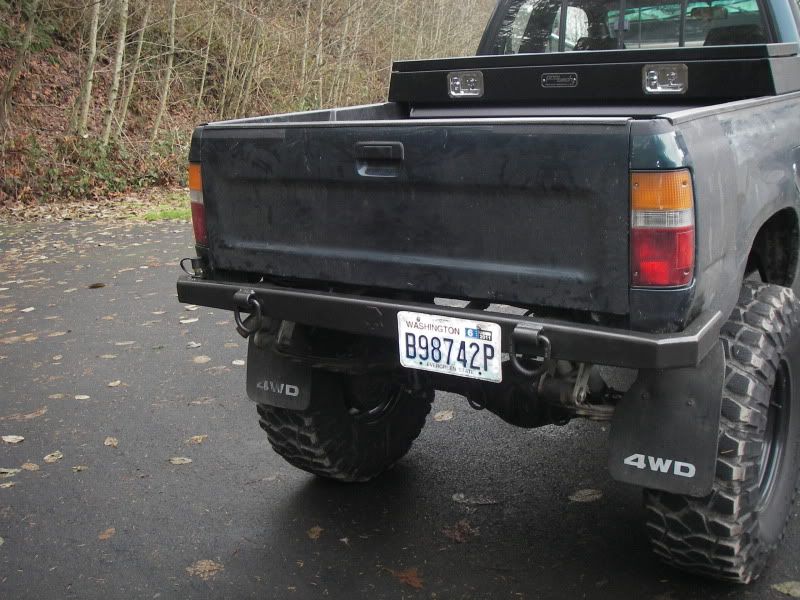
love that bumper and the a/c air set-up. is that a cb lug on the bumper (left side)? if it is, does the antenna hit the truck at all?
edit: or is it the air outlet? i looked again...
edit: or is it the air outlet? i looked again...
Last edited by irab88; 12-02-2010 at 05:01 PM. Reason: i took a second look
12-02-2010, 05:01 PM
#35
Registered User
Thread Starter
Join Date: Jan 2008
Location: castle rock, wa
Posts: 327
Likes: 0
Received 0 Likes
on
0 Posts
12-02-2010, 05:18 PM
#37
Registered User
Thread Starter
Join Date: Jan 2008
Location: castle rock, wa
Posts: 327
Likes: 0
Received 0 Likes
on
0 Posts
 i see it


