Sport Hood Scooped Hood Scoop FAQ Write-Up
 05-06-2008, 06:53 PM
#1
Sport Hood Scooped Hood Scoop FAQ Write-Up
this is a quick-ish run down of what you need, what you don't need, and what i have found useful in putting a sport hood or scooped hood on a 3rd generation 4runner that didn't come with the sport hood stock from the factory.
Parts needed:
12mm wrench or socket/ratchet (hood bolts)
10mm wrench or socket/ratchet (bulge bolts)
Phillips head screwdriver
Parts purchased from a Toyota dealer (or elsewhere if you can find them)
53301-35170 Hood Sub-Assy, Sport Hood ($325.29)
76181-35901 Bulge Hood ($114.15)
76192-35010 Plate, Hood Bulge ($13.20)
76182-35020 Guide, Hood Air ($13.58)
90263-04054 Rivet ($0.57) X 2
90167-45005 Screw, Pan Tappin ($0.72)
76183-12030 Protector, Hood ($0.71)
90179-06324 Nut ($2.20) X4
76187-35010 Retainer, Hood ($0.89)
76184-12020 Protector, Hood ($0.71) Don't Buy
76185-35010 Protector, Hood ($7.00) Don't Buy
OK, let's start with the hood. it will come in a black primer from the dealer and you will want to get it painted, probably before install unless you want to test fit it first to make sure it fits properly. the hood has the hump on it but has an open area in front of the hump where the "Bulge" fits in.
This is a picture of the black hood and the white fiberglass "Bulge" piece when I test fit my hood before painting.
The "Bulge" is a fiberglass piece that fits in the opening in the hood and is secured with four nuts using a 10mm wrench. before you put this in, you will want to put together the mesh piece etc that goes inside this part. you will also want to have this piece painted as well, it comes unpainted plain white.
The first part that goes in the Bulge is the "Guide" which is a black plastic piece that i believe is used to "guide" water that accumulates in the bulge back out through tiny holes in the hood and harmlessly into the engine compartment.
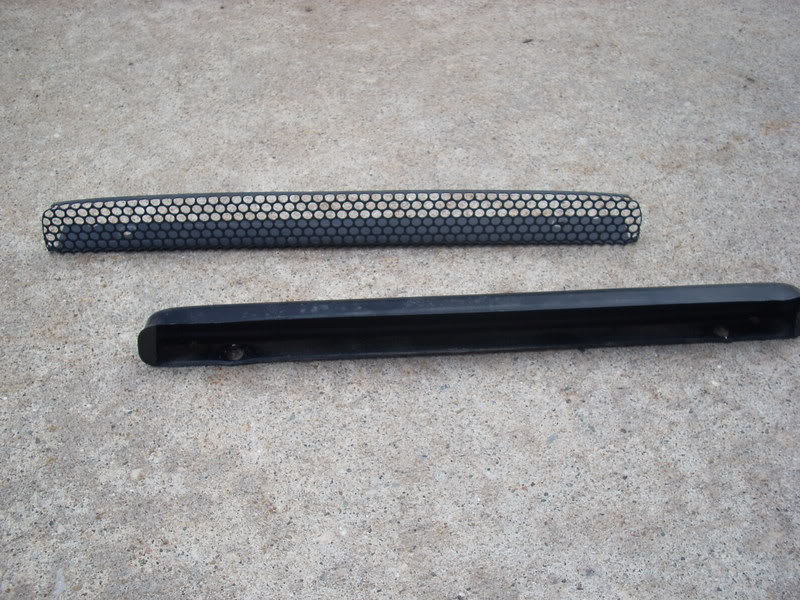
here is a picture of the "plate" and the "guide" pieces:
Second, the "Plate" or Mesh fits snugly inside the guide, there are four holes that line up in the Plate, Guide, and Bulge so you know everything is lined up correctly. You will need two rivets to secure the plate, guide, and bulge together; they go through two of the holes between those pieces. The rivets from Toyota are black (or dark brown, i can't remember) and seem to be a bit longer than what is available at the local hardware store, this is so they are long enough to fit through the bulge, plate, and guide and will secure them together.
how the plate and guide fit together:
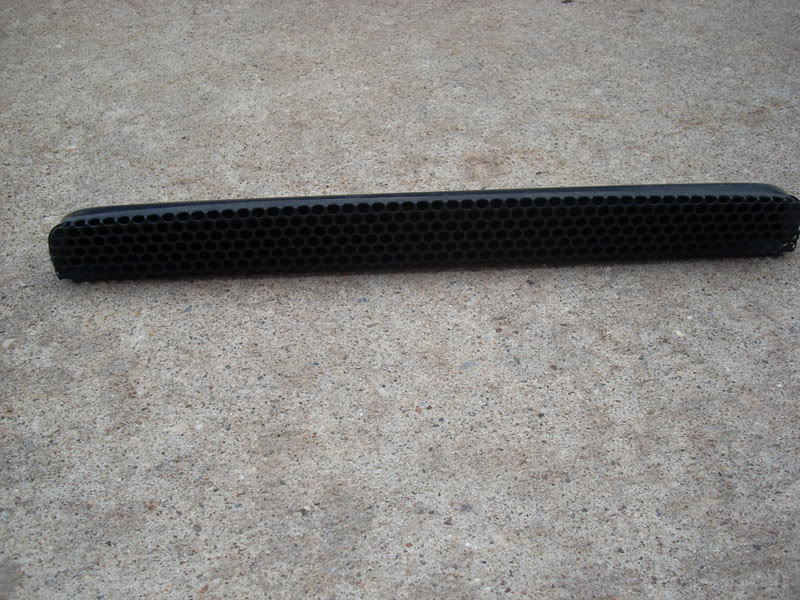
these two pieces slide into the bulge piece and get riveted in.
Once you have the bulge piece assembled, flip it over and there is a hole near the front of the bulge on the under side. This is where the "Retainer" goes.
This piece is just another little plastic clip that helps secure the Bulge to the hood, and probably helps keep the front part of the bulge held down closer toward the front. It is held in place with one phillips head screw as shown in the picture.
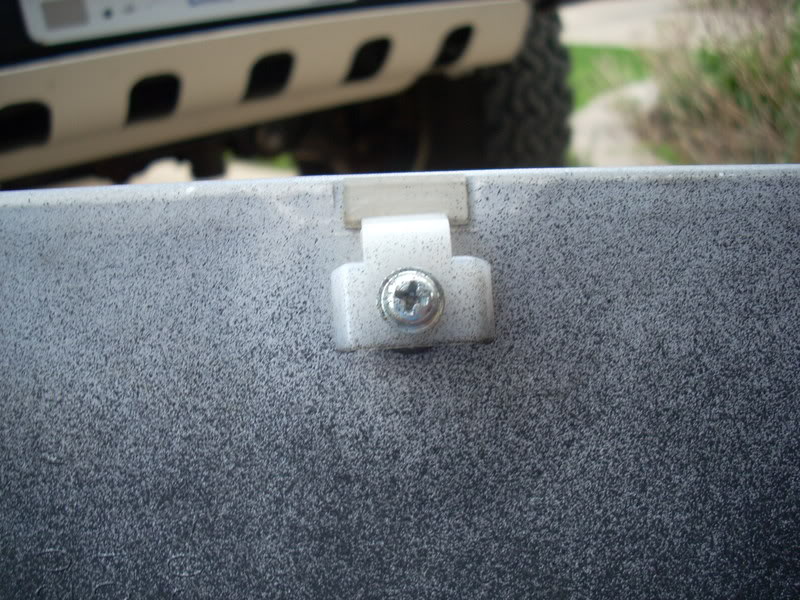
*It is up to you whether you feel this is necessary, it might help or it might not; or you may decide to buy the retainer but source the screw from a hardware store instead of shelling out $.72, for ease i just bought it from the dealer.
Now it's time to slide the Bulge assembly into the open area on the sport hood (get your mind out of the gutter! ).
).
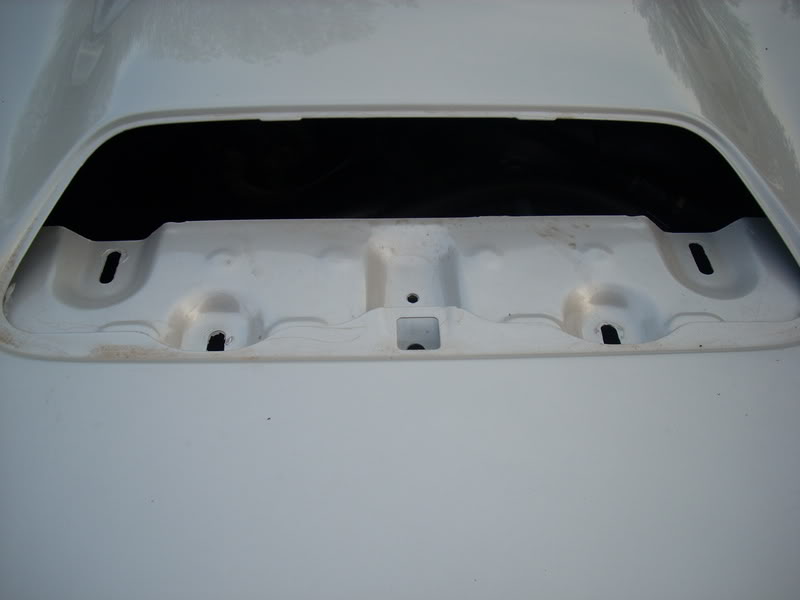
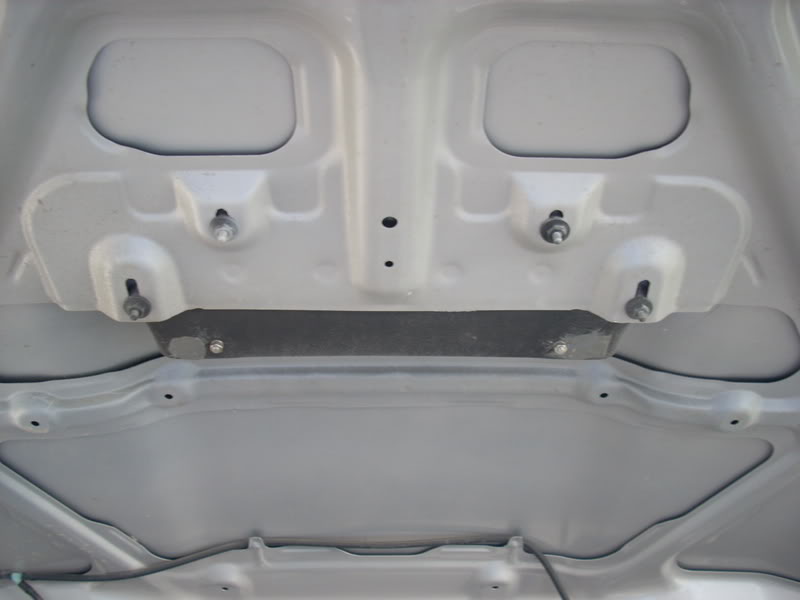
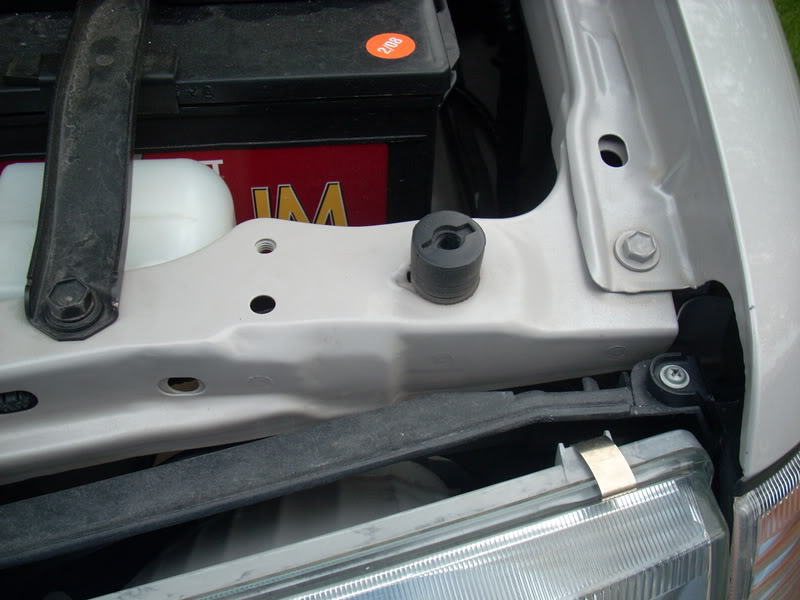
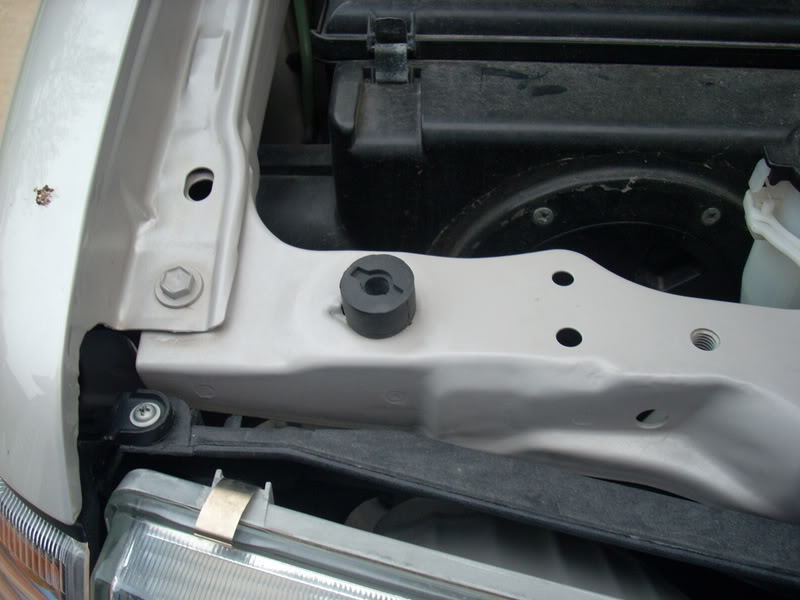
this is just the sport hood with the bulge piece missing, you can see the metal part of the hood where the bulge piece mounts to:
there really is no wrong way to do this, there are four threaded pieces on the underside of the bulge that go through holes in the hood. the retainer should snap into it's designated place on the hood itself.
Next, just thread the four nuts on the underside of the hood and tighten them down with your 10mm wrench.
and all attached!
*again, you might be able to source the nuts at a hardware store and save yourself some dough since the dealer charges $2.20 a piece, i am not sure what the threads are for these at this time. You will need FOUR (4).
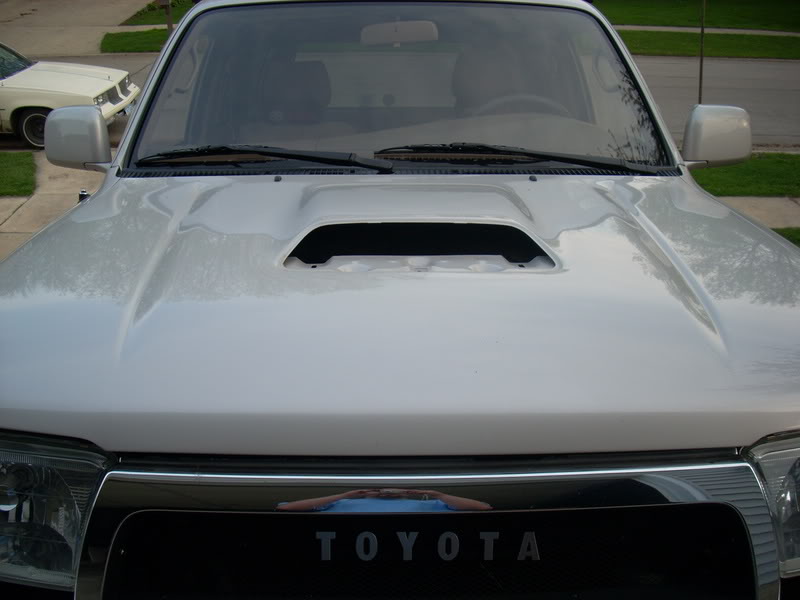
this is the bulge piece fully assembled with the guide and plate, all attached to the hood:

so now, some common questions i came up with about what was needed and what was re-used from your old hood, install tips, etc.
1. you obviously need the parts i listed above from Toyota. Parts re-used from the old hood are:
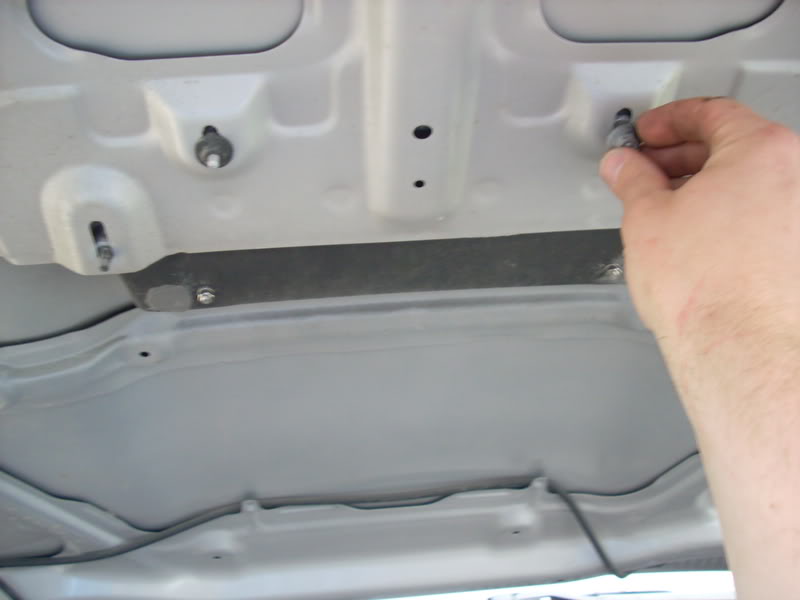
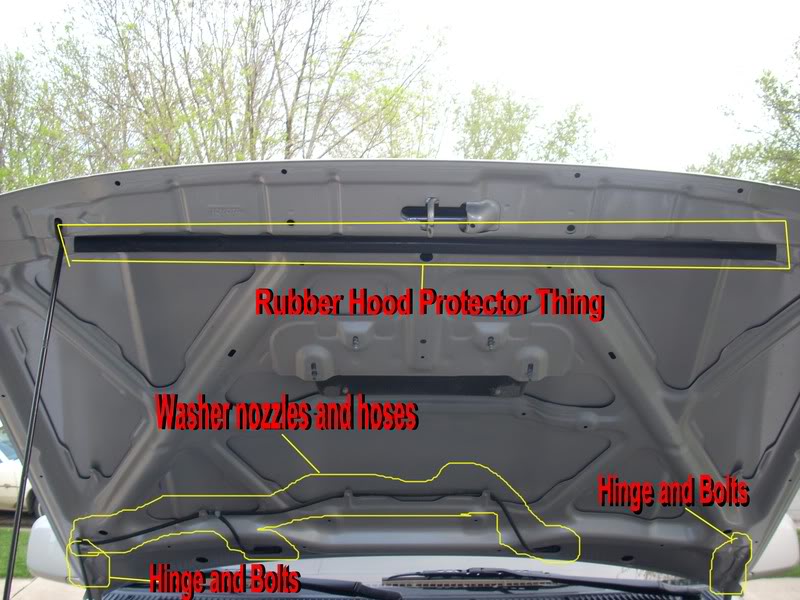
-your hinges and the 12mm bolts that secure the hood to the hinges.
-your washer sprayer nozzle thing-a-ma-bobbers.
-tubing from washer sprayer nozzle thing-a-ma-bobbers to your washer pump or whatever it attaches to, i can't remember right now
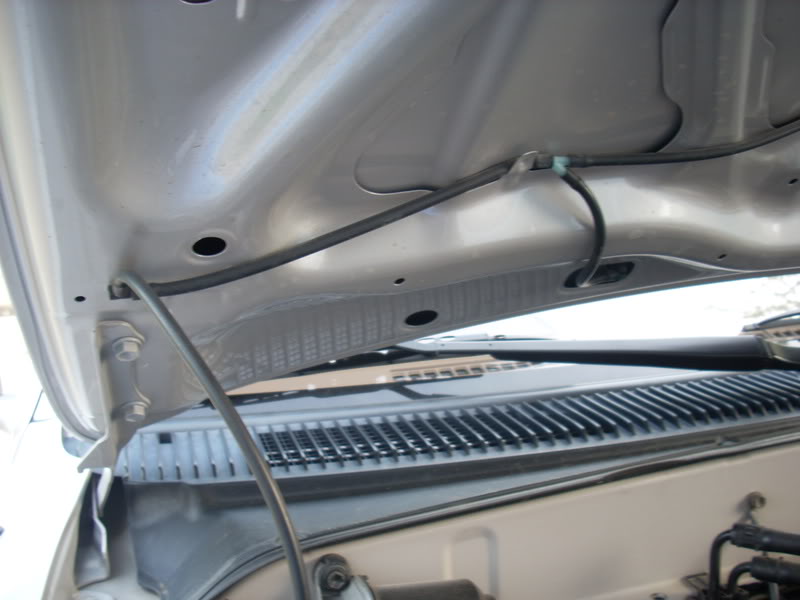

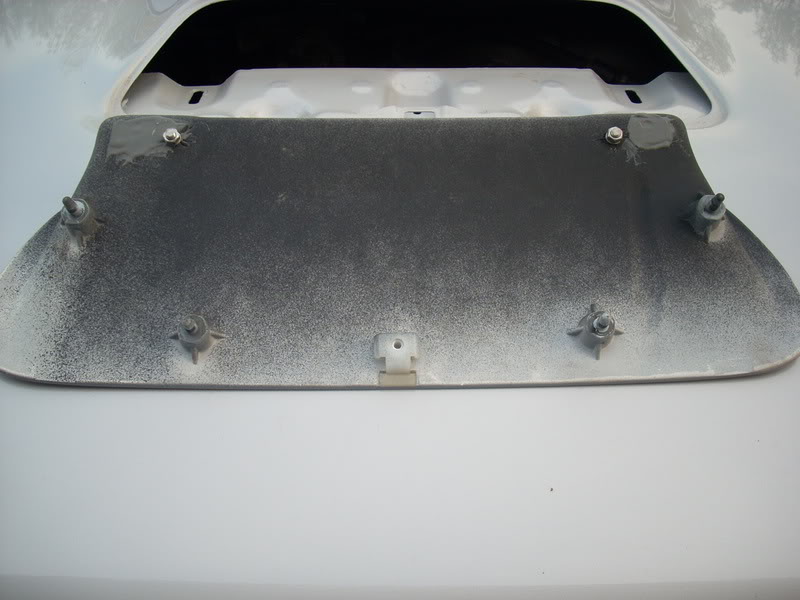
-the protective rubber piece that is on the front part of the underside of the hood (see picture), and possibly some new push tabs to hold it in (i broke all of mine taking this piece off the old hood).
-if you have a bug deflector, i guess you'll have to figure out how to put that on the new hood, i left mine off.
2. A tip when putting the hood on: put down some tape on the fenders to keep anything from being scratched. i have a couple that need wet sanding now from some "oopsies" when fitting it the first time. also, have a couple friends help you out. one person on each side of the hood holding it and a third to thread and tighten the bolts is optimal.
3. getting it to fit right. you can loosen the bolts on the hinges to fit the hood side to side so you don't have super small or super huge panel gaps. for the front of the hood, you can use the little rubber stoppers under the hood to raise and lower the hood a little bit if it's off up or down in the front.
4. before you slam the hood down for the first time, test fit it gently to make sure the hood latch is aligned with the hood. mine was perfect, but you never know, and it would be a shame to get to this point and have a mishap!
5. one other tip. the threaded pieces on the bulge are screw type things that dig into the fiberglass of the bulge piece and the other side is the threaded piece for the nuts to hold it on the hood. when i test fit mine, i went to take that piece out, and instead of the nut loosening, the entire screw portion came out of the bulge piece. to fix this, i put some JB Weld in each hole and then screwed the threaded pieces in and left overnight. now they are solidly in there and don't come out when i loosen the nuts on the bulge piece, the way it should work.
That's it! that's all i can think of right now. if i have something to add later i will, or if you think of something i've missed please feel free to add to this as well.
misc pics that may help:
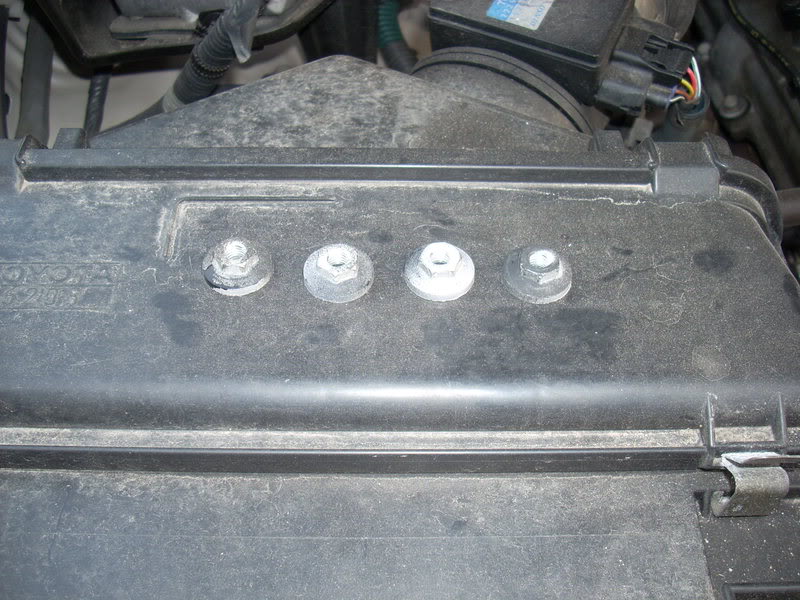
bulge nuts:
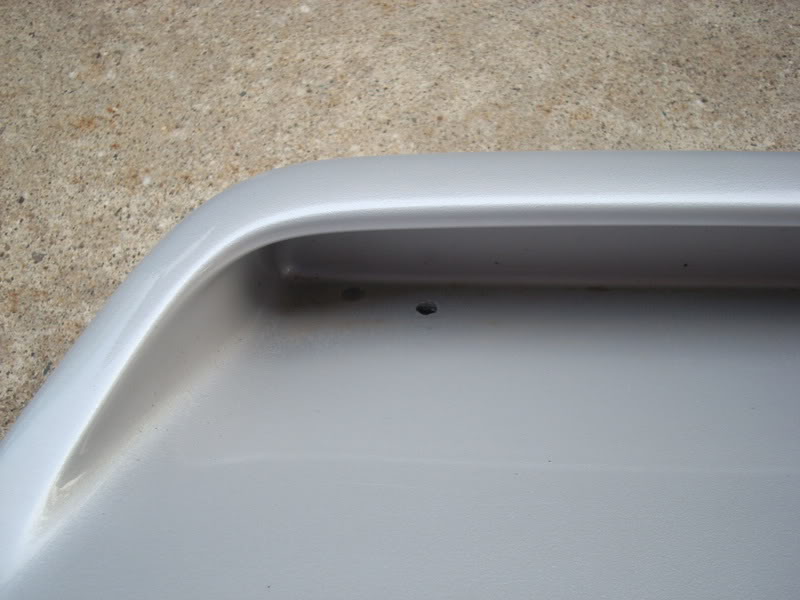
close up view of the inside of the bulge without the guide and plate installed:
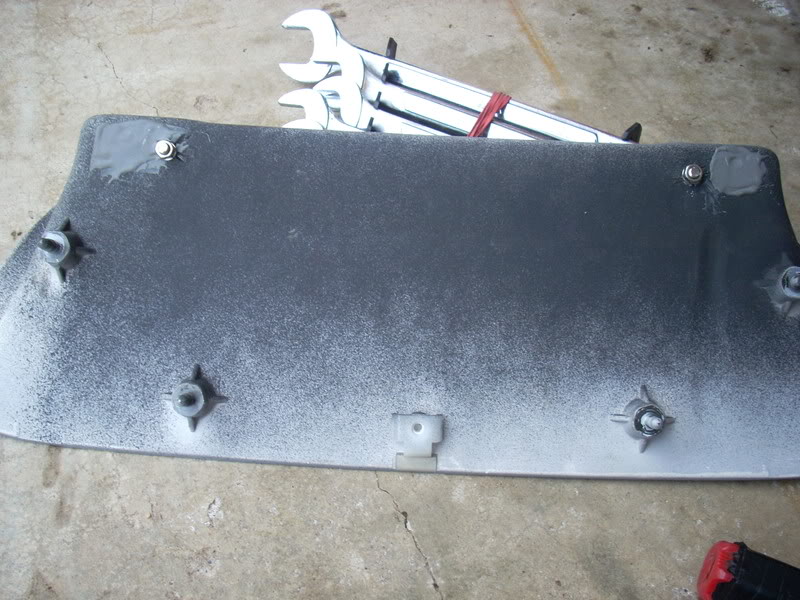
this is the back of the bulge with two of the "protectors" installed, there are two little "feet" areas on the back that meet with the hood, this is where i used RTV for added protection:
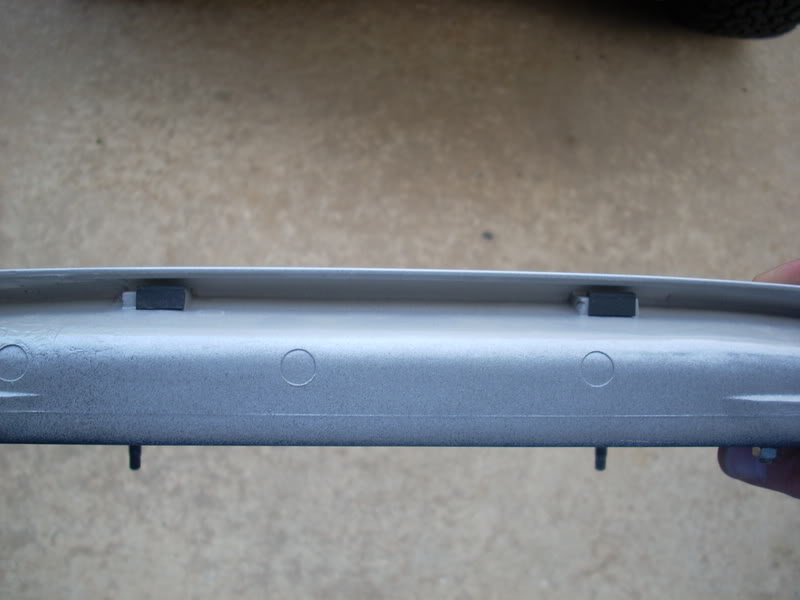
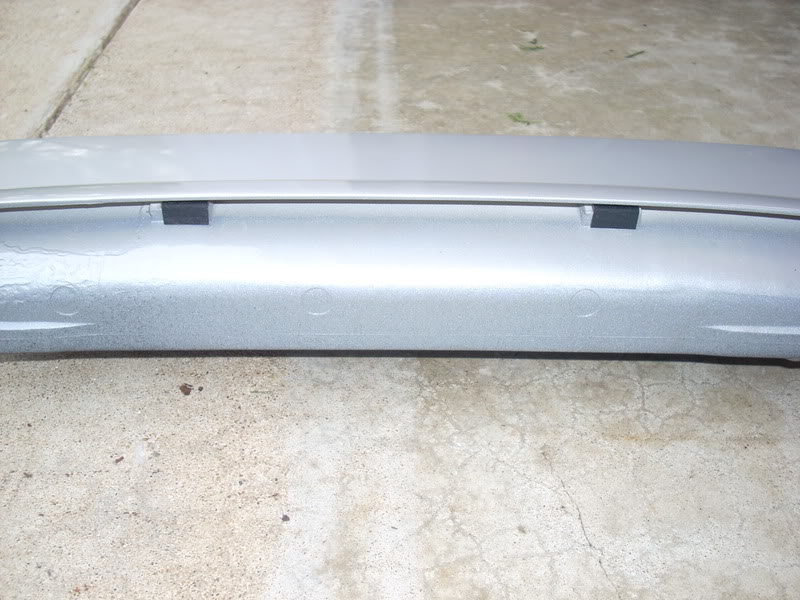
the underside of the bulge:
OEM BABY!

did i forget anything?
*I've edited this for two reasons: 1. RTV/Silicone is a BAD BAD BAD idea on anything and I don't recommend it, it's messy and once dry is hard to remove. It worked OK for what I used it on here but now that I'm repainting I would recommend using the "protectors" supplied by Toyota or make your own with 3M Clear Protective Film. 2. I still recommend filling the little drain holes but I would recommend using the supplied Toyota rivets to attach the guide and plate to the bulge piece. In a pinch the button cap bolts and nuts are OK, but the rivets are a cleaner install if used properly. I did not have a rivet gun that was up to par and that is why I had problems, find one that works and do it right.
Parts needed:
12mm wrench or socket/ratchet (hood bolts)
10mm wrench or socket/ratchet (bulge bolts)
Phillips head screwdriver
Parts purchased from a Toyota dealer (or elsewhere if you can find them)
53301-35170 Hood Sub-Assy, Sport Hood ($325.29)
76181-35901 Bulge Hood ($114.15)
76192-35010 Plate, Hood Bulge ($13.20)
76182-35020 Guide, Hood Air ($13.58)
90263-04054 Rivet ($0.57) X 2
90167-45005 Screw, Pan Tappin ($0.72)
76183-12030 Protector, Hood ($0.71)
90179-06324 Nut ($2.20) X4
76187-35010 Retainer, Hood ($0.89)
76184-12020 Protector, Hood ($0.71) Don't Buy
76185-35010 Protector, Hood ($7.00) Don't Buy
OK, let's start with the hood. it will come in a black primer from the dealer and you will want to get it painted, probably before install unless you want to test fit it first to make sure it fits properly. the hood has the hump on it but has an open area in front of the hump where the "Bulge" fits in.
This is a picture of the black hood and the white fiberglass "Bulge" piece when I test fit my hood before painting.
The "Bulge" is a fiberglass piece that fits in the opening in the hood and is secured with four nuts using a 10mm wrench. before you put this in, you will want to put together the mesh piece etc that goes inside this part. you will also want to have this piece painted as well, it comes unpainted plain white.
The first part that goes in the Bulge is the "Guide" which is a black plastic piece that i believe is used to "guide" water that accumulates in the bulge back out through tiny holes in the hood and harmlessly into the engine compartment.
here is a picture of the "plate" and the "guide" pieces:
Second, the "Plate" or Mesh fits snugly inside the guide, there are four holes that line up in the Plate, Guide, and Bulge so you know everything is lined up correctly. You will need two rivets to secure the plate, guide, and bulge together; they go through two of the holes between those pieces. The rivets from Toyota are black (or dark brown, i can't remember) and seem to be a bit longer than what is available at the local hardware store, this is so they are long enough to fit through the bulge, plate, and guide and will secure them together.
how the plate and guide fit together:
these two pieces slide into the bulge piece and get riveted in.
Once you have the bulge piece assembled, flip it over and there is a hole near the front of the bulge on the under side. This is where the "Retainer" goes.
This piece is just another little plastic clip that helps secure the Bulge to the hood, and probably helps keep the front part of the bulge held down closer toward the front. It is held in place with one phillips head screw as shown in the picture.
*It is up to you whether you feel this is necessary, it might help or it might not; or you may decide to buy the retainer but source the screw from a hardware store instead of shelling out $.72, for ease i just bought it from the dealer.
Now it's time to slide the Bulge assembly into the open area on the sport hood (get your mind out of the gutter!
). this is just the sport hood with the bulge piece missing, you can see the metal part of the hood where the bulge piece mounts to:
there really is no wrong way to do this, there are four threaded pieces on the underside of the bulge that go through holes in the hood. the retainer should snap into it's designated place on the hood itself.
Next, just thread the four nuts on the underside of the hood and tighten them down with your 10mm wrench.
and all attached!
*again, you might be able to source the nuts at a hardware store and save yourself some dough since the dealer charges $2.20 a piece, i am not sure what the threads are for these at this time. You will need FOUR (4).
this is the bulge piece fully assembled with the guide and plate, all attached to the hood:
so now, some common questions i came up with about what was needed and what was re-used from your old hood, install tips, etc.
1. you obviously need the parts i listed above from Toyota. Parts re-used from the old hood are:
-your hinges and the 12mm bolts that secure the hood to the hinges.
-your washer sprayer nozzle thing-a-ma-bobbers.
-tubing from washer sprayer nozzle thing-a-ma-bobbers to your washer pump or whatever it attaches to, i can't remember right now
-the protective rubber piece that is on the front part of the underside of the hood (see picture), and possibly some new push tabs to hold it in (i broke all of mine taking this piece off the old hood).
-if you have a bug deflector, i guess you'll have to figure out how to put that on the new hood, i left mine off.
2. A tip when putting the hood on: put down some tape on the fenders to keep anything from being scratched. i have a couple that need wet sanding now from some "oopsies" when fitting it the first time. also, have a couple friends help you out. one person on each side of the hood holding it and a third to thread and tighten the bolts is optimal.
3. getting it to fit right. you can loosen the bolts on the hinges to fit the hood side to side so you don't have super small or super huge panel gaps. for the front of the hood, you can use the little rubber stoppers under the hood to raise and lower the hood a little bit if it's off up or down in the front.
4. before you slam the hood down for the first time, test fit it gently to make sure the hood latch is aligned with the hood. mine was perfect, but you never know, and it would be a shame to get to this point and have a mishap!
5. one other tip. the threaded pieces on the bulge are screw type things that dig into the fiberglass of the bulge piece and the other side is the threaded piece for the nuts to hold it on the hood. when i test fit mine, i went to take that piece out, and instead of the nut loosening, the entire screw portion came out of the bulge piece. to fix this, i put some JB Weld in each hole and then screwed the threaded pieces in and left overnight. now they are solidly in there and don't come out when i loosen the nuts on the bulge piece, the way it should work.
That's it! that's all i can think of right now. if i have something to add later i will, or if you think of something i've missed please feel free to add to this as well.
misc pics that may help:
bulge nuts:
close up view of the inside of the bulge without the guide and plate installed:
this is the back of the bulge with two of the "protectors" installed, there are two little "feet" areas on the back that meet with the hood, this is where i used RTV for added protection:
the underside of the bulge:
OEM BABY!
did i forget anything?
*I've edited this for two reasons: 1. RTV/Silicone is a BAD BAD BAD idea on anything and I don't recommend it, it's messy and once dry is hard to remove. It worked OK for what I used it on here but now that I'm repainting I would recommend using the "protectors" supplied by Toyota or make your own with 3M Clear Protective Film. 2. I still recommend filling the little drain holes but I would recommend using the supplied Toyota rivets to attach the guide and plate to the bulge piece. In a pinch the button cap bolts and nuts are OK, but the rivets are a cleaner install if used properly. I did not have a rivet gun that was up to par and that is why I had problems, find one that works and do it right.
Last edited by pattycakes77; 07-31-2012 at 04:44 PM.

The following users liked this post:
SugarRhino (10-02-2023)
 05-07-2008, 12:51 AM
#4
Registered User
Join Date: Mar 2006
Location: Lake Stevens, Washington
Posts: 586
Likes: 0
Received 0 Likes
on
0 Posts
Patrick-You amaze me!
Thanks for your fast response to all my pm's. And awesome and thorough write-up!
I'm still waiting on my buldge, I already test fitted the new hood...and I'm debating on pulling the trigger on LineX. I'll probably post in about a week when finished, too.
Thanks for your fast response to all my pm's. And awesome and thorough write-up!
I'm still waiting on my buldge, I already test fitted the new hood...and I'm debating on pulling the trigger on LineX. I'll probably post in about a week when finished, too.
 05-07-2008, 05:30 AM
#6
Contributing Member
Join Date: Sep 2003
Location: Littleton,CO
Posts: 10,549
Likes: 0
Received 0 Likes
on
0 Posts
Finally a good thread for people to refer to so they can see that you can't just buy the hood with a hole in it and be done or you could if you want to look ghetto.
Trending Topics
 01-16-2011, 07:37 AM
#18
Registered User
Join Date: Feb 2008
Location: Woodstock, Ga.
Posts: 44
Likes: 0
Received 0 Likes
on
0 Posts
So I just got my 99 last week. No hood scoop. I do like it. but....
I was looking through the pics and I thought the hood scoop had a purpose. Like bringing cool air into engine bay. However from your pics it looks like the scoop is closed off on the backside. Am I missing something?
I was looking through the pics and I thought the hood scoop had a purpose. Like bringing cool air into engine bay. However from your pics it looks like the scoop is closed off on the backside. Am I missing something?
02-01-2011, 05:18 PM
#20
Contributing Member


