Younguy's 1990 4Runner build "The Phoenix"


 12-19-2012, 08:01 PM
#22
Registered User


 01-16-2013, 11:48 AM
#26
Registered User
Thread Starter
Join Date: Aug 2011
Posts: 72
Likes: 0
Received 0 Likes
on
0 Posts
Sorry its been so long! Haven't had any time with wrestling season but luckily only one more week and I'm back at it! I picked up a new 135a welder and a bottle of gas (:
The plan is fibish the roof, clean and reinstall the interior. Next chop the rear and seal it up. Then imma exo it in 1.5" .120 DOM. Unfortunately the exo has to come beforw the sas :/ dads orders. So imma reinforce my bracket lift and weld my front diff for the time being
My excitement is though the roof! I will take lots of pictures!
02-07-2013, 07:14 PM
#27
Registered User
Thread Starter
Join Date: Aug 2011
Posts: 72
Likes: 0
Received 0 Likes
on
0 Posts
Hey guys! I've made a lot of progress!! Sorry about the waist of time between updates lol But here ya go:

Finally got my new welder, like i had promised
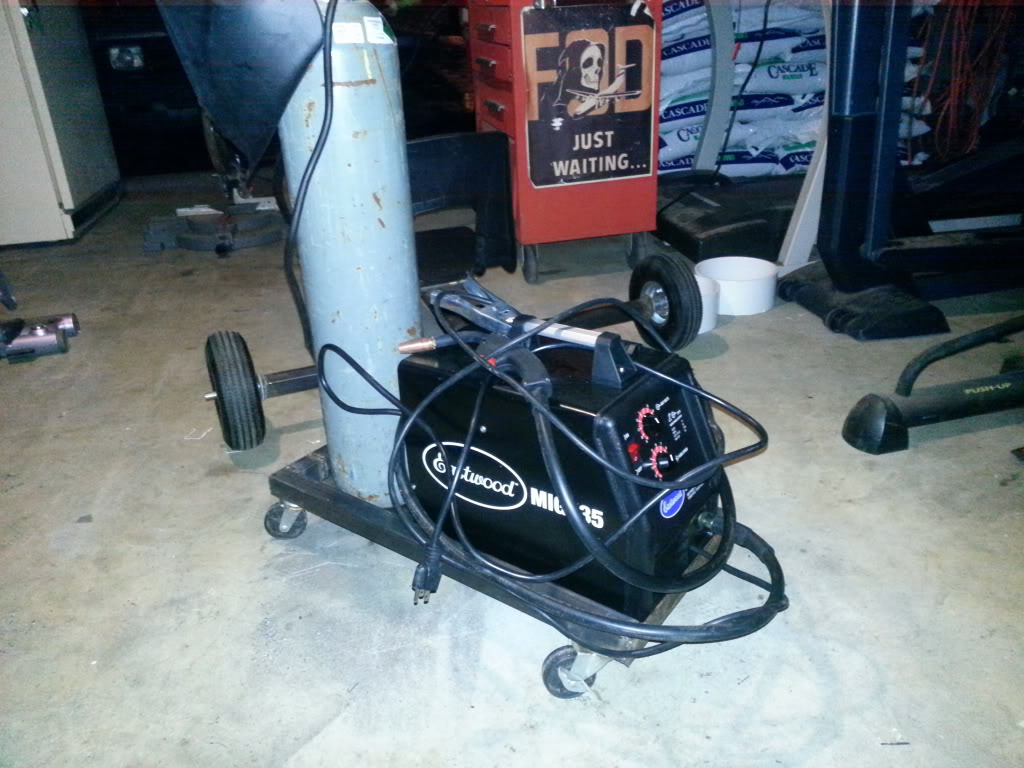
As you can see, i whipped up a nice cart for it with some scrap metal and old casters i had laying in the garage. Need to put a handle on it to secure everything to.

I then proceeded to hit the regulator and break the flow guage!
But it's whatever, ill have to go pic up a new gauge soon, but for now i just electrical taped the cover back on the cheap piece of crap to stop any gas from leaking while i proceeded to weld with it anyways
Here are some of my new beads! compared to the ˟˟˟˟ty splatter from my old welder, this gas mig welder is gold
On the passenger side door, i was able to line the hinges up and get a good feeling seal. However on the drivers side i had to get a little more redneck innovation goin to make the fit feel stock again. Due to the roll, the portion of the body the hinges mount too had been knocked inwards where the upper hinge bolts to, so i had to file out the hinge and make a spacer plate for between the hinge to get it in the right location. I will take pictures tomorrow if i remember.
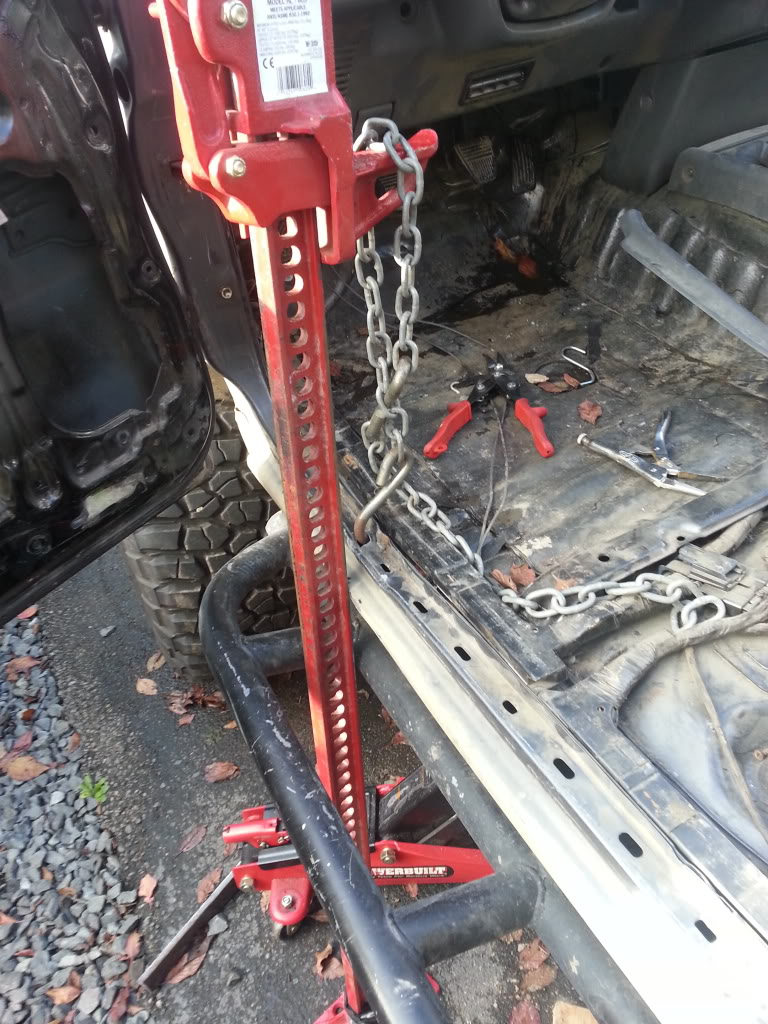
Here is some more of that redneck innovation that i was talkin about! This is how i straightened my floor
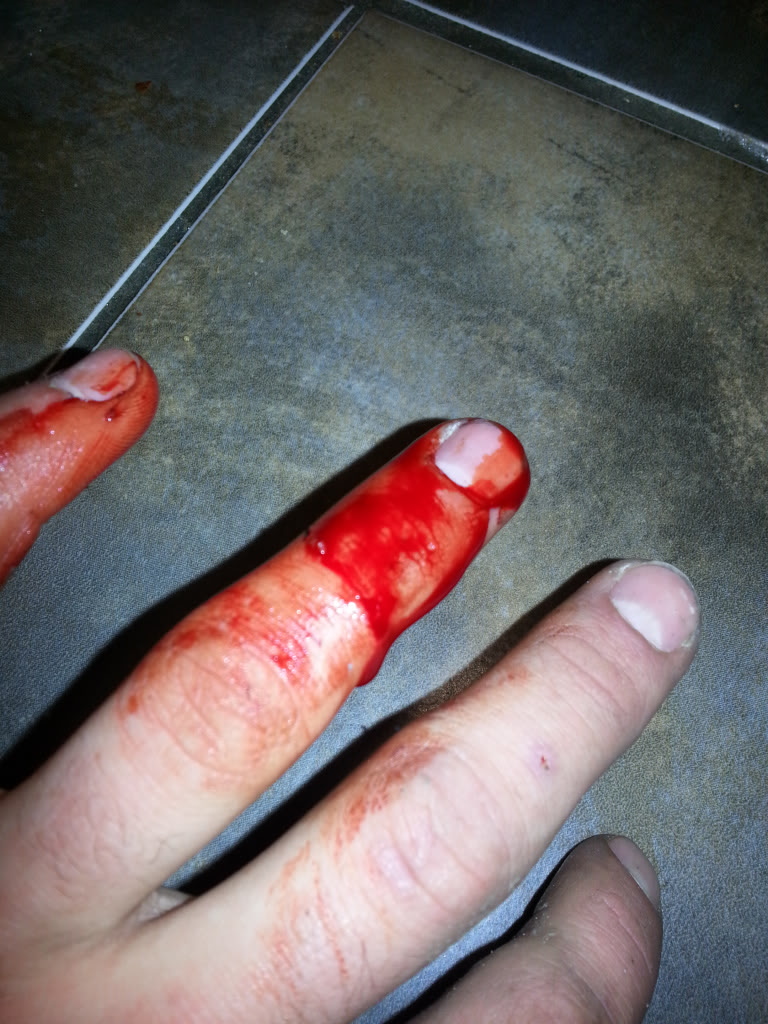
And in the midst of all this progress i had to take a sec to grab a bandaid
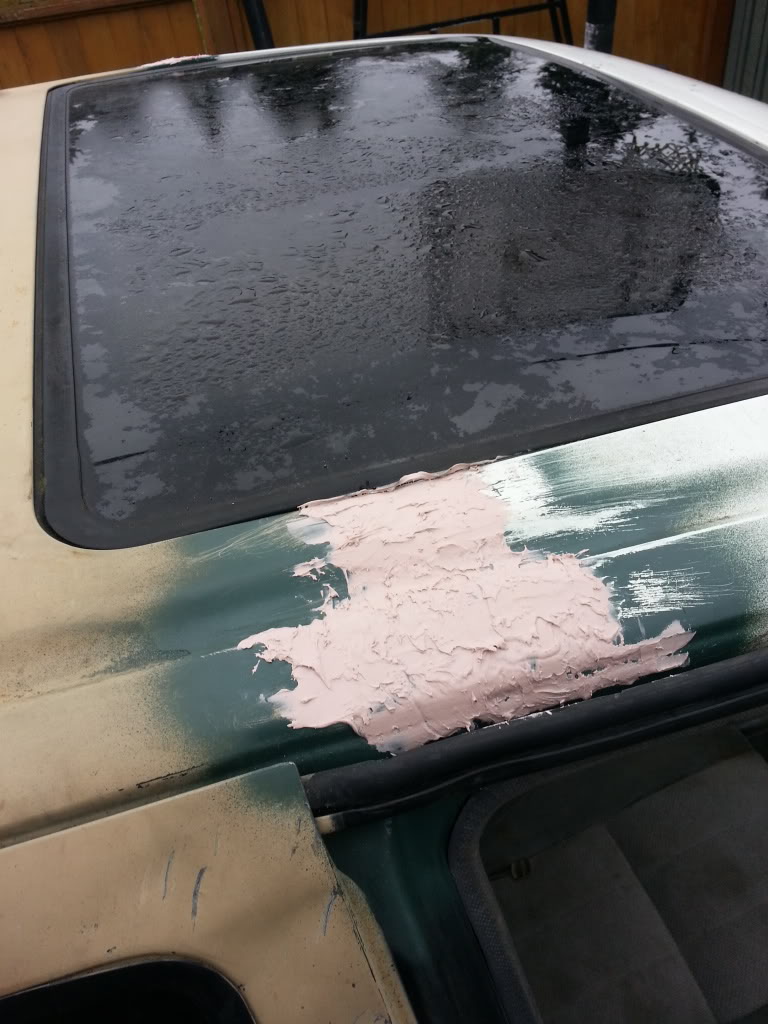
Threw my body filler up top to seal it up nice and tight will have that sanded and hopefully painted soon, tho it is a low priority atm. Due to the fact that im already jumping into my next project on the truck. But first...
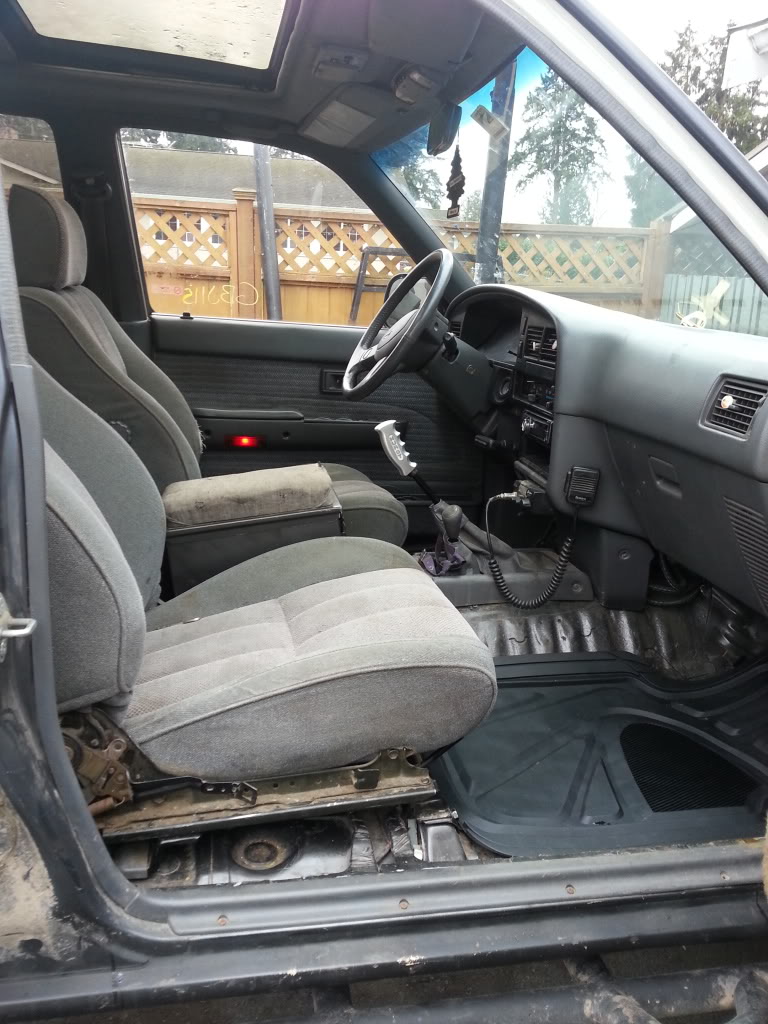
Can you believe my interior went back together as if nothing had even happened?? I was very excited to see this!
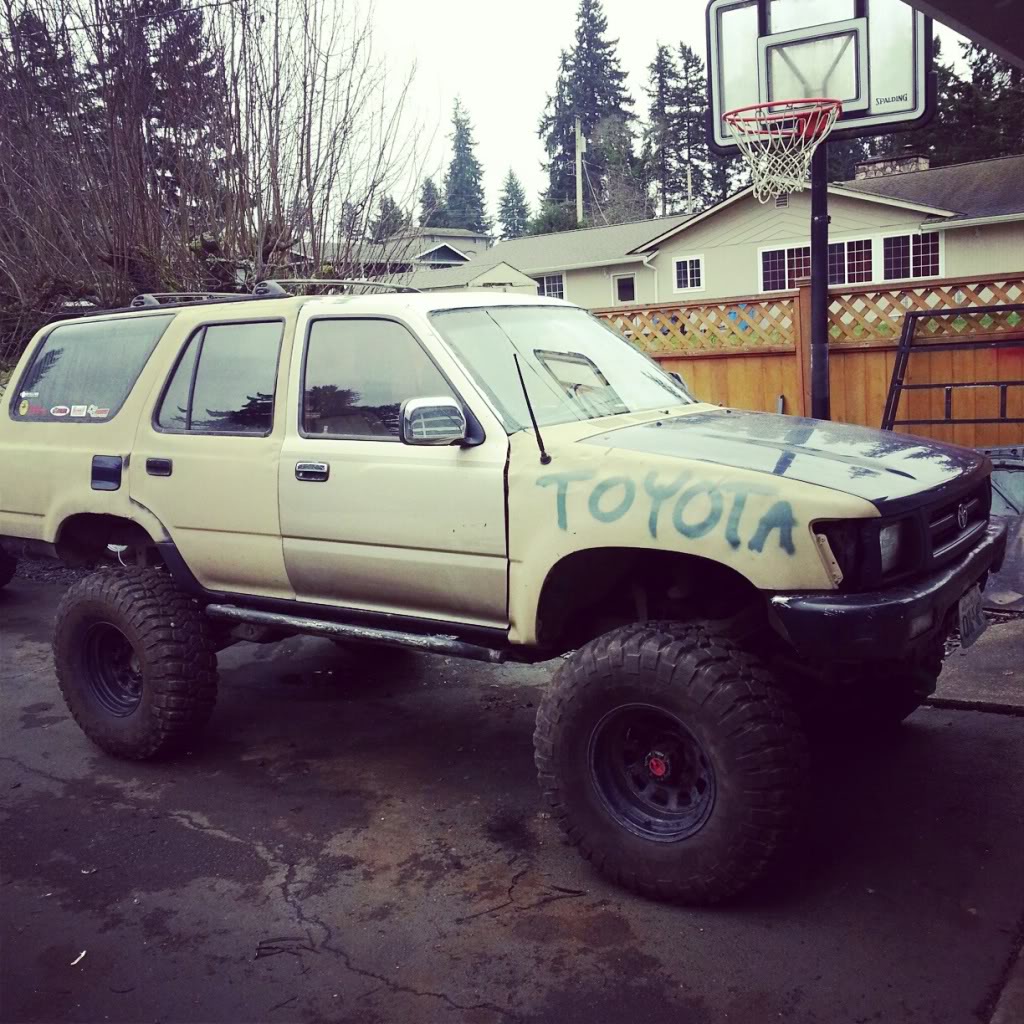
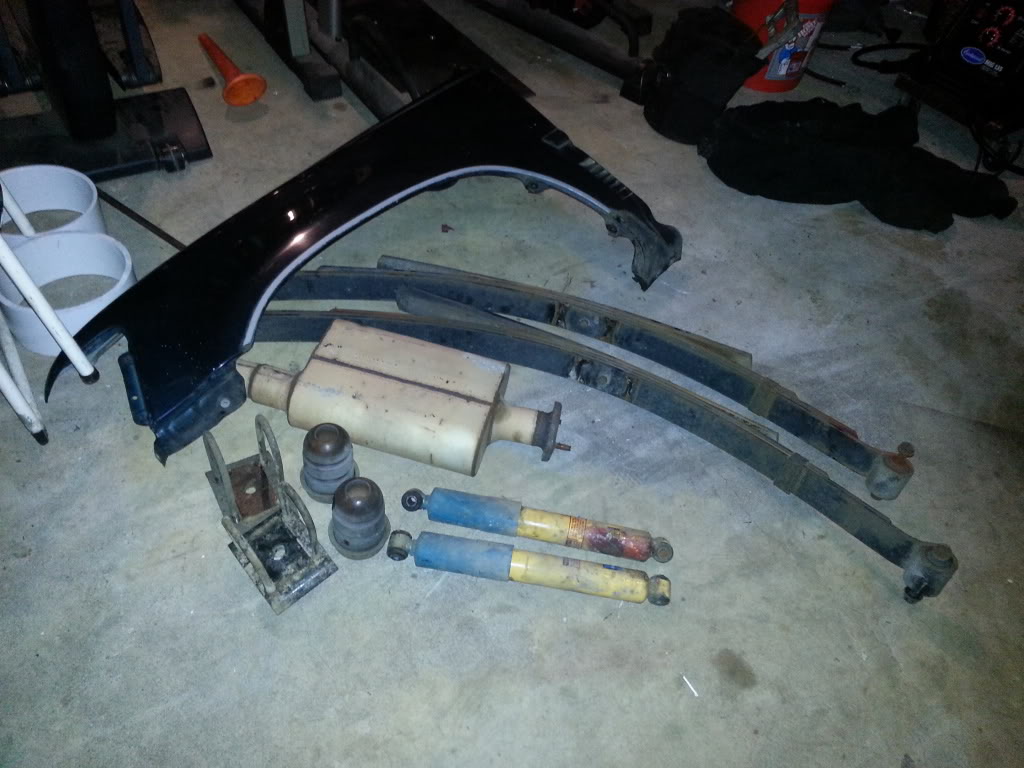
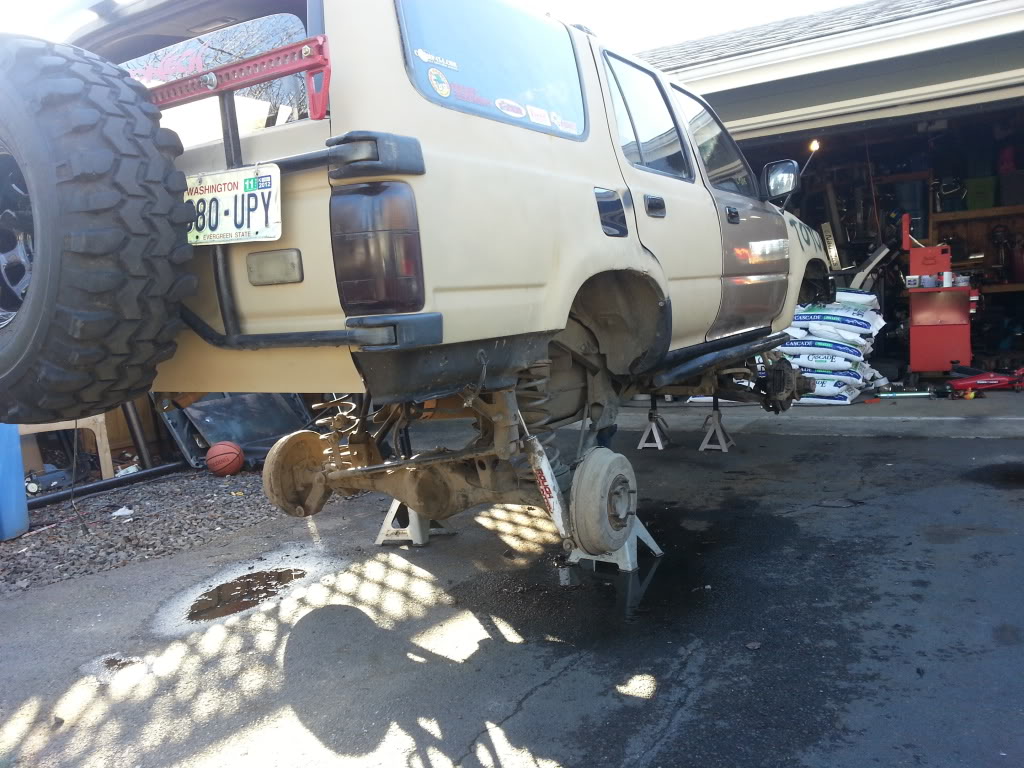
And here she stands! Well, stood i should say Because ive traded the wheels, and she is on jackstands with her rear end torn out because i wend junk yarding and picked up a set of 2wd f150 leaves, u bolt kit, flowmaster muffler, bump stops, a new fender, and some ifs shocks all for $40 bucks, because i got a local guy that hooks me up! 
So she is actually sitting outside like this as of today:
Ohh and remember how i said i traded those pretty little 33x12.5x15 km2's with 500 miles on them? You guessed right! I met up with a guy on nw-wheelers forum today and traded straight across for a Trail Gear 4" SAS kit with Bilstein 5150's I was happy with the trade!
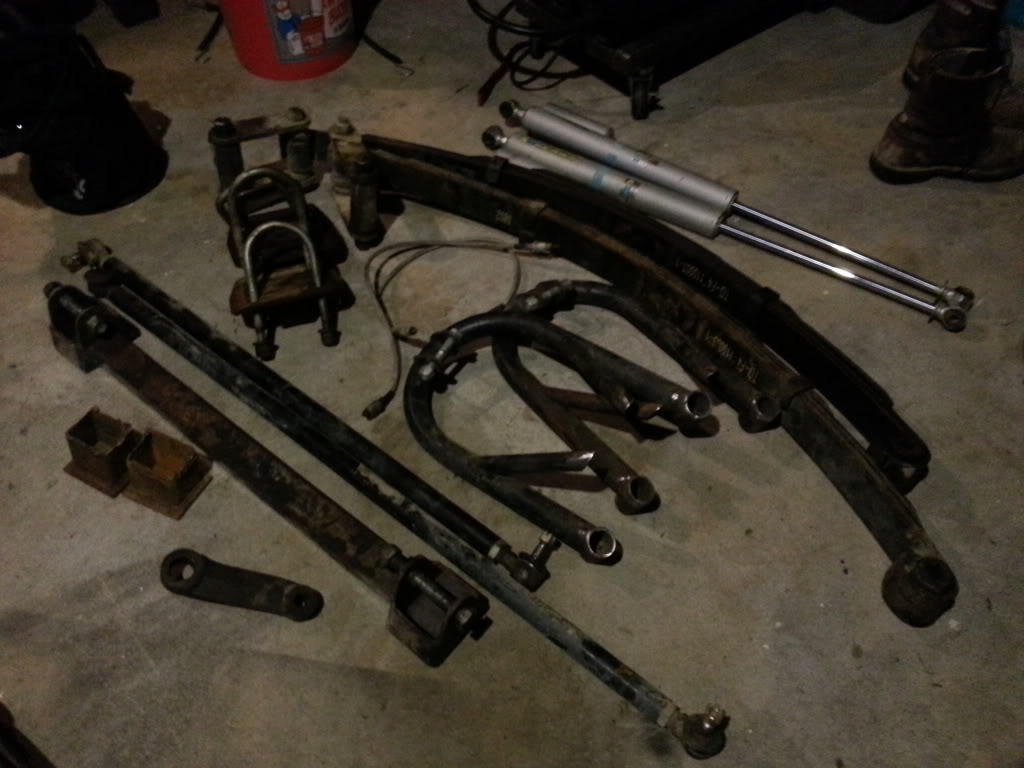
I almost forgot! I also picked up a set of Trail gear creeper joint shackle hangers off craigslist for $40 bucks, they had been tacked to his frame but never were used! They haven't even been painted yet and i got them for half price! Should make my rear end really flexy after i see how they sit and get the leaf packs all adjusted to my preferences, (im debating removing one of the leaves)

Well, there you go guys, i am really excited for what's to come and i hope to get good feedback from the yotatech community! Stay tuned, more to come tomorrow!
Finally got my new welder, like i had promised
As you can see, i whipped up a nice cart for it with some scrap metal and old casters i had laying in the garage. Need to put a handle on it to secure everything to.
I then proceeded to hit the regulator and break the flow guage!
But it's whatever, ill have to go pic up a new gauge soon, but for now i just electrical taped the cover back on the cheap piece of crap to stop any gas from leaking while i proceeded to weld with it anyways
Here are some of my new beads! compared to the ˟˟˟˟ty splatter from my old welder, this gas mig welder is gold
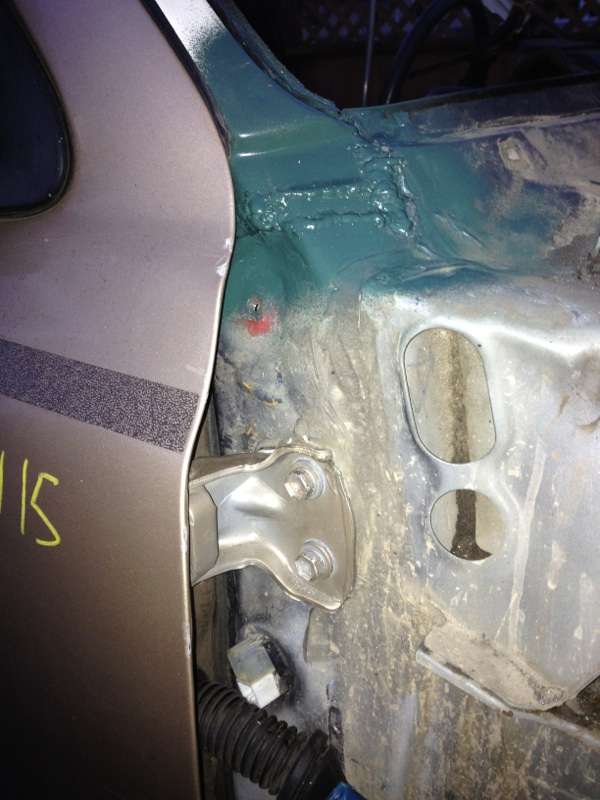
On the passenger side door, i was able to line the hinges up and get a good feeling seal. However on the drivers side i had to get a little more redneck innovation goin to make the fit feel stock again. Due to the roll, the portion of the body the hinges mount too had been knocked inwards where the upper hinge bolts to, so i had to file out the hinge and make a spacer plate for between the hinge to get it in the right location. I will take pictures tomorrow if i remember.
Here is some more of that redneck innovation that i was talkin about! This is how i straightened my floor
And in the midst of all this progress i had to take a sec to grab a bandaid
Threw my body filler up top to seal it up nice and tight
will have that sanded and hopefully painted soon, tho it is a low priority atm. Due to the fact that im already jumping into my next project on the truck. But first...Can you believe my interior went back together as if nothing had even happened??
I was very excited to see this!And here she stands! Well, stood i should say
Because ive traded the wheels, and she is on jackstands with her rear end torn out because i wend junk yarding and picked up a set of 2wd f150 leaves, u bolt kit, flowmaster muffler, bump stops, a new fender, and some ifs shocks all for $40 bucks, because i got a local guy that hooks me up! So she is actually sitting outside like this as of today:
Ohh and remember how i said i traded those pretty little 33x12.5x15 km2's with 500 miles on them? You guessed right! I met up with a guy on nw-wheelers forum today and traded straight across for a Trail Gear 4" SAS kit with Bilstein 5150's
I was happy with the trade!I almost forgot! I also picked up a set of Trail gear creeper joint shackle hangers off craigslist for $40 bucks, they had been tacked to his frame but never were used! They haven't even been painted yet and i got them for half price! Should make my rear end really flexy after i see how they sit and get the leaf packs all adjusted to my preferences, (im debating removing one of the leaves)
Well, there you go guys, i am really excited for what's to come and i hope to get good feedback from the yotatech community! Stay tuned, more to come tomorrow!
02-08-2013, 05:12 PM
#31
Registered User
Thread Starter
Join Date: Aug 2011
Posts: 72
Likes: 0
Received 0 Likes
on
0 Posts
Thanks for all the support guys! Today I didnt have a lot of time after school. But I got the damb gas tank drained and dropped.

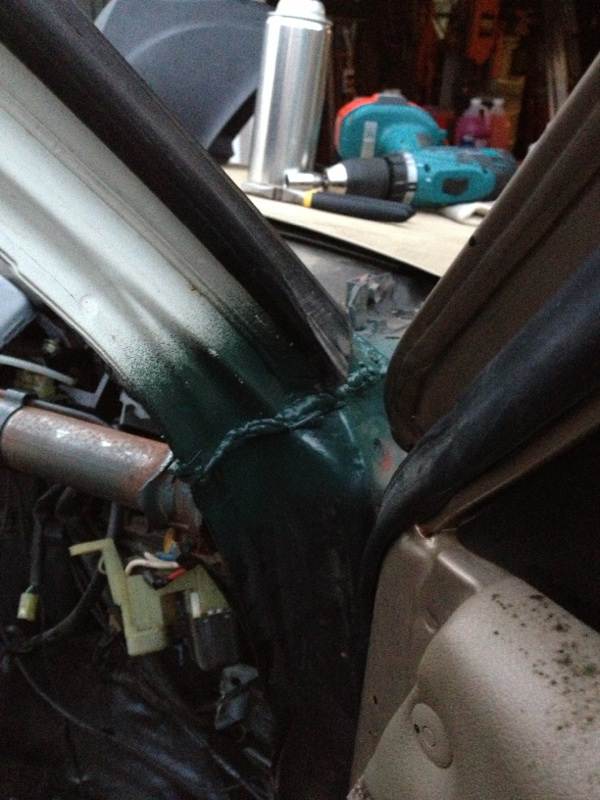
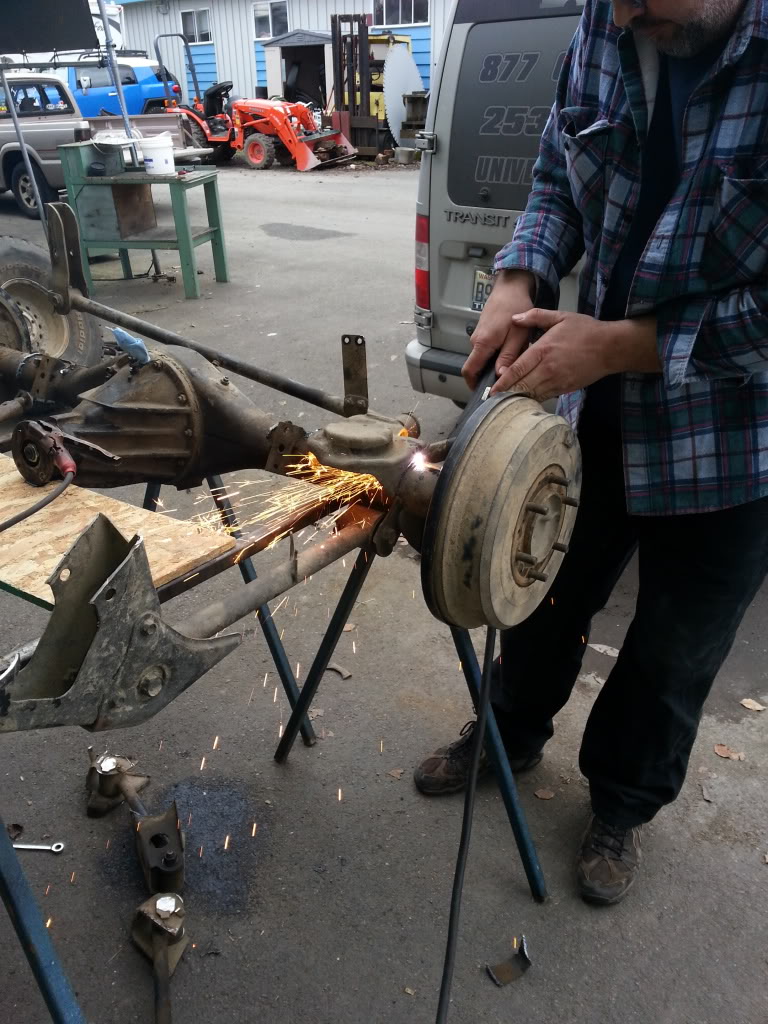
However I had to stop and weld a couple gussets on a buddies new axle:


I like being able to see the inside of the axle and it has the discoloration due to propper penetration and no warping means I have a bad ass weld!
Don't get me wrong they arent all that good but its nice to know they are solid!
Ohh and I'm excited to know I'm the redneck-MacGyver! Hahaha
However I had to stop and weld a couple gussets on a buddies new axle:
I like being able to see the inside of the axle and it has the discoloration due to propper penetration and no warping
means I have a bad ass weld!Don't get me wrong they arent all that good but its nice to know they are solid!
Ohh and I'm excited to know I'm the redneck-MacGyver! Hahaha
02-08-2013, 06:38 PM
#32
Registered User
heck yea! Never taken my filler neck off where you did on your fuel tank. Was it pretty rusty and a pain to do?? I had to use a impact driver with a phillips head bit and a half a can of PB blast to get my sender and fuel pump out. By the way PB blast rocks, anything that you can put in a styrofoam cup and melt is awesome!
02-09-2013, 08:20 PM
#33
Registered User
Yo Austin! Its Kevin. Gosh that thing was purdy when you got it. I'm in the same position you were in lol. I need to get to know you guys! I saw the white runner at picknpull a couple months ago with the top cut off and knew instantly it was for you. I need to get to know you so you can use my lift in my shop 
02-09-2013, 08:34 PM
#34
Registered User
Thread Starter
Join Date: Aug 2011
Posts: 72
Likes: 0
Received 0 Likes
on
0 Posts
Hey Kevin! Yah dude, ive been telling you that i wanna help you get your truck wheelin! Now you know i mean business That i actually do all the work myself on my truck and i may know a thing or two that i would like to share with a young buck like yourself
And did you say car lift??? I'm gonna have to come and see this shop soon!
@kornhuskerwizard, The bolts on the filler neck were super easy to take off, but the actual bolts that hung the tank from the frame, they took a pb blaster bath before i could get them down...well without breaking them that is.
That i actually do all the work myself on my truck and i may know a thing or two that i would like to share with a young buck like yourself And did you say car lift???
I'm gonna have to come and see this shop soon!@kornhuskerwizard, The bolts on the filler neck were super easy to take off, but the actual bolts that hung the tank from the frame, they took a pb blaster bath before i could get them down...well without breaking them that is.
02-09-2013, 08:41 PM
#35
Registered User
heck yea! Never taken my filler neck off where you did on your fuel tank. Was it pretty rusty and a pain to do?? I had to use a impact driver with a phillips head bit and a half a can of PB blast to get my sender and fuel pump out. By the way PB blast rocks, anything that you can put in a styrofoam cup and melt is awesome!
02-09-2013, 08:57 PM
#36
Registered User
Thread Starter
Join Date: Aug 2011
Posts: 72
Likes: 0
Received 0 Likes
on
0 Posts
Saturday updates!
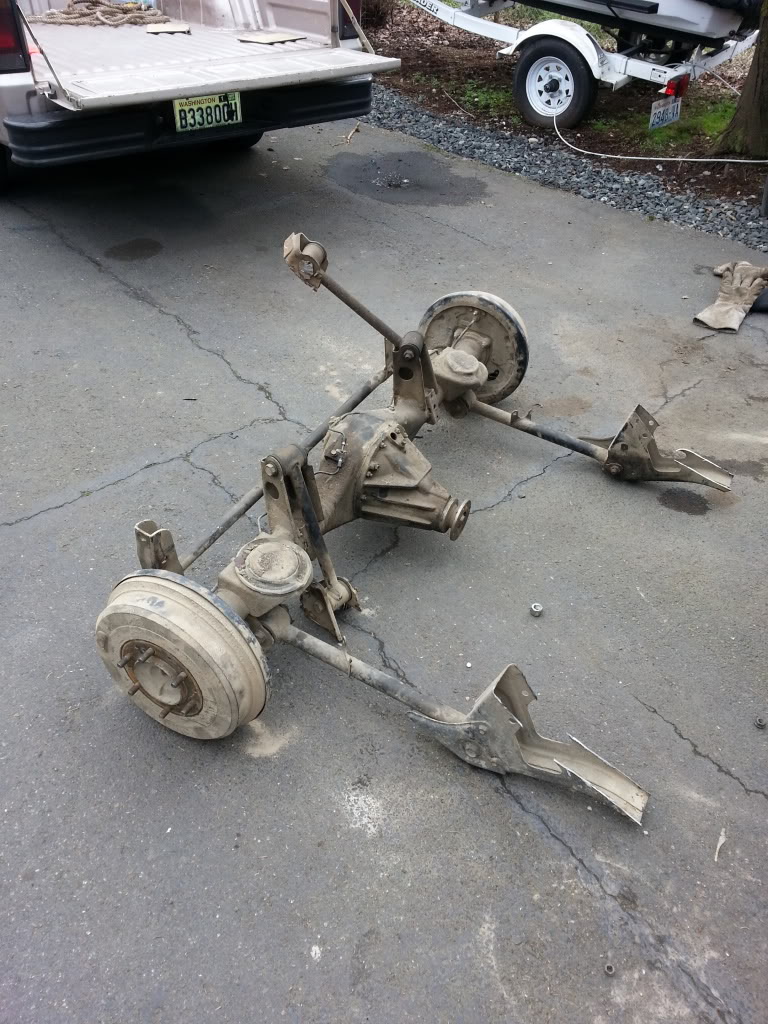
Finally dropped the rear axle!! Then brought it over to my buddy, Ryker's shop, where his dad cut all the god awful stock 4link off!
I now need one of these

Then we loaded the now significantly lighter axle into the truck and packed a set of 35x12.5 rollers on some decent aluminum Center Line rims into my tiny truck bed! Was only a tad sketch considering i didnt bring a tie down, only had a big ass rope just laying in the bed of my truck hahaha.

See how lucky i am?? These are the kinds of friends i have! Ryker was having so much fun grinding that he did nearly half the grinding to be done in one sitting! You know what that means? That means that i didnt have to do it
I still have a lot of grinding to do unfortunately, but i will get a good jump on that tomorrow, if anyone wants to bring over a grinder feel free
Soon to come, i will be stretching my wheel base a bit when i mount the rear leafs to make room for trimming without hacking into my doors! See how this planning makes life easier later? Hahaha or at least that's my hopes.
As far as a rear drive line, does anyone know if an extended cab drive line would work? or will it be too long? I havent done the math yet, im just spit balling. Please feel free to throw out ideas.
My next crazy idea, that isnt so crazy is: Since i have the gas tank already dropped, i love how open my belly is, compared to the 4" under-hang my tank has in the stock location. So im strongly considering chopping my 4runner sooner rather than later, so i can fab some mounts in the bed and keep it above the frame rails. Cant argue with less body to damage and lots more ground clearance!
As far as i can remember, this is everything for today. But i have to say, i am really enjoying having a routine of reflecting on my progress at the end of each day. And i am getting better at taking pictures You're welcome guys.
Finally dropped the rear axle!! Then brought it over to my buddy, Ryker's shop, where his dad cut all the god awful stock 4link off!
I now need one of these
Then we loaded the now significantly lighter axle into the truck and packed a set of 35x12.5 rollers on some decent aluminum Center Line rims into my tiny truck bed! Was only a tad sketch considering i didnt bring a tie down, only had a big ass rope just laying in the bed of my truck hahaha.
See how lucky i am?? These are the kinds of friends i have! Ryker was having so much fun grinding that he did nearly half the grinding to be done in one sitting!
You know what that means? That means that i didnt have to do it I still have a lot of grinding to do unfortunately, but i will get a good jump on that tomorrow, if anyone wants to bring over a grinder feel free
Soon to come, i will be stretching my wheel base a bit when i mount the rear leafs to make room for trimming without hacking into my doors! See how this planning makes life easier later? Hahaha or at least that's my hopes.
As far as a rear drive line, does anyone know if an extended cab drive line would work? or will it be too long? I havent done the math yet, im just spit balling. Please feel free to throw out ideas.
My next crazy idea, that isnt so crazy is: Since i have the gas tank already dropped, i love how open my belly is, compared to the 4" under-hang my tank has in the stock location. So im strongly considering chopping my 4runner sooner rather than later, so i can fab some mounts in the bed and keep it above the frame rails.
Cant argue with less body to damage and lots more ground clearance!As far as i can remember, this is everything for today. But i have to say, i am really enjoying having a routine of reflecting on my progress at the end of each day. And i am getting better at taking pictures
You're welcome guys.
02-09-2013, 09:52 PM
#37
Registered User
Join Date: Nov 2007
Location: Gilbert, Az.
Posts: 680
Likes: 0
Received 0 Likes
on
0 Posts
I to have an EastWood 135. Got it for a song and a dance and for when the Lincoln 180 is just too much. One thing to say though...you'll be able to hold a better puddle if you material is clean..ie, no paint just bare steel. And try not to move so fast and burn into both sides of the material you're working with. Body work welding is typically done with tacks...ie, like you're tacking pieces together. It's long, time consuming and super boring...but you'll have less to grind smooth and just as good of weld... Oh yeah, welding with shielding gas is soooooo much better than flux core huh?! Just wait till/ if you ever start TIG....holy crap! that's a whole different animal..but fun and challenging to.
Sub'd....you should check out my welding cart in my 97BT...LMK what you think...the links in green in my sig below.
Sub'd....you should check out my welding cart in my 97BT...LMK what you think...the links in green in my sig below.
Last edited by snowshredder555; 02-09-2013 at 09:54 PM.


