JoRunners 1990 2DOOR 4Runner Build (Pic Heavy)
 07-16-2013, 03:15 PM
#81
Registered User
Thread Starter
Join Date: Feb 2010
Location: Southern California
Posts: 301
Likes: 0
Received 0 Likes
on
0 Posts
I wish I had a clever retort for this but ya... that kinda sums up how this has been going. Myself and small places dont get along so well. Toyota really crammed that thing in there. Once I dont wanna put my fist through the firewall ill be sure to get back to it.
 11-22-2013, 08:54 AM
#84
Registered User
Thread Starter
Join Date: Feb 2010
Location: Southern California
Posts: 301
Likes: 0
Received 0 Likes
on
0 Posts
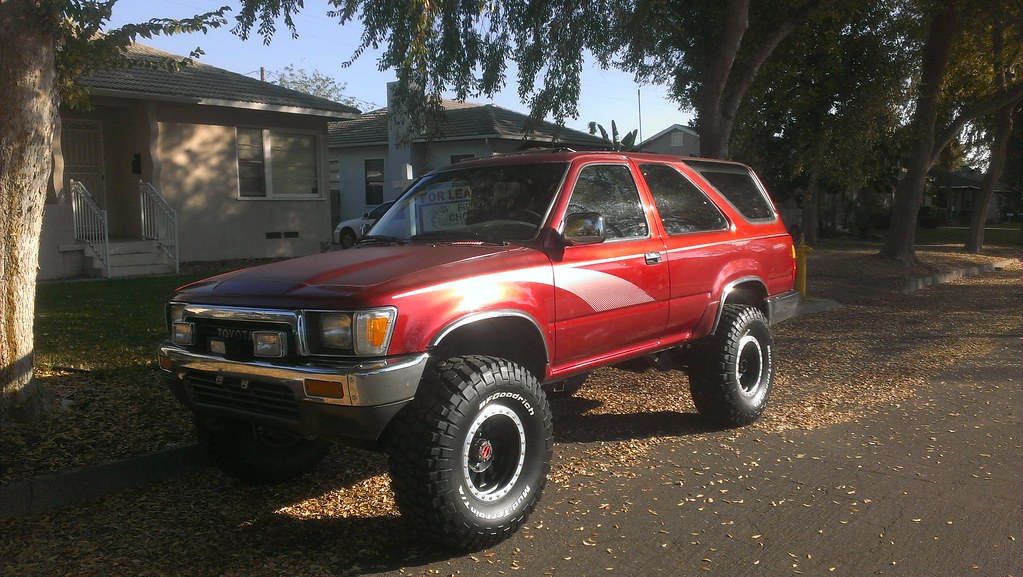
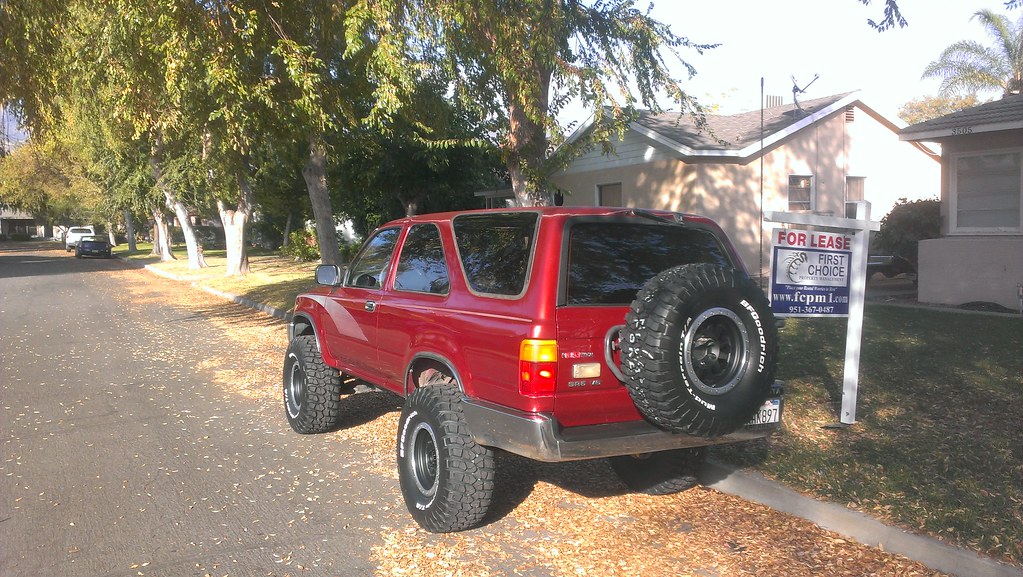
Well I finally get off my ass and finished the pedal swap. Then I decided to finally get my rims wrapped in some km2s. So here is the JoRunner with new shoes!!!
http://www.flickr.com/photos/67740550@N02/10997059734/, on Flickr
http://www.flickr.com/photos/67740550@N02/10996913055/, on Flickr
http://www.flickr.com/photos/67740550@N02/10997059734/, on Flickr
http://www.flickr.com/photos/67740550@N02/10996913055/, on Flickr
11-23-2013, 11:14 AM
#87
Registered User
Thread Starter
Join Date: Feb 2010
Location: Southern California
Posts: 301
Likes: 0
Received 0 Likes
on
0 Posts
33 12.50 15 BFG KM2's and the rims are Method Race wheels Double Standards 15x8 -24mm offset which I think is like 3.5
Im excited for the trans swap as well. I have everything save for the clutch line. Hopefully getting started in a couple of weeks! New (to me)trans, Marlin short shift, headers and a bud built xmember is gonna really make this a different truck to me!
Im excited for the trans swap as well. I have everything save for the clutch line. Hopefully getting started in a couple of weeks! New (to me)trans, Marlin short shift, headers and a bud built xmember is gonna really make this a different truck to me!
01-02-2014, 02:20 PM
#88
Registered User
Thread Starter
Join Date: Feb 2010
Location: Southern California
Posts: 301
Likes: 0
Received 0 Likes
on
0 Posts
Got some updates again. My wonderful Gal got me All Pro Sliders for Christmas! So unlike most projects concerning this build I got right on it for installing them.
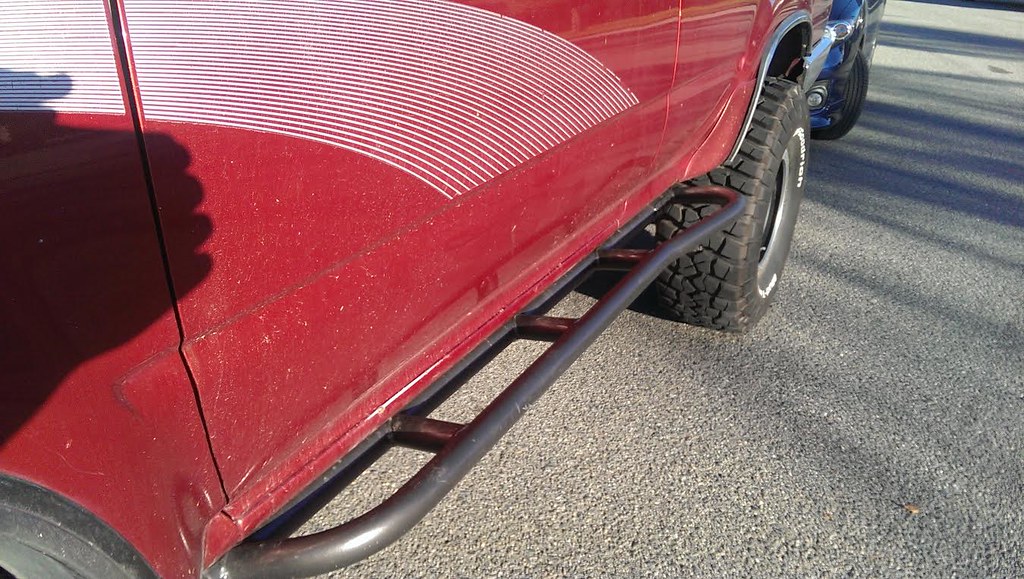
http://www.flickr.com/photos/67740550@N02/11718272713/, on Flickr
My 3.0 Has honestly been treating me rather well *knock on wood* So I decided to buy this.
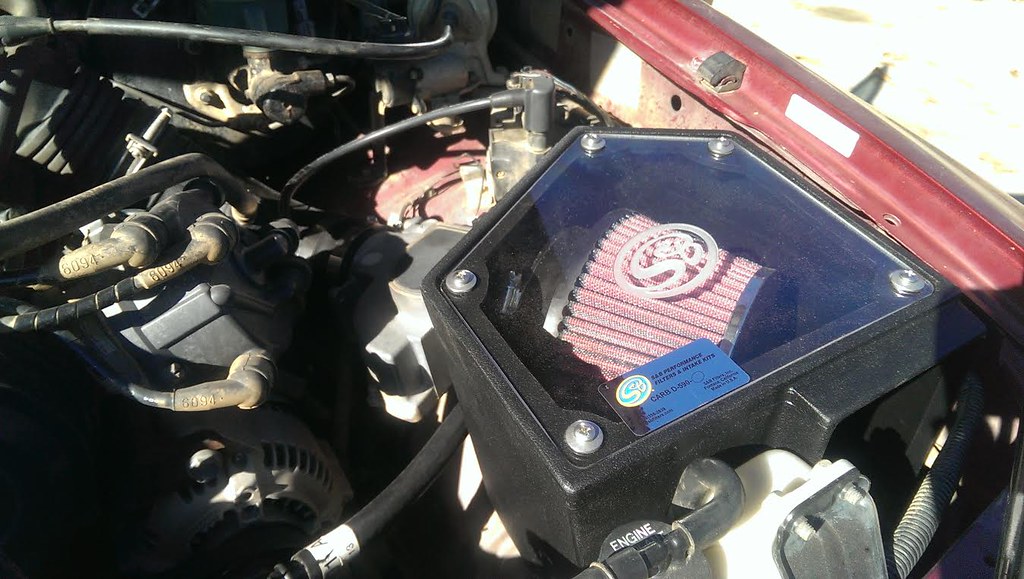
http://www.flickr.com/photos/67740550@N02/11718781466/, on Flickr
Finally I got these for christmas as well and Ive been wanting them forever and I am pretty damn pleased with em.
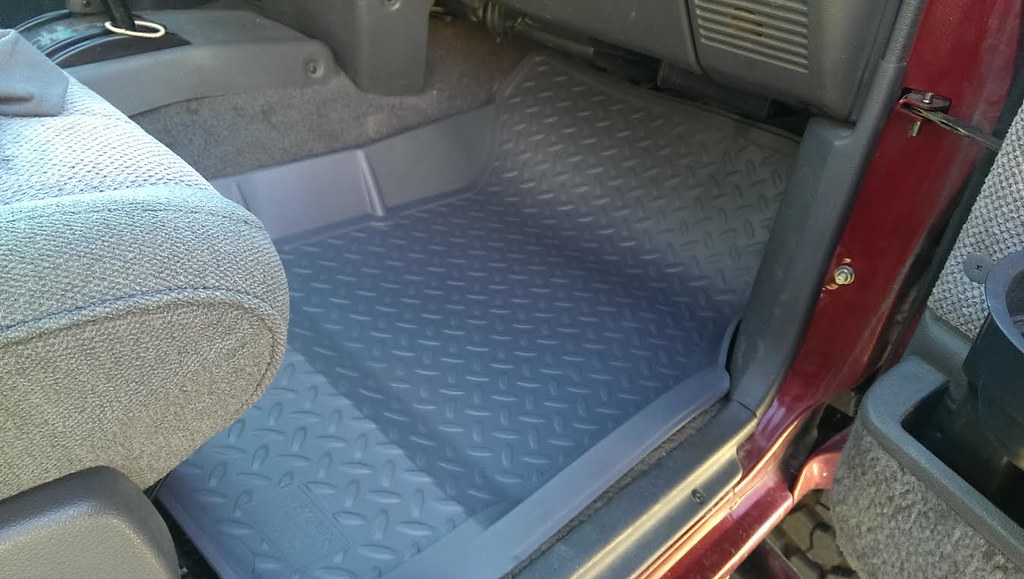
http://www.flickr.com/photos/67740550@N02/11718266403/, on Flickr
http://www.flickr.com/photos/67740550@N02/11718272713/, on Flickr
My 3.0 Has honestly been treating me rather well *knock on wood* So I decided to buy this.
http://www.flickr.com/photos/67740550@N02/11718781466/, on Flickr
Finally I got these for christmas as well and Ive been wanting them forever and I am pretty damn pleased with em.
http://www.flickr.com/photos/67740550@N02/11718266403/, on Flickr
01-15-2014, 12:05 PM
#90
Registered User
Thread Starter
Join Date: Feb 2010
Location: Southern California
Posts: 301
Likes: 0
Received 0 Likes
on
0 Posts
So it has begun...
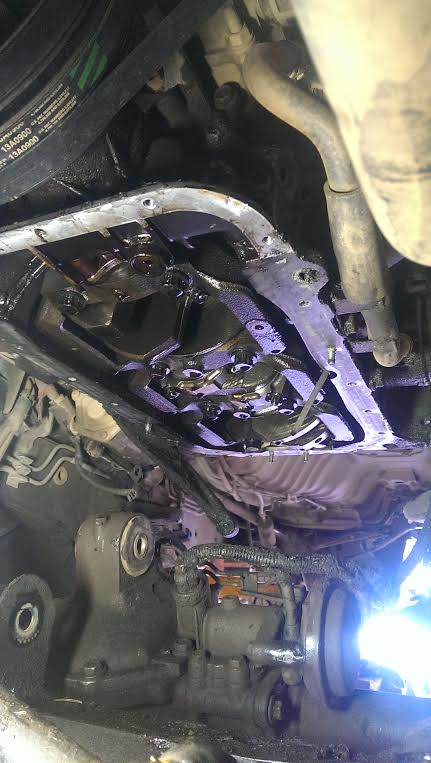
Finally after all this time I am making progress with the trans swap.
http://www.flickr.com/photos/67740550@N02/11969837124/http://www.flickr.com/photos/67740550@N02/11969837124/, on Flickr
As you can see here the trans, torque converter and exhaust manifolds are off. Quite a bit of lines down there to unplug but the trans wasnt a big deal.
The exhaust manifolds were a different story.
http://www.flickr.com/photos/67740550@N02/11969836594/http://www.flickr.com/photos/67740550@N02/11969836594/]qherq[/url, on Flickr
Every single nut almost ended up looking like this one. Whoever had put this thing together at some point hired the incredible hulk to put it back together, quite simply it was obnoxiously over tightened but it is finally out.
The headers are going to be the only real challenge in this install. There really isnt a better time to do them than now but they are going to cause any issues I will have. I mocked them up then sent them to my exhaust guy to weld on flanges to them.
http://www.flickr.com/photos/67740550@N02/11970778366/http://www.flickr.com/photos/67740550@N02/11970778366/]hhweh[/url, on Flickr
Ive been reading reviews on the header install to help. This thing would be an utter nightmare with a trans in the vehicle.
Now I am waiting on ujoints to get here for the longer driveshaft. So i ordered some shifter parts from marlin for my tcase shifter to tighten it up a bit.
So soon ill install the headers, clutch and flywheel, then the trans and budbuilt xmember. Then its time to play the waiting game for parts.
Last edited by 2DoorJoRunner; 01-15-2014 at 12:09 PM. Reason: Pictures were double posted.
01-18-2014, 12:32 PM
#92
Registered User
Thread Starter
Join Date: Feb 2010
Location: Southern California
Posts: 301
Likes: 0
Received 0 Likes
on
0 Posts
So Ive had issue with my accelerator pedal on the 4runner for a while now. I adjusted the throttle cable as much as i could but if i wanted the truck to really move I had to stand on the damn thing. So I decided to remove it, toss it in a vice and bend it to a better shape to really allow it to get the full range of motion and make it "feel" right.

http://www.flickr.com/photos/67740550@N02/11969712293/, on Flickr
and after
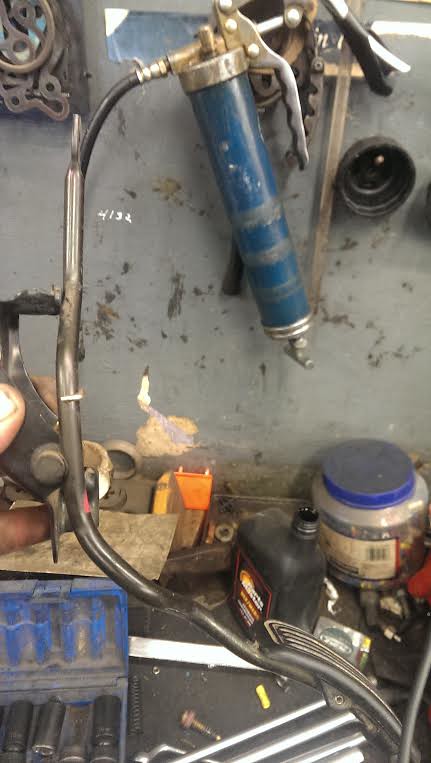
http://www.flickr.com/photos/67740550@N02/11969426775/, on Flickr
A MASSIVE change in feel. Opens up the Throttle body all the way now and I am no longer trying to push it through the floor board.
http://www.flickr.com/photos/67740550@N02/11969712293/, on Flickr
and after
http://www.flickr.com/photos/67740550@N02/11969426775/, on Flickr
A MASSIVE change in feel. Opens up the Throttle body all the way now and I am no longer trying to push it through the floor board.
01-23-2014, 01:51 PM
#93
Registered User

Join Date: Jan 2014
Location: Bishop, CA
Posts: 7
Likes: 0
Received 0 Likes
on
0 Posts
bj spacer size?
Hey JoRunner,
Thanks for posting this build with such detail! I'm curious though, what size bj spacers do you have, and does your rig sit pretty level? I'm asking because I will be running the OME coils in the rear and want just enough lift up front to level things out.
Cheers,
Braden
Thanks for posting this build with such detail! I'm curious though, what size bj spacers do you have, and does your rig sit pretty level? I'm asking because I will be running the OME coils in the rear and want just enough lift up front to level things out.
Cheers,
Braden
01-23-2014, 03:12 PM
#94
Registered User
Thread Starter
Join Date: Feb 2010
Location: Southern California
Posts: 301
Likes: 0
Received 0 Likes
on
0 Posts
Hey JoRunner,
Thanks for posting this build with such detail! I'm curious though, what size bj spacers do you have, and does your rig sit pretty level? I'm asking because I will be running the OME coils in the rear and want just enough lift up front to level things out.
Cheers,
Braden
Thanks for posting this build with such detail! I'm curious though, what size bj spacers do you have, and does your rig sit pretty level? I'm asking because I will be running the OME coils in the rear and want just enough lift up front to level things out.
Cheers,
Braden
01-23-2014, 05:17 PM
#95
Registered User
Join Date: Jan 2014
Location: Bishop, CA
Posts: 7
Likes: 0
Received 0 Likes
on
0 Posts
01-25-2014, 05:42 PM
#97
Registered User
iTrader: (1)
Join Date: Oct 2005
Location: leesburg, VA
Posts: 888
Likes: 0
Received 0 Likes
on
0 Posts
awesome build thread, i absolutely love the 2 door 2nd gens. i just picked up a normal 4 door in the same color and this thread gave me some inspiration haha
01-27-2014, 07:33 PM
#98
Registered User
Thread Starter
Join Date: Feb 2010
Location: Southern California
Posts: 301
Likes: 0
Received 0 Likes
on
0 Posts
01-27-2014, 08:26 PM
#100
Registered User
Thread Starter
Join Date: Feb 2010
Location: Southern California
Posts: 301
Likes: 0
Received 0 Likes
on
0 Posts
So I am not really getting to spend alot of time on the truck I can only pick at it one day a week right now but its all good.
This weeks updates.
http://www.flickr.com/photos/67740550@N02/12183660725/, on Flickr
Dropped the pan to replace the gasket and fix the leaks. Surprisingly simple just free the diff from the truck and let it droop and wiggle the pan out.
Everything looks great you metalic death shavings in the oil. All is well !
As for the headers...( the real reason why this truck isnt back on the road. )
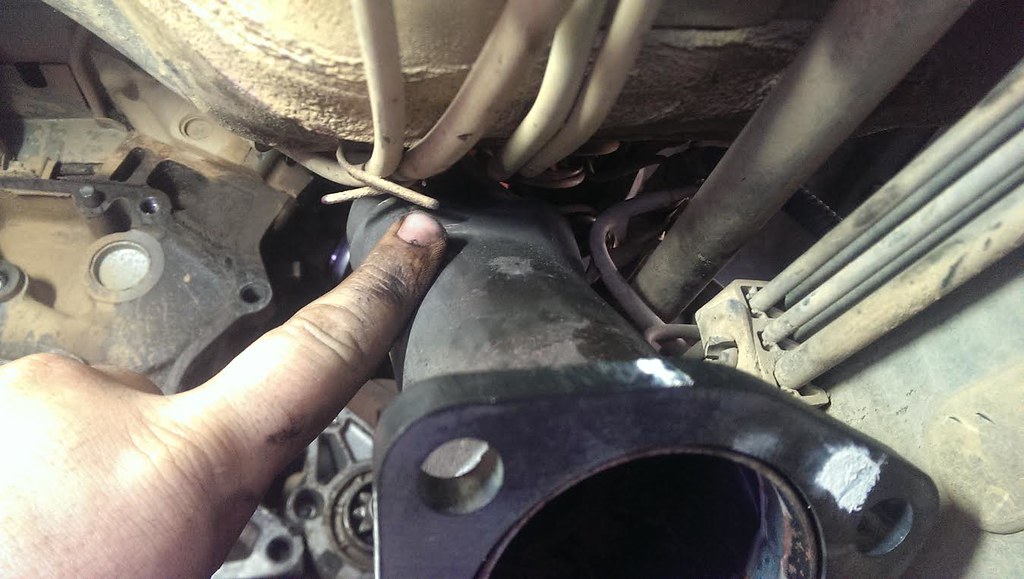
The drivers side is pretty simple with a fair amount of room
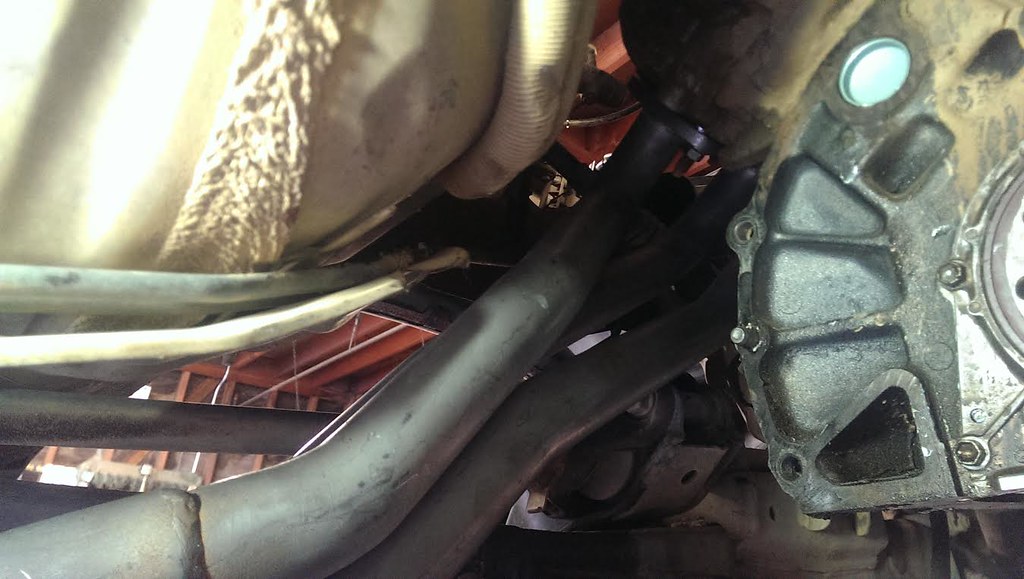
http://www.flickr.com/photos/67740550@N02/12183663085/, on Flickr
The passenger side however....
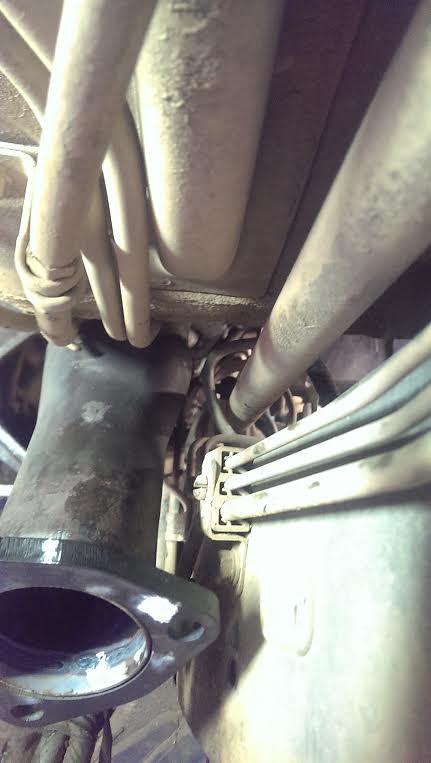
http://www.flickr.com/photos/67740550@N02/12184264556/, on Flickr
http://www.flickr.com/photos/67740550@N02/12183641685/, on Flickr
lil more snug and Im brainstorming ideas on how to properly shield and protect everything as to avoid issues further down the road. Hopefully I can resolve all the issues with this and get the manual trans actually installed in the truck this weekend. Fingers crossed!!!
This weeks updates.
http://www.flickr.com/photos/67740550@N02/12183660725/, on Flickr
Dropped the pan to replace the gasket and fix the leaks. Surprisingly simple just free the diff from the truck and let it droop and wiggle the pan out.
Everything looks great you metalic death shavings in the oil. All is well !
As for the headers...( the real reason why this truck isnt back on the road. )
The drivers side is pretty simple with a fair amount of room
http://www.flickr.com/photos/67740550@N02/12183663085/, on Flickr
The passenger side however....
http://www.flickr.com/photos/67740550@N02/12184264556/, on Flickr
http://www.flickr.com/photos/67740550@N02/12183641685/, on Flickr
lil more snug and Im brainstorming ideas on how to properly shield and protect everything as to avoid issues further down the road. Hopefully I can resolve all the issues with this and get the manual trans actually installed in the truck this weekend. Fingers crossed!!!


