Finally My 5vz swap on 2wd
 10-02-2016, 03:23 PM
#21
Registered User
Thread Starter
Join Date: Nov 2006
Location: Pflugerville, TX
Posts: 553
Likes: 0
Received 0 Likes
on
0 Posts
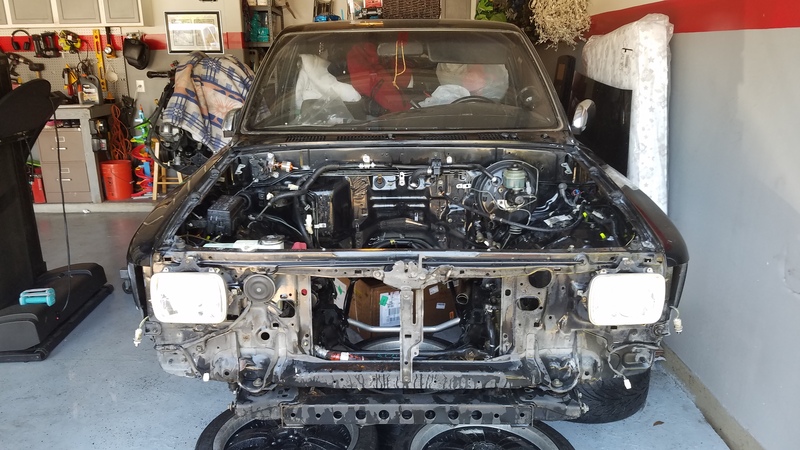
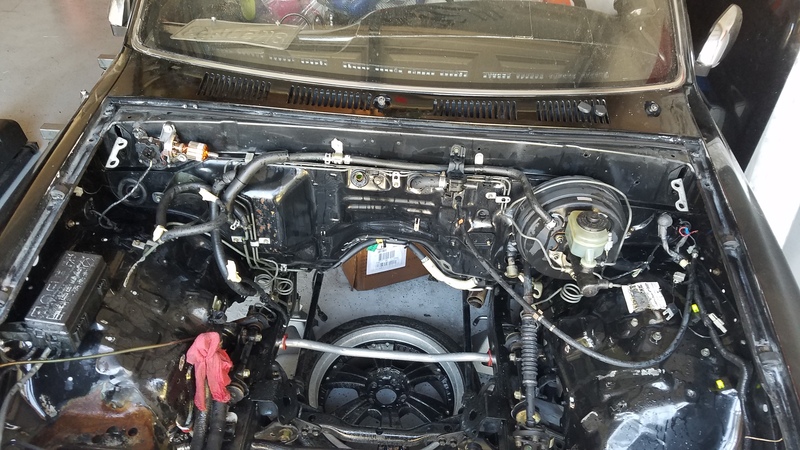
So i finally got around to cleaning the engine bay, also took somethings out that i want to have powder coated. Also working on fixing my BIG brake upgrade and looking to get the calipers powder coated as well. Does anyone know where i could get the rebuild kit for the 4wd calipers??
.

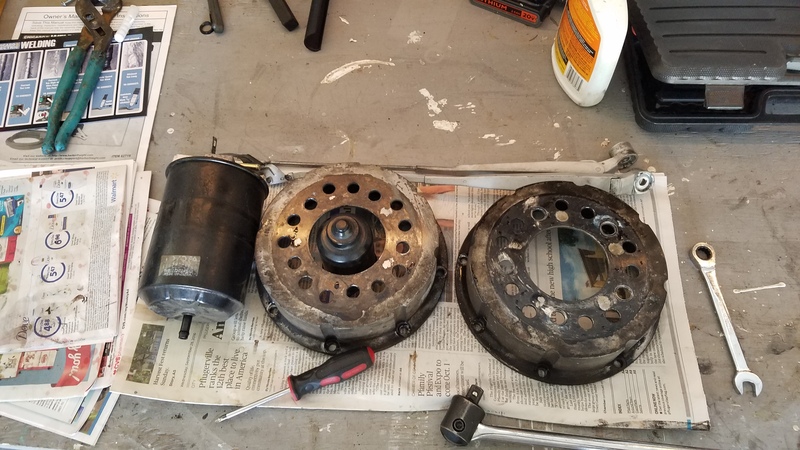
These are a couple of things im looking to get powder coated, which are the rotor hats, Charcoal Canister, Wiper arms, Wiper motor casing.
Now im about to order the timing belt, water pump, fan bracket, valve cover gaskets, Also plan on getting the valve covers powder coated as well.
.


These are a couple of things im looking to get powder coated, which are the rotor hats, Charcoal Canister, Wiper arms, Wiper motor casing.

Now im about to order the timing belt, water pump, fan bracket, valve cover gaskets, Also plan on getting the valve covers powder coated as well.

 10-03-2016, 09:52 AM
#23
Registered User
Thread Starter
Join Date: Nov 2006
Location: Pflugerville, TX
Posts: 553
Likes: 0
Received 0 Likes
on
0 Posts
So i called the Powder Coating place by house and they want close to 200 buck per caliper.....defiantly looking for another location...
 10-05-2016, 04:05 AM
#25
Registered User
Thread Starter
Join Date: Nov 2006
Location: Pflugerville, TX
Posts: 553
Likes: 0
Received 0 Likes
on
0 Posts
Well for the 4x4 trucks it not an upgrade at all. For the 2wd trucks that have a single piston caliper it is. Im using the 4x4 trucks 4 piston caliper with Wilwood Rotors and Hats. I had bought a custom bracket online that will allow me to use the 4x4 caliper and rotor.
10-05-2016, 04:53 AM
#27
Registered User
Thread Starter
Join Date: Nov 2006
Location: Pflugerville, TX
Posts: 553
Likes: 0
Received 0 Likes
on
0 Posts
Here is the link to where i got all the info, Not sure if the Bracket is still available or not.
http://toyotaminis.com/forum/threads...s-for-2wd.241/
http://toyotaminis.com/forum/threads...s-for-2wd.241/
10-15-2016, 06:55 PM
#28
Registered User
Thread Starter
Join Date: Nov 2006
Location: Pflugerville, TX
Posts: 553
Likes: 0
Received 0 Likes
on
0 Posts
Update-
I finally got around to painting the engine bay and tried instead of powder coating to try and polish some things. i first started with the wiper motor(pics will soon follow) I liked the way it look, so then i moved onto the Charcoal Canister. That one took a lot longer than expected since Toyota does a pretty damn good job of cooking their paint on it. Im slowly getting the engine bay to look a lot cleaner than before. As for the engine, i will be ordering the Timing belt package with all the gasket goodies. I will also be polishing the Valve cover to a mirror finish, hopefully they will turn out as good as i hope them to be.
So i've been in the market for a fully loaded 4runner to where i can swap the power window motors, power locks, Tilt Steering and grabbing the seats, door panels, center console. I finally found a cheap 4runner on my local craigslist here in Austin going for 200 bucks! Its been sitting for quite some time and the "owner" just wants to get rid of it. But here is the kicker.....The "owner" doesnt have the title or the key, which to me is a lil alarming to me at least. i offered him 150 for the parts i wanted or if he finds the key i will gladly take the whole vehicle for 180.
So my question is should i be a lil worried that he doesnt have the title nor the key to the vehicle???
Oh btw here are some of the pics.


 10-18-2016, 04:09 AM
#29
Registered User
Thread Starter
Join Date: Nov 2006
Location: Pflugerville, TX
Posts: 553
Likes: 0
Received 0 Likes
on
0 Posts
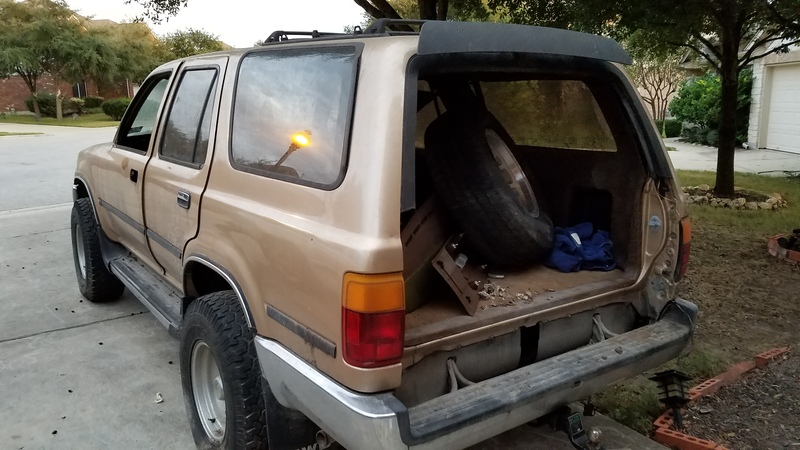
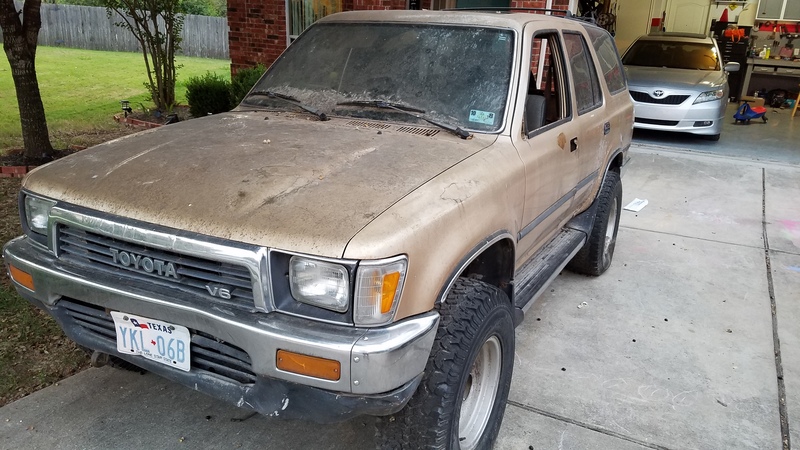
Welp yesterday i bought the 91 Toyota 4runner for only 125. It had been sitting in the same spot for about 7 years, the engine, tranny and the Xfer case is good. It only took me about yesterday afternoon to rip out everything that i needed. The only thing i have left now is is figuring out which wires runs the power doors,locks and mirrors. Also if anyone is needing any parts from a 4runner please let me know. Pics soon to come.

 10-24-2016, 05:21 AM
#31
Registered User
Thread Starter
Join Date: Nov 2006
Location: Pflugerville, TX
Posts: 553
Likes: 0
Received 0 Likes
on
0 Posts
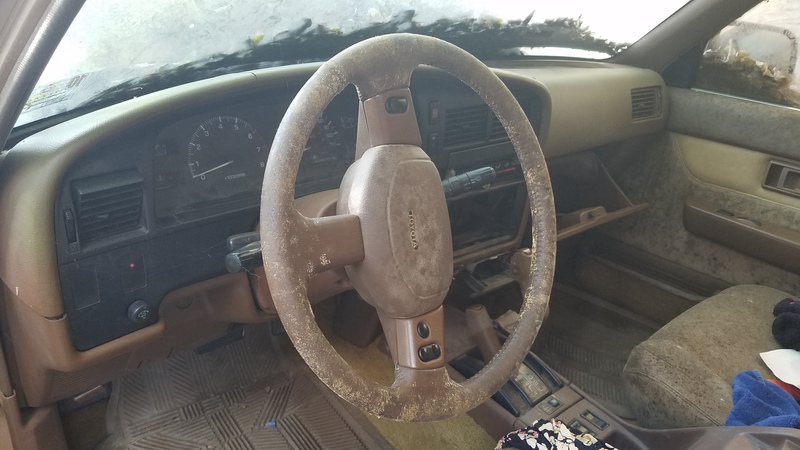
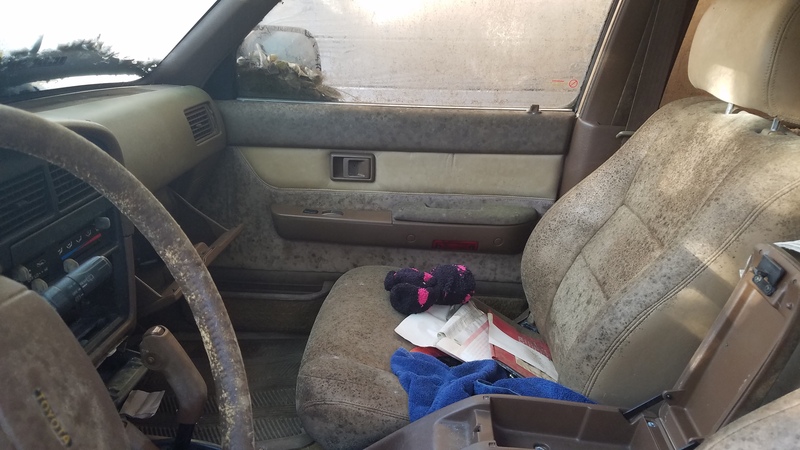
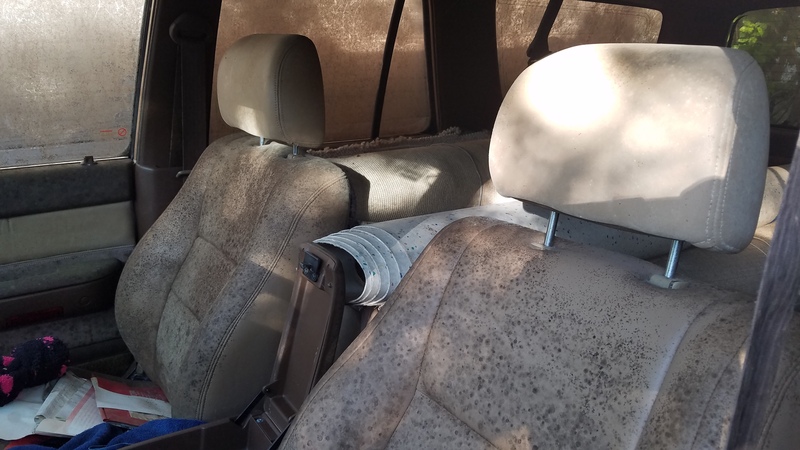
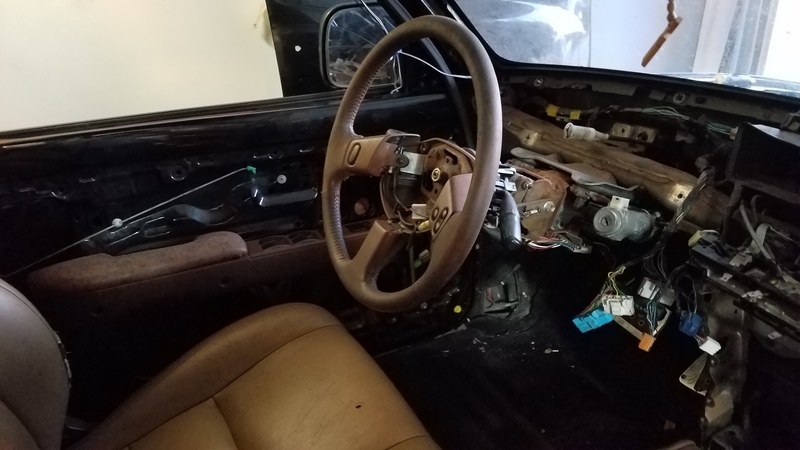
So all last week I've been working my butt off taking parts off the 91 4 runner, I managed to take all the front interior apart with the power mirrors, Locks, and Window harness. At first it was real confusing on which wires to take, i didn't want to cut anything that i needed. This weekend i was able to install the wiring harness and tap that in my Trucks harness. There were a few hiccups and still is but everything is now successfully powered and working. I just need to get a new mirror switch. I was able to swap the seats as well and of course half the bolts dont line up correctly!!! I could have sworn that these seat can swap over directly, but apparently not. I was also able to swap over the Tilt steering wheel as well. That swap was pretty easy and everything bolted in as it should.
I was also able to grab the Speedo w/ Tach from the 4 runner and reset the mileage. Grabbed the center console too and also was thinking about taking the rear heater as well, but i think it would be too much work and it doesn't get that cold here in Texas. And the last thing i took from the vehicle as well was the Front brake calipers, so i could start on polishing them and not have to take the calipers off of my yota just yet.
Well here are some of the pics i promised.....

Interior Pics

Pics of the 4runner
I was also able to grab the Speedo w/ Tach from the 4 runner and reset the mileage. Grabbed the center console too and also was thinking about taking the rear heater as well, but i think it would be too much work and it doesn't get that cold here in Texas. And the last thing i took from the vehicle as well was the Front brake calipers, so i could start on polishing them and not have to take the calipers off of my yota just yet.
Well here are some of the pics i promised.....


Interior Pics


Pics of the 4runner

 01-04-2017, 07:45 AM
#32
Registered User
Thread Starter
Join Date: Nov 2006
Location: Pflugerville, TX
Posts: 553
Likes: 0
Received 0 Likes
on
0 Posts
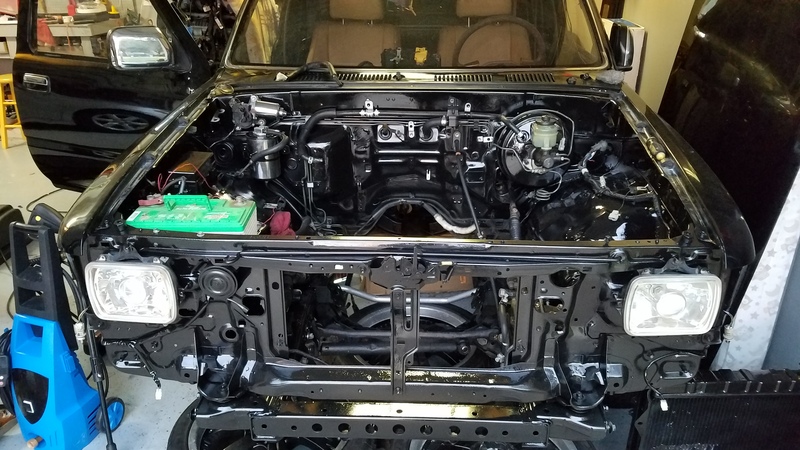
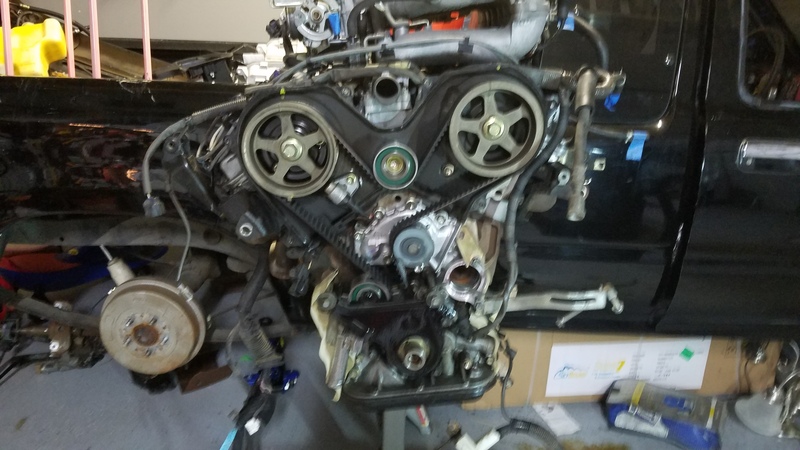
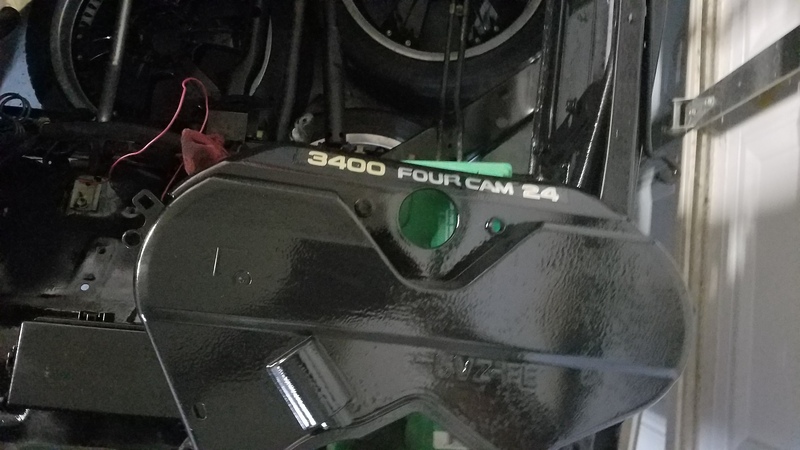
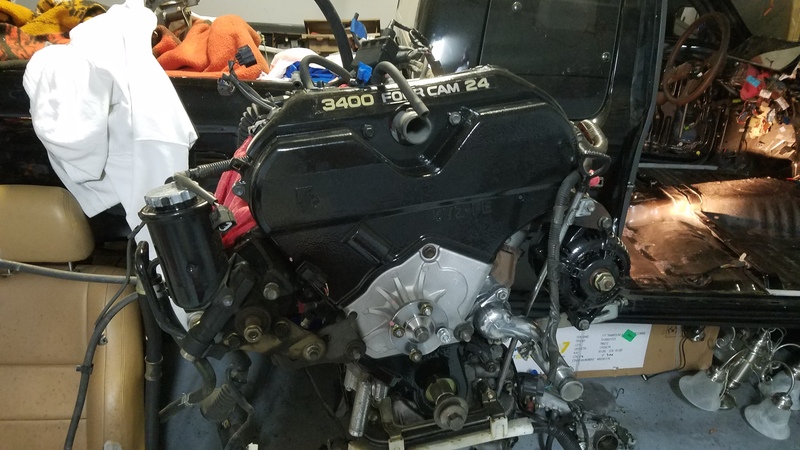
So this week I started work on the engine. I was able to paint the front timing cover and front main cover. I replaced the timing belt which needed it badly. also replaced the bearings and tensioner, getting the block prep for paint. I also polished some parts as well...hopefully they will match the way I want it. This week I got the clutch assembly this week.
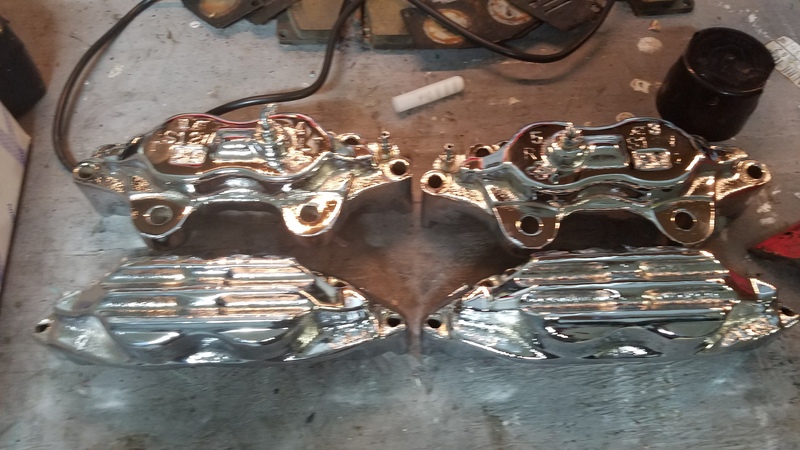
Also just got the calipers back from chrome plating shop. they turned out great I think!
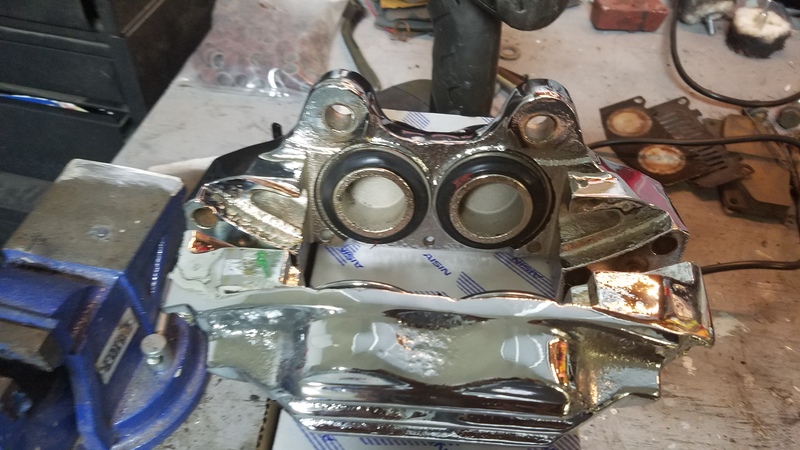


Also just got the calipers back from chrome plating shop. they turned out great I think!

 01-12-2017, 05:34 PM
#33
Registered User
Thread Starter
Join Date: Nov 2006
Location: Pflugerville, TX
Posts: 553
Likes: 0
Received 0 Likes
on
0 Posts
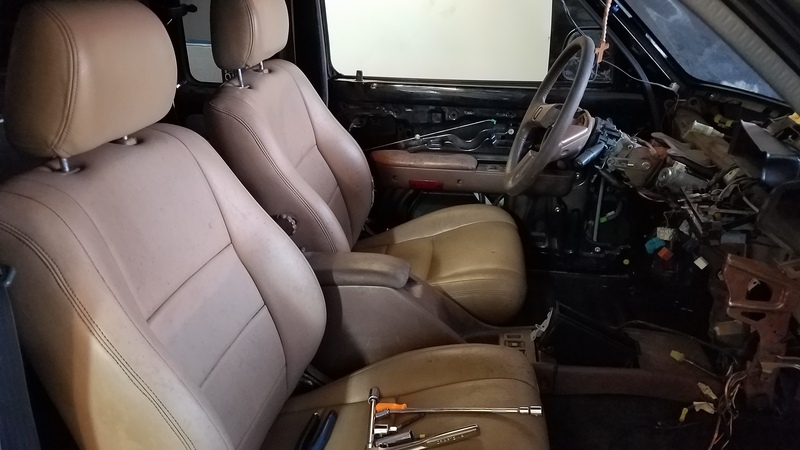
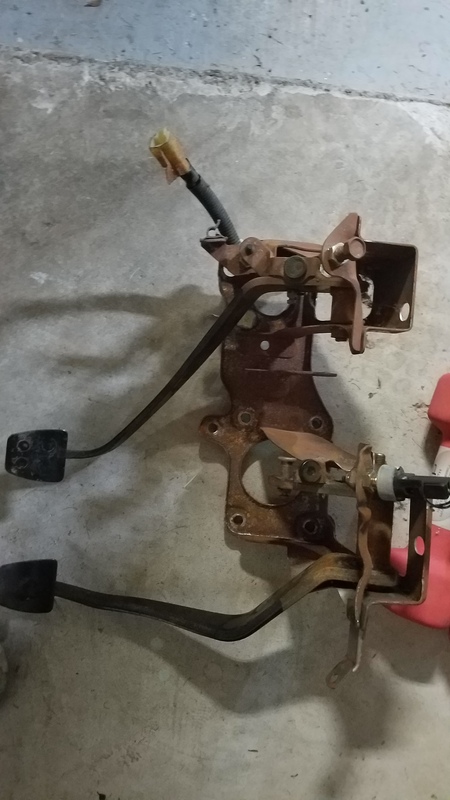
Alrighty so we are back to it.... So i finally removed my brake pedal assembly and replaced with the clutch pedal assembly. Installation i thought was going to be a lil tough, but it actually was a breeze. It also helps as well when you have the right tools.
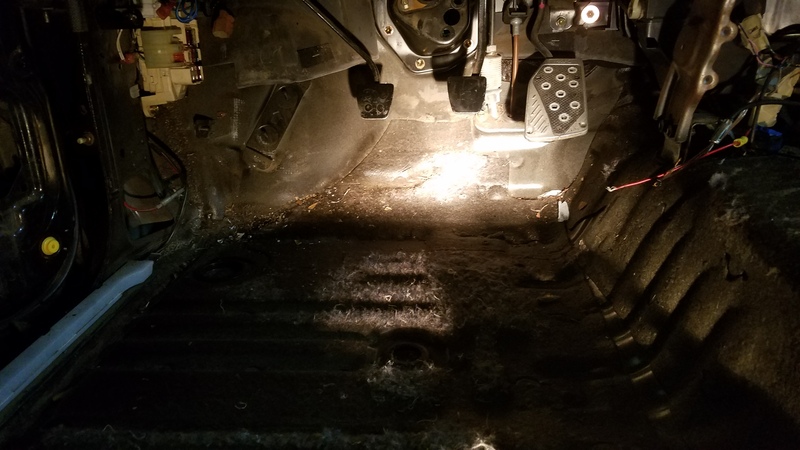
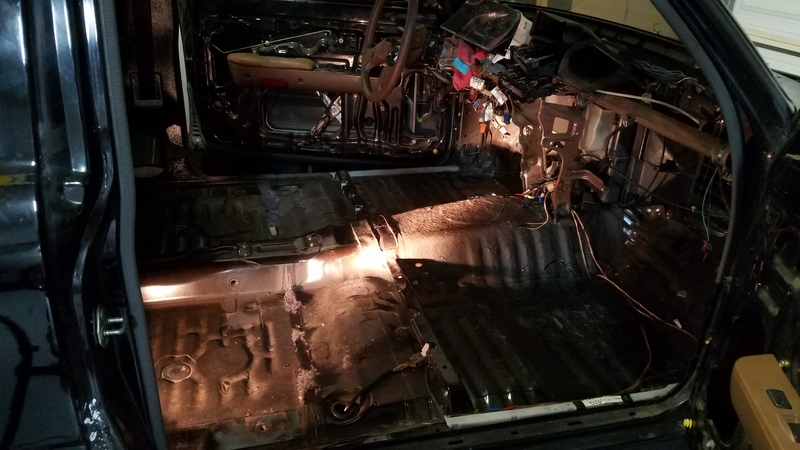
While we are on the topic of the interior of the truck. I was able to pull up the carpet and get the interior ready to lay sound deadening mat. As you there it litterly no rust or anything, my family kept the truck in good condition.
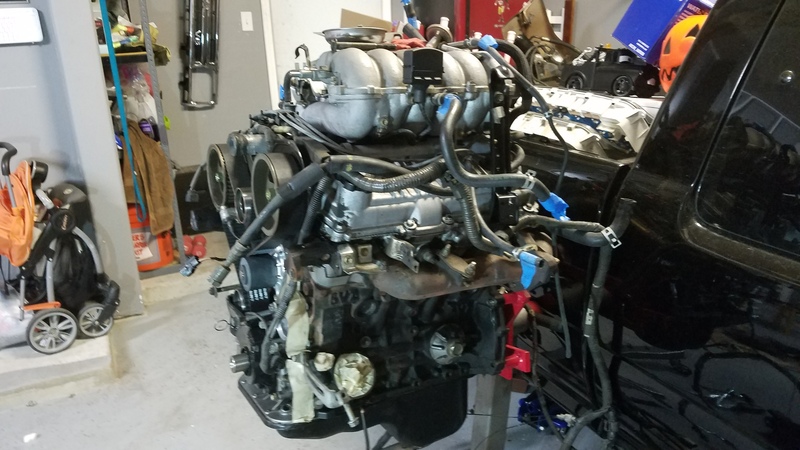
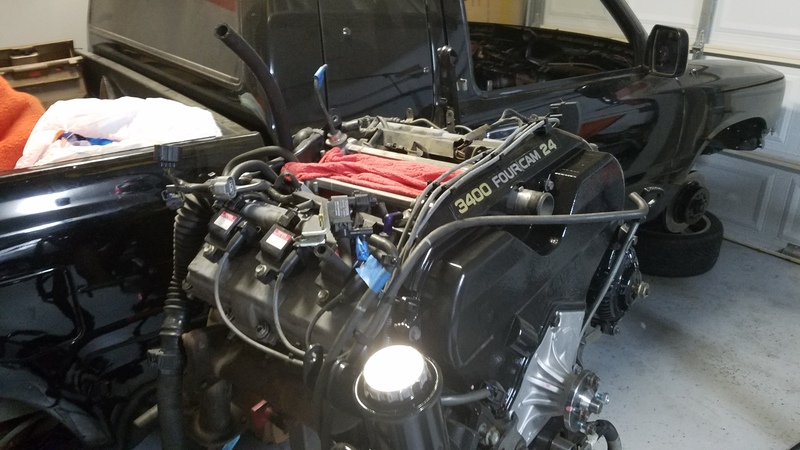
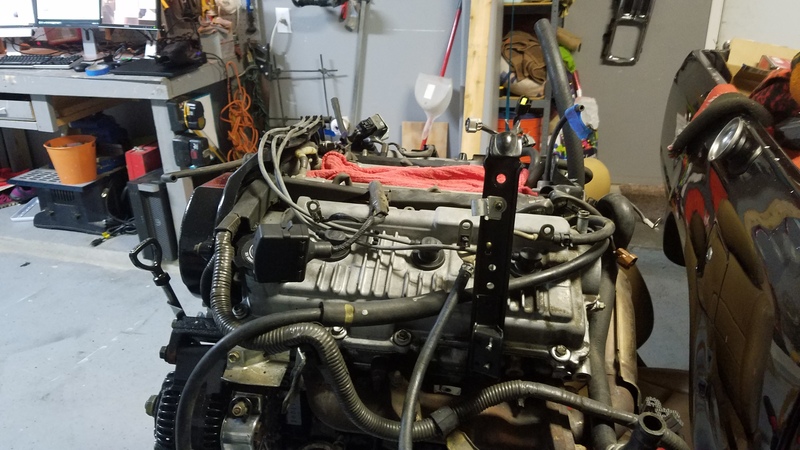
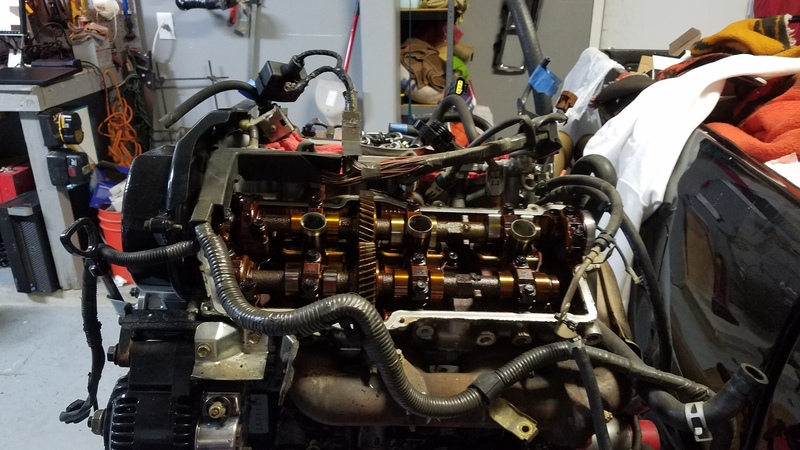
Now on to the engine....I finally had a weekday off to drop my valve covers and pulleys off to get polished and chromed. Had to take off the intake manifold to get to the valve cover. Got a chance to see how the engine was maintained and so far it still looks like its in great shape. I should get the parts back in about a 3 weeks or so. Once i get everything back, i will start to put all the parts back together and look to purchase the transmission and the lovely S/C. Here are some pics of the engine and such.

While we are on the topic of the interior of the truck. I was able to pull up the carpet and get the interior ready to lay sound deadening mat. As you there it litterly no rust or anything, my family kept the truck in good condition.

Now on to the engine....I finally had a weekday off to drop my valve covers and pulleys off to get polished and chromed. Had to take off the intake manifold to get to the valve cover. Got a chance to see how the engine was maintained and so far it still looks like its in great shape. I should get the parts back in about a 3 weeks or so. Once i get everything back, i will start to put all the parts back together and look to purchase the transmission and the lovely S/C. Here are some pics of the engine and such.


 01-12-2017, 08:24 PM
#34
Registered User

Join Date: Jun 2015
Location: WI
Posts: 147
Likes: 0
Received 0 Likes
on
0 Posts
Good to see some progress! What kind of sound deadener you going to use? I was hoping to have mine dropped in before my upcoming hiatus but doesn't look like I'm gonna get to it
01-13-2017, 03:37 AM
#35
Registered User
Thread Starter
Join Date: Nov 2006
Location: Pflugerville, TX
Posts: 553
Likes: 0
Received 0 Likes
on
0 Posts
Here is the product i was looking at, Its called NOICO.
https://www.amazon.com/dp/B01KZ5X7KO...I2OL57WZ5I6A01
01-17-2017, 03:48 AM
#37
Registered User
Thread Starter
Join Date: Nov 2006
Location: Pflugerville, TX
Posts: 553
Likes: 0
Received 0 Likes
on
0 Posts
MLV? would that go good with the NOICO? i didnt think that you would need to use anything else with the NOICO product but i guess it wouldnt hurt. My main concern is that going to be nothing i can do for the road noise from the shifter.
Last edited by shoes138; 01-17-2017 at 05:54 AM.
01-17-2017, 03:30 PM
#38
Registered User
Join Date: Jun 2015
Location: WI
Posts: 147
Likes: 0
Received 0 Likes
on
0 Posts
The NOICO removes the tin sound from the metal. Primarily metal vibrations throughout the area you're applying it but it won't have a large impact on environmental sound like road noise. The MLV will remove these environmental sounds... well not remove  ... it will reduce them. But the MLV needs to have a buffer material between it and the medium it will be resting on. CCF would be the material of choice. Many people use EPDM or an EPDM/Neoprene CCF blend. I went to ebay for my CCF and bought some stuff for cheap out of California. I was just curious what you'll all be doing as I'll be tackling the same thing once I get things running
... it will reduce them. But the MLV needs to have a buffer material between it and the medium it will be resting on. CCF would be the material of choice. Many people use EPDM or an EPDM/Neoprene CCF blend. I went to ebay for my CCF and bought some stuff for cheap out of California. I was just curious what you'll all be doing as I'll be tackling the same thing once I get things running
01-17-2017, 06:21 PM
#39
Registered User
Thread Starter
Join Date: Nov 2006
Location: Pflugerville, TX
Posts: 553
Likes: 0
Received 0 Likes
on
0 Posts
Just received a call from the Chrome Plating shop saying that they were all done with the pieces. So after wokr i rushed over there to pick them up.....Man oh man, these pieces are going to look good on this 5vz.
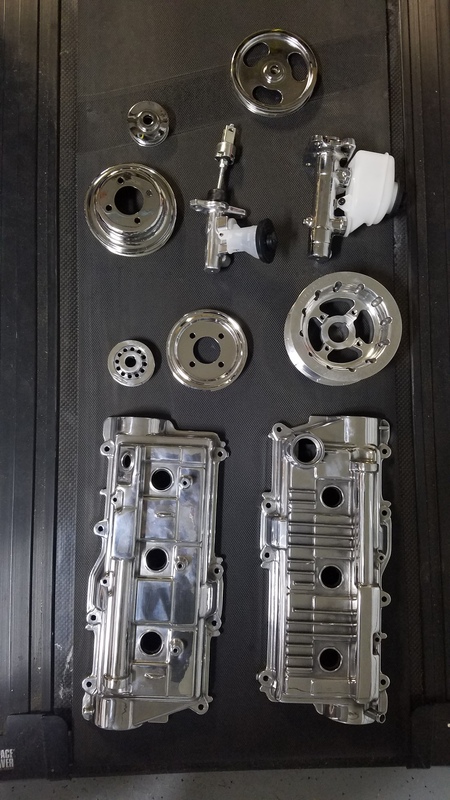
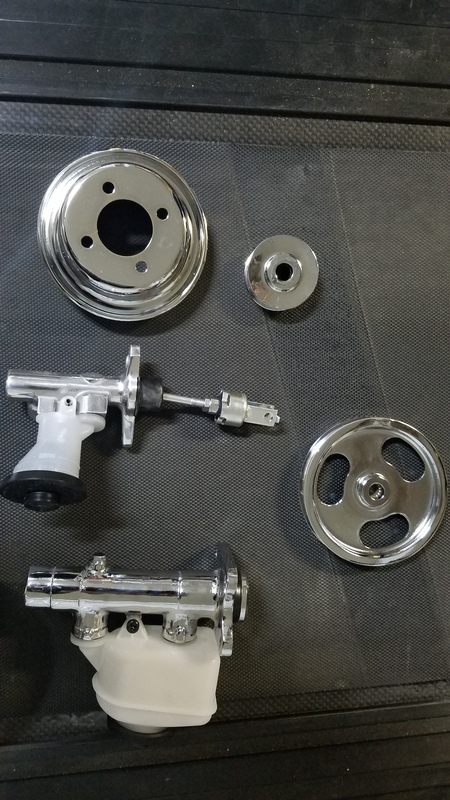
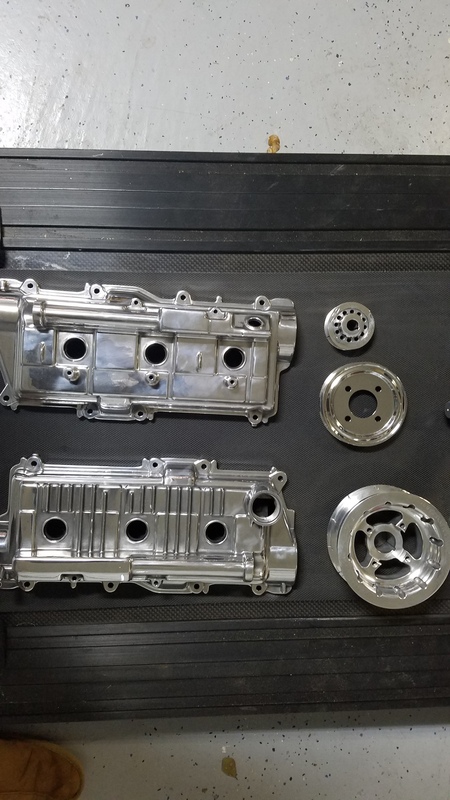
Also there are two new pulleys as well....2.2 Supercharger pulley and URD crankshaft pulley


Also there are two new pulleys as well....2.2 Supercharger pulley and URD crankshaft pulley
Last edited by shoes138; 01-17-2017 at 06:25 PM.
01-17-2017, 06:22 PM
#40
Registered User
Thread Starter
Join Date: Nov 2006
Location: Pflugerville, TX
Posts: 553
Likes: 0
Received 0 Likes
on
0 Posts
The NOICO removes the tin sound from the metal. Primarily metal vibrations throughout the area you're applying it but it won't have a large impact on environmental sound like road noise. The MLV will remove these environmental sounds... well not remove ... it will reduce them. But the MLV needs to have a buffer material between it and the medium it will be resting on. CCF would be the material of choice. Many people use EPDM or an EPDM/Neoprene CCF blend. I went to ebay for my CCF and bought some stuff for cheap out of California. I was just curious what you'll all be doing as I'll be tackling the same thing once I get things running
... it will reduce them. But the MLV needs to have a buffer material between it and the medium it will be resting on. CCF would be the material of choice. Many people use EPDM or an EPDM/Neoprene CCF blend. I went to ebay for my CCF and bought some stuff for cheap out of California. I was just curious what you'll all be doing as I'll be tackling the same thing once I get things running 


