Clarions 90 4runner build
 05-31-2012, 07:44 AM
#1
Registered User
Thread Starter
Join Date: Apr 2012
Posts: 94
Likes: 0
Received 0 Likes
on
0 Posts
Clarions 90 4runner build
Hey yote fans ive been floating around yt for a bit now and figured its been long due that i post my build.
I also have a build thread on dezertrangers.com ( 90 4runner Build)
Link: http://www.dezertrangers.com/vb/fab-shop/149892.htm
The starting platform:
1990 Toyota 4Runner SR5 4X4
3.0 V6 5 speed manual
31x10.50 Yokohama Geolanders
Aisin manual hub conversion 4wd vacuum delete
Spintech catback exhaust
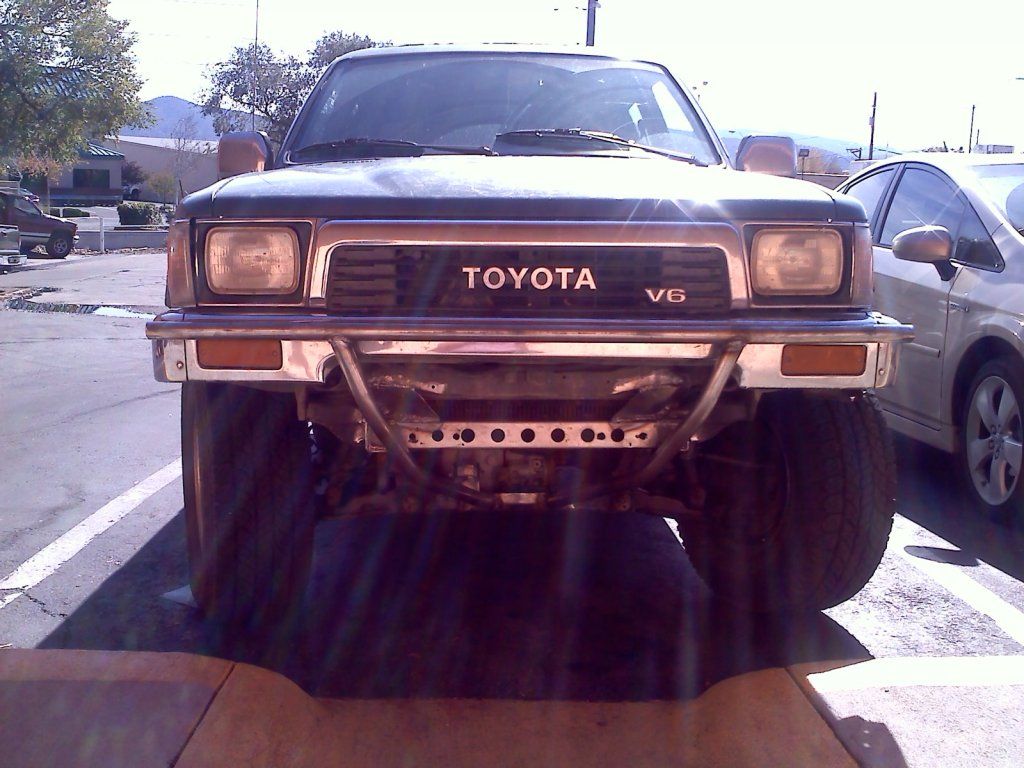
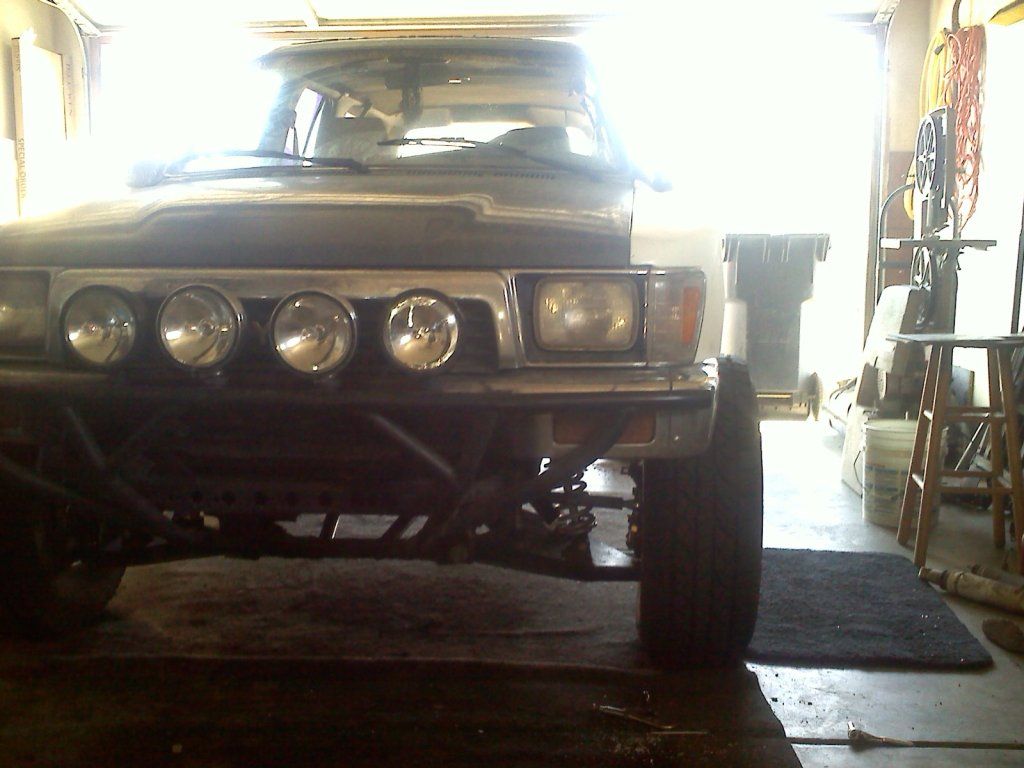
Slapped on a bumper so i could have Aux. lights will be rebuilding very soon. Also built some tube "nerf" bars; for lack of a better name lol, should be able to tie my roll cage into these down the road.
Grrrrr started this thread and now i cant get my pics loaded!!!!!!!!!
Gonna post this for now with hopes of having the picture thing figured out by tonight sorry for the tease guys. My sig should give you an idea of whats goin on :wabbit2:
I also have a build thread on dezertrangers.com ( 90 4runner Build)
Link: http://www.dezertrangers.com/vb/fab-shop/149892.htm
The starting platform:
1990 Toyota 4Runner SR5 4X4
3.0 V6 5 speed manual
31x10.50 Yokohama Geolanders
Aisin manual hub conversion 4wd vacuum delete
Spintech catback exhaust
Slapped on a bumper so i could have Aux. lights will be rebuilding very soon. Also built some tube "nerf" bars; for lack of a better name lol, should be able to tie my roll cage into these down the road.
Grrrrr started this thread and now i cant get my pics loaded!!!!!!!!!
Gonna post this for now with hopes of having the picture thing figured out by tonight sorry for the tease guys. My sig should give you an idea of whats goin on :wabbit2:
 06-01-2012, 09:27 AM
#2
Registered User
Thread Starter
Join Date: Apr 2012
Posts: 94
Likes: 0
Received 0 Likes
on
0 Posts
Sorry it's taking so long guys I'm about to go crazy trying load pics. I've loaded my pics to photobucket but can't ge them on here. Hopefully will get it figured out soon. No wonder I've put off making my own build thread!!!!
06-01-2012, 09:47 AM
#3
Registered User
Thread Starter
Join Date: Apr 2012
Posts: 94
Likes: 0
Received 0 Likes
on
0 Posts
Alright so I think I finally got it fingered out. So this is a test post with a pic of the beginning of the front bumper. If this works then I'll get all my pics on photobucket and give it another try.
06-01-2012, 10:28 AM
#5
Registered User
Thread Starter
Join Date: Apr 2012
Posts: 94
Likes: 0
Received 0 Likes
on
0 Posts
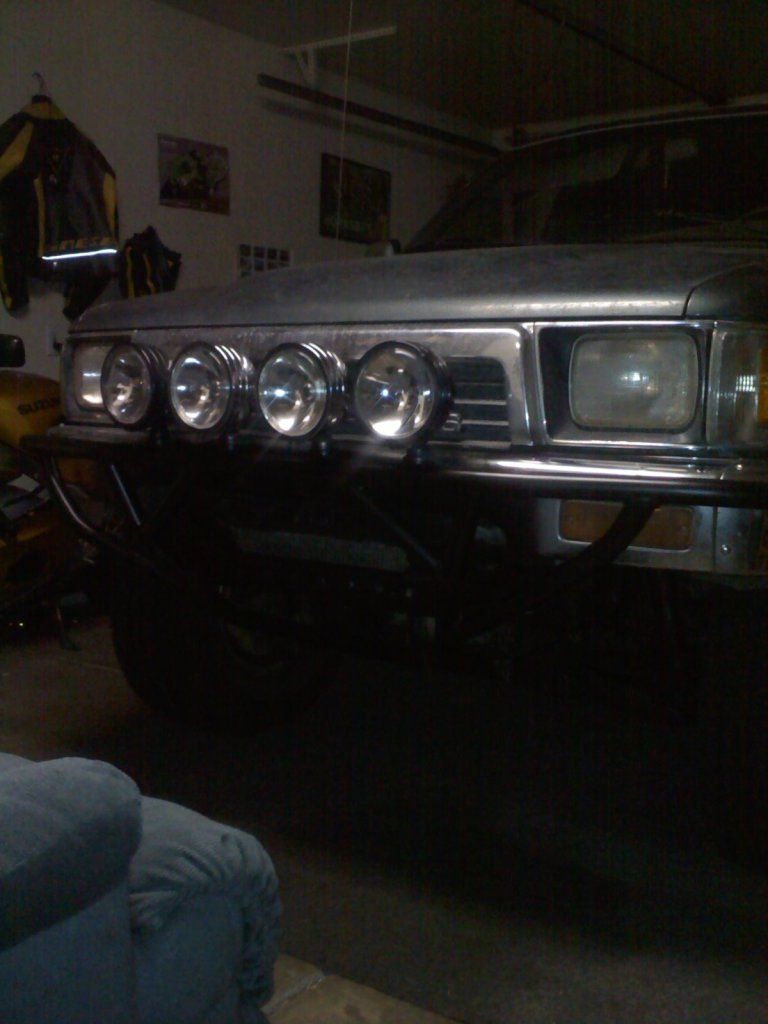
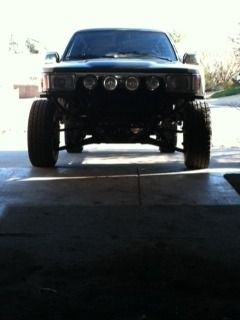
Front bumper finished with lights and tabs for potential skid plate but like I said before I just threw this bumper together so I do plan on rebuilding it.

Painted
Will get pics up of the LT build tonight
Painted
Will get pics up of the LT build tonight
06-02-2012, 10:26 AM
#6
Registered User
Thread Starter
Join Date: Apr 2012
Posts: 94
Likes: 0
Received 0 Likes
on
0 Posts
I couldn't find my pictures of when I very first started building my control arms but I did everything starting from the first lower arm that I finished. Now my original intention for this truck has always been for it to be a prerunner but did not want to spend thousands of dollars on bolt on stuff. I've worked at enough fab shops in the last few years to make me confident that I could build a nice LT setup but for a fraction of the cost. Don't get me wrong still very expensive but I wanted the pride and satisfaction of knowing I did everything myself.
When I find my other pic I'll put them up but this was the first lower arm I completed
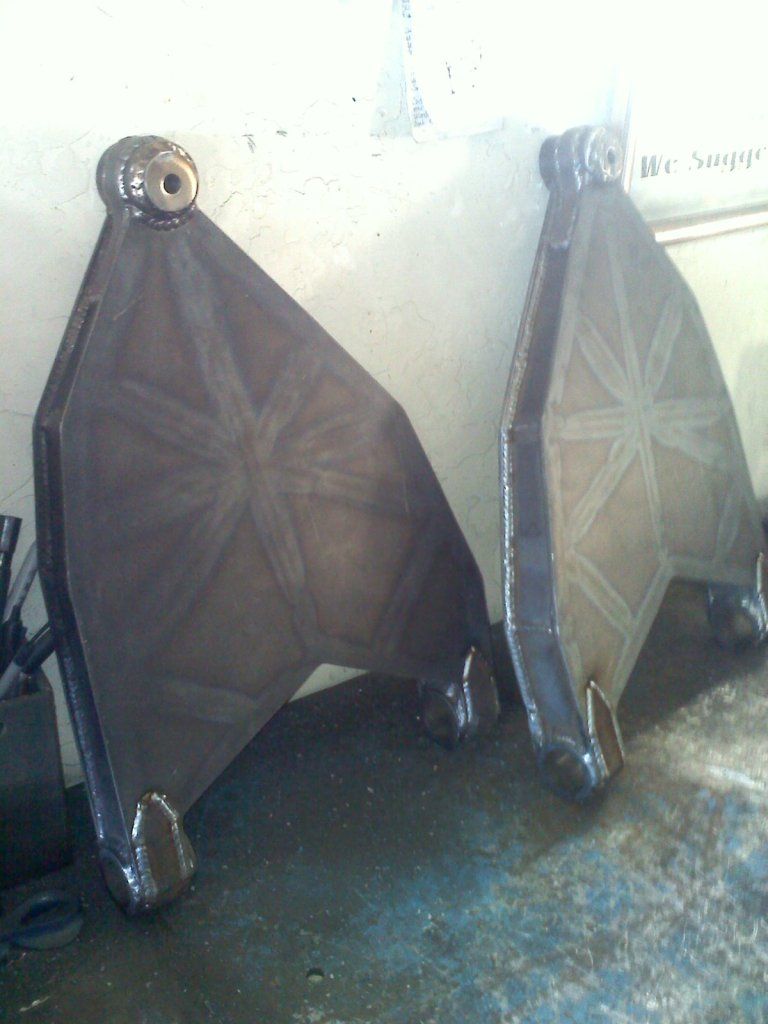
3/16" plate all the way around
2"x.250 DOM for my mounting points
Super BEEF
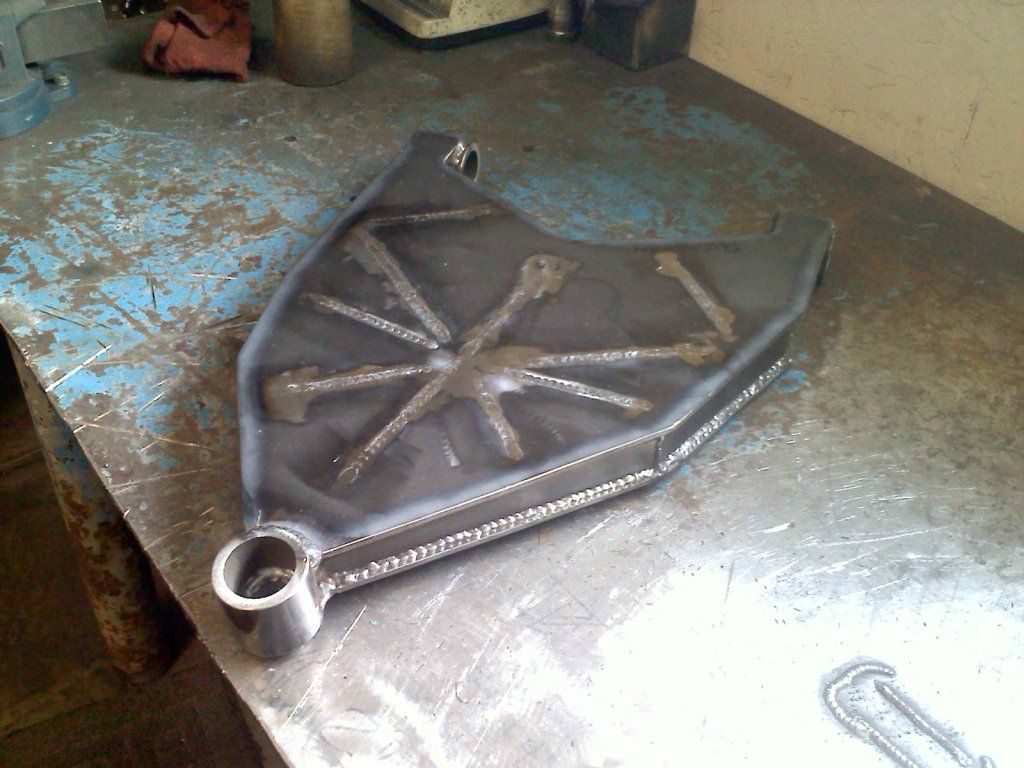
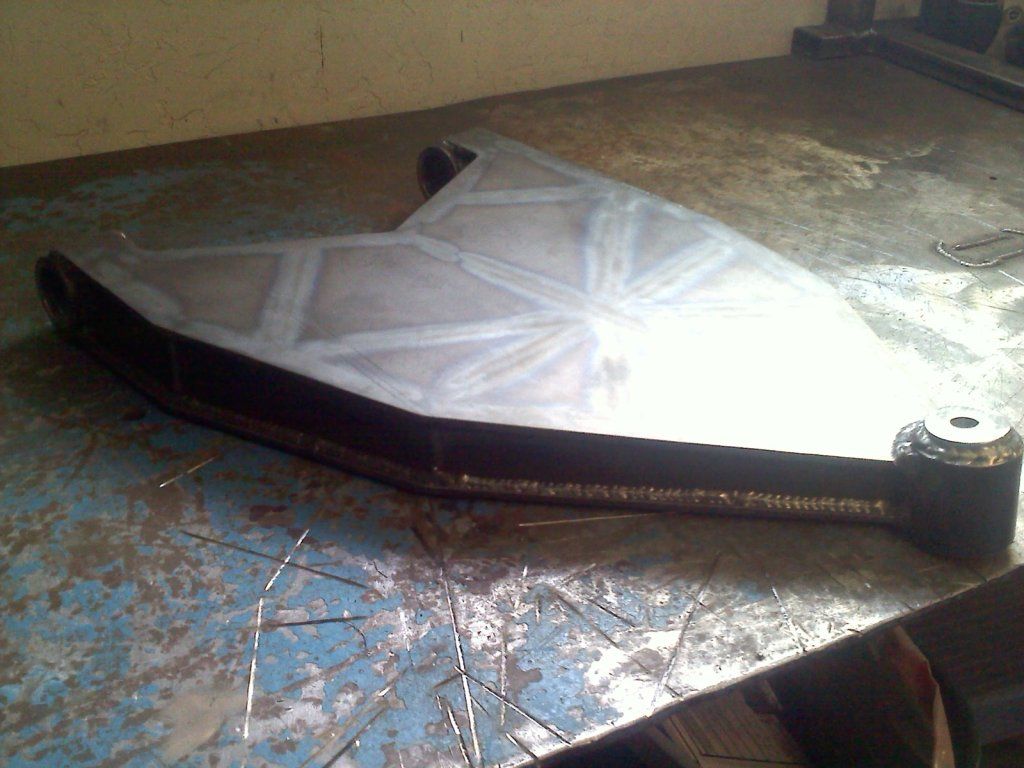
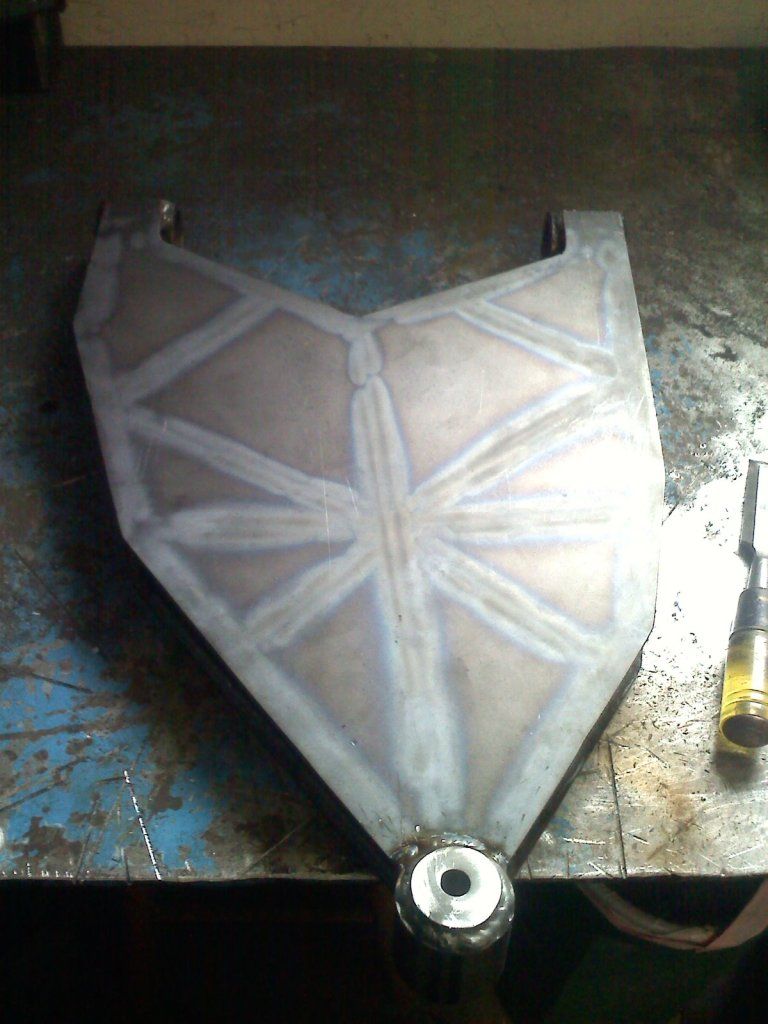

Both lower arms done with gussets
When I find my other pic I'll put them up but this was the first lower arm I completed
3/16" plate all the way around
2"x.250 DOM for my mounting points
Super BEEF
Both lower arms done with gussets
Last edited by clarion69374; 06-06-2012 at 06:39 AM.
06-02-2012, 10:57 AM
#7
Registered User
Thread Starter
Join Date: Apr 2012
Posts: 94
Likes: 0
Received 0 Likes
on
0 Posts
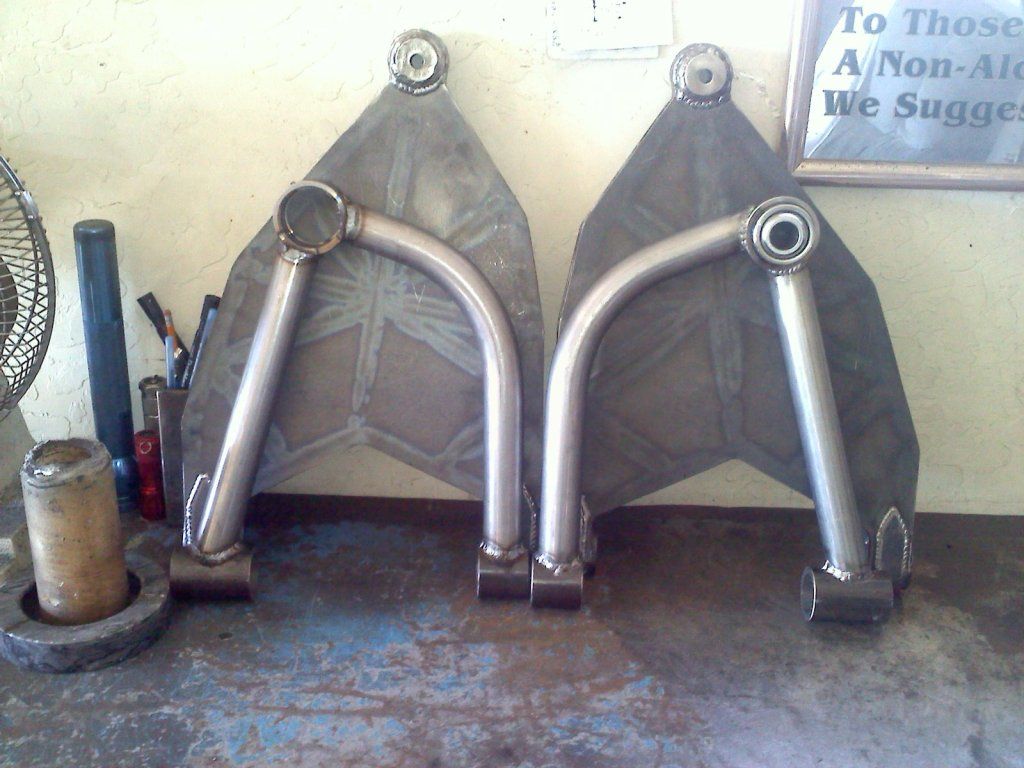
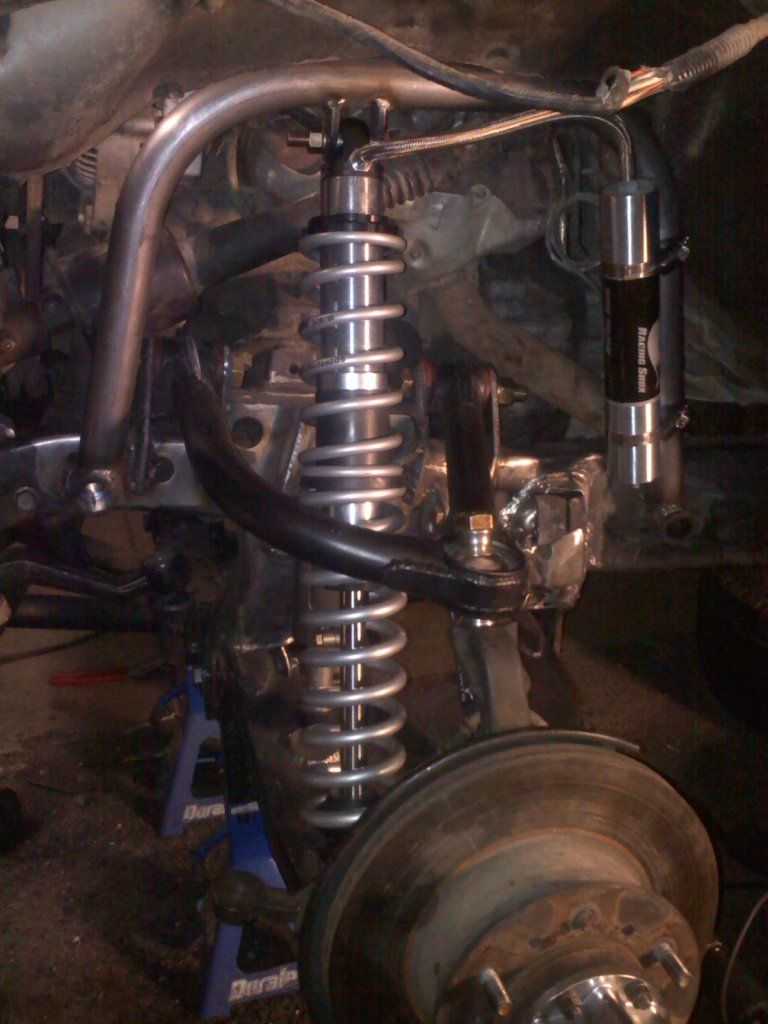
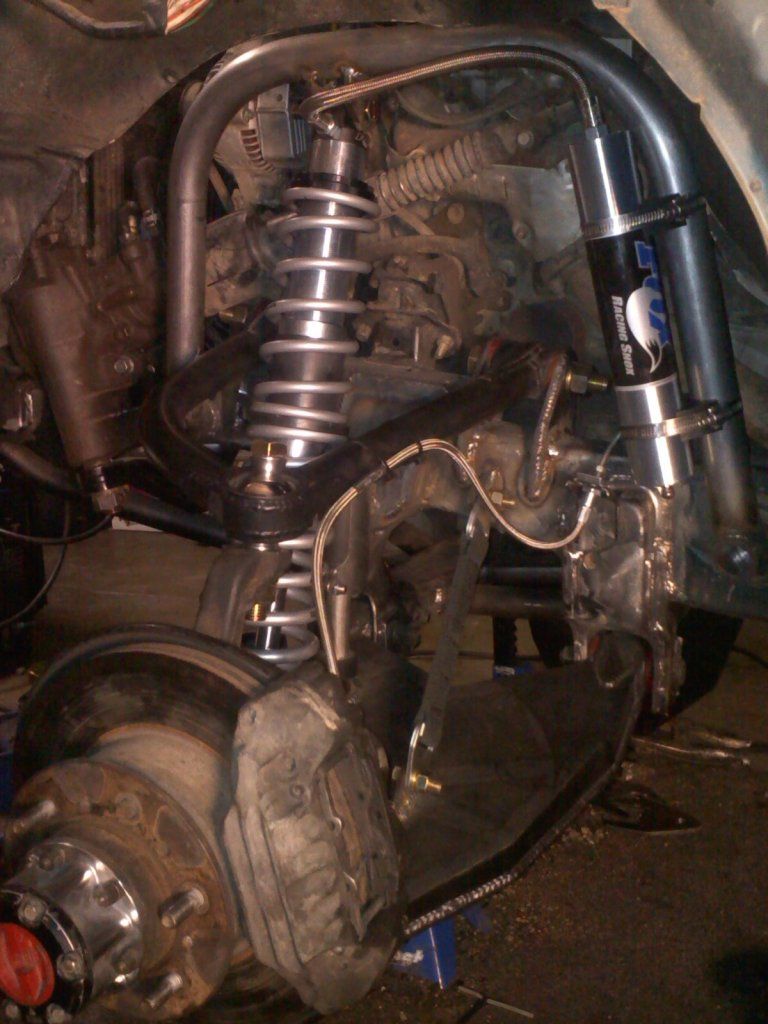
Originally I was gonna run a balljoint on the lower arm and then eventually buy the total chaos lower uniball kit but I then would lose the "all on my own theme" so after a little work I made my own lower uniball conversion which you will see in later pics. With lower arms done it was time to tackle the uppers.
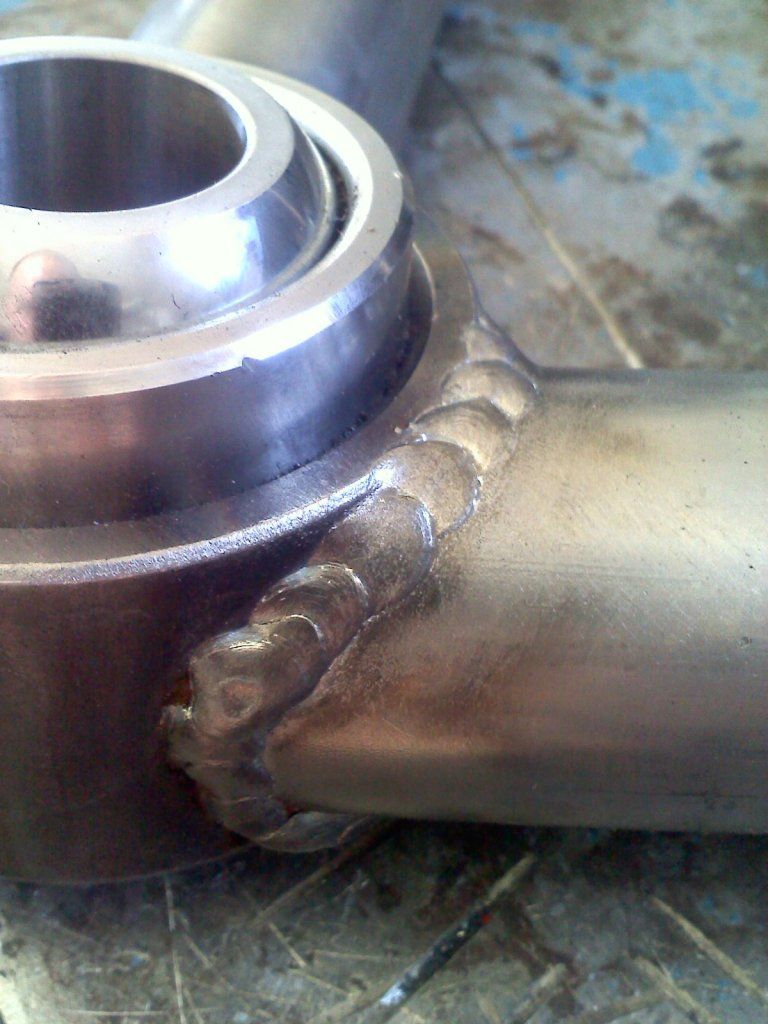
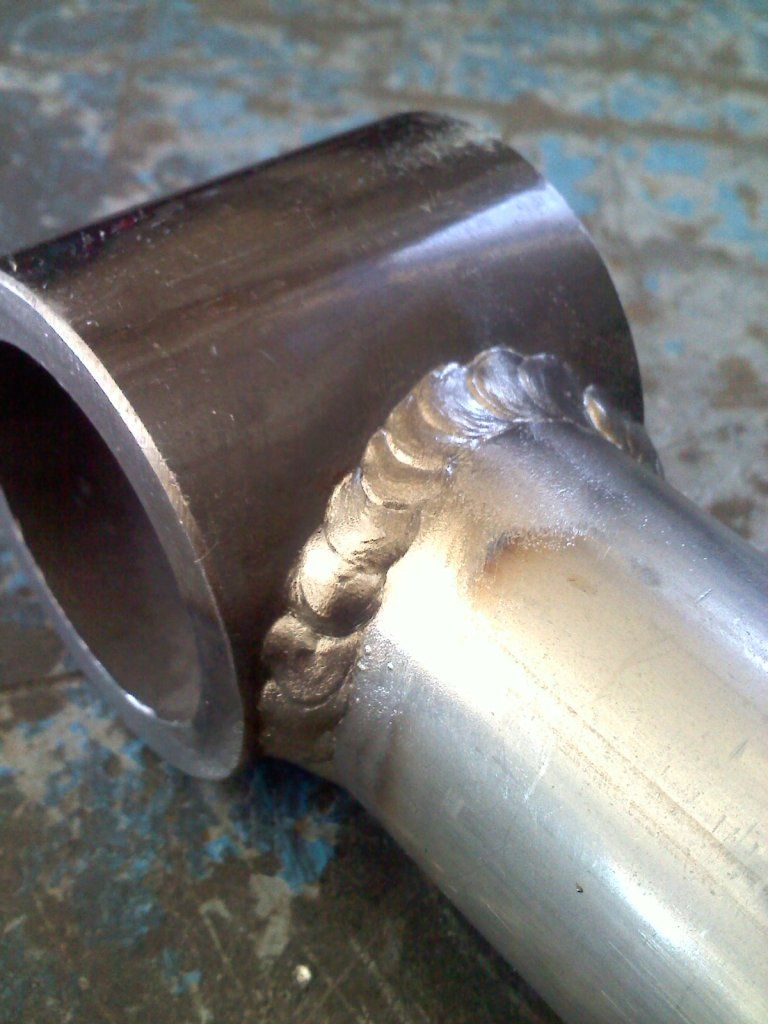
Upper control arms
1.5"x.188 DOM tubing
2"x.250 DOM for mounting points
1" uniball
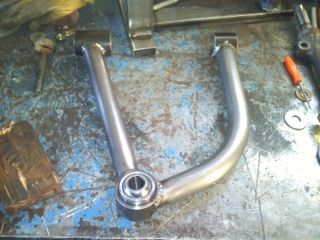
Nice clean welds
All 4 arms. When I took this pic I didn't have the gussets done yet for the upper arms will try to find the ones that show the gussets
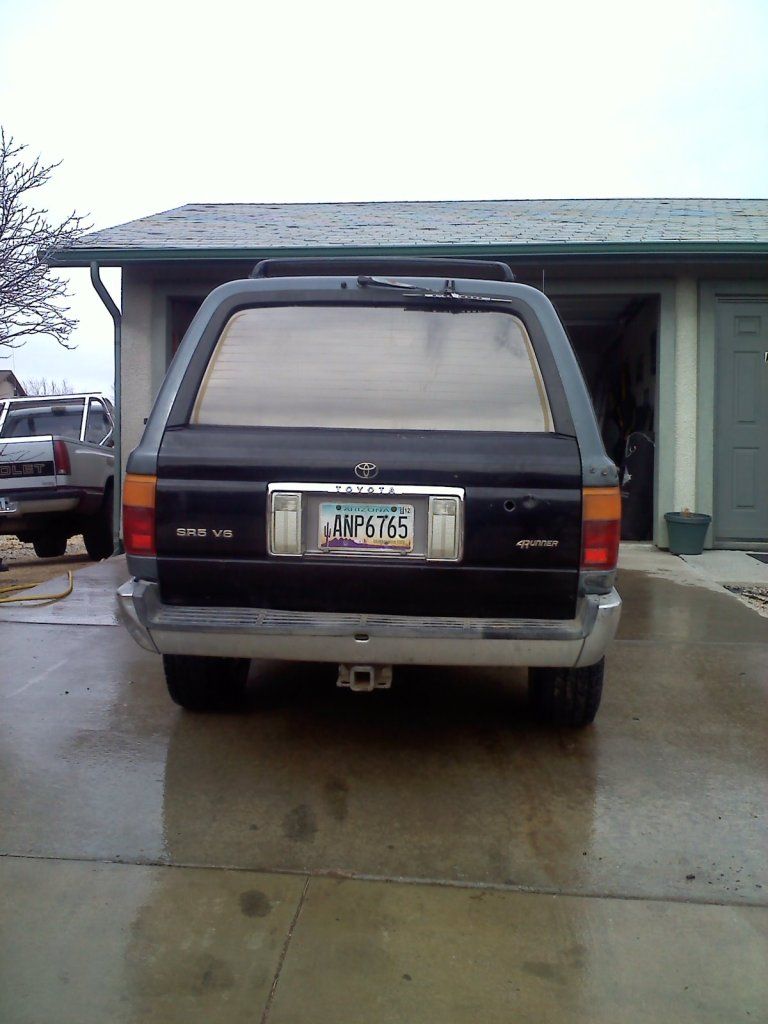
In the meantime the runner needed a new steering box badly so while I was at the scrap yard I scored my 95 tailgate and made the swap
Much cleaner
Upper control arms
1.5"x.188 DOM tubing
2"x.250 DOM for mounting points
1" uniball
Nice clean welds
All 4 arms. When I took this pic I didn't have the gussets done yet for the upper arms will try to find the ones that show the gussets
In the meantime the runner needed a new steering box badly so while I was at the scrap yard I scored my 95 tailgate and made the swap
Much cleaner
Last edited by clarion69374; 06-06-2012 at 06:38 AM.
Trending Topics
06-02-2012, 11:12 AM
#8
Registered User
Thread Starter
Join Date: Apr 2012
Posts: 94
Likes: 0
Received 0 Likes
on
0 Posts
With the control arms finished it was time to get down to the dirty stuff but first a before shot
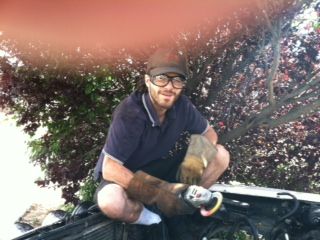
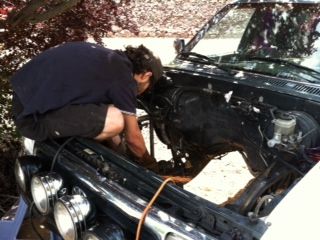
My boy Justin and I tearing the front end down
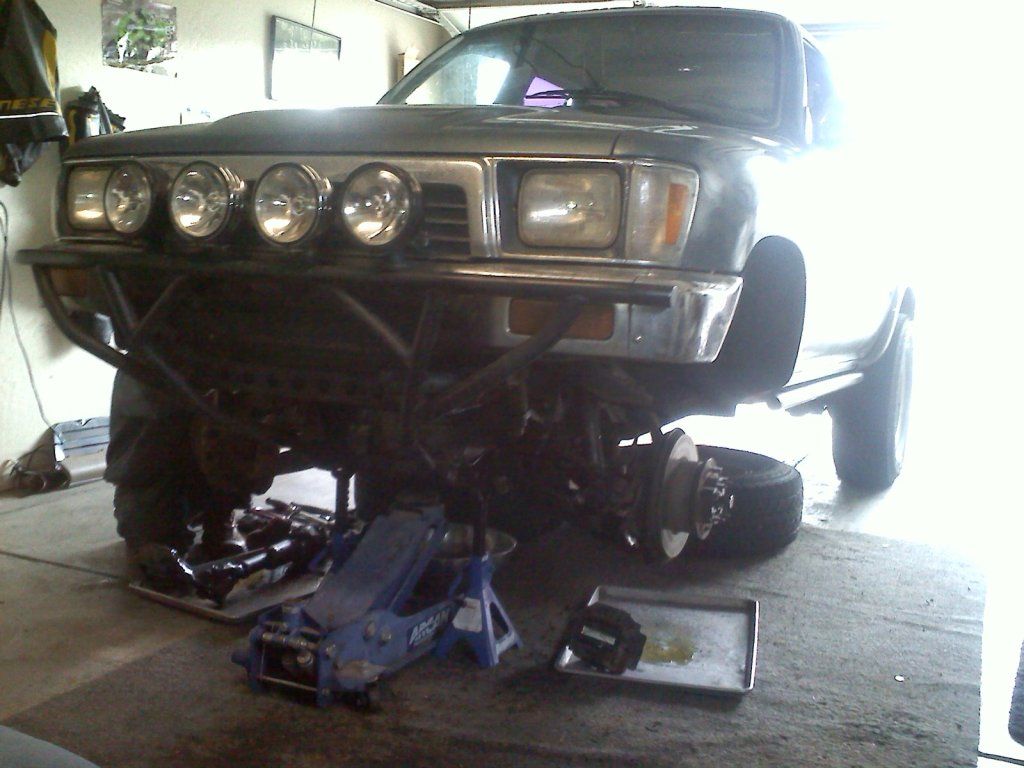
Man it was nasty under there!!!! Not good!!
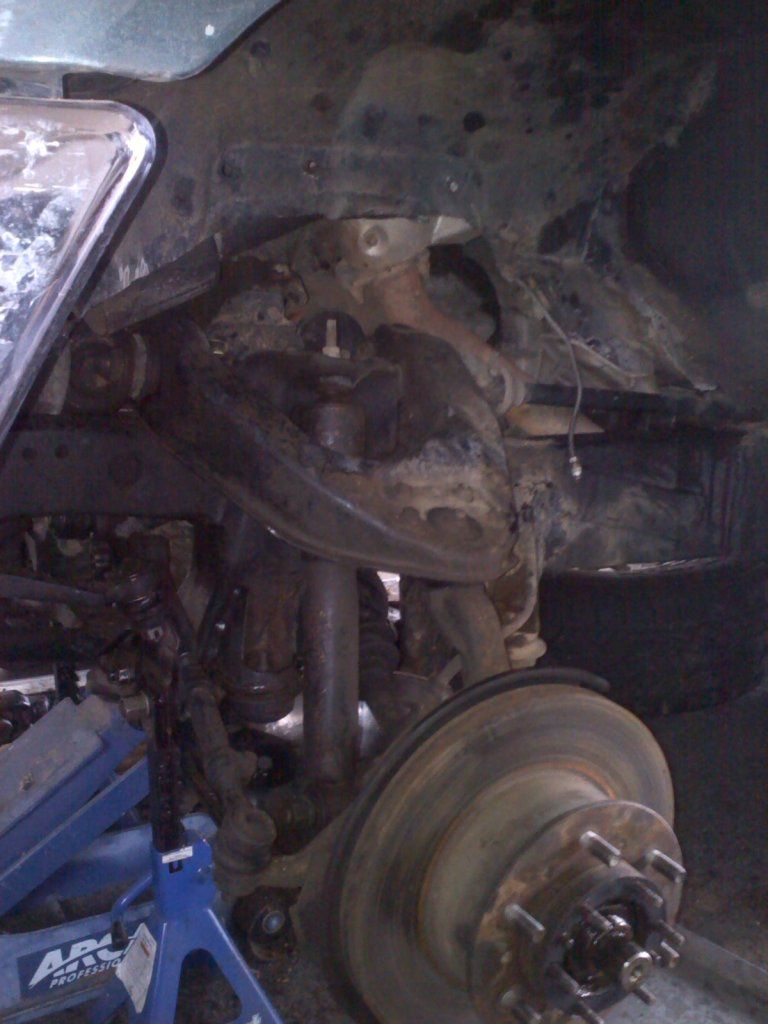
Bye bye Toyota ifs
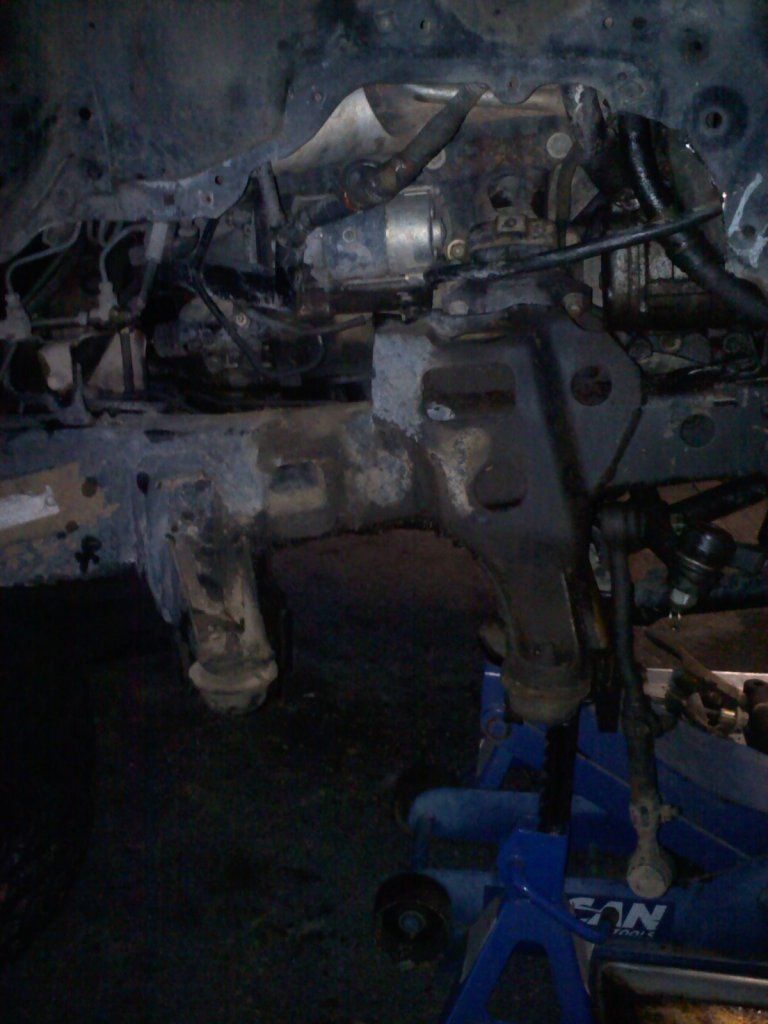
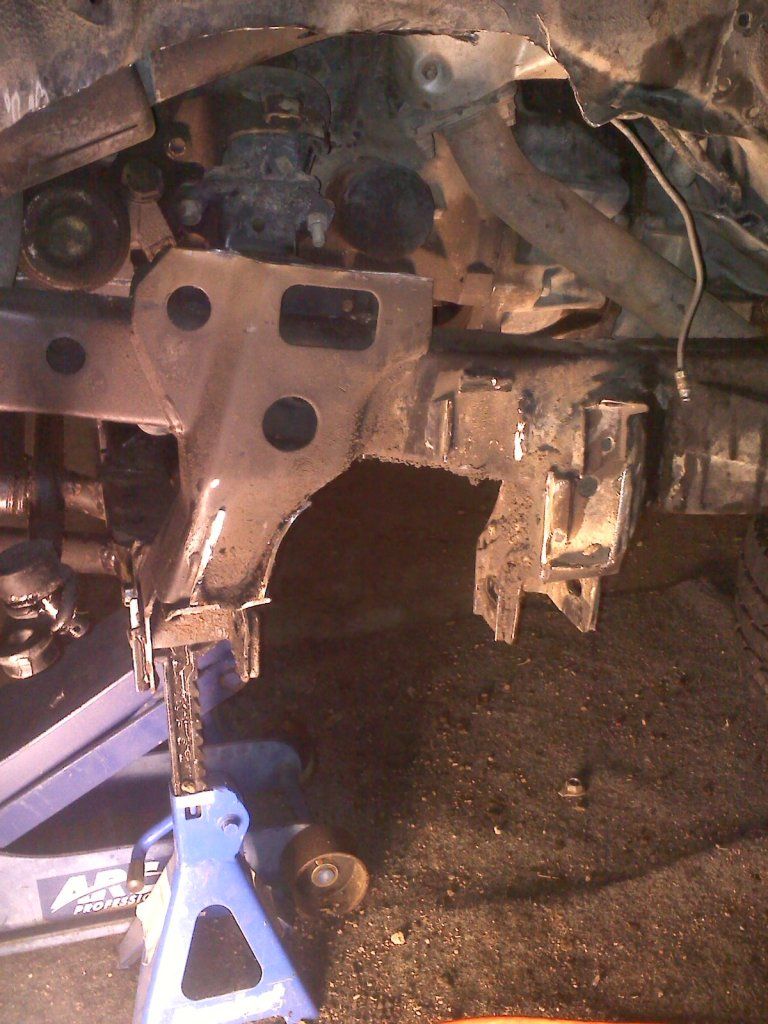
Hello Torched Racing & Fab Long Travel
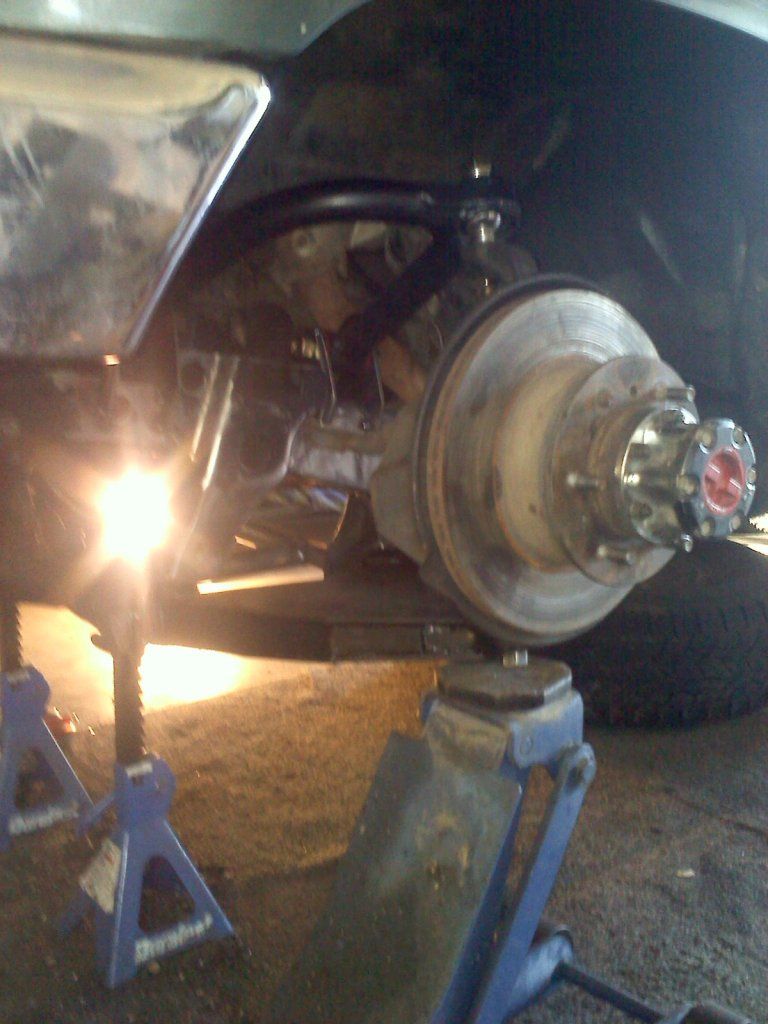
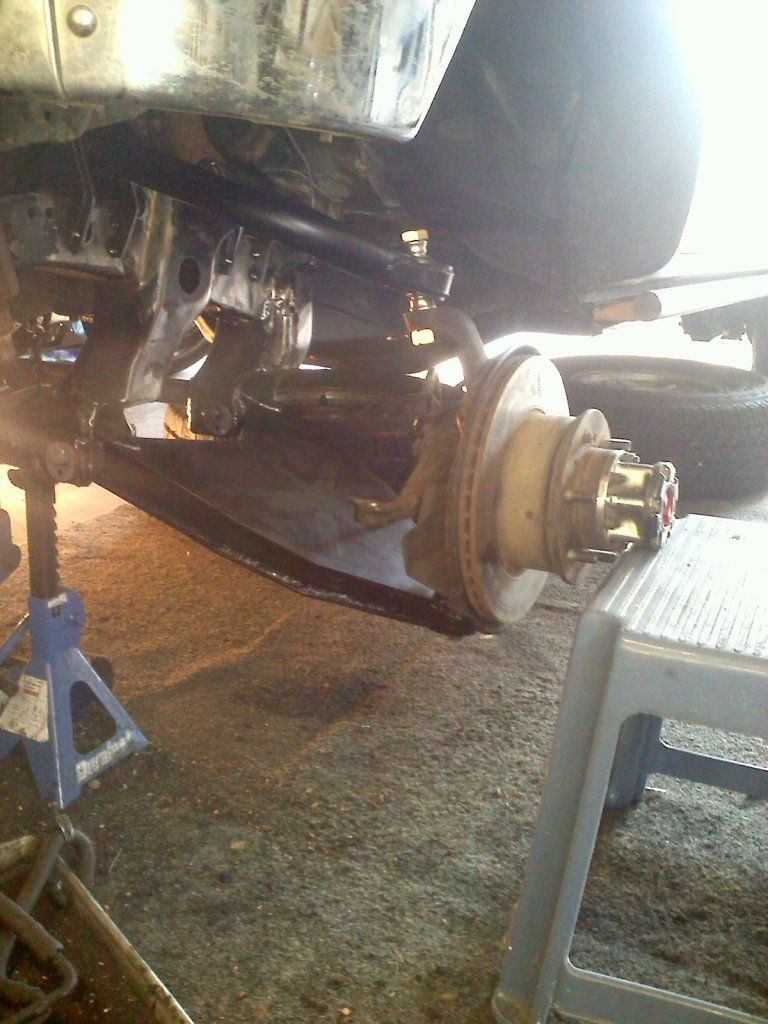
My boy Justin and I tearing the front end down
Man it was nasty under there!!!! Not good!!
Bye bye Toyota ifs
Hello Torched Racing & Fab Long Travel
Last edited by clarion69374; 06-02-2012 at 11:34 AM.
06-02-2012, 11:43 AM
#10
Registered User
Thread Starter
Join Date: Apr 2012
Posts: 94
Likes: 0
Received 0 Likes
on
0 Posts
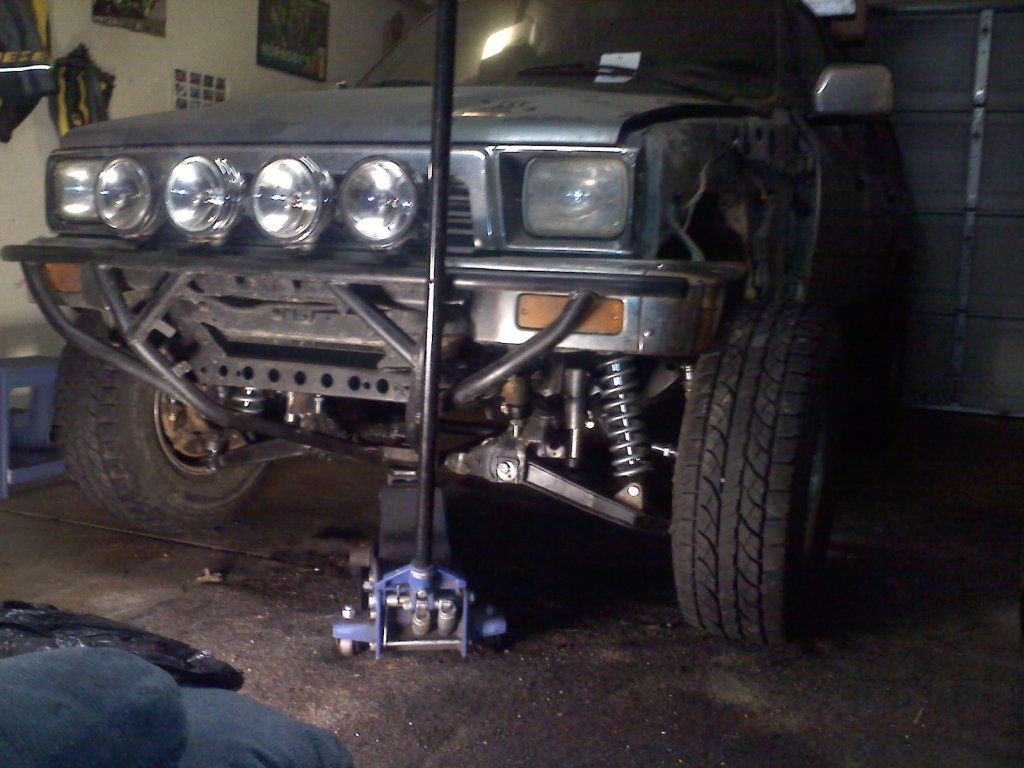
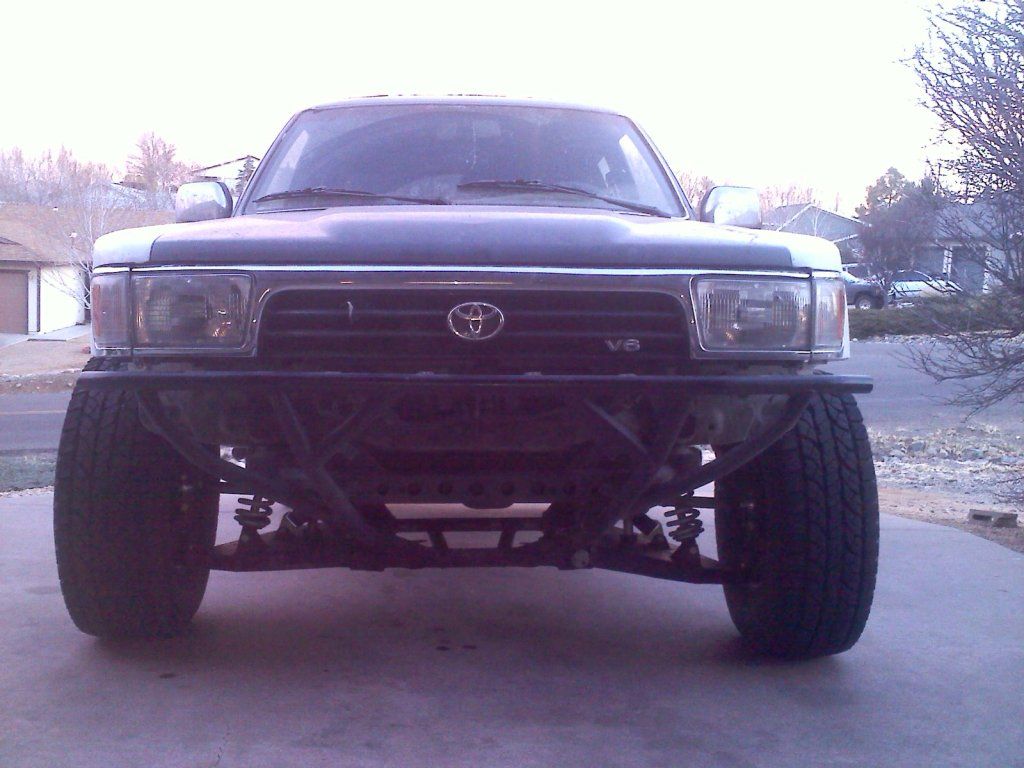
After a couple adjustments I was able to start fitting the shiny stuff.
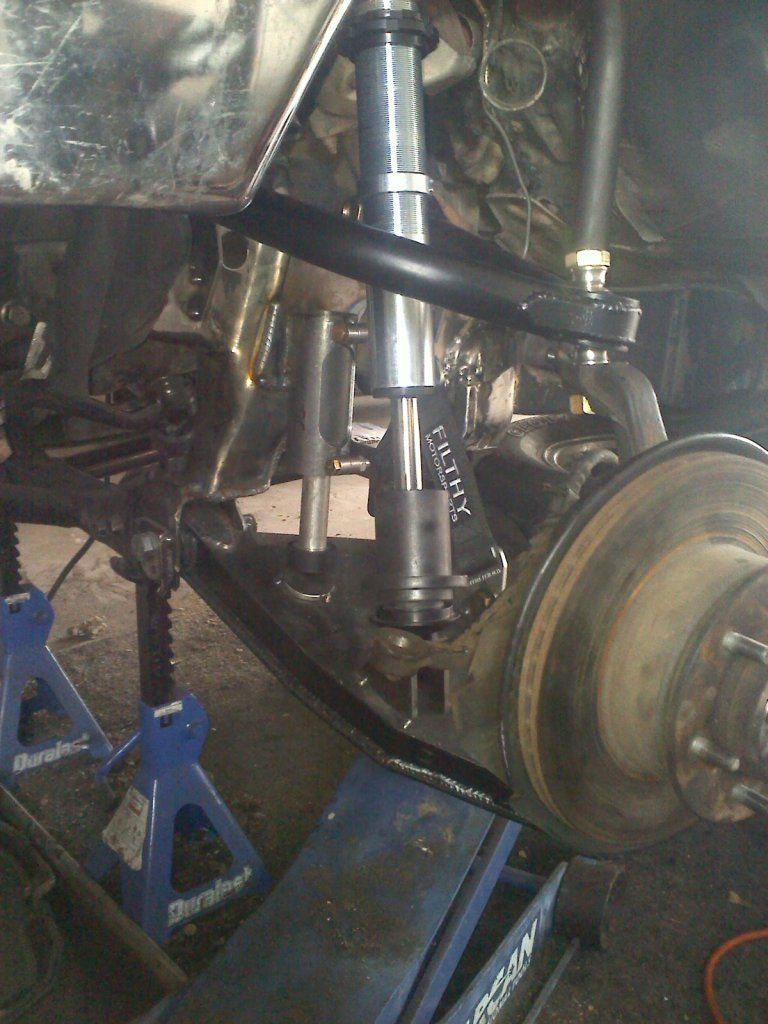
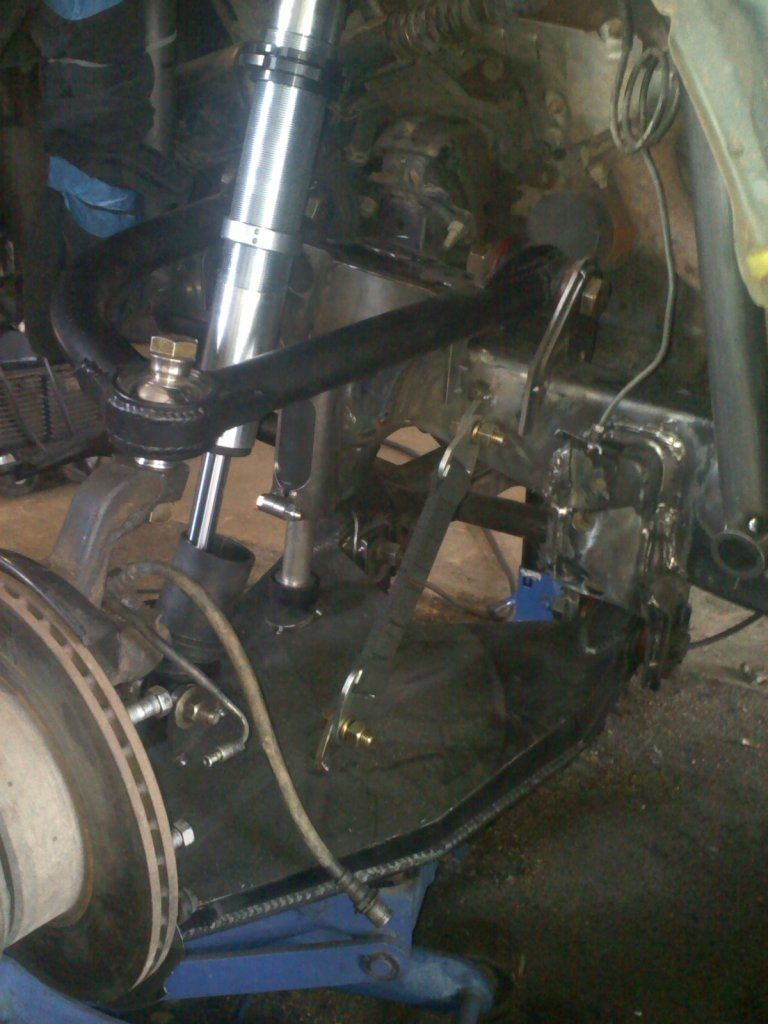
When I did the bump stops I was running a little short on funds so I opted to go with daystar stingers and mounted them in the location shown in the pictures. I know this wasn't the best choice but it would work for the time being. Now that I'm doing the motor swap I scored a set of fox hydro bumps and will be setting those up when I build the engine cage.
Everything bolted up and welded. Ready for tires and to sit on all fours.
Last edited by clarion69374; 06-02-2012 at 12:03 PM.
06-02-2012, 12:06 PM
#11
Registered User
Thread Starter
Join Date: Apr 2012
Posts: 94
Likes: 0
Received 0 Likes
on
0 Posts
06-02-2012, 07:33 PM
#12
Registered User
Thread Starter
Join Date: Apr 2012
Posts: 94
Likes: 0
Received 0 Likes
on
0 Posts
Now with tires on I'm ready to start my tie rods. Unfortunately when I took this picture I was waiting on my 3/4x16 lefty tap so was at a stand still. When I finally got the tap I blasted out the tie rods and snapped a couple pics but never loaded them so once I find em I'll post em.
Rollin under her own power!!! I found out the hard way about proper spring rate lol. This is the after pic but with waaaayyy soft springs.
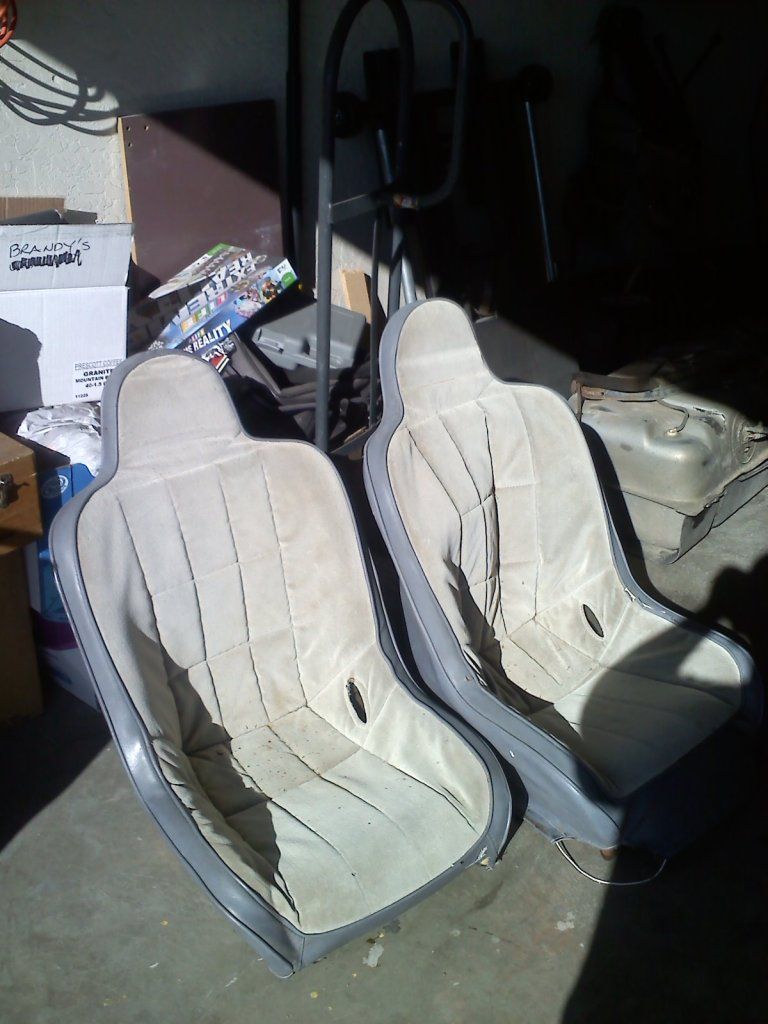
Very obvious that I was in need of some fiberglass!!! I really considered goin with a one piece but ended up with Hanneman 4" flat tops. Was actually quite pleased too.
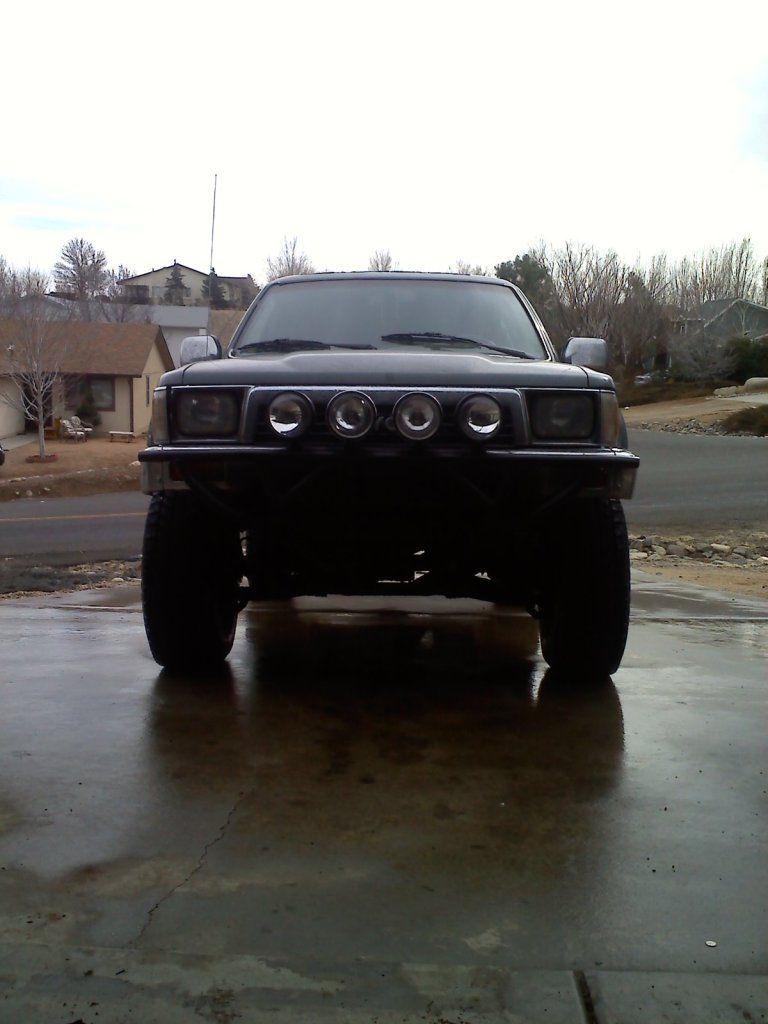
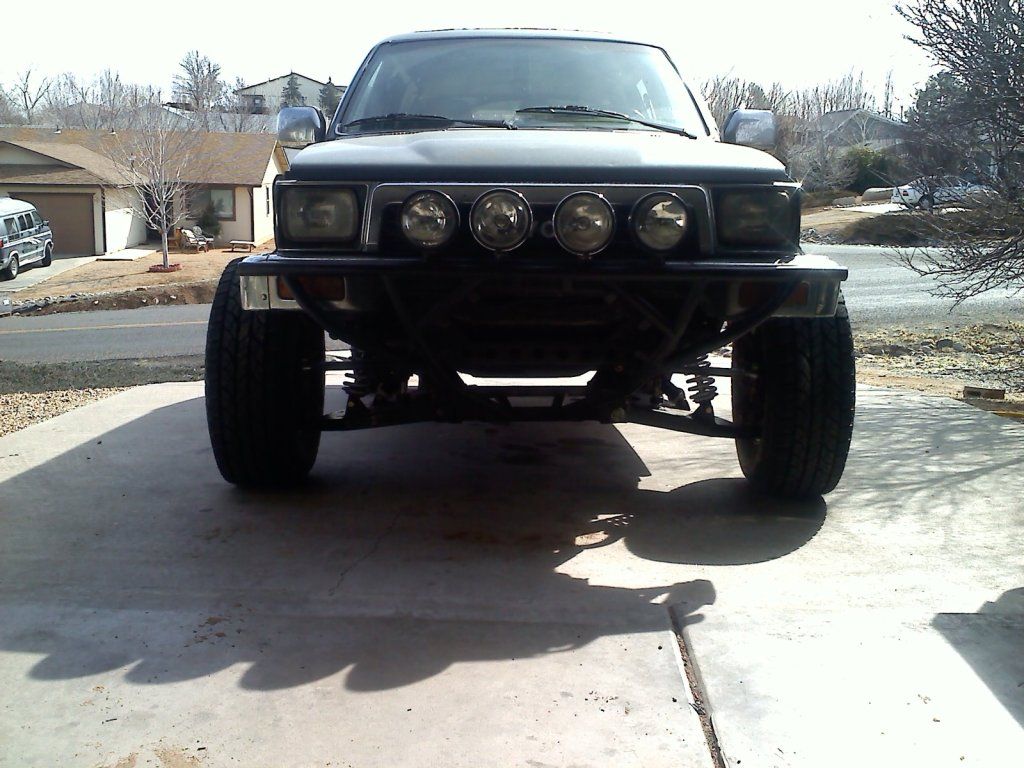
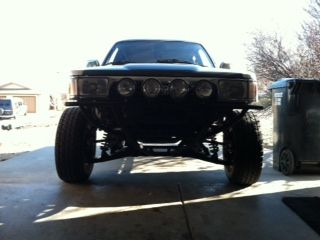
More goodies, took off stock bumper and did the 95 grill swap. Corner light to corner light.
My FREE Beards and the Gas tank out of my step brothers XJ for the tank swap and relocation
Rollin under her own power!!! I found out the hard way about proper spring rate lol. This is the after pic but with waaaayyy soft springs.
Very obvious that I was in need of some fiberglass!!! I really considered goin with a one piece but ended up with Hanneman 4" flat tops. Was actually quite pleased too.
More goodies, took off stock bumper and did the 95 grill swap. Corner light to corner light.
My FREE Beards and the Gas tank out of my step brothers XJ for the tank swap and relocation
 06-04-2012, 07:49 AM
#14
Registered User
Thread Starter
Join Date: Apr 2012
Posts: 94
Likes: 0
Received 0 Likes
on
0 Posts
So after I replaced the uber soft springs with the proper rate springs I was able to test the kit a little harder. I've been a little on the safe side until I can get my cage seats and harnesses in before I really use this truck to its potential but it does run 60-70 across the desert pretty smooth  i did notice the adverse effects of my placement for the bump stops. At their given location it seemed to make the truck rock side to side over the smaller bumps. Bigger bumps were ok but I realized hydro bumps mounted over the spindle needed to be addressed soon. I also realized I was missing something else.... Power!!!! The 3.0 v6 that toy used is gutless!!! It took a decent stretch of desert to even touch 55 so 60-70 just seemed to take too much effort to get there......
Sooooo....
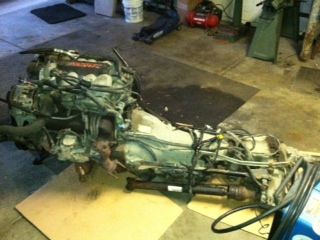
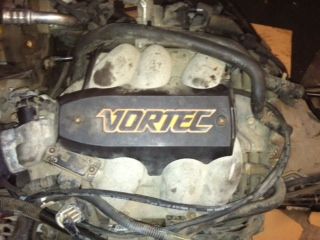
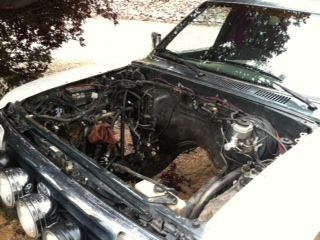
Motor swap time!!!!! After tossing many many engine possibilities around after a year of having this truck I finally chose to go with a Chevy 4.3 vortec v6. I had mentioned to a buddy that I was gonna put the 3.0 on CL he immediately offered me $600 for just the motor!!! He needed it for a truck he bought for his son that had a blown 3.0 After a day at the local pick n pull I scored a 95 CPI vortec v6, motor tranny wiring brain and all for $500!!!! Was pretty stoked and new I had my work cut out for me.
The original intention was to just drop the motor in on some custom mounts and fire off but my better judgement kicked in and went for the tear down & rebuild approach.. The wife wasn't so happy but I knew in the long run this was a more wise decision.
Tear down begins...
Quick note; when i picked out this motor the vehicle still had ALL of its recent tune up stickers on it from the local GM stealership!!! Also could tell the owner made a valid attempt the maintain the vehicle. With the being said I was pretty confident that when I opened her up I would see minimal wear
i did notice the adverse effects of my placement for the bump stops. At their given location it seemed to make the truck rock side to side over the smaller bumps. Bigger bumps were ok but I realized hydro bumps mounted over the spindle needed to be addressed soon. I also realized I was missing something else.... Power!!!! The 3.0 v6 that toy used is gutless!!! It took a decent stretch of desert to even touch 55 so 60-70 just seemed to take too much effort to get there......Sooooo....
Motor swap time!!!!! After tossing many many engine possibilities around after a year of having this truck I finally chose to go with a Chevy 4.3 vortec v6. I had mentioned to a buddy that I was gonna put the 3.0 on CL he immediately offered me $600 for just the motor!!! He needed it for a truck he bought for his son that had a blown 3.0 After a day at the local pick n pull I scored a 95 CPI vortec v6, motor tranny wiring brain and all for $500!!!! Was pretty stoked and new I had my work cut out for me.
The original intention was to just drop the motor in on some custom mounts and fire off but my better judgement kicked in and went for the tear down & rebuild approach.. The wife wasn't so happy but I knew in the long run this was a more wise decision.
Tear down begins...
Quick note; when i picked out this motor the vehicle still had ALL of its recent tune up stickers on it from the local GM stealership!!! Also could tell the owner made a valid attempt the maintain the vehicle. With the being said I was pretty confident that when I opened her up I would see minimal wear
06-05-2012, 05:17 AM
#15
Registered User
Thread Starter
Join Date: Apr 2012
Posts: 94
Likes: 0
Received 0 Likes
on
0 Posts
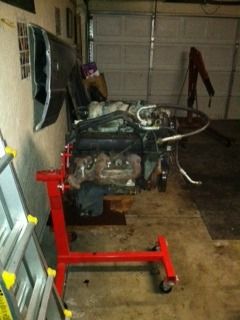
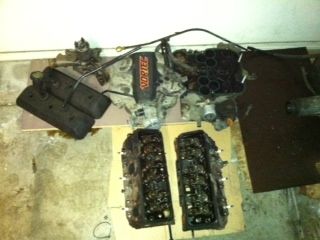
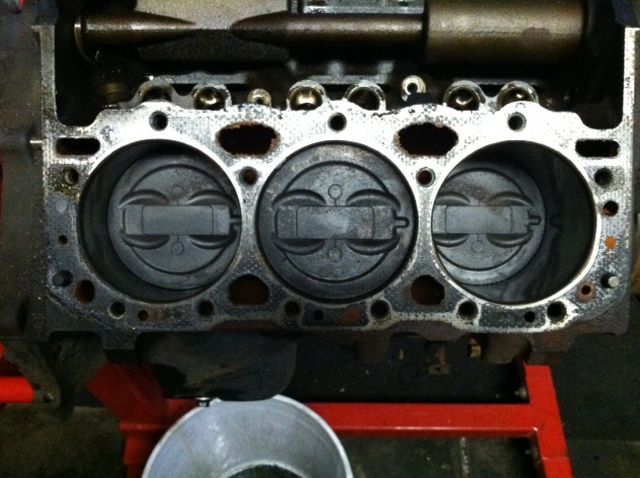
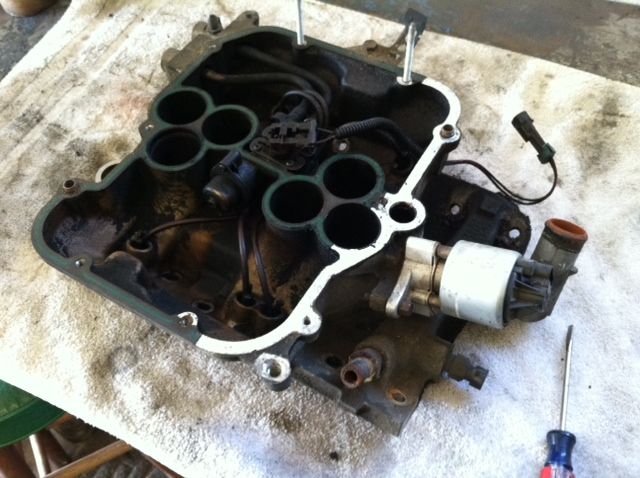
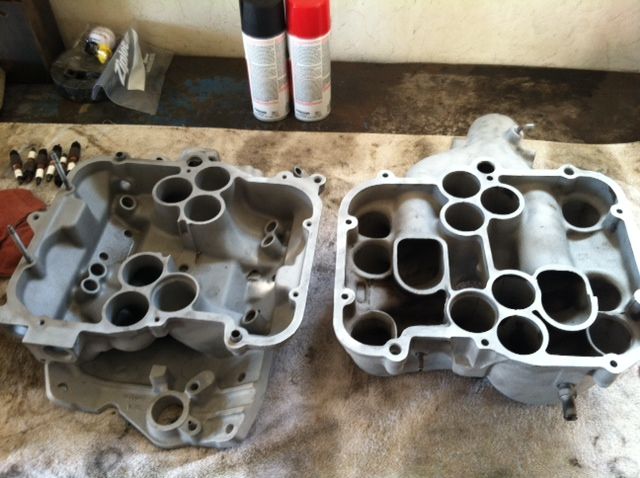
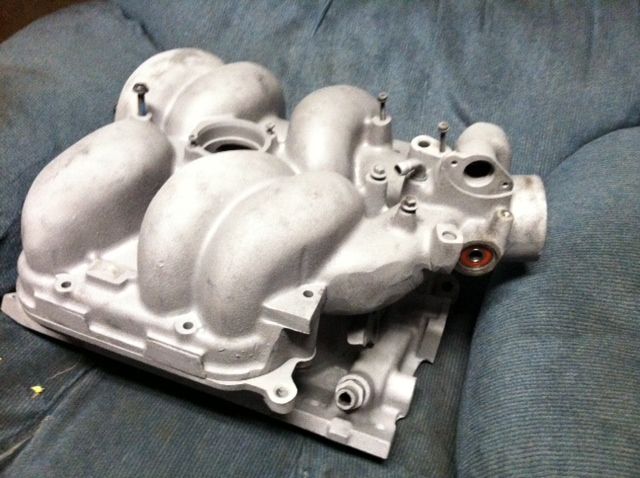
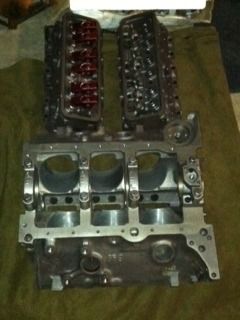
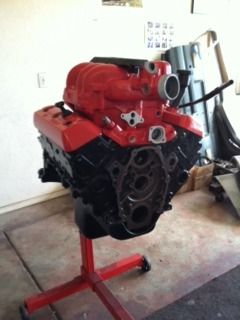
After opening up the motor I was pleased to see that there wasn't much carbon build up and the cross hatching was still visible on the cylinder walls. Intake manifold was pretty nasty so its makin a trip to the sandblaster block and head went to the machine shop for working and cleaning then time for paint.
Last edited by clarion69374; 06-05-2012 at 06:26 AM.
 06-05-2012, 10:05 AM
#17
Registered User
Thread Starter
Join Date: Apr 2012
Posts: 94
Likes: 0
Received 0 Likes
on
0 Posts
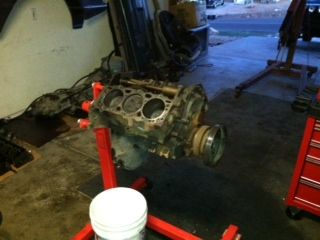
Even though the motor is ready for rebuild I'm going to hold off until after my wedding next week then I'll order my rebuild kit and custom cam. In the meantime there was still a lot of work to be done. First off old 3.0 and tranny needed to come out.
Tranny out
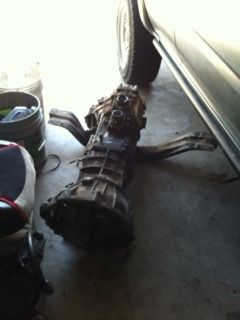
My boy Justin makin friends with the ole 3.0 before she goes

Bye bye 3.slow
Tranny out
My boy Justin makin friends with the ole 3.0 before she goes
Bye bye 3.slow
06-05-2012, 10:14 AM
#18
Registered User
Thread Starter
Join Date: Apr 2012
Posts: 94
Likes: 0
Received 0 Likes
on
0 Posts
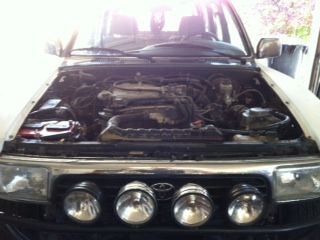
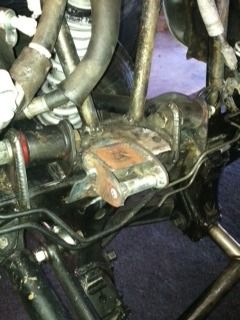
Hello Chevy 4.3
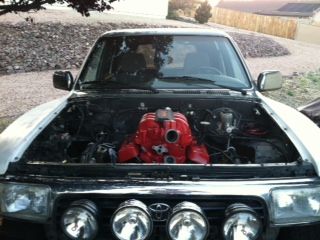
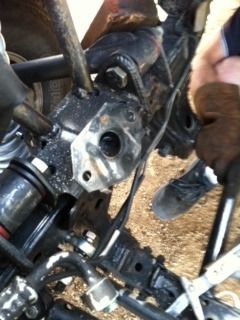
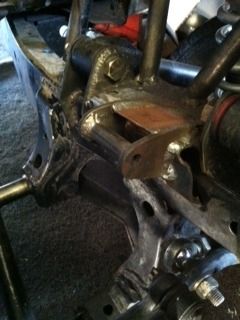
Since I didn't hav any of the guts in the block yet it made it very easy to mock up the new motor mounts but first the stock mounts needed to be cut off. Here's where I call on my Justin again. He's always up to the task when it comes to cutting off factory BS
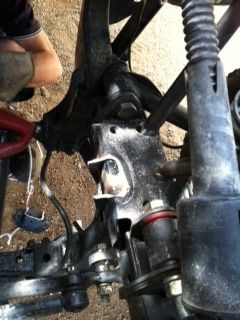
Since I didn't hav any of the guts in the block yet it made it very easy to mock up the new motor mounts but first the stock mounts needed to be cut off. Here's where I call on my Justin again. He's always up to the task when it comes to cutting off factory BS
 06-05-2012, 12:35 PM
#20
Registered User
Thread Starter
Join Date: Apr 2012
Posts: 94
Likes: 0
Received 0 Likes
on
0 Posts
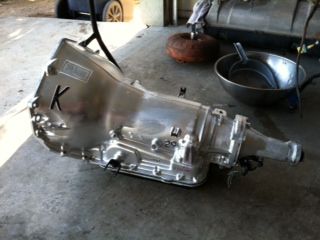
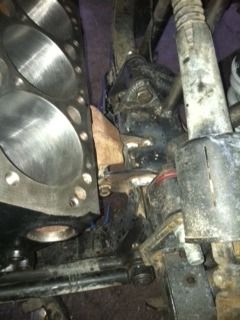
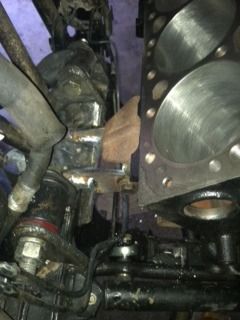
Once I had the motor mounts finished I was on a roll so Justin and I threw the block in AGAIN and got our hands on a bare 4l60e case to mock up the tranny mount. Originally I was gonna build a custom cmember but once we had the case bolted up it came so super close to the stock mount that I decided to modify the stock cmember since I'm gettin close to crunch time. Sooo I took off the stock mount and used some 1/4" plate to mock up the new mount
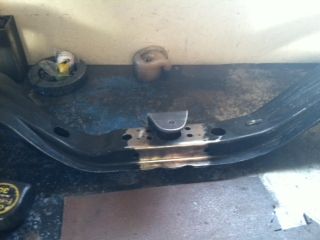
Beefy

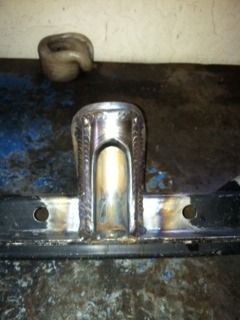
Beefy


