91 toyota ext-cab sr5 build

 03-17-2014, 03:29 PM
#42
Registered User
Thread Starter
Join Date: Jan 2014
Location: colorado
Posts: 153
Likes: 0
Received 0 Likes
on
0 Posts
ok time for some pictures and a write up
ok so i have heard that alot of people have had there filters after the compressor melt so i wanted to mount it out of the engine bay and some place safe a lot of people have mounted it by the bump stop but i had no room so i mounted it to two of the bottom cross rails for my bed under my bed
i then ran a line from there to the back of my truck for the bumper mount (once i build the bumper )
)
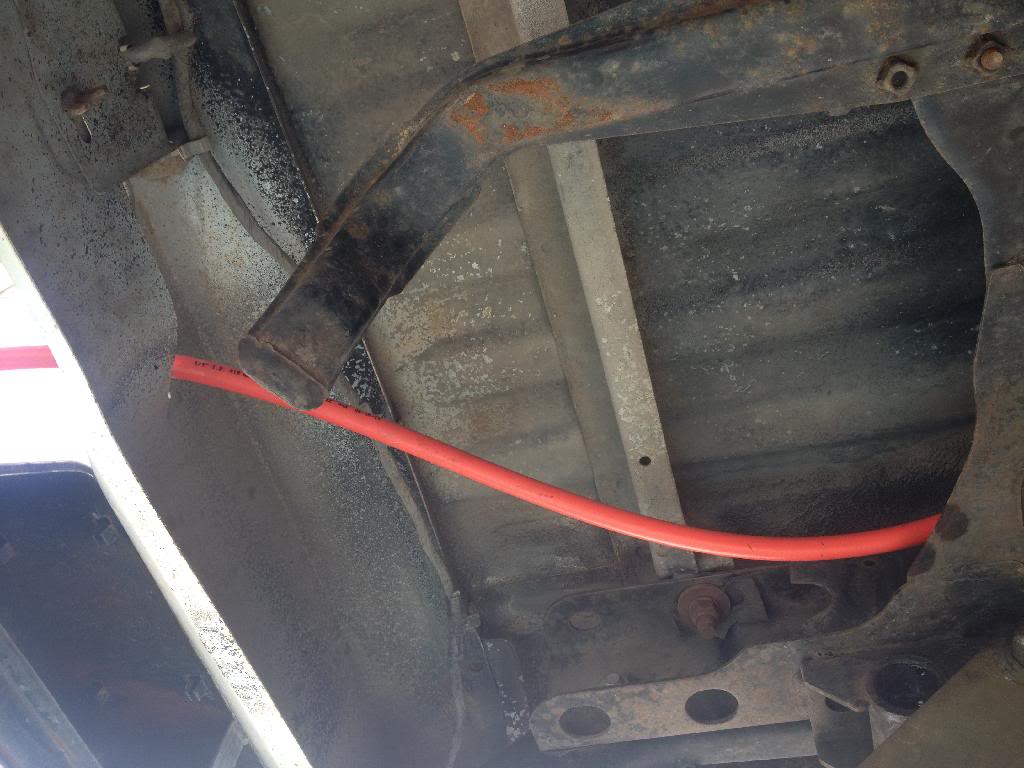
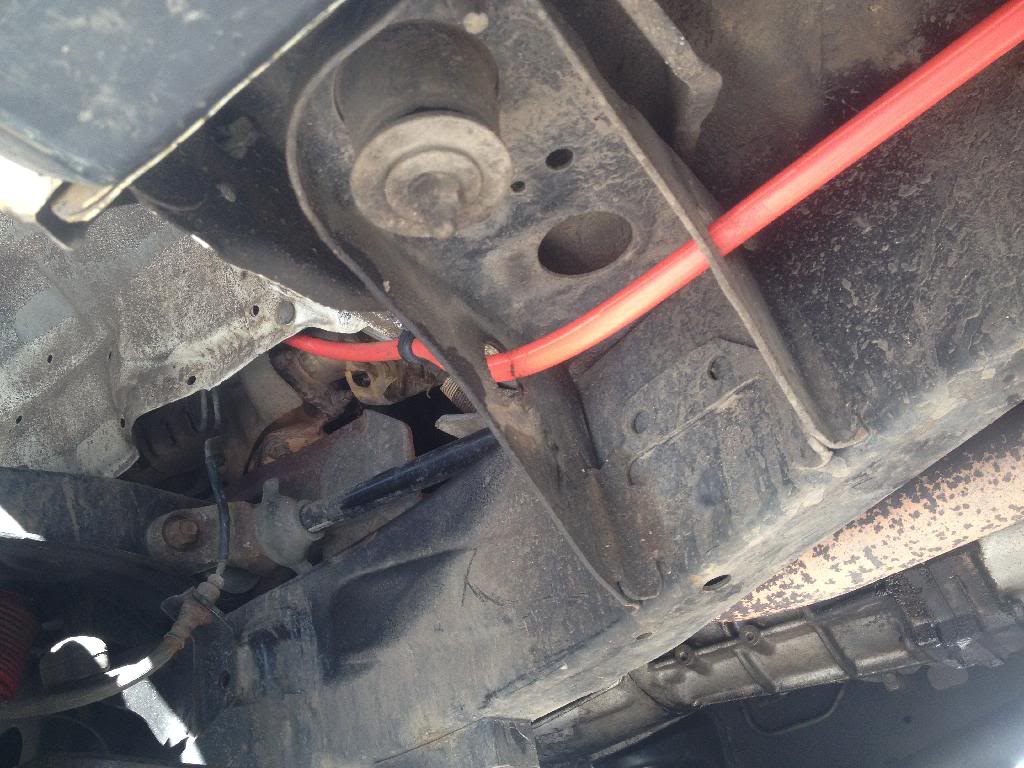
now going to the engine bay (right hand hose)
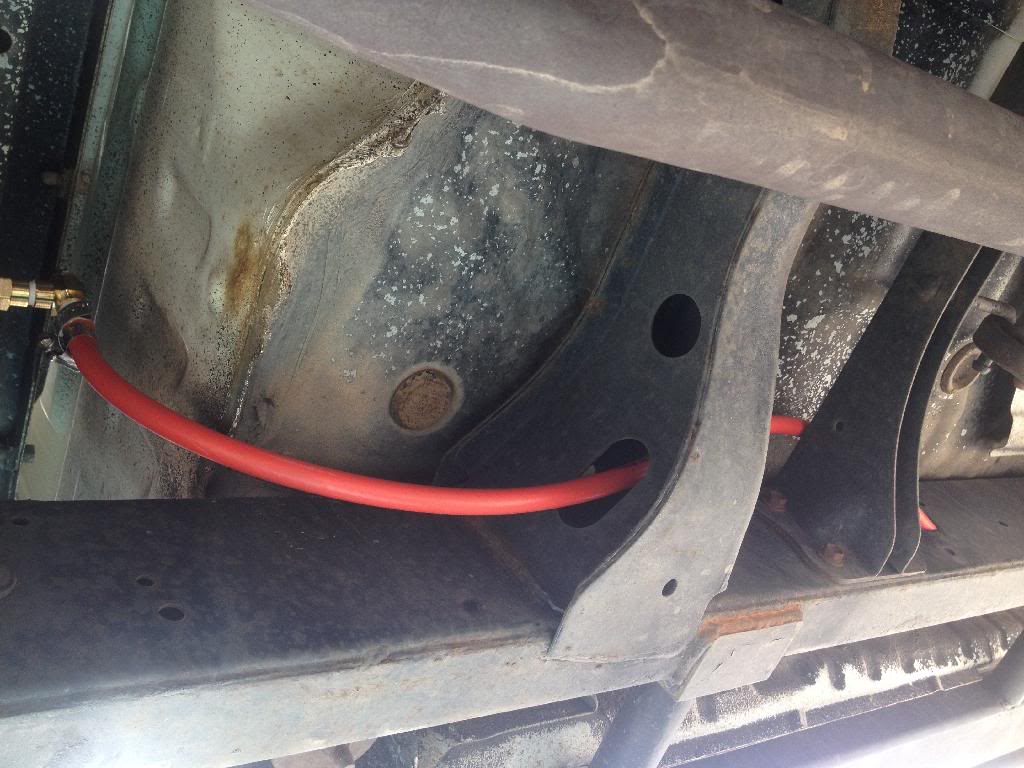
right under the cab and bed seam through a hole then through the frame to the other side
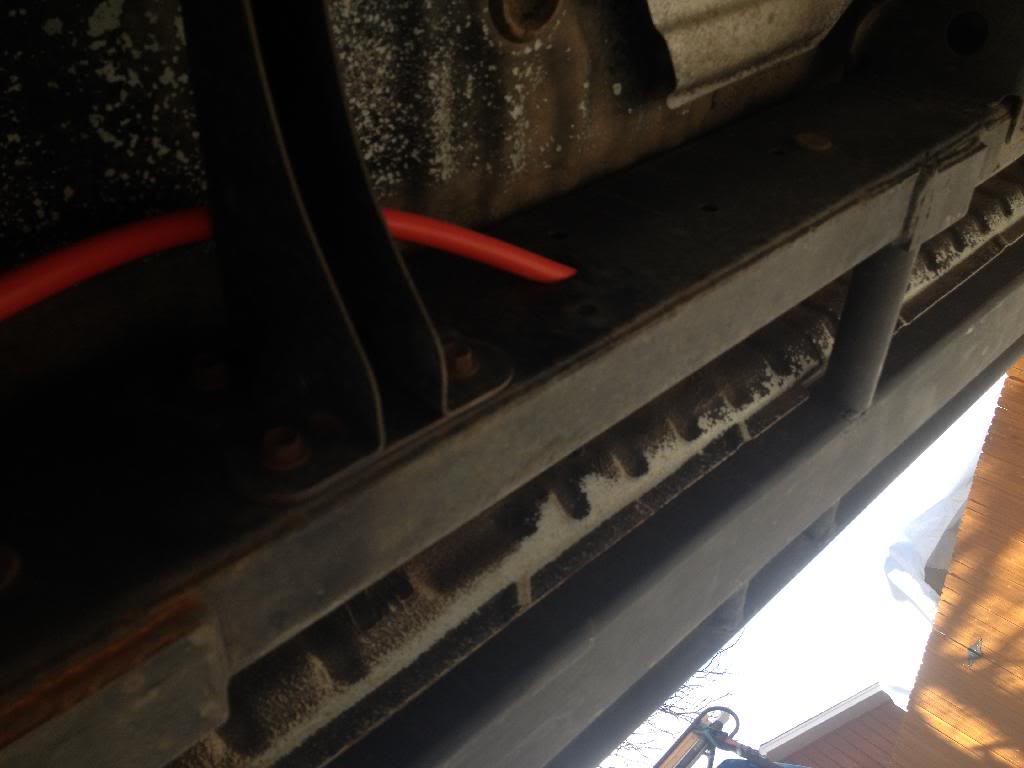
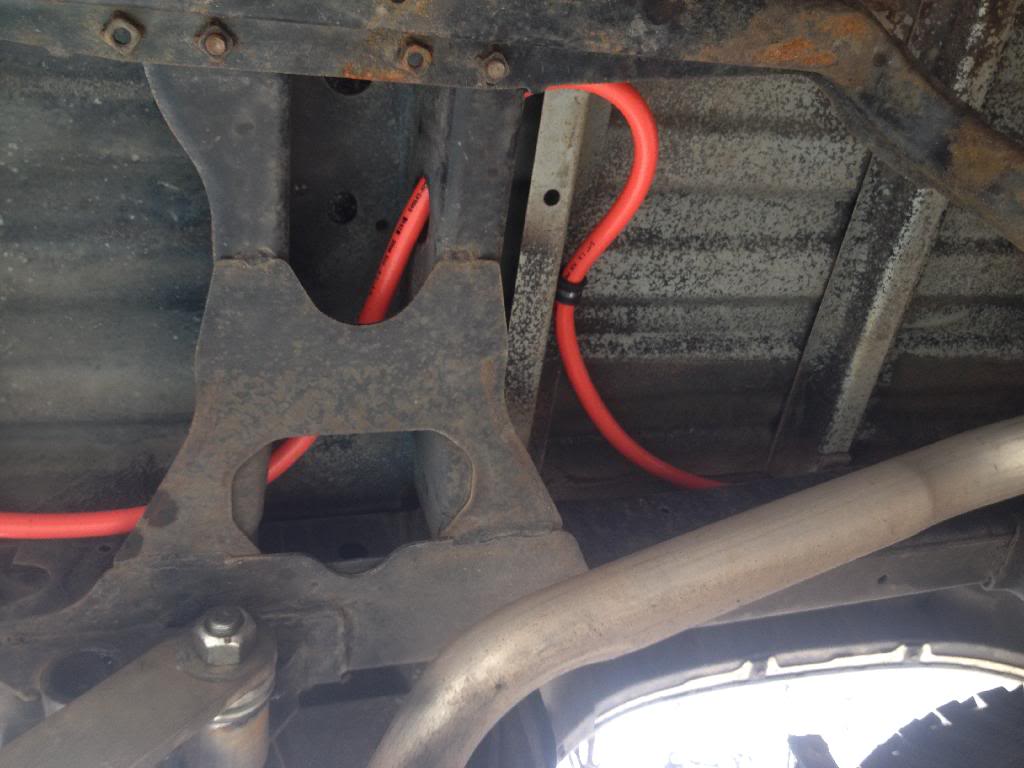
 this one the left hand side is the outer side and the right is the inside of my frame
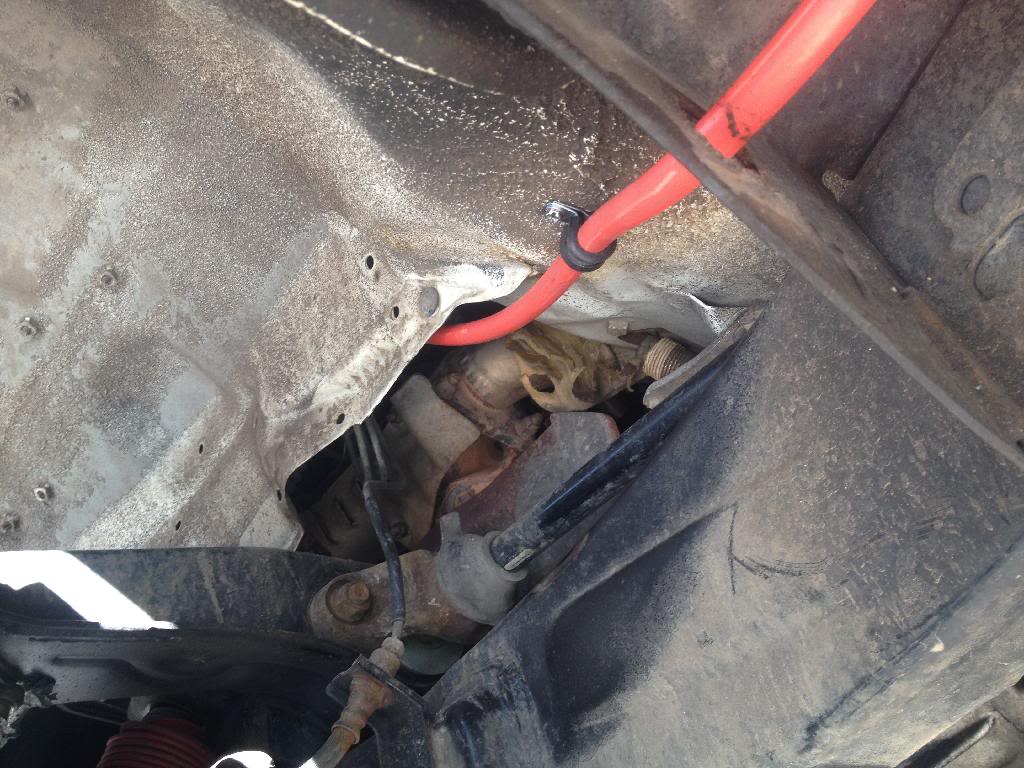
another bracket right after the driver front tire.
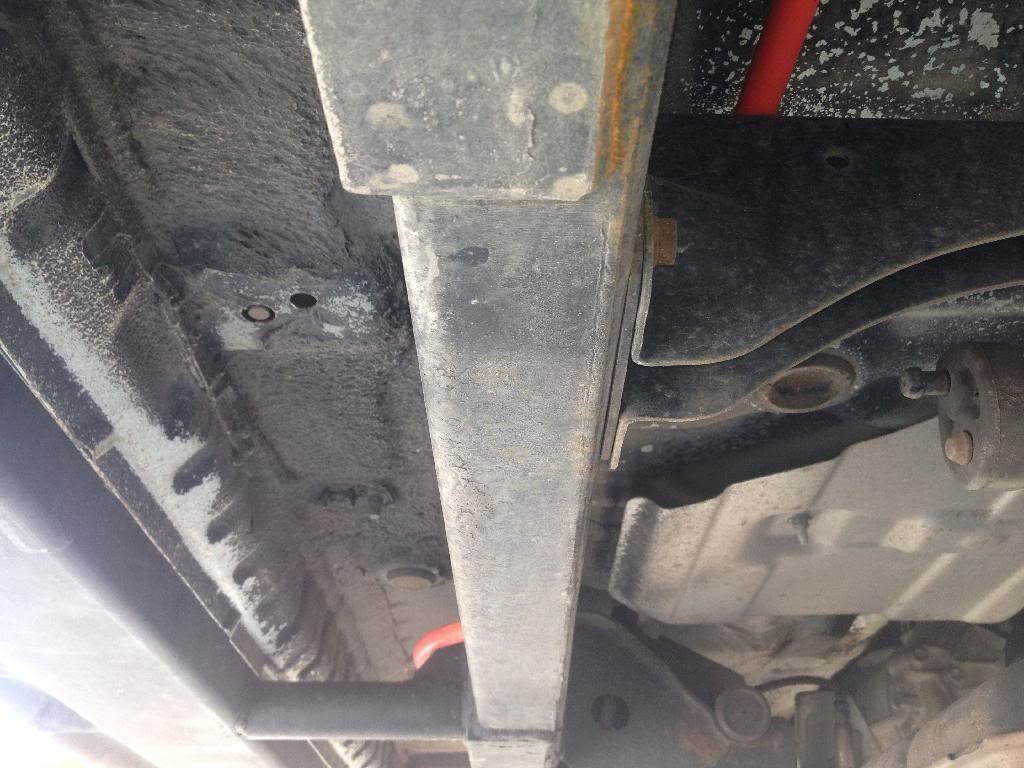
 and then into the engine bay. the hose holders i got from ace ant then they are secured with sheet metal screws with high strength lock tight
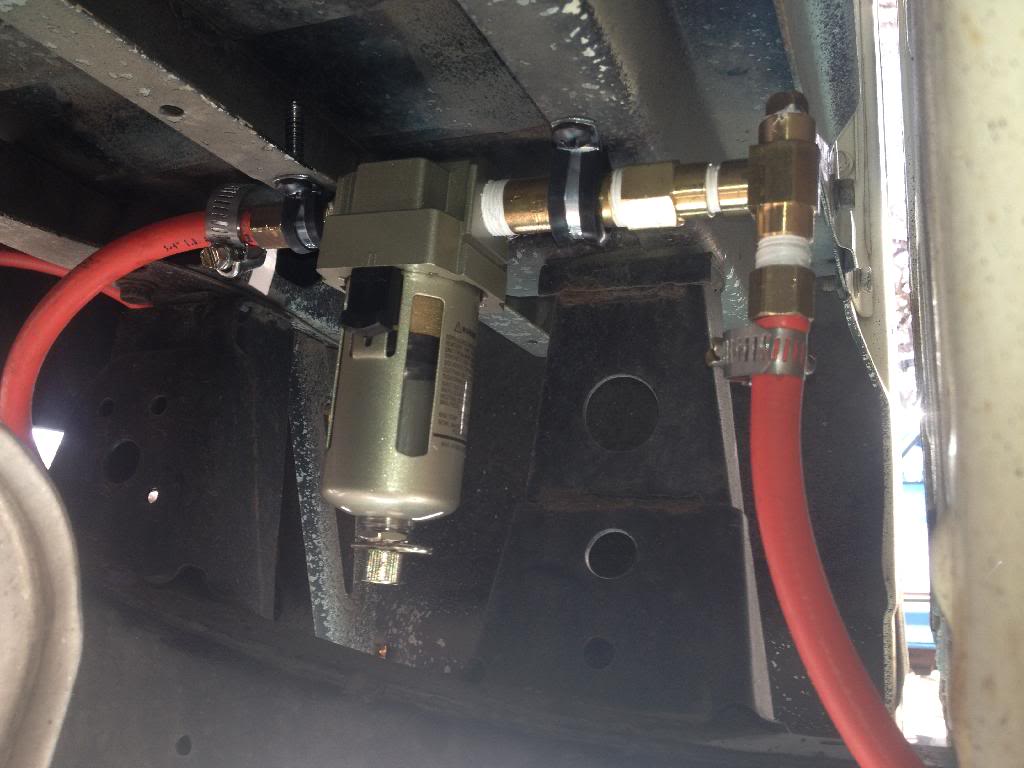
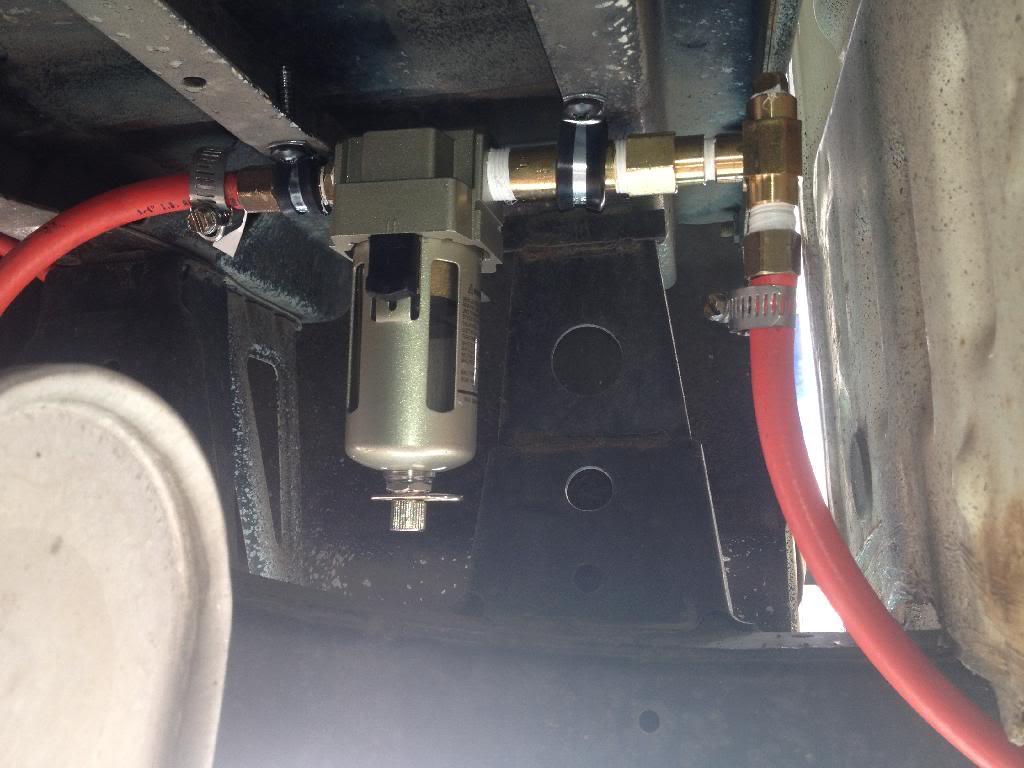
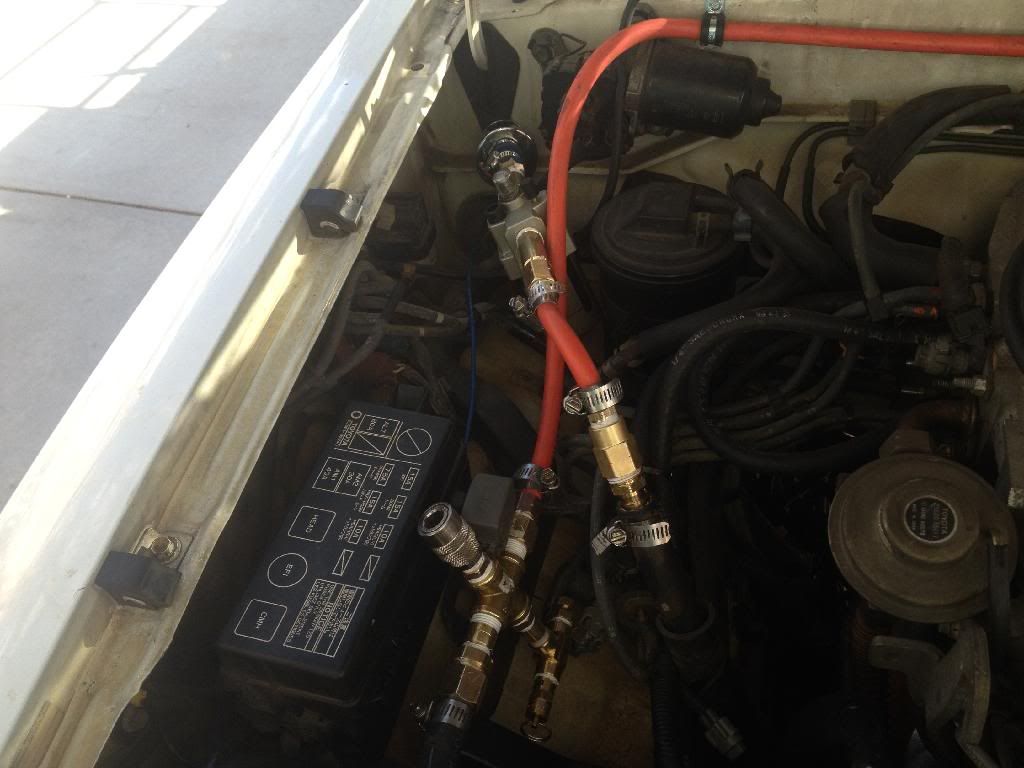
then around the booster and across the back of the bay
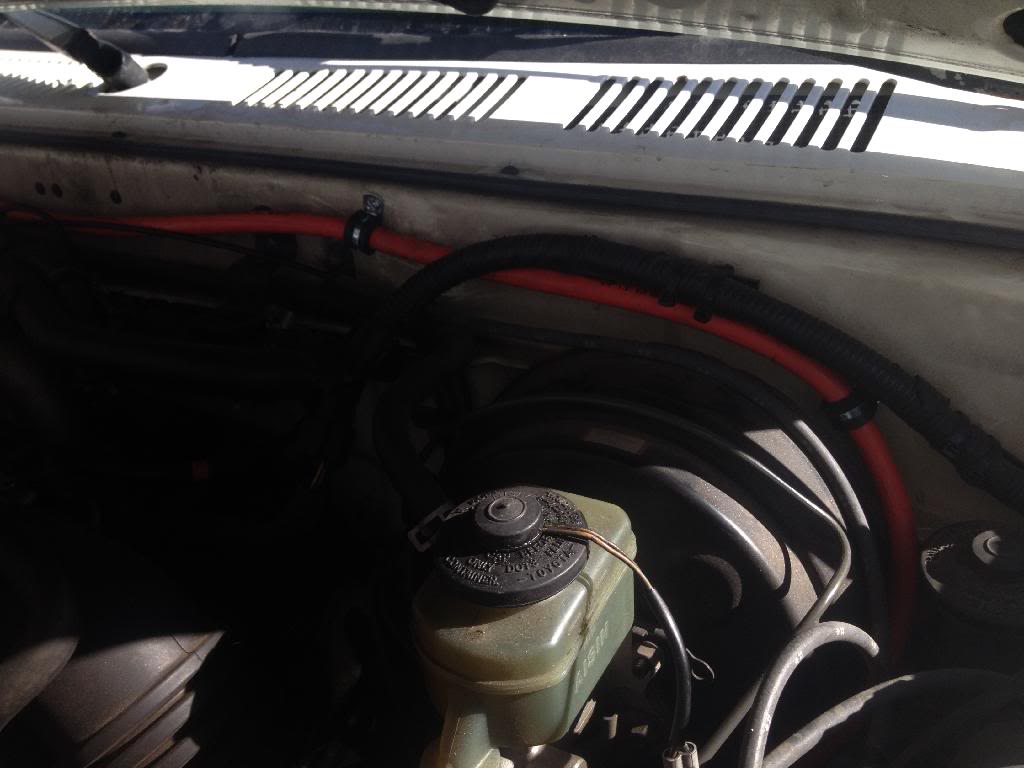
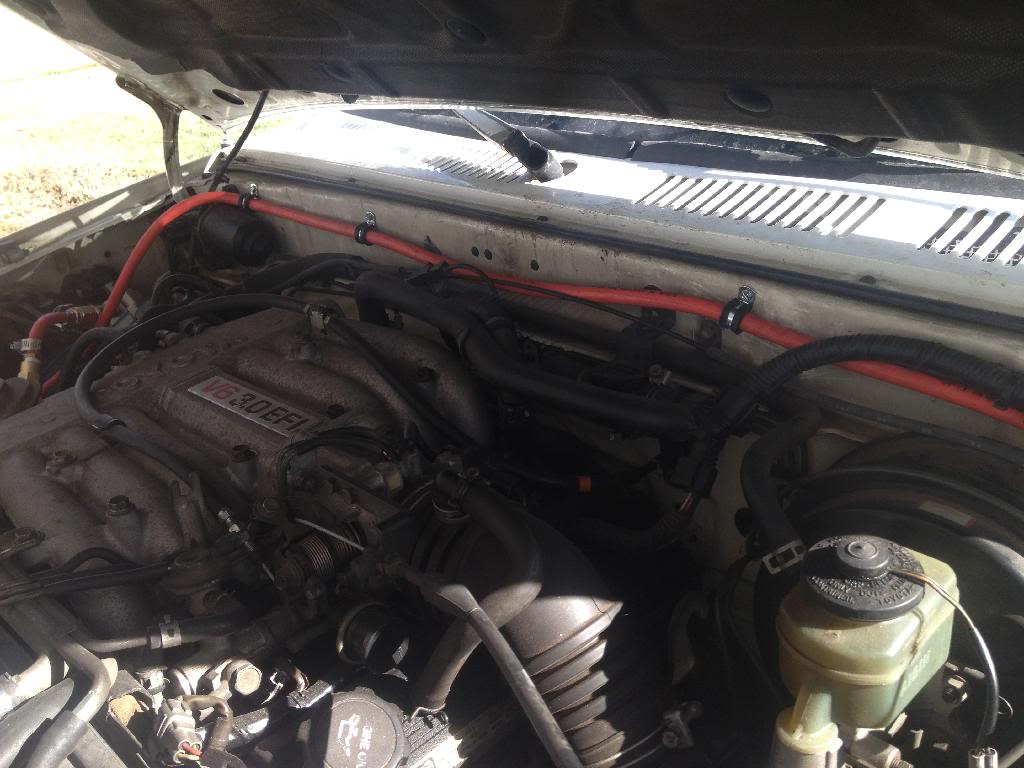
and down to the mess of fittings that has a 150 psi pop valve and a drain cock. the coupler is just a temp because ti is before the filter it will have oil running through that line. i will replace it with a viair pressure switch later.
then that is all connected to the a/c compressor line that came off the ac condenser in front of the radiator.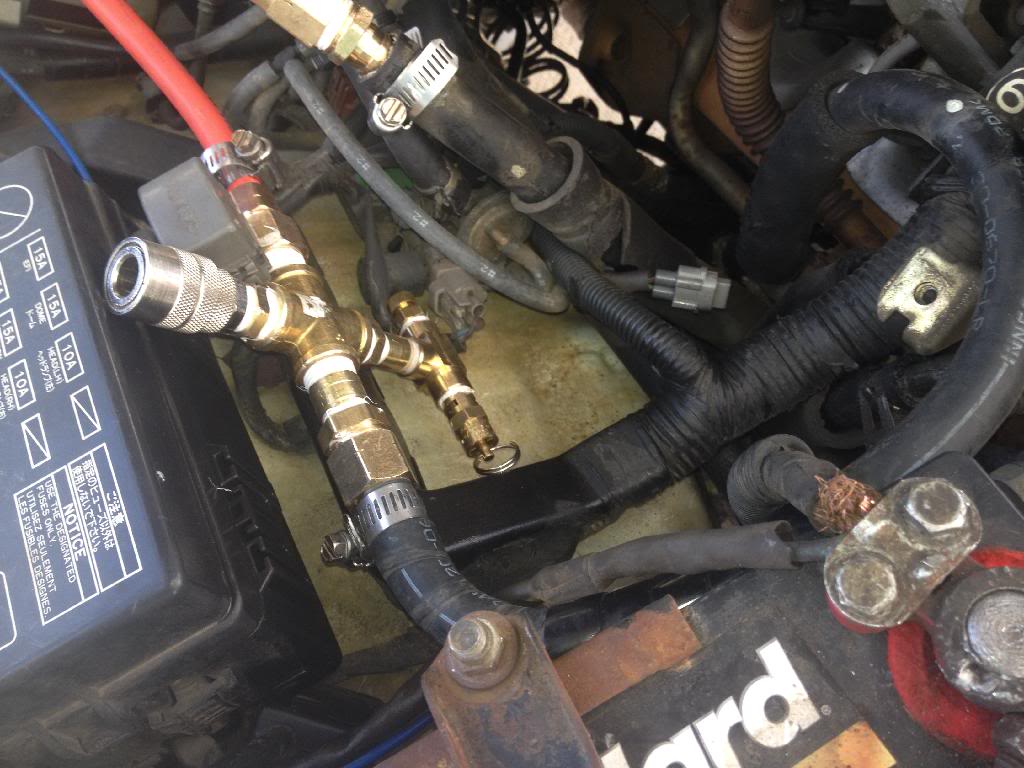
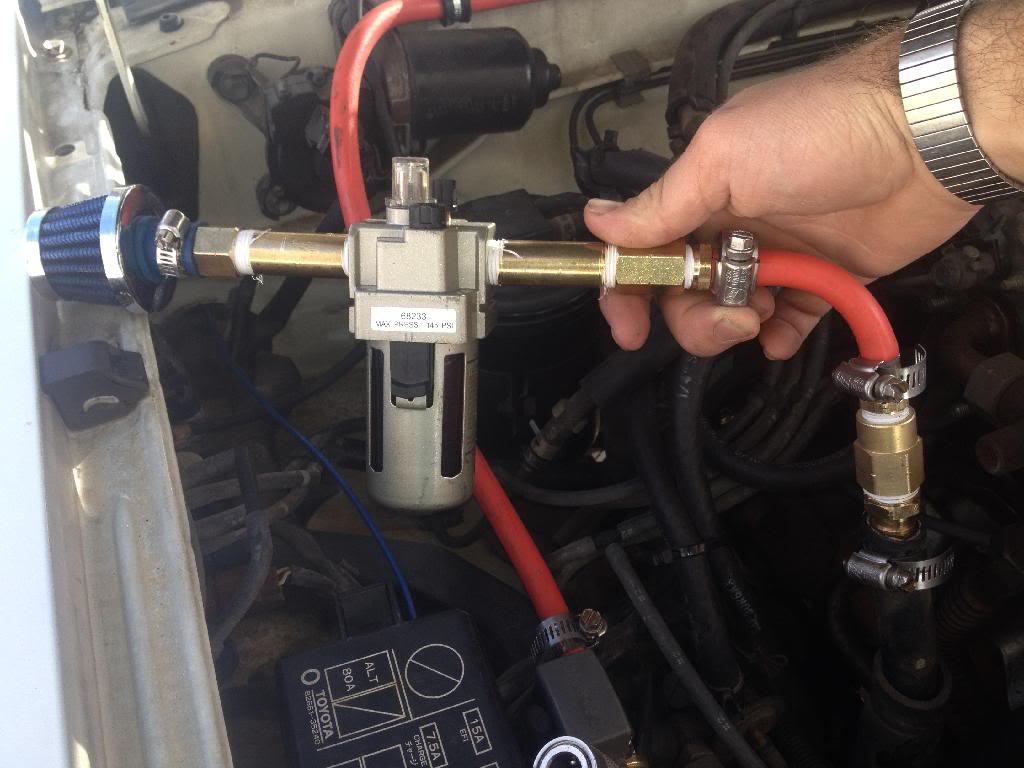
now the coming in line i got a little filter from napa as a filter then along with the filter i got the oiler from harbor freight for 10$ a piece then on to the ac compressor line that was running from the cab
ok wiring was easy to i took the positive wire from my cigarette lighter and spliced in a line for the possitive on my temp switch and negitave on switch to the compressor line (witch by the way there is only one wire coming from the compressor and you do not know how excited that made me because i hate wiring things) i fed it through the gasket in the corner of the cab on the passenger side
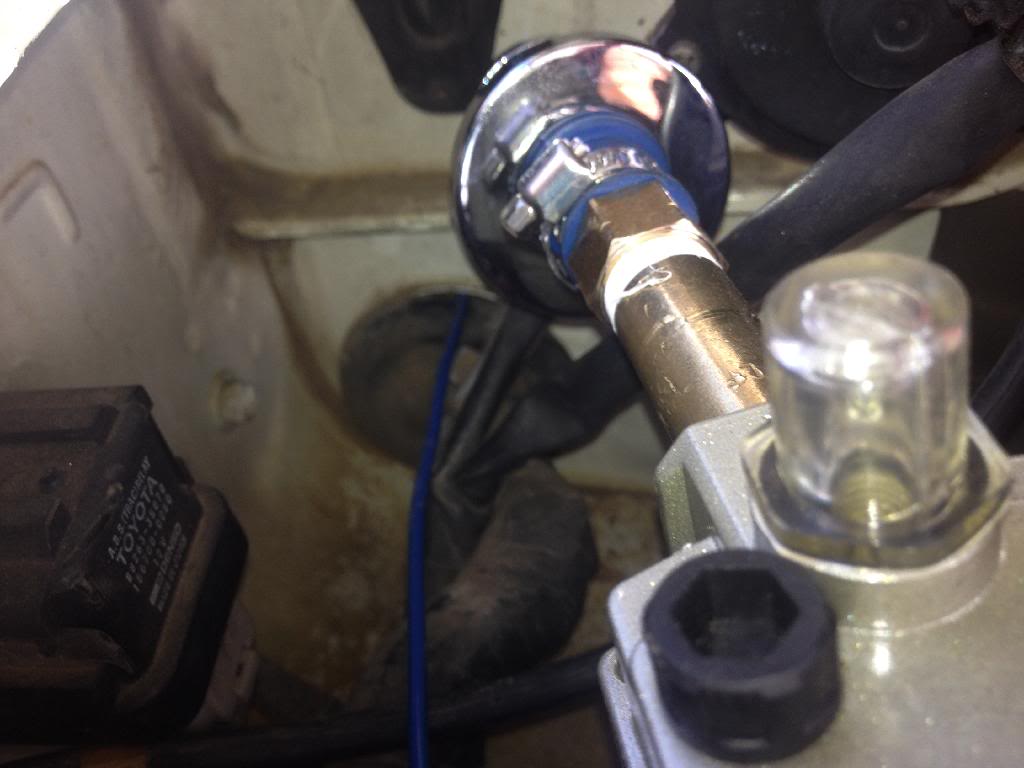 (blue wire) and connected it to the compressor wire
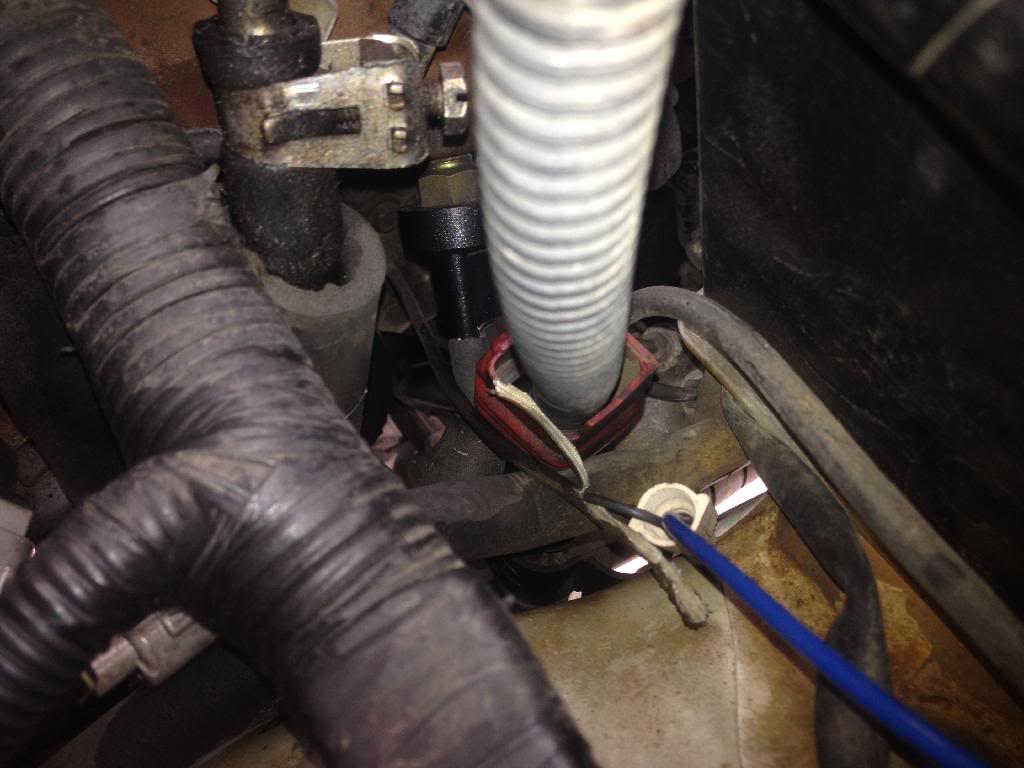
and voila an on board air system.
here is the temporary switch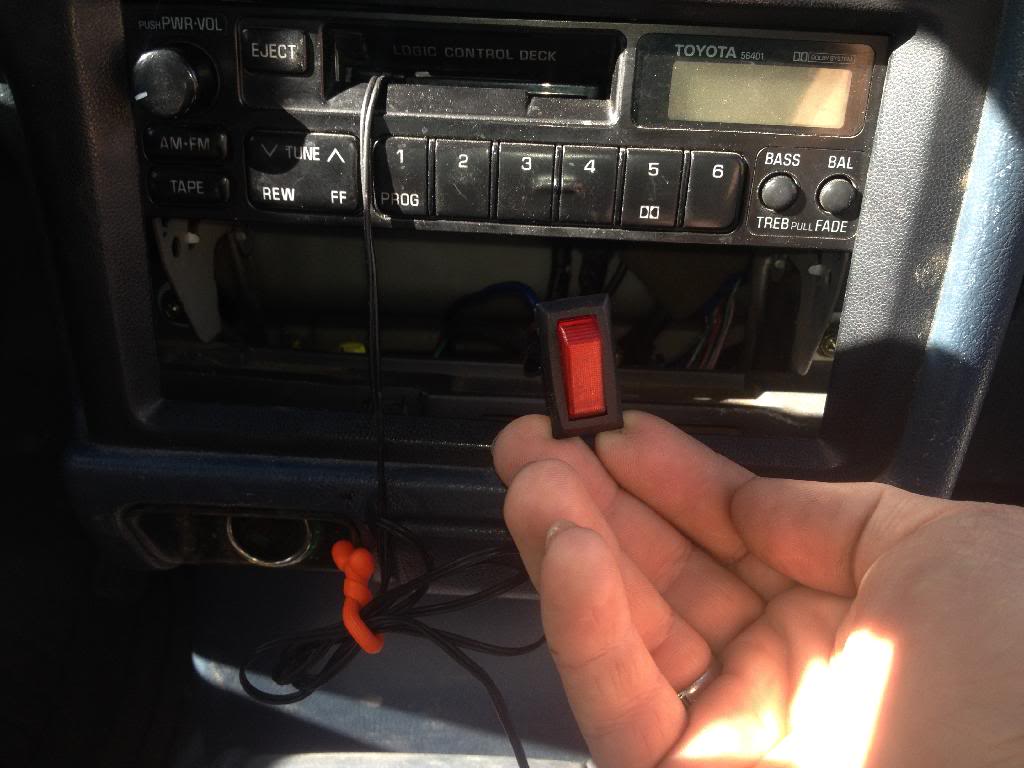 that location also was that little cubby that will be my new switch panel i just need to design
and cut out on the laser cutter at my school.
here is the switch i ordered from otrattw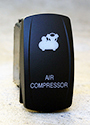
and the color that i am getting the lowwer will be on when the truck is on and the top will be lit up when the switch is turned on.
hope you like and hope you will do this if you have an old ac system thats not cold any more.
jake,
ok so i have heard that alot of people have had there filters after the compressor melt so i wanted to mount it out of the engine bay and some place safe a lot of people have mounted it by the bump stop but i had no room so i mounted it to two of the bottom cross rails for my bed under my bed

i then ran a line from there to the back of my truck for the bumper mount (once i build the bumper
) 


now going to the engine bay (right hand hose)

right under the cab and bed seam through a hole then through the frame to the other side


 this one the left hand side is the outer side and the right is the inside of my frame
 another bracket right after the driver front tire.
 and then into the engine bay. the hose holders i got from ace ant then they are secured with sheet metal screws with high strength lock tight
then around the booster and across the back of the bay


and down to the mess of fittings that has a 150 psi pop valve and a drain cock. the coupler is just a temp because ti is before the filter it will have oil running through that line. i will replace it with a viair pressure switch later.
then that is all connected to the a/c compressor line that came off the ac condenser in front of the radiator.

now the coming in line i got a little filter from napa as a filter then along with the filter i got the oiler from harbor freight for 10$ a piece then on to the ac compressor line that was running from the cab


ok wiring was easy to i took the positive wire from my cigarette lighter and spliced in a line for the possitive on my temp switch and negitave on switch to the compressor line (witch by the way there is only one wire coming from the compressor
and you do not know how excited that made me because i hate wiring things) i fed it through the gasket in the corner of the cab on the passenger side (blue wire) and connected it to the compressor wire
and voila an on board air system.
here is the temporary switch
 that location also was that little cubby that will be my new switch panel i just need to design
and cut out on the laser cutter at my school.
here is the switch i ordered from otrattw

and the color that i am getting the lowwer will be on when the truck is on and the top will be lit up when the switch is turned on.

hope you like and hope you will do this if you have an old ac system thats not cold any more.
jake,
 wish i could 3D print the damn thing in metal

 03-20-2014, 04:38 PM
#46
Registered User
Thread Starter
Join Date: Jan 2014
Location: colorado
Posts: 153
Likes: 0
Received 0 Likes
on
0 Posts
Ok I know this is not a ask questions thread but I want to add an air tank to the OBA and I want to mount it in between the gas tank and exhaust. Then tank is aluminum, and will be around two inches away from the closest part of the exhaust. Any reasons why I can't do this I know heat but I do not think its that much.
I know heat but I do not think its that much.
03-21-2014, 07:39 PM
#47
Registered User
Thread Starter
Join Date: Jan 2014
Location: colorado
Posts: 153
Likes: 0
Received 0 Likes
on
0 Posts
so i got the bumper mock-up done today and it looks really great i think its funny it fits perfectly over my original bumper

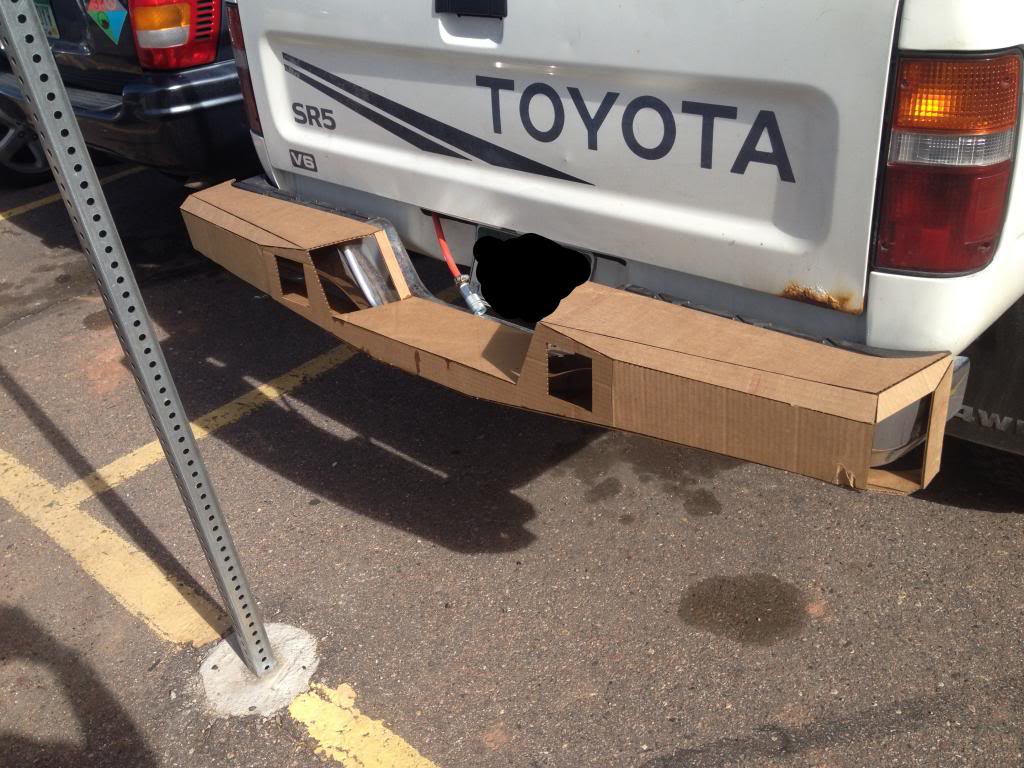
it even matches up to my frends jeep really well
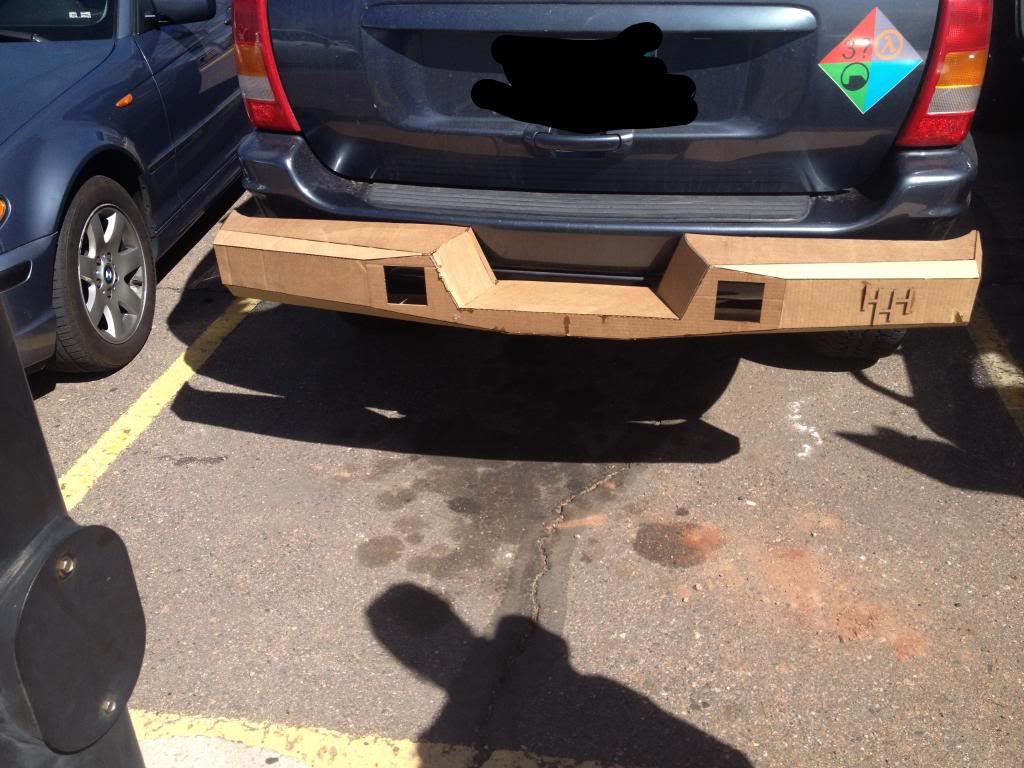
and it looks really great i think its funny it fits perfectly over my original bumper 

it even matches up to my frends jeep really well
 03-24-2014, 08:46 PM
#48
Registered User
Thread Starter
Join Date: Jan 2014
Location: colorado
Posts: 153
Likes: 0
Received 0 Likes
on
0 Posts
Hi guys sorry i have not been on here this last week.
We went playing in the mountains this weekend nothing hard we went to slaughter house gulch it was fun we had to turn back though because there was a jeep and a ram stuck in the middle of the trail and the guys said they had it under control but thats when they where trying to figure out why the recovery vehicle they brought out did not have a working winch!!
While i was Playing in the mountains though i received my switch for the OBA and got that installed over the weekend and will try and remember to get pics tomorrow and also i am starting on the bumper build tomorrow i have to clean a lot of rust off the plate before i can start cutting out parts and start welding so it could be a process. Ill try and post progress and get some where with it tomorrow
03-25-2014, 10:52 AM
#50
Registered User
iTrader: (1)
Join Date: Nov 2012
Location: Elko NV, at the foot of the Rubys
Posts: 358
Likes: 0
Received 0 Likes
on
0 Posts
Great job on the OBA. I knew it had to be one wire, just couldn't remember!
I like the idea of the cubby hole switch holder. Good place to put them!
I like the idea of the cubby hole switch holder. Good place to put them!
03-25-2014, 11:36 AM
#51
Registered User
Thread Starter
Join Date: Jan 2014
Location: colorado
Posts: 153
Likes: 0
Received 0 Likes
on
0 Posts

The intake is a 5/8 inch hose but same concept.

I like it we went wheeling and I know I aired down to 8 and I aired mine and2 other rigs up to 35 psi in about 15 minutes with the truck idling at 750 rpm
 so I love this build!!!
Last edited by Jakesr5; 03-25-2014 at 03:27 PM.
03-25-2014, 11:42 AM
#52
Registered User
Thread Starter
Join Date: Jan 2014
Location: colorado
Posts: 153
Likes: 0
Received 0 Likes
on
0 Posts
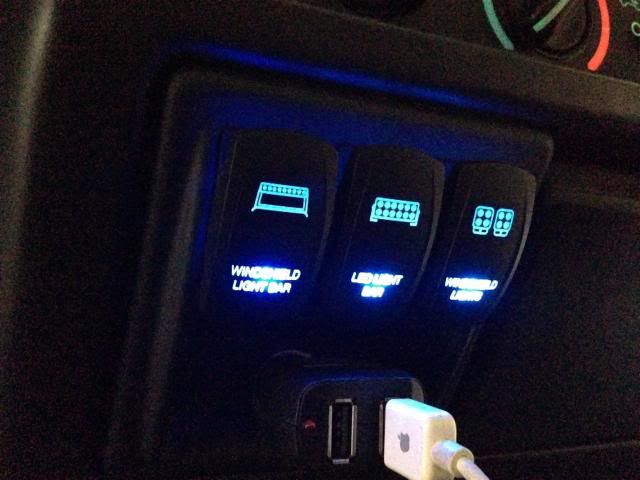
I wired it to the dash lights so the bottom is on with the running lights and both top and bottom lights can be dimmed
Here it is with just the "running" light

And with the compressor on

And I have started to bumper build (kinda) I have to take a lot of rust off the plate first but I am almost done
 03-26-2014, 05:19 PM
#53
Registered User
Thread Starter
Join Date: Jan 2014
Location: colorado
Posts: 153
Likes: 0
Received 0 Likes
on
0 Posts
well after cutting about 4 feet of metal out for the bumper and going through 5 disks i had to find an other way. fortunately i fount a rental store that rents a plasma cutter so i rented that and got all the pieces cut out today and know i have a bumper....
in peices...
on the plate.....
outside ...
while its raining.....

hope tomorrow is good so i can play.
jake,
in peices...
on the plate.....
outside ...
while its raining.....
hope tomorrow is good so i can play.
jake,


 04-03-2014, 06:11 PM
#55
Registered User
Thread Starter
Join Date: Jan 2014
Location: colorado
Posts: 153
Likes: 0
Received 0 Likes
on
0 Posts
Ok so I have not been able to get any welding done on the bumper because of winter I mean spring. But I did get my air hook up set up and finished today.
I mounted it in the bed under the rails on the bed rack so that it would be out of the way.
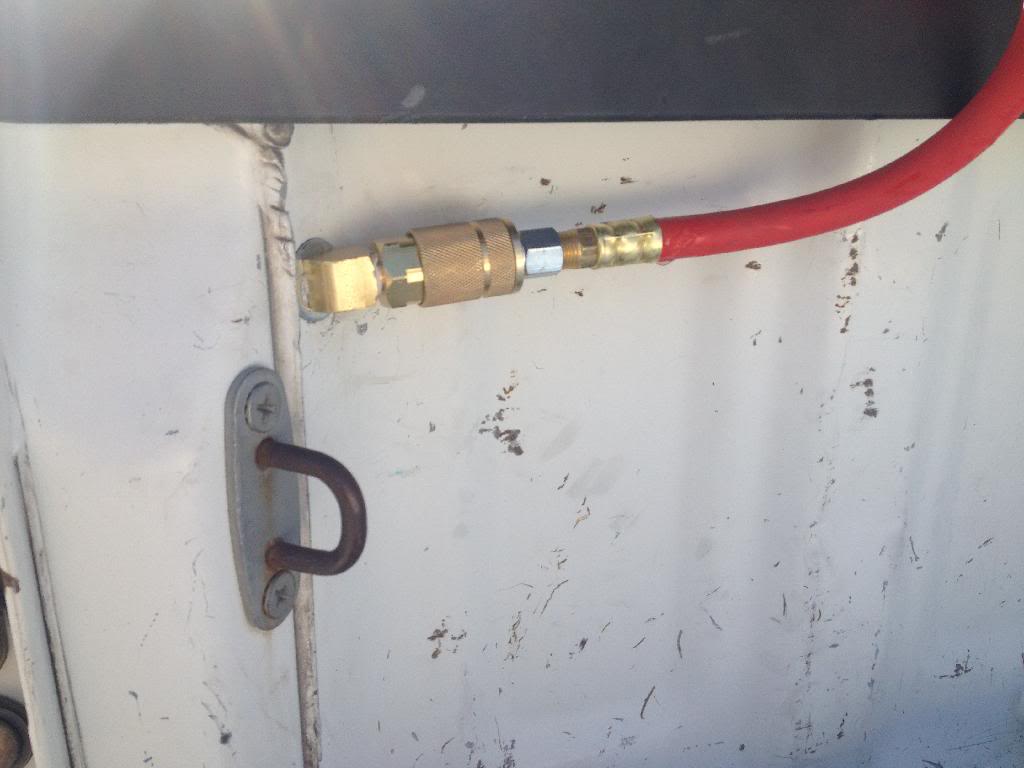
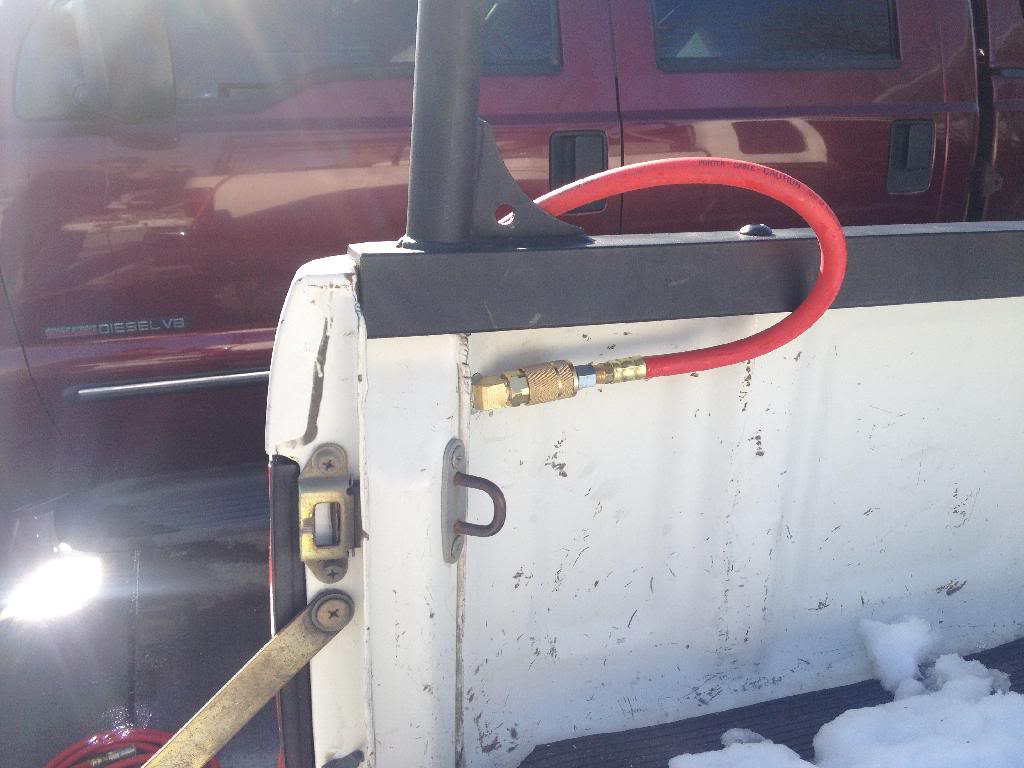 to does not stick out past my bed rails so water should not get on it
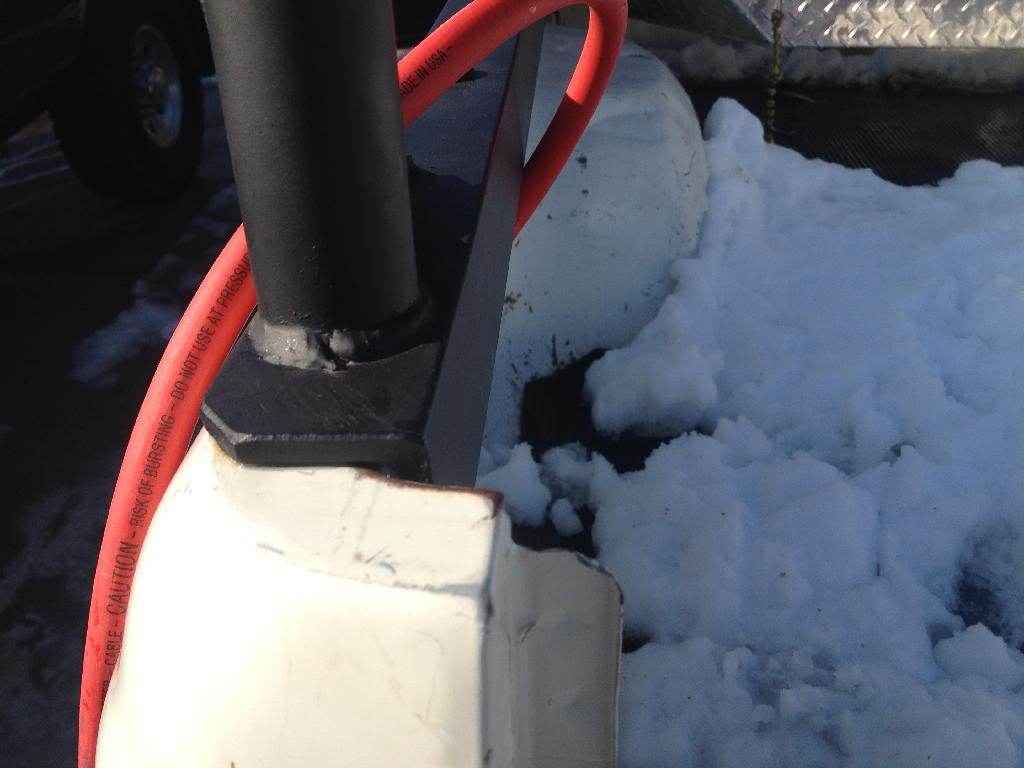
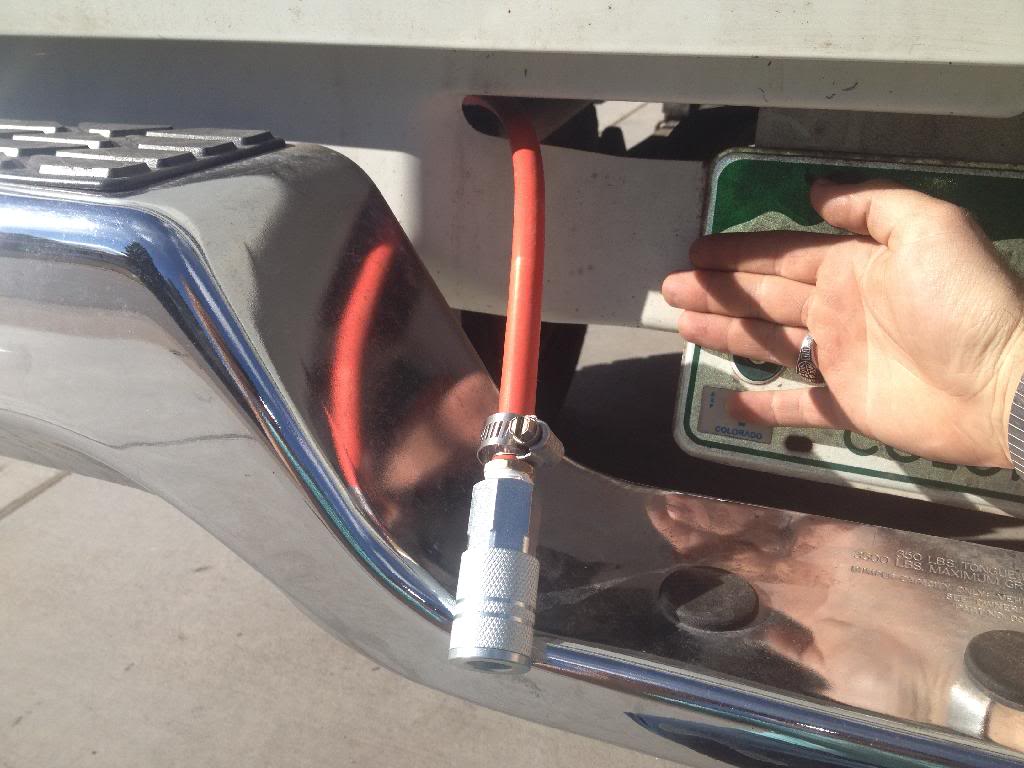
It was a 1/2 inch hole in the metal
What you can see is a 45 deg angle I had to get on amazon because no one has it and revived the package and it has grainger on it so if you need one that could be a place to look too. Then a 3/8 air chuck and my air hose.
On the inside which you can get to buy removing the tail light is a 90 deg angle then a 1/4 inch barb connected to the air hose.
I also got a viair pressure switch with out relay and was sealed and got that installed in the engine bay. It comes on at 110 and goes off at 145 so I'm happy next step is an air tank.
Also,
Quick question the compressor becomes more noticeably loud when it gets to pressure is this ok for it?
I mean spring. But I did get my air hook up set up and finished today.I mounted it in the bed under the rails on the bed rack so that it would be out of the way.

 to does not stick out past my bed rails so water should not get on it
It was a 1/2 inch hole in the metal
What you can see is a 45 deg angle I had to get on amazon because no one has it and revived the package and it has grainger on it so if you need one that could be a place to look too. Then a 3/8 air chuck and my air hose.
On the inside which you can get to buy removing the tail light is a 90 deg angle then a 1/4 inch barb connected to the air hose.
I also got a viair pressure switch with out relay and was sealed and got that installed in the engine bay. It comes on at 110 and goes off at 145 so I'm happy next step is an air tank.
Also,
Quick question the compressor becomes more noticeably loud when it gets to pressure is this ok for it?
04-05-2014, 09:09 AM
#56
Registered User
Thread Starter
Join Date: Jan 2014
Location: colorado
Posts: 153
Likes: 0
Received 0 Likes
on
0 Posts
We'll I got to start playing with the bumper last night and go half of the other side welded up then I took the angle grinder to my nuckle and had to get it stitched up last night.
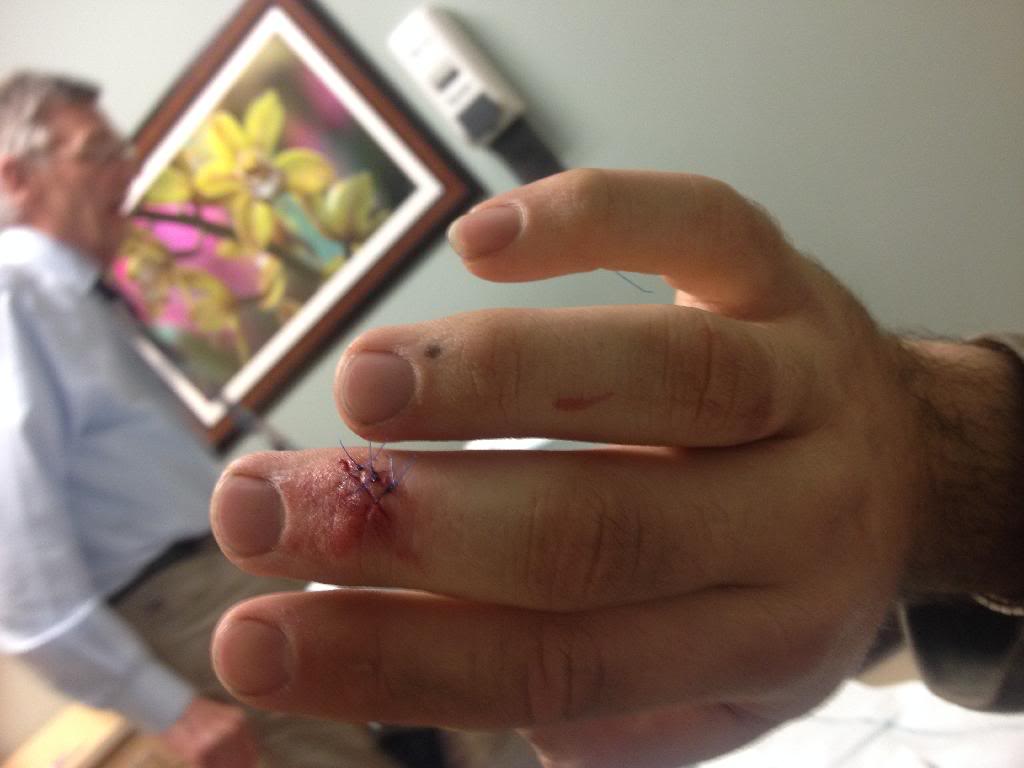
The only bad thing is that my parents won't let me play with the bumper because the doctor said it to keep it still for 4 days so this weekend is shot.

The only bad thing is that my parents won't let me play with the bumper because the doctor said it to keep it still for 4 days so this weekend is shot.
04-05-2014, 05:59 PM
#58
Registered User
iTrader: (1)
Join Date: Nov 2012
Location: Elko NV, at the foot of the Rubys
Posts: 358
Likes: 0
Received 0 Likes
on
0 Posts
Ow! Hope you get it healed soon man. I was playing with the welder and grinder all day today, and there were a few close calls. It's all in the name of fabrication! 
04-05-2014, 08:06 PM
#59
Registered User
Thread Starter
Join Date: Jan 2014
Location: colorado
Posts: 153
Likes: 0
Received 0 Likes
on
0 Posts
yah they said this would hurt i have not felt any pain from it all day. defanitly am getting exsited to get this project going further because it is just to cool to stop. yah the safety glasses and gloves are a must but i had my welding golves to my friend because i was teaching him how to weld more. and i guess thin leather gloves are not the idea thing to use with an angle grinder 
any ways i was able to snap some pictures of some progress

not the best pic but some progress and an idea of the other side
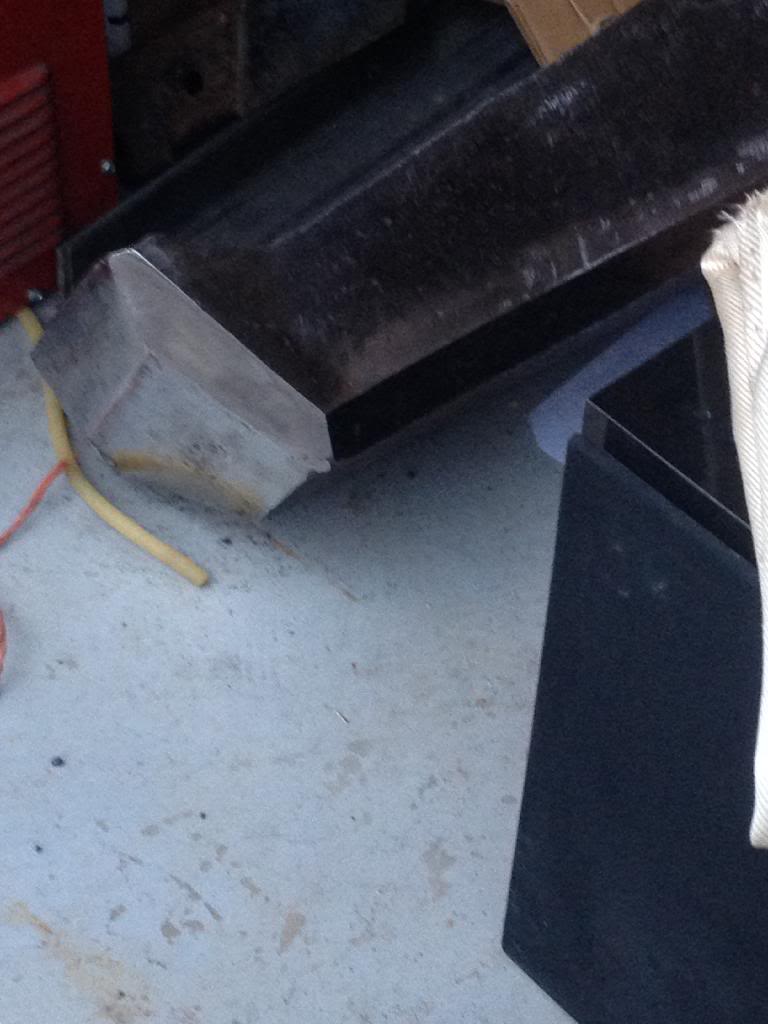
side that got me but it sure looks shiny
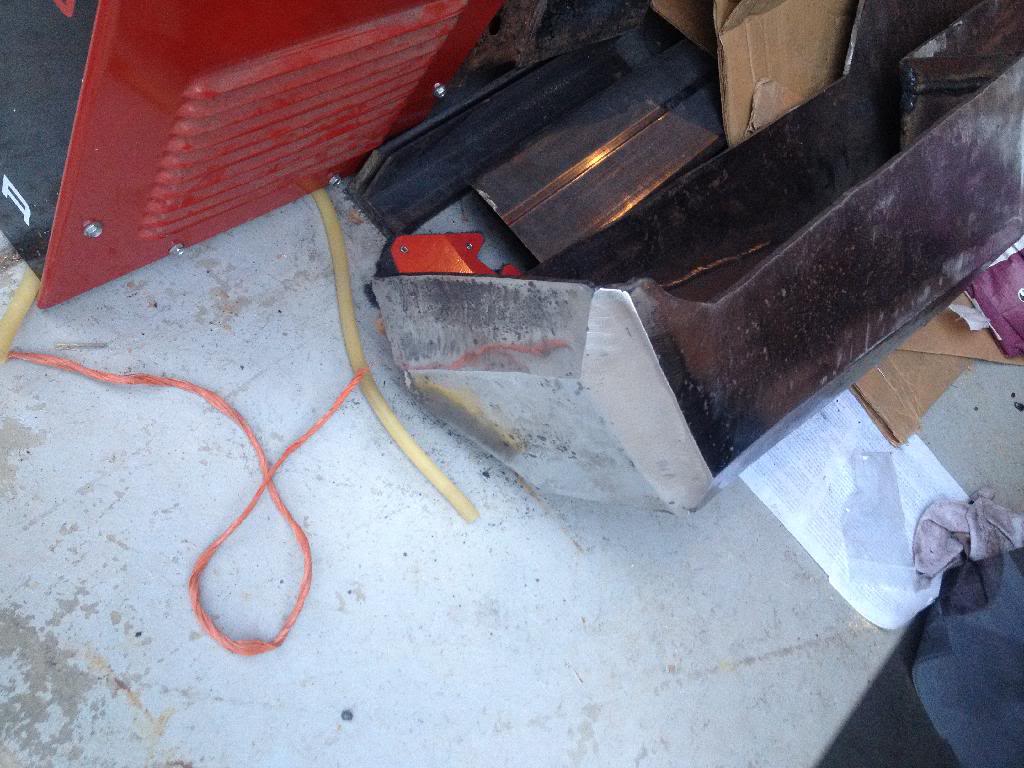
and i like shiny
jake,
any ways i was able to snap some pictures of some progress

not the best pic but some progress and an idea of the other side

side that got me but it sure looks shiny

and i like shiny
jake,
04-05-2014, 08:09 PM
#60
Registered User
Thread Starter
Join Date: Jan 2014
Location: colorado
Posts: 153
Likes: 0
Received 0 Likes
on
0 Posts
what are you building on your side of the woods?
as long as your removing metal with the angle grinder and not flesh
 all is good.


