WD_40's 1985 4Runner Build-Up Thread
 04-13-2011, 07:09 AM
#21
Registered User
Thread Starter
Join Date: Jun 2009
Location: Corona, CA
Posts: 153
Likes: 0
Received 0 Likes
on
0 Posts
Walrus: Yeah, that's the rear where the tranny bolts up. I just showed those pics to an engine builder friend of mine and he said they look fine. I also just looked at some of the previous pics in this thread and noticed that all the oil galley plugs protrude a little. Always a good idea to take lots of pics!
I'll put a little bit of blue loctite on them and call it good.
Last edited by WD_40; 04-13-2011 at 07:23 AM.
 05-24-2011, 08:00 AM
#23
Registered User
Thread Starter
Join Date: Jun 2009
Location: Corona, CA
Posts: 153
Likes: 0
Received 0 Likes
on
0 Posts
I finally carved out some time to do some work on the 'Runner this weekend. I took Friday off and a friend came over to lend a helping hand. Several hours and several home-brewed beers later we managed to make some decent headway.
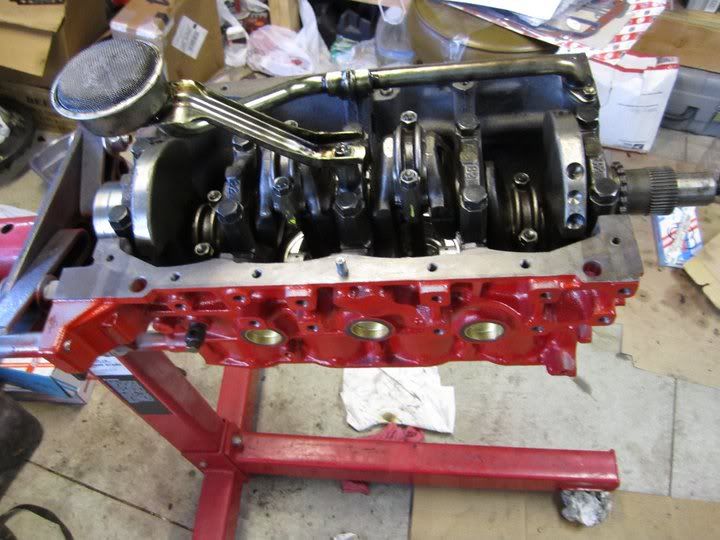
Crank and oil pickup installed:
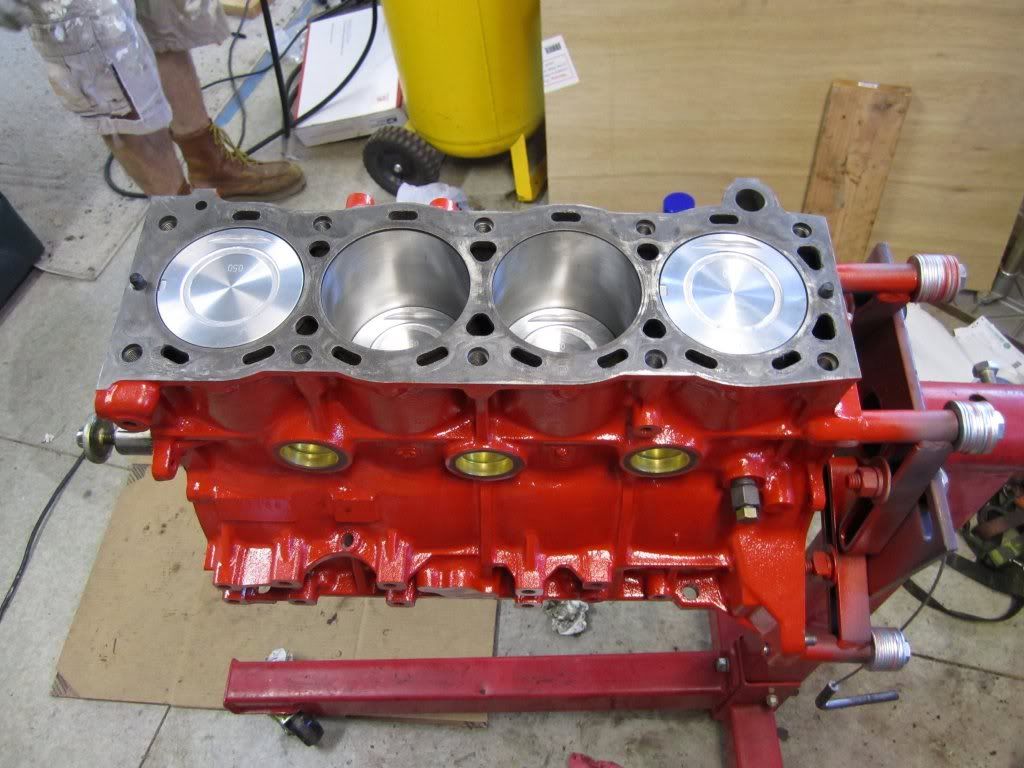
New pistons installed:
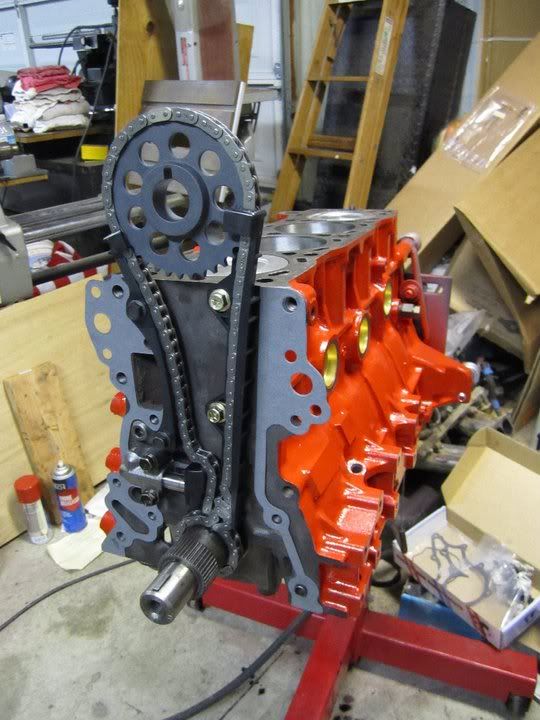
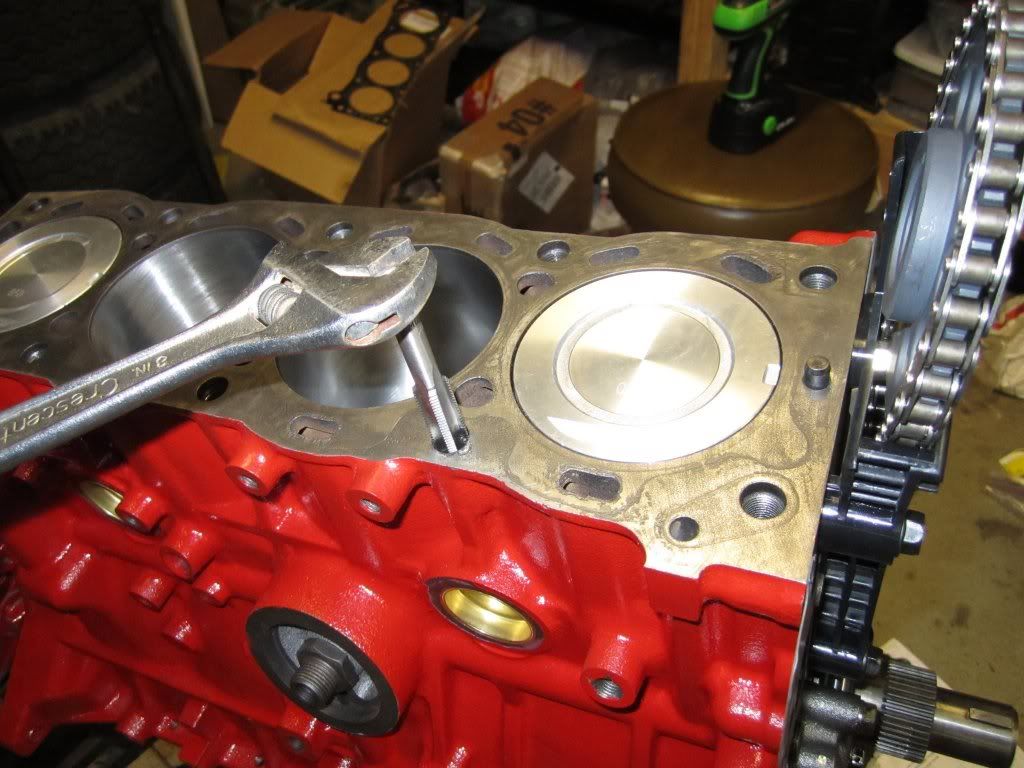
Timing components and TC cover gaskets:
Test fitting the TC cover:
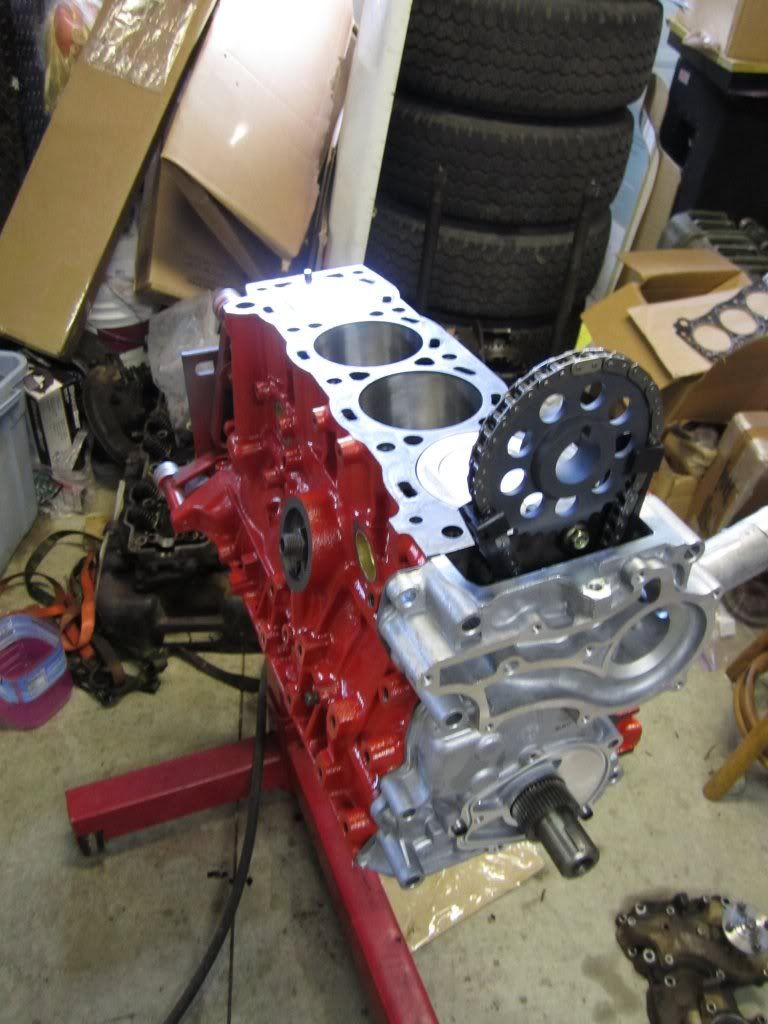
I didn't proceed any further on the TC cover because my old bolts were all rusty and nasty looking. Instead I went to the stealership and ordered some new ones.
I also had to order some new bolts for a little goof-up I made while installing the rear main seal retainer. The FSM says, "Install rear main seal retainer." Great, no problem. I looked for torque specs and finding none decided to just tighten the five bolts down. One broken and four stretched bolts later I learned the error of my ways. I've since found the general torque spec table that lists torque specs for each type of bolt. Live and learn.
While waiting for the bolts to arrive I chased the threads in the head bolt holes in preparation for ARP head studs:
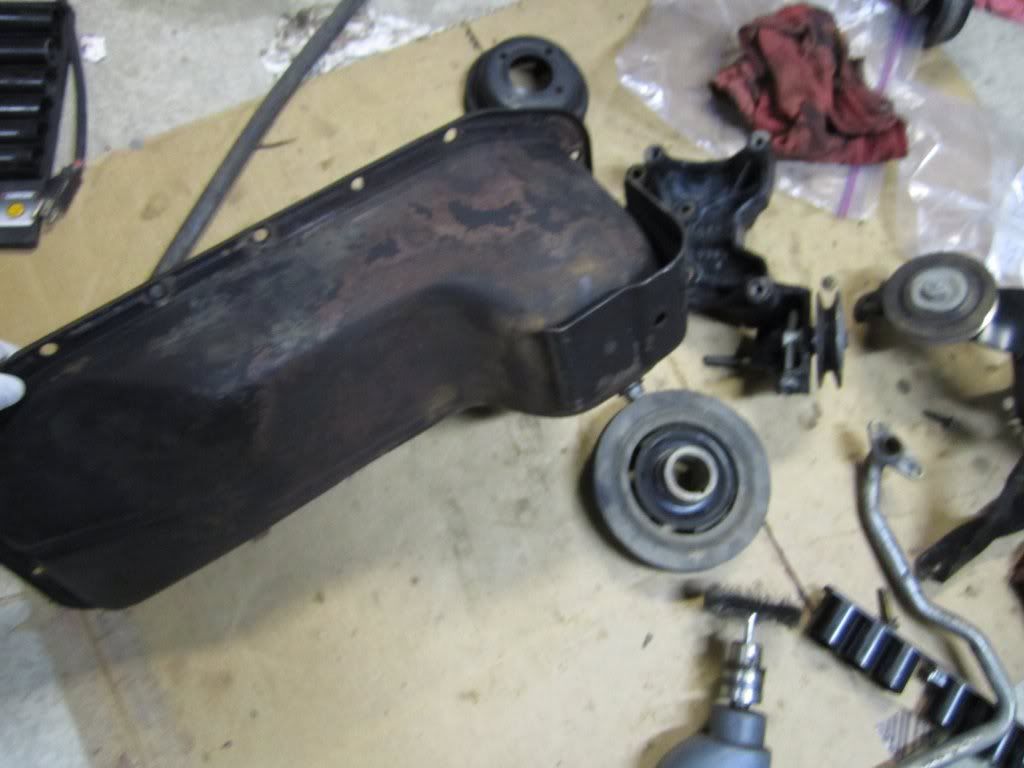
And took the time to clean and paint some of the misc parts. Rusty/dirty/nasty parts:
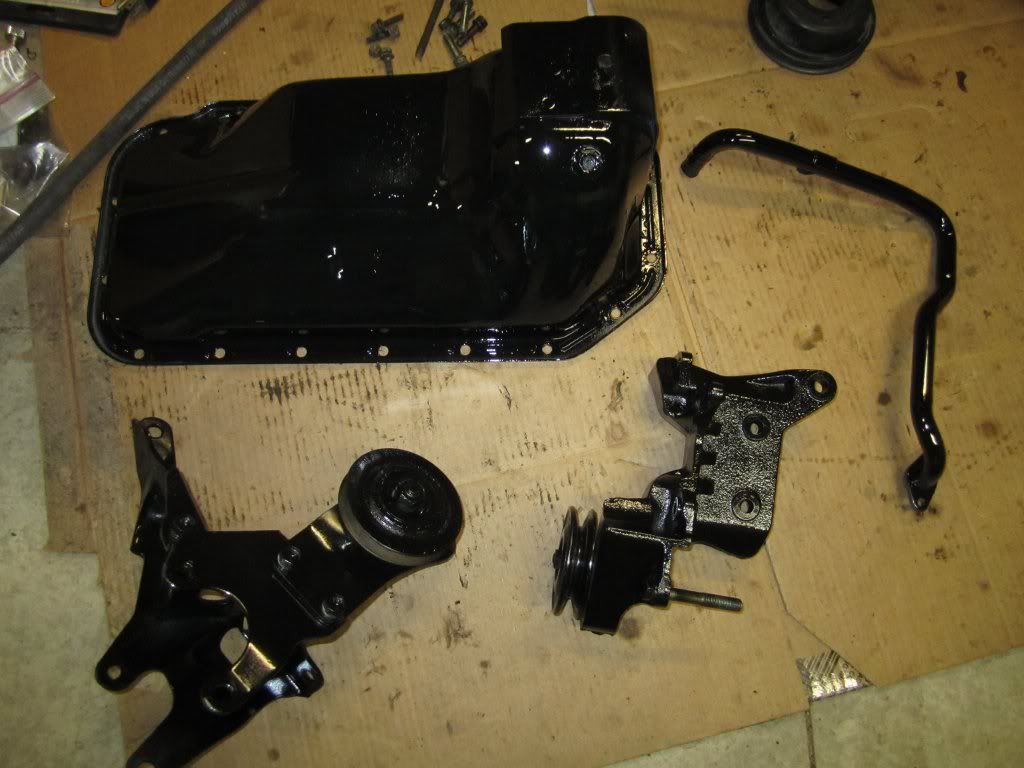
Clean, freshly painted parts. Much better!
Crank and oil pickup installed:
New pistons installed:
Timing components and TC cover gaskets:
Test fitting the TC cover:
I didn't proceed any further on the TC cover because my old bolts were all rusty and nasty looking. Instead I went to the stealership and ordered some new ones.
I also had to order some new bolts for a little goof-up I made while installing the rear main seal retainer. The FSM says, "Install rear main seal retainer." Great, no problem. I looked for torque specs and finding none decided to just tighten the five bolts down. One broken and four stretched bolts later I learned the error of my ways. I've since found the general torque spec table that lists torque specs for each type of bolt. Live and learn.
While waiting for the bolts to arrive I chased the threads in the head bolt holes in preparation for ARP head studs:
And took the time to clean and paint some of the misc parts. Rusty/dirty/nasty parts:
Clean, freshly painted parts. Much better!
05-24-2011, 08:06 AM
#24
Registered User
iTrader: (2)
Join Date: Dec 2009
Location: Pleasanton, CA - SF Bay Area
Posts: 2,159
Likes: 0
Received 7 Likes
on
5 Posts
Too Sexy! Too Sexy!!
For the thread chasing, did you have any metal shavings? Did you just use compressed air to clean it out once chased?
For the cylinders, did you coat the walls with motor oil prior to install? Did you have to use a ring compressor? And....did you generally keep all exposed surfaces coated in light oil to avoid rust during all this?
Sorry for the barrage of questions
05-24-2011, 08:15 AM
#25
Registered User
Thread Starter
Join Date: Jun 2009
Location: Corona, CA
Posts: 153
Likes: 0
Received 0 Likes
on
0 Posts
The chasing did generate metal shavings and yeah, I did blow then out with compressed air. For the cylinders I coated the walls with assembly lube (I forget what brand I'm using right now) and I'll probably add another coat on cyls 2 and 3 before I put the head on. I did rub a thin coat of oil on everything when I got it back from the machine shop; not right away though. I got too lost in admiring the shiny new bores and then when I started to see a little bit of orange in there I thought, "Oh yeah, I'd better do something about that."  I didn't have any surfacing or decking done on the block which is why the top surface doesn't look super sexy. It's not rusty, it's just not super shiny either.
Since I'm doing this when I have free time I don't really know how long (read: how many months) it will be between assembly and actually running it, so I wanted to use something that would stick in place a little better than motor oil, thus the assembly lube for the cylinders and all bearing surfaces.
Thanks for all the questions. It helps serve as a sanity check.
I didn't have any surfacing or decking done on the block which is why the top surface doesn't look super sexy. It's not rusty, it's just not super shiny either.Since I'm doing this when I have free time I don't really know how long (read: how many months) it will be between assembly and actually running it, so I wanted to use something that would stick in place a little better than motor oil, thus the assembly lube for the cylinders and all bearing surfaces.
Thanks for all the questions. It helps serve as a sanity check.
Last edited by WD_40; 05-24-2011 at 08:17 AM.

Thread
Thread Starter
Forum
Replies
Last Post
RedRunner_87
95.5-2004 Tacomas & 96-2002 4Runners (Build-Up Section)
84
06-01-2021 01:51 PM
jon.r
General Vehicle Related Topics (Non Year Related)
8
07-11-2015 03:34 PM


