Finally venturing into my 3.4 swap (dial up warning)
 10-04-2006, 06:40 AM
#61
Contributing Member
Thread Starter
Join Date: Jan 2006
Location: Summit County, Colorado
Posts: 899
Likes: 0
Received 0 Likes
on
0 Posts
Yep! I just removed the passenger side to drop it out of the way when I took the engine out. That thing was so filthy that I had almost forgotten that it was white!
 10-04-2006, 07:54 PM
#62
Contributing Member
Thread Starter
Join Date: Jan 2006
Location: Summit County, Colorado
Posts: 899
Likes: 0
Received 0 Likes
on
0 Posts
I had a very productive afternoon. The weather was pretty decent, so I started to move parts from the 3V to the 5V.
I swapped and rewired the oil pressure sensor (including the original rubber cover over the whole thing). I removed the 5V motor mounts, and replaced them with the 3V, including the new isolators from ORS. I did have to do some grinding on the passenger side motor mount, to clear the engine block drain valve. I was cleaning parts all along the way.
I then had to grind on one bolt mount for the A/C compressor, as the cast 3.0 mounts were about 3 times as thick as the pressed 3.4 ones were.
I also added the flywheel cover brackets from the 3.0.
If tomorrow's weather is as good as today's, I hope to pull the oil pan, and change the oil pickup. I will also install the oil filter adaptor plate, seal the original dipstick hole, drill and install the new dipstick hardware. Then I'll replace the oil pan with the new one.
10-05-2006, 05:16 AM
#64
Contributing Member
Thread Starter
Join Date: Jan 2006
Location: Summit County, Colorado
Posts: 899
Likes: 0
Received 0 Likes
on
0 Posts
Fallman - I'm using the Taco A/C mount (as well as the compressor - will have some hurdles to cross there). I had to grind down the thickness of the top rear mounting hole, since the engine mount sandwiches between that and the block (and the cast engine mount is so much thicker than the Taco one)
10-05-2006, 01:15 PM
#66
Contributing Member
I did, if you use the 3.0 motor brackets in combo with the 3.4 AC bracket the spacing is wrong. That's because the 3.4 motor brackets are thinner than the 3.0. And since the motor bracket goes between the AC bracket and the block it changes the spacing for one bolt hole when you put in the 3.0 motor bracket.
10-05-2006, 01:33 PM
#67
Registered User
hmm like i said i didnt have that issue only thing i can think of is the engine was out of a 95 tacoma so it might have been differnt then your guys. but ill check it out again.
10-11-2006, 03:41 PM
#68
Contributing Member
Thread Starter
Join Date: Jan 2006
Location: Summit County, Colorado
Posts: 899
Likes: 0
Received 0 Likes
on
0 Posts
After a long weekend of my birthday, and some pretty nasty weather, I got back after the truck today. All I did today was to start re-painting the engine bay. I'm going to gloss white under the hood, to make any leaks easier to spot, and to brighten the area up in low light situations. I got about a third of the bay done with primer and two coats of gloss white.
Not the best painting environment, being outside, but I think it will be a nice improvement when I'm done.
Not the best painting environment, being outside, but I think it will be a nice improvement when I'm done.
10-13-2006, 07:24 PM
#69
Contributing Member
Thread Starter
Join Date: Jan 2006
Location: Summit County, Colorado
Posts: 899
Likes: 0
Received 0 Likes
on
0 Posts
Last couple of days have been too windy for painting, or chaging the oil pan. I did make a trip to Yotayard, and picked up all of the factory pieces to install A/C. I plan to take Fallman's lead, and swap the side plate on the Taco compressor to make the system work. I'll just plan on re-selling the Airzona Air kit.
I did get my speedometer cable replaced, and I can definitely say that I hope that there is a special place in hell for the folks that designed that set-up. There is no reason in the world that a speedo cable should be that complex (and a PIT* to replace). Anyway, it's done, so I shouldn't have a screaming cluster in the cold, for a while, at least.
I started to put the A/C core in the dash, tonight, but it was getting too dark to see well, so I'll get back to it tomorrow.
 10-14-2006, 03:27 AM
#71
Contributing Member
Thread Starter
Join Date: Jan 2006
Location: Summit County, Colorado
Posts: 899
Likes: 0
Received 0 Likes
on
0 Posts
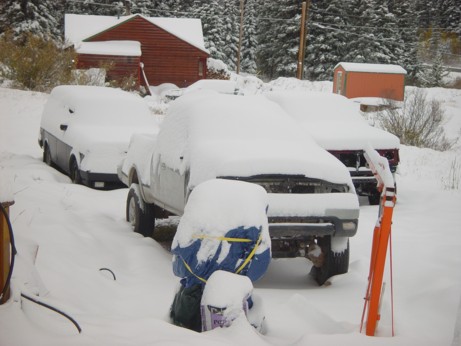
Kind of funny that you can't even tell that it snowed here (right now), but Arapahoe Basin opened for skiing yesterday, and Loveland opens today.
It's not my cup of tea to deal with the early openings, because there is only one run open, and there are usually way too many people trying to use it. It's a situation that we locals fondly refer to as the "White Ribbon Of Death."
I hope that it is a good season, but that Mother Nature will hold off just a little bit more, so I can get the truck running, again, first!
10-17-2006, 07:25 AM
#72
Contributing Member
Thread Starter
Join Date: Jan 2006
Location: Summit County, Colorado
Posts: 899
Likes: 0
Received 0 Likes
on
0 Posts
Very interesting last few days.
I stayed up here to work on the truck last weekend, because the weather report was for a great weekend - So, of course, it snowed most of the day on Saturday.
I did manage to do the Tach conversion, and to re-assemble the driver's side of the dash. At that point, I was still dealing with the typical early season heavy wet stuff that was soaking my clothes, so I hung it up for the day.
This time of year, and the new snow, made me finally cry uncle, so I went out and bought a 10'x10' canopy to put over the front of the truck for a little cover while I'm working.
Sunday morning was much nicer, so I set up the canopy, and staked and tied it down. With the ground wet, it was a perfect day to open up the bottom of the engine (no dust to blow around) I also set my propane burner (turkey fryer) in front of the truck to see if I could warm the canopy a little to continue the painting. That worked way better than I expected, considering that the sides are screens.
So I alternated between painting and engine work. I got the rest of the passenger side and firewall done, and I removed the oil pan, and oil pick-up. I removed the original dipstick assembly, then drilled, tapped, cleaned and plugged the hole. About this time I decided to go after the drilling of the hole for the new dipstick. I had gotten a new close quarter drill for the job, and the fit under the exhaust manifold was fine for the pilot bit. While I was fitting the bit, I discovered that the new drill had not come with a chuck key, and I didn't have one the right size to fit!
Being that it was late Sunday afternoon, I decided that I would wait for Monday to get a key, so I cleaned the mounting flange of the engine, and installed the new pick-up and gasket, and fit the new oil pan (temporarily) to protect the bottom of the engine. I also installed the oil filter relocation plate, with it's new JIC hydraulic fittings.
I was going to do an update here Sunday night, and discovered that the BackUPS on my computer had finally died (had been on its way out for quite a while)
I had been debating whether to continue on the truck, or do a trip to Denver on Monday, and the dead UPS pushed me toward the Denver trip. I removed the wheels from the Taco, and loaded them into the Volvo, to take them to Costco for new shoes.
While I was in Denver I got the new waffle stompers (BFG AT T/A KO 265/75/16), the chuck key I needed, a new UPS, and also paid a visit to the Klode auction and Yotayard.
The snow started last night, and I got about an inch over night, so I will head out soon to see what I can get done today.
10-17-2006, 08:17 AM
#73
Contributing Member
Nice canopy, looking good. When you start drilling your big hole for the new dip stick you may need to cut a few inches off the end of the bit to fit it in position. Are those hood shocks?
10-17-2006, 01:05 PM
#74
Contributing Member
Thread Starter
Join Date: Jan 2006
Location: Summit County, Colorado
Posts: 899
Likes: 0
Received 0 Likes
on
0 Posts
Yes, those are hood shocks. They are the only Rancho product that I have ever put on the truck, but when I saw them years ago, I jumped on them, because I hate hood props. You will notice that I kept my prop as a back up, though.
I did get the new tires and wheels swapped out, and took the Taco off the jack stands today. I did have a minor scare when I started installing the new rims. The previous owner had installed McGard lug nuts, that didn't have the proper step design of factory lugs, so the outer edges of the lug hole were slightly mushroomed. Easy enough to fix, but why do people do this kind of stupid ˟˟˟˟˟!?!? I'd have to say that those tires are pushing the absolute limit of what I can put in there without some kind of lift. I hope that I don't encounter any rubbing problems. I guess I should have opted for the 70 profile. I'll see when I get it rolling, again. I do like the look of the wheels on the truck, though!
That was it for today - there was just a little too much snow blowing around, even under the canopy, for paint or opening the engine again. I'll post some pics of the wheels when the weather breaks.
10-23-2006, 04:52 PM
#75
Contributing Member
Thread Starter
Join Date: Jan 2006
Location: Summit County, Colorado
Posts: 899
Likes: 0
Received 0 Likes
on
0 Posts
Mother nature didn't co-operate much in the last week. We had a lot of wind, 16" of snow Thursday and Friday, so all I did Saturday was dig out!
I bought a couple of tarps to put up for more wind break on the canopy. That allowed me to finish the engine bay painting yesterday, along with the propane heater to keep it semi-reasonable.
The weather was great, today, so I got the fuel filter changed, and greased the driveshafts. I was going to mount the A/C cooling unit in the cab, and discovered that the '95 has a little different openings in it than a '90 would, so I'll worry about that, later. I cleaned the bell housing, and installed the new throw-out bearing, so that's ready to go!
I did get some more engine prep done. I swapped the liquid side hose on the compressor, so that it will match up with the '95 system (leaving the side plate alone). The ORS crossover pipe is installed, and, as per information I got from Fallman, I swapped the position of the fuel intake 180* on the fuel rail, so that it is now pointed to the passenger side, There should be plenty of line there to just link it directly to the line from the tank. The return hose has been moved over to the passeger side, as well.
The new heater hoses are in place, and I'll be able to finish the new dipstick set up tomorrow, since UPS delivered my short "U" drill bits this evening.
I'm planning to get the flywheel re-surfaced in the morning, finish the dipstick, put the engine on the hoist, take care of the clutch, and get the engine into the truck tomorrow.
BTW, does the 5V use 5 quarts of oil, like the 3V did? I know that I still have a lot to do, but I'm really looking forward to seeing the 5V in the engine bay!
Oh, and here's the pic of the Taco wheels on the truck (better ones will come, later!)
10-24-2006, 08:23 PM
#76
Contributing Member
Thread Starter
Join Date: Jan 2006
Location: Summit County, Colorado
Posts: 899
Likes: 0
Received 0 Likes
on
0 Posts
Well, the engine is in - sort of. I got the rest of the engine prep done, as per my last post, but I had problems getting the engine and tranny to line up.
I still have the last 1 1/2 inches to mate the two, but I ran out of daylight to finish it tonight. Hopefully, I can convince them to see things my way in the morning.
I still have the last 1 1/2 inches to mate the two, but I ran out of daylight to finish it tonight. Hopefully, I can convince them to see things my way in the morning.
10-25-2006, 05:59 AM
#79
Contributing Member
Thread Starter
Join Date: Jan 2006
Location: Summit County, Colorado
Posts: 899
Likes: 0
Received 0 Likes
on
0 Posts
I neglected to mention a couple of great hints for anyone doing this conversion that has to drill the block to re-locate the dipstick. First, get your hands on a close quarter drill. I used a 90* electric, but a pnumatic would be very slick, too (no bucking if it gets stuck).
Make sure that you put some kind of protection against the engine internals to keep filings from getting into them, because you are going to come through the side of the block at an angle, generating a lot of stuff that your engine wont like, not to mention that it would be a pain to clean after the fact.
I highly recommend that you drill a pilot hole through the lump in the side of the block - I used a 3/16" bit for the pilot, and eyeballed my alignment to the angle of the lump. Sharp bits are a must here, as is frequent oiling of the bit. I just poured a little motor oil into a spray paint can cap, and dipped the bit into it when needed.
The set back that I had was the letter size "U" drill bit that I had was too long to fit on the drill and under the exhaust manifold. Since I don't have a bit sharpener, I tried to jerry rig something, cutting down the shank, but then I couldn't get it to chuck up square.
I ended up ordering a couple of short "U" bits (3 1/8" long, overall) from Grainger. This was the only place that I found them, and you have to be a business to buy from them, since they are not a retailer.
After I cleaned the hole, and verified that nothing had gotten into the crank case, I put a little FIPG around the cup piece for the dipstick tube, and tapped it in with a hammer, with a folded shop towel over it to protect the edges and finish. The rest was just fiting the motor mount, tube and dipstick, as well as sealing up the oil pan.
10-25-2006, 06:35 AM
#80
Contributing Member
Yeah that's a tough job, congratulations on drilling through 2" of solid cast iron. The 90 deg angle electric drill is the way to go, I tried my pnumatic drill and it doesn't do a good job on thick metal (not enough torque and too much speed).
Looking good!
Looking good!


